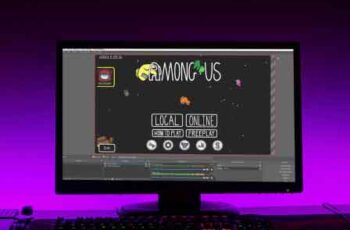
OBS Studio is one of the most popular open source broadcast software on the market. In addition to the advanced streaming features, the program also includes a number of screen capture options. In this tutorial, we will focus on how to use OBS to record a portion of the screen instead of the standard full screen capture.
Since the software works well with multiple operating systems, we've included detailed instructions for Windows, Linux, and Mac, respectively.
All versions of OBS Studio share the same intuitive interface, so the process is nearly identical for all three platforms. Read on to learn more about the app and its many exciting features.
How to record a part of the screen with OBS
If you want to avoid recording the full screen, there are several workarounds. One way to do this is to use Window Capture to screencast a single open window.
Another option is to apply the Crop / Pad filter and adjust the parameters to a preferred setting. The third (and probably the simplest) method involves resizing the display with a simple command.
Below you will find detailed instructions for each screen capture feature. The same steps can be applied to all three OS platforms, thanks to the uniform OBS interface. Of course, any potential discrepancies will be highlighted as part of the walkthrough.
Linux
Let's start with the screen capturing a single window. Here's what you need to do:
- Start OBS and scroll to the "Sources" box.
- Click the little plus icon at the bottom of the box to access a drop-down options panel. Select "Capture Window" from the list.
- A pop-up window will appear. Add a title to the source and press "OK".
- At the bottom, click the down arrow next to "Window" on the left side. Choose the window you want to record from the drop-down list. Make sure the "Capture Cursor" option is enabled. Click "OK".
- The window must be the same size as the display. If not, go to the menu bar at the top of the screen and go to File> Settings.
- Open the "Video" tab and lower the base resolution. It will automatically shrink the canvas to fit the window.
Final report: make sure the window you intend to capture is not minimized. If not, it will not appear in the list of available windows. Instead, make it run in the background.
Windows 10
If Window Capture doesn't work, you can use the Crop / Pad filter to isolate smaller parts of the screen. Just follow these simple steps:
- Open the OBS app and scroll to the bottom of the window. Right-click in the “Sources” panel to open a pop-up menu. Click "Add", then select "Screen Capture".
- A pop-up window will appear. Enter the title of the capture and press "OK".
- If you have more than one monitor, click on the “Display” dialog and select the right one from the drop-down list. Check the "Capture Cursor" box and press "OK".
- Scroll down to the source and right-click. A pop-up menu will appear. Select "Filter" from the list of options.
- A new window will appear. Click on the small plus icon in the lower left corner of the screen. Add the "Crop / Pad" filter and click "OK".
- Resize the view by changing the cropping parameters. Write the appropriate pixel values in the corresponding field. Close the window once you're done. The parts of the screen that you do not want to record will be cropped.
Mac
Finally, the most elegant solution is to use the slider to resize the display capture. In other words, you can manually locate the parts of the screen you want to record. Here's how to do it:
- Click the little plus icon at the bottom of the "Sources" box and choose "Screen Capture" from the options menu.
- Enter the title if you want to create a new capture. To add an existing one, select one from the list below.
- The display capture is outlined with red lines and circles. Hover your cursor over the small red circles and press the "Option" key. Now you can manually crop the screen and locate the parts you intend to record.
Final report: the command for a PC keyboard is mouse "click + Alt."
iPhone
There is currently no mobile version of OBS for smartphones. However, you can use a Lightning cable to connect your iPhone to a computer and add the device as a source. That's how:
- Connect your phone to a computer using a Lightning cable.
- Open the OBS app and click the little plus button at the bottom of the “Sources” box.
- Select “Video Capture Device” from the pop-up list. Name the source and click "OK".
- Click the small down arrow in the "Devices" dialog. Find your iPhone in the device list and click on it.
- The iPhone display will appear. From here on, repeat the steps from the previous sections if you don't want to record the entire screen.
Final report: since OBS is not compatible with smartphones, this method can often cause bottlenecks. It is much better to use the pre-installed screen recorder that most iPhones have.
Android
Unfortunately, the same goes for Android devices. There is no mobile version of the OBS app on Google Play. You can try docking the phone with a Lightning connector and repeat the steps from the previous section. However, the best option is to use the built-in screen recording app designed to fit the phone's display culture.
Additional FAQs
How can I start recording my screen?
The OBS app is extremely easy to navigate. The “Sources” function allows you to fine-tune various aspects of the recording and adjust the audio and video settings to your liking. Here's how to get started:
- Launch the app and go to the "Sources" box at the bottom of the screen. Click on the small plus icon to access a pop-up menu.
- For Mac and Windows users, choose the "Capture Screen" option. On Linux, the feature is called "Screen Capture".
- A small pop-up window will appear. Add a title to the appropriate field and press "OK".
- Then, go to Settings and "Exit" and determine where you want to save the file.
- Scroll down to the “Mixer” box to adjust the audio settings. Click on the small gear icon to choose a preferred audio source (Desktop or Mic / Aux).
- Once setup is complete, click the blue button in the lower right corner of the screen to start recording.
Why is there a black screen on OBS?
Although OBS is a great broadcast software, it is not immune to bugs and glitches. The most common problem that users have when trying to share their screen is the infamous Black Screen error. If this happens to you, there are several potential causes:
- Your computer has been running for too long. If so, try removing all power sources and letting them sit for a few minutes.
- You have installed an incompatible version of the app. Check if your operating system works better with the 32 or 64 bit version.
- The app is out of date. Uninstall the current OBS software and download the latest framework from the official website.
- There are problems with the graphics card. Try switching to a different GPU when using the app.
- The app does not have administrator privileges. Sometimes OBS needs administrator rights for recording and screen casting.
- The content you are recording is encrypted. Some platforms, such as Netflix, protect their content from taking and sharing screenshots.
Moving parts
There are three different ways to capture individual parts of the screen with OBS Studio. You can use the Capture Window feature to record a single window or apply the Crop / Pad filter for more complex details. The simplest method is to use the “mouse click + Alt” command to crop the parts you don't want to record.
You can switch between the three depending on your needs. OBS is famously intuitive and easy to navigate. And if you're unlucky enough to stumble upon the black screen, there's a way to fix that too.
What's your favorite method for recording parts of the screen with OBS? Is there any other screen capture software you like best? Comment below and tell us if there is anything we missed.


