


Please note:
The solution is based on the American version of the game, there may be differences with the European one.
The chase of Catwoman
Our Dark Knight is on a rooftop in Gotham City, on a gloomy evening to say the least; suddenly here she is Catwoman, an anti-hero linked to the bat man by a relationship of love and hate! The woman has an important microchip! The two will soon be surrounded by police; the cat will be able to easily escape leaving you, Batman, to have to see you with the men in uniform. Use normal attacks on cops and deal damage; then perform counter moves when the blue line appears above your target; Once the lawmen have been knocked out, set out in pursuit of Catwoman. Run to the right and use your grappling hook to reach the ledge where your target currently is; continue to the right again, where you will cross the abyss; once you reach the end of the roof, launch yourself on the next building; move to the wall on the right and use the grappling hook to reach the next indicated ledge; then follow the same procedure for the next roof; hook yourself to the building behind you and always run to the right to break through and pass the grate blocking the ventilation system. Continue along the narrow passage staying crouched until you reach the opposite side of the complex; when you see the command on the screen, continue to grapple with the grapple until you reach the highest ledge. Crouch again and go under the large ventilation system and enter detective mode as soon as you notice the ladder; pass the analyzer over it and use the Batrang to drop it. Climb up to meet Catwoman on the roof and chase her to the neighboring building; always run to the right and climb the wall to be able to jump over the chasm; grapple onto the next building where you will find four more policemen; lay them out as you did for the first group and continue; talk to the Cat again, then, use the grappling hook in the same spot where she was just before; cross the makeshift walkway, then use the grappling hook on the building in front; swing slightly to the right to attach to the next building; reach the top and continue to the right until you see the hook icon; so reach the ledge above you then walk through the rope. This building has several policemen scattered over the roof; grab the next ledge and execute a flying attack on the officer nearby; enter detective mode to identify all the positions of your next opponents along with the ledges through which to pass unnoticed; when the police officers have separated from each other, use a sliding kick to knock them out; these will be in possession of powerful automatic weapons, so never face them openly, but continue to follow the trick just performed. Once the area is safe, attach to the top of the building to meet Catwoman again and continue the chase across the rooftops, where you will be forced to use the grappling hook when forced and take on some cops.
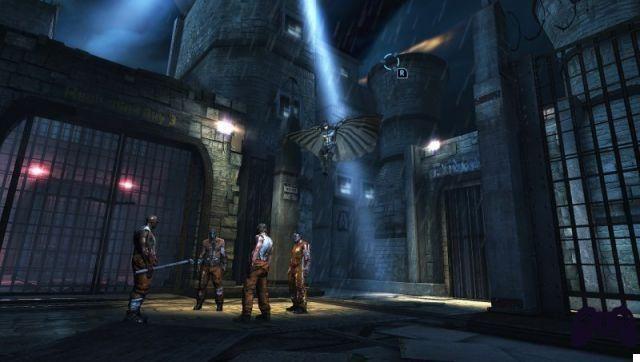
Blackgate Overrun
Two weeks after Catwoman's capture, Commissioner Gordon will turn on the Bat Signal; when you arrive at the meeting place, you will be made aware of the fact that three super-criminals have escaped from Blackgate prison; these are of your old acquaintances, the Joker, the Penguin and Black Mask; you will, of course, decide to lend your help and immediately head to the prison. Once inside the detention blocks, you will see Catwoman surrounded by two brutes; throw yourself down and knock the men out; the woman will decide to help you save the hostages. From here you can decide which area of the prison to explore and complete; in this guide we will deal with the industrial area, the detention blocks and the administration in sequence.
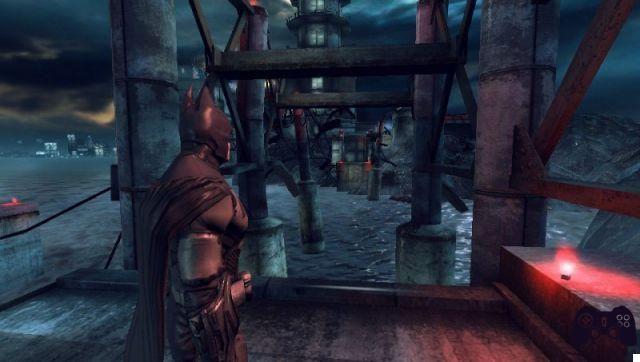
Entry into the industrial area
Once you reach the industrial area, you will have to immediately look for a way to reach the inside; run forward and hook to the ledge above to get past the gate; continue to the left and enter the ventilation system on the ground; inside, go to the right, pass a large pipe and hook onto its top; jump onto the ledge, thus reaching the opposite side of the pipe; from here hook up to the next building; jump from platform to platform until you reach the building on the left; jump on the wall always on the left and use the device on top of the roof to open the doors on the right; jump down and hook onto the pipe, then pass the newly opened passages; you will start an intermission scene during which an unknown group of people are monitoring and commenting on the situation in the prison.
Find the Lance Gel
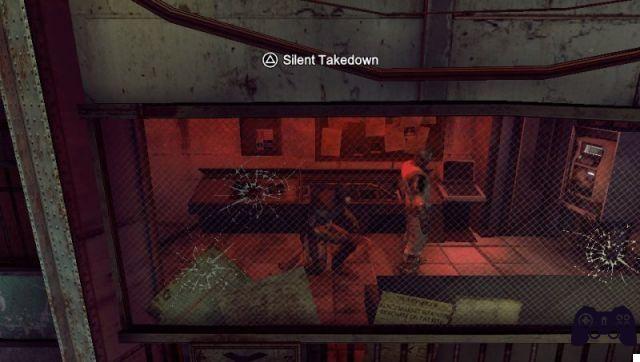
Once inside the loading area in the industrial area, run to the right and hook onto the top of the means of transport; jump to the opposite side and face the three enemies. Once you get rid of the three bad guys, head right and use the "Crypto Sequencer" to hack the device and open the door; slide the numbers on the screen, when one of them turns green, it means that it is in the right position. Go through the door to enter the next room, hook to the ledge above and slide to the right, go down and continue to the right, enter the next room and always go in the same direction; you will be interrupted by an intermission scene during which Black Mask will force an operator to give energy to all the generators; then approach the corpse of the victim and collect the green magnetic key; continue to the right and roll onto the spine of the floor by pressing the run button twice; crack the code to open the door on the right. Inside this room, go to the ventilation system on the right side, crouch and you will be on the opposite side of the corridor; you will find four bad guys wandering around the area, one on the upper floor and the other three below; quietly knock out the one upstairs; then also take out his companions one at a time using the wall that separates them so as not to be seen; you will still alert the last opponent but it will not be a problem since he will be completely alone and you can comfortably knock him out.
Downstairs, head right and enter the next room, you will be confronted by an opponent with knives; use your stun moves to have time to deal damage with normal attacks; also killed this ugly thug, analyze the electrical box on the right; Pull out your trusty Batrang and hit her to open the door. Then reach the corridor on the right, analyze the machinery above and use the Batrang again to hit the button above it as soon as a small gap appears between the bars; then hook into the point where the machine stopped; drop into the room on the left; open the WayneTech chest to find the gel lance; then use it to prepare the three explosives at the same time. Scan the floor of the room for a weak spot, this will allow you to target it for your gel lance, cracking it and allowing you to reach the purifier area. As soon as you fall into the sewer, check the ceiling for another weak spot to the right of the first hole; then hook yourself to the one you just created to return to the room with the machinery, here head left and return to the area where you faced the enemy equipped with knives; then hook onto the ledge at the back and use an explosive to destroy the wall; Enter the room, crouch inside the ventilation system, then drop into the next room and open the chest to find the armor upgrade. Go back to the sewer area, detonate the wall on the right and go through the hole you just created, then enter the next room; call the elevator and enter to reach the next area.
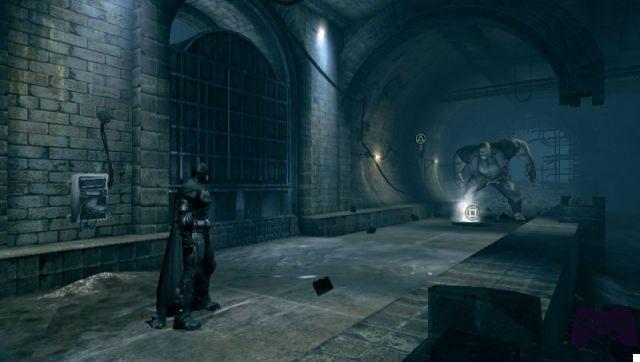
Boss: Solomon Grundy
You will start the journey on the elevator to reach the lowest floor of the industrial complex; scan the ceiling of the elevator to notice a weak point to be blasted with the gel lance; once at the top, hook onto the nearby beam, enter detective mode to be able to see through the darkness; then head right to find a ledge through which to climb up and enter the ventilation duct; advance through the old fan until it collides with a water pipe; then go back one room and apply the explosives to the weak bridge; blow it up and drop into the chasm below; head immediately right and investigate the canal hatch; hack the nearby terminal to open it. Unfortunately, in addition to opening a passage for you, you will also allow Solomon Grundy to join you; as soon as he charges at you, roll under him to avoid being damaged. Place some explosives on the panel to the left of the channel door with the cables running through the floor, detonate it as soon as your opponent passes over the cables to electrify him. Unfortunately Solomon will not be out of the game yet, the next panel will be to the right of the door, the cables will be attached to the wall and you will have to find a way to force your opponent to stop in front of them; place explosives both on the panel and on the nearby drainage pipe; detonate everything as soon as your opponent runs close to you; the cables will electrify; at this point the cables above the door will also be active; place an explosive at the drain outlet and detonate it at the right moment; after this third shock, you will be able to face your opponent with normal melee strikes until he is knocked out.
Rescue the hostage
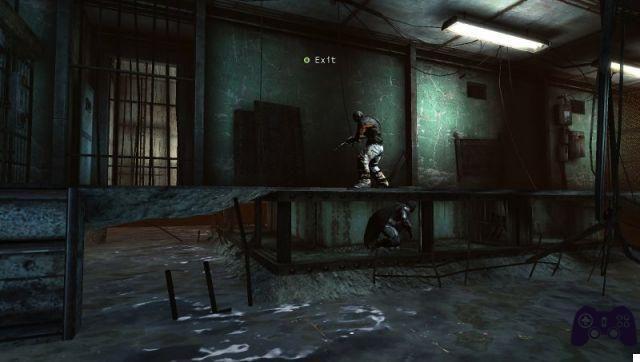
After the fight with Solomon Grundy, grab onto the top of the passage in the canal. Then jump down and hook onto the ledge, swing left and climb up as soon as you get a chance, scan the top of the left pipe and place an explosive to remove the section. Grab the next ledge, under which you can find the Black Mask, swing right and jump to attach to the higher platform, continue to the next room on the left and enter the ventilation system on the wall always to the left, crouch and continue to hang on to the pipes, once you reach the top, enter the following ventilation system. Exit and continue to the right, then analyze the brick wall on the right to place an explosive and demolish it while taking out the bad guys. You will soon be joined by four hostile opponents from the right, once they are all knocked out, go past the room to the right, inside which you will find a Black Mask under a bulletin board, and exit to find yourself in a cargo garage tailor. Enter the ventilation system on the floor and continue crouching to the left passing under the wall, you will exit into a new room, scan the floor for a weak point that can be destroyed using explosives, then check the bookcase on the back for find another Black Mask. Then jump into the hole to find yourself on the next floor, shoot right and enter the next room, reach the computer and update the map of the area, from here roll over the next spikes and continue to the right around the corner. When you reach the end of the area, reach the ventilation system at the top and crouch inside it to reach an area within which you can stand upright, then hook yourself to a high point, continue dropping into the next room after kicking the grate. You will immediately find a Black Mask on top of a chest to the right, then go through the next halls until you reach a dead end, grab the ledge above, then turn the corner to reach a group of enemies surrounding a hostage, hold on to the top ledge, wait for the enemies to separate and sneak them out one at a time, then reach the hostage to free him.
Find the key card
Once the hostage is rescued, head left and use the ledge to drop to a lower floor, enter the ventilation system and reach the room behind the glass, here you will find the Black Mask at the top of the lockers. Reach and enter the ventilation system on the left, once you reach the next room move to the connected grate, then go under the small hole to reach the next room; Before entering the ventilation system, scan the room to find a Black Mask above the storage platforms. The next room, will contain another ventilation system on the left side, crawl through it and drop into a dark area, enter detective mode to see through the darkness, enter the ventilation system to the right of the big one number thirteen on the wall, reach the next room and always head to the right, then use an explosive to get a hole through the pipe, use this new space to cling to another platform and be able to collect the Black Gloves of the Night. Go under the big number thirteen on the wall again, then grab the higher platform, jump off it to reach another one from which to swing to the next ventilation system. Go past the system itself and defeat the three bad guys, before leaving the room, pick up the Black Mask on top of the crates in the left corner. Open the ventilation system on the left (not even Bruce Willis in Die Hard has been through that many) and through it to the next room, here, grab and swing to the ladder seen earlier, roll over the spikes and place an explosive in the weak point of the masonry in the next room to create a hole through which to pass; before leaving this area, pick up the Black Mask at the top of the crates to the left. When you reach the upper floor, head left and exit the area and immediately hide behind the crates to avoid being hit by the enemy with the assault rifle in the distance, move to the side and throw your mighty Batrang into the light and make to fall the darkness inside the area, then immediately enter detective mode to analyze the platform on which your opponent is and send him an explosive with which to lay him down definitively. Immediately grab the platform on which the ugly thug was located, advance to notice another opponent in the distance, hurl the Batrang at the object that is above him, then reach the terminal and violate it to lower the platform allowing you to go down to the point where you just got rid of the ugly thug; immediately pick up the Mask on the controls on the left. Reach and go through the double doors on the left, the next passage will be closed, then look for the weak point on the right wall and detonate it to create a comfortable passage, you will find yourself inside a ventilation duct through which to pass through the closed doors and grab hold of the ledge on the left.
Look for the exit
Now that you have the key card, all access to the Alpha terminals (the green ones) will be possible. Inside the same room you are in, hack the terminal that will allow you to open the doors and reach the next room, here destroy the weak point of the floor to reach a lower floor, then run to the left to reach the next area and open the double doors, you will find yourself in an empty room, scan the floor to find another weak point, blow it up using the explosives then go through the hole you just created to land in a new area. You will immediately notice two enemies on the right, wait for them to turn their backs, then, kick the one closest to you silently and take care of his partner with all the calmness of the case; when you are at the top of the cage, head to the right and drop into the ventilation system below, crouch and exit the opposite side to find a Black Mask above a small locker to the right.
Once you have cleared up, head to the next door on the left and, in the new room, jump down from the higher platform to continue to the room on the left; once you get off the top platform you will find a new Black Mask above a barrel in the corner. You will reach a sewer area, go to the end of the room to find a large column of water that blocks the passage, unable to continue, you will be forced to go back to the previous area. Reach the room, where you found the magnetic key, pass the indicated area and enter the room where you made a hole in the floor, drop on the floor with the stitches and head towards the room on the right, once inside it, use the Alpha terminal to activate the elevator through which to reach the next floor. Go through the doors to the right, go up, the ladder to meet an opponent equipped with a taser, follow the on-screen commands to avoid being hit, then, perform a stun move, so you just have to finish the enemy with normal attacks; once the second enemy has also been eliminated, which will arrive shortly thereafter, look for the Black Mask in the left corner of the same room you are in. Head left and hack the terminal inside the room to open the door to your left allowing you to return to one of the previously visited rooms. Do not enter the ventilation system, instead, crouch and go under the half-closed door on the left, here violate the terminal to raise the gate on the right and allow yourself to pass under it. Continue to the right until you reach a room with an electrified floor, reach the tiles when the power is off and climb the wall on the left, let yourself fall on the next tiles, here you will have to deal with a group of opponents avoiding, at the same time, being electrified by exploiting the tiles that will be turned off in turn. Once you have eliminated the ugly thugs, head to the center of the room and grab the highest platform, from here locate the door by entering detective mode and head towards it, you will be called by Catwoman, after the little chat, hook yourself to the nearby high platform and enter the next room; look for "Detective Case: Breakouy Break-In" on the messy desk. Cling high right above the desk, then enter the ventilation system on the left, crouch and go into the next room, make a hole in the floor using the explosives to reach the lower floor, hack the terminal you will find to open the door on the left, continue in this same direction until you reach a break in the path, analyze the ceiling to find a weak point to blow up with an explosive creating a point to hang on to, then jump to the top and move inside the room to left. Drop off the ledge to land on the lower floor and continue to the left, go around the corner and look for the Black Mask on the pipe.
Enter the detention area
Reach the detention area and immediately head left once you arrive on the spot. Pay no attention to the closed door in front of you, instead grab onto the ledge above the door, from here jump to the next ledge and jump through the window to enter the actual complex. You will receive a call from Catwoman who will inform you that the Penguin is right in the detention area, immediately run right and turn the corner, crouch and go inside the ventilation system (the inmates could not complain about the weather at all. prison) to find you in the next room. Move to the left and enter yet another ventilation system to gain access to the room in the background, quietly approach the ugly thug and stealthily spread him out to clean up the area. Hack the terminal to disable the laser beams blocking the doors on both sides of the previous room, then head to the left side and hack the new terminal to open the door, this is the closed and previously ignored door that leads to the outside area . You can find two Penguin Cages in front of the closed door leading outside, hit them with your trusty Batrang. Now head right until you reach a dead end, grab at the top and go through the hole in the ceiling, check left to find a Penguin Cage, then enter the ventilation system to reach the next room. Arrived on the spot, you will see the Penguin go down with an elevator leaving behind some henchmen, these will have to be dealt with in a stealthy way, so wait for one to get under your position, let yourself fall and eliminate it silently, quickly access the ventilation system below the floor, when the other two opponents split, take them out one at a time always quickly and silently; in case you have trouble, use the alarm bell to make enemies run in the direction of the sound. Once the area is clear, head to the right side of the room, hook onto the platform above, then jump to the far ledge, turn around to find another spot to attack and hit a new Penguin Cage. Return to the previous ledge and drop down to find yourself just behind the elevator shaft. Head to the green light and interact with it to get a message from Catwoman and update your map of the play area, then return to the area where you fought the last of the Penguin's henchmen, from here head to the right once you reach blockages, ignore them and enter the ventilation system. Turn the corner and you will find yourself in front of an enemy equipped with a taser, defeat him in the usual way, then, continue for the entire length of the corridor, you will reach a terminal to the left of the laser beams, violate it to be able to continue.
Get the sticky gel
After entering the ventilation system, head right and take a look at the pump on the wall, throw an explosive at it and detonate it as the twisting section points to the right, this will open a passage above you. . Enter the passage just opened and crouch to reach the next room, throw an explosive on the wall on the right to create a hole and drop into an area full of enemies, take them out without too much trouble, then, run to the left to enter the ventilation system through which to reach an area where to blow up the wall that will be located exactly behind you. Hook to the ledge through the hole you just created, wait for one of the enemies to come right under you, then hit him and knock him out. Climb up and move to the left, you will notice two more bad guys below, kick one of them and face the one still standing, after that, grab the highest point on the left, jump to the right and cross the two chasms to collide with a new enemy. Cling onto the platform above, then drop to a low platform to find the Million Boots inside a small chest. cling again and go to the opposite side of the room. Climb up once hanging, move to the left, jump and grab the next ledge when you get close to it, drop to a new platform below and pick up the "Detective Case: A Line on the Line". Reach the next platform below, then run to the left, once you reach the huge chasm, scan the room to find a ledge, jump to it and grab onto it, then blow up the ceiling above you to create a convenient hole, through which to jump. Head left, run to the platform and drop onto the next one with a terminal, hack it to open the doors on the other platforms around you, then run to the right and past the fire, enter the room behind the newly unlocked door, hook through the floors then hack the terminal that leads back to the room with the pump. Go back to the area, where you unlocked all the doors, pass the terminal and grab the highest ledge, jump and move from platform to platform left and right avoiding falling on the fire. Once at the bottom of the area, run to the left and grab the ledge in the background, hit the enemy from above when he passes under you, then wait for his companions to stand alone to take them out one at a time, scan the wall on the left to identify a weak point where to detonate an explosive; go down the corridor and just before entering the door leading to the basement, hit the Penguin Cage. Enter the door and blow up the next wall on the left, you will find the core in the next room, scan the three bolts around it, then apply three explosives on each of these, then detonate them at the same time to open the core itself, you will have to now use the Batrang to line up the segments, done this, the core itself will glow green and the platform you are standing on will begin to climb.
Return to the industrial area
Now that you have the sticky gel, head to the left side of the room with the core. The door in this area will close as soon as you approach it, then analyze the mechanism above it, stick some gel on it, blocking it and being able to pass through. Violate the terminal on the other side to ensure that the door remains open even without the help of the gel, continue into the next room to find a fork, you can stop the jet of the tube and use it as a bridge to reach the opposite side of the area, or, continue to the left and get on the lift; follow this second choice and once on the map screen, go back to the industrial generators.
From the entrance, run to the right until you reach the room with the spikes, crouch under the gate to the left of the red terminal and keep moving forward to stop after the room with electricity on the panels, cling to the wall with the skull symbol, drop on the opposite side and stay on the pedestal that opens the big door, throw some sticky gel on the top mechanism, you will gain enough time to go to the other side and reach the terminal to be hacked to prevent the door from closing; before continuing, check above the storage platform for a Black Mask. Cling to the room above, place and detonate an explosive on the circuit in the room to the right to open the door and continue, then hack the terminal to keep the door permanently open. Finally, go through the door on the right to start the fight with Black Mask.
Boss: Black Mask
With the clear intention of destroying the entire prison complex, Black Mask will begin to send his brutal henchmen against you, Face the opponents normally but faster than usual, as the boss will shoot you with his assault rifle from above, these blows will not be avoidable and if the fight with the henchmen were to prolong beyond measure, you will soon have a bad end. When the bad guys have been knocked out, Black Mask will flee, leaving you to face three overloaded generators, you will have to turn them all off at the same time and you will all have time to do it calmly. Head to the right side of the room and drop inside the hole, go down two floors destroying the various weak points in the floors, then, enter detective mode and look for the power button, once located, place an explosive on it, but do not detonate it immediately, instead return to the room with the three generators and then activate the explosion. Grab the ledge previously blocked by the laser beams without delay, then explode the weak spot on the ceiling and grab to reach the upper floor, look for the three circuits on the wall and detonate them too to open the door on the left. In the next room, face off against Black Mask's henchmen, then, blow up the weak spot on the floor to drop you downstairs; look for the next power button and use the explosive above it to turn off the lasers and open the door at the bottom, jump right in before the generator regains power. Drop into the hole on the left, then look for the weak spot on the right and blow it up, drop down inside to easily take on other smaller opponents. Once you've cleared the room of hostile presences, blow up the sweet spot on the ceiling, grab onto this and the next hole, then use the explosive on the last power button to open the door on the right. You will return to the starting area, return to all three buttons and place the explosive on top of them to detonate them at the same time. With the generators off, grab upwards and enter the room, where Black Mask has escaped. Do not go under the lights, as the boss will kill you, start by moving silently to the lowest level, hit the alarm on the right side of the room with the Batrang to distract the enemy and be able to hit the nearest light, then enter the system of ventilation and exit the opposite side of the area, hit the alarm on the left side to make the enemy run in that direction, go back inside the ventilation system and reach Black Mask, press the button when the on-screen command to exit appears victorious from this clash.
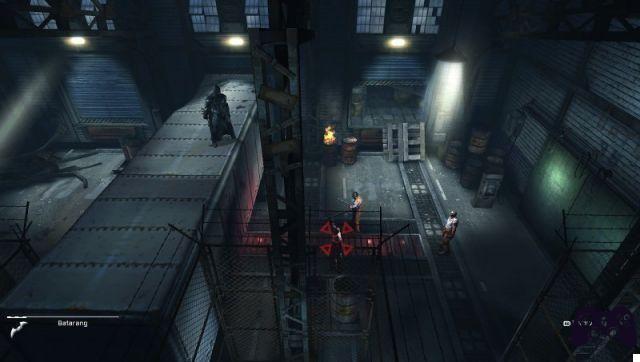
Find the Batclaw
Go back to the detention blocks and pass the elevator shaft, then enter the corridor previously traveled and enter the ventilation system to access the next area. You will find yourself on the opposite side of a pile of crates, run to the right to face two opponents, once they are eliminated, go through the door on the right, perform a slipped kick on the enemy with a rifle and take care of his companions without too many hesitations; Now head to the left and scan the wall for a weak spot, blow it up to find the New 52 Gloves on the opposite side. Use your Crypto Sequencer to activate the explosives on the barrels, take a few steps back to avoid being hit by the explosion, in this way you will create a hole on the floor; Once you have fallen to the lower level, scan the floor to find Detective Case: Ground Zero, then head right and enter the door to reach the detention blocks. Once just inside the main area, scan the floor to the right to find a security camera through which to get the Detective Case: Cell Block Bird Cage. Starting from the first floor, cling to the second and take out the enemy, from here jump left and enter the ventilation system, at the exit you will find yourself on the fourth floor where you will immediately find the road blocked by a metal block. Make contact with Catwoman to update the game map, then face the enemies by eliminating the one with the assault rifle first. Once on the third floor, head right and breach the terminal to open the door, continue in the same direction until you reach the shaft of a broken elevator, then look to the left of the shaft and above the high ledge to find two Cages of the Penguin. Once at the top of the area, scan the wall to find a panel that can be hit with the Batrang, then crouch and enter the panel behind it, once inside the right section, use your Batrang to cut one. of the elevator cables, in this way you will make it fall allowing you to continue inside the level. Go back to the previous room, jump over the elevator shaft, once in the room with the stairs, enter the ventilation system, then reach the next area and the next system. Wait for an enemy to pass in front of you to hit him, then exit the system on the right and enter the one on the left, continue until you exit the opposite side and as for the last time attack the opponent closest to your position. Enter the room on the left and immediately enter detective mode to find the Penguin Cages and avoid being hit by the traps.
Reach the exercise field
Go back to the fourth floor inside the main area of the detention blocks, remove the metal using your new Batclaw, then cling to the top floor, you will then find a damaged door where you can get the Detective Case. A life on the Line. Enter the next room and access the ventilation system to reach the room in the background, then run to the left and exit through the hole in the bars; reaching the fifth floor of the prison blocks, you will find two Penguin Cages in the center of the room. From here head left and roll over the spikes, climb the wall to find yourself in front of a dead end, in the left side of this room, you will find a Penguin Cage.
Scan the room to find a weak board on the floor and a heavy beam, drop it with your Batclaw to split the board and create a huge hole to jump into; Immediately turn left to find a Penguin Cage, then grab the ventilation system on the right to access a small room to find Detective Case: Bird of Prey, then return to the previous room and scan the area to find the Penguin's slipper. Prisoner. Head left to find yourself outside, use the Batclaw to pull down the grate on the left, go past and take out the opponent on the roof. From where you are now, scan the wall on the left for a weak spot, use explosives on it to blow it up; the ugly thug at the top, hearing the noise, will go down the stairs and you will have to fight him. Then grab the roof and check to your left, grab the ledge to get a better view of the fighting arena below; finally perform an overhead kick to start the fight with the Bronze Tiger boss.
Boss: Bronze Tiger
When you reach the exercise field, you will start an intermission scene during which the Penguin forces Bronze Tiger to fight against Batman. To defeat this boss, you will first have to study his movements and attacks and try to perform counter moves at the appropriate time, in the first phase just counterattack when the blue line appears above the enemy, then use the Spin Attack, from this moment you can attack normally until it is spread out on the ground; follow this process a second time to fly your opponent into the electric fence. During the next phase of the fight, your enemy will jump into the air hitting the ground with his mighty fist, roll away from his trajectory to get him stuck in the pavement, take advantage of this excellent opportunity to perform a Spin Attacck and continue with attacks once this is done, the boss will perform several punches from above before getting stuck in the ground, at which point you just have to follow the same procedure to damage it. In the third and last phase, you will have to go back to performing counterattacks when the blue lines appear above the boss's head, do this for a couple of times in sequence and bring up the icon that will indicate the exact moment in which to use a Spin Attack; keep it up until the end of the fight.
The Penguin Chase
After the fight with Bronze Tiger, go to the room, where the Penguin has escaped. There will be no visible exit doors, so you will be forced to scan the area to notice some debris blocking a small hole in the floor, you will also spot the traces of blood left by your prey. Drop into the hole and follow the track to the right, when you reach an electrified pool, scan the room to find two switches to press with your Batclaw and hit at the same time with the Batrang. Go past the liquid and jump the small wall to reach and enter a door, once inside the new room, reach the corner of the corridor to find three Penguin Cages. At the end of the corridor, violate the terminal to open the door on the left, from here you can reach the elevator that will take you back to the area previously left; before calling the elevator, drop inside the shaft to find a small ventilation system on the right, enter it to find Detective Case: Bird of Prey. Once outside, you will have to deal with a group of bad guys and once defeated, go to the closed door on the right, scan the area to find a new trace of blood left by the Penguin on the keyboard, in this way you will reveal the code to unlock the door itself. Keep following the blood trail until you reach the main detention area, stay on the second floor and throw your Batrang at the alarm on the right side, distracting the enemies in this way; finally drop into the ventilation system below and start eliminating them from here. Once downstairs, keep following the blood to the room on the left; unfortunately your main enemy will quarantine the area by filling it with lethal gas, immediately remove the grate in the background and enter the compartment to return to the previous room, immediately use the terminal to stop the release of the poisonous gas and open again the room; run to the left until you come across the hole through which the Penguin just escaped. Grab through the hole and move to the left to face some enemies, grab the high ledge again and make your way to the door on the right. Inside the new area, you will find two bad guys on the opposite side of the wall in front of you, use the ventilation system below to take them out quietly. Follow the corridor for its entire length, once you reach a pile of crates, enter the ventilation system on the wall to return to the corridor previously traveled, from here exit to the right and follow the trail of blood; Check the ceiling for a small weak spot, blow it up and climb through the newly created hole to find an armor upgrade. Go back to the main room with the elevator, scan the keypad to find the right code indicated by the Penguin's blood, then go inside and reach the lower floor; Once exited, scan the back wall to find a weak spot and earn the Heavy Gloves inside a chest. Then scan the door on the opposite side of the room to find that you have to look for an old entrance; then head towards an exit and find yourself in front of the global game map. Select the lighthouse, once you arrive on the spot grab the ledge on the right. Drop down and take out the enemies, then scan the wall to the right to find a metal barrier blocking the way, use your Batclaw to destroy it.
Enter the Administration
As soon as you arrive in the Administration area, head right, the elevator you need to reach the Lighthouse needs the Crypto Sequencer beta update, so move on for now; Climb the wall and enter the door to find yourself inside the real area. You will find the corpse of a guard above which you can get the Dtective Case: The Joker is Wild; head left and around the corner, climb the debris and breach the end to go through the door. As soon as you enter the new room, the light will be turned off and when he returns, all the guards will be hung from the ceiling. You will find the first teeth of the Joker, hurl the Batrang at them to prevent them from exploding against you when you get close. Continue to the next room, where you will meet the Joker himself; once the cutscene is over, your new goal will be to find the keeper; head right to find two of the Joker's teeth on the lower floor. Use the Batclaw to remove the debris from the second floor, then grab up and head left to enter a door, in the next corridor you will meet the Joker again who will release poison gas, run to the door on the left and press it to escape. Take out all the opponents in front of you, then start climbing upwards until you reach a metal block blocking access to a room on the right, use your Batclaw to remove it. Go inside the ventilation system, and once out of it, scan the bookcase to locate a book that can be pushed revealing a secret passage; Before going through the newly discovered passage, scan the area to find Detective Case: Kidnapped.
Drop into the next room and take out all the opponents, head right and reach the bottom floor through the hole on the right. Reach the closed door to locate two guards, then grab the wall and use the Gel Lance to explode the weak spot on the ceiling; hack the terminal on the right and enter the next room to free the two poor guards and reach the ventilation system nearby. You will reach the library, two more guards will be blocked in the second room, defeat the two opponents to be able to free them. Now your goal will be to eliminate the two bad guys by using the chandeliers hanging from the ceiling; from the ventilation system, grab the ledge and use your Batrang to cut the cables and take out the opponents below. Hit the garbage on the right side of the second floor, in this way force the three opponents to climb the stairs, then drop down and then run to the next room, when there is only one opponent left, hit him with a kick to take him out and hack the terminal to free the two guards. As soon as the Joker releases his Mephistophelic gas, escape through the ventilation system above, avoid any electric shock and reach the next room, take out the three opponents, hit the ventilation system above with the Batclaw to get inside and reach Detective Case: No Laughing Matter; Finally, run to the door on the right and push it to access the next area. Hit the top hatch with the Batrang, then grab and go up two floors, reach the electrified corridor on the left and climb the nearby ventilation shaft on the opposite side of the room; look for the Joker's teeth to the right of the new area. Run to the right to find the chest with the Cable Launcher. Return to the area, where you found the Joker's teeth, use the Cable Launcher to get past the chasm and electricity, in the next room grab the ledge above, then enter the ventilation system, use the Cable Launcher again to pass. the new chasm and reach the chest with the Red Son Cowl inside.
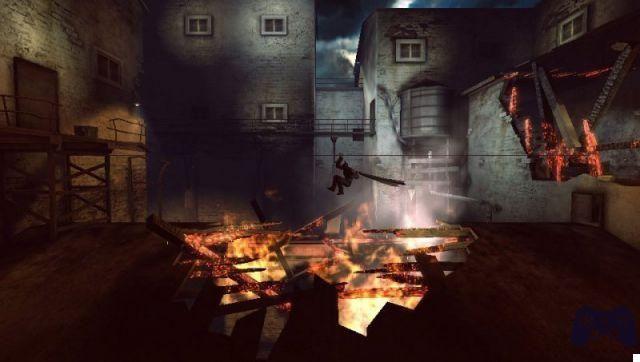
Towards the Lighthouse
Select the lighthouse area from the main game map. Once there, use the rope launcher to cross the huge chasm of water. At the base of the actual lighthouse, grab the ledge and head to the right, use the other ledge with the enemies above and hit them on the fly, advance and kill the next enemy on the walkway, smash the piece of metal with the Batclaw and grab pre continue. Use the rope launcher again to cross the chasm, then, crouch and go through the ventilation system, once on the opposite side, cling to the walls until you reach a point that tomorrow some opponents on the left, drop down and start the fight; once cleared up, hack the terminal to access the next area. You will soon be attacked from above by an enemy armed with a rifle, immediately take cover behind the crates or barrels, then try to move to the left, once under the enemy, take out your Batclaw and hit the platform it is above. Grab the next catwalk, then look for the weak point on the top section, smash it while eliminating other enemies, then reach the next level and look for a door to open using your Batrang. Look for a new door, from this an enemy will come out and throw grenades at you, hit him from a distance with the Batrang to take him out, go inside the door itself and reach the last level, go around the lighthouse until you reach a wall scalable, hack the terminal to open the door at the base; go along the ledge and drop down, you will land in front of the newly closed door, enter to reach the detention blocks.
Boss: The Penguin
Head right and drop inside the next room, you will find the Penguin intent on forcing a door, stop him and start the actual fight. The Boss will have guards at his disposal, these will be practically invincible, so it is the case that you stay out of their visual arc. Scan the room to find a number of fire extinguishers that can be hit with your trusty Batrang and distract the two Mephistopheles guards. When the two minor enemies are separated, use the Batclaw on one of them. When the Penguin is isolated, execute a flying kick on it to grab it and hit it. A third guard will join the fight and they will add a detection system that will fire if you pass within its range. Enter detective mode again and continue to lure the guards by hitting the fire extinguishers, when the Boss is isolated again hit him as you did before. A fourth guard will join, making the process more complicated but unchanged, separate the guards and hit your archenemy a third time to emerge victorious from the fight and start a cutscene, after which you can open the door to a new wing of the prison.
Look for the keeper
Go back to the area, where you found the rope launcher, go through the electrified corridor and reach the room on the left, then drop into the hole. Push the door to be able to go to the next room, throw a rope and cross the chasm to reach and knock out the opponent on the opposite side; then scan the area to find Detective Case: Doctor's Order, then place explosives on the two ventilation systems to stop the release of gas, drop down to breach the terminal and access the room on the left where you can find the Black Boots inside a crate. Cling and reach the next level, use the rope launcher to get in contact with the next enemy group, then enter the next room and reach the door on the right, hack the terminal to open the door of the room where the two hostages are kept; Climb over the debris and go up the next corridor, go through the door, use the Batrang to hit the Joker's teeth inside the lethal gas, then enter the ventilation system.
Once on the opposite side, wait for the two enemies to stop under the chandelier, hit it with your Batrang to make an immediate clean sweep, then reach the next room and hack the terminal to be able to reach the main room with the destroyed staircase again; Once here, use the Rope Launcher to reach the side opposite to where you are to find the One Million Cowl item. Head to the door to the right of the area, you will find some Joker's teeth inside the chasm to be overcome with the rope launcher, go up to the next room to be able to pass a series of doors; finally blow up all the balloons to get the gift and reveal a ventilation system to enter, you will notice a grate inside the system, use your Batclaw to get the armor upgrade. Once on the opposite side, scan the painting to reveal a man behind the wall, hit that portion then pick up the Beta upgrade for the Crypto Sequencer; Finally hack the terminal on the left and once outside you will notice the caretaker inside his office, head left and hit the grate from the ventilation system, enter the room and remove the debris to get the Detective Case: Doctor's Order. Go out and grab the ledge on the left in the background, pass the keeper and try to open the door.
Boss: Deadshoot
Use the rope shooter to return to the opposite side of the area, hack the terminal to return to the room where you found the Joker's gift. From here, go back to the beginning of the administration area, open the door with the Crypto Sequencer and the Beta update; finally use the rope launcher to continue and cling until you reach the fight with Deadshoot. Enjoy the cutscene, after which you will have to run immediately to the left; Whenever the Boss is about to hit you, take cover behind the barrels or other bulky items. Whenever you reach a bright spot, your opponent will hit it, you can put it back in its correct position using the Batrang, in this way you can continue to the left. Just before the dead end, you will find a point to grab onto, do it and continue to the left and into the building. Kill all the enemies, then grab the ledge above while avoiding the Boss hits. Once you reach the area close to Deadshoot, hit the bright spot with the Batrang and move the light beam towards your opponent, this action will buy you enough time to throw a rope at the Boss eliminating him.
Get the Electric Batrang
Once you defeat Deadshoot, you will find yourself in what appears to be an attic, immediately head right and hack the terminal to open the door, then enter the ventilation system on the right. Once on the opposite side, you can find three of Joker's teeth, check the floor to find another conduit to enter, leaving the door closed on the left. Walk the entire length of the narrow passage to the right, defeat the enemy outside and enter the next duct, you will reach a door, open it and defeat the ugly thug behind it silently, at this moment you are in the same room with the keeper , the man will explain to you that there are four buttons that need to be hit in the right order to defuse the bombs. Immediately enter the conduit on the floor, then drop into the next room and hack the terminal to open the door, in the next room you will find a button, but before you can interact with it, you will have to find the upgrade for the Batrang; in the next room you can find Detective Case: Kidnapped on a guard's corpse. Continue to the right and go down the stairs, the Joker will lock you in the room forcing you to continue, further on you will find two pairs of Joker's teeth, then jump over the chasm and defeat the opponents who will parry in front of you. Grab the ledge above, breach the terminal and enter the next area; At the top of some lockers you can find Detective Case: Information Gathering. The door to the next room will be locked, so drop into the nearby hatch, and you'll soon find yourself in the Clown's Room, which your archenemy the Joker has prepared for you. You will be forced to play a sort of memory, where you will have to find the same image twice by hitting the targets with your trusty Batrang, in case of mistake a bomb will be thrown at you. By beating this mini game, you will be able to enter the Clown's mouth and get the electric power-up for the Batrang.
Save the keeper
Scan the wall on the right to find a mechanism above the closed door, hit it with your power-up Batrang to open the elevator shaft and reach the next room. Hit the two buttons near the door with the Batrang and head back into the room, where you previously defeated some opponents. Continue to advance to the right and grab the ledge, swing to the right and drop to continue, go through the door and hit, again with the Batrang, the third button. Cling and go up a floor, then head to the air duct on the left, in the next room you can find three of the Joker's teeth. Grab the highest ledge, enter the area to the right and hit the fourth button on the wall to the right to defuse one of the bombs. Immediately enter the vent below the button you just hit, then open the second desk to find another button. Go back inside the ventilation system, grab the higher ledge and, once inside the new room, open the door on the right to return to one of the first areas visited. Enter the conduit on the floor and reach the room to the right of the Keeper again, hit the button above the door to deactivate the third bomb as well. Jump inside the ventilation system on the floor and move to the left, drop into the next area and enter the vent on the left, here remove the piece of plywood to reveal the fourth, and last, button; finally check the nearby table for Detective Case: Doctor's Orders. Now that all the bombs have been defused, go back to the Keeper to finally get him to safety and learn of the existence of a secret entrance to the industrial area.
The secret entrance
Return to the industrial area and head towards the dead end with the sewer pipes; In the room to the right of the garage, use the Batrang to open the gate on the right revealing a chest with the armor upgrade inside. In the room below the one where you previously found the card, use the rope launcher to go through the barbed wire fence and find a chest with the shot enhancement inside. In the room below the pressure valve, take out a section of the wall with the Batclaw, then use your power-up Batrang on the button to open the door on the left and get the Red Son Boots. Return to the room with the pipes, use the Batrang on the button in the center of the room, then grab and enter the new ventilation system, go down the stairs until you reach the end of the path; once in front of where the water flow falls, enter detective mode to find a Black Mask on a pipe in the upper right corner of the area. Use the rope launcher to cross the chasm and reach the room on the right, here jump over the ledge and follow the long fall; use the rope launcher again to reach the opposite side and grab onto the walkway.
Enter the next room and take out all the opponents present, then reach the door on the right, you will find the Detective Case; Power Play above some cabins on the left. Use the rope launcher to cross the chasm and defeat some enemies, you will find yourself in front of all the various gates, throw the Batrang on the button on the right to open the gate in the lower right, go behind it and enter the first conduit you notice. Hit both buttons to open the high gate, then return to the main area and take the upper right passage, then run through the newly opened gate. In the next area, hit the button to open a new passage, return to the main hall to pass the gate at the bottom right, reach the edge of the walkway and jump from it, then use the rope launcher to reach the opposite side, you will also find the Detective Case: Sixty Feet Under. Jump on the new walkway and enter the next area, take out all the enemies and enter the next area, continue to the right until you reach a room with three grates near the floor, use the explosives to detonate the one in the center. Enter the conduit and keep crawling until you reach the next room, here apply two explosives on the generator in the back, use the Batrang in the same points to stop the flow of water; Finally, hack the terminal on the right to open the gate that leads back into the main area. Cling to the upper left entrance, continue and climb inside the shaft, exit the opposite side and reach a chest with the improvement for the rope launcher, then hack the terminal on the right to open the central entrance. Go back to the area where you took the big fall, start using the power rope launcher to get close to the pipe and grab onto it, swing to the right and drop in the same direction. Use the Rope Launcher again to get over the chasm, then jump to the top and use a rope to reach and grab the ledge, reach the doors on the right to see it directly with the Joker.
Boss: Joker
Make your way to the room, where you will find your nemesis sitting at a table, with the Gamma upgrade for the Crypto Sequencer in hand. Use the rope shooter against the boss when he is on the opposite side of the room to stun him and deal damage. Your opponent will draw the gun, roll away every time the sight is close to you, do this three times, then use the rope shooter to hit the enemy; do all this a second time to start the second phase of the fight. The Joker will extract an electric baton, let yourself be charged and at the very last second use the rope launcher to take you to the opposite side of the area, use it immediately against the boss, follow this process again to start the third and final phase of the fight. Now you will have to go through exactly the same process as the first two steps, but quickly, as the room will fill with lethal gas. At the end of the fight, you will meet your cross and delight Catwoman again. You will also gain the Gamma upgrade. Go to the exit and enter the detention blocks to reach the Arkham Wing.
L’Ala Arkham
Reach the industrial area and enter the room where you fought the Penguin. On the lower floor of this area, go down the stairs on either side, you will find Detective Case: The Bidding War on a chest to the right. You will reach the door to the Arkham Wing, use your Gamma upgrade to open it. Walk the entire length of the corridor until you reach a door leading to the hostages, follow the cable to the button to deactivate the lock. Cling to the right and make a hole in the weak spot on the floor, drop into it, then, grab the small ledge on the right, throw a rope out of the small hole in the gate. Use a rope to climb high enough and reach the two buttons at the top, make sure you recognize which symbol is shown as you are about to hit the button successfully. Crouch and go under the gate on the left when it opens, drop off the walkway, but don't get hit by the electricity on the floor, instead, grab to the right as you fall. Use an explosive to stop the propeller, then look for the black belt inside the shaft behind it; grab the walkway above and make your way to the next room. Poke an explosive on the panel, and wait for it to line up to detonate it, you will open a door to the right, from there, drop to the lower floor, then let yourself hang from the ledge and through the hole in the wall, finally reach the room on the left . Enter the ventilation system and go to the opposite side, hack the terminal to open the door leading to the hostages; however you will find Bane inside a strange machine, at his side Catwoman who will explain her plan, and will assign you the task of defusing some of the Joker bomb gifts scattered in the various game areas.
Boss: Catwoman
Go to the lighthouse area to stop Catwoman trying to escape with Bane. At the start of the fight, just counter-attack the catwoman's moves, when the blue lines appear on her head, and after you stun her, perform normal attacks. During the next phase, the boss will throw a blinding grenade, pay attention to the position of the enemy's red eyes and some specific sounds, as soon as you hear these, perform a counterattack, then stun it and perform normal attacks, follow this iter twice to initiate the third and final phase of this clash. Now Catwoman will jump around you, creating fake copies of herself, wait for the one with the blue lines above her head to jump on you and perform the usual counterattack followed by a stun move, do this twice to emerge victorious from the fight with the cat woman and finish the game!
 Batman: Arkham Origins Blackgate psvita
- Playstation Vita
- 3ds
Exit date: October 25, 2013


