


Please note:
The solution is based on the American version of the game, so there may be differences for the Spanish version.
Area 1 - The Dock
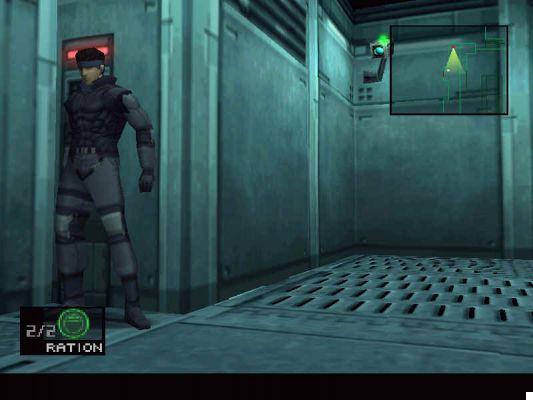
Once out of the water, head down the stairs and grab the rations, which can be especially useful if you are found by the guards too early. Don't worry about using them right away, you will find a lot of them in all levels (they are quite important to progress in the game). Proceed, and when you feel trapped and about to be seen, press X to lie down on the ground and crawl under the pipes to get to the other side. I hope you're in the mood to hide, as that's pretty much what you'll have to do throughout the game. Find a good spot to hide from the guards, such as against a wall, or behind some object. Try to reach the right of this room, in the large metal box there are other rations. Drop down and stand against this crate to hide from the guard patrols. It would be best if you did not walk too close to the guards, as they could hear your footsteps and discover you. Water is another noisy place that you need to avoid. Get the guards away as far as possible and proceed. To the left is an elevator and other rations. When you see the third guard arrive, wait for him to exit the elevator and move away, then run to stock up on rations and get on the elevator avoiding any direct confrontation with the enemies. At this point Snake takes off his wetsuit, receives the briefing with the mission objectives and a small tutorial. You are ready for a real level.
Area 2 - The heliport
In the area near the elevator you will be able to locate other rations. Now it's just a matter of deciding which way to go. Start with the elevator to the right of this area, where there is snow (watch out for snow too, as walking on it creates footprints, and the guards can notice them). There is a guard patrolling this area to the right, try to grab her from behind and strangle her. If you drop a few rations you can now boast a large collection of them. Be very careful in this area: even if you have eliminated the guard there is a CCTV camera that can locate you if you do not notice his presence in time. Observe on the radar if you are in its range, in any case try to leave as quickly as possible. Go back to the initial elevator, and from here go left, into the large room, where there is another camera that you can avoid by hugging the wall. On the other side are three Stun Grenades, which can leave the guards stunned for a few moments, giving you a chance to cut and run. Exit this room the same way you entered, that is, against the wall. In the large area with the two beams of light wait for the moment when the rays are far from each other and make a run towards the object in between, then proceed to the other side. Kill the guard by strangling him, jump to the back of the truck and pick up the SOCOM, a very accurate laser pointer gun. Remember the first camera, where you killed the first guard? Go back to that point, and go up the stairs to reach the upper level of the heliport. There is a narrow air duct in the wall below, crawl into it and reach the Hangar. You will see a cutscene with two soldiers talking about an intruder who killed several of their men. They haven't discovered you, so you are certainly not the person they are talking about ... so who is this intruder? Exit the shaft and enter the Hangar.
Area 3 – L’Hangar
When you enter there are some Chaff Grenades in plain sight. They are very similar to Stun Grenades, but in addition to stun people, they can also temporarily disable surveillance devices, to avoid being seen, or to have time to neutralize them (possibly with a silent weapon). The downside is that it also turns off your radar, so you may not know in time that enemies are on the way. Run to where the nearest camera is and use one of these grenades to knock it out (note that the bar under the radar shows how long the camera will be off). Go past this point and enter the next room. Attention, there is another camera inside, but there is no need to use the grenade, just stand against the wall to retrieve the Thermal Viewer. There is only one other accessible room left on the top floor of the Hangar. Enter it. Fortunately, there are no cameras in here. There are other Chaff Grenades and Cardboard Box A, which you can use when being chased, or when you don't want to be seen. Exit the room and go down the stairs, using a grenade to disable the camera. Always go very slowly, because there are guards downstairs. Hide behind the stairs until the grenade effect is over, collect the ammo. Try to stand on either side of the room, wait for the guards to pass you by and smother them one by one, memorizing their patrol routes through the radar. Or hide under the tank and avoid any confrontation. Do as you like, the important thing is not to be discovered by the guards and unleash a hell from which you would hardly get out alive. Reach the elevator and get carried up to level B1.

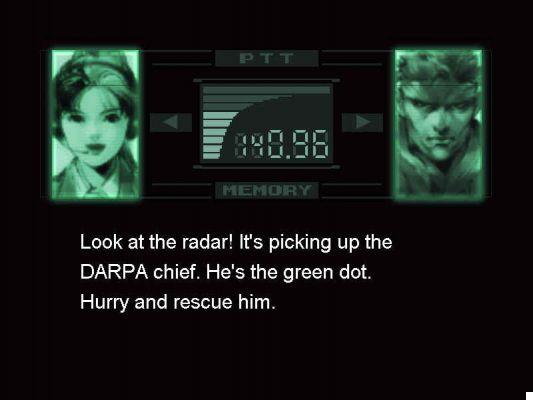
Area 4 - The Cell
Exit the elevator and reach the edge of the area, go right, and at the end of this small corridor you will see a staircase to the left. Climb it and open the ventilation duct, which is very similar to the one you walked before, but longer. At a certain point Snake will stop to observe a woman, then go out to the place where the head of DARPA is imprisoned, who will entertain you for a long time talking about the Revolution, the terrorists, etc. Eventually you will see him die before the eyes of what may seem like a heart attack, but is actually Foxdie intoxication. Crawl on the ground and collect the rations, which you will soon need in large quantities. Save the game. The woman eliminates the individual on guard and opens the cell for you, now you can leave, but she points a gun at Snake's head, mistaking him for Liquid Snake, her genetic brother. The qui pro quo is resolved, and the two joke amiably, when suddenly they are surprised by a group of guards. You have to kill them all, avoiding being hit by the grenades they will try to throw into the room. After leaving you there like idiots shooting with a miserable gun, the girl decides to give you a hand and helps you with her big machine gun. He thanks you and leaves, with a too provocative walk. However, before entering the elevator he suddenly turns around and starts shooting at you. Spare yourself the insults, later you will understand that this attitude is not wanted, it is simply controlled by a psychic entity called Psycho Mantis. Go to the elevator to reach the B2 floor.
Area 5 - L’Armeria
This is a rather large area that can be tricky, so be careful. There are whole flocks of guards, and many hatches on the floor that can send you to the other world in a moment (you will know that you have activated one if you hear a click, and then it will be perhaps the case not to stand there impaled to see what happens but to get out of your way, and quickly). Exit the elevator and enter the nearest room, where you can pick up some C4s, which you have to place on the sides of the elevator and detonate by pressing O. This will open two rooms, each of which contains several interesting objects. The whole level is called the Armory not for nothing, there are a lot of small rooms that contain weapons that can come in handy. Be careful though: some of these places have infrared rays that can end your adventure. To avoid them, crawl without getting up until you have passed the risk zone. Now that you are armed to the teeth you will certainly feel much calmer than before. Now you have to go back to the wall to the left of the area, at the corner there is another point where you have to place the C4. After you detonate it, move on and place another C4 on the wall to detonate it and proceed. Reach the end of this wider corridor and place it on the final wall to cross it. At this point a video shows you the president of ARMSTECH and Revolver Ocelot. Get ready for your first boss fight.
Boss 1 - Revolver Ocelot
It's not a difficult battle, but there are a few things to keep in mind.
Do not enter the central area where the president is, or you will trigger a chain of explosions that will damage both of you. Do not use any kind of explosives, only use SOCOM, which not only can cause serious damage, but also has a precise aim. Ocelot has a standard number of bullets he can use from time to time, so it may be wise to dodge his shots and shoot him while he's reloading. Don't think you are safe if you miss it by shooting: bullets can bounce off walls and hit you anyway. Another effective strategy is to run in the opposite direction to his: crossing him you can hit him from a closer range and in the meantime collect the ammo scattered around. After about ten hits, the battle ends with your victory. At this point you have a long conversation with President Baker, after which he too dies, just like the head of DARPA did. Before that happens, however, a lightning-fast ninja bursts in and cuts off Ocelot's arm, who in turn runs away. After the cutscene you can go out the door, leave the Armory by taking the elevator and go back to the Hangar, where you have to call Meryl (the girl who helped you out of the cell) with the Codec. The large door to the northeast of the Hangar opens for you. Don't head straight for it, instead go right and open the door, strangle the guard and grab everything you find, including the SOCOM silencer. You can now go through the large open door and head into the canyon. There are infrared lasers. Collect the Mine Detector.
Area 6 - Il Canyon
This is a long area and you will soon be in trouble. The first significant thing that happens to you is a call from a mysterious guy named Deepthroat, who warns you of the presence in the whole area of mines invisible to the naked eye. There are two ways to locate them: either use the Thermal Visor you collected earlier, or use the Mine Detector. Collect them all, and get ready for the second boss, which is about halfway down the canyon.
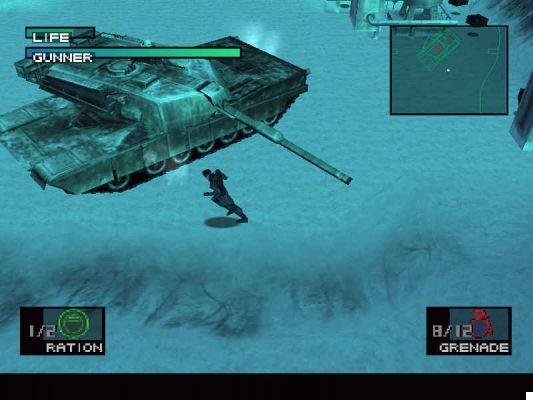
Boss 2 - Vulcan Raven
This boss's appearance is slightly more creepy than Ocelot's. Be very careful not to be hit by the missiles and bullets from the machine gun. If by any chance you run out of ammo, there are Grenades at the corners of this canyon. Raven not only controls the tank, but also a soldier, but this is not a problem. Rather, be very careful not to get too close to the tank, as it can literally pull you under. The first thing you should do is throw a Chaff Grenade, which briefly prevents the machine gun from working and allows you to get close to the tank. From here you start throwing grenades at the soldier, after about three throws there will be a big explosion in the tank. Raven and Snake have a conversation at this point, then head to the building that houses nuclear warheads, using the key Raven took to open the door on the other side.
Area 7 - The Nuclear Warhead Plant
Go up the stairs and at the top of them collect the rations. Go down and go to the end of the room, into the door with the crack in the lower part. You will learn that you cannot use any type of weapon inside the facility, as it contains nuclear warheads. Crawl on the floor through the door, then proceed to the left corner, pick up the Chaff Grenades. Keep an eye on the radar constantly to avoid guards and cameras - there are plenty of them, but there are just as many places to hide, so that's not a problem. Now you can go back to the door you entered through and proceed straight. Avoid the cameras, avoid the guards and strangle them if necessary, jump on the truck. Once you have found everything there is to find in this gigantic area, go upstairs and run to the elevator. There is a guard, but it's easy to hide behind something so as not to get noticed and then surprise her from behind. Get on the elevator and enter the B2 floor. Exit the elevator and go straight to the room in front of you. You get another call from the mysterious Deepthroat, advising you not to walk on the floor, as it is protected from high voltage electricity. What to do then? Equip the missile launcher obtained earlier and use it. You can control the missile's direction in two ways: by leaving the camera as it is and guiding it to its destination, or by changing the first person view. Your goal is to hit a power generator located in a small room at the end of a path where you have to go straight, left, straight and right. Be careful not to be seen by the cameras: they are equipped with weapons capable of detonating your missile before it has reached its objective. Once the generator is deactivated, it will be possible to walk on the floor. Proceed along the first corridor and follow the path taken just before by the missile. Throw a Chaff in the room with the cameras, enter the rooms to the right, previously inaccessible, and collect what you find. When you get to the last room (and do it quickly, so you don't have to throw another Chaff), you'll find some rations. Go back to where you launched the rocket, and head right instead of left. Head to the last room of this corridor and collect the Gas Mask. Then go through the main door to confront the next boss, more difficult than the previous ones.
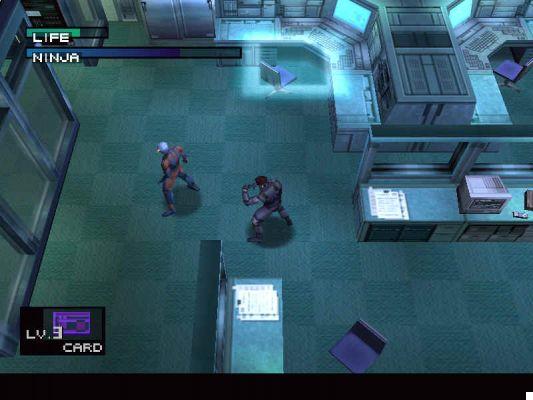
Boss 3 – Ninja Cyborg
This battle is definitely challenging. Never use any type of weapon - it's just a waste of time (and ammo), as this ninja will block all kinds of bullets with his sword. Even using the missile launcher can be counterproductive: your opponent is very fast and can hit you with ease. You can only use your feet and hands to win the first phase of this fight. There are plenty of objects to hide behind, exploit them and hit them as soon as they seem more vulnerable. During the fight you will notice that you are causing considerable damage to the furnishings of the place, do not care and move on. At some point the ninja will become invisible, and this is the right opportunity to take advantage of the Thermal Visor and understand where he is going to hide. Keep fighting him, until he starts shaking, and it's finally time for you to shoot him! You have finally defeated him!
At this point a movie starts in which a certain Otacon explains a couple of things about himself and the project you are part of. Go back to the elevator and go to floor B1. Do you remember Meryl, the girl you met at the beginning of the game? Now you will have to find it. Meryl wears the uniform of the guards who patrol the area, so as not to be recognized. When you get to the floor, go to the room just in front of the elevator. Among the various guards present you will recognize Meryl from the provocative walk that you had noticed a few levels back. Let her find you (fearlessly, she's on your side) and follow her into the ladies' room. A long video follows in which Meryl talks about herself and gives you a key. Go back to the room where you met Meryl and exit in the corridor, from here enter the room, where a boss is waiting for you.
Boss 4 - Psycho Mantis
Here he is, the psychotic nut who controlled Meryl's actions earlier. The time has come to kill him and free him from all suffering. Before starting to fight, however, he resumes telepathic control of Meryl. You don't want to kill her, but you need to temporarily knock her out. What to do? But of course, throw a couple of punches at her and knock her out. Which is not nice behavior towards a lady, but in this case we will make an exception. Psycho Mantis begins to move quickly across the room. He can easily avoid your attacks, given his ability to read minds. However, the battle is not as difficult as expected, especially after the appropriate call from the Colonel, who explains how to do it. In two words: take the controller out of slot 1 and put it in slot 2. And the first problem is solved. Now let's move on to the rest. The battle is very simple: he attacks in only one way, which is to lift objects and throw them at them. There are many objects to hide behind, such as tables, chairs, etc., but the best technique is to keep moving while hitting it. The best weapon to use here for speed and power is the FA-MAS. After a couple of hits Meryl gets up and you have to punch her back. Then focus again on the main enemy. Defeated Psycho Mantis, you get Meryl's apologies for her unforgivable behavior, you know more about the game's plot and you even get to see the true face of Psycho Mantis, and it's certainly not a pretty sight. Before going into the newly opened secret passage, go back to the elevator, head to floor B2 and from there to the closed door that you can now open thanks to the key that was given to you by Meryl. Inside you will find the Night Viewer, which allows you to see perfectly even in non-optimal light conditions (such as the ventilation ducts you have already encountered previously). Go back to the room where you fought the boss and from here into the secret passage. Get the ammo under the stairs and enter the caves.
Area 8 - The Caves
It is really a pity that the radar inside these caves is not working and that you have to find your way on your own. This area is very dark in some places, but that's exactly what the Night Vision you just found is for: put it on and you will immediately feel more comfortable, even in the event of an attack. When you enter the caves, run across the path to get ammo and rations, then go back to the entrance and crawl under the rocks. When you get out of this situation, get up immediately, take out the SOCOM or FA-MAS and get ready to face tons of huskies. Collect the other ammo and keep going right. Here's another crack to crawl under, as you did before. Collect everything there is to collect, then go back through the same crevice you entered and move forward. Kill the huskies, crawl into the crack in the wall on the right: here is Meryl waiting for you, along with many husky friends. Enter the door.
Area 9 - The Underground Passage
Meryl tells you that there are mines scattered all over the place. Wait and carefully observe the path he takes to avoid them, fortunately he leaves footprints that you can easily follow. Once this is done, go forward through a large passage, where unfortunately Meryl is shot by a sniper. A moving scene follows in which Meryl talks to Snake with her heart in her hand. Promise to save her. Go back to the Armory to find the Sniper Rifle, then come back here and face Sniper Wolf, a beautiful woman who is a sniper by profession.
Boss 5 - Sniper Wolf
Throughout the battle you will have to look for Sniper Wolf on the peaks of this vast area. You will also need to locate the Diazepam, as in this battle you will need a lot of it to be able to take aim and hit the target. The effect only lasts 15 seconds, so it's all about precision, patience, consistency and willpower. Fire as many shots as possible before he starts hitting you in turn at regular intervals. Also try not to lose sight of it, as finding it can take some time, and in the meantime you may be hit. With the enemy destroyed, proceed along this wide passage and watch the cutscene.
Area 10 - The Torture Chamber
After a long cutscene you are left alone in the room in the company of Ocelot revolvers, who is not very happy after losing his hand. He gives you a good explanation about the methodologies he will use to torture you. Basically it will subject you to high voltage current shocks, and you will have to press O at the right moment. If you can do it up to once, you keep living, but Meryl will die. If you manage to overcome at least two sessions (the first shake is easy, the second difficult, the third extremely difficult), you will both survive. Whatever happens, after the torture curtain is over, you will be imprisoned in a cell along with the real DARPA leader, who looks horrible. When you have talked to everyone, even via Codec, call Otacon, and when you hear the guard go to the bathroom, Otacon himself will arrive to give you the access card to level 8, a handkerchief and some ketchup, essential to get out of here. Wait for the guard to go to the bathroom for the umpteenth time, wait for him lying in the cell, using the ketchup. The guard will come back and take a look inside: seeing you in that state he will think that you have committed suicide and will break into the cell, giving you an excellent opportunity to strangle him. But be careful: remain motionless until he has completely entered the cell, or he will understand what is happening and close the door, sending your trick up in smoke. And when you kill him, do it quickly so he can't escape outside and raise the alarm. Method B to get out of the cell instead consists in hiding completely under the bed and waiting for the guard to enter the cell, alarmed for your probable escape, then quickly get out of hiding and strangle her. At this point, go back to the torture room and collect your equipment. In case you have survived two torture sessions you must press O to adjust the time bomb that Ocelot placed in this spot. Take the elevator and go back to the hangar, then to the canyon, turning off the cameras. Enter the building and kill all the guards. Take the elevator down to floor B1 and enter the room, from here on relying on your orientation skills, as the radar is inoperable due to interference. Also use the Night Vision when needed. As you enter, crawl under the rocks, then proceed forward, under the wall on the right and through the door on the other side. Go through the passage and the door, towards the Communication Towers.

Area 11 - The Communication Towers
Enter the door and put on the Thermal Visor. Wandering around this place you will set off an alarm, and you have to run like hell up the stairs, chased by many guards armed to the teeth. The best choice in this case is the FA-MAS. Kill as many as you can by collecting ammo if there is any. Reach the top floor, collect the ammo and climb the ladder that takes you outside. Use your access card and exit. Liquid Snake arrives by helicopter and destroys the satellite under construction, as well as the passage leading from tower to tower. Use the Rope to descend from the tower (you will also receive explanations about this through the Codec). On your way down, avoid the pipes that emit steam. When you get off, shoot the three guards from distance, using the Diazepam if necessary. Collect the explosives and ration, then proceed and have another encounter with Liquid Snake in a helicopter. Quickly enter the door to find a new powerful weapon, a missile launcher with which you will be able to take down that annoying helicopter once and for all. Enter the other door. There is an elevator, but it is out of order so you have to use the stairs. Go down until it is no longer possible to continue. Go back to the elevator and watch the cutscene in which Otacon appears, who after a good chat starts to repair the elevator. You can finally fight Liquid Snake aboard the helicopter.
Boss 6 - Liquid Snake (Elicottero)
It is about him, Liquid Snake, the number one enemy of the whole game, but we are far from the last battle. However, it is a difficult fight. One of the biggest difficulties is to handle the missile launcher accurately enough to be able to follow the movements of the helicopter, and in the meantime avoid the various missiles, bullets, etc. that will be fired during the duel. When you equip the rocket launcher you enter a first person view, and you can use it like any other weapon. You must center the enemy in the central square: when it flashes, launch the missile, which will follow it for a short time, as long as the opponent does not make too abrupt changes of direction. Hit the helicopter a couple of times, then move and start over, avoiding its shots as much as possible. The helicopter has only a few points that need to be hit: the back, the front and the two wings. When you are finished with Liquid Snake, go down the stairs, and you will find that the lift has now been repaired and is usable, but it appears that you are exceeding the weight limit of the lift. Why? The only plausible explanation is that you are not alone in the elevator, and in fact two guards come out in the same stealth disguise used by Otacon throughout the game. Put on the Thermal Visor and immediately take them both out. Get off the elevator and enter the door. There is a lot of snow here. Proceed a little and contact with the Otacon Codec. You're about to fight Sniper Wolf ... for the second time.
Boss 7 - Sniper Wolf 2
This enemy is much more difficult this time for two sets of reasons. First of all, the area is bigger than last time, and it's harder to find. Secondly, she moves more steadily, and you will need more Diazepam, a good supply of bullets and rations. When the battle begins, find a good spot to lie down on the ground and shoot them, possibly not in the open but between some rocks, for example on the right. The first challenge of the duel is to find it. The first time it will be at the bottom, usually behind a tree. Find her, grab the Diazepam, zoom in as much as possible and hit her in the head. From this point on, try not to lose sight of it again. Hit it a few times and you will get rid of it forever.
After the battle begins a long sequence that shows you a dialogue between Snake and Sniper Wolf, at the end of which she asks him to kill her to put an end to her suffering. Then talk to Otacon. Then collect all the items around the perimeter of the base, then go inside and throw a Chaff to disable the cameras.
Area 12 - The Blast Furnace
When you enter the Blast Furnace there will be a guard very close to you and it is not recommended to take him out with a noisy weapon. Choke it, or use SOCOM with the silencer. Go through the passage to the left silently and without being discovered, collect more bullets for the SOCOM. Move along the wall and slide to the other side. To do this, you can also lower yourself when the crane passes, but be careful not to fall into the lava below. Go down the stairs and find the spot in the wall where you can slip into. Enter the room like this and pick up the ammo. Exit and enter the nearby door. Cross the room, go up in the big elevator and you will be attacked by some soldiers, which you can easily eliminate with the FA-MAS. Go down, go left to collect ammo, then continue to the other side, throw a Chaff to deactivate the camera and run past it. Avoid the mines scattered in this level. There are more ammo next to the elevator. When you are ready, enter the large door to face Vulcan Raven again.
Boss 8 - Vulcan Raven 2
Despite being one of the last bosses you have to face, Vulcan Raven is by no means a challenging enemy, given its slowness and the practice you have acquired over the course of the game. His big weapon can be intimidating, but there is no difficulty whatsoever, as long as you are quick to move. After the introductory cutscene, you notice that you are standing in a warehouse and there are piles of crates around you, which you can of course use to your advantage. Hide behind a chest a long way from Vulcan Raven and hit him in the meantime. When he sees you and reaches you, change your hiding place: it will take him a while to look at you again, he does not have very quick reflexes. If you are feeling particularly bold you can even throw missiles behind him. Since he is very slow, it is easy to get around him and hit him a little from every angle, but be careful with his big weapon, very dangerous, which you must avoid at all costs. His movements are only linear, it is easy to trap him between the crates and hit him without worrying about being attacked in turn. Hiding spots are a great way to escape him, even if his visual perception range covers a large part of the deposit. When he starts destroying the crates, and consequently reducing your attack points, it's time to finish him off. A brief conversation at the end of the battle reveals that it is your last meeting, after which Snake leaves and Vulcan Raven is devoured by ravens. Obtain access card to level 7. Collect ammo and rations and use the access card to exit the depot. Go left paying attention to the traps on the floor (similar to those encountered in the Armory) and using the Chaffs to deactivate the cameras. Enter the Underground Base.
Area 13 - The Underground Base
Upon entering you will see the gigantic and legendary Metal Gear Rex. Don't worry, you don't have to fight it (at least, not right away!). Go ahead, climb the first ladder you encounter, and at this point Otacon will contact you via Codec, explaining the current situation and informing you that he is trying to illegally penetrate the ARMSTECH president's computer files, to find the key to deactivate the Metal. Gear Rex. Go back and go up the next stairs. You get another call from Otacon, telling you that he has managed to penetrate some security devices, but not all of them. Climb the next ladder to get to the head of the Metal Gear Rex, from which there is another small ladder leading to the side of the head. Go down and around the corner, paying attention to the guard who is manning this area. You get another call from Otacon, telling you that he has finally managed to get the files he was looking for, and that the nuclear warhead is about to be launched. Take out the guard silently, collect his ammo and go to the office where Liquid and Ocelot are located. You can hear them talking about Foxdie, the deadly virus that simulates a heart attack. Otacon explains the use of the PAL card, which works as a temperature regulating key. Unfortunately Ocelot notices your presence and starts shooting at you. However, he does not shoot you directly: in his plans there is the idea of dropping the precious card from your hand. Leave the room, go all the way down to the beginning of the Underground Base, killing the various guards along the way. Pull out the Mine Detector and look for the PAL. If you don't find it in the water, look for it in the animals you find. At this point, go up the Metal Gear Rex and go back to the office, killing the guards. Insert the left key (yellow symbol), which represents the normal room temperature. Return to the depot where you faced Vulcan Raven the second time. Eliminate the automated soldier if you want to perform the operation in peace, otherwise do it without being noticed. Stay a couple of minutes to let the card cool, then go back to the underground base and insert the card in the central compartment (the one with the blue symbol). Return to the Blast Furnace to heat the paper, killing the guards. After about two and a half minutes, during which the card will have turned red, you can return to the Base and insert it in the last remaining compartment, the red one. Everything must be done quickly, or you will have to repeat the operation from the beginning and redo the whole path.
If you thought that this laborious process was to prevent the launch of the nuclear warhead, well, you were wrong. The terrorists deceived you, and the PAL triggered the launch. Now you have to escape from the room, which is filling up with poisonous gas. Call Otacon, who will help you out of the room (you will learn to love this man by the end of the game). Leave the room, turn right and then right again. Liquid Snake jumps aboard the Metal Gear Rex, and now you have to fight it! Good luck!
Boss 9 - Metal Gear Rex
The only way you can harm this immense creature is by throwing missiles at it. The fight is divided into two phases, of which the second is simpler than the first. The objective of the first part is to hit the disc on his arm with the missiles. The point is that Metal Gear Rex shoots a lot, with rockets, machine guns and lasers; moreover, he can also crush Snake with one of his huge feet (and you can easily guess that in this case he only needs one blow to send you to the other world). Metal Gear Rex moves a lot, and you will inevitably have to do the same. Avoiding the SMG and the laser is not complicated if you keep moving. On the other hand, missiles are more difficult to avoid. You can ask for assistance through Codec, you will receive valuable suggestions. Before starting to fight save, then take care of his left shoulder first. Use a Chaff and short-circuit him for a few moments, so you can easily hit him. Keep doing this until you have done enough damage to him. At this point, one of the longest cutscenes of the whole game starts, in which Ninja Cyborg and Snake talk hidden behind a crate, after which Ninja Cyborg comes out and sacrifices his life to stop the Metal Gear Rex, which crushes him against a wall , but at the same time he is hit in the left shoulder. Now it is Snake's job to complete the job, but Snake hesitates, as hitting Rex would hit his new ally as well. Who is destined to die anyway, crushed by one of his big feet. The second round begins, easier than the previous one because the destruction of the left disc has uncovered the cockpit of Liquid Snake, which of course you will have to hit with the missile launcher, and thus destroy Metal Gear Rex once and for all.
Liquid Snake, however, is still alive, and is your last enemy ...
Boss 10 - Liquid Snake
With the destruction of the Metal Gear Rex you have crushed all the ambitions of the terrorists, but Liquid Snake has not yet given up: he wants you dead. You will attend a ten-minute film, in which you will learn many details about the whole story. You are without equipment and without weapons, you will have to deal with it hand-to-hand. Try to stay on the defensive, retreating with each attack and attacking him when he drops his guard. You cannot strangle him. When you defeat him and the fight is over, grab all your gear and escape in the car with Otacon. You have to face Liquid again in a car chase. The ending depends on what happened in the Torture Chamber, but in both cases Liquid Snake dies, and the terrorist threat is annihilated.
 Metal Gear Solid ps1
- pc
- ps3
- ps1
- gbc
Exit date: November 6, 1998


