


Please note:
The solution is based on the American version of the game, so it is possible to find differences for the Spanish version.
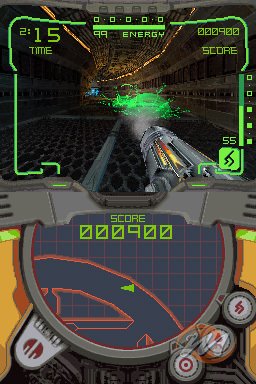
CHAPTER 01
Jump off the ship and take a look around. There are two portals left and right, a console and a green barrier under the landing pad. Scan your surroundings and blow up the door to enter the next area. Scan all items in this room. A walkway near the center of the room goes up. Climb it and go left first. Scan the console on the other side of the walkway. Scan the button next to the door on the far wall to unlock it. Enter and the door will close behind you, trapping you in a room where several Psycho Bits v 1.0 appear. Scan one, then kill all the specimens to open the doors. Climb to the top of the ramp and follow the corridor to the Meditation Room. Destroy the crate and collect its contents. Follow the corridor and go right, enter the door. Blast the brown door with a missile, then leave the room. At a certain point the corridor forks: go left. Notice the crack under the floor, you'll be back shortly. Keep following the corridor to the left and kill the Psycho Bits you encounter. When you are almost at the end of the corridor, you will receive a message telling you that another ship has landed in Celestial Archives. Enter the silver door on the right. Scan the low wall in front of you, then jump to the platform in the center and scan the blue diamond to make the usual enemies appear - kill them until they stop respawning. Once you have killed them all, a shield key will appear: take it and also take the artifact. Exit the door with the two crystals on the sides, kill the enemies that attack you and jump into the pit. Turn around, there is a small path that runs along the bottom of the floor. Roll inside to find some missiles, then go back and continue down the corridor. Do the same for the other small tunnel similar to this one, go back to the corridor and eliminate (after having scanned it) the new creature to be able to open the door. Scan the base of the pillar, then climb to the top using the surrounding platforms and enter the door. Follow the tunnel to the right, towards the end you will see the silhouette of a humanoid figure: it is Kanden, the first and weakest of your rival hunters. If you get too close it runs away, so try to scan it before it notices your presence. Chase him, passing the room with the pillar and the one with the crates (collect what they contain). Then follow the corridor to the left, up to the silver door. Enter, and Kanden will attack you.
Kanden begins the fight in his alternate form. As you will then do with all the hunters you meet, scan it in both its two forms. Hit it a couple of times and it will return to its humanoid form. Hit him as much as you can and never stay still in one spot so as not to get hit in turn. Not that his attacks are particularly dangerous, but it will serve as training for later when you find yourself in more ... complicated situations. Try to aim for the head.
When Kanden is defeated, collect the key and open one of the doors on the upper walkway. Take the artifact, go back to the previous room, scan as much as possible and exit through a third door. In the corridor, scan for new enemies before taking them out. A door will open on the left. Scan the yellow button on the floor to the left to activate the portal, but don't enter it. Jump onto the platform to reach the door at the top. Collect the last artifact you need, scan the four switches to reveal the key. Open the door to the next room, which takes you to the portal. Go back to the previous portal, enter the ship, save and regain health, then return to the other portal. If you have all three artifacts, the machinery in this room will activate and open another portal. Go straight, go up the stairs and scan the door before opening it. Open the second door.
Boss: Cretaphid v1
It shoots laser beams from your eyes, but it doesn't do you much damage, so don't worry too much if you get hit. Go around the pillar clockwise or counterclockwise, hitting the blue eyes. When you have destroyed them all, your enemy's brain will appear at the top. Keep hitting it until it is completely destroyed. Collect the Octolith. Return to the portal and run away from the area - you only have 8 minutes to get to the ship, which can be tricky as some doors are closed. To open some of them you will only have to kill the enemies who are guarding them, for the others you will find alternative paths. You will also encounter a new type of enemy, the Guardians. Their combat is very similar to that of hunters, with the advantage that they do not have an alternate form. Don't waste time scanning them, just kill them. Enter the portal, reach the spaceship and leave the area. A new planet appears, Alinos. Go there.
02. ALINOS
Get off the ship and take a tour around by scanning everything you find. Jump on the rocks in the lava (but don't dwell too long: they sink) and enter the door. Plants on the ground can be destroyed, and some of them contain objects, remember if you need them later. There is a large sandy area at the end of the corridor, enter the tunnel, which turns out to be a small maze (right, left, right and straight at the intersection). Kill the enemies to get the key, retrace the maze: straight left, straight and around the corner open the door, at the end of the path there is an elevated tunnel, which takes you to the small room that contains the first artifact. Enter the door with the two crystals, enter a second door. Kill all the enemies to open the door, scan the orange stripe on the left wall before proceeding, then turn the corner and make new kills to open another door. Head left, ignore the opening protected by the field. force purple and scan the crack in the floor, then jump into the crevice in the ceiling. Spire, another rival hunter, will attack you. Don't fight yet, take advantage of it to scan it, then go back to the center of the room, explore it, go up the ramp to get the missiles, go down and go left, following the wall. Enter the silver door. Go right, where a force field will activate and trap you in the room. Destroy the two generators and all the enemies to make the force field disappear and Spire reappear. Also scan it in its alternate form, then hit it to make it escape. Scan the orange switch on the wall to make a key appear. Take it and take the artifact too. Go through the silver door again.
Now take on Spire once and for all. Use the complex architecture of the area to find coverage. Taking down Spire should be as easy as killing Kanden was.
Collect the key and grab the last artifact in the corner. Jump on the platforms to get to the previously unreachable silver door and enter. Scan the yellow switch and enter the portal to return to the gate. Save to the ship, then return to the portal and enter the double door to face the boss.
Boss: Slench 1
Before starting, scan all possible objects. During the first part of his attack, move back and forth to avoid his blows and hit his tentacles. Once you have destroyed all three tentacles (and be quick, as they regenerate), Slench will detach from the wall. Also scan it in this new form and hit it in the pupils. When he has lost approximately a third of his health, he will stick to the wall again and start the whole process again, and the more he gets hurt the faster he moves, which makes it difficult to hit his pupils, which are so small. Collect the Octolith and run to the spaceship. You have four and a half minutes to leave ... and a second hunter is waiting for you to ambush.
Weavel is a different type of hunter than Kanden and Spire. It possesses the ability to split in half, turning the legs into a turret and the lower body into an automaton. Hit him until he splits in two, scan his two shapes and hit them quickly. The turret is quick to fire, but its shots are not very accurate against moving targets. Then follow the upper part into the tunnel and finish it. Go back to the gate, get on the spaceship and leave the planet.
Two new areas appear on the map: Vesper Defense and Arcterra, and it's up to you to choose which one to explore first. Due to the difficulty level, it is advisable to tackle Vesper Defense first.
03. VESPER DEFENSE OUTPOST
Get off the spaceship, go down the sloping bridge to the left, go right behind the wall and enter the laboratory. Kill the enemy ring in order to cross the room, scan everything you see. Go to the door on the opposite side from which you entered. Follow the corridor, ignore the door with the blue crystals for now and go right into the next room, where there is an artifact. Kill the enemies and their generators, and the force field will deactivate. Kill the enemies that fall from the ceiling by making a key appear. Pick it up and take the elevator. Go up and get the artifact, then go back down to the door with the crystals and enter it in your alternate form. Go up the elevator and explore the entire second level. Jump with the right timing on the trampoline and enter the tunnel, rolling to its end. Return to your humanoid form, scan the four switches in each corner of the room, use the Battlehammer to break through the force fields blocking the door, and head back down the same path you came from. Kill the enemy with the bombs, go up the elevator to where the missiles were: there is a tunnel in the upper left with two blue pillars. Jump and roll in. Use the Battlehammer to destroy the green force field and take out all the enemies and their generators in the room. Between the two doors is a force field switch: scan it, then go back, there is another in the alcove across the room, you have to jump to reach it. Go back to where the trampolines are and roll into the tunnel in the left wall. Destroy the enemies and their generators, if you have scanned both switches in the previous room the force fields here should be disabled. Roll into one of the small openings to the next room. Kill the enemy and make the key appear. Use the trampoline to reach the compression chamber at the top. Collect the artifact and a Guardian will appear in the room below. Go down and kill him to deactivate the remaining force fields in the room. Go back to the room where you found the first artifact, destroy the enemies and generators and cross the green force field with the Battlehammer. Scan the pillar and approach it to make it fly away: hit it in the red eye it has at the bottom before it hits the ground. Repeat the process until it is destroyed. Go up the elevator and activate the portal at the top. Go save to the spaceship, then return to the portal. Follow the tunnel in the left corridor to meet a hunter, Sylux.
Sylux spends most of his combat time trying to drain your strength with his shock attack, moving a little in all directions. Use short shots and flares if you have a precise aim. When it takes its alternate form, it becomes more vulnerable but at the same time also more difficult to hit. Use short strokes just like before. Take the contents of the various boxes if you are in trouble with health. One of his favorite moves when he's in his alternate form is to keep circling around very quickly to attempt to hit you from behind. Don't try to follow him: turn around and hit him before he can. After a while the force fields will deactivate, moving the battle to the central area. His spaceship will also come to cover Sylux: scan it and then throw it at a couple of rockets to take it down.
A key appears. Collect it and enter the newly opened tunnel. Collect the artifact, then go to the portal to save inside your spaceship. Enter the tunnel near the center of the morphosphere maze, enter the portal and walk through the tunnel to the end to face another Cretaphid.
Boss: Cretaphid v2
The basic idea is the same as in the previous battle with this type of enemy. Shoot the blue eyes around the pillar to make the brain appear on top, and shoot it until you have destroyed it. This enemy, however, has a novelty: he can shoot green orbs, his eyes change color between red and blue, and while they are red, they are invulnerable. You don't have to change your strategy, you just need to calculate the attack and defense times well (and don't forget to scan this enemy too). Collect the Octolith.
Go back to the portal: you have three minutes to return to the spaceship, and that's more than enough time. Then head to Arcterra.
04. ARCTERRA
Enter the tunnel and start descending along the platforms. Don't worry if you fall down you don't risk dying, however you will miss many scans. Enter the door at the bottom. Scan the orange disk in front of the door. Approach the force field, and you will notice Noxus and Trace facing each other in a duel. When they see you, Noxus' attention will be focused on you.
Avoid its attacks, making sure to scan both of its forms. When it turns, look for a higher shelf to escape it. Trace will continue to hit both of you throughout the battle - take cover from his attacks (staying close to the right side of the bridge can be very helpful).
Once Noxus is defeated, numerous generators will activate. Destroy them as you get closer. In this same area there are six locks to be scanned for the key to appear. Assuming the northwest corner of the area is the door you entered, the four locks are located:
1. in the northeast corner, on the wall near the door
2. on the south side of the damaged bridge
3. and 4. on the north side of the damaged bridge
5. in the southeast corner, near the red door
6. in the northeast corner, near the turret.
Collect the key and open the locked door towards the center of the north corridor with it. Collect the artifact, roll like a morphosphere under the bars against the wall and drop a bomb to activate the elevator. Enter the door to the northeast. Go straight and jump across the force field to the floor. To the left is a recess, scan the switch to disable the force fields of the two recesses on the sides. Scan the other switches. Destroy the wasp nests and jump on the trampoline that appears to get back up. Take the left path, scan the console to open the safe, jump down and enter it. Enter the tunnel on the right. In the room some force fields block all exits, climb the broken pillar to get to the other side of the room. Scan the light to make platforms appear. You only have one minute to complete the next section, so quickly transform, enter the opening on the left, get on the elevator, follow the tunnel to the rocks, jump across the three platforms until you reach the tunnel on the other side, then roll down onto the ledge and pick up the Judicator. Use it to cross the purple force fields. Cross the bridge, jump into the opening in the wall to the right, destroy the turret to receive the key. Go down to get the artifact, follow the corridor and activate the portal, but don't enter it. Instead, continue down the corridor full of weeds. Remove them to reveal a small opening. Go back to the ice cave and reopen the safe door, go back to the ice bridge and enter the room where there is a portal. Use the other portal to return to the spaceship and save. Go back to the corridor with the weeds, open the door and enter the maze, in the form of a morphosphere. Take the key that is above the crack in the ice, then go back to the closed door and take the last artifact, then return to the ice cave and from here head to the portal that takes you to the boss.
Boss: Slench 2
The battle is identical to that with the previous version of Slench, with the only exception that its tentacles are only vulnerable to hits from the Judicator. His attacks are now flammable and have the ability to set you on fire. Be sure to scan both forms of Slench before completing the battle.
Collect the Octolith and leave. You have seven minutes this time to return to the ship. Return to the portal, but on the journey back to the ship, you encounter the second hunter: Trace.
Trace spends most of the early stages of the battle shooting you from his post. Wait for his shots, avoiding them until he becomes visible, scan him quickly and shoot him until he jumps down. When it takes its alternate form, take refuge on top of a pillar to avoid it. Keep hitting him, trying not to lose sight of him.
Once defeated, the force fields blocking the doors will disappear. Climb to the spaceship by jumping on the platforms and fight the three Guardians you meet.
05. RITORNO A CELESTIAL ARCHIVES
From now on, hunters will move randomly between planets and attack you in some of the larger areas of the game. To see which hunters are present on a planet, look at their coordinates. Get off the ship and enter the portal. Then enter the door next to the portal, and here you will meet one of the hunters, or some Guardians. In the corridor, go right and enter the silver door. In the silver room, fight the Guardians or the hunter present, then leave the room through the other silver door. Go left and enter the door at the end of the hall, jump down the shaft and enter the room. Now that you have the Battlehammer, you can open the green doors. Then enter the door on the right and fight against the two Guardians. Collect the items in the room, do the necessary scans and jump to the central pillar, then to the suspended platform. Jump to the ledge in the pure, transform into the morphosphere and roll into the tunnel to get the Volt Driver. If you want, go back to the spaceship and save. Use the Volt Driver to blow up the yellow force fields. Climb on the four platforms you encountered earlier, break through the barrier and follow the tunnel to the end. Go up the elevator, jump on the trampoline to reach the other side of the room. When you get to the portal, enter it. Scan everything you can, even in the lower part of the room, before crossing the white barrier. Enter the room full of enemies, kill them all and go to the back, behind the structure. Eliminate the last generator to deactivate the force fields. Go to operate all the switches in the sunken part. Each switch makes a tall one appear in front of the structure. Go around the building and enter it. Scan the console inside to reactivate a portal, then go back not forgetting to pick up the Photon Stabilizer. Enter the portal on the third floor. Kill the guardian to get the key that deactivates the artifact on the other side of the interruption. Go up the elevator to collect the other artifact. Return to the landing point. To the left is a walkway at the end of which are four suspended platforms, which move back and forth. Reach the last platform on the right and enter the room. kill all the enemies, then enter the farthest portal, collect the missiles and scan the top of the big green tube to get the item, go back and take the other portal where you will perform the same operation. Also kill the Guardians and collect the key, go back to the starting point. Climb on the platform on the right, enter the portal next to the blue shield, walk the walkway and enter the structure to collect the key. Take the artifact, then go back. Drop into the hole in the floor of the second room to get the Shock Coil, which you will use to break the blue-green shields. Then go through the barrier, in the new room drop down and kill the enemies, then enter the force field using the Shock Coil and enter the portal. In this new area, be very careful not to fall below. Collect the items, take out the enemies and enter the door on the other side. Scan the new enemy (the Quadtroid), then start hitting him with all the weapons at your disposal. If it manages to stick to your head, transform into a morphosphere and shake it off with a couple of bombs. Kill all four Quadtroids in the room to unlock the door at the end of the hall. Enter and activate the portal, which allows you to reach the spaceship and save. Go back, go up a couple of elevators, jump to the hanging platform and jump to the artifact in the recess. You will be locked inside by a force field, scan all objects for a key, but when you try to leave an Ithrak will drop from the ceiling. To defeat him, hit his tail.
Boss: Slench 3
He is identical to all of your previous encounters, except he is now stronger and only vulnerable to the Battlehammer. Shots from this weapon tend to reach their destination slightly below where you were aiming, so adjust accordingly. When it takes its alternate form, quickly transform into a morphosphere and roll to the sides to avoid it. From the moment of his defeat you have eight and a half minutes to reach the spaceship. Ignore the enemies when you can and remember to enter the doors without blue crystals to go back.
06. RETURN TO ALINOS
As before, expect to find at least a couple of hunters and an unspecified amount of Guardians. Destroy the force fields with the Volt Driver - one of them has a trampoline, but ignore it for now. Go through the tunnels until you find a small grate covered with purple force fields, open it with the Judicator, transform into a morphosphere and enter. Don't be scared if the path is in lava, you will always have enough energy to complete it. When you reach the end, turn right. Jump up from ledge to ledge and exit the room. Go back to the main area and take out the purple force field with the Judicator. Come in. There is a door at the top of the ramp, but the fight room won't be of any use until your third visit to this planet, so ignore it. Continue down the hall, exit the door and scan the button on the end of the ledge to activate a suspended platform. Enter the door on the other side using the Judicator. Drop down in the center of the room, then enter the door on the other side of the garden. Transform into a morphosphere and follow the tunnel, climb the platforms suspended above the lava to cross the area. Enter the tunnel and arrive at the springboard, which will launch you in a spot with generators on either side and another tunnel. Enter the door. To the left is a closed door, and to open it you have to kill the Guardians of this area (preferably using the Judicator, to which they seem particularly vulnerable). Enter the council chamber. Enter the one-way barrier and hit the enemy emerging from the lava with the Judicator in the mouth. Go get the Magmaul, which you will use to open the orange force fields. Go to the other side of the lava, follow the corridor and scan the security computer to deactivate the force field. Use the diving board to reach the council chamber. In the room around the corner take out the generators, then enter the door on the left and activate the portal to the spaceship (where you can go to save). Enter the circular room with the force fields on the floor and ceiling. Scan the computer to receive a key and make the force field disappear on the floor. Collect the key to also eliminate the shield above, revealing an artifact. Drop down and hit the switch on the wall to activate a trampoline, which you will use to retrieve the artifact. Return to the room with the lava and break the last remaining orange force field. There are three switches to activate. Use the Magmaul to take out the force field, hit the switch in the small bunker, go back and use the springboard to reach the higher plateau. Scan the computer to open a door. Drop onto the trampoline and jump to reach a second one to enter the newly opened door. Jump on the rubble to reach the key and deactivate the artifact's shield to be able to get it. Go back to the council chamber, activate the portal to return to the spaceship, then enter the room with the boss portal. Collect the items, then climb to the top of the room and jump to the ledge where the plunger is. Enter the tunnel as a morphosphere. Follow the path on the walkway avoiding the pistons and trying not to fall into the lava. At the end of this path you will find the last artifact, which you can only take after finding the key (at the top of the stairs).
Boss: Cretaphid v3
He is the same Cretaphid as ever, with the exception that he can now shoot green-eyed orbs. Other than that, you can disable its laser eyes by hitting them while they are blue. Then destroy the brain and repeat the process until your inevitable victory. Grab the Octolith and return to the spaceship. You have 5 minutes to reach it, which can be a lot or a little depending on how many hunters you meet along the way.
07. RETURN TO ARCTERRA
As soon as you get off the ship, there should be a hunter to welcome you. Enter the southwest door opening it with the Magmaul. Kill the Quadtroids in the room to unlock a force field in the back. Make your way through to the newly unlocked area and you will be surrounded by another force field. Fight with the ice creature, very similar to the one that came out of the lava in the previous level, preferably using Magmaul. Take the Imperialist. Stay in the back of the room, between the two arches, and with the Imperialist aim the red switch on the wall to operate the elevator. Go up to the second level, use the diving board and go through the narrow tunnel. High on the right and left walls, there are two more switches similar to the previous one. Hit them both to cancel the force field. Enter the newly opened area. Scan the switch on the left side of the room to open a portal from which you can reach the spaceship. Use the trampoline near the portal to reach the door on the ledge above. Enter the door. Climb onto the square tile on the floor, which will begin to move forward. Go to the door on the other side and enter the basement. To deactivate the force fields you have to hit the four switches in the top ring. Go to the center of the maze and stay on the disc, which is an elevator that takes you down. In the corridor on the left there is a large crack in the wall. Enter it and retrieve the key you need to get the artifact, which is across the hall. Return to the disc-elevator and exit the labyrinth. The force fields will deactivate and none other than six Guardians will appear at intervals of a few seconds from each other. Go back to the room where you faced the ice creature, use the Imperialist to hit the switch that opens the door. Transform into a morphosphere and enter the tunnel. Climb to the top of the maze and enter the red door. Enter the next room, where you have to kill the Ithrak hanging from the ceiling. There are also three switches to scan to disable the force fields that block the switch from being hit with the Imperialist. When you do, a key will appear that allows you to take the artifact. Kill the two Guardians that appear, then return to the frozen creature's room. Jump on the trampoline closest to the elevator to enter the narrow tunnel, go up the ramp, kill the enemies and their generators to make a key appear in the opposite corner of the room. take it, then go back. Scan the computer between the two pillars under the ledge and the shield in the tunnel below will deactivate, allowing you to reach the artifact. Go save to the spaceship, then go to the boss portal.
Boss: Cretaphid v4
As usual, Cretaphid is similar to its previous versions but has a new trick. At this turn, the pillar can move. Hit his eyes when they turn blue and in the second stage destroy his brain, always moving clockwise or counterclockwise. Take the Octolith and return to the portal, you have even four minutes to return to the spaceship. You have found the seventh of the eight Octoliths, and at this point you have also found all the weapons in the game.
08. RETURN TO VESPER DEFENSE OUTPOST
Enter the portal to enter the upper part of the complex. Go down the elevator and use the Imperialist to enter the red door. Destroy the enemies and their generators, go through the door and destroy the turret at the top. At the top of the ramps turn right. Enter the passage with the door closed, turn left to find the portal. Scan your computer to activate another computer - you only have 20 seconds to reach it and you are certainly faster in the form of a morphosphere. Also scan the other computer for the key to appear, and again you only have 20 seconds to reach it. The key will lower an artifact in the large room on the first floor. When you take it, some Guardians will appear: kill them to get the key that allows you to take the second artifact as well. Return to the boss portal and enter the door nearby. Go up the elevator and activate the portal to the spaceship. Enter the nearby door and go into the corridor to the left. But the unexpected happens: you only have one minute to activate the computer on top of the area before the entire planet explodes! Run into the passage and jump from ledge to ledge, ignoring the enemies you encounter and finally arriving at a small indentation where the computer you seek is located. Scan it immediately. A key will appear. Go down to get it, then take the artifact and go to save your spaceship. Go to the boss portal.
Boss: Slench 4
It is always the same Slench. Only this time it hangs from the ceiling and is only vulnerable to Magmaul. In its alternate version it will turn into a ball and bounce around the room. Take refuge in a corner and wait for it to stop, taking advantage of it to destroy the remaining green orbs. When you have eliminated it (as you did the previous times, nothing changes), take the Octolith and return to the portal. You have three minutes to return to the ship. Now go back to Alinos for the third and last time.
09. MORE ALINOS
Reach and enter the fighting room, enter the other door, go through the barrier and scan all four pillars. Enter the central part of the room. If you have all eight Octoliths, Oubliette will appear. Return to the fighting room. This time you don't have time running out as you return to the spaceship, but you will be chased by Guardians and hunters in every room, stop and fight them. When you reach the ship, you leave Alinos forever.
10. OUBLIETTE
Enter the doors in front of the ship and ride the elevator to reach the top. Enter the portal, then the door. To the right of it is a tunnel: roll over to the end, jump on the light platform and enter the portal to collect the energy, then go back. Jump down to the ground floor and go down the corridor. Activate the boss portal and enter it.
Boss: Gorea
Scan Goree and one of his arms, then quickly run to the perimeter of the room on the other side of the yellow moat. Goree cannot get past this point, but he can always shoot you. Around the perimeter of the room is a series of colored plates. Hit them in the following order, with the following weapons:
yellow: Volt Driver
verde: Battlehammer
arancio: Magmaul
blu: Shock Coil
viola: Judicator
rosso: Imperialist.
Keep the Imperialist drawn: it will be the first weapon you use. Run around the perimeter of the arena, avoiding Goree's shots. When it turns red, it's time to hit it. Zoom in and hit both shoulders in one shot. You can try to hit it with other weapons on the other colors, but it is very difficult. The Imperialist is not only the easiest weapon to use, but also the safest and in most cases the fastest. Gorea will change its appearance, remember to scan them all. Keep staying out of his attack range and hit his yellow eye repeatedly with the Imperialist. After a while Gorea will return to its original form. Repeat the process until you kill him.
If you hit the colored plates correctly, you will be transported to a new battlefield, otherwise the game will end here and you will see the unhappy ending.
Boss: Gorea 2
Scan the new (?) Enemy, then drop to the bottom of the area. Take the Omega Cannon and use the radar to locate Gorea 2. In fact, now he spends most of the time of the battle teleporting from one point of the arena to another, throwing yourself at heavy boulders and using a very powerful laser attack, which it hurts you terribly. The fact that you continue to move then certainly does not make it easier for you to avoid its blows. The trick is to locate him right after he teleports and be very accurate in hitting him with the Omega Cannon, which unfortunately has long reload times. Goree 2 loves to roam at the top of the arena. If you can't find it, you probably have it over your head. When you manage to defeat him, you will see the happy ending to the whole story.
 Metroid Prime: Hunters ds
- ds
- WiiU
Exit date: May 5, 2006


