Elden Ring continues to give challenges, joys (and curses) to players all over the world, and many of them will already be facing the arduous boss fights that put us in front of the Summit of the Giants, the Consecrated snow fields e Azula's lighthouse and Sacred Tree of Miquella, fights that we will help you to overcome thanks to this guide. With today's guide, we propose how to tackle these very challenging challenges, which also involve some of the most fearsome bosses in the game ever so get ready for the best!
In fact, in one of the three areas, you will face the challenge that has been defined by many as the most difficult and demanding of all Elden Ring, namely the fight with Small, a character who has become a symbol of the work of FromSoftware (as well as the figure chosen as the subject for the various components of the limited editions of the game, such as the statue and the helmet). Later, we will discover all its characteristics and its - very few - weak points to exploit in order to win it.
Before continuing for the three areas mentioned, we remind you that we have written several guides regarding Elden Ring, such as the guide to all the bosses, the guide to trophies and platinum, and a series of other useful guides that you can find on the page dedicated to the game.
ATTENTION: we remind you that reading this guide to the bosses could make you run into unwelcome spoilers on the plot of Elden Ring, linked to the Peaks of the Giants, Farum Azula and the consecrated Snow Fields and the Sacred Tree of Miquella, so we invite you to read only with that awareness in mind.
All the bosses of the Giant's Peak
Night Knight (7) - Medium (at level 85 or higher)
You will find it between Leyndell and the Sacred Snow Fields, more precisely in the Forbidden Lands, continuing the main road. Beware, like the other bosses of this type in Elden Ring in this guide, he will only appear at night.
It is one of the armed knights of halberd, so it will have wider levers than those with the flail, which might bother you enough given the tight space you're fighting in. There are no other special tips to combat it, given that it is about a copy that is than everyone else, but with improved stats.
If you defeat it, you will get it as a reward 72.000 rune and War Ash: Phantom Slash.
Video of the upcoming fight ...
Follower of the Black Blade - Hard (at level 85 or higher)
You will find it just before the Giant's Peak, at end of the Forbidden Lands. This is the same type of boss found in front of the Ferine Sanctuary in Dracotumulus, as well as the one you will likely face first in this Elden Ring guide.
This is a boss who could put you in a lot of trouble. Try to face it only when you have reached an adequate level. Like other gargoyles you have encountered, it has varied attacks, heavy airborne attacks, charged attacks, and so on. Also, it owns 2 weapons, which will change during the fight, modifying some patterns. There your build will do the difference in the strategy, especially as regards the defensive phase. If you have a shield of the big ones and a good dose of stamina, you can risk parrying his blows, while the blows imbued with magic are convenient to dodge them with deafult. Beware of poor visibility in the area, which could annoy your try.
With magical builds you try to keep your distance, and with melee builds, study the timing of his attacks well to alternate hits and dodges. In both cases, a summoning might come to your aid.
If you defeat him you will get the Black twin lama of the gargoyle,Black ax of the gargoyle e 60.000 rune.
Video of the upcoming fight ...
Bird of the death rite (3) - Medium / Hard (at level 100 or higher)
It is located on the Peaks of the Giants, to the west starting from Castel Sol. Like the other bosses of this type in Elden Ring and the guide, you will meet him only at night.
If you have already crossed swords (or rather wings) with this type of enemy, you already know what you are facing. More or less the statistics are similar to the boss you faced in Caelid, however the conformation of the area in which you will find yourself could cause variables, such as fewer obstacles to get in your way, but a less room for maneuver in terms of amplitude.
Pay attention as always to his shots, and try to fight him on horseback to have greater speed in avoiding them. If you have a magical build, continue to be wary of distance and take advantage of summons to keep the beast busy, if you are a melee fighter you may have to go round and round with a little more difficulty, and hit it every now and then when you can.
If you defeat him, you get the reward Ritual spear of death e 77.000 rune.
Video of the upcoming fight ...
Borealis the Frosty Mist - Medium / Hard (Level 115 or higher)
It is located on the Vetta dei Giganti, al center of the frozen lake to the northeast.
This is a flying dragon-type boss like many within Elden Ring, and this guide won't be much different from the others. Focusing on the particularities of this boss, we will have to pay particular attention to the freezing status which is capable of inflicting. However, this is not the only variable, since in this fight one of the fundamental characteristics of a fight will be missing: visibility. The thick frosty fog that invades the arena will often make it difficult for you to understand where the attacks will come from, especially when the dragon takes off. Sure, the camera lock on the enemy can help and work like a little cheese, but don't be surprised if you lose it and have to run left and right trying to avoid it blindly. For the rest, it is practically identical to the other flying dragons faced. Face it on horseback.
If you defeat him, you will get a reward Dragon heart e 100.000 rune.
Video of the upcoming fight ...
Mother Tree Avatar (5) - Medium (level 90 and above)
You will find it on the Vetta dei Giganti, as always near theMinor Mother Tree the area.
This time things are different, as despite the fact that the boss is an exact copy of those already faced, when it will reach just over half the damage the boss will split, turning it into a 2v1 fight. However, the Avatar's vitality will remain unique, and you can hit either one to continue dealing damage.
Always remember that taking advantage of the horse can be very useful, especially to keep yourself at a distance and / or escape from its extensive physical attacks. If you are a wizard, the The fire will continue to be a great friend of yours.
If you defeat him, you will get the reward Cerulean crystal tear, Crimson bubble tear e 70.000 rune.
Video of the upcoming fight ...
Ancient Hero of Zamor (3) - Medium (level 90 and above)
It is located on the Vetta dei Giganti, and you will find it inside the Tomb of the conqueror of Giants as the final boss of the dungeon.
THEarena in which we will fight this boss for the third time is more small of the previous ones, and obviously his stats have improved. The difference from the very first time you meet him is that you can take advantage of the summons, and you will also have a fair amount of experience in dealing with him (if you have also completed the Tomb of the Blessed Hero).
For everything else, the fight will be almost identical. Continue to use the columns to protect yourself from some of the hits, try to be as mobile as possible to dodge the quick attacks, and especially the phase in which the ground will freeze.
If you defeat him, you will have the plentiful loot of his entire set, including the Curved sword of Zamor, Zamor mask, Armor of Zamor, Zamor's Armguard, le Bandages of Zamor e 83.000 rune.
Video of the upcoming fight ...
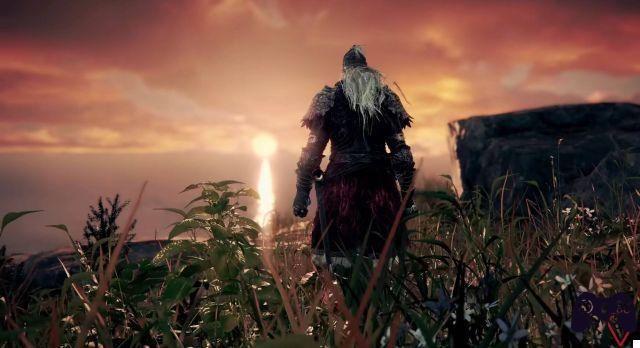
Vyke, Knight of the Round Table - Medium (at level 100 or higher)
You will find it on the Vette dei Giganti, in the Eternal Galley of the Lord Pretender. He is one of the few human bosses you will meet in this guide dedicated to Elden Ring.
Vyke is an enemy not too complicated to defeat, which nevertheless will be Very annoying. If you have a build melee, arm yourself with patience and a voucher shield, since with his spear he will often try to throw you off balance and hit you repeatedly, as well as attack you in jumping. Always look for the propitious moment to attack, and try not to get caught. Beware of its electrical attacks, that if you are too close it will be more complicated to dodge (if you are at medium / long distance, just stop "diagonally" compared to him). The wizards will be easier, because it will be easy for you to run in circles so as not to get hit, and when you are far enough away, spam magic attacks (if you have a faith build, for example, the spear of electricity will do it good damage, and using it repeatedly you could defeat it without never be hit), always clearly capturing moments in which he would not dodge.
If you defeat him, you will get a rich reward of the runes, the Vyke's Draconic Lightning Bolt,Elmo dell'impronta, Armor of the footprint, the Footprint gauntlets and Footprint greaves.
Video of the upcoming fight ...
(TROPHY) Commander Niall - Medium (at level 100 or higher)
You will meet him on the Vetta dei Giganti, on the highest part of Castel Sol. This is the second boss of this type we meet in our Elden Ring guide.
At first glance, you will see that this boss looks a lot like it both in appearance and in the moveset, to Commander O'Neill you faced in Caelid. As soon as the fight starts, this Commander too will perform summons, and precisely he will call to him two knights with sword and shield, ready to beat you up. As always, if you do not want to remain outnumbered, you can also count on invocations yourself. The first few seconds of the fight will be important, because you can use them to take out the knights before Niall engages, and then focus on him. Always pay attention to where he is and to his attacks, because some have a medium and wide range. Also remember, as O'Neill inflicted rot, Niall owns gods freezing attacks.
If you defeat him, you will get the Veteran's prosthesis e 90.000 rune.
Video of the upcoming fight ...
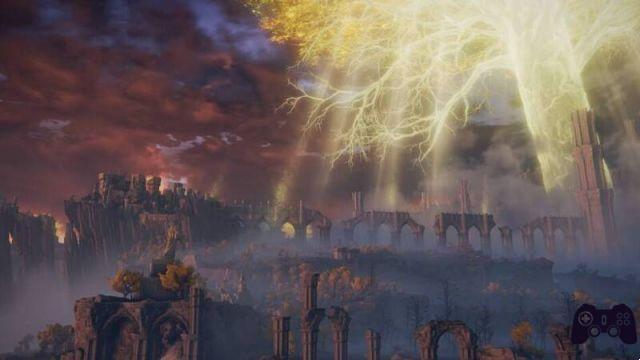
(TROPHY) Fire Giant - Medium / Hard (at level 110 or higher)
It is located on the Vetta dei Giganti (grace point on arrival).
It is one of the biggest enemies in terms of tonnage that we will find in this Elden Ring guide. This is a fight that could put many players in difficulty, especially if they are very static. The advice to deal with it, especially if you have a melee build, is to go under it, and hit him in the foot (clearly with the due precaution di dodge and / or jump to avoid being hit by him).
The one that could worry the players the most is phase two, during which on several occasions the Giant it will not be approachable, Because surrounded by flames, Because will roll or else, as a result you will be more advantaged if you use ranged weapons, such as bows and crossbows, and of course certain types of magic or sorcery. If the first phase could be played smoothly on foot after approaching the boss, the second is much more suitable for a combat on horseback, increasing your mobility.
As always, you can get help from summons, which could come to your rescue for example if you miss melee attacks or vice versa.
If you defeat it, you will get it as a reward 180.000 rune and Remembrance of the Fire Giant.
Video of the upcoming fight ...
All the bosses of Farum Azula shattered
(TROPHY) Sacrifice Duo - Hard (at level 120 or higher)
You will find them at Farum Azula Shattered, starting from the point of Grace of Dragon Temple. This is a tough combo of two bosses that you have already faced in the past, namely the Noble sacriderm and the Apostle sacriderm. This is the only double boss that we find in the section of the Elden Ring guide dedicated to Farum Azula.
As you can imagine, things they will be complicated immediately. If you have already learned to fight them individually, respectively at Villa Vulcano and Caelid, in this case you will have to deal with them in Contemporary. As if that weren't enough, the duo owns a unique life bar, and consequently killing one will still see the second return after a few seconds, so you will still have to deal with it at the same time. In any case, there are ways to keep them busy and make sure to deal with them one at a time, such as exploiting the ashes of evocation, first of all the Reflected Tear, which you should have by now for a while and that you probably have. also boosted.
Take advantage of the columns of the living room as a cover, which could save you from some of their attacks, and always pay attention to how the combat takes place between the other sacriderm and your summoning, or you may have nasty surprises, such as back attacks while you are distracted.
If you decide to face them without the help of a summoning, it will definitely be a more difficult fight, and you can try to manage it in all other possible ways, perhaps with DoT and bleeding, or the cheese of the Comet of Azur if you are sorcerers.
If you defeat them, you will get the Minatore Cinereous Globe [4], War ash: Tornado of black flame e 170.000 rune.
Video of the upcoming fight ...
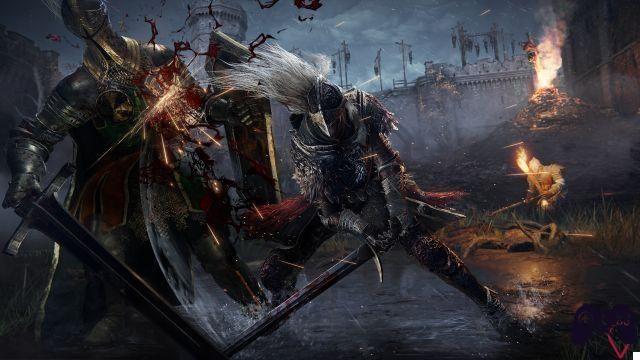
(TROPHY and BOSS STORY) Ecclesiastical Beast and Maliket the Black Blade - Very Hard (at level 120 or higher)
You will find it in shattered Farum Azula, starting from the point of Grace near the Great Bridge. Despite being two names, it is a single boss, that once he is left with half the HP, he will transform into Maliket and the second phase will begin (with the HP that fortunately remain removed).
It is a fight in a relatively comfortable area, which despite having precipices on the sides of the large platform, is still very large and provides some coverage points. However, the fight will not be plain sailing, because our opponent is very tough. For the first stage try to always be on the move and to be quick to dodge at the right time, as feral attacks will not only be melee, but also at medium range. If you use a magical build, you could take advantage gravity spells, an element that will also lead him to be stunned. If you play body to body, make sure you are slim enough to alternate dodges and hits, with a recommended medium load (the heavy one would make you extremely slow).
La second stage it's more annoying, however. We tell you first of all that the boss has combos that if he hits you he will be able to kill you instantly even if you have 99 at the life benchmark and heavy armor. It will be essential to memorize his move set and dodge. Makes attacks with a wide range, goes far and jumps often. In any case his Ranged attacks are more complicated to dodge compared to melee, so try to always stay close to the boss.
The tactic for the melee then returns to that of multi-paced dodge, to then strike during the openings. THE Wizards they will have to be held slightly further away, and take advantage of the brief moments after the end of Maliket's attacks to use his own spells (perhaps the gravitational ones that can stun, with a little luck). Remember that the cast of spells must be short.
We do not deny you that this is a fairly demanding fight, in which you will need it patience and time. It may take him a few tries before he learns the boss's movements and defeats him for good. If you got theBlasphemous claw from Bernahl, you can parry when an attack starts with the shining golden blade.
If you defeat him you will get the Remembrance of the Black Blade e 220.000 rune.
Video of the upcoming fight ...
(TROPHY) Draconic Lord Placidusax - Medium / Hard (level 120)
It is located at Farum Azula in Shattered, and is a secret boss. You can reach it by following the video of Powerpyx that we propose below.
It is a two-headed dragon, which for part of the fight will be on the ground, throwing lightning upon lightning, but also with electric claws, and that at some point it will also begin to attack you in flight. This boss has great stamina and a lot of life, but more than other dragons, so be prepared to be careful with your moves. In any case, his attacks are quite predictable, and with the right amount of agility you will be able to evade them.
La difficulties in combat will vary based on your build, which partially sees take advantage of the players with magical attacks. In fact, as always, they will be able to spam attacks from afar, while perhaps an evocation (almost certainly you will use the Reflected Tear) will take all the attacks of the dragon.
Melee fighters will have to get closer of course, which could be disadvantageous at times when the dragon it disappears and reappears a little farther on, which easily exposes them to attacks. On the other hand, players who have always faced dragons while playing on horseback will have to improvise in this case, as the mount will not be available.
If you defeat him, you will get 280.000 rune and Remembrance of the Draconic Lord.
All the bosses of the Sacred Snow Fields
Putrescent Dueling Burial Guard - Easy / Medium (at level 100 or higher)
You will find him in the Sacred Snow Fields, as a boss at the end of the dungeon Catacombs of the consecrated Snowfields.
This is a boss in the similar conformation to the other duelists we've fought in the game, however it might be more annoying for a couple of reasons. First of all, it owns a double ax very large, a weapon different from the others we have seen it wield, and from which we can expect some nice heavy attack. Moreover, unlike the others, its putrescence gives it a breath that will be able to inflict scarlet rot on us. It will also not be the only way he can do it, because if he can grab us and ad make a grip, we will be bitten by a snake on his back and the result will be the same.
His movements are not very fast, but always pay attention to when he will run against us or when he will charge attacks. We also remind you that he can always activate the anger and make his attacks more dangerous.
If you defeat him you will receive as a reward 78.000 rune, 2 Large sepulchral convallarias and Putrid cloak of the keeper of the tombs.
Video of the upcoming fight ...
Rotting Avatar (3) – Medium/Hard (level 110)
You will find it in the consecrated Snow Fields, as always near theMinor Mother Tree. This is the boss in the Elden Ring guide who is strongest for his type.
There are no differences from the others you have met. Fight him as you already know, but be careful of the smaller space in the arena (you may have to give up fighting on the creek on some occasions. Make sure you get to challenge him while you are at an adequate level in the area.
If you defeat him, you will get 160.000 rune and Thorny crystal tear and Disruptive crystal tear.
Video of the upcoming fight ...
Spawn Crusader - Medium (at level 100 or higher)
You will find him in the Sacred Snow Fields, as the final boss of the dungeon Cave of the Desolate.
This is basically one of the various Spawn or Aberrant Warrior bosses we've encountered throughout the rest of Elden Ring, so the guide on how to deal with him will probably already be in your head and muscle memory, but be careful. all'unica and important variable (in addition to the fact that the boss will have improved stats and a restricted arena): this spawn has a very special sword, which they will use against you not only to inflict physical damage, but also to use their special power. In any case, this peculiarity will not change the fight with the boss much, so you shouldn't have too many problems with combat.
If you defeat him, you will get him as a reward Great Sword of the Golden Order (the one he was using against you) e 93.000 rune.
Video of the upcoming fight ...
Night Knight (9) and Night Knight (10) - Medium / Hard (at level 115)
These are the last 2 bosses of this type you will encounter in the Elden Ring guide, and they are found in the Consecrated snow fields. They will only appear at night and will stay escorting a caravan.
Although they will both appear in the same area, if you are careful in moving, you can even deal with them one at a time, thing recommended. There will also be other enemies around there, so be careful not to get hit and lose your pace. Despite being two enemies divided, the drop will be unique, so for get your reward you will necessarily have to kill them both, as already happened on the Altus plateau with the two Sentinels of the Mother Tree.
The two knights will be armed with one of halberd (or falcione, if you prefer) and the other of scourge. Face them as always, being careful not to be surprised by the other enemies. Fighting them while on foot might be cheaper for damage, but less so for mobility, try to assess quickly on the spot.
If you defeat them you will get 168.000 rune,Helmet of the night knights, Cuirass of the Night Knights, the Gauntlets of the Night Knights, the Greaves of the night riders, and the Ancient dragon forging stone.
Video of the upcoming fight ...
Bird of the Death Rite (4) - Medium / Hard (level 120)
It is found in the Sacred Snow Fields, in the northern part where the frozen river ends. It is a boss that appears only at night, and it will be the strongest of all those of its type.
Being the fourth enemy of this type, by now you will have understood what his moves are and how to counter him, and also you will have on your side not only a good level, if you are facing this area, but probably also a noteworthy arsenal. Watch out for his moves, and get rid of the small enemies in the area to avoid them bothering you during the fight. The rest of the arena will be bare and quiet.
If you defeat him, you will get 220.000 anime and Explosive ghostly flame.
Video of the upcoming fight ...
Astel, stars of darkness - Medium / Hard (level 115 or higher)
You will find him in the Sacred Snow Fields, as a dungeon boss Yelough Anix Gallery.
It is a boss of large, at times elusive, and which uses both physical, remote physical and magical attacks. His features make him look like a mixture between a spider and a dragonfly, but with a humanoid face. It can hurt you in a number of different ways, ranging from lethal ranged tailing, to spells that will make it unapproachable (or forcefield that will deal damage if you're in its area), to quick close-range hits with fangs coming out of it. mouth. He will be able to deal a lot of damage to you, so come to face it if you have already reached the recommended level.
The best way to take less damage is to take advantage of one remote tactics, with ranged weapons, spells or sorceries, perhaps summoning a leathery scapegoat to attract his attention. In any case, if you are a gamer accustomed to the genre, you will find it in combat many similarities with several bosses from other souls, so it may turn out to be a more familiar fight than expected.
You will do your fair share of damage even if you attack him body to body, but in this case you will have to be careful to approach only at certain times, avoid staying too high at the head (although it is the safest and easiest part to hit), and above all get away when you see that it is preparing its own gravity spells.
If you defeat it, you will get it 120.000 rune and magic Astel meteorite.
Video of the upcoming fight ...
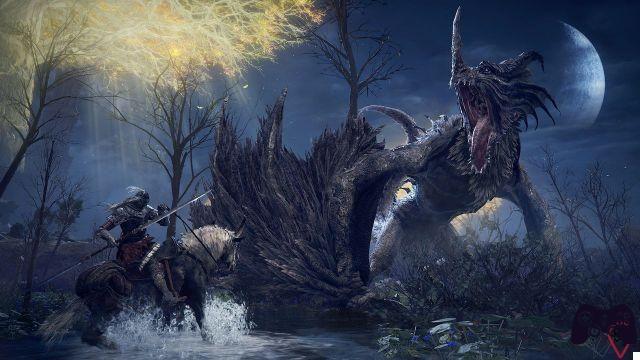
Giant Dragon Theodorix - Medium (at level 115 or higher)
You'll find it in the consecrated Snow Fields as you proceed east on the frozen river, until the confine with the area of the Vetta dei Giganti. Yet another dragon of this type that we meet in the Elden Ring boss guide.
You'll find the dragon lying on its side, so charge it up to hit it with a couple of free hits while waking from sleep. It is a drag of magma like others who have already fought in Elden Ring, a boss who by now for you should be quite simple and not in need of a guide, which however may have its peculiarities. Being like the others, you will know that hitting him repeatedly can lead him to stun, and if we also count the initial hits while he was resting, you can take advantage of the opportunity to continue hitting him (perhaps while you are in position behind him, and always on horseback to be more fast), stun him and even give you a critical attack, taking away a good slice of life before the real fight even begins.
Once this is done, go back to to face it in the way that has been increasingly congenial to you, using evocations, magic or melee attacks, on horseback or on foot, in complete freedom. Attention, it comes to one of the dragons however stronger given the area and the level, then do not underestimate it, and remember that it has the second phase in which he will stand up.
If you kill him, you will get well 3 Dragon Hearts e 180.000 rune.
Video of the upcoming fight ...
All the bosses of the Holy Tree of Miquella and Elphael
(TROPHY) Loretta, knight of the sacred tree - Medium (level 110)
You will find it at the Sacred Tree of Miquella ad Elphael, it is a boss that we will have to defeat before arriving in Malenia.
If you have played the area west of Liurnia Lacustre, you will have already addressed this boss. In fact, it is always about Loretta, with the difference that this time it will be in front of us in flesh and blood, and clearly with far more advanced statistics. The moves will be the same, but it will clearly have higher vitality and deal more damage. It goes without saying that even the tactic for fighting it will be very similar.
It will attack you both from close melee and from a distance with magic, and you will therefore be forced to balance attacks, parries and dodges, also based on your build and your style of play. For melee builds, it is still recommended to use weapons that deal a fair amount of damage. Try to be well defended from magical damage.
If you defeat it, you will get it as a reward 200.000 rune, witchcraft Loretta's mastery and the weapon Loretta's war scythe.
(TROPHY) Malenia, sword of Miquella and Malenia, Goddess of rot - Extreme (level 130 or higher)
You will find it in Elphael in Sacro Albero di Miquella, starting from the point of grace Roots of the Sacred Tree. Malenia is an optional boss, and it is probably the Elden Ring's most challenging boss fight. Despite the guide, the fight could be very complicated to carry out even at a high level. It is a two-stage combat, where once defeated, Malenia will rise to her most powerful form.
The fight will be very eventful, and to some it may be reminiscent of Lady Maria's vibes in Bloodborne: The Old Hunters. His sword attacks in the first phase are quick and deadly, with one very wide scope and with variable speed depending on the combo (some longer than others). It will be essential have patience, because the openings will be few, and in some cases it could suddenly jump and start a very quick combo of slashes that will kill you instantly. Some combos are so fast they are virtually impossible to dodge, and that if you try to parry it will see you drain your stamina. In that case, pray. The first phase will be more "simple", and you can play it touch and run, always paying attention to its response shots and its sudden attacks. If you play from a distance you may have a less difficult life, but always if you learn how to dodge his attacks.
With the second stage the most mangy part begins: the Goddess will be able to inflict wilting on you, will possess area attacks, as well as attacks with delayed explosive effect. His attacks are always composed of fairly long combos, but in this case they will be less fast of the first phase, so you can try to play it better by attacking at each end of the combo, since it will grant more openings. Watch out for when he will jump and throw himself to the ground, because he will create a wilting rose able to quickly infect and harm you. If you have started to take measurements, the advice is to keep a good rhythm in the attacks and prevent her from preparing new ones, practically without letting her breathe.
Whatever set of weapons you use, it will be very important to exploit an evocation, to give yourself breath or to keep her busy and attack her, and we advise you to do it about halfway through your life in the first phase (summon only if you are already at a safe distance). The build with bleeding it will hurt her, and forget about giving her status like rot (and I'd like to see…). To give yourself a "second chance" we recommend mix in the conditioner the tear it bestows maximum resistance.
If you defeat it, you get the reward Major rune of Malenia, Remembrance of the Goddess of rot e 480.000 rune.
Our video of the fight is coming, while the video of the Powerpyx fight that we also propose below, provides a sort of "trick" to defeat Malenia, which could make things much easier for you.
Guide to all the bosses of the Giant's Peak, Farum Azula, the Sacred Snow Fields and the Sacred Tree of Miquella currently being updated. The missing fights will be added little by little in the respective sections.