


Please note:
The solution is based on the American version of the game, so there may be differences with the Spanish one.
Introduction
What you are about to read is a step by step guide to Broken Age - Act 2. Since they are intertwined, I will not separate the stories of Shay and Vella. We will start with Shay until we reach the point where you have to move on to the adventures of Vella. The last chapter of this guide will see you change characters several times. When I talk about exhausting each option, I will refer to the various dialogues and I intend to select each option, question and affirmation available; it will not always be necessary to continue within the game, but listening to each dialogue is the best way to fully enjoy this wonderful adventure. By following this solution you will be able to see all the cutscenes in the most opportune moments and you will minimize the "backtracking".
Shay
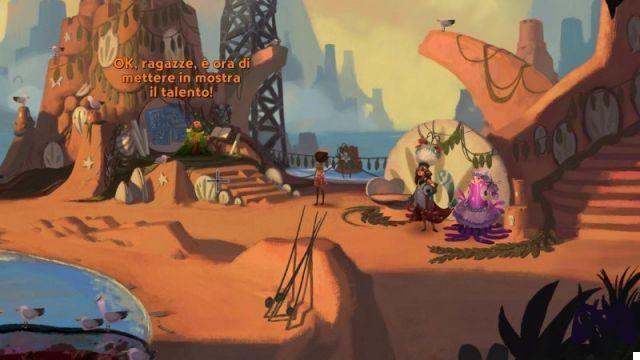
As written above, we will begin our adventure as Shay. Click anywhere on the screen to wake up. Your father (Ray) will talk to you and you can select any answer, then he will come out of the sand. You are in the Shellmound, go left to collect the broken Hexipal.
Go up the stairs to the right of the pyramid, talk to Alex to find out how you can help fix the ship. Check out each dialog option to get the schematics for the "Superconductive Gyroscopic Hypercam". Your goal will be to get one of these items, an "electric genius", help your father repair the ship's hull, find a radiation suit for Alex and get an anti-gravity unit.
Leave the pyramid and head to the beach. The ship is really bad! Ignore Marshall Dune for now, we'll help him in the future, talk to your father again. The man will tell you that he needs more calcium carbonate to balance the ph of the mixture to fix the hull; by now he has used all the shells and it will be up to you to find more.
Talk to Carol (also called Car'l) and exhaust all dialogue options. The woman has a cable that you need, however she will want a hook in return; she doesn't think your hook will catch any fish, so you'll have to convince her later in the game. Go left and continue to the talking tree, exhaust all dialogue options with the plant and continue to the left until you are in front of the woodcutter's house.
Continue to the left until you reach the snake, let it envelop you, instead of blowing the horn, let the reptile try to crush you until the moment when it gets tired and falls to the ground without strength, pick it up and enjoy the scene during which Shay will decide to call the snake Mr. Huggy.
Go to the mailbox in front of Curtis' house and pick up the missing Vella flyer.
Enter the house and talk to Curtis, the man is working with metal instead of wood. Exhausted all dialogue options, then climb the ladder to Meriloft.
Talk to F'ther to find out he's not fearless enough to go up the stairs and save Harm'ny, it's up to you to do it. Go up the ladder and talk to Harm'ny exhausting all the dialogue options, ask him what the knot looks like, finally don't tell him what to do with the knot now, otherwise the knot itself will change shape.
Return to Shellmound and give Marsall the snake that will envelop him, making him spit the shell-shaped fife that was blocking his vocal cords, you can then pick up this new and strange object. Talk to Marshall and exhaust all dialogue options, then hand him the "Superconductive Gyroscope Hypercam" schematics to have him pull one out of the sand.
Go to Carol and ask her about the knots, tell her the shape of the knot you saw earlier, she will tell you that she needs a special tool. Join Alex in the pyramid and ask him for his space pencil, then go back to Carol and give it to her to get the diagram.
Go back from the talking tree and place the "Superconductive Gyroscopic Hypercam" on the hardened sap at its feet, show Vella's flyer to the plant to make it vomit some sap on the model which will effectively become a mold.
Go to Curtis and ask him if he can create the object starting from the mold you just obtained; you will come into possession of the infamous "Superconductive Gyroscope Hypercam"!
Go back to Meriloft and use the diagram Carol gave you to explain to F'ther how to untie the knot. At each game the node will be different, therefore it is not possible to make a unique guide for this puzzle. Unfortunately with every mistake you will be forced to start over, having Carol deliver a new diagram, in this case always make sure you understand what shape the new node has. Once you have untied the rope, you will get the anti-gravity unit from F'ther which will help you take it to Alex, then you can use the opportunity to deliver the Hypercam too.
Return to the talking tree and wait for the fish to fall onto its branches. You will then have to tell a joke to the tree to make it laugh, so that it shakes its branches and makes the fallen object fall from the sky. There are several pranks you can use, but in case I followed these dialogue options:
"Hey wanna hear a joke?"
"Did you hear about the First National Tree Bank"
"It has recently closed"
"But don't worry, it already has a new branch."
The talking tree will start laughing and the singing fish will fall to the ground and you can pick it up.
Go to Carol and show her the fish, convincing her that you caught it with your hook, she will believe you and give you the line you need.
Combine the newly received thread with the broken Hexipal, however you will still need some advice from Vella's story to rewind the thread properly.
Go back to Meriloft and go right towards the village center to talk to Vella's sister, Walter and Maggy's daughter Rocky. The girls are selling sweets with Vella's face drawn on them, but they won't give you one unless you pay for it.
Go to the point where Vella's grandfather is teaching the Ch'to sword technique and ask him for money to get a coin. Check out all other dialogue options to learn more about his staff. Return to the two girls to exchange the coin for a cake.
You can offer the cake to your grandfather, but he will refuse, so go back to the center of the village and go to the "Cloud Shoes" station where Carol usually works. On the spot you will find Vella's father, Husker and Walter talking, exhaust all dialogue options with them and offer the dessert to Walter so that he licks all the icing.
Go back to your grandfather and offer him the cake again to make him glaze again and get the empty stick. Reach the center of the village and go up the stairs to Jessie the bird, go over to the big fruit tree. You will find the Dead Eye Drudi and you will need their clothes to create Alex's suit. Exhausted all the dialogue options with the sinister figures to find that you will have to face them in a fight, use the staff of the grandfather to make him have an epiphany, then you can collect the clothes they will leave behind.
Reach the tree and drop down, walk left until you reach Gus and pick one of the fruits from his pile. Talk to the man and ask him about his fruit tool, exhaust all other dialogue options and go back to Jessie.
Use the fruit tool on Jessie's egg to hatch it, the bird will get very excited, causing you and the eggshell to fall out of the nest. Pick up the shell and walk away.
Head south to find Harm'ny locked in a cage, you can talk to him, but the man won't be able to do much for you. Talk to Vella's mom, Morella and Twyla, exhaust all the dialogue options and selecting "Well, at least your costume is nice" you will find that she made the costume herself. Ask the girl if she can make a radiation suit, she will accept, but she will need the material and a model, give her the druid clothes and the little space suit to get what you need.
Now that you have everything Meriloft could offer you, go back to Shellmound and talk to your father. Feel free to get all the information you need. The man is still working on a compound to repair the hull, use the spoon in the mixture to check the pH which will now be six, add the eggshell and check again with the spoon to find that the level has risen to nine . Talk to your father again to find out that something acid will be needed to lower the pH level, squeeze some of the fruit juice into the mixture and use the spoon for the third time and find that the pH has finally dropped to seven. . You will automatically find yourself on Alex's ship and your father will descend the stairs to fix the hull.
Hand in the radiation suit. Now you just have to fix the Hexipal, unfortunately you will not know how to do without the clue from Shay's spaceship, so you will have to move on to the story of Vella. Before you step into the shoes of the other protagonist, give Alex the shell-shaped fife and ask him to play the NavSong for you. Be sure to turn on the subtitles, as the game will report the notes played "middle, middle, high, low and middle".
Vella
Vella's story will begin with the Dutch knife pointed at the girl herself. Click anywhere on the screen to knock Dutch to the ground. Talk to the knife and exhaust all dialogue options, then pick it up by saying "You come with me".
Go right to the next screen. Pull the helmet out of the hole in the wall to notice the ship repairing the hole, then use the Dutch knife to cut a piece of the pipe hanging to the right.
Use the pipe on the transport system on the right, connect the pipe at the top with the one at the bottom to access the maintenance panel 36. Climb over the pipe again and use Dutch to cut it at the top, you will fall to the ground and the panel will break, luckily you just earned yourself a longer tube.
Attach one end of the long tube to the one at the top of the left transport and the other end to the center tube of the system on the right, this will activate the gravity suit.
Vella will then be free to float through space. You will have to reach the inside of the ship, unfortunately it will not be easy and you may also need several failed attempts. First line up Vella so she can reach the smaller claw, use the helmet with this to attack. You will now need to use the claw to reach the floating boot to Vella's right, unfortunately the larger claw will not open until you are turned exactly to the right side. Try until the claw closes and you can reach the boot with the smaller claw. Use the small claw and boot on the larger one when it is opened. The anti-gravity boot will attach to the larger claw and you will only have to enter the ship.
Head left twice (many of the doors will be locked) until you reach the pile of debris to move to the side to continue. Always go left and go through the door to "the belly of the beast". Here, too, all the doors will be closed except for the one on the left that leads to the kitchen and to Mum's bedroom. Talk to Mom through the door, convince her that you are Shay, but the woman won't believe you.
Go through the next door on the left to enter Shay's bedroom. Climb inside the ventilation system to meet the Marekai wolf. The poor animal is stuck under some debris, talk to him and exhaust all the dialogue options, the wolf will tell you to reach the central control room where Mom is, then he will unlock the door on the left and you can go through it.
Continue through Marekai's room and go left to the trophy room, here you will find many of Shay's old items. You will find a lot of the information you will need soon in the game. You will find a photo of Shay being held by a toy snake, you will notice that he has lost two teeth, his shoe size is seven and there are several skulls on it. You will also find a drawing of a fireman made by Shay at the age of eight, wearing blue boots, a vase with two teeth and a pair of bronze-colored boots. In addition to these items you will also find a medical report and a couple of other interesting items:
A painting of a red boot
A trophy from a musical
The award for the hug marathon
A note to the shoe fairy
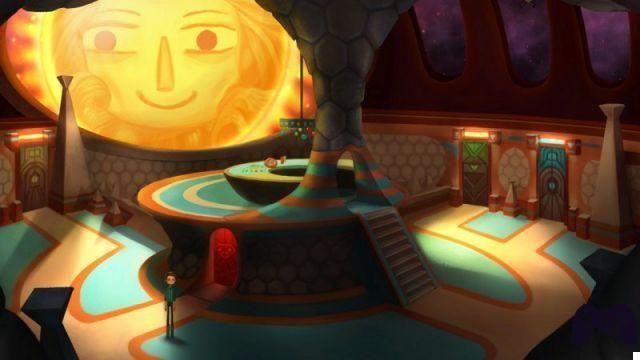
Get on the teleporter on the left, her name is Melanie or Mel. Once on the opposite side of the transporter room (Nexus), Vella's head will be bigger and the girl herself will inform you that her voice is different, although you won't notice any difference. Go left and pass the Starboard on foot, take the teleporter up to the Nexus, your head will have grown further. Go back to the door of the control room, you will notice the teleporters left and right illuminated in the Nexus, before heading into the control room. If everything worked out, you will be able to talk to Mom and ask questions to convince her that you are Shay.
Request. What is the name of your favorite baby animal?
Reply. Mister Huggy.
Request. Of all the nicknames I gave you what was your favorite?
Reply. Can we move on?
Request. What was the color, size and shape of the first space boots.
Reply. Purple color, size 4 and the shape is Polka-dot.
Once you have answered all of Mom's questions, you can enter the control room.
Mom will leave the room, but the ship will shake, throwing you both back inside. Talk to the woman and exhausted all dialogue options, then tell her she has never been in space, Marekai will confirm everything.
Pick up the fork and look at Shay's family photo, this is where you will find the clue to repair the Hexipal by checking the triangles to the left of the photo.
Now you will have to deal with another fairly complex puzzle, first talk to Mom (Hope) again and exhaust all the dialogue options to learn more about the story. Interact with the central control sphere, you can then control a few small things inside the ship itself.
Click the left arrow to go to Shay's room, click the claw icon to have the mechanical arms remove the debris from the bed. Keep using the control sphere to break things and fix wires, then fix the rescue Hexipal and fix the door to the control room.
Now that you have opened the door to the control room, you can leave this place, but first, watch the cutscene during which Mog Chotra enters the red hangar. Your plan will be to blow up the place and escape with the ship. Lastly, use the control ball again to open all the previously locked doors.
The time has come to build a bomb! First, go into the kitchen and grab Shay's deflated puppet. Go left to Shay's bedroom through the ventilation system and see what Marekai is doing, you will hear him talking to the Thrustmaster. Continue to the right until you find the passage for the Ice Cream Avalanche, cross it and use the whipped cream tube to inflate Shay's puppet.
Talk to the two Yarn Pals, the two characters are trying to freeze in ice cream. Collect some ice cream from the top of the mountain by putting on your boots first, insert the ice cream inside the helmet and go down to lose your boots.
Leave the Ice Cream Avalanche and go right to the Starboard Passageway and approach the train. The conductor will not allow anyone to drive the train other than Shay, show him the puppet to get on the vehicle anyway. The tongue that acts as a bridge will be raised, as he no longer trusts Shay, so you will not be able to do anything at that point. When the time comes, do the wave to get one of the Yarn Pals to catch the arm in the tree and come undone; you will then be banned from the train forever.
Once back at the Starboard Passageway, take the teleporter to the Nexus to find that the middle one is now active. Reach the Fusion Sphere which will be frozen, this thing will allow you to pass through without wearing a suit. Interact with the sphere to find from the fork that it will explode if it gets hot. You have found your bomb, but you will have to keep it cold until the right time, insert it inside the helmet full of ice cream and return to the Nexus.
Go through the left teleporter (Mel), pass the trophy room and go right through the ventilation system to reach Malek's dorm. Pull the tile to the right of the prison to see through the glass. The girls will talk to you, exhaust all the dialogue options to find that they are hungry and that you will have to bring them some food. After the chat is over, pull the exposed wires to get Marek to escape through the ventilation system.
Go through the teleporter Mel again to the Nexus, go left and reach the central control room. Talk to Mom to learn more about the story, then use the control orb to access the kitchen. Change the neon sign to read "good morning", then press the claw icon and when the cereal box drops, press the pause button so that the claw holds it suspended.
Leave the control sphere and go through the door on the right to reach the Ice Cream Avalanche one where you will find the debris, move the block and make sure all teleporters are available inside the Nexus.
Reach and pull the cereal box so that some of them fall to the floor, a vacuum cleaner will come to clean the floor and you will have to try to reach the garbage hose before her. You have already cleared the debris, so take the teleporter from the Nexus instead of following the vacuum cleaner through the door on the right, pick up the cereal and the garbage hose will remain open, allowing you to throw in the helmet with the fusion bomb.
Return to the Nexus and teleport into the trophy room, go through the ventilation system and talk to the girls again. Ask if they want cereal, then use these on the floor by the door. The girls will try to pull the cereal through the cage, using a hook that you will need to grab immediately. Vella will explain to the girls that it was a rat that stole the hook itself, then throw some more cereal under the door.
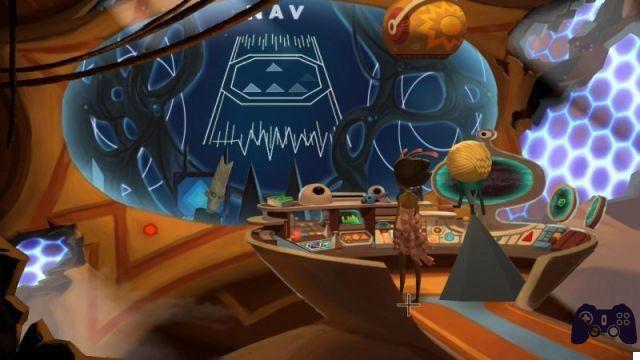
Pull the exposed wires again to distract Merek, this time head back to the Nexus and quickly reach Shay's bedroom to go through the ventilation system and reach Merek's area. Press the green button on the computer to lock the door. Collect the astronomical map on the left.
Go to the NavScarf robot and talk to it to find out it needs a coil, use the fork on the loose Yarn as if it were spaghetti and pin it all to NavScarf. Give the robot also the astro chart and use the hook to change the pattern. You will have to remember the notes played during the NavSong, you will have to select from the left, the first central triangle, the second central, the upper one, the lower one and the last central one.
Unfortunately, it seems that Mom is preventing the ship from following the commands just given. Make your way to the control room to find that Marekai is checking NavScarf for possible errors. Once the cutscene is over, you will find yourself stuck inside the room.
Vella and Shay - Final part
Once back as Shay, use the clue found on the family photo to reconnect the cables to the broken Hexipal. The combination presented in the photo will be different for each game, so it is impossible for me to write a solution to the puzzle. To connect the wires, turn the contraption to see the back, then interact with the connections at the corners of the hex to start the wire to be connected to the following connection; the direction in which you move the wire is not influential, so you just need to imitate the symbols seen in the photo.
Once the Hexipal is in place, go to the Diamond Charging Station on the left and place the contraption on it, then take the working Hexipal to Alex to let him do its magic.
Vella's family will flee and you can enjoy a great cutscene, interact with both ships to return as Vella. Talk to Mom to find out why she can't move the ship. Both vehicles are driven by autopilot and the NavScarf refuses to cooperate, so it's up to Shay and Vella to save the whole situation.
First leave the control room and go right, the rescue Hexigal is broken and on the floor, take it with you. Marek is gone, so go to his post and grab the wire from his computer. Now you can talk to the Thrustmaster simply by interacting with the big screen. Exhaust all dialogue options to find out about his plans and learn more about the story.
Use the wire you just found with the Hexigal, helping you with the connection burns which will show where and how to connect the wires (the black burned connections indicate the starting point for the wires). Once you've found the right combination, write it down as you'll need it soon with Shay's Hexipal.
Reach the "belly of the beast", you can see Alex's ship through the window, press the death ray remote control system and Alex will go downstairs to cut off the energy.
Step into Shay's shoes and go through the door Alex left open. Go right and go down the ladder to the next level of the ship, where you will find your father fixing the hull. You will notice an open book on which the sequence for programming the Hexipal to play the harp is written, write down this combination.
Go through the door on the right to enter the music room, pick up the radio note and notice the central harp and the missing drum clapper. Leave the room, if you go through the door on the left, you will notice some diamonds blocking your way, your aim will be to pass them, as behind them is the energy room. Go back upstairs, hand the radio to Alex who will tell you that it is broken, you will notice the Hexipal dancing and playing with Rocky, give him the radio to have it fixed and pick up the Hexipal itself and check how the wires are configured, you won't need this to solve a puzzle, but it will prove to be a lot of fun in the future. Give Alex the fixed radio.
It is time to reconnect the Hexipal wires so that it can play the harp. Use the sequence found on the open book and remember it, as you will need it with Vella. Go back downstairs and show the Hexipal to the riotous diamonds blocking your way to make them worship it as a god and follow you wherever you go. Take the Hexipal to the music room and place it at the harp to make it play and block the riotous diamonds.
Go to the energy room and pick up the clapper for the drum, then move left to reach the button and return the energy. Return to the music room and use the same combination that Vella used on the rescue Hexigal on your Hexipal, combine it with the clapper and place it at the drum. The riotous diamonds will start to mimic your robot causing a lot of noise and Alex will come down to check what's going on. Send Shay upstairs and step into Vella's shoes.
Arrange the Hexigal wires following the combination to play the harp, then place the robot at the NavScarf and have Mum arrive on the spot. Go to the control room and set the manual setting on the computer, then go to the room, where is the window behind which you can see the other ship.
Step into Shay's shoes and use the Grabbin 'Gary's control to make Mog Chothra wrap around the nearest ship. As Vella, press the death ray button to launch the death ray from the top of the pyramid, no one will block the energy, as both Mom and Alex are distracted. Now you just have to enjoy the game's ending.
 Broken Age pc
- pc
- ipad
- iphone
- android
- ps4
- Playstation Vita
- atv
- Xone
Exit date: January 28 2014


