


Please note:
The solution is based on the US version of the game for PlayStation 4, so there may be divergences from other versions.
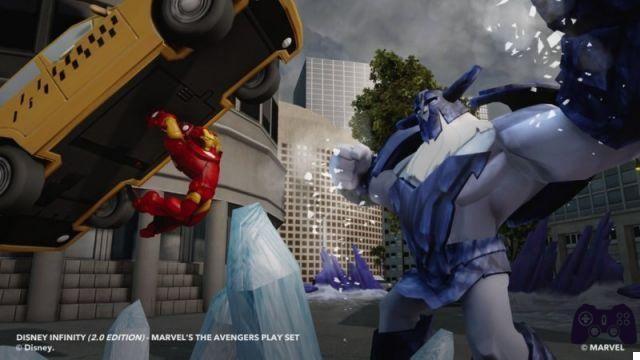
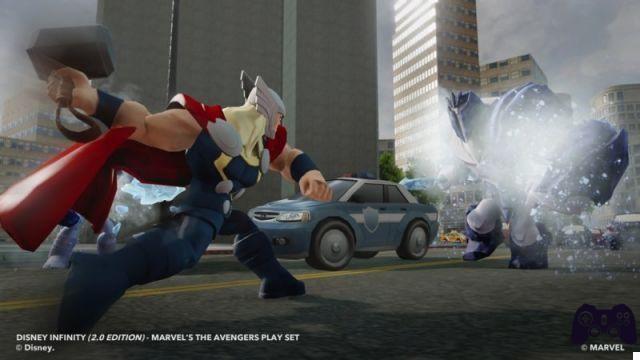
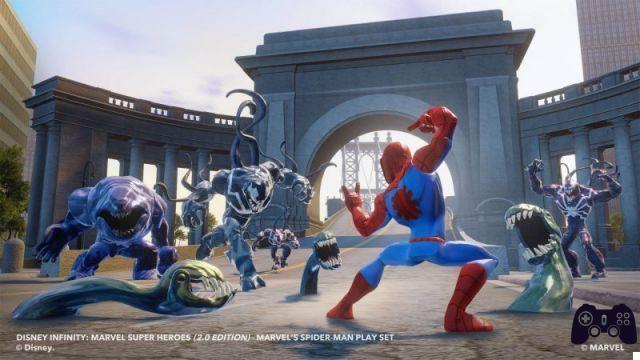
Avengers
Cold Opening
The elevator doesn't work. Never mind, we settle it with fists. First destroy the block of ice blocking the entrance, then jump over the cabin and perform two jump attacks to send it down into the room. To contain the damage, Jarvis will seal the doors, so take out the three enemies as soon as possible to start a cutscene. So avoid the lasers in the next room by skipping the first and third, and going under the second instead. After defeating five other ice giants, exit through the hole in the wall at the bottom of the ramp. To get the door to open anyway you will have to defeat five other ice giants. To lower the force field, destroy the console near the platform, then prepare for a confrontation involving twelve frozen giants. Once you have won the battle, climb the blue pipe and pop out into the next area destroying the ice blocking you. Waiting for you, another clash with the giants and another set of lasers, this time, however, moving from the bottom to the top: obviously pass under them when they are at the highest point. When you get to the lab, go up to the platform in the center and defeat other ice giants to take down the force field. At that point interact with the console, then exit through the tunnel to close the mission.
Sheer Wheel Power
Use the bike to reach the indicated point, where you will find Nick Fury waiting for you.
Energy Crisis
To reactivate the power in the Avengers Tower, you will have to reactivate the indicated switches, but not before having defeated the ice giants. Repeat this sequence for all three Power Stations before pressing the button that lights up the Avengers Tower.
Street sweeper
Ice is a problem in New York this season, to the point where a fifteen-block barrier has appeared in the middle of the road and prevents a SHIELD convoy from advancing. Go to the indicated place and destroy all the blocks, also taking care of the giants that appear when you are about halfway through the work.
Bridge May Be Icy
SHIELD vehicles aren't the only ones in trouble, even a civilian bus is blocked by ice on the bridge. Go to the indicated place, getting rid of the usual giants, and destroy the ice around the bus, then fix the bridge by performing a jump attack. At this point you will have to escort the bus defending it from the attacks of the giants or from the blocks of ice that emerge in the middle of the road. The mission will be over when the vehicle reaches the end of the bridge.
Shaking the Wasp's Nest
Wasp is a prisoner of a building completely covered in ice. To help her, start destroying some blocks until the arrival of the enemies forces you to stop. The novelty in this case is given by the appearance of some armored enemies that will require a few more hits to be defeated. Beyond this, fight as you have done up to now and free the points indicated to conclude the mission and move on to the next.
On the Grid
The first part of this mission will keep you busy trying to get all the Avengers to the top of the Avengers Tower. For those who can't fly, use the convenient elevator located just behind Nick Fury at the point where you are assigned the mission. At the top interacting with Jarvis, you discover that a blackout has hit the city and your task at this point becomes to reactivate the six control units to bring the light back to the Big Apple. So go to the six points indicated and get rid, if necessary, of the enemies you meet.
Make Mine Marvel
Your job here is to defend a SHIELD convoy. The first obstacle is an ice barrier, but soon you will also be facing giants. Be careful because to ensure the vehicle restarts you will have to eliminate all the enemies in the vicinity, so if the vehicle is stationary it means that there is still someone around. If the vehicle arrives intact at its destination, you will have completed the mission.
Bad Press
The mayor under the influence of Loki is broadcasting the war god's messages through the city's antennas. Your task is to destroy the three antennas on top of buildings. Of course, the transmitters are guarded by ice giants, so you won't be able to do your job until you've defeated them.
Civil Warfare
This time your priority must be the six frozen civilians you find near the SHIELD outpost. Obviously ice giants will appear to hinder you, but their defeat is not essential. After freeing a civilian from the ice, hurry up and take him to the safe zone, then go back to find the others.
A Heavy Dilemma
Retrieve the chest marked by Nick Fury and take it to the first checkpoint where you are attacked by some ice giants.
After defeating them, continue trying to keep as close as possible to the yellow line that indicates the path to avoid being hit by the ice rain. When you arrive at your destination you will find a new welcoming committee: defend the crate from the ice giants to make sure it is recovered intact by the SHIELD agents.
Chasing a Lead
Follow the ice giants to the three locations marked on the map, vanquishing their gathering on all three occasions. In this mission you will find yourself facing giants with shields for the first time.
Loki's Swelled Head
Continue to the hall where you are attacked by flying drones and ice giants. Concentrate on the first ones, much faster and more annoying, then clean the environment from any hostile presence and interact with the console to deactivate the force field. In the next room, even more enemies await you. Accompany your entrance with a special move in the center of the room to weaken as many opponents as possible, then rush to destroy the computer that manages the annoying turret on the roof. Repeat this move in the next room too, so after having defeated the enemies here too, take the corridor to the right and pass the laser on the ground and the vertical ones, taking advantage of the moment when the beams move away. Finally, pay attention to another set of lasers and don't be fooled by the third one moving at a different speed than the others. Then interact with the console to continue.
In the next room the same situation occurs again: destroy the console that governs the turret on the left, then deal with the enemies. Continue through the door on the right, pass the lasers and climb the conduit. At the top, destroy the PC to turn off the lasers, then face the dozen enemies in the next room to open the door that leads upstairs to where you find Loki. Loki initially creates his own clone. Attack Loki or his clone using melee attacks. The fight is tough, so often rely on the parry button to cushion the effects of Loki's attacks. Around the room you will find power-ups that allow you to restore health and recover the special move. If you are defeated you can decide to bring another hero into play by placing his figurine on the base. Loki's attacks will be mostly from distance, while you will have to get close to hurt him. Once hit, an ice giant will appear: at that point focus your efforts on him while temporarily ignoring Loki. In the second part of the fight, Loki creates two clones of himself. Use the somersault to dodge the three distance attacks that the three Loki perform simultaneously, trying to get close to hit one of the three. The hit Loki will transform into an ice giant. Once again focus on the latter, avoiding the attacks of the other Loki. Repeat this mechanic until you collide with the only Loki left. After a few hits the real Loki will generate three copies of himself. At this point you will know how to do it: eliminate the three fake Loki who turn into ice giants, then give the real one well served, without forgetting to use parry and dodge to guarantee your survival.
A Change in the Air
Reach the first marker at the top of the building, then from there continue to the second that leads you to the machinery to be destroyed. In this case you can snub the enemies because the destruction of your target closes the mission.
Chilling Chase
Go to the two points indicated and eliminate the enemies there.
Keeping it Loki
Kill the four enemies holding the mayor prisoner first, then the other five that await you in the safe zone.
Air Mail
Make your way to the marked spot to pick up the new aircraft that SHIELD has developed for the Avengers. Press the Triangle button on PlayStation (or Y on Xbox) and use the new flying bike to reach the top of the Avengers Tower.
From now on, the aircraft will always be there at your disposal.
A Worldwide Web
Your objective is the four UN members to be freed from the ice blocks and brought back to safety. If you want you can also beat up some giants, but it is not necessary for the purpose of the mission.
Snow End in Sight
Head to the five machines that are conditioning New York's weather and destroy them, along with the ice giants that protect them.
Ice breaker
SHIELD is charging a device in the park that will destroy the ice giants, but it's up to you to protect it until the charge is complete. Hold on for 2 minutes and you have completed the mission.
Hasty Retreat
Three minutes and eight people to free from the ice and bring to safety. Of course the ice giants will try to stop this, but you can safely ignore them unless they are an obstacle in your way.
Training Ground
After destroying the five giants, perform a jump attack on the frozen area to break through the ground and crash into the subway tunnels. Then destroy the obstacles on the tracks, then the other enemies who try to storm the convoy.
Pier Pressure
Investigate what happens at the dock. As you approach, you are greeted by dozens of enemies. Eliminate them all to close the mission.
Sif's Ship-Shape
This mission begins immediately after the conclusion of the previous one. Advance through the warehouses and take out the groups of giants until the action is interrupted by a cutscene. Use the vehicle available outside to reach your new destination in the cave area. Inside you find yourself trapped between different groups of ice giants that once defeated leave room for a large monster.
Don't be scared, staying at a distance and taking advantage of the dodge + ranged attacks combo you will get rid of him in no time. Then join Sif in the next room to close the mission.
Taking Some Heat
Locate the three marked machines and destroy the generators that power them. Of course the ice giants will try to stop this, but you can safely ignore them unless they are an obstacle in your way.
Just Say Nano
Your task is to defend the two entrance gates of the Avengers Tower. Jarvis will inform you live on their state of health so make sure you always stay close to the one most in need. At this juncture, only deal with the closest enemies who pose a direct and immediate threat to the gates.
Chill Out
Face and defeat three waves of eight ice giants.
I'll Let You Off with a Warming
The SHIELD generator is very effective against giants, but it takes some time to start up. Your job is to protect it for 2 and a half minutes. As before, focus on the enemies closest to the generator and when you find yourself surrounded, resort to a special move.
Hot Spot
Mission identical to the previous one beyond the location, the pier, and lasting 3 minutes.
Joining the Frozen Legion
Follow the ice giant to the indicated point, then eliminate him and his cronies.
Cold Rush
As before, go to the indicated location and get ready to face two waves of ice giants.
Take Snow Prisoners
The concept of infiltration in this game is rather strange. Head to the giant general's fortress and destroy the two waves of henchmen that are thrown at you. After that, get ready to face the general, who is nothing more than an enhanced giant of the kind you have faced before, with the addition of a few more attacks and a longer health bar. Dodge the chunks of ice he throws, the shockwaves on the ground, and the cooling beam and you shouldn't have any trouble getting through this fight.
Safety First
You have three and a half minutes to free the frozen civilians in the park. Start with the ones furthest from the safe zone, smash the ice with a punch, then load them on your shoulder and carry them safely to the area controlled by the SHIELD. The giants will try to hinder you, but given the limited time available, our advice is to ignore their attacks and react only if forced, for example in cases where you find yourself surrounded.
Viral Infection
Your task is to collect the object that is next to you at the beginning of the mission and take it to its destination at the indicated point. Along the way you will be attacked by giants and obstructed by ice barriers. Since the mission is not timed, do not be in a hurry: put down the object and take care of the mishaps, then leave for your destination.
A Chilling Conclusion
The final clash of the Avengers adventure sees you face a giant ice monster summoned by Loki, a decidedly more difficult opponent than the previous ones. Its frozen breath, however predictable, immobilizes you, exposing you to the devastating explosions of the rocks on the ground. Use dodging and parrying to limit the damage, then wait for the moment when the beast tries to claw you and dodge this attack too. At that point, however, the monster's paw will be stuck on the ground: it's your time! Attack the paw until the monstrous animal collapses, then rage on its head. When you've done the right amount of damage, the beast will momentarily retreat, leaving room for a group of ice giants. Get rid of them, then be ready to repeat these mechanics three times to end the fight.
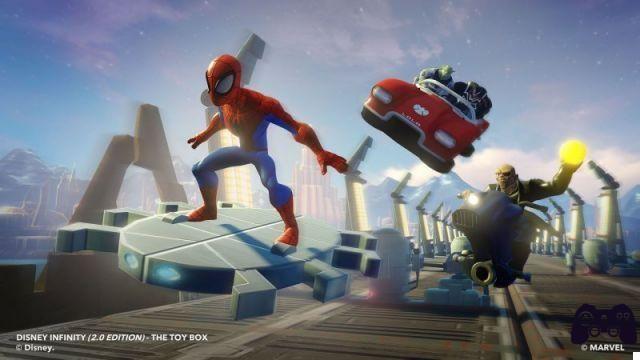
Spider-Man
Dark Days Ahead
Spidey's first mission is a mini tutorial. Start by following Mysterio and jumping over obstacles, then become familiar with climbing. In the glass room, watch the reflections of Spider-Man and Miysterio to decide which direction to attack.
Trapped Like Sardines
First, proceed to the adjacent room and destroy the computer indicated by the arrow to take down the force field. Then climb the elevator shaft and exit where possible to immediately confront a symbiote. Confronting other symbionts in the next room where you are asked to hit the battery until it detaches from its seat and then picks it up. Place it in the free compartment to open the door and proceed to the next room. Here, dodge the missiles and detach another battery from the right to place it on the left. Then advance making your way through symbionts and turrets to the area with the glass floor that you will have to destroy with a jump attack. Then unplug the battery and exit to find that the turrets and force field have shut down. Beyond, overcome the chasms using the holds on the ceiling: if you fall you will find a convenient conduit below to climb to go up. Beyond the chasm, a small puzzle awaits you that requires you to place the battery hit by the turret in its place (i.e. in the elevator). For the other, look next to the elevator: hit this second battery and place it in the nearby compartment. Now that the elevator is working, use it to go up to the upper platform, but don't forget to disconnect the battery as you will need it to open the next door. After defeating the enemies, momentarily ignore the electrified battery and go to the room on the left and put the battery you find here in its place: doing so will activate a turret that you will have to use to detach the electrified battery from the wall. Now that the force field has been shut down, use one of the batteries from earlier to open the door and free the scientists.
From Tiger to Cage
Go to the indicated point.
Unfriendly Neighborhood
Eliminate the symbiotes released by Goblins in the points indicated.
Track-A-Mole
Use the hover car to get to the predetermined point, there you transform the vehicle into a hover craft and use it to follow the target from a distance to the pier, without getting too close so as not to be discovered. At the dock you will have to collect the ten pieces of SHIELD technology (four in the crates around the building, six on the roof of the second floor), while defending yourself from the assault of some symbionts.
Interrupted Upload
Go to the indicated point and defeat the symbionts that you find welcoming you. In the laboratory, remove the battery from the wall on the right and take it to the next room where you will have to hook it on the left after getting rid of the symbionts. In the next room destroy the door of Lab C43, defeat the symbionts, then disconnect the battery and retrace your steps to use the elevator that leads to the upper floor. There, place the battery on the wall opposite the elevator to activate the second elevator on the floor. Then pick up the battery on the lower level of this room and go out to the main room of the level to place it on the left.
Avoiding stepping on the red areas of the floor, move towards the Observation Area on the left. Depending on the character you are controlling, you can use his aerial powers or climb up thanks to the yellow conduit. After that you will have to deal with symbionts and turrets. Go through the non-walkable area of the floor using the handholds on the wall, then step on the last red tile and draw the turret fire towards the force field of the battery. Then pick up the battery and continue along the path to place it in the slot that powers the center console. From that moment on you will have two minutes to defend the console from the onslaught of enemies.
Sweet e Sewer
After talking to the Black Cat, deal with the ten symbionts that you must defeat before you can enter the sewers. Once in the pipeline you receive a very useful cylinder against symbionts from a SHIELD agent. To reload this weapon use the green lightning panels. Proceed by getting rid of the symbionts to the point where you have to destroy the wall to free the SHIELD agent. Continue to the ramp, then follow the green mobile ramp and after a few jumps you find yourself fighting against different groups of symbionts. When you have defeated them, go back to the wall where you hear screams coming from and destroy it. Finally, to close the mission, eliminate the symbionts that you find around the raised platform further ahead.
Agents of Goblin
From the starting point, proceed through the seven red lights to the SHIELD agent to free from the symbionts. Then bring the saved agent back to the starting point and repeat the sequence with the other two remaining.
Target the Traitor
Talk to Cage, then go to OSCORP and pick up the scientist to drive to three different consoles, the last two of which will be defended by symbionts. When the scientist has finished his work, return to Cage to start a cutscene. When the game resumes you will be inside a vehicle engaged in a chase (as always, don't get caught). At the end, another video then precedes a battle with some symbionts, of which at least a couple are larger than average.
Sewer Search
Go down the pipes, destroy the symbiote wall with the blaster, then press the button to open the path that leads below. There, defeat the symbionts and press the "In" key to bring down the water level. Then go down to make your way towards the wooden planks to be destroyed, then return to the upper level and press the button to return the water. Moving on the boards, pick up the blaster and use it to break down the symbiote wall. Further on, use the planks again to move on the water and shoot the blaster at the symbiont walls to clear the way. At the end of this sequence, a cutscene precedes another confrontation with some symbionts.
Goblin's Lair
After a small fight, reach the next room where you will have to climb the central column, using your powers or jumping on the platforms. Here are buttons on the ground that you can press with the jump attack and which activate the flow of steam from the corresponding pipes. Use them to hit the drone, so when it isn't moving grab it and throw it at the Goblin, making sure it doesn't explode while you handle it.
You will need to land three hits using this technique, but be careful, after the first two Goblins he will throw explosive pumpkins and symbionts at you. To avoid pumpkins it may be a good idea to take advantage of the airflows from the fans.
The Sound of Safety
Your task here is to defend the SHIELD vans from symbiote attack. You will have a sonic cannon at your disposal, but you can only use it 15 times. Don't waste the shots, because the last obstacle will be a large symbiote that could destroy the two vans in a few hits.
Earn Your Wings
First, pass the little flying bike driving test. Then use the bike to go to the three points indicated where you will have to fight both the symbionts and some Goblin robots. The last destination will reserve you a large symbiote, against which you can take advantage of the weapons of your weird aircraft.
We Interrupt This Broadcast
Destroy the indicated screens and satellite dishes.
Sky-Cycle Salvo
Your task is to defend three antennas from ever heavier assaults by symbiotes of various sizes and Goblin drones. Take advantage of the weapons and speed of the flying bike and try not to stop too close to the antennas, because often the enemies seem to focus more on you than on their real target.
Escape Escort
In the first part of the mission you will have to defend a SHIELD vehicle in three different locations. The dynamics are always the same: you are attacked by symbionts and / or drones that you will have to defeat before destroying the pipe from which the symbiotic liquid flows. Then the three vehicles converge towards the same place. Of course, you will soon be joined by a large group of enemies. Once again you will have to defend the vehicles, defeat the enemies and destroy the pipes. Try to lure as many enemies as you can to the pipes and use your Special Move there to maximize damage. Then go up to the roof and defeat the symbiotes that threaten the helicopter. In the final phase of the mission you will find yourself on your flying scooter with the CPU in control of the commands: all you have to do is shoot the enemies.
The Cat's Out of the Bag
After defeating the first group of symbionts, launch into the sewers. Your goal is the symbiote wall above: obviously if you can fly or cling to the cobwebs it will take you a moment to get there, otherwise you will have to move between the various platforms and make your way to the top. Anyway, climb the yellow pipe and collect the sonic cannon to use on the symbionts and on the wall that blocks your passage. Proceed to the pump room: here the lower positioned pump can be used as an elevator. Repeat the same sequence in the next room, then continue down the sewers until you meet the Black Cat after a symbiote wall. So pick up the sonic cannon on the opposite side of the room from the symbiote wall to destroy it, use the weapon to eliminate the symbiotic material that is holding the Cat. Then use the pump to go up, defeat the symbionts and destroy the planks to advance. Go all the way down the corridor and destroy other planks at the bottom to get to the second strand of symbiont material that holds the Cat stuck. Destroy it, then go down to the back of the room and use the pump to go up to another level. Destroy the last piece of symbiote material that imprisons the Cat at the bottom of the platform and enjoy the cinematic that closes the mission.
Oscorp Escort
Another mission in which you will only have to take care of shooting to destroy the drones that threaten the helicopter.
Rooftop Rendezvous
Defeat the enemies, then approach the scientist to be saved: if you want to stop and destroy other symbionts, otherwise pick up the unfortunate and take him immediately to the safe zone.
Symbionte Ambush
Two waves of symbionts, including a giant one in the finale.
Mysterio's Hideaway
Take the scientist to one of the two radars and defend it as he struggles to find Mysterio's hideout. Settle things here then go with the scientist to the second point indicated and repeat what you did before defending the two scientists at work.
The third location is eventually split over two floors and will require two trips to get both scientists there. Alternate between the two levels and defend the geniuses at work until the end of the mission.
Illusion of Grandeur
Start heading to Mysterio's hideout and eliminate the drones, then enter the Oscorp Chemical and watch the rotating cube, wait for the face facing you to show the shape of the door and hit the dark one to open the way to the next room. Here you find two batteries arranged on two distant platforms. To access it you will have to hit the blue and red sides of the rotating cube and then place the batteries in the center of the room that will give Mysterio a good shake.
When the game resumes, hit the purple side of the cube to proceed and find yourself in front of another puzzle. Hit the green triangle first, then the purple one and use the platform that appeared to get to the battery. Place the battery in the center of the room and face the symbionts, then move to the other side where you will have to repeat the same sequence, but first hit the round symbol, then the blue one to open the door, then the purple and green circles for the battery.
Back to the starting point press the green circle and then the purple one, then hit the red target to make the missing step appear and go up through the door. Then hit the red symbol on the cube, go around the door using the side platform and pick up the battery, take it to the red door and hit the red target again to open it. After defeating the symbionts, repeat the same thing by pressing the green side on the cube, then in the central area hit the purple and blue circles to be able to arrange the batteries in their place.
Green Goblin's Grim Gauntlet
On board the Sky Cicle, hit the drones that protect Goblins, then focus on the green goblin until your arch-enemy is protected by the force field again. This simple mechanic will have to be repeated several times as you try to avoid the various obstacles scattered in the air and the attacks launched directly by Goblins. When you have dealt the right amount of damage to Goblin, a cutscene will interrupt the fight to close this section of the game as well.
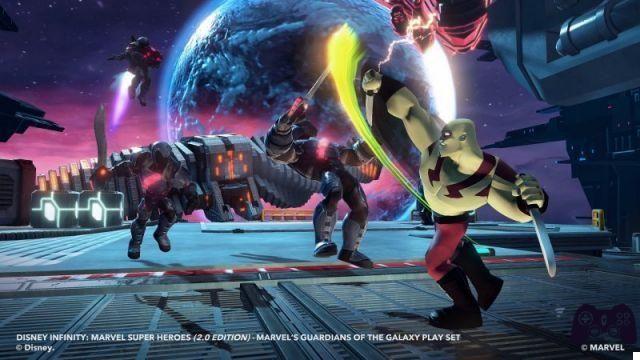
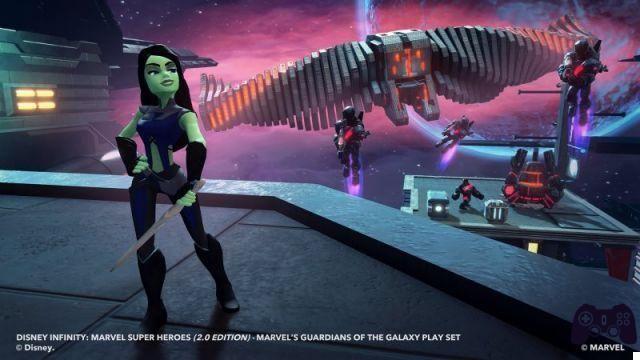
Guardiani della galassia
Spatial Delivery
Jump onto the platforms, then grab the beam and use the pipes to climb up. Finally, double jump over the chasm and watch the structure you escaped from collapsing on itself. Then go up again using the pipes and shoot the door to open it, then jump to the next door and shoot it too. Climb the pipe to go up, then move horizontally, still holding on to the blue pipe, to reach another door. Take it down, then move over the iron pieces and finally shoot the floor to collapse into the room below.
Knowhere to Run
Eliminate the first wave of enemies, then stay out of sight of the turrets to destroy them without too much effort. Then go up the ramp and get ready for more turrets and a couple of waves of enemies.
Let's Be Clear
Pick up a container of fuel and throw it over the debris to clear your way. Collect another one and use it to thin the ranks of the enemies, then after defeating them all, use the explosion again to clear the bridge. Finally, use the fuel containers to take down the enemy spacecraft: note that the jump launch makes the explosive container cover a greater distance.
Pest Control
Destroy the marked objects. Note that those that are more difficult to reach are often accompanied by a jump pad at the lower levels to make life easier for characters who do not fly.
Spy Sweep
The Collector requests that you destroy the six remaining sentries: their position is indicated by convenient markers and their appearance is similar to that of the turrets. Stay out of their line of sight and you will have no problem destroying them all in a short time.
Power Full
Find the fuel station in the Docking Bay and launch containers at each of the indicated points.
Sentinel Skirmish
Other sentries to be eliminated. Two are on the lower level: to go up you can use the comfortable elevator, in case you are not in control of a flying character.
Power Outrage
After reaching the control room, locate a fuel container and place it in the space provided to partially restart the system. So grab another supply of fuel and jump on the row of platforms just emerged from the wall until you find the niche where you can fit your load. Quickly return to the ground, grab another container of fuel and move to the furthest row of moving platforms to put this second container in place as well. If you have taken too long to place the first container, you will have to restart the system according to the procedure described at the beginning of the paragraph.
Miner Catastrophe
Head to the area under attack and grab a container of fuel right away. Use it to power the platform and go up, then ... that's it, that's all. Just get to the designated location to complete the mission.
Drop Everything!
Climb the pipes and move left to the room where the fuel canisters are. Place one in each of the Anti-Air Gun quarters. At that point the view switches to first person and you find yourself in control of the weapon. Your goal is to destroy the ships that attack you in two waves. Keep your eyes peeled and don't miss the big bomb that the enemies try to drop on the base.
Destroy the bomb before it hits the ground or your health bar will be drastically shortened.
Tome for Paws
Climb up the pipes to reach the opposite side of the structure where the mission starts. Eliminate the Sakaaran attacking in flight and try to stay out of sight of the turret to destroy it more easily. Then move right to collect a fuel container while avoiding cannon fire in the distance. If you are in control of a character who can count on a ranged attack (Star-Lord, in particular) you can destroy from the platform you are on both cannons and the turret at the bottom right to act with more tranquility. Anyway, after collecting the fuel, return to the central platform and place it in its compartment. As the machine starts to move jump to the platform ahead and from there look at the platform below which has several turrets. Kill them all before jumping onto the pipes as you move towards the central tower. Resist attacks from turrets and enemies, then move to the moving platforms and use the pipes again from there. Around the corner destroy the turret that sees you from the distance, then open the door. Collect the fuel immediately and insert it quickly to the left to activate two turrets that will assist you against the enemies in the final phase of the mission. Once the battle is over, you can finally talk to Cosmo.
Wind Blue Yondu
Meet Yondu on the tracks leading outside the control room. The only difficulty is given by the obstacles along the tracks that you will have to avoid.
Free Your Mine
This mission asks you to return to the mine area again. Use the pipes to escape the heat and open the door. Inside, keep to the right to avoid being scorched by the puffs of fire, then pick up a container of fuel and transport it downstairs to the large moving platform in the center. Finally, place it in its slot to close the mission.
What's Yours is Mine's
Reach the indicated spot to find that debris is blocking the way. So move on the moving platforms to get to a petrol station, collect a container and retrace your steps to make it explode on the debris.
Cosmic Creature
For this Collector mission you will need to find three of his precious trophies and bring them back to the Central Operation Tower. The first is below you where the mission begins, the second in the Living Quarters, the third in the Docking Bay.
Pest Behavior
Move on the indicated platforms and eliminate the enemies you find there.
Rockin' Ronan
Kill the five sentries in the Central Operation Tower.
Cool Miners Fodder
Along the Pod's path, insert the fuel canisters into the appropriate slots to get it to Yondu.
Peace in a Pod
Another first-person mission aboard the Anti-Air Gun in which you have to destroy everything that moves to protect Yondu, who is inside the Pod intent on programming its commands. The most dangerous enemies are the Giant Sakaaran and the spaceships. As before, beware of the bombs that once hit the target can do big damage.
Up and Running
After opening the door, defend the pod from enemy attacks, and most importantly, destroy any obstacles in its path. These are crates or doors: obviously hit the first ones to make them disappear and open the second ones. But try not to get too far from the pod to avoid that it can be damaged by enemies you do not realize.
Launch Time
Mission identical to the previous one, the only difference is the setting. The pod race this time takes place at Docking Bay.
Out of the Frying Pan
Another first-person mission, this time aboard a much more powerful cannon. In fact, by holding down the firing button you do not release a continuous stream of fire, as before, but you load a single more destructive shot. You will have to withstand three waves consisting of 16, 17 and 18 Necroships and destroy as always and bombs before they hit the ground.
As you will soon learn charged shots destroy multiple ships at once: make good use of this technique and you will pass this mission without too much difficulty.
...into the Fire
Locate Yondu, who is in the pod a few steps away and talk to him to move to Ronan's ship.
Unwelcome Wagon
Move along the moving walkway being very careful not to get shocked. The path leads you to a room whose doors are sealed at your entrance, forcing you to immediately deal with the enemies that appear there. At the end of the fight, darkness falls in the room. Pick up the luminescent object in the center of the room and use it with the luminescent compartment in the wall. Then locate the second light compartment and shoot it too. Then examine the symbol composed of three triangles that appears at this point and identify the same one among the drawings that move on the walls of the room. So hit the three triangles as they move on the wall and wait for the symbol now highlighted in blue to pass under the switch to reopen the doors. At this point, return to the central room of the structure destroying the turrets along the way.
Door and Piece
The light weapon recovered in the previous mission will still serve you in this mission to open the door you are facing. Advance making sure you get the shock again and destroy the two turrets, then enter the room that opens in front of you ... and watch the doors close again as you pass! After fixing the enemies that have ambushed you this time you will have to hit three symbols: load the switch on the wall to start the sequence, then use the light weapon as you did in the previous mission. Once out, pass the turrets unscathed, then face the Sakkarans, paying attention to those armed with lasers. When you take down the last one, you will get the key to finally arrive in the presence of Ronan.
By Buster
You now have the key, but you have to get to the door and that group of oncoming enemies don't seem willing to make your way. Put the key down and face the Sakaaran, then after defeating them throw the key on the electrified coils to cause an explosion. Then wait for the coils to slow down their rotation and run between them, collect the key and move on to the next room. Here some turrets and new Sakaarans await you. After the fight, repeat what you did before with the key and the electrified coils, then proceed towards Ronan.
Dark Aster Disaster
Once you reach your destination, the doors close in front of you. Collect the weapon you find on site and shoot the generator to make Ronan appear. The final enemy attack in the game consists of a hammer blow to the ground that generates shockwaves that move towards you. Avoid them and use the new weapon to hit him. The shield that protects it will prevent them from damage, but the hits will free some blue spheres that you will have to place in the appropriate slots near the ceiling. Then shoot the spheres and watch them move in the air towards their destination. Don't get too distracted by the backup Sakaarans and keep hitting Ronan to generate more blue orbs until the cutscene that closes the fight starts.
 Disney Infinity 2.0: Marvel Super Heroes ps4
- ps3
- ps4
- Xone
- x360
- WiiU
- pc
- iphone
- ipad
- Playstation Vita
Exit date: 18 September 2014


