


TRAINING 1
Commando: Fireman, Lupin
TARGETS:
- Neutralize all enemies at the border post. To do this you must:
1) reach the guard post
2) take the metal shears from the metal case
3) cut the barbed wire and disarm the mines on the other side
4) Fight against the group of officers
SECONDARY OBJECTIVES:
Take over the contents of the wooden crate
CLUES:
Watch out for enemies who don't seem threatening.
First you have to knock out and tie up the guard who smokes near the bush. Use Fireman, make him crawl and hit. To bind the enemy, press shift over the body and the cursor will change to show the bound guard, then click. Always using the same technique, click on the guard to pick it up and take it to an unnoticed place (eg: your starting point). Now you have to take care of the worker who works on the fence and then the guard who patrols. Be careful not to be seen. Now it's the soldier's turn to the right of the screen (east), always use the same technique, hit him and gag him.
Attention if you want to be able to control the bodies of the soldiers and then take possession of their objects simply by approaching the body and clicking on the eye from the main menu on the right. To overcome the fence use Lupine by making him climb on the electricity cables (using the shift key on the electricity poles), once crossed, hit the guard in the trench and take the hand grenades and metal shears from the nearby chest. Head to the chest near the guard post to get the medkit, and return, still using the poles, to Inferno. Using the W key, give Inferno both the shears and the hand grenades (the two characters must be close to make the switch). Use Fireman with the shears on the barbed wire all the way to the right, then take the metal detector and start looking for the 7 mines.
Move slowly and every time a mine appears, position the cursor over it and as soon as it changes shape (it becomes a type of pincers) disarm it. You can also retrieve mines which will come in handy later. After clearing the mines, go crawling towards the guard that we only stunned before (north), hit him and tie him up. Approach the guard post and using a grenade (A button) against the three soldiers in the trench you will win the first mission.
TRAINING FIELD 2
We must first free the allied soldiers (in the map they are circled in green) find the key to open the house and use the radio that is inside. Also check all the crates two on the outside highlighted in yellow and one is in the house.
Our men (the BV, THE G, and the P) are located in the lower left corner (in blue), here you choose how to start without giving too much attention and eliminating the guards below with the BV and knife; or as I did by eliminating the guard closest to me with the BV, hiding it while the guard under the staircase does not see it, taking the rifle with the P and making the latter crawl up to the wall near the staircase. Here with a gunshot I attracted the guards and when they were close I threw a Molotov cocktail, (alternatively you can send the BV with the rifle behind the wall and attracting the guards always with a pistol shot eliminating them both with the rifle and with the gun one by one) whatever tactic you used, after eliminating the guards take back the BV give him the rifle and load as much ammunition as you can, recover the keys of the house from the officer who was kneeling near the ladder and crawling up along the itself.
Here I have dedicated myself to the elimination of the guards on the left of the map (side A) using the rifle and opening the chest and taking everything, then always with the BV with the rifle I eliminate both the officer (the one who patrols around the house ) is the first guard on the left of the house itself. Once this was done, I headed to the right side of the map, and with the knife I dedicated myself to cleaning the map on side b, after that I opened the 2nd chest and I let myself be reached by P and G. Before entering the house, delete the guard the window with a grenade or with a shotgun (remember to kill a man with firearms you need a shotgun or 3 pistol shots, always remember this).
Now open the house with the keys and enter with the BV, quickly eliminate the officer inside and use the radio, you will find that enemy reinforcements are coming your new target and eliminate them and destroy the tank! Give the bomb and anti-tank mines to the G and have the allied soldiers positioned behind the wall so that they face the road (in the direction of the first crate you opened side a I marked the area in green). I recommend that you turn the map so that it is flipped in a north-south direction with respect to the origin, place the mines on the road, space a little apart from each other and place the bomb more or less halfway between the trees and the light pole (circled in yellow). Put the G in the edge of the map a bit hidden by the trees (blue area in the image).
Once this is done, press the button to send the enemy reinforcements (if you don't press it, the enemies do not arrive, this gives you all the time you want to place your men).
Here is the button to send enemy reinforcements.
Wait for the enemies to group together and detonate the bomb and throw some grenades if necessary (quickly take out the opponent's grenade launcher you recognize him because he is dressed in a lighter shade of brown than usual) (a trick: keep in mind a thing, the brown-clad German soldiers have a rifle while the blue-clad soldiers have a machine gun). Wait for the wagon and enjoy the scene.
THE NIGHT OF THE WOLVES
Here is a mission where, in spite of myself, I have not killed anyone. No, I have not become too good ... I only thought it was convenient not to: it is in fact an 'intelligence' mission (information retrieval), in which you will have to contact the ally who has been captured, take contact with N and recover the Enigma device (for those who do not know the Enigma device really existed and until a copy of it was stolen the messages encrypted with this device were inviolable; from truly documented information hundreds of soldiers lost their lives to recover (or defend) it and thousands lost it due to its inviolability!).
Select the L and let it enter the water (you cannot arrive by boat because of the mines) turn the map to the right and approach the ladder by swimming slowly, then crawl to the door in front of you, look inside the structure and at the moment Appropriate enter and knock out the guard, then talk to the ally (follow the yellow arrows).
You now have a new friend W, which you can use to distract the guards.
Always crawling, go towards the structure where N is (green arrow) you should be able to get there without too much difficulty! Enter, at the appropriate moment stun the sentry and the soldier and enter to talk to N (in the room circled in green).
Check the wardrobe in the room where N is and you will find the first piece of the Bonus, now bring the L back into the hallway of the entrance (they will never find out there) and select N (also turn off the power (top room, highlighted in yellow) ).
Exit and go north (avoid the group of three guards next to the building (in red) they can discover N while the sentries will not discover it. two sentinels (green), and arrive near the long building (it turns out to be the dormitory - circled in green).
With N, enter the dormitory and distract the guard from the long side; enter the L and hide it in the first room with the bunk beds in front of the door (close the door or the guard in the patrol will discover you).
The plan is simple you have to find the general's assistant and steal the keys, you have to use the sleeping pill (which you will have found in the closets of the first building) after which the thief will enter the general's office and steal the Enigma code. Enter the various barracks (in yellow) and rummage through all the closets you will find two more bonus pieces, as well as various useful things.
The assistant is in the rear structure behind the general's quarters (in light blue), enter, check the cupboards (another bonus) finally look in the chest, put the sleeping pill in the wine (move the sleeping pill bottle over the bottles when you are looking at the cash desk), go out and while the sleeping pill takes effect go to the bathroom (orange) check in the closet (I say now, especially inside buildings, get used to rotating the view often and willingly so as not to forget to check angles and to have a better overview) and take the last bonus. Go back into the building where the assistant was eating and you will find everyone asleep.
Steal the keys and go and give them to L. Now with N go and call the general (the phone is in the building in yellow) when the general goes out, select the L and look out the window when the guard patrolling the office is from behind jump out the window and go to open the office (in red). Enter, stun the guard and open the safe (your name is Lupine for a reason right?) Steal the mechanism and the letter, rummage through the closets, wait a moment and rest the guard, look out the door and as soon as the guard patrols turn go out and re-enter the dormitory (still the same room in front of the door, it's the only lighted window) from the window.
You have to radio the commando, team play is needed again, select N and have her distract the guard in front of the gate (green), with the L crawl out the window and using the cover boxes in the courtyard crawl end to door next to the gate (it is locked) then open it and paying attention to the times return to the dormitory from the window following the same path (marked with the arrows in yellow). Now take N and paying close attention to the patrol outside the walls, (they can discover N), go to the room between the two gates where there is a radio, use it, now you just have to hide the L under the bed, you have to select the bottom edge of the bed by holding down the shift key until the pointer changes and then clicking under the bed.
SILENT MURDERERS
The night has passed, and the reinforcement commandos have arrived, now after that, in the previous mission, we have not killed and slaughtered anyone, the moment of reckoning has come.
(at this time the map placement is with the sea to the south.)
Select the M, put on the wetsuit and let it go down in the water, immerse yourself and defuse the mines, after that, always submerged on the surface of the water (key Q, you are still submerged but you see what is above the water) , head to the beach on the left.
Once here, I recommend that the other Commandos who are on the boat arrive by swimming on the beach, and making them swim "slowly" and away from the "sight" range of the sentry on the lighthouse. Once arrived, make the wall go up, with the harpoon, (the area is highlighted in blue in the image) to M and with a clever "game" of knives eliminate the various sentinels avoiding triggering the alarm (the position of the sentinels are highlighted in red) also remember to eliminate the one on the lighthouse (hidden on the far right in the image) one thing by eliminating an enemy engineer (near the crates on the far left of the image) recover a commando bomb, which you will promptly deliver to G; after this sort of preventive cleaning, make the M go down on the beach, and with the G open a gap in the fence and using the metal detector, discover and defuse the first line of mines (highlighted in yellow on the image), now crawling and paying attention to the mines of the second line, (which you have not yet discovered) make the M arrive in the area highlighted in green and with a skilful launch placed, the sentry along the second fence, once this is eliminated, discover and defuse the other mines too, collect more than you can (of mine) will be useful in case you want to raise the alarm to eliminate a few nice Germans en masse. At this point, select the L, give W the pass, call W with the whistle of the S, and let the S take the pass, now only the officer's uniform is missing for our S and the first objective will be concluded the car through the base gate).
Open a passage in the second fence and with the help of the M eliminate the sentries near the gate on the west side, (in the direction of the beach), be careful to find the right times and ways, I highly recommend the cigarette-knife trick, in practice with the well-positioned throwing of the cigarettes, a sentry was sent out of the range of action of the comrades and promptly eliminated it in complete safety (from now on I take for granted the fact that, both the trick of the BV radio, and the trick of cigarettes, are well used and used, are in my opinion a basic fighting technique, and "impossible" situations for the elimination of the "uncomfortable" sentries are real stupid using these "tricks") once the officer has been eliminated near the car, borrow his uniform and give it to the S, who will promptly dressed and fully shod will use the car and enter the base undisturbed (degree power).
Ok first goal achieved now we can devote ourselves calmly to cleaning the outside of the base from the sentinels, it seems a useless task, but I assure you that, in the later phases of the mission, when the alarm is triggered it is very unhealthy to see one come running crowded with sentries that you had not set up before, without taking into account the fact that there is also a very painful armored car around. If you really don't want to waste a lot of time throwing the knife, you can use the shotgun (you remembered to take rifles and ammunition right?
Here, too, always collect everything you find, especially weapons, usually from my commandos, BV, M and G in the first place, that is, the ones I use to clean have as standard rifle and submachine gun always at maximum ammunition, the rifle for precisely eliminate the sentries that for one reason or another it would be too imprudent to eliminate "silently" and the machine gun in those desperate situations where a swarm of guards will try to kill me), be careful to be well hidden so that alarmed guards will rush en masse towards the sound of the shot but will not give the alarm as when they are dead before detecting you! Only note beware of the gate area, first for the armed guard above the radio watchtower and second for the fact that the guards inside could see through the gate.
Ah, if you find it useful, send the S to use the radio and let the BV drop off near the beach, many prefer to call it after but I really love its ability to take care of the sentries!
Now after this cleaning, let's say when all the guards of the gate (compressed the two directly inside the base and looking outwards), the sentries above the guard turrets (the rifle is essential) are suppressed, we can dedicate ourselves to the car busbar that (provided that the alarm has not been triggered in which case the armored car drive along the entire external perimeter of the base, in this case the trap can be triggered at any point of the perimeter) will be quiet outside the northern walls ( compared to the initial map direction the one with the sea to the south) wisely placed some anti-personnel mines to eliminate any sentries that will rush (remember above all the gate area which seems to be clear but in case of alarm all the guards who will come out of the various buildings they will direct either that gate or the other mirror, and by making the engineer crawl, place the bomb at a distance in the most suitable point, (always save and com unque before attracting the armored car in case you were wrong by placing the bomb observe the path of the armored vehicle and so at the time of reloading the game you know exactly where to place the bomb, obviously the same speech with the anti-personnel mines), now attract the attention of the armored vehicle or of the guards shooting or making you "peck", at that point the alarm will go off and now with the triple force of the mines, the bomb and possibly the accuracy of your rifles, made a nice carnage. Once this is done we can introduce ourselves "stealthily", so to speak after the massacre just carried out.
With all the commandos, except the S, arrive in the area where the M first cleaned up and calmly and coolly enter the various buildings and recover the recoverable items. The most interesting building is the central one (where N was in the previous mission). don't have it with you yet remember to place one as soon as you find it) near the table where you can see a torpedo (in red), and leave it there ready for the fireworks.
Now calmly let BV, S and M climb over the time of the hangar where the submarine is located (here if you allow a small military note, a submarine is an underwater vehicle that remains submerged almost all of the time (modern nuclear-powered submarines are in this category) while in the 2nd WW they were all Submerged as they navigated it on the surface like ships and only dived to attack or avoid dangerous areas).
Here, after having placed the guards (the one in red with the BV and the one in blue with the help of the S to distract her), make the remaining Guards run with a shot, and placing you lying in the middle of the roof and with the help of the rifle eliminate as soon as they go up the stairs (the area where you place the yellow circle the stairs to keep an eye on yellow rectangles) eliminated some people recover the keys of the cell of the allied sailors from the guard highlighted in green.
Now, it's a suggestion, with the M enter the water and dive head to the front area of the submarine building, carefully and silently eliminate the two guards who are in the docks, one of which (the one in the most central area of the map) is a sniper who could give you a lot of trouble if left alive.
Now calmly and using the BV or the M eliminate the snipers that are in the corners of the roof. Once this is done, head to the area to the right of the roof (the one with the stairs that bring you close to the dogs) and with the same tactic of the shot to attract and the rifle to eliminate the funny guys you will be able to wisely reclaim the radio area (buildings behind the hangar) by quite a few sentries.
Now with the spy to whom you have given the keys to the cell, enter the hangar, without suspicious moves, take a reconnaissance tour and keep in mind the position of the various guards and the various sentries, done this go to the cell (use the notebook to show you the room), enter and talk to the sailors who for the moment you will leave safe in the cell, go out and look for the captain, once you find it, talk to us and retrieve the bonus piece. Leave him there and go back to the other commandos.
Now take your time to reclaim the dormitory area (the area of the buildings where the L is located) (go down from the roof via the same staircase you came up from) I recommend looking out the window to observe the movement of the guards inside and if necessary, send the spy to distract some of them and make BV and M act undisturbed, check in all corners and in all possible boxes, recover all the recoverable items, give the G a supply of 3 time bombs and one remote ( for safety, give another commandos two more time bombs) you will find bonus pieces in the commander's building (the one where the safe is), and in the dormitory where the phone is (I wouldn't want to be wrong but you should find three pieces of the bonus , sorry but when I started writing this part of the solution I had already played the mission for some time, in a subsequent release I will correct this lack).
Now finished here, dedicate yourself to the area of the anti-aircraft turrets nearby.
Clean up the guards and before placing the bombs enter the building, eliminate the eliminable and check in all the closets (you can also not enter but you want to put the fun), however at the end place the time bombs near the anti-aircraft batteries of the base (circled in red) another anti-aircraft battery is located near the lighthouse (where you climbed with the harpoon of the M to eliminate the sentries at the beginning of the mission).
Now let's dedicate ourselves to the fuel depot, eliminate the remaining sentries, it's not very difficult you just have to pay attention to the sniper (circled in red, a quick run and knife work by the BV should fix the funny guy), place a bomb at a distance above the fuel depot (in green) and dedicate yourself to the guard posts, (in yellow) inside one of these you will find another piece of the bonus.
All that remains is to clean up the radio area inside the buildings, it should not be a very onerous task and we can dedicate ourselves inside the hangar.
The trick here is to enter undetected with the BV and crawling to get into a position to dominate the neighborhood with the shotgun, I recommend the elevated sidewalk in the upper left as you enter through the rear doors of the hangar (the ones for to understand that they give to the buildings of the radio), once in position you attract the guards with a gunshot and keeping an eye on the various access roads to the ramp you arrange the various guards who arrive.
Keep in mind that this building behaves as if the same building is outdoors and the various rooms within it are standard buildings. Now with a little good will he clears the area of all Germans, even inside the various rooms, and I recommend you check all the wardrobes, (you should find the last pieces of the bonus, check the photo to see if you have taken everything) once the whole area has been cleaned up, there is only one thing to do, enter the submarine and clean it from the various German guards done this (turn all the compartments) check that the hangar door from where you will escape is open (l switch is in the next room where the captain was locked up). Once this is done, let all the sailors and the captain enter the submarine, check that you have all the commandos with you, (including W that you should put inside the backpack, a fun to see the BV with a puppy inside the backpack), last hour check the objectives, if, in addition to the depot and the torpedoes, you have any other objectives to complete (which I doubt) do it now, the base is now completely deserted and accessible.
Once this check is completed, flash the charges in the fuel depot and torpedo depot, take all the Commandos and go inside the submarine, if everything is done in a workmanlike manner, the mission is over.
DEATH ON ICE
Mission on the ice, I must tell the truth, I was also a little disappointed, it is maddeningly simple, with only 3 or 4 passages of medium difficulty.
Let's start, our Commandos have all been captured, and we have only the M available, first thing to do and turn the whole submarine around, eliminating the guards from time to time without raising the alarm (the throwing of the knife in this mission is crucial , I would be inclined in this mission to give up the services of the BV and give the M the second knife) and check in all the wardrobes, we would find the Arctic suit (essential for not freezing) the various tools of the trade of the M and a bonus piece. Once I have cleaned up the inside we go outside (make sure you have worn the suit) I recommend going out at one end and eliminating the guards from the closest to the farthest, giving priority to the sentries on patrol; if for some reason some sentry on the ground will be alarmed and will run to check, do not be scared but have the cold blood to retrieve the knife and fix the unfortunate. Once the deck is in place, we enter the water and starting from the side next to the submarine (the submarine must cover you with respect to the cruiser) eliminate the various guards with the famous cigarette-knife trick.
Now let's devote ourselves to the enemy camp, cross the sea and arrive at the bow of the submarine, here is a piece of medium difficulty as you have to attract the sentry, eliminate it and carry it away on the shoulder to hide it while the others do not control. Following this procedure you will not find many difficulties, in principle you should be able to eliminate all the sentries, and free the various commandos without problems. Check all the buildings and find a bonus (in the house where the radio is). Now eliminate the sentries near the balloon, at this point I would finish the perimeter of the map, clearing the guards, keeping myself away from the ship and if the case in the more complicated points (near the plane and the bomb crates) using the rifle.
Without this we would have the map clear except for the sentries of the ship, here it is up to you to choose, or let yourself be discovered and triggered the alarm or try the more silent approach; in the first case, get ready to eliminate several guards armed with machine guns, it will be essential to hide most of the commandos and with one (BV or M) eliminate the Germans who came with the rifle, it is essential to have a cool head, aim and a large dose of drugs; in the second case, instead, take the M up with the grapple and eliminate the various sentinels without letting me discover and making the ladder go down at the first opportunity to get the BV on board.
I advise you to start from the stern of the ship which guarantees you good coverage, for the rest the only slightly difficult piece is to eliminate the sentry that blocks your way to the central guard tower, I recommend throwing the knife and off with the BV above the turret to eliminate the two gunners.
At this point we are almost at the end, following the objectives (free the hostages, recover the enigma device etc ...) we enter the ship, here the difficult places are two, at the enigma device where you have to pay attention to the patrol sentry, and when you go down the ladders, if there are two guards going down, the most elegant solution to not sound the alarm is to give M two knives and the throwing of the knives will be easy. For the rest the only rules to follow are extreme calm and small steps, when entering a new room the most essential thing is speed.
Once the ship is cleared, search wherever you will find the remaining bonus pieces, in the bunk room and in the torpedo room immediately after it. Now take the G get him to take the balloon and get to where the explosives are, retrieve what you need and enter the ship.
Free the captain and sailors (if you haven't already) and have them board the submarine.
Use the radio when prompted (after retrieving the puzzle device), and all that remains is to place the bombs, three one for each cannon and one for the engine room.
By now we have reached the end, bring the S and the BV to the plane and make sure that the S has the enigma device with all three parts that compose it, let the other commandos get on the submarine and that's it.
OBJECTIVE: BURMA
Medium difficulty mission with some difficult permanent passages. The objectives are simple, contact the holy man and take him away at the end of the mission, find and arm the Ghurka warriors and eliminate the enemy tyrant.
As you can see it is an island connected to the mainland by three bridges. The island (in red) is the part where most of the objectives will take place and especially in its structures you will find all the bonus pieces, the part highlighted in green is the statue of the Buddha (? I don't know! is, then if it is another divinity sorry) where at the end of the mission the tyrant and his garrison will stop, it will be an ideal opportunity to eliminate him. The area in yellow instead is the border (full of sentinels) of the map that allows access to the island through the bridges.
I advise first of all to eliminate the sentries on the map (yellow zone) thus allowing to create a clean working corridor for our commandos, remember that it is of crucial importance to hide the bodies of the sentries in the structures that are scattered around us. around the whole map, by doing so you will not alarm the personal guard of the tirano and you will get out of a lot of difficulties afterwards. I recommend using the BV, the "reclamation" of the area is quite easy, you just have to be careful of the look of the sentries of the island who occasionally take a look at their companions on the other side. If you really want to hurry after the first sentries, get hold of the rifles (take as much as you can as they will then be used to arm the warriors) and by shooting at the sentries you will also call the comrades who are on the island, made in a way to draw attention to us. of 3 or 4 sentries at a time in order to then have time to recover weapons and equipment.
The only points of medium difficulty in this first phase are the reclamation of the various corners (I recommend shooting with the rifle so you will also recall the sentries of the island), and the bridge in the lower left corner. Now, if you have followed the "noisy" tactic or have used the rifle, you will already have the first line of sentries of the island (those that are near the shore) quite thin, while if you have used the "silent" tactic I suggest you swim across (the bridges are still too guarded for my liking) the river and attend to the sentries on the bank, paying attention to the sentries on the rooftops.
Well, having done this we can already solve two objectives:
The first, once you have easily eliminated the sentry in front of the stairs, enter the door at the end of the staircase itself (circled in yellow) and talk to the saint, assimilate the information and continue (for the moment leave him in here, it is the safest place ).
The second, dive into the river and arrive near the bridge at the bottom left, there are two stairways that rise from the river towards the shore, between the two you will find a sewer opening, enter and you will be in the den of the Ghurka warriors, arm them (to arm them select the "look" option and click on the warrior in the same way you used to open the inventory of the commandos, give each warrior a rifle and relative ammunition) and after that we are ready to continue for the moment leave the warriors where they are .
Now let's take care of cleaning the map well and above all finding the bonuses, the latter are all found in the various buildings of the island, so enter everywhere (eliminating all the sentries and guards present there) and search everywhere and I mean also in the basements and in the attics where you will find some nice snipers who if left alive will have fun killing you, ergo return the favor before they can.
The first bonus is in the building behind the holy man's temple, turn the map to the left for simplicity. (highlighted in green on the map).
The second bonus, continue along the bank to the left, enter the building with the U-shaped roof where (on the roof) you will find a nice guard to be eliminated promptly (in red).
The third and fourth pieces of the bonus you will find them in the watchtower by climbing the stairs always continuing to the left.
Now turn the corner to the left (and with it the map as well) you will find a watchtower and the boat you will use to leave once the mission is over, I at this point (being careful to let everyone pass by the road I traveled so far, which is free from sentries and guards) I brought into this structure both the holy man (obviously after you have cleaned the structure from the guards), both the warriors and the members of my command, in fact the structure is the most suitable for hiding without take too many risks and is also the closest to the escape route in case the need arises (the watchtower in yellow, the boat in red).
The fifth piece of the bonus is located in the corner structure.
The sixth piece can be found in the garrison structure, which is located next to the statue of the Buddha, (always in green on the map), as already mentioned since the base of the garrison will be particularly "inhabited", so be careful;
I would recommend cleaning up the inside of the statue as well you won't find anything interesting but at least you will get rid of the snipers who are in the last room above. If you find it difficult to get out of the statue (the ladder to exit is hidden and it takes a millimeter mouse control) I suggest you go through the basement and exit via the river.
The seventh bonus is found in this watchtower (in green), memorize the place highlighted in blue (later on it will be the collection point of enemy grenadiers).
Finally, find the last two structure bonuses in front of the statue.
If you need ammunition or explosives, enter these structures and to open the crates just talk to the fat man (so you complete another goal).
We are at the reckoning, they should remain as objectives to be completed: use the radio with the warrior, kill the tyrant and escape in the boat with the holy man.
Now comes the fun with a warrior go to the attic where the radio is, don't use it yet though.
Now you have two options to kill "only" the tyrant, or to exterminate as much as possible.
In the first very difficult case, place the C on a roof in front of the statue, use the radio and while remaining hidden, let the tyrant arrive (he is the last to arrive, by car moreover, after the reinforcement troops have deployed), come out in the open kill him and start to escape dodging bullets and bombs to the Matrix, get to the boat, let the Santone and the commandos get on and off the mission;
The second possibility is also to eliminate the tyrant's escort, place the P behind the wall to the right of the statue (in red) and at the appropriate time (after using the radio and waiting for all the enemy reinforcements to be placed, I recommend why the reinforcements take sides and the bodies of the enemies killed so far are not alarmed must be well hidden, or they are alarmed and every tactic so far elaborated goes to be blessed) unleash hell with Molotov cocktails, obviously the first to die flambé must be the tyrant (in blue), grenadiers (in yellow) and snipers (in green) and gradually all the others.
One last thing if some group of guards escaped, get them reorganized (they will try to regroup (remember the point I marked in blue)) and eliminate them.
At this point go to the boat and let the holy man and the Commandos get on and off to other shores.
THE BRIDGE OVER THE KWAI RIVER
Simple mission but with great charisma, I found myself playing it whistling the tune of the well-known film.
As soon as we start we think of silently eliminating the patrolling sentries, paying attention to calculating times to hit and hide the various corpses. Once you have eliminated 3 or 4 sentries, you can use the shotgun and continue much faster.
I'll describe them quickly, keep in mind that I list them in ideal order to clean up the map.
Green zone: the area where you start, in the lower left corner of the initial map view, is located at the bottom of the river, you have to pay attention only to the peripheral view of the sentries on the other side of the river.
Red zone: the ledge above the green zone, pay attention to the sentries on the bridge and the patrol on the other side of the river.
Yellow Zone: area partly on the plateau and partly on the edge of the shore, pay attention on the edge of the bank to the sentinel under the bridge and in the plateau to the sentinels near the border of the blue zone.
Blue Zone: the part where to pay more attention especially for the fact that there are snipers stationed inside the huts.
After having cleaned the green area from the sentries, (use the rifle as well done before), the only point to pay a minimum of attention is the guard tower (in green in the image), enter the two huts near the shore, you will find two pieces of the bonus, please check all the corpses and always keep the ammunition level at maximum. To open the crates, use the L after clearing the area. For the moment forget the elephant we would do this later.
Let's move on to cleaning up the red area. I would advise you to place yourself within the blue circle and take the rifle, take care of the guards in sight first and pay attention to the area in red (the exit of the bridge), the guards attracted by the shots will come from here, maybe one or two from below (the transition scale from the green area to the red area, in yellow in the image).
Cross the bridge eliminating the sentries (they are snipers) that are above, arrive crawling in the Yellow area, here I would recommend to silently eliminate the two guards at the entrance to the bridge (the cigarette trick works wonders) and get off already at the bank of the river temporarily leaving out the prisoners' huts.
Silently take care of the guards near the shore and free the prisoners kept in the cages at the edge of the river.
To do this, a minimum of timeliness is required. Make sure you have eliminated all the guards, at this point use the action option (click with the shift key pressed on the base of the suspended cage (in red)) on the cage, it will fall into the river, dive and dive, click again with the action option and open the cage, the prisoners will come out and escape.
Now let's deal with the prison area.
Pay attention to the area in red there is the peripheral range of view of the sentries on the edge of the map, so be careful when you move and hit.
For the rest, eliminate the guards and I recommend that you eliminate the guard at the bottom left of the image by opening a breach in the fence (in yellow).
Enter and check everywhere in the hut in red you will find a bonus while in the one in yellow you will find the explosives to blow up the bridge.
Let's deal with the blue area of the map.
I advise you to place yourself in the green area with the P in order to have the possibility to use the Molotov cocktails, (obviously the two guards highlighted in red should already be eliminated) in order to have an excellent point from where to shoot with the rifle at guards who will arrive from the area highlighted in yellow. Throw a Molotov cocktail at the stationary patrol (blue circle), immediately afterwards take the rifle and eliminate any reinforcement that arrives, if everything goes well you should still have two sentries alive in the area by the river (in orange) that you will eliminate without problems calmly later. Dedicate yourself now to enter all the buildings you will encounter, open all the wardrobes and do not miss any stairs or openings, in fact there will be a few snipers stationed that could ruin the party outside if you do not suppress them quietly now.
In the various buildings you will also find all the bonus pieces, except one that we will recover later.
Here we are at the end of the mission.
Enter the building highlighted in yellow (approach by crawling inside there is a sniper who will want to give me an unwelcome gift), and eliminate all the sentries, after that exit and go to the point in red to free the prisoner who will ask you to bring him in the bridge model room to show you the best spots on the bridge to place the bomb. Take him to the model room (zoom in yellow on the image the point where the bridge is in green), after that there are only two objectives left to complete, destroy the bridge, and cross the river with the elephant.
For the second point, have him cross the river at the L (perhaps by swimming to optimize the time) and take him to the elephant (at the point where you started the mission) let him get on the back and guide the elephant with the CURSOR keys on the keyboard and not with the mouse. Cross the river and the objective is complete. Now place the bomb on the bridge, near the barrels in the center of the bridge, where you will find (check on both sides) the last piece of the bonus.
At this point go and use the telegraph and enjoy the ending!
SAVING SOLDIER SMITH
Location: Cherbourg, France
Personal: Tiny, Duke, Inferno, Lupine
Introduction:
June 6th arrived. With the landings in Normandy a third front was created and the war for the liberation of Europe began. The beaches of Juno, Omaha, Sword, Utah, and Gold bear witness to the landing of hundreds of thousands of men who form the first landing head. The next key objective is the capture of Cherbourg which will allow the construction of a permanent port to receive the necessary supplies and reinforcements to fortify the allied positions and continue their advance on the continent. But the Wehrmacht troops, under the command of Erwin Rommel, initially baffled by surprise, are reorganizing to launch a decisive counterattack and push back the allied troops at sea.
During the week of June 19th, violent thunderstorms hit the Canal rendering the ports of Mulberry Harbors prepared on the Normandy beach unusable. The taking of Cherbourg is vital to receive reinforcements and especially the armored units with which to face the German Panzer Divisions. The most desperate combat of the Second World War is about to break out on the rural landscape of Normandy.
Objectives:
-Care Smith.
-Steal the radio codes from the safe
-Smith needs to radio the HQ
-Resist the invasion (bonus).
-Destroy the tanks (bonus).
Secondary objectives:
-Release the Green Cap.
-Save the Sapper.
-Save the sniper.
-Prepare your men for the invasion that is about to begin (bonus).
Tips:
-To cure Smith you need a first aid kit.
-Find the Trance.
Solution:
-RELEASE THE GREEN CAP-
Have Lupine crawl to the building where Tiny was captured and stop him near the door just below the balcony. Wait for the officer on the balcony to start walking west, then Lupine should start climbing the wall. Knock the officer out of action and look through the door leading inside.
Additional note: if commandos hit a person more than once it will take longer for them to wake up.
Wait for the patrolling guard to stop right outside the door then quickly enter and take him out. Enter the bathroom and close the door. Wait until the guards in front of the door look away, then Lupine should quickly exit and climb the ladder to the third floor.
Throw a pack of cigarettes to lure the stationary soldier out of the room where Tiny was captured. Take out the soldier, enter and take out the lieutenant before quickly freeing Tiny. He should tie up the lieutenant and then the guard outside. Check the chest to find Tiny's equipment which consists of a knife, a pack of cigarettes, a pistol, a recall and remote control.
Climb the ladder to the attic and take out the soldier and officer here. Go back down and fire a shot near the ladder leading to the second floor. Wait here for the four soldiers who climb up from the second floor, then quickly kill them.
Go down the ladder then check all the cabinets, drawers and chest to find a pack of cigarettes, binoculars, canned food, some first aid kits, some sniper rifle ammo, a rope ladder and first two pieces of the mission bonus.
Stop at the top of the stairs to the first floor and fire a shot to lure the three guards to the first floor. Kill them all with the gun, then check the worker's body for a welding burner. Go down the stairs to the first floor and check the closet for a pack of cigarettes, two slices, some canned food and some first aid kits.
Have Lupine unlock all the doors on the first floor and exit the door under the balcony.
Take out the patrolling guard west of the house, then throw the body inside.
-SAVE THE ZAPPATORE-
Tiny should now crawl to the west edge of the map, then go north. Stop behind the worker who is standing near the pile of sandbags, then stab him. The officer to the east will come to investigate. Get your gun out and kill him. The patrolling soldier to the north will also come to investigate: kill him with the gun and leave the three bodies here.
Tiny should now climb up the pole next to the sandbags and swing towards the building where Inferno was captured (watch out for the soldier with the machine gun who occasionally looks out of the window).
Enter the building and wait in the attic. When the soldier with the machine gun is looking through the first floor window, Tiny should go down and take out the worker by the ladder. Take the body to the small room where Inferno is bound and free it. Hell should check the worker's body for a mine detector and anti-tank mine.
Wait for the soldier with the machine gun to return to the second floor, then Tiny should take him out and hide the body with that of the worker. Go down the stairs to the first floor and take out the soldier standing near the door as well as the one peeking out the window. Get Lupine in like Tiny did before and unlock all the doors on the first floor. Check the closets and the chest to find a pack of cigarettes, a rope ladder, canned food, a shear, some grenades, some first aid kits and the third piece of the mission bonus.
Go up the stairs again to the second floor and fire a shot to lure the officer and soldier looking out the window, then kill them both with the gun. The soldier from the attic will come down to investigate - kill him too. Climb the ladder to the attic and shoot the German sniper, then grab his sniper rifle.
Gather all the commandos and exit through the back door (the one facing the west side of the map).
Tiny should drop the lure near the metal fence to lure the patrolling soldier nearby. When he comes to investigate take him out and then hide the body inside.
- SAVE THE SNIPER -
Tiny should return to the stairs near the commandos' starting position and crawl east. Take out the stationary soldier who is looking at the river, then quickly hide the body a little to the west to avoid being seen by the patrolling guard nearby. Fire a shot on the ground to lure the patrolling soldier, the stationary guard facing the street, and the guard on the stairs behind the building where Duke was captured. Kill the three soldiers as they circle the corner then leave the bodies there.
Hell should now arrive and huddle against the wall along the north side building (watch out for the enemy soldier peeking out the penthouse window). Throw a grenade to the side of the building to take out the four soldiers near the barbed wire as well as the one looking outside the house.
Send Lupine to peek out the window and when all is safe climb inside and unlock the front door and exit again quickly. Tiny should peek through the door and wait for the patrolling soldier from the second floor to come down. Quickly enter and take him out. Check the drawers here to find a pack of cigarettes, binoculars and the fourth piece of the mission bonus.
Climb the stairs to the second floor and take out the soldier who peeks out the window towards the street. Bring in Inferno and throw a grenade into the adjoining room to take out the officer, soldier, and sniper peeking out the window at the river. Now Tiny should take out the soldier beating Duke and free him.
Check the closet and drawer in this room to find a pistol, a shear, some first aid kits, sniper rifle ammo and the fifth part of the mission bonus. Go back to the first floor but don't forget to get the dead sniper ammo.
Place Tiny, Duke and Inferno with their guns drawn at the top of the ladder leading to the basement. Fire a shot to lure the guards to the back, kill all three of them then take Tiny and Lupine down the ladder.
Fix the remaining guard standing near the radio and get Lupine to open the safe. Get the radio code in there and gather all the commandos back to where the mission started.
- USE A FIRST AID KIT FOR SMITH -
Duke should be able to sneak up on the soldier standing on the dock across the river, followed by those near the railing and stairs near the dock (5 dead in total).
Then Inferno should cut the barbed wire with the shear and use the mine detector to clear the embankment. Don't forget to get some mines for Inferno.
Tiny should then jump into the river near the cabin of the crashed plane and dive. Enter the plane through the small hole and kill the pilot in there. Check the crate to find a pack of cigarettes, binoculars, a gun, canned food, some first aid kits, as well as the sixth and final piece of the mission bonus.
Exit and join the rest of the group on the embankment.
Tiny should now climb onto the pole near the cabin of the crashed plane and slide across the river. Go down, then go up the ladder near the church and take out the two soldiers standing nearby. Leave both bodies there and go down the stairs again to the embankment.
Now Tiny should go south and climb the stairs here (near the 5 dead soldiers Duke shot earlier). Take out the guard behind the pile of sandbags, followed by the one lying on the ground to the north.
Lupine should cross the river and climb the stairs to join Tiny. Then he should unlock the metal chest next to the sandbags to find some sniper rifle ammo and two remotely controlled bombs.
To the south of the church there is a rectangular hole. Tiny should go north and take out the soldier standing south of the rectangular hole (near the white wall). Turn around to take out the guard crouched behind (under the arch with the words "Hotch Kiss" at the top), drag and drop the body with the guard from before. Calmly look around the battlefield and there will be two officers who keep running from place to place. None of the officers frequently stop near the lieutenant stationed southeast of the 'Hotch Kiss' arc. Take out the second lieutenant and throw the body somewhere safe when the officer is not around. Wait again and a soldier with a machine gun will come to replace the lieutenant: take him out and throw the body as before. Wait for the officer to return, then take him out.
Go back to the same spot, then take out the crouched soldier to the north (near the lamppost and scattered sandbags). Hide the body somewhere safe and go back again to wait for the second officer. When he comes, take him out and bring Duke.
Duke should shoot the enemy sniper at the southeast edge of the map and take his shotgun. Tiny should then go to the building northwest to the sniper and take out everyone inside. There are four soldiers on the first floor and one on the second (near the stairs). Get Lupine over to unlock the metal chest and he will find some grenades.
Tiny should go north to the huge piece of wall and take out the lieutenant, then the soldier who is shooting towards the church and then the enemy sniper who gets the shotgun ammo.
Go behind the wall and take out the three soldiers who are shooting at the church. Go north again and take out the sniper lying on the other side of the railing. Now Tiny will take out the sodato, southwest of the dead sniper, who is shooting at the church (near the railing), followed by his colleague who is crouched on the stairs below him. Head to the church and go to the small guard post near the concrete wall and take out the soldier standing there.
Get Duke to walk up and shoot the two soldiers at the bottom of the north staircase as well as the soldier next to the German vehicle standing on the barbed wire near the northeast corner.
Now Tiny should take out the lone soldier on the right side of the church, then the one in the rectangular hole by sneaking up from behind. Get Lupine to the hole and open the canister to find canned food, binoculars, a remote controlled bomb, a bazooka and some sniper rifle ammo.
Now send Tiny to the north side of the map to clear it of the two soldiers left here, as well as the worker working on the blocked German vehicle. Get Lupine into the church through the small hole in the wall and open the main door from inside. Treat Smith with the first aid kit and escort him to the radio. Smith should use the radio to contact Headquarters.
- PREPARE FOR THE INVASION - (MISSION BONUS)
There is a difficult goal to accomplish. For starters, there are a total of 11 Allied soldiers including Smith. But Smith will not take part in the fighting because if he dies the mission fails. So there are ten of them left. Of these ten, eight have guns and are those of the church. The ninth soldier is the one who stood next to Smith when he was wounded, and he carries the gun and the bazooka. The last soldier is the one crouched near the northwest edge of the map (near the forests).
The first thing to do before anything else is for Inferno to discover and deactivate all the mines on the embankment. There are 48 mines in all. Distribute them among the commando inventories, then leave the last eight to be taken later.
The hardest part is positioning the soldiers and explosives so that they do as much damage to the invading German forces as possible, while preserving the commandos and allied soldiers.
First of all, have Inferno go to the southwestern edge of the map. Place a remote control bomb on the narrow road near the east edge of the map.
Head to the northeast church road that leads to the east edge of the map and place an anti-tank mine here. Now place another remote control bomb on the road on the right side of the church, but the bomb must be placed near the south edge of the map (between the two street lamps slightly south of the intersection). The last remotely controlled bomb must be placed on the intersection itself.
The next thing to do is have Duke collect every sniper rifle ammo that can be recovered by any sniper across the map, because they can be used later.
The last thing to do is to put mines around the church. The remaining mines are scattered over the rest of the map possibly near stairs and the west side of the concrete bridge because soldiers tend to run around there.
When this is done, get everyone into the church and hide in there. Have Duke lie down on the roof of the church. Launch the invasion and watch the German soldiers blow to pieces on the mines. Remember to keep an eye on the first bomb and as soon as the tank passes over there, detonate it immediately.
Additional Note: Get Inferno to join Duke on the church roof and help him take out some soldiers with grenades.
When the first wave is over, wait for a while and then the second wave will come with the second tank. The antitank mine to the north will take care of the problem.
Wait for the third wave to arrive, then detonate the second bomb to destroy the third tank. Again wait for the fourth wave, then detonate the last bomb to take out the last tank.
Duke will then have to shoot the German soldiers who are running around the concrete bridge. Kill as many soldiers as possible and try not to miss them. Hopefully the mines have killed most of the soldiers. If Duke is running out of ammo, have allied soldiers clean up any remaining enemies, which should be pretty easy to do right now. Mission accomplished!!
Quest Bonus Locations (6 in total):
-Two pieces found in the drawers located on the second floor of the building where Tiny is captured (in the bedroom and in the bathroom).
-A piece found in the cupboard located on the first floor of the building where Inferno is captured.
-One piece Found in the drawers located on the first floor of the building where Duke is captured.
-A piece found in the closet located inside the room where Duke is captured.
-A piece found in the crate located in the crashed plane.
THE COLDITZ CASTLE
Location: Colditz Castle, East Germany
Personale: Tiny, Duke, Tread, Spooky, Lupin
Introduction
In a small town in East Germany, on top of a hill, surrounded by the River Mulde, stands the impregnable fortress of the Third Reich, Colditz Castle. Now converted into a prison, it houses high-ranking military personnel made up of Allied prisoners who have tried to escape from other camps.
Colditz is considered by the Germans a 'sonderlager' that is a maximum security prison, Colditz is the pride of the German penitentiary system, considered 'escape proof'. For Allied prisoners, the only way out is death.
Objectives:
-Save the Thief from certain death without setting off the alarm.
-The format of the code was hidden by General Heinz.
-The encrypted plan is held by Major General Rudolf.
-Unite the three parts of the secret plan and broadcast it with the allied radio.
- Escape in the balloon.
Secondary objectives:
-Distribute enemy uniforms to prisoners so they can escape (58).
Tips: None
Solution:
-TINY IN ACTION-
Have Tiny stab the patrolling soldier near the greenhouse on the right, then hide the body in the greenhouses. Drop a decoy and hide next to the greenhouse to the east. Activate the call to lure the patrolling guard from the west, then take him out from behind when he comes to investigate.
Check one of the bodies for a pack of cigarettes and pull it to attract one of the lieutenants who are talking near the greenhouses. When he comes for the pack of cigarettes take him out, then take out the second lieutenant and hide the bodies in the greenhouses.
Hide next to the house to the west and wait for the patrolling guard to arrive. When he turns his back on you take it out, then leave the body there for now.
Go around the back of the house and take out the lieutenant who is standing by the river and throw the body with the one of the guard from before. Enter the house west of the greenhouses through the door facing north and kill the lone officer in there. Check the closet here for binoculars, a man trap and a poison syringe. Climb the ladder to the attic and take out the lone soldier on patrol here. Go down and go to the bedroom and here too take out the lone soldier on patrol. Check the closet and also the one in the bathroom to find a pack of cigarettes, a poison syringe, and some first aid kits.
Go to the kitchen and take out the two workers. Check the cupboards to find four bottles of wine and some canned food. Open the door leading to the office and fire a shot to attract the officer and second lieutenant who are talking to each other. Kill them both, then wait for a soldier and a worker to come down from the attic: kill them. Check the cabinets and drawers in the office to find binoculars, a bottle of wine, a pistol, a poison syringe, some first aid kits, some sleeping pills, some smoke grenades and some Molotov cocktails. Exit and drag the two bodies inside.
Exit the door Tiny came from before and enter the door of the house opposite. Fire a shot to lure the two lieutenants sitting at the table and kill them both, followed by the soldier who will come running from the attic.
Go back outside and enter the small greenhouse next to the house. Check the drawer to find a bottle of wine, a poison syringe and a shovel. Enter the next room and check the closet for three bottles of wine, a gas grenade, and some first aid kits.
Exit and enter the building to the north then take out the lieutenant and the worker. Check the shelf and table for canned food, a bottle of wine and some first aid kits.
Go outside and take out the patrolling guard outside the gate leading to the brewery complex. Enter the complex and go inside the large building south of the west gate. Take out the two workers and enter the small office to kill the officer.
Check the filing cabinet and table to find a poison syringe, a smoke grenade, two packs of cigarettes, three bottles of wine, some sleeping pills and the first two pieces of the mission bonus.
Enter the blue door and take out the five workers, followed by the second lieutenant. Check the crate for a shovel, some gas grenades and some first aid kits.
Go back outside and take out the two workers near the truck to the south. Enter the building south of the east gate and kill everyone inside with the gun. Go back outside and take out the soldier patrolling the east gate, then hide his body inside.
Climb the ladder to the roof and take out the three soldiers here, then leave the bodies there (make sure no one sees them). Go back out of the brewery complex and take out the guard to the south of the complex (east of the farm where Tiny started earlier). Go east and take out the patrolling guard between the brewery wall and the river.
-COOPERATION BETWEEN TINY AND DUKE-
Duke should now take out the stationary guard to the west and hide the body behind the trees. Wait before the guard, who patrols the road leading north, stops at the intersection, then tie him up and hide the body as before.
Duke should now hide near the trees near the bridge and wait for the patrolling guard to come to the end of his road. Take out the soldier, then shoot the sniper on the balcony of Castle Colditz. Get Tiny to join Duke by going across the bridge.
Tiny should now enter the house near the bridge. Take out the lieutenant who is reading the newspaper, followed by his colleague standing by the table. Check the wine rack and table to find a poison syringe, four bottles of wine, some sleeping pills and some canned food.
Have Duke crawl along the road to the north (not too close, near the east edge of the map) and shoot the sniper with the shotgun sticking out of one of the windows of Colditz's round tower (near the river).
Tiny should crawl through the trees west of the north road, take out the lone officer standing there, and then hide the body behind the brick wall to the east (watch out for the patrol officer to the north).
Take out the patrol officer to the north and move on.
Throw a pack of cigarettes to lure the patrol lieutenant, then take him out.
Tiny should crawl to the stationary soldier who is watching Colditz (near the wire fence around the factory compound), then hide his body in the dark corner near the factory.
Get Duke to the dead soldier's position and aim at Colditz Castle to take out the German sniper.
Now Tiny should take out the soldier patrolling back and forth between the factory and the house to the north, then hide the body as before.
Tiny should enter the house through the side door. Take out the soldier who leans out the window then check the green closet to find a poison syringe, a smoke grenade, some gas grenades, and the third piece of the bonus mission.
Fire a shot to lure the officer and the lieutenant into the adjacent room, who will arrive: kill them both. Check the files and the officer's desk for canned food, binoculars, a bottle of wine, some first aid kits as well as the fourth and fifth pieces of the mission bonus.
Go back out of the factory complex and take out the lone officer standing outside the two small houses south of the factory complex (watch out for the patrol), then hide the body in the corner.
Take out the patrolling guard north of the farm complex, followed by the two workers near the main gate (watch out for the patrol), then hide the bodies of the two workers somewhere safe.
Tiny should now enter the door leading to the blue-roofed house just across the street from the factory complex. Use the pistol to take out the lieutenant, followed by the officer and the worker. Another officer will come down from the attic: kill him. Check the two cabinets in the house to find a poison syringe, ladder, four wine bottles, some sleeping pills, some first aid kits as well as the sixth and seventh pieces of the mission bonus.
Go outside and take a look through the door that leads to the red roofed building to the south. Wait for one of the lieutenants to leave the table, then have his colleague follow him. Check the table and shelves to find two poison syringes, six bottles of wine, some canned food, some sleeping pills, some first aid kits and the eighth, ninth and tenth pieces of the mission bonus.
Go up the stairs to the second floor and take out the patrolling soldier. Enter the bathroom and check the drawers to find a pack of cigarettes, a Molotov cocktail, a poison syringe, some first aid kits and the eleventh piece of the bonus mission. Get Duke in and fire a shot: Kill everyone trying to get into the bathroom and heal any wounds with canned food or first aid kits.
Check the drawer in the bathroom next to this for canned food, a poison syringe, three bottles of wine. Some sleeping pills and the twelfth piece of the mission bonus.
Go up the stairs to the third floor and check the closets and drawer to find a ladder, a smoke grenade, canned food, a bottle of wine, a Molotov cocktail, binoculars, two poison syringes, some ready-made kits. rescue as well as the thirteenth and fourteenth pieces of the bonus mission.
Go back outside and have Duke shoot the patrol that goes around the place. Shoot the patrol leader first, followed by the two men behind him, then take the patrol leader's uniform: hide all three bodies inside one of the houses that are already safe.
-CONTACT SPOOKY AND TREAD-
Take out the soldier who is looking at the River Mulde just to the west, followed by the stationary guard to the east of the church where Spooky is. Have him arrive and wear the patrol leader's uniform as a disguise. Don't forget to give him all the poison syringes Spooky has collected so far.
Now enter the building east of the church. Take out the seated officer, followed by the standing officer. Check the closet and drawer to find a poison syringe, four bottles of wine and some first aid kits. Fire a shot to lure the soldier and the worker into the bathroom: as they try to get through the door, kill them both. Check the closet in the bathroom to find a Molotov cocktail, canned food, a poison syringe and some sleeping pills.
Spooky should go into the building to the west of the red roofed building (the one in the middle of the row of three houses), and check the closet for a gas grenade, some Molotov cocktails and some smoke grenades.
Go back outside and enter the building to the west. Check the wine rack on the first floor and find five bottles of wine. Go up the stairs to the second floor and check the closet for a pack of cigarettes, binoculars, a gas grenade and a smoke bomb as well as some first aid kits. Go back down and exit through the back door. Enter the small house behind the row of three houses and check the cupboards and drawer to find a shovel, two bottles of wine, some canned food, some first aid kits, some sleeping pills as well as the fifteenth, sixteenth and seventeenth piece of the mission bonus.
Get Spooky to distract the soldier standing at the bottom of the ramp leading to Colditz. Tiny should take out the soldier standing near the house just north of the church, followed by the guard Spooky is distracting, then throw both bodies near the house.
Have Spooky enter the house and check the closet on the first floor to find three bottles of wine, some canned food, and some sleeping pills. Go up the stairs to the second floor and check the drawer for a poison syringe and some sleeping pills.
Go back outside and Spooky should distract the lieutenant standing near the Kubelwagen northeast of the map (not the one reading the newspaper). Tiny should take out the two soldiers standing guard outside the small chapel nearby, and hide the bodies near the trees. Then Tiny should take out the lieutenant who is reading the paper, followed by the one Spooky is distracting, and then hide the bodies as before.
Get Spooky to distract the patrolling guard near Tread's position who should take him out and hide the body near his starting position (watch out for the soldier standing near the grating of Colditz's main entrance). Gather everyone near the ramp leading up to the castle and give Tread all of his equipment that was collected earlier.
- GAIN ACCESS TO THE INSIDE OF 'SONDERLAGER' -
Have Tiny go up the ramp and shoot the soldier at the top, then hide the body near Colditz's main gate. Then Spooky should distract the guard in front of the house near the main gate.
Have Tiny take out the patrolling soldier near the main gate, followed by the smoking lieutenant nearby, the one Spooky is distracting, and also the lone soldier standing by the railing looking west.
Spooky should enter the house and check the table for a bottle of wine and some Molotov cocktails. Go up the stairs to the second floor and check all the furniture here to find a bottle of wine, a man trap, two poison syringes, two German rifles, some gas and smoke grenades, some Molotov cocktails, some canned food, some first aid kit, and some sleeping pills.
Spooky should enter the castle courtyard, where Lupine is about to be executed, by going through the main gate. Distract the soldier at the top of the stairs who is looking at Lupine and the firing squad. Send Tiny to take him out and hide the body near the corner.
Tread should join him and drop two Molotov cocktails to burn the firing squad and his lieutenant. Talk to Lupine to free him and reunite the commandos in the castle courtyard.
-FIND THE THREE PARTS OF THE SECRET PLAN-
Additional note:
Due to the complicated interior of the Conditz Castle, select a target and click the? Target? Icon. to know which path you have to take.
First, the code was hidden by General Heinz. Follow the arrow inside the door at the top of the stairs. Enter the second door to get to a large dining room.
Get Spooky to distract one of the lieutenants while Tiny silently takes care of everyone. Tread should go in and throw a Molotov cocktail at General Heinz and the officer who is talking to him. Check the coat hanger for the code, then exit the dining room.
The arrow will point towards the stairs to the codebook, which is held by Field Marshal Desfell. Go up the stairs and use the arrow again to determine where to go: it will point towards a door. Tiny should go inside to find another dining room. Take out the patrolling soldier and have Tread throw two Molotov cocktails to burn everyone down. Check the left drawer to find a bottle of wine and some Molotov cocktails.
Go out the only door and have Spooky distract the patrolling soldier. Tiny should take out the worker, followed by the guard Spooky is distracting. Follow the arrow again which leads to an area with many stairs.
Get Spooky to distract the guard on the top level, while Tiny take out one on the middle level and then the one that Spooky is distracting.
Enter the door just at the other end and take out Field Marshal Desfell, followed by the other soldiers in the room, then check the hanger for the code book. Check the cupboards and weapon rack for some sleeping pills, some first aid kits and a German shotgun.
Go out the only door and have Spooky distract one of the patrolling soldiers and allow Tiny to take them all out. Check the furniture to find a pack of cigarettes, canned food, two poison syringes, some first aid kits and some sleeping pills.
Exit the only door to return to the courtyard, go through the next door and have Spooky inject the patrol officer. Tiny should arrive and take out the soldier and then Major General Rudolf.
Check the hanger for the encrypted floor. Search all the shelves to find a gas grenade, canned food, a poison syringe, three bottles of wine and some sleeping pills.
-SAVE THE ALLIED PRISONERS-
Get Spooky to distract the guard at the bottom of the stairs while Tiny comes in to kill her. Enter the door and have Spooky distract the patrolling soldier while Tiny clears the room as usual. Check the drawer to find an antipersonnel trap and some smoke grenades.
Go out the only door and have Spooky distract the patrolling guard while Tiny takes him out.
Enter the door indicated by the arrow to reach another huge "courtyard" area. Enter the building on the left as indicated by the arrow.
Spooky should take out the guard at the top of the stairs, then distract the lieutenant by the door as Tiny enters to kill. Take the lieutenant's uniform and pass it to the allied prisoner. Go to the next room and have Spooky take out the officer and lieutenant with the injection while Tiny takes care of the worker and soldier. Pass three uniforms to the allied prisoners and go up the stairs to the second floor.
Get Spooky to distract the guard at the top of the stairs while Tiny should go behind and take out the lieutenant behind the stairs, then pass the uniform to the prisoner nearby.
Take out the patrolling guard in the adjacent room, then the one Spooky is distracting. Take out the officer and lieutenant next to the allied prisoner and pass him the uniform.
Spooky should distract the remaining soldier on this floor, while Tiny silently takes him out and then passes the two uniforms to the two remaining allied prisoners. Check the furniture for a smoke grenade, canned food, a poison syringe, a pack of cigarettes, three bottles of wine, some ladders and some first aid kits.
Climb the stairs to the third floor and take out all the enemies with the same system as before (Tread will help if necessary). Pass the uniforms to the five allied prisoners, then stop near the ladder leading to the penthouse and fire a shot to lure the enemies down: kill them and pass a uniform to the only allied prisoner in the penthouse. Check the furniture on the third floor to find a Molotov cocktail, a poison syringe, two packs of cigarettes, three bottles of wine, some canned food, some ladders, some sniper rifle ammo, some sleeping pills and some. first aid kit.
Go back out to the 'courtyard' and enter the building which is brown in color (the short one).
Get Spooky to distract while Tiny clears the foreground of enemies as usual, then pass two uniforms to two allied prisoners. Check the cabinets in the kitchen to find a poison syringe, three bottles of wine, some canned food, some sleeping pills, some first aid kits and the XNUMXth piece of the mission bonus.
Go down the stairs to the basement and clear the place of the enemy soldier, then pass the uniform to the only allied prisoner. Check the shelves to find three bottles of wine, some canned food, some Molotov cocktails, some first aid kits and the XNUMXth and XNUMXth pieces of the mission bonus.
Go back outside to the 'courtyard' and enter the door that leads to the building just to the right of the entrance where the commandos first entered. Use Tiny and Spooky to clean up the whole place as usual, then pass four uniforms to the allied prisoners. Go back outside and enter the next building. Take out the lone patrolling soldier and check the closets for a poison syringe, some ladders, and some first aid kits.
Climb the stairs to the second floor and clear the entire area, then pass some uniforms to the six allied prisoners. Go down the other stairs into a small room and take out the lone patrolling soldier, then give the uniform to the allied prisoner.
Go down the ladder and take out the soldier and the lieutenant, then the two officers in the adjacent room then pass some uniforms to the two allied prisoners. Go back to the second floor and go up the three stairs to the third floor and clear all the rooms of the enemies. Pass some uniforms to the four enemy prisoners on the third floor.
Climb the ladders to the attic from the rooms on the third floor, then clear the whole place of enemies. Pass some uniforms to the three allied prisoners, then don't forget to climb up to the roof from one of the attics to join the allied prisoner there.
Are you going back to the? Courtyard? and avoid the radio tower. Enter the building next to this, which contains a large theater. Clean up the theater and pass a uniform to the lone allied prisoner.
Exit the door behind the stage and clear the place, then pass some uniforms to the two allied prisoners. Check the hanging shelf for an antipersonnel trap, shovel, poison syringe, and the twenty-first piece of the mission bonus.
Go up the stairs to the second floor and kill the patrolling soldier and the lieutenant then pass some uniforms to the three allied prisoners. Check the shelf for a bottle of wine, canned food, some ladders and some first aid kits.
Climb the stairs to the third floor and clear the place of enemies, then pass some uniforms to the two allied prisoners. Check the furniture for a pack of cigarettes, a poison syringe, canned food, some ladders, some first aid kits, some sleeping pills, and the twenty-second, twenty-third, and twenty-fourth pieces of the mission bonus.
Go up the stairs to the fourth floor and take out all the enemy soldiers who are here and pass some uniforms to the two allied prisoners.
Check the hanging shelves to find a poison syringe, a Molotov cocktail, three bottles of wine, some ladders, some sleeping pills, some canned food, some first aid kits as well as pieces 25, 26, 27 and 28 of the mission bonus.
Enter the adjacent area through the only door, kill all the enemies and pass uniforms to the six allied prisoners. Check the furniture to find a gun, a bottle of wine, some gas grenades, some sniper rifle ammo, and the XNUMXth and XNUMXth pieces of the mission bonus.
Climb the ladder to the attic and pass uniforms to the two allied prisoners.
-THE GREAT LEAK-
Now go back to the 'courtyard' and go to the radio tower. Take out the lone soldier then check the chest for a Molotov cocktail. Fire a shot to lure the enemies to come and investigate: as they come down the ladder, take them all out. Go up to the second floor and check the crate to find some sniper rifle ammo then repeat the process to lure the enemies from the third floor. Climb to the top of the radio tower and use the radio to contact the Q, G, then pass a uniform to the allied prisoner.
Gather all the commandos then exit Colditz and go to Tiny's starting position to board the balloon. Mission accomplished!!
Locations of the pieces of the mission bonus (30 in all):
-Two pieces found in the furniture located inside the small office of the large building south of the west gate of the brewery complex.
-Three pieces found in the furniture located inside the house north of the brewery complex.
-Two pieces found in cupboards located inside the blue-roofed building just across the street from the factory complex.
-Three pieces found in the furniture located on the first floor of the red-roofed building just across the street from the factory complex.
-Two pieces found in drawers located on the second floor of the red-roofed building just across the street from the factory complex.
-Two pieces found in cupboards located on the third floor of the red roofed building just across the street from the factory complex.
-Three pieces found in the furniture located in the small house behind the row of three houses (near the church).
-A piece found in the closet located on the first floor of the brown building in the prisoners 'courtyard' area.
-Two pieces found in the shelves located in the basement of the brown building in the prisoners 'courtyard' area.
-A piece found in the hanging shelf located on the first floor of the building next to the theater.
-Three pieces found in the furniture located on the third floor of the building next to the theater.
-Four pieces found in the hanging shelves located on the fourth floor of the building next to the theater.
-Two pieces found in the furniture located in the area adjacent to the fourth floor of the building near the theater.
Mission Bonus 9
Location: Unknown
Staff: Inferno, Tread
Objectives:
-Destroy all enemy vehicles
Secondary objectives:
Eliminate the enemy grenadiers.
Tips:
Using the bazooka.
-Take the anti-tank mines.
-Take the smoke grenades.
-Use grenades to distract the enemy.
Solution:
Board the Inferno and Tread tank, then wait for the tracked vehicle to make its rounds. As soon as Inferno has a good view, fire a bullet to destroy the tracked vehicle.
Maneuver slightly north and fire another bullet to take out the patrol tank.
Go east and shoot the two grenadiers to take them out. Quickly fire again at the other grenadier who comes to investigate, then followed by the tank patrolling near the northeastern corner of the map. Destroy the tank patrolling from west to east followed by the last tank patrolling near the northwest corner of the map. Mission accomplished!!
PARIS BURNS
Location: Paris, France
Personale: Tiny, Duke, Fins, Inferno, Tread, Spooky, Natasha, Lupin, Whiskey
Introduction:
August 1944. Three months after the invasion of Normandy more than half of France is under Allied control. On the morning of the 19th, General Eisenhower sent the 2nd French Armored Division, with the support of American troops, to liberate Paris. After four years of occupation, the dream of millions of French people is about to come true.
But Hitler has different plans. His orders are clear: The Paris that falls into the hands of the enemies will be nothing but a heap of ruins. General Dietrich von Choltitz, commander of the occupation troops of Paris, is in charge of demolishing the city. From his headquarters in the Meurice Hotel he oversaw the work of the 813th Corps of German Engineers who planted tons of explosives in the city.
Objectives:
-The Sapper must deactivate the detonating device in the General's office.
- Contact Natasha.
-Use the radio on top of the tower.
Secondary objectives: None
Tips:
-Get mines and grenades.
-Steal a tank.
-Get the key to the tower from the SS General.
Solution:
Have Tiny climb up and hide behind the small shed. Wait for the patrolling soldier to leave, then kill the seated soldier. Drag the body into the hut and kill the patrolling guard when he returns.
Take out the seated lieutenant, then the workers. Spooky should take the lieutenant's uniform to disguise himself. Check the trash can by the stairs for the first piece of the mission bonus. Head up the stairs and have Spooky distract the patrolling guard, while Tiny enters and kills her (watch out for the patrolling lieutenant), and then hide the body near the stairs.
Get Spooky to kill the soldier sitting near the hut with an injection. Wait for the confusion of dying then have Spooky distract the patrolling lieutenant as Tiny takes him out, followed by the soldier looking at the map.
Spooky should now distract one of the guards standing near the exit as Tiny enters and takes them both out.
Spooky should exit the train station and distract the soldier who is talking to a nearby lieutenant. Tiny should arrive, take them both out and hide the bodies in the station.
Have Spooky distract the patrolling guard near the road to the left of the station, which runs southeast, while Tiny deals with him from behind.
Spooky should now go to the southwest corner of the map and distract the patrolling guard there. Get Tiny to take out the worker sitting in the shade just west of the train station, followed by the soldier Spooky is distracting.
Now Spooky should distract the patrolling soldier near the main road running from the southwest corner of the map to the northeast, while Tiny takes him out and hides the body somewhere safe ...
Distract the patrolling lieutenant and have Tiny take him out, but watch out for the patrolling soldier to the north.
Tiny should take care of the patrolling guard east of the train station (near the road where the tracked vehicle occasionally passes) then hide the body somewhere safe.
Head southeast to the last soldier Tiny took out and get Spooky to distract the guard here (near the intersection). Tiny should follow from behind to kill her and hide the body somewhere to the southwest.
Tiny should be waiting nearby for the patrolling officer near the trees to the northeast. Take him out, pass his uniform to Spooky, then hide the body.
Have Spooky crawl along the main road to the northeast and shoot the German sniper who is well hidden in the shadows near the Eiffel Tower leg which is marked "N". A soldier will come across the street to investigate: knock him down with a well-placed bullet.
Have Spooky distract the patrolling guard near the leg? N? of the Eiffel Tower, and Tiny should come in from behind and take care of her. Hide the body in the shadows with its dead colleagues, then grab the dead sniper ammo.
Put Spooky across the street to distract the patrolling guard nearby.
Tiny should then take out the stationary guard near the south edge of the map (near the trees), then the guard that Spooky is distracting, and then throw the bodies into the shade somewhere nearby.
Get Duke to come and shoot the SS General as well as the officer standing outside the hut in the middle of the park to the east. Spooky should quickly enter and take the keys from the SS General along with his uniform.
Spooky should go back to the hut and distract one of the lieutenants, while Tiny takes out the other and hides the body inside (watch out for the soldiers patrolling nearby). Go out and deal with the soldier patrolling around the hut there and drag the body inside.
Exit again and take out the lieutenant that Spooky is distracting, then the guard patrolling the west side of the small hut, then hide the body inside. Distract the patrolling guard to the north then have Tiny take him out. Spooky should now distract the worker north of the explosives and have Tiny come in and take out the soldier near the canisters, then the worker that Spooky is distracting, and the soldier standing near the truck (check the bodies for cigarette packs ).
Have Lupine arrive to unlock the metal boxes that contain four time bombs, four remote-controlled bombs, some grenades and some anti-tank mines.
Have Spooky drive the nearby crawler with Inferno and Tread behind. Drive to the empty crawler near the north edge of the map (near the Murice Hotel). QUICKLY get Inferno and Tread off the crawler and run to the empty crawler.
Once inside, go like a fury to the other side of the map and destroy everything and everyone including the tracked vehicle and the tracked vehicle. Kill the four German snipers on the west roof of the Murice Hotel. The soldiers and workers on the roof of the hotel will try to understand except the one on the roof to the east. With the crawler, kill everyone who comes down to investigate.
- DEACTIVATE THE EXPLOSIVE DEVICE -
Get the commandos to gather outside the door leading to the west side of Hotel Murice. Send Tiny in and take out the two workers. Spooky should distract the lieutenant at the table, while Tiny takes care of the two soldiers behind the table, and then the second lieutenant that Spooky is distracting. Check the furniture to find a bottle of wine, a shovel, a smoke grenade, canned food, a poison syringe, some sleeping pills and some first aid kits.
Head up the stairs and have Spooky distract the patrolling guard nearby while Tiny takes her out from behind.
Get Spooky to distract the guard on the right of the general's office, while Tiny takes out the one on the left and throws the body out the window.
Then Tiny should take out the guard that Spooky is distracting, then the soldier sitting at the desk nearby and alerted: quickly throw the bodies out the window before the second lieutenant on patrol can see anything. Distract the lieutenant, then Tiny will take him out and throw the body out the window.
Get Inferno to join Tiny and Spooky, then have them throw a grenade into the general's office, killing the general and the two officers. Go inside and deactivate the explosive device. Check the general's closet and desk for a bottle of wine, a poison syringe, a Molotov cocktail, some sniper rifle ammo, some sleeping pills and some first aid kits.
Climb the stairs to the third floor and have Tiny occupy the soldier patrolling nearby. Get Spooky to distract the lieutenant sitting at the desk at the back of the room, while Tiny takes care of the patrolling soldier who occasionally looks out the window. Then deal with the lieutenant and check the small file cabinet for canned food, and the second piece of the mission bonus.
Go to the adjacent room and take out the soldier who is cleaning the board.
Go back outside and open the door to the last office you haven't entered yet. Spooky should distract the guard near the door as Tiny walks in and deals with the lieutenant, then the two soldiers sitting at the desks who will have been alerted by the noise.
Take care of the soldier Spooky is distracting and check the furniture for a poison syringe, smoke grenade, canned food, binoculars, three bottles of wine, some sleeping pills, some grenades, some first aid kits and the third. piece of the mission bonus.
Go up the stairs to the fourth floor and take out the soldier patrolling nearby. Enter the next room and take care of the soldier and the worker. Place a remotely controlled bomb near the door leading to the office and fire a shot. When the enemies come running out of the office, detonate the bomb and kill them all.
Check the furniture to find a gun, binoculars, a pack of cigarettes, some sleeping pills, some first aid kits and the fourth piece of the mission bonus.
Go out the door to reach the balcony and collect all the dead sniper ammo for Duke.
-CONTACT NATASHA-
Enter the east wing of the Meurice Hotel through the back door, have Spooky distract the patrolling soldier as Tiny enters and deals with the soldier sitting by the table, then the guard Spooky is distracting.
Go to the next room and distract the lieutenant reading the newspaper as Tiny sneaks up from behind and takes him out. Pull out your gun, then kill the officer and lieutenant who are talking to each other on the sofa. Check the furniture for canned food, a pack of cigarettes, a Molotov cocktail, a gas grenade, two bottles of wine, some first aid kits and the fifth piece of the mission bonus.
Go up the elevator to the second floor and have Tiny take out the soldier nearby. Spooky should distract the soldier patrolling the corridor as Tiny enters to kill him and then throw the body out the window.
Enter the room in the center and take care of the soldier who is sweeping the floor. Go back to the corridor and deal with the two guards outside the patrol leader's room, then the leader himself using the gun.
Check all the drawers to find a poison syringe, binoculars, smoke grenade, two bottles of wine, some ladders, canned food, sniper rifle ammo, some first aid kits and the sixth and seventh pieces of the mission bonus.
Go up the elevator to the third floor and have Spooky distract the soldier patrolling in the corridor. Fins should take care of the lieutenant sitting on the couch near the elevator, throwing his knife at him.
Have Tread crawl into the corridor, then throw a gas grenade to take out the two soldiers talking to each other. Tiny should take out the guard Spooky is distracting, then fire a shot to kill the officer inside one of the rooms. Check all the drawers to find a gun, smoke grenade, canned food, binoculars, a poison syringe, two bottles of wine, some ladders, some Molotov cocktails, some sleeping pills, some first aid kits and the eighth and ninth piece of the mission bonus.
Take the elevator to the fourth floor and have two commandos fire a shot. Kill all the enemies that come running, to make the fourth floor safe. Climb the ladder to the roof, kill the lone patrolling soldier and then head back down again.
Talk to Natasha and she will update the goal. Check all the furniture to find a smoke grenade, a gas grenade, a Molotov cocktail, a pack of cigarettes, two bottles of wine, two poison syringes, some foil ladders, some canned food, some first aid kits and some sleeping pills.
Take the elevator back down and gather the commandos in the center of the Meurice Hotel.
- GET TO THE TOP OF THE WORLD-
Inferno should throw a grenade through the door / window leading to the center of the Meurice Hotel. Wait for everyone to gather around the explosion site then throw another grenade to take them all out.
Check all the furniture in the bar to find nine bottles of wine, some canned food, some Molotov cocktails, some first aid kits, and the XNUMXth and XNUMXth pieces of the mission bonus.
Head up the stairs to the second floor, and anyone distracted by Spooky will be taken out by Tiny from behind. Check all the furniture to find an antipersonnel trap, two packs of cigarettes, two bottles of wine, some canned food, some first aid kits, some sleeping pills and the twelfth piece of the mission bonus.
Go up the stairs to the third floor and have Tiny kill the soldier reading the newspaper. Stop outside the door and fire a shot to lure the others out. Kill them all and check the furniture to find a shovel, anti-personnel trap, pistol, Molotov cocktail, gas grenade, smoke grenade, four bottles of wine, three poison syringes, two binoculars, two packs of cigarettes, some. stairs, some canned food, some grenades, some sleeping pills, some first aid kits and the 13th, 14th, 15th and 16th pieces of the mission bonus.
Go up the stairs to the fourth floor and have Inferno throw a grenade to kill the two soldiers lying on the floor and the one leaning out of the window. QUICKLY throw another grenade to kill the soldiers who come from the art room to investigate. Shoot each survivor and check the furniture for a gas grenade, poison syringe, canned food, some sleeping pills, some first aid kits and the XNUMXth and final piece of the mission bonus.
Do you bring the commandos to the leg? of the Eiffel Tower. Open the door with the key from the SS general earlier and have Spooky distract the patrolling soldier, while Tiny cautiously approaches from behind and takes him out. Spooky should then distract the patrolling worker at the back of the room while Tiny takes care of the soldier standing outside the cable wagon. Take out the worker Spooky is distracting and shoot the second lieutenant below.
- CONTACT THE GENERAL DISTRICT AND ESCAPE !! -
Get Tiny and Spooky to drive the cable car to the third level of the Eiffel Tower. Spooky should go out first and distract the worker looking at the cable car.
Tiny should exit and enter the opening on the right. Take out the patrolling soldier and then the stationary soldier near the lifter. Get Spooky and Tiny up with the lifter to the top.
Get Spooky to inject the patrolling soldier, then the stationary soldier and the second lieutenant reading the newspaper. Have Tiny climb up the two sets of ladders and exit the door. Take out the patrolling soldier and shoot the officer and soldier who are looking at the railing. Use the radio to contact Headquarters. Mission accomplished!!
Mission Bonus Locations (17 total):
-A piece found in the waste bin located inside the train station (near the starting position).
-Two pieces found in the furniture located on the third floor of the Hotel Murice, west wing.
-A piece found in the drawer located on the fourth floor of the Hotel Murice, west wing.
-A piece found in the drawer located on the first floor of the Hotel Murice, east wing.
-Two pieces found in the drawers located on the second floor of the Hotel Murice, east wing.
-Two pieces found in the drawers on the third floor of the Hotel Murice, east wing.
-Two pieces found in the furniture located in the bar of the Hotel Murice.
-A piece found in the desk located in the office one floor above the bar of the Hotel Murice.
-Four pieces found in the furniture located in the office two floors above the bar of the Hotel Murice.
-A piece found on the shelf located inside the art room three floors above the Hotel Murice bar.
Congratulations!! You just finished Comandos 2: Men of Courage. Enjoy the ending! And don't forget to play the latest mission bonus!
Mission Bonus 10
Location: Unknown
Personale: Tiny, Duke, Tread, Lupin
Objectives:
-Escape using the enemy's car
Secondary objectives: None
Tips:
-Neutralize enemy snipers.
-Take the trance.
-Cut the fence.
-Get some Molotov cocktails.
- Enter the bunker through the window.
-Unlock the bunker door from inside.
Solution:
Have Duke shoot the German sniper on the left. Lupine should then crawl under the barbed wire and open the metal box near the west edge of the map to find a shovel, shear and some Molotov cocktails.
Go back again but this time cut a hole in the barbed wire. Pass the Molotov cocktails to Tread and have him throw one to the officer and second lieutenant talking to each other to the left of the bunker (make sure the soldier near the big crates sees this). Wait for the worker near the metal crate and the soldier near the large crates southwest of the machine to arrive to investigate the charred bodies, then drop the last Molotov cocktail to take them out.
Get all the commandos to go through the hole in the barbed wire and up to the other side of the excavation. Run the commandos to the car and quickly drive it along the road to the north. Mission accomplished!!
Solution Summary
TRAINING 1
TRAINING FIELD 2
THE NIGHT OF THE WOLVES
SILENT MURDERERS
DEATH ON ICE
OBJECTIVE: BURMA
THE BRIDGE OVER THE KWAI RIVER
SAVING SOLDIER SMITH
THE COLDITZ CASTLE
PARIS BURNS
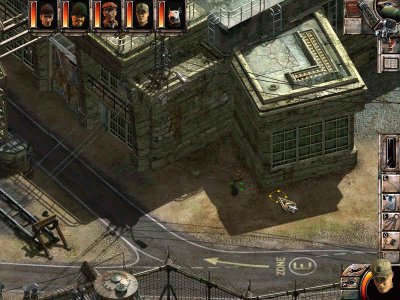 Commandos 2: Men of Courage pc
- pc
- ps2
- xbox
Exit date: 28 September 2001


