


Please note:
The solution is based on the US version of the game for PlayStation 3. There may be divergences from the Spanish version and / or for other platforms.
Capitolo 1: With Great Power...
You will now find yourself living a story set two years before Peter Parker became Spider-Man. After viewing the cutscene, head to the checkpoint visible in the area. You will hear a rifle shot. The next checkpoint will then appear on the screen: proceed to the area and observe the cutscene.
Capitolo 2: On the train of a killer
At this stage you will first have to face a tutorial that will teach you how to make the most of the acrobatic skills of your characters (their specific use has in fact changed compared to the previous episode of Spider-Man). In fact, you can use your web only if there are buildings and / or objects in your vicinity where you can "hook" the web.
In this episode it will also be necessary to specify the "hand" with which you are going to launch, for example if you want to project yourself towards a building on your right you will have to use your right arm.
Once the tutorial is complete, a checkpoint will appear on the map. Proceed in his direction, then take a picture of the guy nearby as well as the "imminent danger" sign. Look up and dodge. Get rid of the fighters in the area, making your way to the next checkpoint.
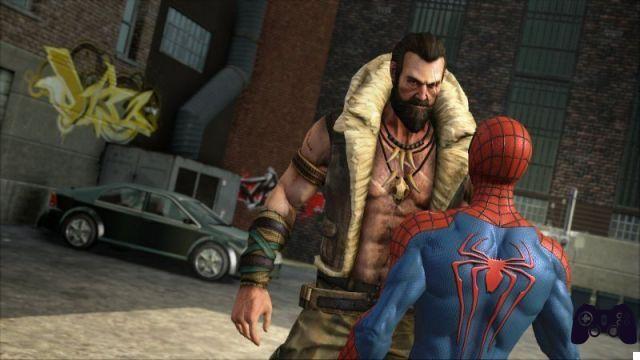
Here, destroy all the crates, until the arrival of the big boss (Herman Schultz). Repeatedly dodge his attacks, then use the web to "lure" him towards you and hit him repeatedly until an intermission scene is activated. You can then view a skit during which you will learn what has happened or is happening in New York.
Capitolo 3: Live by the Sword
Proceed to the radio tower, using your spider sense to locate the three jammer transmitters. After deactivating them, head to the checkpoint, where you can fight 5 other subjects. Having finished them, they will begin to focus on the building.
Proceed inside, using the spider sense to create a mind map of the area. Destroy all the doors, thus arriving near a flight of stairs. Go up the flight of stairs, break the door, then listen to Stan Lee's speech. Use your web on the sprinklers to get even closer to Stan Lee.
Then exit the building, reaching the kiosk where they sell the newspapers, locating Stan Lee in this way.
Approach the checkpoint, jump on the car, interact with the subject on your left, then proceed to the back window, getting rid of the hostage in the area.
Continue back to the checkpoint, taking a photo of the area labeled "CK". Now jump on the train to go home, and talk to Aunt May who you can find in the area.
Video - Launch Trailer
Chapter 4: Raid on Oscorp
Once at the top of the Oscorp tower, you will be ambushed by some unarmed subjects and others equipped with machine guns, we advise you to focus first on machine guns, since they are able to inflict a considerably greater amount of damage; you can then move on to the rest of the enemies that will not represent a real obstacle. So head to the helicopter, using the spider web to get inside the building.
Once you get down, sneak free of the subject closest to you, then going to stop the nearby fan through your web. At the crossroads, turn your gaze to the right, recovering some technological points. Proceed along the wall to reach the next play area. Get rid of the following subject called "Max Dillion".
Then proceed upwards, quickly eliminating the boy guarding the corridor. We recommend maximizing your speed and eliminating him before his partner manages to reach the area; in case you fail, you can still wait for him to arrive and hit him later.
You can then take care of the subject at the end of the corridor, and talk to Max Dillon again. Now, before reaching the cooling system, you will need to complete three sub-goals, namely recover two audio recordings and a photo.
You can locate the first recording exactly to the left of Max Dillon's current position; in fact, you can locate a holographic head there, with which you can interact to obtain the registration you need.
The second entry is instead located near the subject guarding the corridor; exactly to its left you will see a "Tech Point", near which you can retrieve the recording you are looking for.
The photo is instead to the right of Max Dillon, there you can locate a bulletin board where there are the "wings" of an eagle, take a photo of these wings, to then deliver it to JJ.
You will therefore have to try to get all four crates. The actions we advise you to take are the following: proceed straight ahead until you locate the first box, located on the same "level" as you. Then locate the nearby window, retrieving from it a photo called "Robotic Limbs". So examine all the fans visible in the area, recovering the technological points visible in the surroundings, as well as the third recording.
It will therefore be necessary to deal with The Shocker. It is, in practice, a standard enemy enhanced further. Your goal will be to dodge all of his attacks, as the counterattack will not work normally. When he tries to charge towards you, you'll have to dodge twice to either side of the play area.
When his HP has reached 50% of his maximum total, some pillars will rise from the ground. You will have to use them to attack your opponent more effectively. Throw some cobwebs towards the pillar where the enemy is positioned, thus causing his fall.
He will therefore remain stunned for a few minutes, and you can attack him repeatedly. Continue to make these attacks until you KO him permanently. In this way you will get two different trophies, one called "Shocking" and one called "Shotgun".
Capitolo 5: Day of the Hunter
Throw yourself freely along the buildings of New York until you hear a conversation about Central Park. So head in his direction, locating four suspicious people.
One of them will leave, but you can KO the remaining three. Your next goal will be to locate the fourth: it is straight in front of you, in less than 10 seconds you will go and track it down. Once this is done, you will have to proceed to the bus station, so as to help the police visible in the area.
Use your web to repeatedly move forward, arriving at the opposite side of the play area. Get rid of the two subjects on the left and right, always focusing with the highest priority on all those with firearms.
You can therefore go to meet Kraven; talk to him, and proceed to his loft, then enter. Move along the corridor, observing the intermission scene, and then try to take three photos: you will first have to photograph the portrait of Kraven, positioned in front of you, and try to do it immediately after you have finished talking to him. So move on to photograph the skull of the T-Rex. To the left of the skull, you can also retrieve a Mammoth skull.
After you take the photos, Kraven will want to talk to you again - please him, then leave soon after.
Chapter 6: Into the Lion's Den
Head to the checkpoint, taking four photos of the guards "marked" on the screen. So head to the next checkpoint, near which you will notice a truck. Position yourself on the wall, thus observing the rear of the truck, where a group of men is loading objects.
After taking a photo, you need to start following the truck. When it stops, you can proceed towards the inside of the hideout. Now, before proceeding, you will need to upgrade your spider sense. It will allow you to visualize the "line" along which you will have to proceed to finish the opponents without being recognized.
First get rid of the subject exactly outside the train carriage. Move to the right, examine the barrel, position yourself on it and wait for the arrival of a first character that you must quickly finish. So wait for the return of the subject who had gone away, hitting him too. You will now have to "aim" at the patrol subject near the Drone. Wait for it to head towards you, thus trying to catch it from behind.
Then move on to the subject positioned immediately to the right, near the spider suit; also in this case, wait for him to go to your current position, so you can hit him from behind without too much trouble.
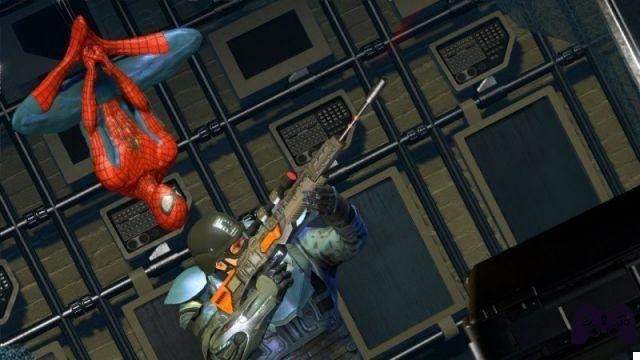
Use your sniper rifle to take out the subject on the lower floor. Move along the wooden pole, then retrieve the Ultimate Spider-Man costume. Return to the patrol area, near the Drone, thus locating the train that proceeds towards the ground.
You will find only one opponent in the area, so we recommend entering the room and observing the area on the left, where a slow motion sequence will be activated. We recommend that you use your web to speed up the game, so that you can safely attack the enemy and complete the mission.
Capitolo 7: No One is Safe
Before entering the theater, move upwards, locating a sign indicating "Wilson Fisk". Also examine the audio log nearby.
Proceed forward, then converse with Harry Osborn. Having talked to him, continue to the left, retrieving yet another recording. Also take the tech points on the left, next to the door; in its immediate vicinity you will also find another recording. Move to the opposite side for more tech points, then continue to the door, retrieving a third registration there. Move to the end of the corridor, transforming into Spider-Man. Move along the ventilation duct to proceed.
Upon entering, we recommend using the Seismic Blast to stun hostages. You will therefore be free to explore the rest of the game area: to the left of your three characters you can pick up some Tech Points. Proceed further, retrieving the purple robe and taking a picture of it. Then go up the stairs behind you, obtaining an additional registration. So move towards the gate, then looking towards the scaffolding on the right to retrieve yet another registration.
Use your web to open the portal, then use "Web Rush" to move forward. Collect the tech points on the left. Right, get some other tech points. Begin to move upwards, until the wall is destroyed: at that point, look to the right and try to evade the blow that will be launched towards you. Fight the Brute, awaiting the arrival of three of his assistants.
After completing this fight, you can return to the dressing room. Listen to the gossip, returning to the area where you met Harry. Move to the bar, locating Felicia Hardy in the area. So talk to Wilson Fisk, then leave.
Starting again after the cutscene, first get rid of the boy on your left, therefore of the one who was exactly below you during the initial stages. Then get rid of the subject immediately beyond the second you have eliminated. Destroy the weapons visible in the area. There will therefore remain three more: go back to the initial area of this juncture, move to the left, reaching the second weapon reserve. Eliminate the subjects placed to guard him visible on the sides, then destroy the reserve.
So move towards the third reserve, directly in front of you, but pay attention to the considerable amount of snipers in the area. Still straight in front of you there will also be the fourth reserve of weapons, to be recovered at speed. After completing this phase, observe the cutscene, and then quickly get rid of the machine guns visible in the area. Pass only later to finish also the "human" subjects in the vicinity, which are much less dangerous.
Then proceed towards the interior of the building, recovering the technological points visible in the area. Then move up, paying attention to the sniper visible along the left side.
After the cutscene, perform a "silent" KO on the enemy close to you, then on the next one visible on the other side of the catwalk. Then turn around, examining the area where you started, recovering the tech points near the roof. Then move to the nearby ventilation duct, eliminating the second opponent visible in the area. Proceed to the inside recovering the tech points, getting rid of the two guys on the sides and using Seismic Blast to blow away the weapons of the guys in front of you. Once this is done, you can enjoy the next cutscene.
Capitolo 8: The Hunter and the Hunted
The chapter consists of the fight against Celtus Cassidy, an opponent of enormous size and fearful appearance. However, it will be very easy to dodge his shots and the only real difficulty will be represented by his considerable amount of life points. It will therefore be enough to have some patience to be able to finish it without problems.
Capitolo 9: Claws of the Cat
The goal will be to protect the police convoy while transporting criminals. You will first have to deal with the two trucks (equipped with turrets) that will appear in the area, destroy them using your cobwebs. Once this is done, you will be "forcibly" hit by a flashbang; when your vision has been restored, immediately focus on the three machine guns that will appear in the area.
So use your spider sense to locate the three bombs visible along the way; after that, a convoy will stop in the area and you will have to aim at its turrets: 2 well-aimed shots will be enough to make them explode, thus minimizing the damage suffered by your team. In case you encounter any problems, we recommend activating the spider sense.
Now move to the museum. Before you start moving, you should always cover all cameras with your web. So get rid of the two opponents visible in your same plane. Then go down to the lower floor, recovering the weapons of the other two subjects in the area, and also taking the nearby photo (visible on the left with respect to the Mammoth's "butt"). Also take the mask, always on the left. Move to the room where the mask is located, examining the area on the back of the green display, obtaining an audio log.
Continuing to the room on the opposite side, you can recover the tech points. So make your way to the area containing the T-Rex skull, aiming your gaze to the left and examining the nearby Display to get yet another audio recording.
You will therefore have to deal with "Black Cat". In order to attack it, it will be necessary to "capture" it with your web and then drag it towards you and hit it repeatedly; it is in fact a very fast opponent that would escape you in all other cases.
After dealing enough damage to her, she will disappear and you'll have to use your spider sense to go find her. When you have found it, you will have to start the "procedure" described above, that is to catch it with the spider web, then hit it, and go looking for it again as soon as it disappears. By repeating all four times, you will complete the level. Retrieve the Ricochet costume from the ground.
Capitolo 10: My Ally, My Enemy
Before entering Harrys' apartment, we recommend proceeding to its elevated part to obtain an audio recording. Talk to Harry to get additional tech points (visible on the table) and the next registration, placed right next to him, then another one near the table next to the door. Then examine the bookcase, recovering a pumpkin.
Take a picture, then go for a little robbery, then go back to Harry's apartment and jump into the limo. Now move to Kraven's loft, go up to the second floor and continue to the end of the corridor, thus locating the Clipings. Look at the area behind you; unfortunately you will be hit by an enemy, but do not worry, it is a "predetermined" event.
You will now have to deal with the enemy, hit him in a "standard" way during the initial stages, waiting for the arrival of the "illusions". As soon as they arrive on the scene, throw a smoke bomb. The opponent will then disappear in the middle of the trees. Use your spider sense to locate him and attack him before he goes to attack you.
When it disappears again, use your spider sense again to continue this "procedure". Finally, you will get the Ionic spider web.
Video - Gameplay video
Chapter 11: The Kingpin of Crime
Move to the truck, hiding inside it. So use the ionic web to hit and break the door. You will therefore have to deal with the subject with armor: use the "new" ionic web to destroy the armor, then continue towards the fence to locate the horoscope chest, recovering the technological points inside.
Entered the building, get rid of the two subjects present. Move up, then out, locating the subject on the bridge. Move forward twice, look to the right and retrieve the tech points as well as the audio log. So turn 90 degrees to the right, locating a tree, near which you can see a recording.
Continue to the top of the building, getting rid of the two snipers. Then examine the fireplace full of graffiti, thus locating the truck exactly below and recovering the audio log from it. Move to the subjects near the barrel, getting rid of the snipers in the area.
Keep going down, using a silent KO on the nearby subject. Examine the sand nearby, taking a photo of JJ.
Move to the last group of people, visible on the lower floor, and get rid of the enemies in the area, as always focusing first on the subjects with armor. Try to pull the wooden planks towards you, then wait for the debris to disappear to retrieve the audio log. Then move towards the boss (Kingpin).
Now retrieve the recording visible immediately behind the boss, on the table, near the monitor. You will therefore have to face the boss directly: he will stop for a few seconds, then throw his weapon towards the ground and create a kind of "laser" in your direction.
The only way to effectively hit him is to use Seismic Blast: when you hit him with this move, he will knock both of his legs to the ground, then charge towards you - and you will have to move sideways, so that the opponent goes to hit the wall, stunned. You can therefore attack him without risking any counterattack on his part.
After repeating this procedure twice, the opponent will call some armored soldiers. First destroy their weapons with maximum speed, as if you get hit you will be slowed down. So go on to hit them directly; when you have eliminated them, you can move on to hit the boss again, until you finish it definitively.
Chapter 12: Power Surge
Before reaching Electro it will be necessary to destroy four generators. We recommend that you pay some attention, given the presence in the area of several "Task Force" type drones, capable of inflicting large amounts of damage to your characters if / when you do not go to eliminate them.
After you have destroyed the generators, head to the Electro, paying attention to Danger, always placed behind you. You will have to keep shooting your web to slow it down, until you can make a quick "run" towards the enemy; during the attack phase, he will have a "horizontal" line that will hit the ground directly and a "vertical" one that will try to determine your position.
During the next cutscene, you will have to try to make an attack, and then follow your assistant avoiding the mines in the area.
A second interlude scene will therefore begin, similar to the previous one, but this time the opponent will have a fast and alternative air attack.
After you manage to inflict sufficient amounts of damage, a second cutscene will appear and you will have to again and again attack the opponent. You will get the "Switch Off" trophy in exchange.
Chapter 13: The Green Goblin
Before you can fight against Goblins, it will be necessary for you to deactivate 3 bombs. The first will be guarded by two Drones, which will try to detonate it as soon as you enter their range. For this reason, we recommend using your "cobwebs" to proceed quickly towards the bomb, so as to maximize your speed and try to recover it immediately.
The second bomb will be guarded by four soldiers with armor, first try to remove all their weapons, then destroy their armor and finally eliminate them and then move on to deactivate the bomb directly, with the necessary calm.
The third bomb will finally be found in the vicinity of the newspaper sales area, you will first have to eliminate the sniper, then the three subjects with armor, finally deactivate the bomb with the due calm.
Completed these objectives, you will have to head to Oscorp. In the area, it will be necessary to fight against some gliders and some snipers; as usual, we recommend first of all to aim at the snipers, and to pass only in the second moment to finish the gliders - these should preferentially be "recovered" through the use of your web.
So help the three civilians to repel the aggression of the two weak enemies in the vicinity, and then finally begin the pursuit of Goblin. When you reach it, you can also finally start fighting it.
You will therefore have to fire repeating bombs, always "pulling" your enemy towards you when he goes too far. When / if he falls to the ground, you can attack him repeatedly. At a certain point in the fight, you will be transported towards the enemy's face, and you can "grab" it and slam it towards the visible buildings in the surroundings, until you return to the roof.
Therefore, repeat all the actions described above in their entirety, until you defeat Goblin and enjoy the interlude scene that marks the end of the chapter.
Chapter 14: Maximum Carnage
Before proceeding, three civilians will need to be rescued. The first will be located exactly at the beginning of the level and its elimination requires you to get rid of a tank, three gun subjects and a brute - as usual, focus initially on the subjects with guns, then move on to the tank and finish with the brute, then saving the civilian.
ù A little further on, you can locate a building with two snipers (one in front of the other, in two buildings facing each other) - first get rid of the snipers, and then eliminate the three subjects immediately below, and quickly go to help the civilian nearby. The last of the civilians to be helped will be attacked by two "standard" soldiers and a brute, get rid of the soldiers and therefore the brute, and then go (easily) to save the third civilian.
Now, starting from the beginning, get rid of the Glider using a Seismic Blast, preferably with a modulation that allows you to increase its impact. So eliminate the subjects visible below you with a "Stealth" KO. Move to the control room visible above, making another KO.
Get rid of the next subject in the area, recovering the tech points. Exit, reaching the next three subjects. Quickly KO the lone human visible in the area, and enter the electrical cage to retrieve an audio recording. Go back to the guard area, then enter the nearby crack and remove the debris from it. Then use your web to move along the Drones and reach the next play area.
Examine the area on the right to locate a photo named "Venom Wing". Quickly get past the Tendrills using the seismic strike. At the tube, use the web and make your way to Celtus Kassidy. Hit him repeatedly, then talk to him, to cause his transformation into "Carnage".
Always try to dodge his "jumps", as if he hits you you will suffer a significant amount of damage. After you attack him a sufficient number of times, he will go to "release" some enemies of a lower level, the so-called Tendrills, with the aim of making you desist.
So use your spider sense to locate him and use the Seismic Blast to knock him out. Then release the fire to inflict further damage. After the opponent has suffered sufficient damage, he will take off: dodge the rocks that will be thrown at you, then use the Seismic Blasts repeatedly to KO the enemy permanently and finally use the fire to destroy him!
Video Solution - Playlist
Click here for the playlist!
Video Solution - Chapter 1
Video Solution - Chapter 2
 The Amazing Spider-Man 2 ps4
- ps4
- ps3
- Xone
- x360
- pc
- WiiU
- 3ds
- iphone
- ipad
- android
- wph
Exit date: May 2, 2014


![Guides Sophia's Shop Guide [100%] - Persona 5 Strikers](/images/posts/1f5e1c7629d56d6c792ac770a5d6b182-0.jpg)