


Home
The first thing you need to do in this expansion is to go to Solstheim. Solstheim is the land located in the northwest of Yvardenfell. This island is half tropical and half covered in snow, the snow won't hurt you but the attacks of wolves, bears, witches, orcs and other nice creatures will. You must necessarily have at least level 20 to be able to go there so adjust yourself. You pass Khuul and from there you reach Solstheim. You can also swim and it wouldn't hurt but be very careful of new creatures called Horkers which can be dangerous if they attack you in a group.
Once in Solstheim you will have to go to the Fort of Frostmoth, the Sanctuary of the Imperial Cult will be in the North while the Headquarters is in the West and the Armory in the East.
Go to the Headquarters, go up the spiral staircase to the south and then go to Carius's room where you will meet Captain Falx Carius.
Mission 1: Why is morale in the Fort low?
Main Missions
Mission 1: Why is morale in the Fort low?
Talk to Carius who will inform you of several things and in the end he will tell you that the morale of the troops is low and the cold is not to blame. Carius will immediately trust your success in the mission and send you to investigate.
Start the mission by asking the guards around the reason for their low morale, go to the first floor of the Headquarters and talk to the guard who is there, she will not want to tell you anything and rather will ask you to bring her some liquor. Now you know what to do, in order to convince the guard you will have to retrieve some strong stuff for the guard. Go straight to Carius's room and then to his right you'll find some Greef that's right for you. Go back to the guard and give him the object of his desire and maybe Talk to Carius again now and suggest that the problem is alcohol but he will tell you that it is not forbidden, so the matter gets complicated and he will also tell you that the only one who really has alcohol problems is the priest Antonius Nuncius.
Talk to the priest if you want but he won't solve your problems, talk to the guards around now and they'll tell you he has an office in the armory on the second floor. Go there and you will find several drinks, but you can only advance in the game if you crack the drawer of his desk and look inside. Result? Drinks and money for you. Grab the money and go back to the cheating priest immediately. He will finally admit that he hid the liquors and you can choose whether to let him discover or leave him free.
Choice one:
Tell Carius that the results have gone nowhere but Carius will still be proud of you and give you potions.
Choice two:
Although this is the morally less ethical choice I already know you will choose it, Nuncius will give you his key which will allow you to access his locker (do not try the lock picks because they will not be useful).
Take it all and then go to Carius who won't believe you but will still give you three potions as a reward.
Choose what you want but Nuncius will have a bad end anyway. Now go back to Carius for another mission.
Mission 2: Smuggling weapons
Not happy with the solution you found in the previous mission, Carius will ask you to investigate again. It is clear that there are very few weapons in Fort Frostmoth, far fewer than there should be. Carius doesn't want to leave you alone on this mission and so they will join you either Saenus Lusius or Gaea Artoria.
If you ask around about them you will discover the great differences between the two. Lusius is a weak but very intelligent type while Artoria is a war machine but with a disheartening stupidity. With the first you will avoid battles while with her there will almost always be a struggle. If you are very weak you can take the warrior but if you are strong enough you can easily choose Lusius.
Decide and talk to who you want to enlist, they are both in the Headquarters, Lusius on the top level and Artoria on the ground floor. After choosing your companion, go to Faustus on the ground floor of the armory. He will tell you about the smuggled weapons found in the Gandrung caves. Exit the fort through the north door and head east to reach your new destination. It will be a short walk without major hazards to the caves. Once inside the Diary it will inform you that you are in the right place.
Advance by eliminating the enemies through the passage in the caves, if you have chosen Artoria you can kill all those who come within range while if you have Lusius be careful to defend him because he could succumb to enemy attacks. In the end you will have to choose whether to eliminate the smugglers or let them escape. The choice is hard and quite difficult to understand, if you let them go you will not have to fight them and this would already be a good reason but ethically if you come back here towards the end of the game you will find them again and this means that they have only cheated you.
Whatever you choose, the diary will update and you can return to the Fort.
As soon as you get close, your mate will tell you to find Captain Carlius. He will not be in his room, talk to the travel companion who is not with you (depending on who you have chosen) and you will find that you have to go to the village which is north of the Fort. The village is called Skaal and is located on the other side of the island, it is located in the upper right corner. If you open the map of the island you will discover a dark area in the upper right, the village you need to visit is in the middle of that dark area.
Mission 3: Restore Skaal's power
Mission 3: Restore Skaal's power
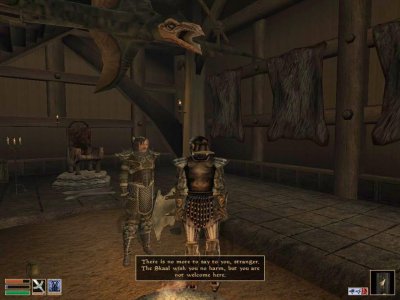
Your aim will be to find the captain who has decided to restore power to some villages including Skaal. As soon as you arrive in Skaal go to the large hall and talk to Tharsten Heart-Fang. Give him the decomposed skull of the warrior Skaal and he will tell you that you must do justice to this wrong.
Go to where Korst Wind-Eye is located, it is located in the shaman's hut. Talk to him and after the dialogue you will discover that you have to retrieve six stones and give them back their power. Read the story of Aevar because he will explain to you where to find the six stones, you can follow Aevar's instructions or choose the fastest team.
Wind Stone:
This stone is located southwest of the shaman's hut. If you look at the map it should be in the middle of the two rivers, activate the stone and a door will magically open. He will ask you to travel East of Lake Fjalding to release the wind inside the bag. You will have to go to the Glenschul tomb which is located exactly at the bottom right of the wind stone. Open the bag and after the noise you will find that the wind has released.
Go back to the wind stone and activate it. Well done, the first stone has been made, there are five left.
Stone of the Beast:
This stone is located more or less to the right of the wind stone. The goal for this stone is to help the wounded beast from the South. Go south of Lake Fjalding to find a snow bear attacked by a group of enemies. Kill them all but be very careful not to hit the bear or the mission for you will end inexorably.
After killing everyone go to the bear and remove the arrow, now you can heal the bear with a healing spell or if you haven't, wait a couple of minutes until the diary is updated and the bear is completely healed. Go back with the bear to the stone and you will finish the objective of this sub-mission.
Stone of the Tree
This stone is very difficult to find, it is located in the lower left corner of the rightmost area of Lake Fjalding. As usual the map won't help you much, once you find it, talk to the tree stone.
It will tell you what to do, go East and collect some seeds to reactivate it.
Travel East until the diary updates and soon after you will see five or six enemies on the right, go there and eliminate them to receive the seeds you need and after clearing up, go back to the stone and walk around it a bit. left until the option to plant seeds appears. Once this is done you will have restored the stone.
Stone of the Sun
The sunstone is not so far from the point marked on the map. The stone is located south of Lake Fjalading, a lot to the south or if you find it easier to the north-east of Fort Frostmoth. Your mission this time will be to free the sun from the dim room (there must be a reason they call it that).
Bethedsa will make it very easy to find this dungeon. You just have to go West between the two rock formations and then go into the dungeon and kill all the enemies. The final monster found at the very end of the Dungeon is much stronger than all the other creatures encountered so far. After defeating him, loot him of all useful items and after taking the eyeball use it on the ice wall to free the sun. Go back to the sun stone and you will finish this part.
Stone of the Earth
Another rather complex stone to find, if you find the Raven Stone which is located northwest of the Frostmorth Fort it will be almost done. Go to the right of the stone and from there go northwest until you finally find it (hopefully).
Talk to the stone to find out that to the north-east of where it is there will be the cave of music, do not follow these directions or you will never find it. Instead, go up the coast to the west until you find the Clock of Thormoor (also found on the general map). As soon as you find the place, go all the way East and you will find it.
Enter it and then head towards the three stalagmites and the three stalactites that are located one above the other. Repeat the sound of the rocks or if you can't, here's the solution:
Activate half, right, left, right and then the next session will be left, right, middle, left. I'm not sure they're not random, they were like that to me.
Made the right sequence, go back to the stone of the earth to conclude.
Stone of Water
Get two potions of water breathing if you don't use special boots and then go Northeast of Thormoor's Clock to find the stone. Activate it and follow the instructions to find the island. To find it, go west to the coast and then continue north until you see an island, swim there and then go inside the cave and continue until you find a large skeleton.
Kill him and then take the potion that is behind him, use more potions if you need it and then go back to the water stone and use the potion you found in the cave and you are finally done with the magic stones.
Torante at Skaal village and talk to Heart-Fang to tell him that you have done all the work, surprisingly he won't be very friendly.
Mission 4: Test of Wisdom
In this mission you will have to investigate a theft, Rigmor will tell you that Engar Ice-Mane has stolen a fur coat. Investigate by talking to these people: First talk to any person (not a guard) in Skaal and talk about Engar. Then talk to Engar's wife named Risi Ice-Mane and ask him about Engar and Rigmor and finally talk to Rigmor about Risi Ice-Mane.
After doing all these investigations go back to Ice-Mane's house and take the note under the pillow. Talk to Risi about this and she'll admit she's doing business with Rigmor. Talk to Rigmor about the whole thing and he'll admit his crime.
Take him to the Great Hall and talk to Heart-Fang. Now you decide Rigmor's fate, choose Sacrifice which I think is the best choice. Take Rigmor with you and go out to the wolf enclosure, open the enclosure door and then enjoy the scene that will end the mission.
Mission 5: Showdown
You have tried your loyalty and your wisdom, what is missing? The ability to do damage. Talk to Heart-Fang until he tells you to go meet Wind-Eye at the lake. Go to the lake and then up to the right to find it. He will tell you that your test of courage will be to go swimming inside the cave in the lake and kill them the Aesliip.
Find the fire in Lake Fjalding and swim in it and you will be in the cave. Make your way through the Fjalding cave until you get to Aesliip. You can incredibly talk to him and he will tell you that usually he is a Skaal. Listen to the whole long and boring conversation until he asks you to assist him. You will have to agree not to kill him and instead help him, Aesliip will follow you and you can go to the next area, here you kill all the enemies and your new friend should also help you (not sure, it depends on how he turns) .
After killing them all, it is not known why but Aesliip will also die and with his last breath he will give you his super ring that will increase your magic points by 75 and strength by 10. It's a great thing and you should hold on to this mythical ring. Leave the cave and return to talk to Wind-Eye explaining everything.
Mission 6: The Attack of the Wolves
Mission 6: The Attack of the Wolves
Go talk to Heart-Fang, he will tell you to go ahead so do it. Walk back and forth to the entrance of the Great Hall until a message warns you of the arrival of the wolves. I remind you that they are not ordinary wolves, they are wolfweres. Go outside and kill all the crappy creatures, remember that if you are not very strong try to stay back and let the guards do it, they are quite effective.
When the enemies are all dead go back to the Great Hall and after the scene kill the two wolfweres and then go out and talk to Wind-Eye. After the chat he will tell you that you have been poisoned, use one of the potions that Carius gave you and you will cure yourself of werewolf poisoning and then talk to Wind-Eye for the next mission. For your knowledge you may not be treated and become a wolf man but it will not be very convenient.
Mission 7: The Totem of Claws and Fangs
Mission 7: The Totem of Claws and Fangs
Now that you are cured of the infection, Wind-Eye will still be confident in you. You will for the first time be traded like a real Skaal. Wind-Eye will want you to repair the Talon and Fang Totem located in Skaalara which is northeast of Thirsk near the coast.
There are two solutions to take the Totem and both are good for me, if you are a fighting type like a warrior kill all the wolfweres in it before you dedicate yourself to the Totem. If, on the other hand, you have the boots of speed or a good skill in hiding and disappearing you can run directly from the Totem and take it. The Totem is located in the cave in the southernmost part, once you have recovered the Totem you will have to exit quickly and return Wind-Eye, Give it the Totem and you will have finished this simple and very short mission.
Mission 8A: The Ceremony
The Totem will be needed for the Ristaag ceremony. The ceremony will be practically a great hunt where you will have to eliminate a beast spirit that will have taken possession of a snow bear.
Once you get the mission, go to the West side of Fjalding Lake. You need to get to know Rolf Long-Tooth. You will find it around sunset and after a chat you will understand that it will only help you late at night. After you find it, wait until nine in the evening and then talk about the Ristaag ceremony. He will tell you to follow him in search of the bear.
As you walk a big scream will come out from the rocks, your friend will tell you to investigate (yes always you) and so you will have to go towards the big rock which is on the right. Behind you will find poor Sattir trembling with fear. When the log updates, you can return to Long-Tooth and after another stretch of the walk another hunter will scream. Go behind the two rocks on the left to find Ax-Wife.
Go back to Long-Tooth and get ready for combat, follow him a little longer and immediately you will be surrounded by wolfweres. Kill them avoiding them from hurting Long-Tooth and at the end after the slaughter take him with you to the bear spirit, kill him easily and then take his heart and talk to Long-Tooth again, Return to the village of Skaal alone and give the good news to Wind-Eye.
Mission 9A: Karstaag Castle
This is perhaps the most useless and aimless mission in the whole game. During the conversation with Wind-Eye the prophecy of the Blood Moon will come out but your friend will absolutely not want to go into details. He will find it much more important to tell you about the death of the horkers. It is evident that Wind-eye absolutely wants to avoid talking about the Bloodmoon and for this he came up with the stupid story of the death of the horkers.
For this at the end he will tell you to go to Karstaag Castle. The place is beautiful as it will be an ice castle that will be located west of the village of Skaal. There is a direct path on the bridge to allow you to cross the river, watch out because on the other side of the river there are a lot of enemies so if you don't feel ready don't go there. Once you arrive at Karstaag Castle you will find that it will be impossible for you to open the main doors.
There is an underwater entrance very close to the castle, in the north of the island.
Hold your breath and then step inside to meet the idiotic Krish. You may not understand much of what he will tell you but very soon all the knots will come to a head. In the absence of the Castle Chief, Krish will want to take you upstairs. He took on a grahl but the grahl ate all of Krish's allies. You will need him to go up the stairs so take him with you, you will need him. The area is a bit confusing but you will get out of it pretty soon. Now kill all the enemies that are nearby and remember that Krish must stay alive, if he dies recharge because he is indispensable to you in this mission. Enter the banquet hall, remember that the useless must be near you when you enter, kill all the weak enemies in the area and be careful they don't hurt Krish. After killing everyone, open the large doors and then talk to Dulk.
After the dialogue you will be attacked by three wolves and the mystery will be revealed (if you have understood it). You can take whatever you want from the castle but remember that in the end you will have to talk to Dulk to be able to return to the village of Skaal. Inform Wind-Eye who Karstaagian are innocent.
Various Missions
Marisa the missionary
This sub mission is a kind of training, talk to Jeleen in the Imperial Shrine and she will tell you that Marisa is missing. You will be located exactly in Thirsk which is southeast of the village of Skaal. Do this sub-mission before the Thirsk mission or it will be impossible for you. You will find Marisa on the second floor of the hall and the kidnapper Udyrfryke you should have already killed him so there should be no major problems, talk to her and she will follow you, take her back to the Sanctuary to finish this mission.
Remember that she will not be of any help to you during the fighting.
Moon sugar poisoning
This moon sugar is actually a nice drug true plague in the world of Morrowind, you will find that it is that thing that Caius had in Balmora and that it is so strong that it can poison your blood and kill you.
Talk to Severia Gratius outside the Frostmoth Keep to get this sub mission and then talk to Jeleen at the mission's Imperial Shrine. All you'll find is clues to the killer playing a weird song and not escaping north.
You will find your target in the building south of the westernmost area of Lake Fjalding the name of the building is: Uncle Sweetshare's Workshop. Once inside, look to the left of the entrance and you will find a dead man, go forward now to find the man who poisoned so many people and talk to him to understand that he is a madman. Kill him to stop the slaughter and grab his helmet before you leave. Return to Gratius to complete the sub-mission.
Thirsk: The horrible Udyrfrykte
Now for this mission you will have to head to Thirsk, enter the hall and you will find that many of the inhabitants have been killed. Talk to the only survivor named Svenga Snow-Song. She will tell you a terrible story about Udyrfrykte and eventually tell you to kill him. Udyrfrykte is very close so go left across the east side of Lake Fjalding. Enter the cave and kill the beast.
Take his heart and after the journey into the cave you will find Snow-Song blocking your path. Tell her the good news and you will receive a new mission in return.
Thirsk : Hrothmund
Before you are proclaimed chiefs of Thirsk, you must have the approval of Thirsk's first chief, Hrothmund. Now you have to find him, he will be north of the Moestring mountains or just south of Karstaag Castle. As soon as you find the house, enter and you will be asked a question, answer Ondjage and then go inside and take the Amulet that is here (you will need it for another sub-mission). Then examine the ax.
As you do this you will receive five Santaurio points. Go back to Thirsk and talk to Snow-Song to be the village chief.
Thirsk: Orders
Now that you are the owners of the place you can order Snow-Song to do things, beware that many of these things you can ask only once so be very careful. Remember that after placing an order you will have to wait at least a week before it is executed, do not talk about it sooner or it will fail.
1) Order honey. You will not have a weekly income but you will immediately receive 60 units that you can use, remember that it increases strength but decreases intelligence.
2) After you have placed your first order you will receive weekly profits, which will be 50 gold coins per week.
3) Kill the snow wolves and bears. This order will give you the chance to receive 5 bear skins and 5 snow wolf skins.
Mission 10A: The Hunting Game
The last major mission of this expansion is certainly the most difficult, Wind-Eye will tell you to wait. I recommend that you take as many healing potions and healing spells as you can carry. Repair all your items and equip yourself to the best and then save.
Sleep at least an hour in any house to be attacked by wolves for the final attack. You will find yourself in front of Hircine, he is a bad and very big boy from Solstheim. Now you will be part of the final hunt, enter the door where Hircine passed and you will have to assist Falx Carius. The thing will be very difficult, you will have to clean up the dungeon and the big problem is that Carius will follow you and you will have to keep him alive, the thing I swear to you is anything but easy.
There are two possibilities to keep Carius alive, first you can use the big sword to slice the enemies, you will find the key in the chest. Use it in the entrance to the Circle in the center of the room. Eventually Carius will thank you and tell you to continue.
The other method will lead you to be quick and ruthless, leave Carius to his fate and run as far as possible towards the key and return in time hoping that your friend is still alive.
The Circle is where Heart-Fang is located, believe it or not he will be corrupted by dark magic, be smart and tell him that you will follow him but when he is turned take him out mercilessly. Heart-Fang will transform into a Werewolf, eliminate him and watch out because he will have the Hircine ring that will allow him to transform from a man to a wolf at will, as soon as he is killed you can take the key and then you will have two possibilities. You can now kill all the werewolves that come your way or do the smartest thing and turn yourself into one of them and start zomping around and getting her out of the way. Once you get to the teleport, pass it and you will find yourself in an area where you can rest, return human if you are werewolves and you will find yourself completely naked. Get dressed and then save. Advance and kill Karstaag the ice giant.
It will not be difficult and once dead go to the teleporter and you will have to confront Hircine, he will have three forms, here below their description:
Forzuta form:
He will turn into a slow but very strong animal. When you kill him you will have an amulet that will increase the strength by 10 and the attack by 15.
Speed' :
He will become a very fast animal, once beaten you will have an amulet that will increase your speed by 10 and your athletic and acrobatic moves by 15.
Hoax :
It will not transform at all but it will remain in its human form, it will have the hunter's spear that can paralyze, blind and poison. The good news is you'll get the spear after you beat him.
In any form you eliminate the enemy you will receive a key and you can reuse the warp gate. You beat Hircine and Bloodmoon's prophecy has not become true, go East and return to Wind-Eye and tell him the good news. He will no longer be the leader of the Skaal but will still be grateful to you for what you have done. If you saved Carius, go back to the Fort and talk to him. He will tell you his story and the expansion will end.
Werewolf missions
Werewolf missions replace the last four main story missions. Instead of trying to get the Claw and Fang Totem back and since you don't want Ristaag to make it you will have to kill the spirit in the bear yourself. Instead of entering Karstaag Castle from the rear entrance, you can enter Krish's entrance.
The last mission is the same as the main one except that you will be werewolf all the time.
I don't advise you to become a werewolf for these missions because in practice they will be the same as you are human. In fact, the form you take to finish the missions will be exactly the same for the game. Becoming a werewolf is simple, when you catch the disease in the attack of the wolves don't cure yourself. The second night you are Werewolf, you will receive a mission from Hircine.
The only thing you have to do every night is get some blood from your victim, kill one of the non-player characters in the game and remember that if you don't, you will lose vitality every hour until you die completely.
Be very careful not to be seen as you transform from man to wolf and vice versa or everyone you find will try to kill you both day and night.
Mission 7B: Defend the Totem
This is the first werewolf mission and it is also the most difficult. Don't be discouraged if you don't make it the first few times because it won't be easy and there are many different variables to know. The second night you are Werewolves, Hircine will appear in your dreams, the dream will be really hard to understand but in the end the diary will be updated and reading that the whole plan will be explained to you in detail.
You werewolf will be told to go to Skaalara and kill all the Skaal warriors. Look at mission 6A to find out where the quarry is. Once inside you will be immediately attacked by a Skaal warrior. Kill him and move on. Use your human skills to find the position of all the warriors, if you see that they are not nearby and you want to regain your strength you can rest. If you rest too much and go back to being human then you just need to return wolves again, there are no problems in doing this but do not let yourself be seen please.
Go ahead by eliminating every enemy that will appear in front of you and in the end you will not be able to do anything but fight against three warriors at the same time, it will not be easy but you can do it. After beating them the journal will update and the mission will be over. Next night you will receive another dream where Hircine will sharpen your claws or increase your strength by 150.
Mission 8B: Stop Ristaag
The night after you get the 150 points another dream will come. The Totem was stolen while you were sleeping and you can't do anything to avoid it otherwise the game doesn't go on. Hircine wants you to go West of Lake Fjalding and kill the Skaal men and then eliminate the spirit in the bear. This mission will be very simple because Skaal men are easy to kill and your strength will be greatly increased. After killing them all, the diary will update and on the far left you will find the bear that you have to eliminate.
Mission 9B: Help Dulk
Your boss needs assistance, you need to go to Karstaag Castle and help dulk. As a beast, you are allowed to enter the main entrance where Dulk will speak to you. Now you have to go down and get to the banquet hall and kill all the grahls.
This time you will be completely alone for this mission, go through the door on the right and kill everyone in the banquet hall. In the next room take out everyone again and after passing from room to room you have killed everyone go to the first room and talk to Dulk. Hircine will be very grateful for your support.
Mission 10B: Final
Two nights later you will have the next mission, after the necessary explanations saved and then continue in the next room, you will find Carius who without too many explanations will try to take you out, kill him and then advance by eliminating the enemies until you get to the circle, it will not be easy so when you can escape. Remember that you don't need to take the key to enter the Warp as you are beasts.
Once you enter the warp you will fully recover and find them Heart-Fang. He too will turn into a wolf and attack you, take him out and then reuse the Warp.
Now you will have to fight the ice giant Karstaag, it will be simple so take him out and then enjoy the following scenes and at the end Hircine will ask you which is the main feature for a warrior, choose the one you like the most and then he will die. and you will just have to wait until you become human again and take the items you need most, eventually go out and use the warp but unfortunately for you Carius will be dead.
Solution Summary
Home
Mission 1: Why is morale in the Fort low?
Mission 2: Smuggling weapons
Mission 3: Restore Skaal's power
Mission 4: Test of Wisdom
Mission 5: Showdown
Mission 6: The Attack of the Wolves
Mission 7: The Totem of Claws and Fangs
Mission 8A: The Ceremony
Mission 9A: Karstaag Castle
Mission 10A: The Hunting Game
Werewolf missions
Various Missions
 The Elder Scrolls III: Bloodmoon pc
- pc
Exit date: June 3 2003


