FIRST PART
Below, the galaxies contained in the first part of the game map.
Galaxy Sky Station
Peewee Piranha's Temper Tantrum
You will come to a disk-shaped planet. Talk to the Luma who will ask you for help in finding the stars stolen by Bowser. Go down the orange tube, retrieve the 1-Up. Go back, this time entering the green tube. View the video near the green sign, it will provide you with some suggestions to better tackle the next situations. Climb up the brown building, drop down into the black hole. Follow the Luma, up to a flag. Take out the coin as well as the musical notes. Continue behind Luma, launching as soon as she transforms into the Star. When you reach the next planet, retrieve the flag and start moving to the right. Jump on top of the machines to facilitate your progress. Use Luma again to continue forward, retrieving the flag and star mushroom. You will reach the top of a giant egg. It will open, bringing out Peewee Piranha, the first boss! He will immediately start running after you, try to reach his back and attack the egg placed there. He will try to escape - coming back shortly (escape where?) - continue the attack on the red blister on his back, until you defeat him, recovering your first star! You will be transported to the mother ship. Talk to Lubba, then hop on the teleporter to reach the world map.
Storming the Sky Fleet
Left, go down the green pipe. Locate Luma, then climb to the top of the brown hill, visualizing the path below you (leading to a treasure chest). Attack the balloon plant, it will automatically kill the Chomp. Retrieve the key, free Luma. Make it transform and go for it. Approach the bullets, then pass the giant glass cylinder. Enter the nest which will open. Hit the flag, move right along the platforms. Launch yourself (using the appropriate star). The next puzzle requires you to flip each blue switch, turning it yellow. Repeat this strenuous task on the next platform, then having the star shoot yourself again. Climb to the cage, move left, climb the pole to the plateau. Try to draw the piranha plant towards you, then dodge it as it falls; at the same time, you have to spin the green plant so that it hits the piranha plant. It will release a key that will allow you to retrieve the star.
Peewee Piranha's Speed Run
Quickly run to the left, reaching the green tube characterized by the presence of a clock. Climb up the brown hill (still retrieving the various clocks), then jump to the second cart, using it to reach the launch star. Hit the enemy with 2-3 attacks, thus completing the level and recovering the star.
Galaxy Yoshi Star
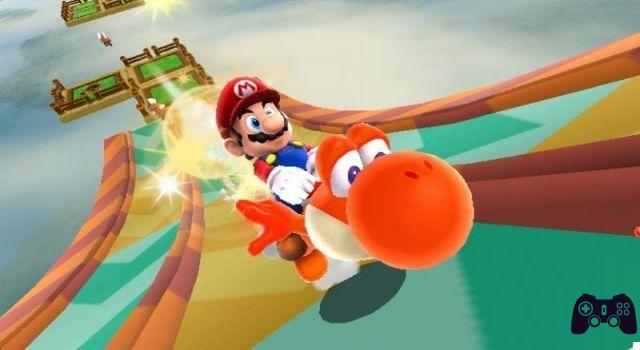
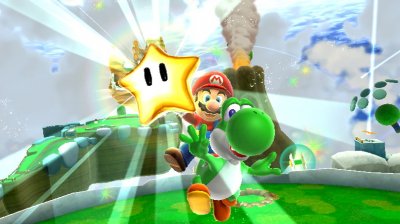
Saddle Up With Yoshi
Start walking straight, dodging the piranha plants and the blue enemies that throw stones from their mouth. After defeating the Magikoopa, you will have access to Yoshi. Hit the egg, jump on the back of your friend. His moves are slightly different than for Mario solo - by holding the A button, you will continue to "jump" in midair; by pressing B together with the pointer you can pick up objects with the tongue; finally, by pressing Z and A at the same time, you can get off Yoshi's back. Jump immediately on the trampoline to retrieve the Comet Medal. Then walk the mud-covered path, following the instructions marked on the sign. Launch into the air, retrieve the flag. Break the crystal above the gray path. Launch yourself again, climbing the mountain. Aim Yoshi's tongue at the flower suspended in the air, thus arriving at a rather large ravine. Still using Yoshi's tongue, pull out a platform from the side of the ravine. Then start climbing the whole thing, holding on to the flowers. When you get to the crystal containing the star, attack it twice. Pick up the star that pops out (using the flower on the left as a lever), completing the level.
Spiny Control
Get to Yoshi's egg. Hit the red turtles with Yoshi's tongue - twice - so that Yoshi eats them, completely neutralizing their action. You can then spit them out at your opponents. Break the cage around the star and go for it. Shoot the cage with Luma inside, then talk to Luma himself to initiate the launch. Thanks to the usual language, you can get the platforms out and go up. Swallow one of the turtles, then swallow it and spit it towards the cage. You will meet a Lakitu on a purple cloud. Hit him too - in the usual way, pushing back the turtles he throws at you - then break the crystals next to you to recover some life points.
Spiny Rainbow Romp
The stars are positioned here as follows: one near the entrance, three next to the white stones, inside the mud circle. The only real trick we recommend you to take is not to be imprisoned by the circle of mud, otherwise everything should be extremely simple.
Galassia Spin Dig
Digga-Leg's Planet
Retrieve the jackhammer, then set off in search of the tallest tower on the planet. The jackhammer allows you to drill through the planets, thus reaching the opposite side in the blink of an eye. Starting from the tower, perform the maneuver just described. Talk to Luma. Launch, then equip the hammer again and off to the other side of the planet. Locate the square shaped piece of land, start digging with the hammer. Jump off the tower, grab the Comet Medal on the right. Jump to the left, start drilling again (directing the flow slightly to the right). Talk to Luma again, thus reaching the next planet. Walk along the bridge (consisting of 6 retractable platforms); wait for Luma to join you. Dig into the interior of the following planet; arrived at the top, you will locate a small pit - it is the indication relative to the point from which to start the umpteenth excavation. Launch the starship, then launch from the back of the starship to get close to the Digga-Leg. This is the equivalent of the end-of-level boss. To defeat it, drill into the planet and hit it when the glass cage containing the star faces the planet. Three hits will be enough to tear the glass apart, allowing you to get your hands on the star.
Silver Stars Down Deep
Break the crystal containing the star; defeat the piranha plant with a standard attack, thus climbing the vine plant (you will have to rotate the Wiimote to make the climb). Go down the tube, arriving at an underground level. To proceed, you'll need to drill through the ground while avoiding the oncoming enemies. Drill straight into the first room; come to the second, on the right. Then, inside the tube. Drill down, go down the pipe. Let yourself be launched, reaching a planet covered with dust. Jump to the side of the platform, locate a new drill. Next to it, a silver star - you'll need to recover five to make a gold star. They are located in the center of the planet, inside small secret chambers - to reach them, drill as only you know how to do. The starting points will be indicated by small black spots.
Digga-Leg's Daredevil Run
You've done it before, so the fight will likely prove to be very easy. Repeat the strategy - stay on the opposite side of the planet, strictly avoiding / dodging his underlings.
Fluffy Bluff Galaxy
Search for the Toad Brigade Captain
Locate the white flower at the top of the altar, next to the wooden man. It is the flower-cloud that allows you to create cloud-platforms in mid-air, turning on yourself. Begin to walk the level, using the clouds when necessary. At the top of the ascent, kill the two piranha plants. Climb up, then left, up to the group of clouds, from which you can then reach the launch star. Use it to get to the aquatic planet. Run straight along the linear path that characterizes the planet (we use the verb "to run" as there are several of your clones and the only way to avoid them without hassle is to run). Collect the five star pieces to create a launch star. Now, off to the next planet. Here, too, you will have to use the flower to create cloud platforms. Get thrown up by the "hook" near the tree, pressing the A key to let you shoot forward. Work again with clouds to reach the top of the tree, then the gray plateau, then the monkey. Talk to her to retrieve the star.
The Chimp's Stomp Challenge
This is a minigame, it requires you to earn a total of 10'000 points; they will be earned in the following way:
Killing 1/2/3 consecutive enemies: 100/200/300 points.
Star section: 10 points.
Coin: 100 points.
Large coin: 1000 points.
Mushrooms: 1000 points.
Start moving towards the tree, climb it, then hit the large coin - without disdaining its smaller companions. Locate the mushrooms at the bottom of the tree, as well as at the top of the ravine. We recommend mid-air somersaults as a "connection" move to kill more than one enemy in a row.
Every Planet Has Its Price
Climb the tree near the entrance to the level, grab the various coins. Enter the pipe behind the tree. Try to recover as many coins as possible. If you collect more than 60, the level will be completed. If not, keep going. You will come to a flower bed, upon which a piranha plant rests. Kill the plant, then use the cloud platform to hit the block above you. Retrieve the coins, repeat the procedure for the block above the next cloud. Now you will surely have the opportunity to take 60 coins. After doing this, take the first cloud flower, climb to the top of the tree, then go with a throwing star to the top cloud. Collect all the coins, reaching at least 100. Give them to Luma. It will eat them, turning into a planet. Explore the planet, traveling through the usual clouds; once you reach the highest peak, you can make the star yours.
Flip Swap Galaxy
Think Before You Shake
To access this galaxy, you will need to donate 300 Star Pieces to Luma. Once this is done, the particularities of the galaxy are mainly related to the presence of platforms whose shape will change with each of your somersaults. Therefore, you will not be able to perform somersaults when you are on the ground, as in that case you will fall down immediately. Secondly, you must absolutely avoid contact with electric gates. These two tricks will be enough to get you through much of the level. You will therefore arrive in the vicinity of some Chomp, enemies who go to occupy the platforms that have their same color (avoid them, therefore, by jumping only on the differently colored platforms). Retrieving the comet medal will see you visit their respawn point - so it's best to familiarize yourself with this type of opponent before doing so.
Purple Coin Flip 'n' Sprint
Here you will have to take a little more seriously the typical characteristic of the platforms of this galaxy, that is their tendency to change following the somersault. Carefully select the direction of your jump, as well as whether or not it is worth the turn, as a single misjudgment can cause your demise. With caution, you will certainly be able to recover the two stars, given the total linearity of the path.
Rightside Down galaxy
Breaking The Laws Of Gravity
The level will start from a two-dimensional view. Proceed down, then climb the flower. Press the switch, causing gravity reversal. Continue forward, up to a piranha plant. Get closer to it; when he starts chewing, run to the edge of the platform. The enemy will fall down, you can easily jump on his head. At the platforms, pay attention to the arrows; indicate the direction of the gravitational field. Always press the reverse switches, they will allow you to drag platforms to new areas. Perform a somersault followed by a wall-jump (press A after impact with the wall) to retrieve the first Comet-Star, located between the two Thwomp. In the next area, a back flip will allow you to get your hands on the Fire Flower; it allows the launch of fireballs following the shaking of the Wiimote. Break the various crates, reaching the green section, where the gravitational field "points" towards the screen (act as if the camera were placed on top of Mario). The next room will be full of Thwomp, but you can avoid them by jumping on the brown wooden blocks. Follow the "circle" formed by the gravity arrows in a clockwise direction, thus reaching the Star (we recommend a long jump, starting from the initial platform).
The Great Crate Incinerator
Select the first level, continuing to the first gravity inverter. Left, enter the tube. Get the Fire Flower, break the crates. Enter the following tube, thus encountering Gearmo. He will ask you to break the crates there on his behalf. We recommend fireballs to maximize your productivity. After completing the process, you will get a Star as a reward.
Galaxy Bowser Junior Fieiry Fotilla
Gobblegut's Aching Belly
Go up the stairs right after the first Thwomp, then perform a back flip to get your hands on the Comet Star. Then reach the switch at the top left; reached the next planet, look at the screen with the suggestions to understand the technique to use, so as not to fall into the lava (a kind of aerial "stall", allows you to re-align the fall). So walk along the various platforms, not forgetting the mushroom between the last two. Then launch towards Bowser Junior. He will summon a large dragon. To defeat him, you will have to wait for him to "dive" into the planet, thus making attacks towards the red spheres that will appear along his body - obviously, always dodging his blows. Its elimination will allow you to get your hands on the first Grand Star!
Fiery Flotilla Speed Run
This is a repetition of the previous fight, with a time limit of 2 minutes (usually more than enough).
PART TWO
Below, the galaxies contained in the second part of the game map.
Galaxy Puzzle Plank
The Puzzling Picture Block
You will easily notice a 10-pointed white star near the start of the level. Jump on it, holding Z, to make it literally "sink". Then press the switch at the bottom right for a launch star, the one at the top left to "recover" some musical notes that will compose new "lives" (1-Up). So continue straight, arriving at 3 towers - also "marked" by a white star. Make them sink to the ground, then head to the opposite side of the planet, climb the towers and launch. Keep running straight, paying attention to the wooden platforms being destroyed by the electric saws. Collect the Comet medal on the left, then wall-jump across the crevasse, running forward at full speed to dodge all the looming power saws. Press the switch on the left, then forward again, towards the launch star. The following planet is a kind of wooden puzzle. Locate the white stars, sink the pieces in their correspondence. A giant insect will appear; wait for him to charge in your direction, then do a somersault, reach for his head and hit him repeatedly. Its elimination will release a star.
Purple Coin Shadow Vault
Short-lived puzzle, for which some general advice applies: try to make your coins in groups of four at a time; at the same time, absolutely avoid retracing your steps (it would further confuse the progression). Don't worry about the maximum time: one minute is more than enough.
Bugaboom's Back
You will need 70 stars here for Luma. You can retrieve five by pressing the switch at the top right; the rest by playing the minigame in the center of the planet where Luma is located, a minigame that will simply put you in front of a platforming session - which, if performed perfectly, will allow you to recover the required 65 stars. By feeding Numa, he will transform into a large boss - a kind of giant insect with equally huge pincers. Its back has a white star, you will have to jump (by pressing Z) on it to end the existence of the insect.
Hightail Falls galaxy
Hot-Stepping Dash Pepper
Retrieve the "Dash Pepper" immediately to speed up Yoshi's run. Use it now to reach the launch star at the top of the steep climb. So, walk the vertical wall (again thanks to the Dash Pepper) and overcome the path of flowers using the help of Yoshi's tongue. After the log bridge, you will find the Comet-Medal, at the top of yet another vertical wall.
Silver Stars in Hightail Falls
Sufficiently linear level; after passing the first vertical wall, take the leftmost path. You will find in front of you a coin of considerable size, surrounded by other smaller cousins (even if some are missing, you can repeat the procedure over and over again). Give 30 coins to the Luma, it will create a new planet. On it, have Yoshi eat all enemies who have Silver Stars (at least 5), thus minting the Golden Star.
Boulder Bowl Galaxy
Rock and Rollodillo
Unlock the rock mushroom by destroying the three rock spitters around the cage. Then shake the Wiimote to start rolling along the level, like a rock (to stop, press the A and Z keys at the same time). Roll to the giant pink crystal, locating the Metal Comet. Then reach the steel wall, hitting it to create a bridge. Eliminate the opponents, then launch down the ramp (always like rock). A launch star will be unlocked; using it, you will reach a second crystal, which is pink in color - break that too. Beware of the slime on the ground, however, it can slow you down considerably in your standard form - but not if you are boulders. After two launches, you will find yourself in the presence of Rollodillo, a boss. To destroy it, retrieve the nearby mushroom-rock, then roll onto its back-butt; avoid it absolutely in the moments when it will turn into a ball of quills, trying to hit you to death. Given the difficulty of controlling the rock, we recommend starting rolling from its immediate vicinity, greatly simplifying the process.
Rolling Crabber Romp
Conceptually rather simple level; immediately retrieve the mushroom-rock, start rolling towards the clusters of enemies scattered along the level - frequently using the jump + Z command to "attack" two different jump-roll, so as to obtain a bonus and minimize your exposure to enemy shots .
C'mere, Goomba
Proceed through the galaxy until you have a chance to launch towards the planet of rolling rocks & Chomp. Locate the Golden Gearmo, it will tell you that it is looking for a Goomba. Go back to the place you came from, take the mushroom-rock and break one of the three rock columns. Two of them contain Goomba; make them chase you, so that they end up inside the "zone" set up by Gearmo. He will reward you with a star.
Video - Gameplay
Cosmic Cove galaxy
Twin Falls Hideaway
Attack the Koopa, grab its shell - you need it to increase your swimming speed. Go down to the river - you will notice the appearance of a timer next to Mario's head, this is the remaining air supply. Go along the river (with the help of the Koopa shell we were talking about earlier), and then retrieve the Comet-Medal present in the shell at the end. Then climb the tower in the center of the level, where there is a switch. Press it to freeze the body of water, which will allow you to skate on ice. Use this skill to reach frozen waterfalls; perform a wall-jump using the waterfalls as leverage; Break the crystal at the top to retrieve the star.
Exploring the Cosmic Cavern
Skate along the ice path, entering the tube on the right - near the end of the level. You will enter a kind of two-dimensional cave. Crush the blocks, then swim to the right (press the A button to jump out of the water when you are close to the surface), try to dodge the incoming rolling balls. Jump back into the water, right after the flag. Go down for a while, to a conduit. Then right, switch on the wall. Press it and keep going down. Dodge the various monsters that try to bite you by swimming quickly (holding down the A key), then enter the tube. Swim to the top, then along the short stream, avoiding enemies and mines along the way. Locate the Goomba on the platform; you continue undeterred to dodge the mines, then exiting near the platform next to the Paragoomba. Use the moving water cubes to reach the key. Teleport and talk to Luma, making yourself launch twice, towards the rock planet. Take the drill, then go to the piece of land at the bottom left (a kind of very long rectangle). Kill the robots (by jumping over them and then literally "drill them"). Grab a second key, then continue digging into the pit. Water will begin to gush out of the liquid that you can use to reach the platform with the star.
Catch That Star Bunny
Select the first level, starting to move along its entire length, taking coins when possible. You will need to provide 15 coins to the Luma for it to take you to the water planet. Once there, converse with the rabbit, then press the switch on the left, causing the stream to freeze. In this way, it will be much easier to catch the rabbit, as Mario's speed will be increased by his skating (use the column of light as a reference point to understand his location). After you catch him, he will give you a star.
Wild Glide Galaxy
Fluzzard's First Flight
Talk to the little bird next to you, he will let you use Fluzzard - a species of large fish-ray in the form of a bird. Fly along the only aerial track available, recovering the star; to get your hands on the Comet Medal as well, you will need to pass through all five checkpoints - only after that will it appear near the end of the path. The first checkpoint is next to the red balloon; the second immediately after the blue balloon, near the river; the third on the island after the yellow balloon; the fourth on the brown root that comes out of the wall to the left of the waterfall, and then proceeds towards the canyon, reaching the last one right next to the end of the river.
Jungle Fluzzard Race
Talk to the black bird to start the run; we recommend a conservative and cautious approach to acting at this level - try not to hit any obstacles, always maintaining a decent level of speed (absolutely avoid placing the Wiimote upwards, it will slow you down). Remember that the opponent who will take the first place will usually have a time around one minute and five seconds, adjust accordingly.
Honeybloom galaxy
Bumble Beginnings
Wall-jump to reach the platforms above you, then slide down to the Bee Mushroom. After equipping Mario, he will be able to fly for a certain amount of time by holding down the A button. If you touch a water thing, the bee skill set will automatically be removed. Begin to climb, thus turning to the right, using the clouds as platforms. At the top, you can retrieve the Comet Medal (inside an alcove). Then use the vines as a support to retrieve the next mushroom-bee. Jump along the fruits (they give you an extra momentum to continue the flight). So dodge the clouds, until you reach the next flag. Up, then right, grab onto the orange rods, dodge a subsequent group of opponents. The last section will see you "facing" plants with spikes trying to pierce you. Given their slowness, it is enough to stay far away to avoid their oppression. Climb the clouds to get your hands on the coveted Stella.
The Secret Wall Jump
Cling to the rope (at the beginning of the level), start moving trying to reach the highest point possible (pick up speed by moving like a pendulum). You should notice a wall, with some wooden planks, in the upper right. Rotating during the jump, keeping the direction constant, is the only way to get to the alcove unscathed. Collect the star bits, then do several wall-jumps to the top, where you can locate the star inside a puddle.
Galaxy Bowser Lava Lair
Bowser's Big Lava Power Party
Kill the Magikoopa, causing a blue star to appear. "Underline" it with the pointer, press the A key to make it throw a pull beam. Approach it, then move along the lava using the special platforms. Pick up the star mushroom in the center. Launch yourself forward. You will notice several platforms "with the face". You will know that they are about to take the support out of their "mood" shift - the big face will get angry. Kick the Hammer Bro to finish his walk, then move along the "angry" platforms. The various Whomps will try to take out you, of course - dodge them and jump + Z on their back to send their warlike intentions back to the sender. Also jump on the small yellow meteorite next to the white star, thus shooting it in the air and knocking the Comet Medal to the ground. In the next area you will encounter enemies who will "eat" the ground below you, trying to make you fall. Jump on their head to counter their action. Also pay attention to the statues of Bowser, capable of electrocuting you. Try to get the star mushrooms to regain life points. To open the door at the end of the path, hit the meteorite twice - from different angles - so that it hits the symbols of Bowser, top left and right. So approach Bowser himself; it will immediately try to fire in your direction. Wait for the meteorites launched by him to reach the surface of the planet, thus diverting them towards the white star, so that they go to hit Bowser! By repeating this procedure, it will release the Big Star that you can safely withdraw!
PART THREE
Below, the galaxies contained in the third part of the game map.
Tall Trunk Galaxy
The Flotacious Blimp Fruit
Walk under the planet, locating Yoshi. Jump on his back, buy the Blimp fruit. Climb the tree, using this very object. Once you reach the trunk, use the fruit to "rotate" around it (gravity follows the shape of the trunk). Take possession of the stars, go for it. Hold the A button to stay in mid-air, thus extending your flight, until you reach the next level. Its structure is similar to that of the previous one - walking through it in its entirety you can finally get your hands on the Star.
Tall Trunk's Big Slide
Use the branches to reach the launch star. From it, you can reach a rather large descent, where gravity does not act - you can therefore "slide" both towards the floor and towards the ceiling, as you please. Then proceed along the path, until you reach the Whittle (the subject made entirely of wood) with the triangular head. Talk to him to retrieve the star.
Tall Trunk's Purple Coin Slide
The amount of coins here is extremely high, it is practically impossible to go through all of them. We therefore recommend focusing on surviving along the "slide" rather than attempting to withdraw coins located in high-risk areas. If you get less than 100, simply repeat everything until you reach the quantity you want.
Galassia Cloudy Court
Head in the Clouds
Jump immediately into the clouds, then use them to reach the flower, where you can "refuel". Jump on the batteries that will act as a springboard to reach a throwing star. It will allow you (and your cloud) to proceed along the wall and then to the next planet. Then again up, therefore left, up to the moving roof. Do a back flip, create a cloud when the wall opens. To your right, the Comet-Medal (you have to be quick to be able to make it yours). A little higher, again through the intercession of the clouds, you can get your hands on the star, a situation that will coincide with the end of the level.
The Shadow Lining
Follow the path that is autonomously made up of blue blocks, going to pick up the pieces of the star, at the same time dodging all the clones (as usual, the best method to avoid them is to run as fast as possible). Then perform a wall-jump, so as to be able to reach the next segment of blue blocks, the last part of the level, without particular obstacles.
Silver Stars in the Purple Pond
Select the "Head in the Clouds" level, trying to get as many coins as possible (you can find a giant one right above one of the batteries). Next to the hippo, you can find Coinstar, ready to convert coins to a planet. You will be thrown into the middle of a kind of plain full of purple slime. Go straight ahead, trying to recover the five bits of star quickly, so as to escape the looming clones - use the cloud mushrooms to create shortcuts along the pools if necessary.
Haunty Halls galaxy
A Glimmer of Bulb Berry
Follow the only path available, then let yourself be launched. The next path will tend to appear and disappear periodically. Try to always stay in motion, staying close to its central section. In doing so, you shouldn't run into excessive problems. You will come to a pipe, completely surrounded by enemies. Move to the upper left section of the platform, wait for the path to appear, reach its end to retrieve the Comet Medal. Then enter the tube and get Yoshi. The Bulb Berry will light the path beneath your feet. Pick up the key on the right (just before the door). Then continue exploring the path; try not to be hit by the enemies - on pain of your death and Yoshi's. At the end of the path, you can get your hands on the Star.
Sneaking Down the Creepy Corridor
You will be immediately chased by a giant Boo, but it won't cause you any major problems, assuming you stay within the main path. However, you can immobilize them simply by looking in their direction. The level turns out to be linear, dodge everyone present until you reach the star at the end, by now you should have acquired enough experience in "standard" practices.
Spooky Cosmic Clone Chase
We recommend a slow and cautious approach, as although you may be concerned about the slowdown caused by the carpet, you must remember that it slows down your clone enemies as well. The only problem could appear towards the end of the scheme, where some self-propelled platforms are placed in such a way as to conflict with the camera; however, using the air "stall" allows you to precisely direct your jump and should prevent your departure. Break the crystal to retrieve the Star.
Galaxy Freezy Flake
Bowser on Ice
Pick up the Fire Flower, then continue to the lower section of the planet. Shoot a fireball at the Goomba statue, then launch. Take the next Fire Flower, roast the Bowser statue (with three consecutive balls). Then proceed along the icy descent to a pile of snowy blocks. Shoot at the completely white ones. You will reveal a small alcove, inside which you will find the Comet-Medal. At the top, a pipe - enter it. Shoot the snowballs at the lava to move around the room. In front of the statue, yet another Fire Flower, with which you can roast Bowser himself and take possession of the star.
The Chimp's Skating Challenge
Select the first level, make the first Fire Flower yours. Shoot a (fire) ball at the tree beyond the frozen lake. A tube will appear, inside a chimpanzee will propose a challenge. You will have to slide along the path, then hitting the green and gold colored enemies, dodging those with spikes. We recommend eliminating them as soon as they enter the scene, accumulating them would be extremely dangerous.
Sorbets's Chilly Reception
First break the Goomba sculpture below. Then jump in and start retrieving the star pieces; to do this, you will have to roll inside the following objects (breaking them): the two Goomba sculptures next to the mushrooms, the tree next to the rabbit, the crystal next to the stairs, the Goomba sculpture on top of the hill. You will then be catapulted to the next planet, a kind of labyrinth full of snow. Keep to the right, taking out the enemies. Jump from the wooden platform to the coin below. Take possession of the 1-Ups. Then use the small launch star to get back up. Keep following the wall to the right, reaching the Luma shop. Throw yourself repeatedly, thus encountering Sorbetti, a giant ball of ice (the boss). The best way to eliminate it is to hit (via a somersault) its red nose. In case you have HP problems, dodge his attacks, so he goes to "uncover" coins for you. Victory will allow you to get your hands on a star.
Galassia Rolling Masterpiece
Silver Chomp Grudge Match
Talk to Bill Board to start the short tutorial related to the level in question. You will have to press the A key to jump, then deviate the trajectory to move in the selected direction; holding the Wiimote vertically. Retrieve the key from the planet, then press all the blue switches - turning them yellow; retrieve the Comet Medal and very quickly run forward before your platform is literally "sawed" in two. Throw the Silver Chomp off the platform, then place the ball in the last hole. It will open, revealing the Star.
Masterpiece Speed Run
The key can be found in the blue section of the planet in the shape of a pencil; you will have to try to get to the golf course within one minute of the start, in this way you will ensure a discrete maximum time. Jump to avoid the bombs and speed up your progress. Again, the last juncture requires the launch of the Silver Chomp from the edge of the platform.
Beat Block Galaxy
Step to the Beep
Turn the volume up to maximum; the background music will indicate the color of the platform that is about to disappear. So, skip one of them if it is mentioned by the jingle. The Comet Medal can be found shortly after the right turn, above the yellow blocks. At the last juncture of the level, remember that the first three stars are in the blocks at the bottom, the last two at the top.
Silver Stars in Double Time
The platforms will change here four times faster. You will have to perform a large amount of jumps; obviously remembering to memorize the visibility / invisibility of your destination / origin. In case you find yourself in the middle of the jump with no places to land, turn around to buy time, it should usually cause it to appear in sufficient time. Upon reaching the pyramid, retrieve the silver stars (using the purple terrain section as a "free zone"). Almost all of them are clearly visible; only exception - one is hidden in the upper left corner, with the necessary calm you can still recover it without major problems.
Galassi Bowser Junior Fearsome Fleet
Bowser Jr.'s Mighty Megahammer
Jump on Yoshi, swallow a bullet and shoot it at the glass cage. Climb onto the moving platforms and use their own bullets to take out the enemies. Destroy the glass cage, then go to the next planet. Here, move to the left platform, breaking another cage, still swallowing bullets. Press the switch, go up on the platform making it reach the ships. Grab the mushrooms, then continue on to Megahammer.
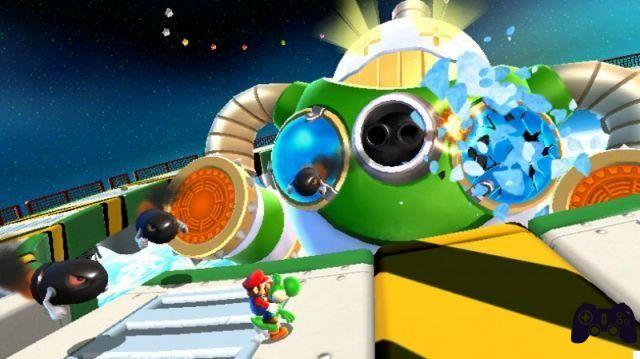
To defeat him, have - as always - Yoshi swallow the bullets, then send them back to the sender aiming at the blue pustules on his chest. After two shots, it will show Bowser Jr. inside his "head", shoot him two more times to end the level, recovering the Star.
FOURTH PART
Below, the galaxies contained in the fourth part of the game map.
Supermassive Galaxy
Huge Trouble with Big Wigglers
Begin moving forward, then taking a long jump to reach the Comet Medal. So go wall-jump near the Coin, clinging to the pipe, traveling upwards (always trying to dodge the Piranha Plants). Use the small alcoves along the way to avoid the Thwomp, thus reaching the next planet. Begin to "drill" it trying to hit the belly of the turtles that are on the other side (their traditional weak point). So hurry forward, up to a stone building. Make a long jump to dodge the Wigglers, arriving at a kind of ring of stones. Grab the Coin, jump along the ring until you reach the flag; use it as a lever to get to the Star.
Big Wigglers Speed Run
Level identical to the previous one, even if - as the name implies - the focus is shifted to speed. Try not to be hit by the enemies, easily reaching the pole, on top of which will be the flag.
In Full Bloom
Select the first level, then perform the first roll. Wait a moment before carrying out the second; Mario will come out of the star. Walk forward, you will notice that the plants grow under your feet. Fill the planet with green, a long branch will appear that will lead you to the Star.
Flipsville Galaxy
Flip-Flopping in Flipsville
During the initial section, use jump + Z on the grates to slam them to the ground, repeating the procedure in succession along all the following ones (grates). Walk to the right, reaching a room with a Mugiwara. Do a somersault near the central grate, recovering the Comet Medal. New somersault, this time back, then enter the grate farthest from the stone-throwing enemy. Drop down, dodge the Chomp, launch. Enter the grain furthest from the flag. Overcome the platforms with various somersaults, thus arriving in the presence of Glamdozer. Wait for it to charge in your direction, then perform a pirouette, making it sit above you; another pirouette to hit her (her weak point is her belly).
Flipsville's New Digs
Slight variation on the theme - you'll have to dig the holes here yourself, rather than pushing the grates towards the ground. Reach Toad, get launched. Reached the tower, retrieve the pneumatic hammer; excavate the points where the "non-raised" sections of the tower coincide with the "non-raised" sections of the tower on the other side. By repeating the procedure, you will reach a pipe, obviously to go through. In the next section, you'll have to wait for the "gravity arrow" to point in one direction in order to dig. By respecting this precaution, it will not be particularly difficult to navigate it.
Purple Coin Spin Speed Run
Collect the coins in the first room, then the hammer. Drill left, grab the coins (changing gravity to your advantage). Then right, up, left, up, right, left x 2, and down. You should have taken all the coins, so the Star will appear in the center of the room.
Starshine Beach Galaxy
Surf, Sand, and Silver Stars
Reach the water planet (dive in its direction) and launch. You will have to recover the five silver stars to go and compose a gold one. The first is inside the glass cage (use a thorn to destroy it); the second on top of the plant; the third at the top of the tower (use the Blimp Fluit to increase the range of the jump); the fourth right above the stream (Yoshi can "walk on water"); the last one right next to the penultimate, on the buoy. As for the Comet Medal, you will have to dive into the lake and locate the cave with the two monsters coming out of the wall (Yoshi can't swim underwater, go down with Z + A).
Climbing the Cloudy Tower
Pass the statue, dive into the lake characterized by the presence of a cloud-mushroom-shaped tower. Follow the coin path to the base of the tower. Go ahead, hit the switch. Take the flower-cloud, continue towards the cylindrical tower. Climb to the top, using the moving clouds. Retrieve the second flower and climb the tree, at the top of which the Star awaits you.
Purple Coin Beach Dash
Use the Dash Pepper - after jumping on Yoshi - to walk along the water, following the path of coins. Try to stay in the center of the course to maximize your chances of winning (tacking is complicated, it can make you "miss" a lot of coins).
Chompworks Galaxy
Where the Chomps Are Made of Gold
Go up the stairs, then veer to the left, where the switch is. Press it, drop down, then another switch. Launch yourself, then reach the following star. You will now need to roll a Chomp across the room. With each flip, the red and blue platforms will change color - be careful. Press the switch to activate the Chomp. Jump onto the green scale when the red platforms are raised. As soon as the Chomp steps on the scale, make a second turn, making the platforms appear blue. In doing so, the Chomp should naturally reach the hole. In the next juncture, use Mario's weight to push the first two switches; the third must instead be lifted (by Mario) while the Chomp is on top of it.
Spring into the Chompworks
Retrieve the mushroom-jump, use it to reach the launch star. Walk the path with the Chomp, jumping over the beings. Once you reach the platform, launch yourself a second time, thus climbing the vertical wall with a single, long jump. Another platform, then Stella (at the top of the path).
Cosmic Clones in the Chompworks
This is the clone-level of the last part of "Chomps Are Made of Gold", with the addition of Cosmic Clone all along the way. Reach the end of the level, you will notice several Chomp emerging from the lava. Drop the two platforms down, so the Chomp can walk across them, impacting the clones - thus stopping their path in your direction. As soon as the Golden Chomp arrives on the scene, jump to the next two platforms, then circle around the switch, finally managing to press it.
Sweet Mystery Galaxy
Bulb Berry's Mysterious Glow
Begin to proceed along the level, recovering all the Bulb Berry in the area. After the first flag, walk up to the right, then enter first person mode. Take possession of all the bits of star; if you want, it is possible to commit suicide and repeat the procedure, with the aim of taking possession of large quantities of pieces of star (you will be able to reach 999 pieces). After the chocolate bar, go down to the cracker with the red fruit. Right, take the Comet Medal. Quickly return to the chocolate, before the fruit finishes its action. A little further on, take the fifth fruit using Yoshi's tongue, letting it fall vertically for a moment. You will then have to press the blue switches, causing them to turn yellow. Hit the first one, then walk across the platforms, left, hit the second one. Pick up the fruit, climb up. Right, third switch; recovered the Bulb Berries. Right, away along the platforms, to the last switch. Another fruit, then left, up to the launching star. Use it, then go up the cake. Right, then left, until the Star is recovered.
Bulb Berry's Purple Coin Glow
Here you will need to recover 100 purple coins. Always try to keep enough time to retrieve the flashing berry, possibly going back and eating the "reborn" berry. The level is structurally identical to the previous one.
Honeyhop galaxy
The Sweetest Silver Stars
Collect the mushroom, then start walking the platforms (linear path), paying attention to the water. At the second part, wall-jump towards the crevasse on the right, recovering the Comet Medal. So, go up to the top of the mountain (in the form of a bee), recovering the silver star on its back. The other four are located along the approach path to the queen.
The Chimp's Score Challenge
Minigame that requires reaching a score of 10 - Scores are identical to what was seen in that of Fluffy Bluff. Most points can be earned along the way up the mountain. Move to the right, jumping on the enemies one after the other (without interruption, so as to improve the level of the multiplier). Take the coins also from the swimming pool and only then throw yourself. More coins are found along the rope, shortly after the ravine. At the top, the greatest contribution to the objective will be made by the "rings" of enemies that facilitate consecutive killing. At this point, you should have reached the 000-star target.
Galassia Bowser Junior Gravity Gauntlet
Breaking into Bowser's Castle
The first part of the path is extremely linear, especially since you have probably already familiarized yourself with the changes in gravity, during one of the many previous themed levels. After a while, you will enter 2-D mode. First, retrieve the Comet Medal above the first block, always paying attention to the looming fireballs. So swim along the river, again a linear path. Back in 3-D, dodge the Whomps. Again 2-D. Jump to the ground (below, inverted gravity). Left, low. Jump to the platforms. Still down, to the launch star. Hit the meteorite, causing it to reach the Bowser icons on the ground, so that they are destroyed. Repeat the procedure on Bowser himself, dodging his shock waves, which you are used to by now.
Gravity Star Speed Run
Speed-based level (clocks increase the time limit). The watches whose finding is more difficult: above the case, next to the rotating arms of fire; above the block, after the start of section 2-D; above the blocks on the left, in the vertical walk section; left, immediately after the jump to the "land" below. Finally, perform a wall-jump to recover the Star.
FIFTH PART
Below, the galaxies contained in the fifth part of the game map.
Space Storm galaxy
Follow me, Bob-omb
You will experiment with blue stars here - underlining them with the pointer, then pressing A will cause a pull beam to appear and move you in their direction. Use them to reach the first launch star. Then, go to the cylinder, trying to avoid the green electricity discharges. At the third ring of rotating platforms, wait to reach the lowest part, then make a long jump to the Comet Medal. You will find yourself on top of a second glass cylinder. Locate the star under the glass; guide the nearby bob-omb to the case, causing it to be destroyed. Retrieve the launch star and off you go. Here you are at a second cylinder. Move forward, then left, looking for the raised square of land. Locate the "traction stars" by following the path created by them, progressively speeding up your progress to avoid contact with the green force field. At the end of the path, place yourself between the two traction stars to be automatically transported to the real star that marks the end of the level.
To the Top of Topman's Tower
Let yourself be pulled up to the first launch star. You will reach a tower, surrounded by some moving platforms. Use the switches to reach the top of the building. There you will find two Topmen; you will have to use the attack flip to cause their impact with the green force field. A third will appear, also reserve the procedure just described for him to get his hands on the Star.
C'mere, Topman
At the purple cylinder, locate the Gearmo next to the raised square. He wants you to lead a red enemy to his area. Reach the flag to find one. You will have to be able to lead him beyond the "source" of the bombs. Take the first bomb, attack it with a somersault, take it, throw it towards the glass case to cause it to break. The rest of the bombs will have to be thrown out of the way, so as not to cause a hitch to your client. Lead it along the right edge, then climb up and walk the left edge to Gearmo.
Galassia Slipsand
Squizzard's Sandy Sinkhole
Let the sand flow carry you to the launch star. Fly, then again a river of sand, up to a Comet Medal. Jump on the blocks at the end of the path, another launch star - through which you will come to a sandy drop. You will have to dodge the rolling stones. Quickly jump to the flag, launch again. Dodge Squizzard's attacks, hitting him with the Fire Flower - 2 times and it will be finished.
Sailing the Sandy Seas
Again, move along the stream of sand, eventually encountering a pipe. Enter it to reach a two-dimensional cave, where gravity will always be directed towards the "floor" on which Mario will be. Move left, then climb the wall and up the stairs to reach the rotating platform. Wait for gravity to turn left, jump into the orange tube. Use the special star to launch yourself. Use the bird to avoid most of the platforms, thus finally reaching the Star, immediately after the Chomp.
Shiverburn Galaxy
Prince Pikante's Peppery Mood
Stand on the yellow platform, dodging the shock waves, until you reach a mushroom cloud, near which you can flip a switch - it converts lava to ice. You can then slide to the next launch star. Walk (up) the various platforms, then convert the lava back into ice. You will reach some enemies that "spit" rocks and melons. Carry out the flip-attack on incoming melons to return them to the sender. So, continue walking on the lava-ice, passing the hexagonal sections. A little further on, you will face the boss. Its attack mode is similar to what was seen for the last group of enemies; you will have to wait for melons to shoot and send them back to the sender; the added difficulty is the progressive melting of the ice under your feet - always position yourself in places where you are sure you can move slightly to avoid falling. His demise will mark for you the possibility of recovering the Star.
Octo-Army Icy Rainbow Romp
Get launched immediately, then start skating, all the way to the rainbow star. In this way, you can simply "skate" over all the enemies - given your invincibility - and destroy them in no time at all. The star is the secret to achieving a quick and sure victory.
The Chimp's Ultimate Skating Challenge
Follow the path indicated during the first "episode" of this galaxy, until you reach the first launch star. Instead of using it, enter the pipe immediately behind it. A monkey will challenge you to a skating minigame. Try to stay near the central section of the level, memorizing the various game patterns that will tend to repeat themselves as the level repeats.
Video - Japanese Spot
Galaxy Boo Moon
Silver Stars Pop-Up
The start of the level is located inside a rather dark maze. Follow the wall to the right, open the doors, meeting the Boos. Go up, take a right at the fork. Launch yourself towards the self-propelled platforms. Collect the coins, then let the platform take you down. Then jump to the pink platform, follow it along the vertical walls. Launch yourself forward, not before taking possession of the Comet Medal. Collect the Silver Stars, using the switch at the bottom to raise the platforms.
Haunting the Howling Tower
Right, proceed along the doors. Hit the star pieces to stun the ghosts, then climb up and follow the wall to the right until you reach the Bowser statue. At the second fork, take the path that goes up. Another statue of Bowser, then down and right. Press the doors in front of you, enter the tube. Two-dimensional section: take the Boo mushroom, then press the A button to start floating and use the Wiimote (move it quickly) to make yourself invisible. Dodge the enemies, the level will now be completely linear, up to the coveted Star.
The Star in the Sinking Swamp
Proceed to the pink platform that leads to the launch star. Instead of using it, wait for another to appear on the left; jump in his direction, reaching a square platform. Dodge the ghosts and reach the Star.
Upside Dizzy Galaxy
A Walk on the Weird Side
Begin moving upward, using the gravity switch as an aid to get to the pipe. In the next room, the gravity will change about every 10 seconds, signaled by some kind of alarm. So try to secure yourself before the alarm. Reached the Comet Medal (taking advantage of the gravity modifications). The end of the room also contains the Star - don't worry too much about the damage caused by electricity, it won't be enough to seriously damage you.
Burning Upside Dizzy
Walk forward until you reach the two self-propelled platforms near the tube (top left). Jump to the lower platform, then move up. Proceed along the pipe, retrieve the Fire Flower, hit the central section of the crates. Climb to the top, then drop down the next hole. Then go down to the lower section of the screen (next to Gearmo) and shoot all the fireballs at your disposal vertically, destroying the crates. Geormo will give you the Star.
Galaxy Fleet Glide
Fluzzard's Wild Battlefield Glide
Talk to the little bird (right at the beginning of the level). Jump down to go through the first gate. Always remain almost crouched. Follow the circles further down near the next walls. The second gate is located on the back of the cylinder. Follow the path marked by the star pieces; the third gate is immediately after the second Thwomp. The fourth immediately after the enemies in the shape of bullets, also in this case remain rather low (and facing slightly to the left). The fifth - on the ground, before the closing door. Beware of falling debris; the Comet Medal is immediately on the left, after the fifth gate.
Fastest Feathers in the Galaxy
Quite simple, since you can choose the path that suits you best. Keep in mind that your opponent's time will be around one minute and two seconds; its speed will tend to decrease as you progress, so do not worry if you are losing a bit during the initial situations.
Galassia Bowser Junior Boom Bunker
Bowser Jr.'s Boomsday Machine
Have one of the bullet enemies chase you, so that it then crashes into the glass of the cage. Jump on the cannon, aim for the red and white target. Hit its center to take a life (1-Up). Kill the two Boomerang Bros, enter the launching star, shoot yourself; then use the next one, near which you will find yourself immediately after. Retrieve the Cloud Mushroom and Comet Badge from the blue platform circle. So jump + Z near the group of stones surrounded by mines. In this way, you can launch yourself towards Bowser Jr.; use the cloud-mushroom to climb upwards; from here, you can jump to the machine control room (where Bowser Jr is); smash the glass three times, defeating it - it will release the coveted Stella.
Boomsday Machine Daredevil Run
After defeating the Boomerang Bros, jump into the purple pool of slime twice. In its vicinity, a self-propelled platform. Stay in its highest section, avoiding the slime, reaching the clouds of flowers, from which to arrive at a launching star. It will lead you to the same boss from the previous level.
SIXTH PART
Below, the galaxies contained in the sixth part of the game map.
Melty Monster galaxy
The Magnificent Magma Sea
Proceed along the gravity path, holding A to stay on the ground. Move Mario to the pre-penultimate star on the left, then use the last star on the left to reach the launch star. Go through the platforms, paying attention to the emerging fireballs. Climb up the square pipes, retrieve the star mushroom. Move quickly along the square platform, avoiding the lava monster. Jump into the tornado, use it to reach the next area. Locate the only non-black planet, there is the Comet Medal. The planet next door instead contains the Star, hidden inside a crystal case that you will have to break.
A Stroll Down Rolling Lane
Pick up the rock mushroom, drop down the ramp. Jump to drop the steel bridge. Then start down the ramp, rolling and bouncing off the walls, finally pressing jump + Z to retrieve the Star in "Mario" mode.
The Chimp's Bowling Challenge
The goal here is to roll straight down the middle of the track. It is a matter of practice, difficult to give indications; we can tell you to be careful of the initial "pause" that characterizes the launch, it will take place only after 1-2 seconds, always keep this in mind. Victory will be awarded to you after reaching 5 points.
Galassia Clockwork Ruins
Time for Adventure
Move right, along the rotating platforms, using the aerial "stall" if necessary. In the next section, be careful to position yourself in front of a green block when the walls move, so you don't get crushed. Hit the switch, then make your way back along the blue walls. Free Luma (with the switch), then launch. Climb the incline, using the niches as protection from the rocks. Collect the Comet Medal near the "source" of the rocks. So do a wall-jump to hit the white star. Press the switch after the elevator, jump into one of the rock niches, letting yourself be carried to the top by its rotation; there you will find the Star.
The Adventure of the Purple Coins
The level is identical to the previous one in terms of structure, but there will be several purple coins to be recovered. Getting to 100 will be easy (in 5 minutes), take it easy.
The Ledge Hammer Trap
Move along the platforms, stocking up on coins (especially using the wheels). Just before the last platform, hit the block 10 times to get all the coins back. Then feed them to the ally, he will launch you towards a planet. Run along the first grassy path (watch out for the hammers coming from above - flip the switches to slow down the time). At the end of the path, Stella!
Throwback galaxy
Return of the Whomp King
Climb the mountain, then jump across the platforms to the flag - behind which is the Comet Medal. You will then have to fight a giant Whomp. Stand in front of him, positioning yourself directly between his feet. Run under him after his jump and hit him on the back as soon as possible. Enter the Bowser symbol that will appear. You will have to fight the King of the Whomp. Despite his charge, he does not particularly differ from other Whomps - it will be enough to hit him 3 times in the back to neutralize him. Therefore, recover the Star.
Silver Stars in the Whomp Fortress
Mission whose goal is to recover Silver Stars. The first is at the beginning of the path that climbs the mountain; the second under the sinking platform; the third on a cloud, immediately next to the rotating platform; the fourth on the cloud above Bowser's emblem; the fifth above a cloud, behind the Whomp fortress.
Whomp Silver Star Speed Run
The stars are found in the places listed in the previous post; to speed up the procedure, we recommend the continuous use - when possible - of the cloud-platforms created with a special flower.
Galaxy Battle Belt
Mini-Planet Mega-Run
In order to continue, you will have to kill all the enemies on the planet here. Eliminate the Goomba, go for it; hit the sender with the fireballs, then retrieve the Comet-Medal from the crater, on the next planet. Kill the crabs (by hitting their "back"). Take the shell, you will need it to eliminate the Boos. Push the ice back to the sender, then destroy the hoppers waiting for gravity to show their "weak" side (yellow). Then retrieve the key to get your hands on the star.
Snacktime for Gobblegut
Here you will have to donate 20 coins to Gobblegut. It will be quite easy to retrieve them - you'll have to get rid of all the gombas by "squeezing" them rather than using the usual somersault / spin kick. You will then be placed in front of a boss. It is exactly the same as the Gobblegut you faced during one of the first levels - the only additional thing needed is the presence of lava.
Flash Galaxy Black
Jumping Around in the Dark
Particular level, as it will take place almost completely in the dark. Pay attention to the rare moments when you will notice a "flash" of light, memorizing the route. When you reach Yoshi, take the fruit and travel to the left. Take the mushroom-star, then right. Hit the Paragoomba twice, defeating it. Float to the crevasse, then to the right of the mine. Take the fruit again, walk up to the Comet-Medal (just above the mine, top left). Jump across the ravine, then launch (launch point - bottom right). You will therefore have to get your hands on several Silver Stars. The first - path on the left, immediately after the start. Second - after the ghosts, on the platform on the left. Third - on the right, shortly after the start of the brick path. Fourth - on the self-propelled platform. Fifth - on the left, immediately after the platform releases you. So the Star will appear, make it yours.
Dark Octo-Army Romp
The goal is to kill all enemies within the time limit. The structure of the level is identical to what has just been seen; just pay attention to the crystal containing Yoshi, just before the end of the level (on the left) - given its ability to hit two enemies at a time, it will be essential to maximize the level of kills in a given time frame.
Galassia Slimy Spring
The Deep Shell Well
Go down, dive into the water, take the shell. Go past the group of enemies, grab the Comet Medal from the cave on the right. Another group of opponents, therefore a brick wall in front of you. Smash it with the shell, dive down (dodging the enemies). Take the air bubble, go for it. Dive again, another shell, then follow the rings that outline the path. Once they emerge, shoot your shell at the chest, retrieving the Star.
The Chimp's Coin Challenge
Talk to the monkey, he will give you a star if you manage to get the usual 10 points. The scores are similar to what was seen in the other sui generis levels; drop down, then dive into the water, taking the shell on the right. Dodge enemies with tentacles, they are a nuisance. Follow the next line of coins, then dash across the ravine. "Squeeze" the next line of coins to retrieve them all in one fell swoop; take yet another shell. Use it to finish off the Boos, it will yield a fair amount of shells. Go down the corridor, avoiding the rolling boulders (each dodge will increase your coin level). Once on the surface, you can make your last group of coins, on the grass.
Bowser's Galaxy Generator
Bowser's Fortified Fortress
Follow Luma, taking out the Hammer Bro and the plant. Use the spore to go down, retrieve the jackhammer, drill in correspondence of the mud. Let yourself be launched, then move along the cylinder, possibly helping you with the cloud mushroom. Talk to Luma again, launch. Forward, then right. Climb up Yoshi, continue straight along the flower path - watch out for the lava columns though. Eat the Dash Pepper as soon as the gate opens so you can fly inside. Launch into the section of self-propelled platforms. Take the mushroom-star, then turn right at the fork. Eat the Magikoopa, then jump to the left path to dodge the lava beast. When the paths converge, use the flower on the left to get to the Comet Medal. Climb up to the left again, climb the flag pole, shoot the meteorite at the symbols of Bowser on the ground. Hit the white star from different angles, starting the battle with Bowser. The main moves at his disposal are two: launch of meteorites (with an attached shock wave) and punch to the ground (also equipped with a shock wave). The method of attack always remains the same: repel the meteorites to the sender. After four hits, you can get your hands on the Big Star. Try to get it, unfortunately Bowser will appear again. Repeat the attack procedure, throwing meteorites at the monster. Take the Big Star, this time without trick or deception!
Video Solution - Playlist
Click here for the playlist!
Video Solution - Initial breakthroughs
Video Solution - Final Part
 Super Mario Galaxy 2 wii
- Wii
- WiiU
Exit date: June 11 2010