


Please note:
The solution is based on the American version of the game, so there may be differences with the Spanish one.
Claire's campaign
Medals available
Knock out an enemy five times, blinding them with Moira's flashlight beam, then hit them with a melee attack.
Escape the factory with more than a minute left.
Stun twenty enemies with Moira's flashlight beam.
Defeat ten enemies with secondary weapons.
Defeat three enemies with a silent attack.
Defeat ten enemies with a headshot.
Create five secondary weapons by combining items.
Create five healing items by combining items.
Open four military chests.
Find seven objects with Moira.
Main campaign
You will start this new episode in front of the closed door to the tower, the crashed helicopter will continue to burn in the background. There won't be much to do in this area, however you will have a new goal: to reach the factory.
Drawing by Kafka
Right off the bat is a very easy to miss design. Check the right side of the gate before entering to find the design on the wall.
On the other side of the gate, you can walk the long path that leads to the factory itself. Don't forget to look around for a chest, then go through the blue door. The next area will be the courtyard in front of the factory itself, inside there will be three buildings: the process plant, the butcher and the actual factory.
Tower emblem
Before going through the entrances to the main buildings, turn left from the door and look up at the large building in front of you to find the hidden emblem on the wall.
Break the crate on the left, then head to where the three buildings are. You will be provoked by the Superintendent and will be able to explore this safe area. The door on your left is electronically closed, the building ahead is closed by a retina scanner, and the building on the right is blocked by a large statue of Prometheus. On the statue you will find the name "Neil" and after checking it, the Superintendent will open the door behind it. Before entering, don't forget to open the military chest in the middle of the processing plant and the butcher shop, you will get the increase in ammunition for the automatic pistol, alcohol near the butcher shop and a ruby stuck in the wall above the statue (shoot to make it fall).
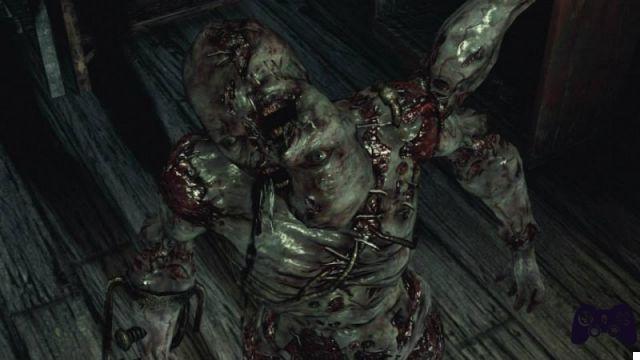
Inside the atrium of this first building you will find a table with a hidden object inside and a work table on the opposite side. Go past the graffiti (which says "Welcome to hell" in Cyrillic) and enter the plant. As you enter, you will come across a large blocked room a little further on, some bathrooms on the right and a freezer on the left. An Afflicted One lies on his back inside the freezer, but you can smash the window to hit him from a distance. In this episode, many Afflicted ones will tend to turn into Spolders within a minute of their first death, be very careful and keep your weapons pointed at newly killed enemies for safety. You will also find an empty bottle at the end of the hall leading to the locked room and some alcohol in front of the large door. Inside the freezer, be sure to pick up the item on the shelf to the right and check the bathroom for some cloth.
Take the stairs that go up to find yourself in front of another door closed by a retina scanner. There will be another bathroom on the right that hides a Afflicted hit in the legs from the door itself. Collect the green grass in the bathroom and the hidden object near the pipes in the nearby hole.
Drawing by Kafka
After taking out the Afflicted (and doing the same thing with his transformation into Spolder), check the desk he was standing on and light the wall to find the drawing.
Tower emblem
Check to the large locked room from the second floor, look above the hanging flag to find the emblem.
Going down one of the two corridors, you will find two closed doors (the noises on the opposite side will let you know that an ambush awaits you). The other door will have two windows that will show you two more Afflicted ones, take them out of the distance along with their transformations, then jump inside the room itself. You can collect ammo and gunpowder inside the lockers, a hidden object under the tables and other ammo in the drawers.
Head to the two large unlocked doors at the end and look to the right for a hidden object before entering the "Eagle Room".
This room contains a huge spiked ceiling, several interesting graffiti on the walls and two eagle statues. One of them holds a key and the other has an artificial eye. The key will be locked and removing the artificial eye will activate the ceiling with the spikes. To solve this puzzle, follow the graffiti warning asking you to crouch for the spikes to destroy the statue holding the key, then put the eye back in place. You won't be able to take the artificial eye with you, but the newly obtained key will open both shortcuts to the lower floor and the door to the great room.
Outside you will be attacked by some Afflicted and an Iron Head on both corridors. Try to clear one of the corridors before going through the other and, in this way, do not risk being surrounded. The door that was closed and that has now been broken open by an Afflicted will lead you to a room where you can find ammo, an empty bottle, a smelly chemical and a note. There will also be a military chest containing parts for the rifle, gunpowder in the lockers and ammunition. Two Spolders will appear soon, so be careful as you go downstairs. Some Afflicted will reappear inside the freezer, take them out and head to the room of light.
Ironically, the light room will be very dark, inside you will find green grass and other graffiti. A large space separates you from a bust. If you try to walk through this area, some firearms will tear you to bits in no time. As Moira, use the flashlight to light up some blue footprints to follow to reach the opposite side, collect the glass eye and disable the traps.
Return to the eagle room and swap the artificial eye with the glass one you just found, use it on the retina scanner and enter the manager's office. Here you can pick up the Magnum from the table and smash the vases to get a gem. Collect the fake guts from the corpse and the map on the table, then check the floor for a hidden item under the shelf before leaving the room. Place the fake guts inside the statue to free up space in your inventory and use the artificial eye to enter the next building: the butcher shop. Open the chest inside the first corridor and pick up the empty bottle before going through the door. Inside you will find an Afflicted one lying on the ground and one controlling the large room with two barriers inside. Collect the red grass in the room along with some hidden objects in the hall that connects the two rooms. A chest, a note and another hidden object will be found under some bins in the first room.
Drawing by Kafka
In the room with the two barriers and the explosive red barrel, light the wall near where you found the red grass to find the drawing.
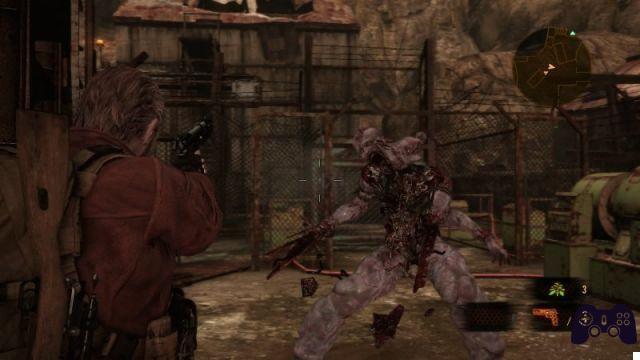
The next room contains the centerpiece of the butcher's shop, a large, bloody pit full of pig corpses and a Vulcanblubber ready to skin you. The enemy will reach you from the hallway at the back of the room and can be hit from behind if you are able to go unnoticed and discharge some firepower before retreating to a safe distance. Follow up to the red explosive barrel and hit it to damage the enemy with the resulting explosion, then use the columns to avoid getting hit by its mortar rounds. Once the enemy is past history, be sure to collect the chest in the blood pool and inside the back room, some cloth on the table, and a military chest containing the inventory expansion for Claire. The large door to the slaughter room is closed, so take the other corridor to the next room.
Tower emblem
Before the door to the next room, check inside one of the dumpsters on the left to find the emblem.
The next room contains a gate with a button, two columns of lethal blades as traps, a key inside one of them. Collecting the key will activate the traps on both sides. Quickly move to the left of the newly blocked door and have Moira climb onto the catwalk above. As your partner, you will only have a short time to collect some items along with a chest, a hidden object next to it and two military chests that contain rare parts. Be extremely cautious, as the traps will advance towards you. Once you have the crate, jump over the railing and pull it against the button to open the door, then run through it as Claire.
With the key in your possession, head to the slaughterhouse to find a machine with an object inside. Open the various chests and pick up the Sapphire on one of the platforms, then head to the back room for more chests and a military one. The button in this room will activate a conveyor belt with large chunks of meat. You will have to press the button a second time before the meat reaches the chopper, then hit one of the pieces to make it fall into the machine and get artificial guts. After you hit the fourth piece, two Afflicted ones will burst into the room, one of them will turn into a Spolder. Other enemies will be waiting for you in the back room and will attack you as you reach the artificial guts. Once you have the macabre item, an alarm will start ringing.
The escape for the entrance will surely be hectic and you will want to avoid the enemies along the way as much as possible so as not to be surrounded. From the butcher's, don't go right immediately as a Vulcanblubber is hiding there. Cross the walkway and turn around, dodge the Iron Head by circling the column, then go up the stairs. Once on the top floor, some Spolders will appear, it's time to use one of your explosives on the enemies and clear the area. Go straight through the room with two barriers where an Iron Head awaits you, throw another explosive at the enemy and advance trying to limit other clashes as much as possible.
Also arrange the second artificial guts inside the statue and move away to avoid an unpleasant surprise. With the statue to the side, enter the factory. From the long corridor make sure you enter the room on the side where you will find a green grass, an object hidden in the middle of the barrels and, more importantly, a new firearm. Continue down the hall until the gate closes behind you and a huge explosion will shake the very foundations of the structure you are inside. There will be no need to translate what the Russian voice is saying through megaphones, things are looking bad! Quickly run to the gate and enter the burning area.
As soon as you enter the area, you will only have five minutes to get out alive and you will have to collaborate frequently with your partner. Start by climbing the stairs and turning left to turn the valve, then have Moira up the walkway and have her turn the valve as well to open a passage for Claire. As Claire, go down the ramp and open the chest, then go up the stairs and turn a new valve.
Tower emblem
From where you stand, look towards the left wall where Moria must climb a broken ladder and make the emblem appear on the wall.
As Moira avoid the Iron Head and quickly open the chest, pick up the box and use it as a platform to reach the ladder. Turn the last valve and rejoin Claire. Go down the catwalk and take out the two Afflicted, smash the last chest and meet with Moira at the end of the room. There will be four iron heads, do not open any of these, in fact, three will be traps that will kill you instantly. Check the note on the table which will give you a useful clue. Head to what looks like a dead end where a pipe will collapse, have Moira climb to the top. Now you can move behind the heads and climb the top catwalk to open a military chest. Once behind the metal heads, look for the one that doesn't hide blades, then open it with Claire to unlock the gate and escape with a nice explosion.
The time has come to explore the sewers. All the next portion of the game will take place in a semi-submerged area, which means you won't be able to dodge and the explosive bottles won't do much good.
Drawing by Kafka
Before entering the sewer tunnel, check the left wall to find the drawing.
Inside the sewer area, you will come across a closed gate, try to open it to meet a crazed Russian who will open the gate for you. Once on the opposite side, use the work table to upgrade your weapons.
Tower emblem
From the work table, head into the water and turn right the way you came from, look through the bars to see the emblem on the wall.
Go down the path through the sewers, pick up the map for the area on the platform to the right. You can also find a hidden object on the opposite side of the barrel. When the path forks, go straight to a dead end and smash the crate on the platform, then go up to the emerged area on the opposite side to open a military crate. Go back and take the passage to the side to go further into the sewers. Head right at the intersection and go under the waterfall that comes out of a broken pipe, go up and turn the valve to open a grate.
Drawing by Kafka
On the opposite side of the waterfall, beyond the grate, light up the large drawing.
Collect the chest on the way to the next room and turn right to go up the ledge and collect some ammo and a hidden item. Go back to the platform above and have Moira go up. From here you can drop a crate at the bottom and allow Claire to climb up. Collect the ammo, alcohol, cloth and open the military chest.
Tower emblem
Look across the water to the raised platform, check behind the barrels for the emblem.
Upon reaching the end of this room, a Vulcanblubber will begin to descend the stairs and will be flanked by two Afflicted who will come out of the water. This situation will prove to be really dangerous given the limited possibility of action you have inside the water. The best tactic is to go back to the raised platform and defend yourself from this position while dodging the explosive blows of the major enemy (the Magnum will prove to be remarkably useful). Once the enemies have been eliminated, continue up the stairs until you reach the door on the opposite side, do not open it, but instead, jump the railing to reach a raised area and move to a hidden area at the top. Break the crate and go up the ladder to find a green grass and a gem.
Go through the barred door, collect the ammo on the chest and the hidden item below, then proceed to the next area. You will find a large electronic gate that you will need to activate to get a comfortable passage to the next area. As you walk through the submerged area to reach the button, you will be attacked by several Afflicted. Be careful after pressing the button as you will be attacked by other enemies, some of which will turn into Spolders. An Iron Head will go through the gate that is now active, take him out with team play and open the chest shortly after the gate.
Go through the next area eliminating every enemy and collecting all the items until you reach the last platform and exit the sewers to climb up to the tower. Inside the tower, pick up the bottle and the hidden item in the corner, then open the gate to advance. This area will resemble a very macabre cemetery, you will find a note on the central tombstone.
Tower emblem
From the boards at the end of the graveyard, look at the small stream that crosses the room and check the side of the small bridge you just crossed to find the emblem under it.
Drawing by Kafka
From the closed gate, go left and past the shelves to reach another huge gate, check the wall to the right to find the last drawing.
Solve the cemetery puzzle with the help of the clues on the note found near the closed gate. Finally, go through the whole area until the boss fight.
The whole fight will require the massive use of team play, but you will not be forced to follow a single tactic. The boss is huge and very powerful and is able to perform some quick melee moves and charge you over distance. You can use this to your advantage and force him to crash into the large crates full of explosives. You will notice that the more he is engulfed in flames, the more his skin will become red, use Moira's torch to heat it under the collar. When his skin is red enough, he will start screaming showing his weak spot, you only have a few moments to hit him to the best of your ability. After he has taken enough damage, the Ouroboros virus will explode from his arm granting him even more range in melee attacks. When he raises his arm, immediately dodge to the side to avoid getting hit, then take out the various tentacles that fall to the floor using Moira's flashlight. Keep hitting the sweet spot following the usual path until you see the boss collapse to the ground. Collect all the items scattered on the battlefield and head inside the elevator. Unfortunately the climb will be interrupted since the boss is not completely dead yet, press the buttons that will appear on the screen to pick up your gun and reload it to deliver the final blow to the enemy.
Game Notes
During this last part of Claire's Campaign, you can decide to grab the gun with Claire or take Moira's controls and slowly crawl towards the firearm itself activating some memories about her past. Depending on who defeats the boss, there will be different events in the next episode.
Barry's campaign
Medals available
Defeat three Revenants by hitting only their weak point.
Finish the episode without destroying any of the Dhurlga's tentacles.
Hit enemies with Natalia's brick fifteen times.
Defeat three enemies with a chain attack.
Defeat ten enemies with secondary weapons.
Defeat four enemies using a silent attack.
Defeat ten enemies with the knife.
Open three Grimmick crates.
Find five hidden objects with Natalia.
Complete the water treatment plant without Natalia suffering any damage.
Main campaign
Once you have the controls on Barry, feel free to retrace the path through the sewers as it is free from enemies, you will find the map near the base of the second platform, a topaz at the bottom of the stairs leading out of the first room and some cloth on a chest at the top. The next large room is also empty and you will find another topaz under a collapsed walkway and an empty bottle in the mud. By the time you reach the electronic gate room, Natalia will have recovered.
Insect larva
Going down to the water-emptied area and with the gate sealed, look for the red cloud above the collapsed bridge.
As you go up to the other side of the gate, you will encounter the first enemy in the form of a Rotten lying on the floor. It will be difficult to tell which enemy will react and which will not, so just hit them all with your knife, or fire a few gunshots in the distance. Going down the corridor, Natalia will spot three Marci just around the corner, use a Molotov cocktail to eliminate them without too much trouble. The next room contains the familiar gallery which has now been emptied of water and filled with Rotten in the middle of the mud along with an army of giant spiders. Stay in place and take out the approaching enemies using the knife, then take care of the Rotten on the floor. If you were smart enough to raise the gate near the stairs as Claire, you can reach a Grimmick chest.
Tower emblem
From the Grimmick chest, turn around to find the emblem hidden in a small space on the wall.
Going down the tunnel and taking out the enemies, you'll have another chance to find valuable items if you've done certain things with Claire and Moira; do you remember the movable crate on the high platform? If so, you will now find it in the mud and you can move it to the opposite side to go up and find some parts for the weapons along with some crates and a Tower Crest behind some barrels (if you missed it with Claire).
Insect larva
Going down the path that passes under the now inactive waterfall, check the small pipe that comes out of the wall on the right to notice the red cloud inside. Throw a tube inside the tube to get the insect.
There is another opportunity in this portion of the sewers, if you raised the gate over the waterfall as Claire, the area will now be dry and you can get an AK-47. Continue down the path and turn right into the dead end for a chest, then head back to the entrance area, where Claire and Moira met the old Russian man. You will find a Glasp that controls the area, going further down you can drain the water from the path and get some chemicals behind some debris along with a hidden object. The gate will be opened and the work table moved into the old man's residence. The Russian lies on the bed and holds a hidden object. After the cutscene is over, be sure to modify your weapons, collect the bottle, alcohol, gunpowder, key, and read the note before moving on to the next area.
The area in which you will find yourself after going down the stairs is the water treatment plant, an incredibly long tunnel divided by several bulkheads and to pass it you will need teamwork, since only Natalia can reach the part high while Barry will be forced to stay low.
Insect larva
When you first go down to the Rotten area, turn around and look at the giant bars blocking the rest of the sewers, look for the red cloud behind them and throw a brick to get the bug.
When Natalia has crawled through the small opening and climbed to the top, head to the opposite side to collect the map of the area, then turn the valve fully to open the first gate. You will notice that some of Marci's bodies are lying on the floor of the upper area and since Natalia is defenseless, it will be better to avoid passing close to the enemies. As Barry, go down the tunnel and take out any enemy who dares to stand up, collect the ammo and, once you reach the next gate, locate a propane tank to hit to make it explode allowing Natalia to go further safely. As your companion, walk down the side to the next gate, check the opposite side to see several Marci coming towards you. To make things easier for Barry, go up to the deck and push the propane tank to the lower deck, then turn the valve to open the gate. As Barry, step past the enemies and follow them to the tank to hit him and take out all threats with a single shot, then hit the barricade that prevents Natalia from continuing. You can drop another propane tank at the next valve and help Barry again; turn the valve and get ready to face other enemies in the next corridor.
Tower emblem
After passing the bulkhead marked with the number two, turn around as Barry and look up at the wall near the top of the gate to find the emblem.
As Barry, take out the Orthus before they are too close, there will also be some Marci who control the bridge above, take them out to allow Natalia to cross safely. On your right, you'll notice another propane tank with a Rotten nearby, hit it to take it out and help Natalia again. Looking behind the first bridge, you will notice a barricade leading to a Grimmick chest, smash it as Barry and open the chest with Natalia. Inside the upper room where you blew up the Rotten with the propane tank, you can find a hidden object and some gunpowder. Below, where the pipes have fallen in the center of the corridor, Barry can collect some alcohol and open a chest before jumping over the debris to the right. Make sure you detonate yet another tank on the upper deck so that Natalia can continue with you. Once on the opposite side, you will hear a Glasp below you, luckily this enemy will be vulnerable to smoke, so hit the fire extinguisher with Barry to see the enemy. Destroy the barricade blocking the passage to the last valve and open the bulkhead. Kill the Rotten on the bridge and open the crates below.
As Natalia wait to open the gate, and climb over the bridge, cross the platform of pipes until you reach a propane tank to push down, then go back and open the bulkhead. As Barry, take aim and hit the newly dropped tank to kill several enemies lurking nearby.
Cross the platforms with Natalia and go down the ladder to go up through a hole. You will be very close to the last of the tubes, but two Marci will rise up next to you, forcing you to retreat into the hole you just passed through, leaving Barry to take them out. Go back to the place once the enemies have been eliminated and rejoin Barry, then open the Grimmick chest. In the next room, go down the path and jump to the opposite side to reach a chest, then look towards the ladder to notice a Glasp loitering around the area. Head to the ladder, now clear of the enemies, and climb it to open a Grimmick chest, then return to the opposite ladder to reach the gate leading outside.
Insect larva
Just behind the gate leading outside, you can find an insect; however there will be no bricks nearby and you will be forced to hit it from the upper platform.
Now that you're finally outdoors, head up the path to enjoy a view of the next area in this episode. Your goal will be to reach the opposite side of this huge quarry, but as the bridge collapsed, you will have to go from below. Tower emblem
While looking at the quarry area below, look for a crashed container with a hut below, you can find the emblem on top of it.
Go down the slope on the left and follow the path to a dead end, where you will find a staircase that goes down to the right. Head inside the house with the collapsed roof to collect some useful items and the map of the area. A Revenant will have appeared outside and you can easily go unnoticed by the entrance on the right. The structure on the right is blocked and there is no way to reach the ladder above, go up to the far side where there is an elevator. Unfortunately the vehicle is without power as the generator does not work. Collect the green grass and check the note near the elevator before exiting on the opposite side of the quarry. In this area there will be two other areas that cannot be reached yet, but you may notice something strange that is wiggling under the larger structure.
Insect larva
Behind the large macabre structure, you will find a fence behind which is the insect that you can hit with a brick.
There will be an empty bottle near the conveyor belt leading out of the structure, pick it up and head to the other two buildings on the far side. The structure on the left has a work table that you can use along with a note and some alcohol inside a cabinet. The other facility has a generator that you can activate to make the conveyor belt move. Go to the larger structure and place the generator on the belt. Once outside you will have to deal with the Dhurlga. Face the fight using the debris in the center as cover and hit him until he escapes.
Now that you have the generator, several possibilities will open up for you. First, use the generator itself as a platform to climb up the largest container and collect the object on top. At this moment two Revenants will begin to control the area, avoid the clash by passing silently, or eliminate them by hitting their weak points. Before using the new conveyor belt, climb into the container next to the other structure to collect the emerald on top. Place the generator on the belt and lead it to the next area. Also in this area you can do several things with the generator, place it near the broken ladder you came from, to climb the collapsed bridge. Once at the top you will find a hanging man, hit the run to get the sniper rifle upgrade. Move the generator to the other side of the container, smash the crate at the top, then use it to climb up to the Grimmick crate containing the Magnum reload upgrade. Finally, use the generator in the empty space near the gate, press the button with Barry on this side and have Natalia pass through the hole to open the gate.
You will be in front of the closed structure again, use the generator near the broken ladder to climb up and enter the side door. A single Revenant is controlling the area under the stairs, kill him and open the door to pull the generator up the stairs, then onto the conveyor belt. Once you reach the elevator, connect it to the generator to activate it, eliminate the enemy and start the climb.
Once the elevator stops, go up the back and use the small passage under the bridge and jump to the opposite side. Smash the crate before going up the stairs to the top. Eliminate the enemies with the secondary weapons and cross the bridge to reach a chest.
Tower emblem
While looking to the opposite side of the quarry you came from, check the tall tower on the right and use the shotgun to hit the emblem at the top.
Once you reach the generator at the top of the elevator, you will have to collide with the Dhurlga again accompanied by other enemies. First take out the Slingers with a good shot at their weak point, then focus on the Revenants while maintaining cover to have a good distance between you and the main enemy. Use the sniper rifle to hit the boss in his weak points, be patient and always keep your distance. Once the enemy is past history, place the generator in its space and go through the gate.
Insect larva
The last insect hides shortly after the gate and before the episode ends, in the small grassy space.
<
 Resident Evil: Revelations 2 - Episodio 3 ps4
- ps3
- x360
- pc
- ps4
- Xone
Exit date: March 11 2015


![Guides Sophia's Shop Guide [100%] - Persona 5 Strikers](/images/posts/1f5e1c7629d56d6c792ac770a5d6b182-0.jpg)