


Cuphead is one of the most popular titles of recent years: initially released as an Xbox One exclusive, it has succeeded in the arduous task of thrilling all the players of the world, combining a captivating and peculiar artistic sector with a challenging, layered and satisfying gameplay.
In the latest direct held by Nintendo, the video game giant has announced a partnership with Microsoft aimed at bringing Cuphead to the Nintendo Switch, the last famous consul of the "Great N". With the awareness, therefore, that many players will find themselves busy trying to kill all the bosses of the title, and to overcome all the obstacles that Cuphead proposes, we propose the complete guide to the game developed by Studio MDHR. Wishing you good reading, we invite you as usual to let us know what you think of our strategic guides which, despite having received numerous appreciations, we would like to continue to improve and make them as detailed as possible.
Read also: Sekiro: Shadows Die Twice, the complete guide
Cuphead, The Tips To Get Started
Cuphead is quite a peculiar game, which incorporates some dynamics seen in the Run 'n' Gun productions of the past trying to adapt them to the difficulty curve required by the current videogame generation. The experience is divided into islands, each of which will offer you bosses that will change shape, while also changing their attack patterns. Whenever you die, you will restart from the first form of the latter, so arriving prepared and aware of what will happen to you could definitely make a difference.
We therefore advise you to follow these simple steps before embarking on the adventure of Cuphead and Mugman, so as not to encounter further difficulties during the early stages of the game:
- First remap your controller in such a way as to have only the jump and shoot commands on the front keys. Move dodging, Super Ability, and Weapon Switches to your controller's backbones so you can find all game controls at your fingertips during the hottest battles.
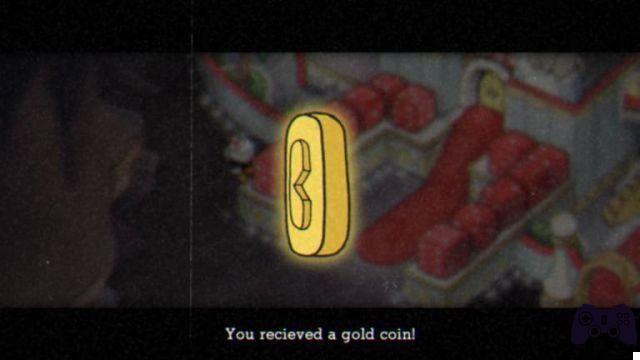
- Explore the map thoroughly before facing the Boss Battles. Play the Run 'n' Gun levels, search for hidden coins and purchase all useful upgrades before challenging your opponents.
- Face the Mausoleums as soon as they are reachable, the super attacks that you will unlock from their achievement will prove particularly useful from the earliest stages of your adventure.
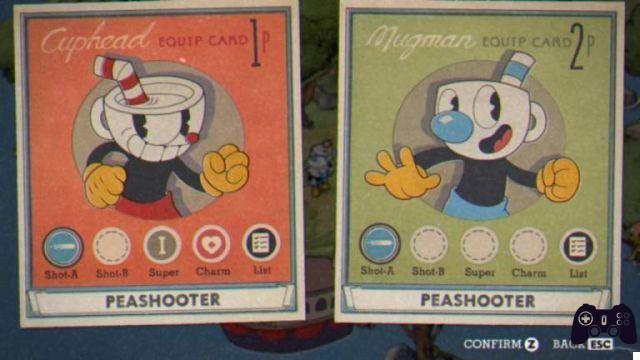
- Keep in mind that Cuphead and Mugman have no difference in terms of skill. So choose your favorite character in total freedom by completely relying on your aesthetic taste.
So arm yourself with patience and follow these first tips as Cuphead will offer you a rather challenging level of challenge, able to pay you back only if you combine great dedication with an equally great technique. Once the premises are finished, we wish you "Good Game" and ... when you have finished the game let us know your opinions and if this guide will have been of help to you.
Inkwell Isle One
The first part of the island where Cuphead and Mugman's adventure takes place, offers a series of clashes of increasing difficulty, designed to familiarize you with the dynamics of the game, and two Run 'n' Gun levels where you can collect your own first coins to be able to purchase the upgrades to facilitate your journey to hell.

Botanic Panic
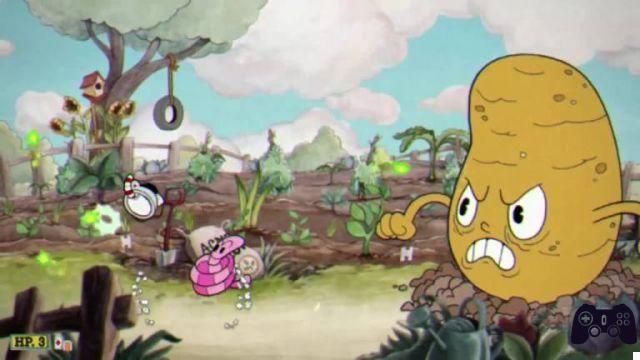
The Root Pack is the first group of bosses you will face in Cuphead. The battle will be divided into three phases, one for each opponent, and will be based on some easy to learn redundant patterns.
STEP 1: The first part of the fight will take place against a huge potato that will throw at you a series of three earth balls followed by a pink worm, on which you can make a parry to load your super more quickly. Keeping to the far left of the screen, simply jump over the various obstacles by shooting relentlessly at the giant vegetable. Do not waste any special attacks and maintaining a constant volume of fire to pass in a few seconds to the next phase.
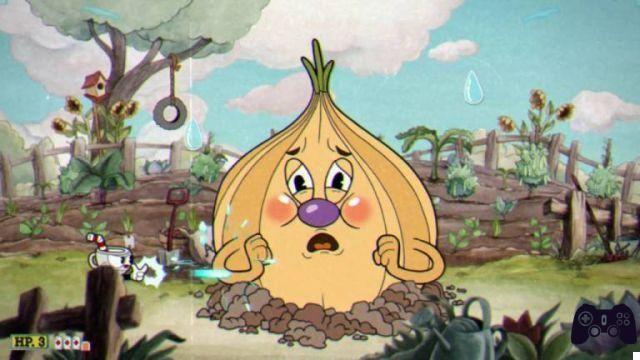
STEP 2: The appearance of an overgrown onion will welcome you to the second part of the battle. Do not hesitate and in the very first moments when your opponent appears, start throwing at him all the special attacks you have available before his offensive begins. The only attack the vegetable has is based on tears, generated by its copious crying, which will randomly fall on the battlefield. Stay on the left side of the screen and simply avoid them by moving horizontally while continuing to shoot the onion until it falls under your shots.
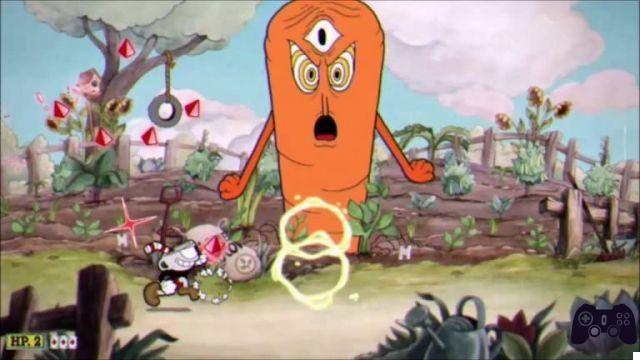
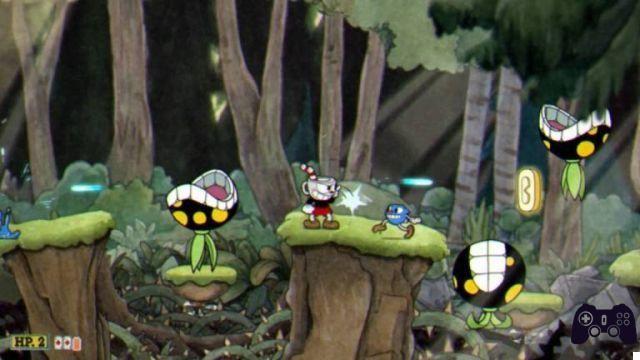
STEP 3: The last part of the fight will see you collide with a giant carrot that will stand out in the background and that will accuse your blows only if directed towards his eyes. The two attacks it is equipped with will be easily evaded when you follow this simple technique to quickly annihilate it. Position yourself in the exact center of the area and begin to spare upwards inflicting damage to your opponent, when the vegetable begins to massage the temples, summoning carrots to search, activate the lock to block your character on the ground and direct your shot at the vegetable bullets and return to aim for the carrot's eyes as soon as possible. When it attacks you with its circular beam, simply run horizontally to avoid it and repeat the whole procedure until you win your first Cuphead boss battle.
SUGGESTED SKILLS: Spreader / Chaser / Smoke Dodge
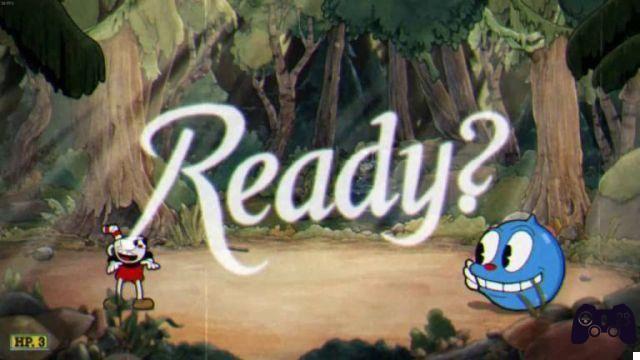
Ruse Of An Ooze
The fight with Goopy Le Grande is divided into three phases but your opponent's attack patterns will prove to be really easy to avoid. Plus, if you've already bought the Chaser (the type of shot that can constantly follow your enemies), this battle will prove to be the easiest of the entire Cuphead.
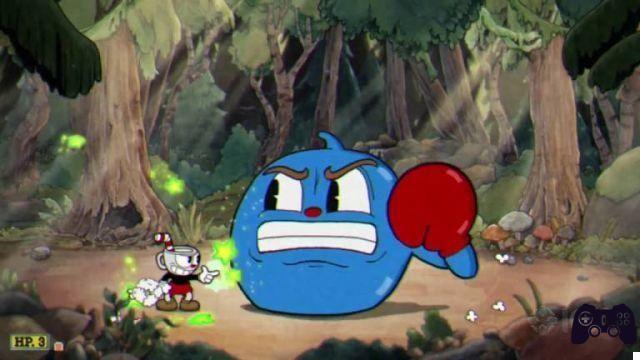
STEP 1: The first part of the fight will see Goopy Le Grande jumping from one side of the battlefield to the other, pausing from time to time to charge up a melee shot that you can easily avoid by simply crouching down. Keep your distance, passing under him when he jumps in your direction, constantly firing at him or using the Chaser so you don't even have to worry about aiming at your opponent.
STEP 2: After a set amount of damage taken, Goopy le Grande will stop by causing three pink question marks to appear on her head and substantially increasing her size. If you are quick enough you can ring a series of Parry on the question marks, to increase your rating and increase your super, without taking damage and before starting the second part of the fight. In this phase the attack patterns will remain unchanged with the only variation of a slightly increased movement speed of the abnormal blue slime. Repeat the tactic performed previously to quickly move on to the final part of the fight.
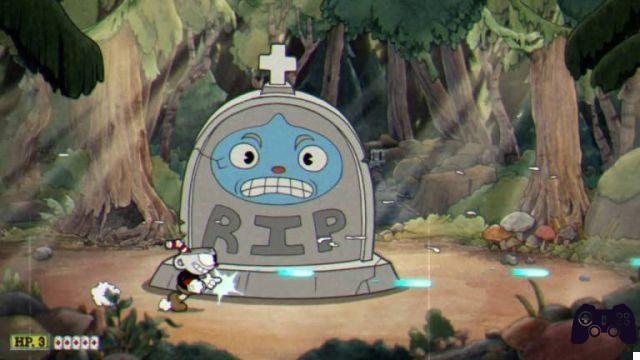
STEP 3: A tombstone, with the effigy of Goopy Le Grande, will appear, starting to move rapidly from left to right of the playing area. The only weak point will be the face of your opponent present on the tombstone and the only way to hit it, if you do not have the Chaser equipped, will be to shoot it by jumping or directing your shot using the Lock. The only attack pattern available to the tombstone is based on stopping for a few moments before capitulating to the ground trying to crush yourself, what you will have to do is simply move in the opposite direction as quickly as possible and start shooting at it again until you finish it. clash. A good technique to further simplify this phase is to equip the Chaser, shoot without aiming at your opponent by moving in the opposite direction to that of the tombstone and use the smoke dash as soon as the animation preceding the attack begins. In a few seconds you will emerge victorious from this simple battle.
SUGGESTED SKILLS: Spreader / Chaser / Smoke Dodge
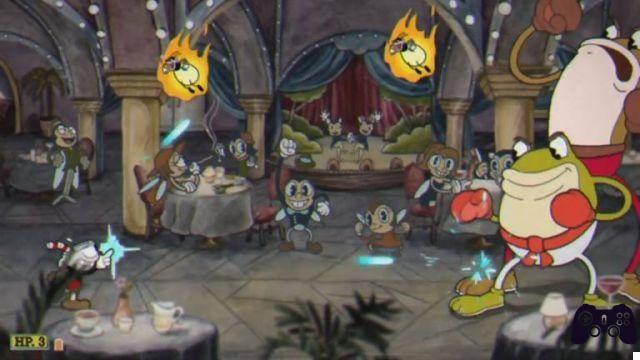
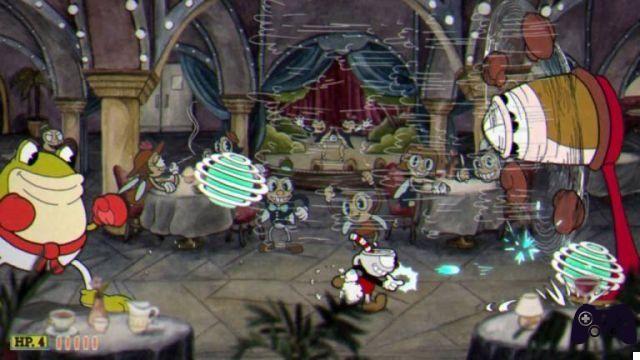
Clip Joint Calamity
The fight at the Casino against Ribby and Croaks begins to introduce different mechanics within Cuphead and require a preliminary memorization of the attack patterns in order not to perish quickly, especially in the last part of the battle. A loadout composed of the Chaser and the Spreader (the shot at a short distance that can cover a wider area) certainly proves to be the best choice to maximize the damage done to the boss, combined with a good positioning during the various phases of the fight.
STEP 1: As soon as the fight begins, your positioning will depend on the type of shot you have available. If you are equipped with the Spreader, immediately move close to the two antagonists and try to keep this close position as much as possible while firing, maximizing the damage and moving away only to counter the attack patterns. If, on the other hand, you don't have one, stay on the far left to have more control of the situation while firing:
- Ribby, the shorter frog, will rotate his arms and throw blue and pink boxing gloves at you. As the animation begins, use dodge to position yourself to the far left of the area and avoid attacks by crouching, jumping or parrying.
- Croaks, the tallest frog, will summon some flaming fireflies that you must eliminate before you can start shooting at the two opponents again. If you have the Spreader, you can stay in close range and simply start aiming upwards as soon as Croaks begins the attack.
When Ribby gets on all fours, get ready to avoid her as she rolls towards you, that will be the signal that will indicate the passage to the next phase.
STEP 2: In this second part of the battle, Ribby will position himself on the far left, throwing balls at you again that will swing from top to bottom. Croaks, on the other hand, will remain on the right, changing into a sort of fan that will generate a current of air that, pushing you to the left, will make it difficult for you to move. Equip the Chaser, if you have it, and keep centered avoiding the orbs and continuing to shoot the tallest frog until Croaky gets back on all fours to roll back towards you announcing the start of the last phase of the fight. .
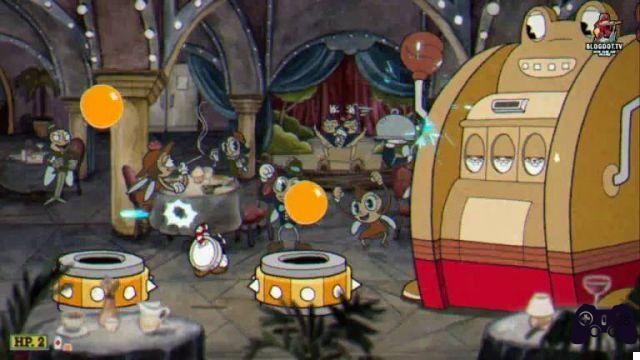
STEP 3: Ribby and Croaks will merge, in this last part of the battle, taking the form of a huge animated and seemingly invulnerable slot machine. Initially you will have to avoid the coins that he will throw at you until he lowers the lever, carry out a Parry on the latter to trigger a random choice of one of the three attack patterns, recognizable by the symbols that will appear on the slot machine, and finally be able to inflict some damage:
- Three Frogs will reveal a series of green platforms that will quickly travel the ground. Jump them in quick succession while continuing to shoot in the direction of the massive opponent.
- Three Bulls will generate floating moving platforms that will attack you with vertical flares. Observe the incipit of the attack to avoid them easily while continuing to fire at the enemy.
- Finally, three Tigers will release yellow platforms which, moving in a similar way to the green ones, will have large marbles bouncing off them. Calculate the tembi of the swinging of the voluminous orbs to avoid the platforms trying to inflict damage on the boss.
Given the total randomness in the choice of attack patterns, we advise you to equip the Chaser to be able to concentrate more on dodging offensives, without having to worry about aiming.
SUGGESTED SKILLS: Spreader / Chaser / Smoke Dodge
Threatenin’ Zeppelin
After a short tutorial to familiarize yourself with the controls of your aircraft, Hilda Berg will be waiting for you for your first Cuphead air battle. This battle, structured in two macro phases, is not composed of particularly complicated mechanics but requires a good dose of attention in understanding your opponent's moves in advance.
STEP 1: The first portion of the battle will see Hilda aboard her unicycle throwing tornadoes at you or throwing an "HA!" onomatopoeic. If both attacks are easily dodged, staying on the far left of the screen, you will still have to constantly pay attention to the two types of missiles, purple and green, which will often appear to shoot you. Stay focused by continuing to shoot at Hilda, dodging the shots and not skimping on reducing the size of your character whenever you find yourself in situations where the bullets are too close to each other to be easily avoided.
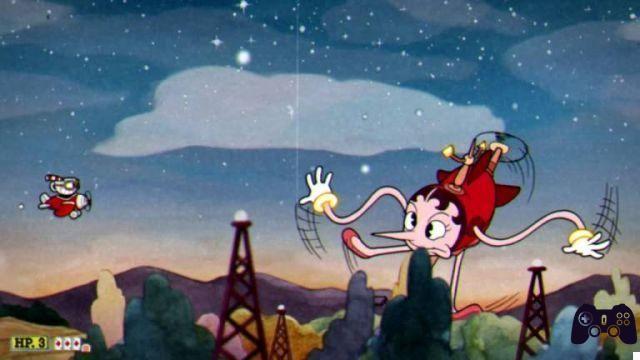
Cyclically Hilda will stop to start inflating before launching in your direction and exiting the play area and randomly transforming into one of the following constellations:
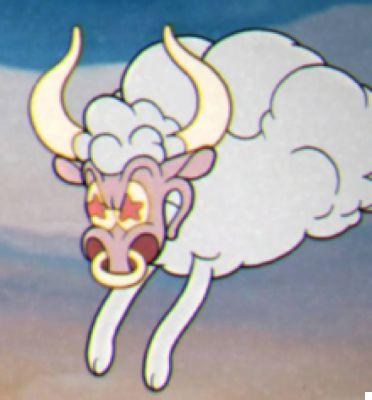
- The bull will move vertically, heralding, with a horn-like sound, an easily eluding charge in your direction.
- Sagittarius will throw at you a one-way arrow followed by three homing stars that you can avoid or simply destroy by shooting them.
- The twins will release a sphere of energy that will cyclically shoot 360 degrees forcing you to circumnavigate it to avoid the hit.
All the transformations of Hilda will be accompanied by the missiles already seen previously and that you can avoid with the same technique. Continue to methodically dodge the blows by constantly keeping the fire on the opponent and after a couple of transformations you will move on to the second part of the fight. Do not use any special attacks if you are not sure to reload them in time for the next phase of the battle.

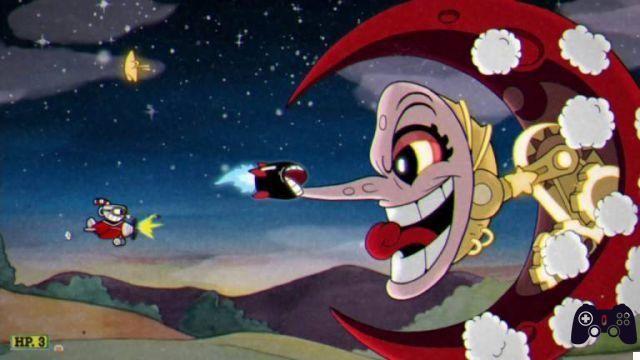
STEP 2: The second part of the battle against Hilda will see her transform into a giant mechanical moon but don't be fooled by the size, ending the fight at this point will prove to be really easy. Stay to the far left of the screen and avoid the stars it throws at you by continuing to shoot them incessantly. The UFOs that appear will emit a vertical beam that you will not be able to avoid, the only solution is to go beyond the flying saucers, as soon as they begin to charge the laser, focusing slightly on the battlefield. When Hilda does, she will lean her face towards the center of the screen, use your special attack to avoid colliding with other elements on the screen. Using this technique in a few seconds you will finish the battle victorious.
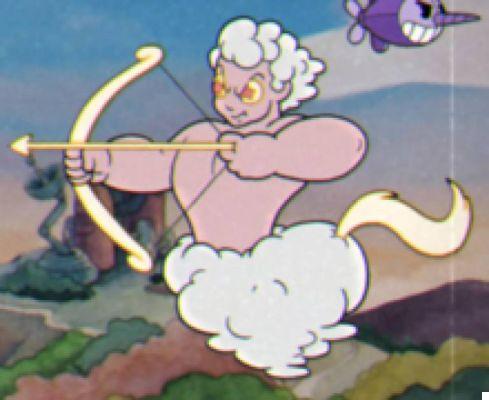
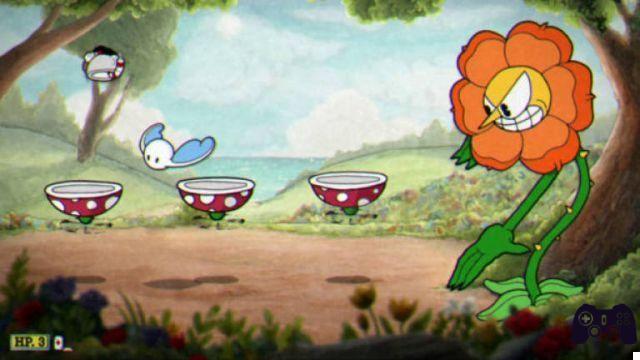
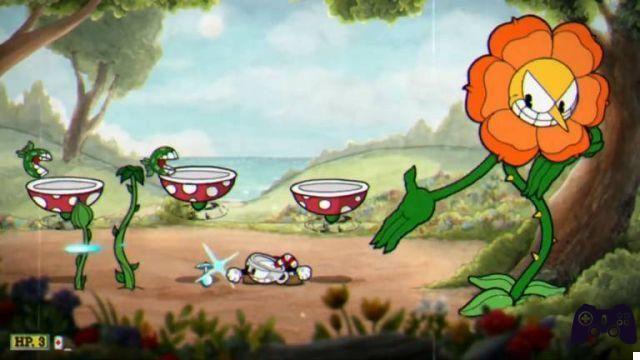
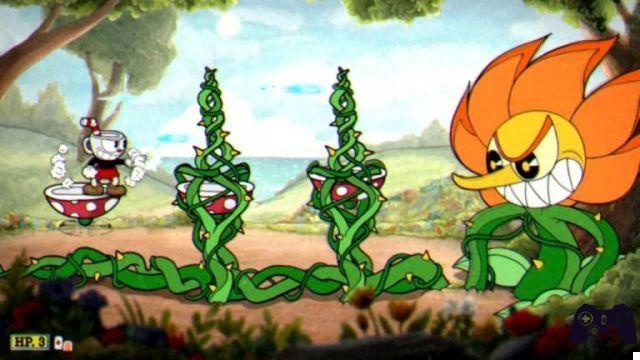
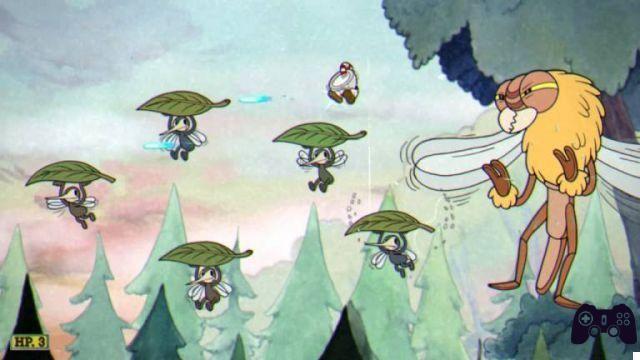
Floral Fury
Cagney Carnation will be the last Cuphead boss present in the first section of Inkwlee Isle and, thanks to his numerous attack patterns, could prove to be a tough challenge if you don't know how to quickly evade his offensives. We advise you to equip the Chaser to constantly hit the flower while you are intent on avoiding its attacks and the Spreader to maximize the damage when you can get in close range, or to quickly clear the battlefield from smaller enemies.
STEP 1: The first part of the fight will see Cagney Carnation attack you in numerous ways, tending to fill the screen with weak but annoying enemies. Try to keep yourself constantly on the central platform, to have greater control of the situation, and follow the list below to know how to avoid the various types of offensive:
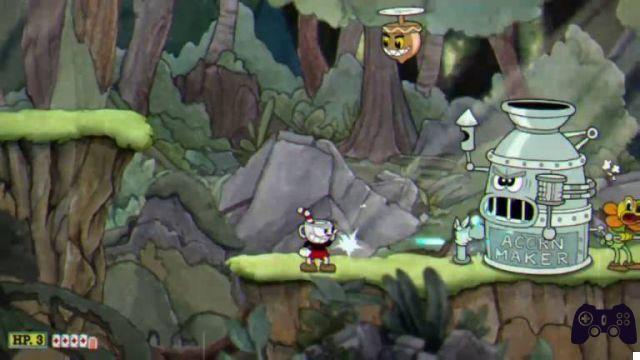
- When he closes and reopens his hands later, Cagney could throw you three acorns to search, impossible to destroy, which will absolutely be avoided by trying to attract them towards the floor.
- In a similar way, he could decide to throw a floral boomerang at you that will travel, following a U-shaped trajectory, the two floors of the playing area. Staying on the central platform, jump in place when it gets close to you.
- Simulating a hand-cranked machine gun, Cagney Carnation will flood the battlefield with different types of seeds. Make a parry on the pink ones and immediately afterwards think about cleaning the area of enemies before dedicating yourself again to doing damage to the boss.
- It will cyclically charge a melee charge that will travel entirely through one of the planes of the area. Go up or down to avoid the offensive, observing when the flower will cover the face with its petals to understand which direction to move.
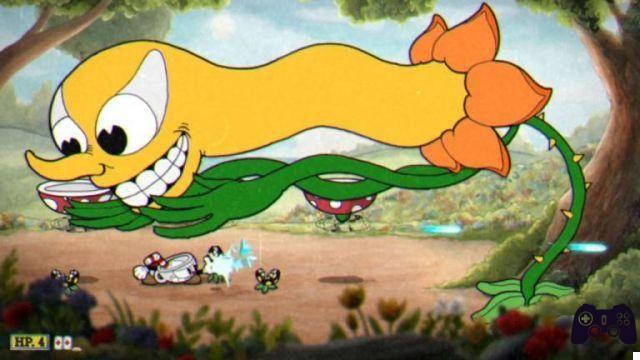
STEP 2: In the second part of the battle, Cagney Carnation will plant his arms in the ground, generating two vines that will randomly entangle two of the available platforms. Follow the movements of the branches on the ground to constantly position yourself on the free one, maintaining a constant volume of fire towards the enemy and jumping in time the pollen that will throw at you. In a few moments you will end the battle victoriously.
SUGGESTED SKILLS: Spreader / Chaser / Extra Heart
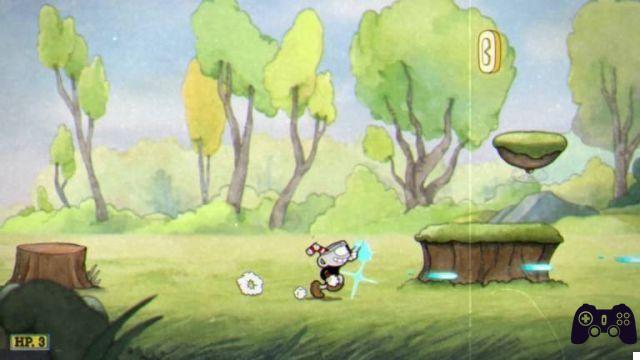
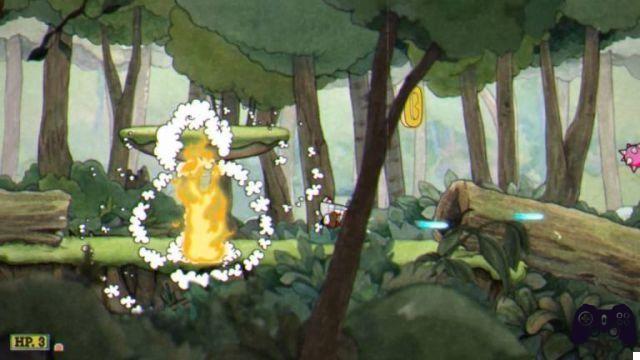
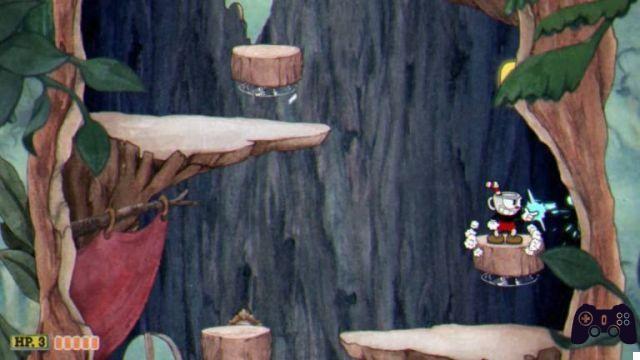
Forest Folies – Run ‘n’ Gun
The first of the six Run 'n' Gun-style levels, present in Cuphead, does not present particular difficulties, offering a general experience of the mechanics that will be expanded in subsequent scenarios. You can choose between two different types of approach, one more offensive (for which we suggest you equip the Spreader in order to maximize the damage you will do) and one more cautious and devoted to exploration (for which the Chaser will be the best choice , allowing you to focus more on the platforming stages.
Coins: There are 5 coins in each of the Run 'n' Gun levels featured in Cuphead. In Forest Folies you will find them all on your path without particular complexity in collecting them but do not get used to them because in the next scenarios some of them may prove to be more difficult to track down.
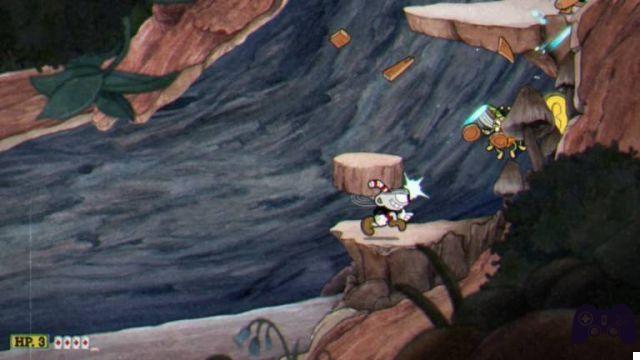
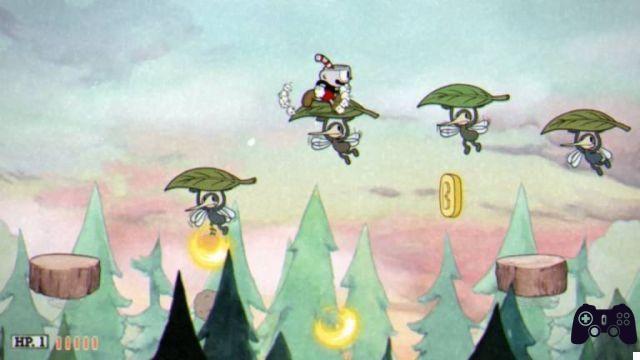
Treetop Trouble – Run ‘n’ Gun
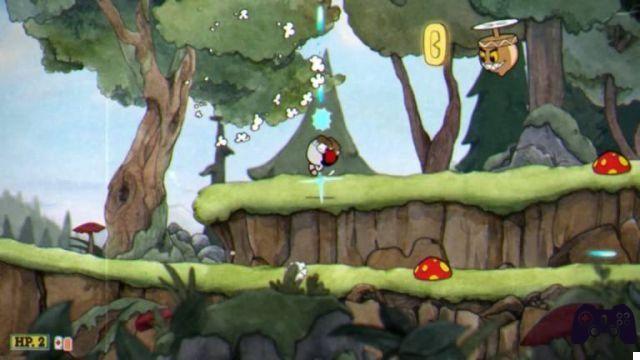
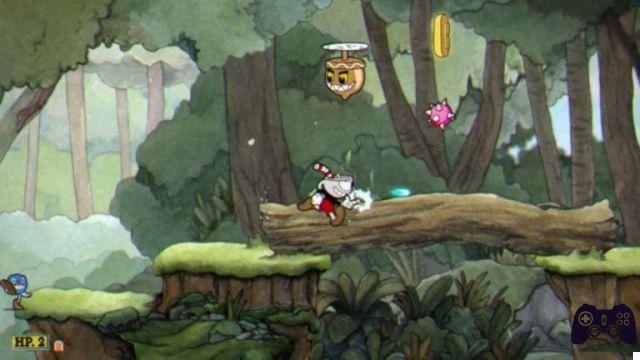
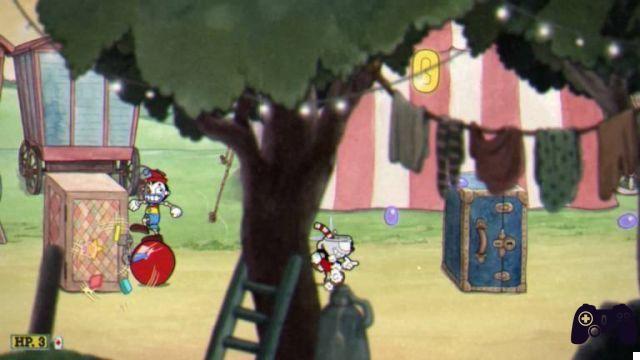
Cuphead's second Run 'n' Gun level, present in the first part of Inkwell Isle, offers a slightly more complex challenge than the previous one. In the final stages of the scenario, in fact, you will find yourself facing a miniboss that will constantly take care to destroy the platforms on which you will be stationed, forcing you to think more about your movements so as not to fall into the void.
Coins: The five collectibles present in Treetop Trouble do not present particular difficulties in being identified. Just keep in mind that for the first of them you will absolutely have to use the Parry on one of the ladybirds that will bounce on the ground, in order to avoid being unable to collect the coveted collectible. The enemy, unfortunately, will pass on the scenario only once so try to keep your attention high to avoid having to restart the level.
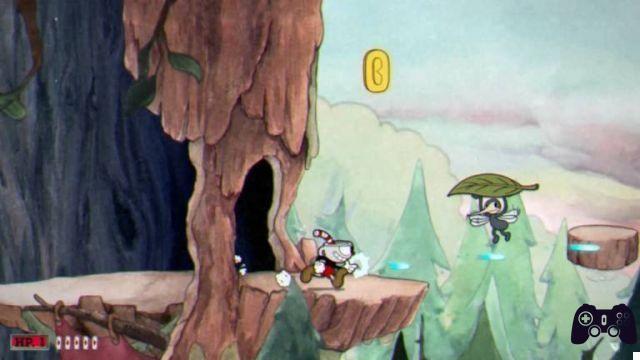
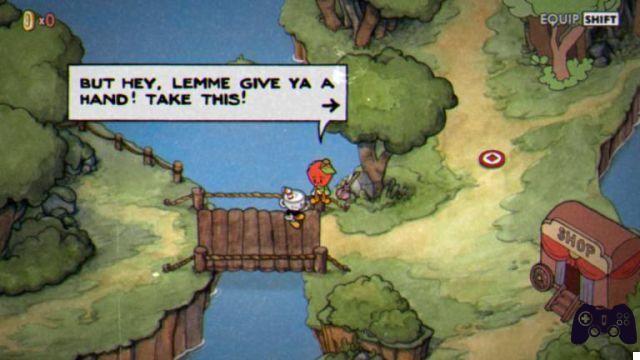
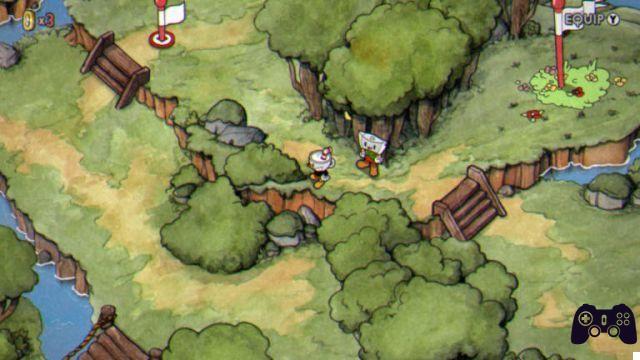
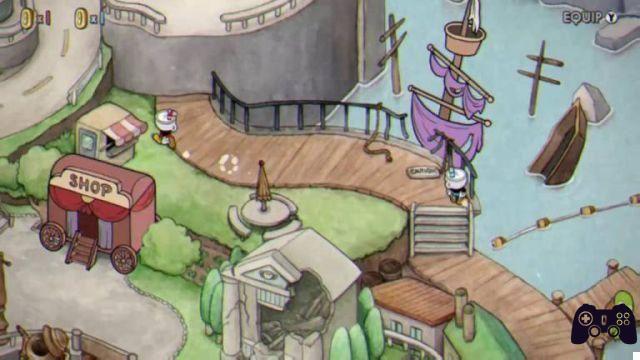
Inkwell Isle One Coins and Secrets
In the very early stages of the game, as soon as you are allowed to move around the game map, talk to the Apple sitting on the bridge to get your first three coins to spend on upgrades for Cuphead.
Just below the area where the tutorial for the flying sections will be shown, if you follow the narrow path that runs along the river you can cross it using a hidden shortcut.
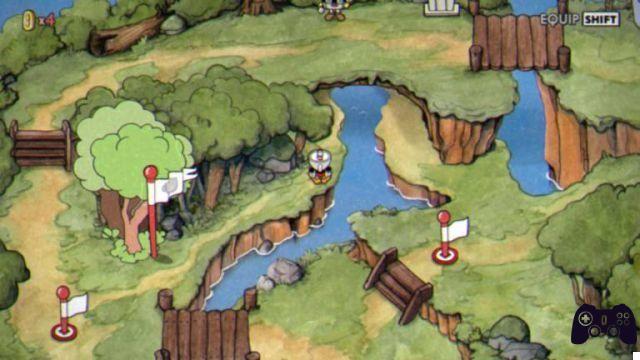
Once you have defeated all the bosses of the first part of Inkwell Isle, the shy Ax positioned near the grove will move, allowing you to obtain an otherwise inaccessible coin.
Inkwell Isle Two
The second part of Inkwell Isle presents a circus scenario that will be the scene of one of the most difficult Boss Battles in Cuphead, a particularly difficult Run 'n' Gun level and a couple of truly "unique" characters.

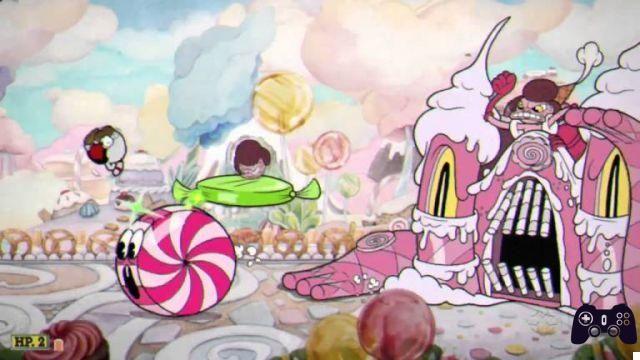
Sugarland Shimy
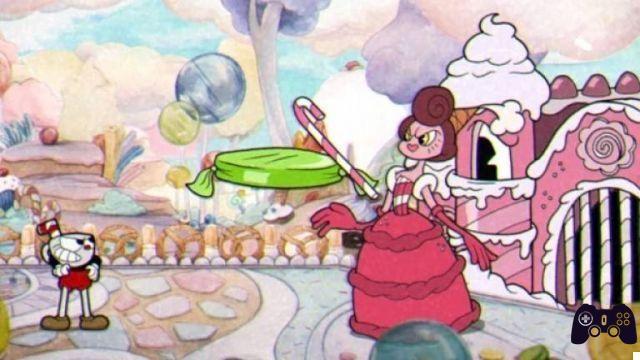
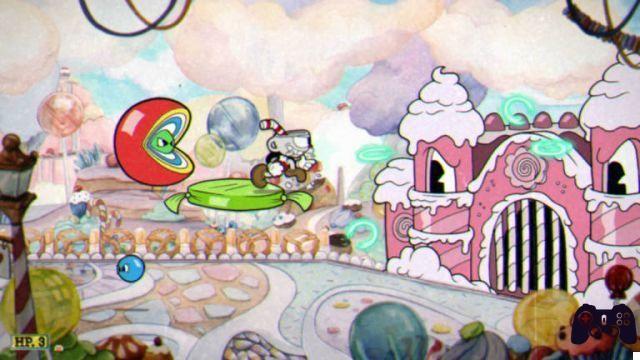
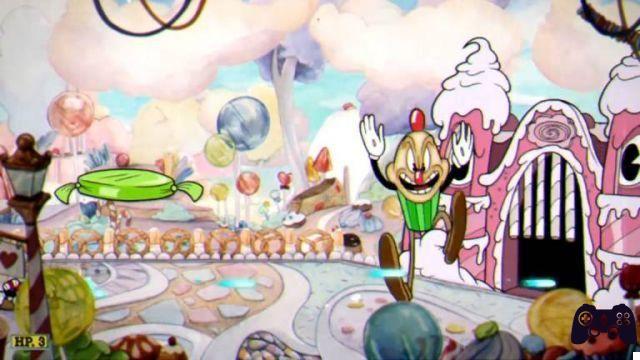
Baroness Von Bon Bon will welcome you to the second part of Inkwell Isle with a structured clash of several randomly chosen minibosses that will face you before you can confront your sweetest opponent. Within Cuphead, these clash dynamics are quite unique.
STEP 1: In the first part of the clash you will have to face, one after the other, three opponents randomly chosen from the five that we will illustrate later. Although the attack patterns of the different opponents do not present great difficulties in being memorized, you will have to take into account that, during the second fight, candies will start to come out of the castle which you will have to deal with quickly by lowering and shooting, while on your third meeting also the Baroness will begin to attack you by shooting you from the top of the battlements of her fortress.
Your opponents in this first phase will be:
- A gigantic Waffle that will move in flight attacking you randomly, breaking down into eight parts that will disperse in as many directions. Constantly shoot your opponent away from him when he starts to stop to charge his attack.
- A Chewing Gum dispenser that will run horizontally, constantly throwing bonbons over the entire area. Stay on the far left of the battlefield, where your opponent will not be able to reach you, and keep shooting at him moving a few, millimeters, whenever you have to avoid being hit by the candy.
- A muffin that will jump by copying a triangular trajectory trying to tumble over you. Keep your distance and shoot whenever you have the chance remembering to pay attention to the filling that your enemy will release at each crash with the ground. Using the Chaser could prove useful to focus on avoiding attacks without having to worry about aiming at your creamy opponent.
- A huge Chewing Gum that, similarly to Pac Man, will follow you trying to taste you. Shoot while continuing to keep your distance, trying not to get locked in the ends of the playing area, and pay attention to the bon bon satellite that will gravitate around it. Not having ranged attacks it will be really easy to eliminate him, especially if you have the Chaser at your disposal.
- A triangular piece of caramelized corn that will move horizontally and vertically across the battlefield without following a specific pattern. Use the movable platform to constantly keep your distance and pay attention to the bullets it will release vertically. Shoot without being greedy, stay on the defensive and maximize the damage by using some special attacks whenever your opponent gets in your line of fire.

STEP 2: In the second part of the battle, Baroness Von Bon Bon will animate her castle and will begin to follow you by throwing rotating heads that will constantly follow you. Stay on the central moving platform and fire your trusty Chaser to keep your focus on avoiding his attacks. Cyclically from the mouth of the fortress a giant candy will come out and roll across the lower part of the battlefield. Do a Parry on the latter if you need to load up your Super bar or simply stay on it while continuing to jump to avoid staying in the path of the rotating head.
SUGGESTED SKILLS: Peashooter / Chaser / Smoke Dodge
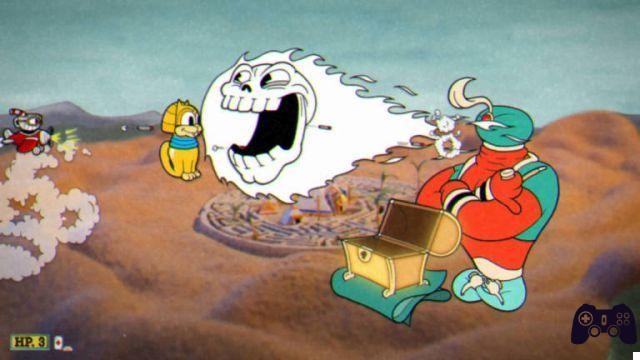
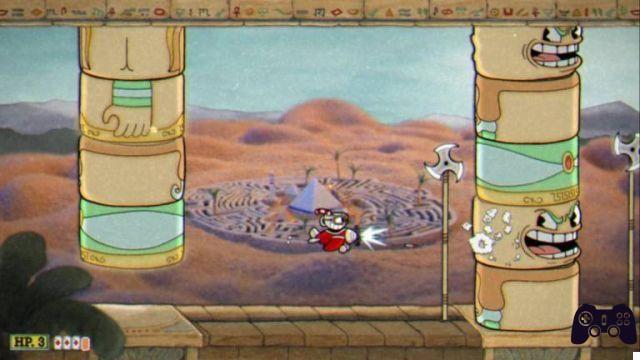
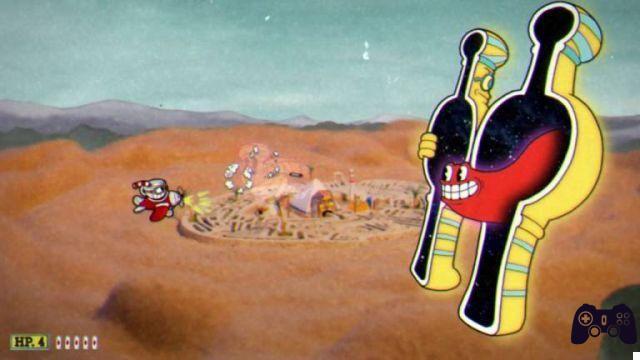
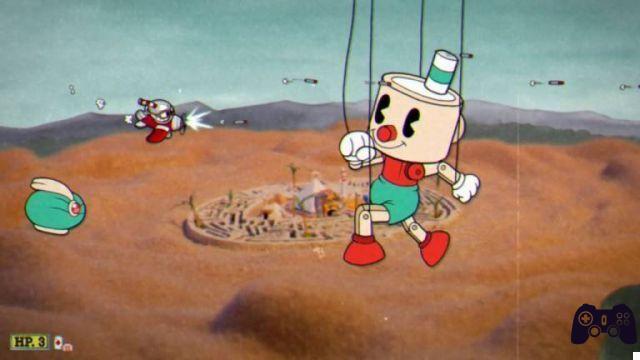
Pyramid Peril
The clash with Djimmi, in addition to being the second air battle present the Cuphead, could frighten you for the five parts into which it is divided. In fact, a good understanding of what awaits you, combined with the “Coffee” ability to constantly charge your Super, will prove to be the key to locking the evil genius back inside his lamp.
In the first part of the fight, Djimmi will stay to the extreme by opening a chest from which different groups of objects will emerge, generated randomly at the beginning of each game, which will try to attack you. Move constantly to avoid the offensive, make a Parry whenever you get the chance and keep in mind that staying in line with Djimmi's face could make him attack directly by throwing yourself at a burning skull, which you can avoid simply by moving. vertically.
In the second part of the fight you will have to hit the parts of the column with the laughing face of the evil genius to open a passage to continue. Pay attention to the halberds that will move between the gaps, try to position yourself quickly in line with the portions of the colonnade you will have to fire at and keep in mind that any wall in this section can damage you you will bump into it.
Waiting for you for the third round you will find an open sarcophagus capable of throwing ghosts that will horizontally cross the playing area. Use the drop bombs, position yourself at the highest point possible and continue to bomb the sarcophagus paying attention only to the two oscillating planets that Djimmi will throw at you. In a few seconds the sarcophagus will close sadly and you will pass to the next phase.
A huge puppet will arrive on the battlefield accompanied by Djimmi's hat. Worry more about the latter as, in addition to moving around the area, it will continue to make area attacks which, if ignored, could prove fatal. The puppet will fire three shots in quick succession after aiming at you for a few seconds. Avoid the attack by constantly keeping your distance from the hat of the genius, take advantage of the bombs and special attacks at your disposal to reduce the duration of this phase of the clash.
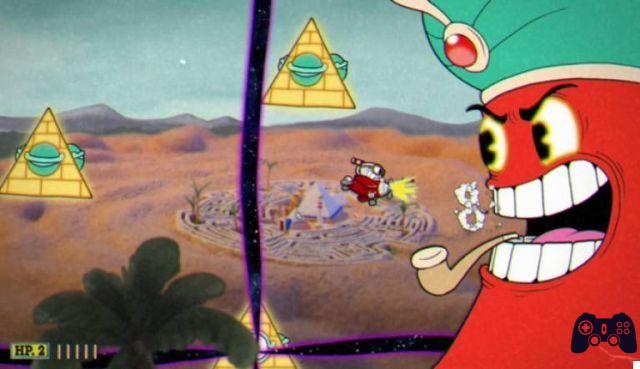
A gigantic Djimmi will welcome you to the last part of the battle, which surprisingly turns out to be the simplest. Three pyramids with eyes will rotate around you and one of them will periodically launch a cross beam that greatly reduces your room to maneuver within the area. Keep yourself in a position that allows you to move without being damaged and keep shooting at Djimmi who, from time to time, will throw energy rings at you from the diamond placed on his hat. Constantly focus on your positioning and in a few seconds you will emerge victorious from the fight.
SUGGESTED SKILLS: Coffee
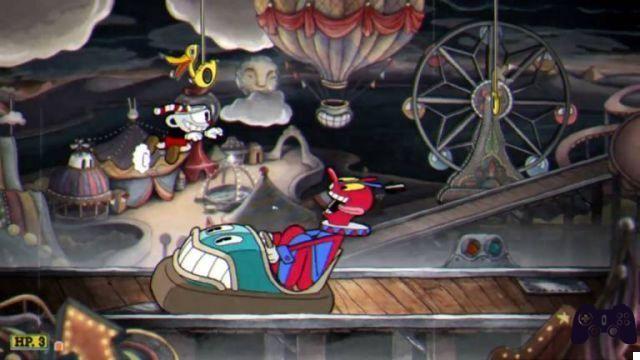
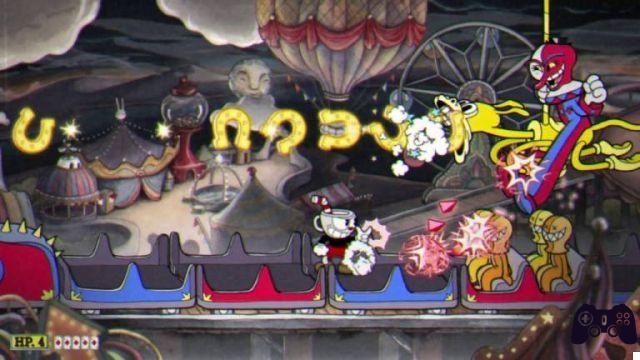
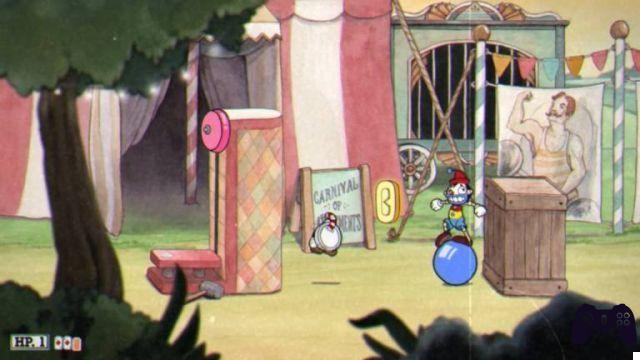
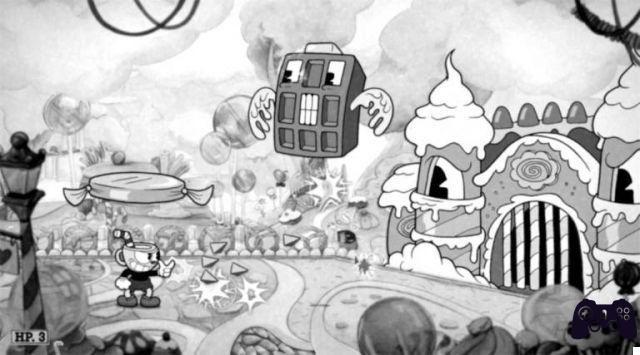
Carnival Kerfuffle
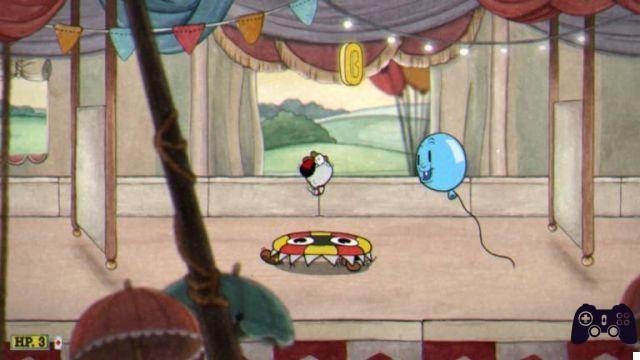
Beppi the Clown could turn out to be a very formidable opponent if his attack patterns are not fully understood. With the speed with which it can blanket the play area with harmful elements and an annoying roller coaster train that will constantly traverse the play area, the clash with the demonic clown, as well as being one of the most varied within Cuphead, it will require a good dose of reflexes to be successfully completed.
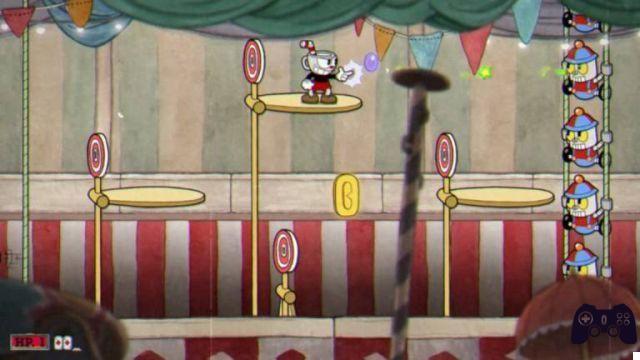
STEP 1: Beppi will swing in an unpredictable way aboard a Go Kart in one of the two halves of the playing area. Periodically an animation will herald his attack which will simply consist of crossing the battlefield from one side to the other. A series of target ducks, however, will move to the top of the level, preventing you from jumping over Beppi when he attacks you. To easily get through this first phase you will have to hit the clown until he begins to charge his offensive, shoot the ducks above you, jump over your opponent and start over. A Smoke Dodge could prove useful in avoiding potential accidental damage caused by timing not perfectly calculated.
STEP 2: The clown will stand out against the background of the battlefield in the form of a giant inflatable balloon, generating floating rabid dogs that will constantly attack you. Equip the Spreader and redistribute the fire between Beppi's mighty face and the balloons that will attempt to damage you, being careful to jump on the roller coaster train that will cross the play area periodically. Keeping in mind that the nose on the head of the latter can accuse a Parry and that the entire surface of the vehicle can be stepped on without suffering damage, with the exception of the passengers present in the central carriage.
STEP 3: In this part of the battle Beppi will descend from the sky aboard a yellow or green horse. Each of the two colors will have a specific attack:
- The green horse will attack you by throwing a barrage of horseshoes that will travel the battlefield moving like a wave. Run under the animal and shoot upward with the Spreader to maximize damage and avoid all attacks.
- The yellow horse will launch a quick horizontal burst that will disappear from the play area to reappear at the higher end. Quickly locate the break in the line of horseshoes and position yourself under it to avoid taking damage when they fall to the ground. Equip the Chaser and continue firing focusing only on the Clown's attacks.
Remember that the train will continue to run through the play area periodically, you can guess the timing of its steps by looking when it passes the background.
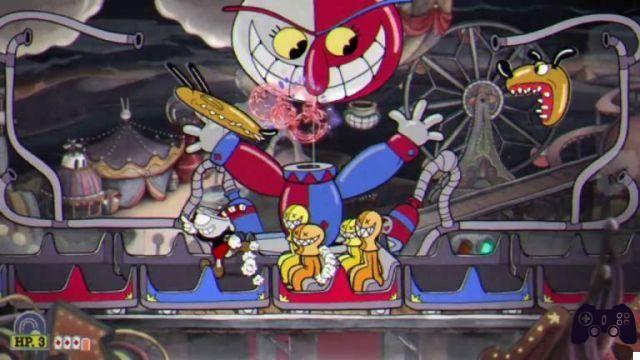
STEP 4: Beppi will play in a carousel that will stand out in the background. In this phase the roller coaster cart will move much faster than before, so jump on the moving platforms of the carousel to avoid it and maximize your fire at the clown using the Spreader and your special attacks. Periodically Beppi will throw Penguins to the ground that you must quickly eliminate before they start throwing a huge number of baseballs at you. In a short time the clown will become just a bad memory.

SUGGESTED SKILLS: Spreader / Chaser / Smoke Dodge
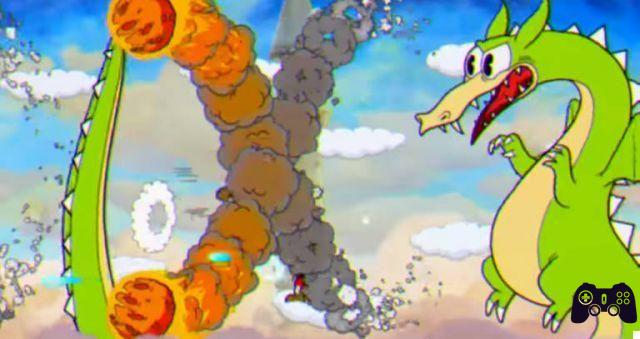
Fiery Frolic
The fight with the dragon Grim is undoubtedly one of the most difficult of all Cuphead. The obligation to constantly jump on the moving clouds combined with the random and unpredictable patterns of your opponent make this battle really difficult and able to put a strain on your nerves. We recommend that you equip yourself with the Roundabout, the Chaser and two extra hearts before facing the fearsome reptile.
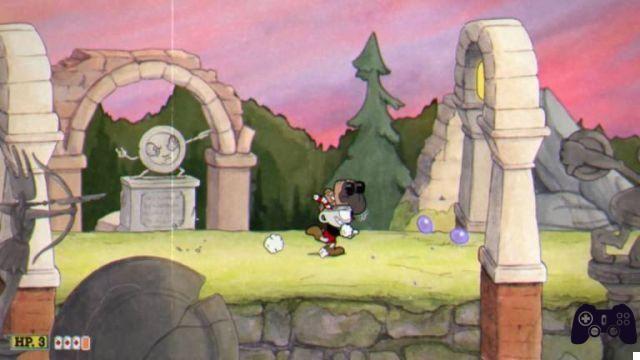
STEP 1: In this first part of the battle Grim will be able to attack you in three different ways: by throwing in your direction four energy rings, of which on the last you can make a Parry, spit fireballs, which will travel like a wave the battlefield, or trapssare the playing area vertically with its tail. While these are easily evaded offensives, the constant movement imposed by the level, and Grim's ability to mix or combine his attacks, could make you hit easily. Equip the Chaser so as not to have to think about aiming at your opponent, stay focused on your movements and keep your attention focused on the animations that precede the various attacks to be able to overcome this phase without great difficulty.
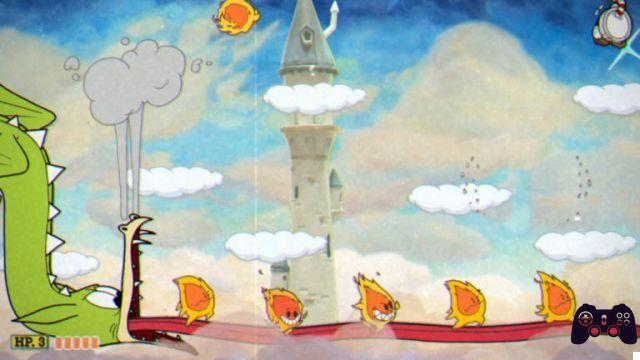
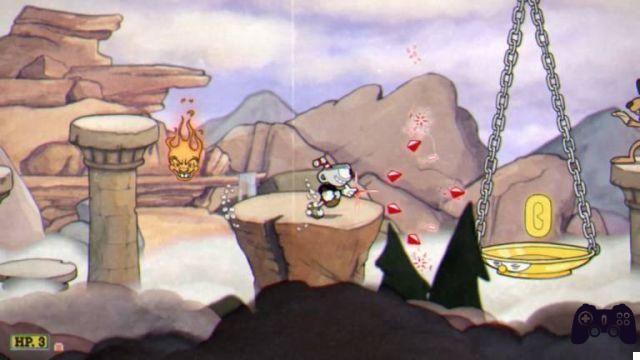
STEP 2: Grim will move to the opposite side of the playing area, opening his jaws and marching some very tender flames in the lower part of the battlefield that, periodically, will jump towards you trying to hurt you. Unfortunately, their offensive does not have a precise timing, just as the trajectory they will follow is not predictable. However, you can understand when they are about to attack you by hearing the noise they will produce before charging the attack as well as you can guess the direction in which they will launch by looking over they will turn their body. As in the previous phase, equip the Chaser to damage the dragon and stay fully focused on the little fires, in order to avoid constantly taking damage as you jump from one new to the other. Keep constant and in a short time you will reach the final stage of the battle.
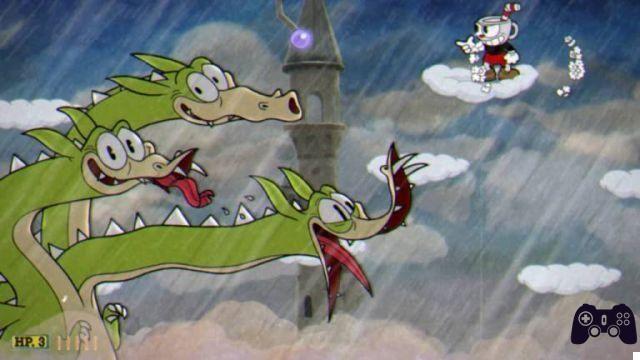
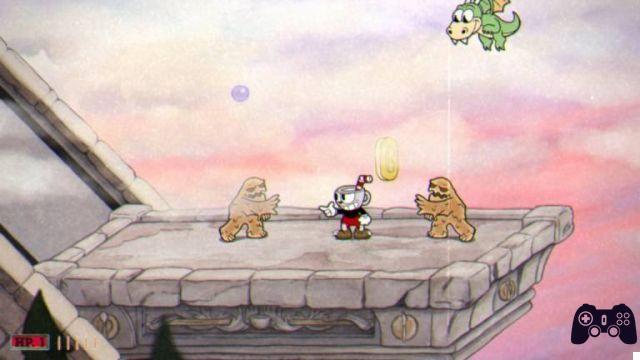
STEP 3: This last part of the encounter with Grim will require patience and a defensive attitude to be easily overcome. The dragon will transform into a three-headed creature which will constantly spit fireballs which, if hit, will split into four flames that will cover as many directions. Periodically Grim's central head will turn into a flamethrower and spit fire into the central part of the play area forcing you to stand in a raised position. The best technique in this phase lies in not firing when the dragon spits out the fireballs and using the Chaser, or the Roundabout, in the moments in which it will turn into a primitive flamethrower. In this way, while extending the fight by a few tens of seconds, you will be sure not to end up damaged by the flames generated when hitting the fireballs, being able to move more freely from one cloud to another during the offensives. Be patient, don't try greedily to maximize the damage and in a short time you will annihilate Grim without much difficulty.
SUGGESTED SKILLS: Roundabout / Chaser / Twin Heart
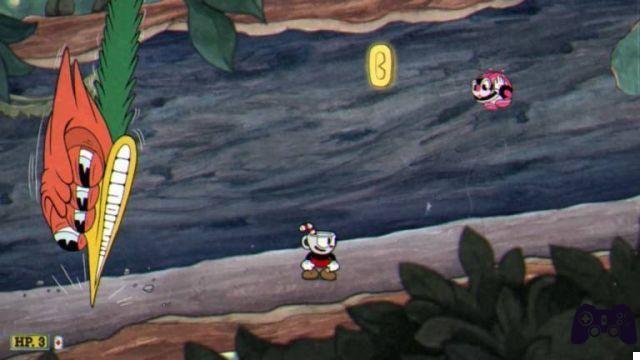
Aviary Action
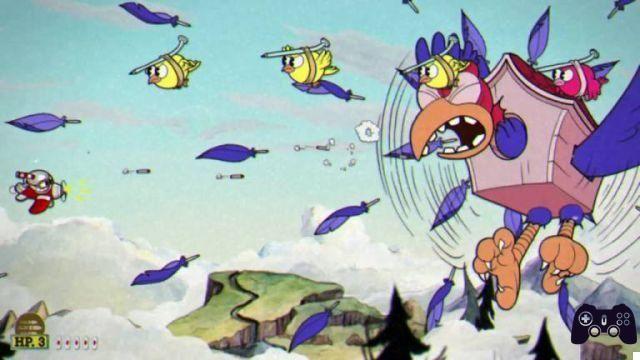
The last fight of the second part of Inkwell Isle will be back aboard your trusty airplane. The three phases of the battle against Wally Warble have very simple attacks to evade and will not be a challenge that will worry you if you know how to position yourself correctly. In Cuphead, remember, level design study and enemy patterns are essential elements.
STEP 1: Stay to the far left of the area and constantly shoot at Wally, and at the birds that will cross the screen horizontally, moving vertically to avoid the triplet of bullets that the woodpecker will occasionally shoot at you and the eggs that will periodically spit in your direction. If you keep the position you will not have to worry about the shell fragments that the latter will release on impact as they will not be able to hit you in any way. Towards the end of this phase the bird will start to get angry and cover the area with feathers. Stay in the previous position, keep the focus constantly on Wally and move a few inches up or down to avoid the more that will come towards you.
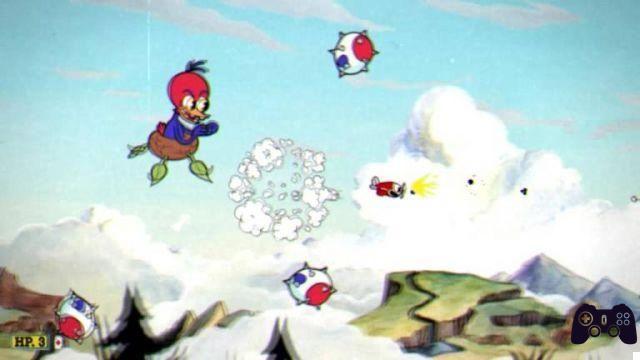
STEP 2: Wally will give way to a baby woodpecker aboard a flying shoot (Yes… you read that right!) That will fly in disorder on the battlefield surrounded by four eggs that will rotate around it, constantly approaching and moving away. Keep your distance, using the ability to shrink to easily untangle the woodpecker and the eggs, and shoot the bird whenever you get the chance. Pay attention to the bullets that his laser pistol fires at you from time to time and keep yourself in constant motion to briefly get to the final stages of the fight.
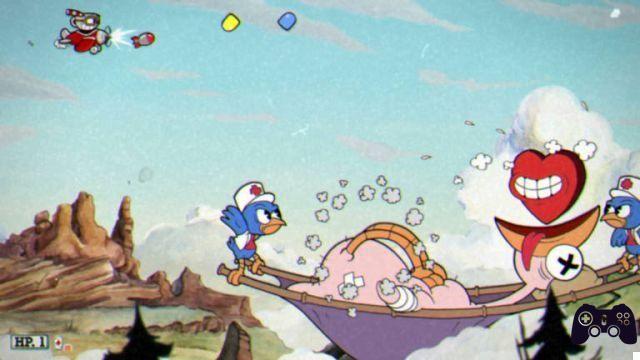
STEP 3: Once the young feathered threat has been eliminated, Wally's wounded body will arrive at the bottom of the screen aboard a stretcher supported by two nurses. The bizarre procession will move horizontally, hurling you against a series of objects of various kinds with widely predictable and easily avoidable trajectories. Pay particular attention to the nurses' pills, which can split into additional bullets once you reach the top of the play area, and keep bombing Wally from above while continuing to move until you finish the battle as winners.
SUGGESTED SKILLS: Coffee
Funfair Fever – Run ‘n’ Gun
Cuphead's third Run 'n' Gun level comes with the most classic of level designs. Retractable platforms, elevators and an elastic trampoline, to overcome some otherwise insurmountable walls, make up a platform-style mosaic which, while not offering a complex level of challenge, manages to be worthily layered. As with the previous levels, equip the Chaser and focus on your movements.
Coins: Of the five collectibles scattered throughout Funfair Fever, only the third coin may require a minimum of attention to be collected. In fact, you will have to drop on the platform below, paying attention that the enemies do not hit you, or the target connected to your goal.
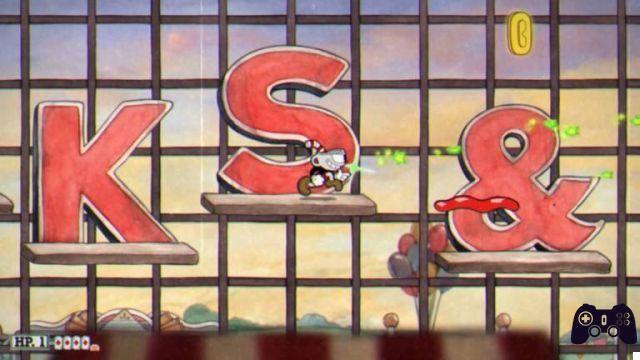
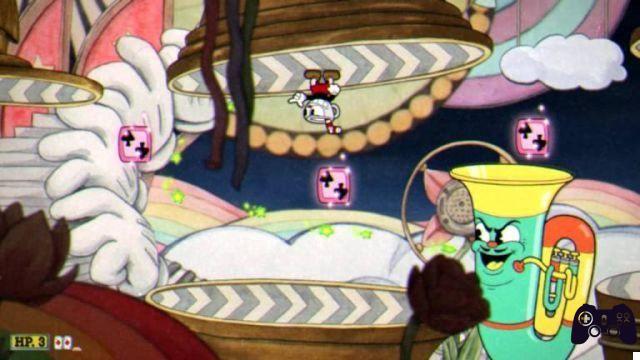
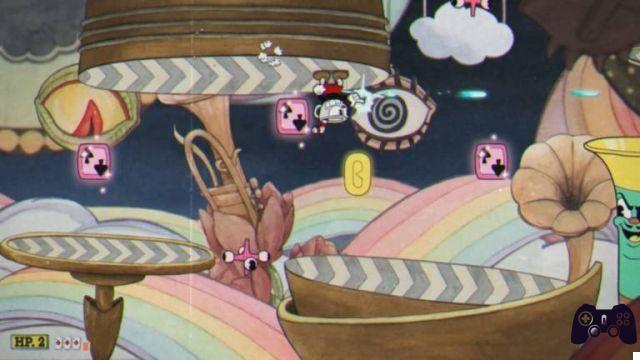
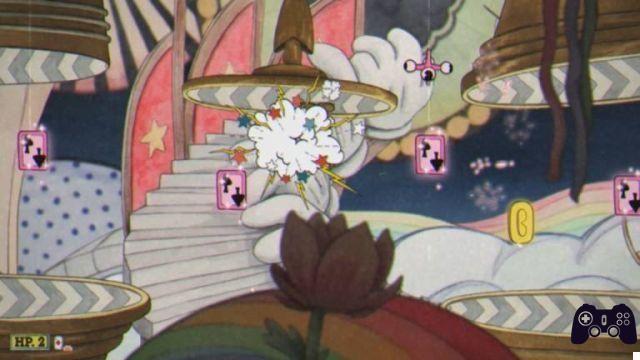
Funhouse Frazzle
The particular structure of this level of Cuphead will require you to constantly move between the floor and the ceiling by making a Parry on the pink cards distributed over the entire surface of the playing area. The ability to move on two different planes will allow you to easily evade the attacks of your opponents, as long as you maintain an almost mechanical precision to avoid futile damage from falling.
Coins: Cuphead's fourth Run 'n' Gun level offers no particular difficulty in finding all the collectibles. The coins will, in fact, be clearly visible and easily available by moving between the two floors where the action takes place with the right timing.
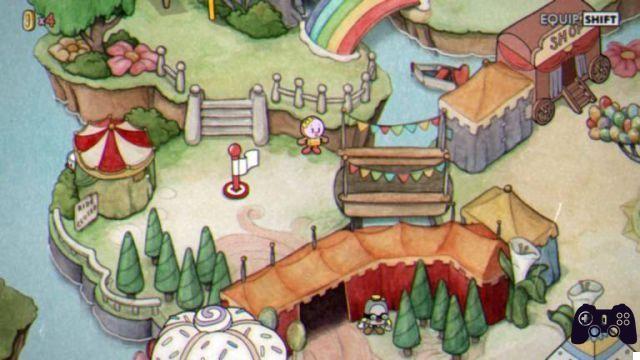
Coins and Secrets of Inkwell Isle Two
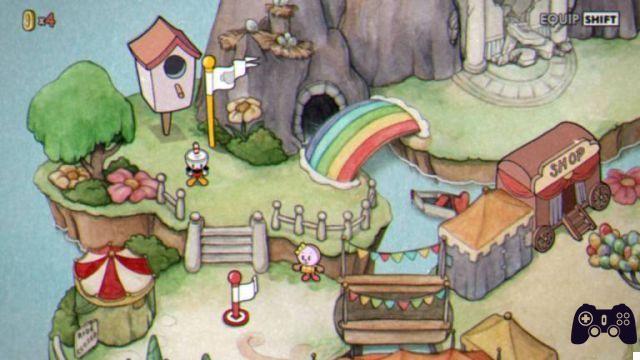
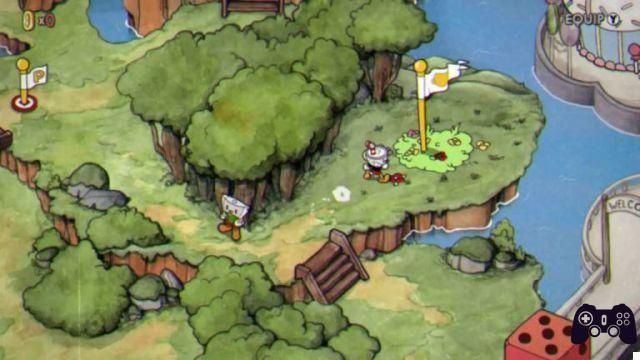
In the first part of the map you will meet a trio of singers who will confess that they can no longer perform due to the disappearance of the fourth member of their group. Once you've defeated Baroness Von Bon Bon, and unlocked access to the top of the map, head into the hedge behind the closed tent on the left of the Run 'n' Gun level to find the missing singer. Once the latter is reunited with his peers, the singing quartet will thank you by performing for you, allowing you to continue your Cuphead adventure.
Exactly behind the birdhouse, the scene of the battle with Wally Warble, you can find a shortcut that will take you directly in front of the castle where you will collide with the dragon Grim. Once you have completely covered the secondary road, return to the Cookie Girl, located in the first part of the map, to receive a coin as compensation for discovering a shorter route to travel the island.
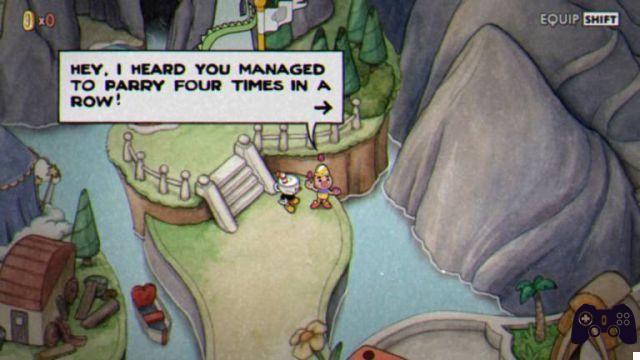
The juggler located near the castle will propose you a challenge: carry out four consecutive Parries without touching the ground and he will give you a coin. To succeed in the enterprise you can try inside one of the mausoleums, restarting the level whenever you fail in the enterprise, or go to the Funfair Fever level and take advantage of the pink balloons present at the beginning of the level until you reach your goal. Once you have done four consecutive Parries, return to the juggler to get your reward.
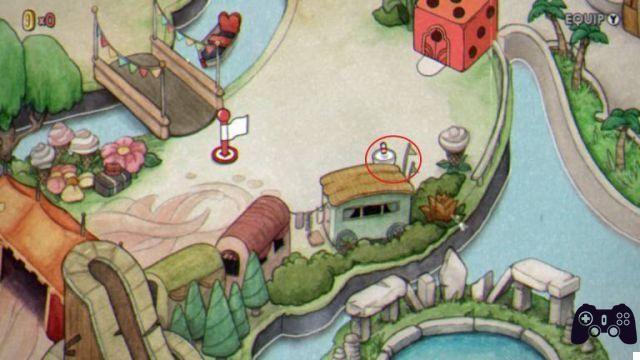
A coin is hidden in the small blue trailer located before the end of the level.
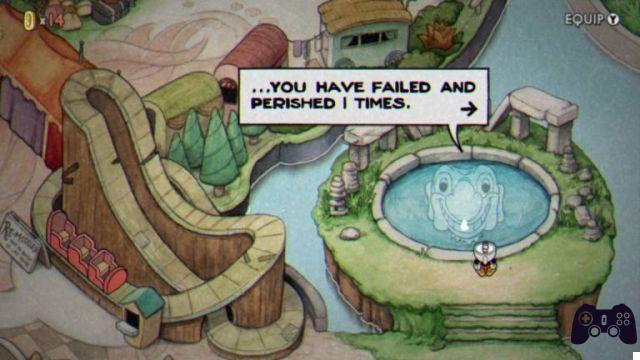
The lake located to the south-east of the map will animate every time you interact with it, telling you how many times you have died during your adventure.
Inkwell Isle Three
The urban atmospheres of the last part of Inkwell Isle are home to the final seven bosses that separate you from your encounter with Lucifer, as well as two Run 'n' Gun levels and a couple of side challenges that will keep completists busy even after finishing the journey. by Cuphead and Mugman.
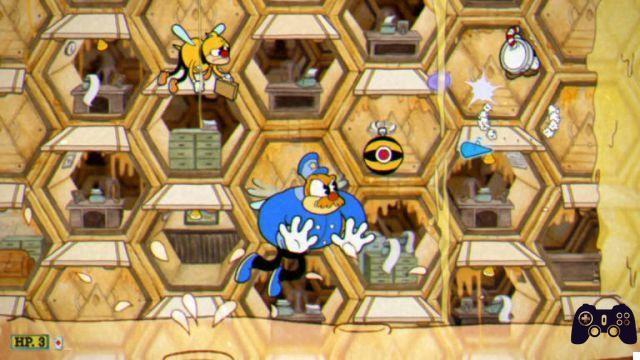
Honeycomb Herald
The battle with the queen bee has the same peculiarities as the battle against the dragon Grim, proposing a play area that will constantly move vertically, forcing you to constantly jump to avoid falling damage. The three phases of the clash do not present insurmountable difficulties, offering easy-to-learn attack patterns that turn out to be complex only by virtue of the constant mobility required of the player. Clearly all this variety, typical of some Cuphead fights, requires some commitment.
STEP 1: In the first part of the battle, the queen bee will give way to a bee-guardian who will fly over the playing area throwing bombs that, exploding, will throw bullets in six different directions. Keep moving alternating between the Chaser and the Spreader to maximize damage to the guard and don't ignore the worker bees that will walk through the level. Eliminate even the latter quickly to keep the battlefield always clean in order to guarantee constant movements in safety.
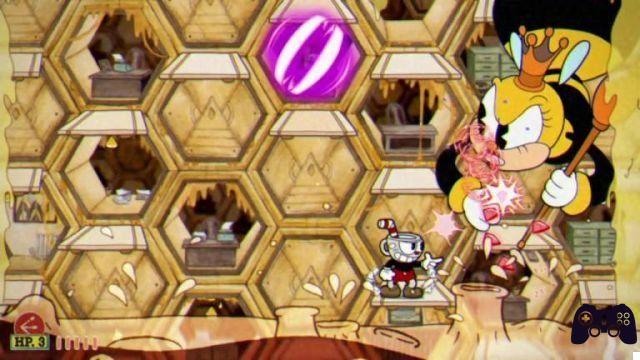
STEP 2: The queen bee will finally enter the field by descending from the ceiling to attack you. If it occupies the right or left side of the level it could attack you either by summoning two spheres of purple light that will follow you for a few seconds or by making a triangle of energy appear that will run through the playing area firing bullets from its three ends. If, on the other hand, the queen drops into the central part of the playing area, she will start spitting bee-shaped bullets that will zigzag up both sides of the battlefield. Equip your trusty Chaser and leave him the honor of damaging your opponent while you focus on the jumps you need to perform to avoid being hit by the royal offensive.
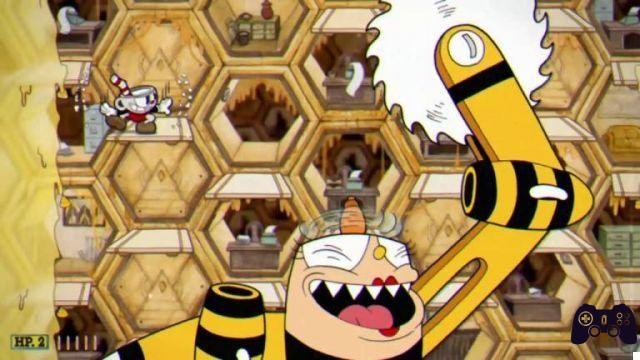
STEP 3: The last part of the meeting will be heralded by the appearance of the queen bee as she leafs through a spell book. Use this moment to throw them at your Super and significantly shorten the next phase of the fight. Your opponent will transform into an airplane that will preside over the lower part of the level by throwing homing punches at you, which you must avoid while jumping from platform to platform, or attacking you by turning his limb into a circular saw and horizontally traversing the field of battle. Follow his movements and as soon as he raises one of his arms, quickly move to the opposite side so as not to be hit by his mutation and keep jumping the punches he will throw at you as you hit it with your Chaser. If you have used the Super in the moment that we have suggested, this confusing phase will last a few seconds and you can make Cuphead and Mugman rise, victorious, on the remains of the Queen Bee.
SUGGESTED SKILLS: Spreader / Chaser / Twin Heart
Shootin N’ Lootin
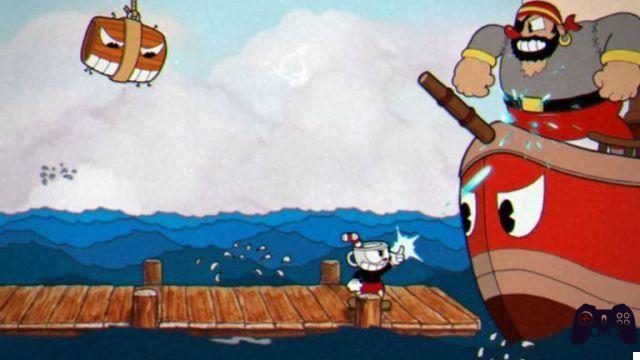
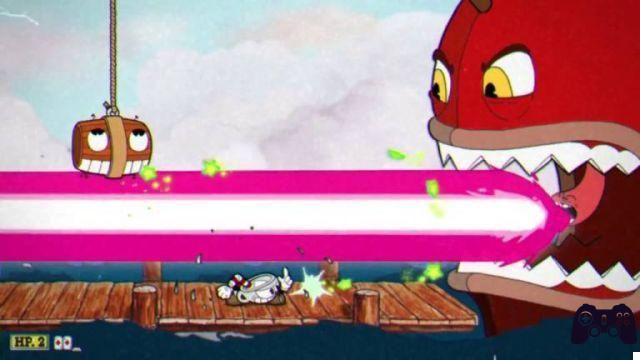
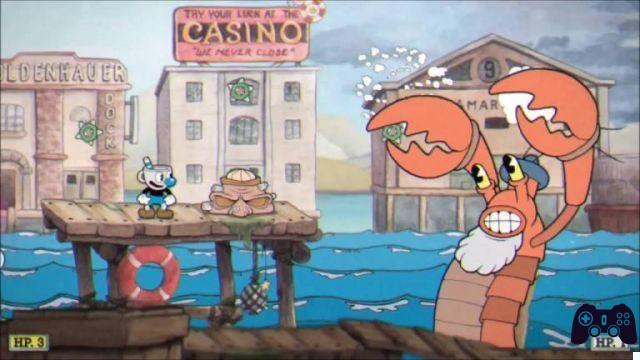
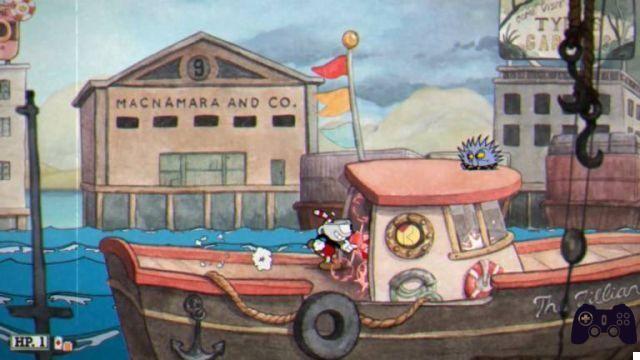
Captain Brineybeard will be your next opponent and, albeit it is one of Cuphead's simplest fights, will require a good dose of reflexes and adequate equipment to be faced with ease, especially in the face of the amount of different attacks available to the boss.
STEP 1: The first part of the battle will also be the longest and will consist of an ever-increasing number of attacks that will be launched at the same time. First of all, only Captain Brineybeard will be able to suffer damage and this detail will require you to constantly shoot using the Lock to aim diagonally, thus remaining anchored to the ground, or, alternatively, to attack in jump. The first offensives you will have to worry about will be the bullets that the pirate will shoot at you through his octopus, which you can easily dodge or jump and the chest that for the duration of the fight will horizontally cross the upper part of the level trying to crush you every time you are in. line of air with him.
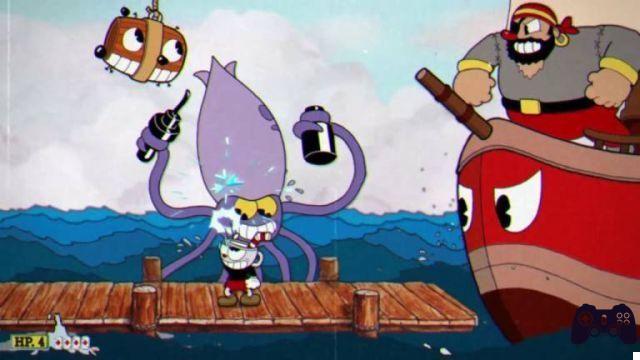
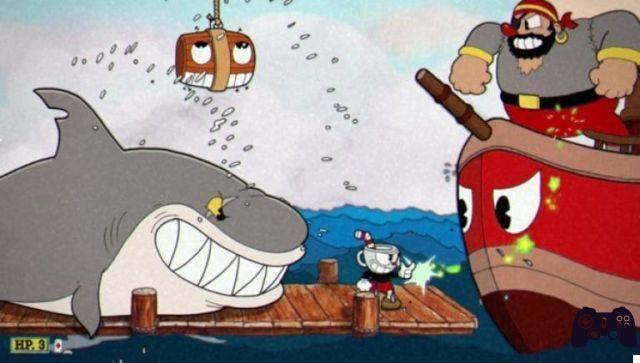
After inflicting the first damage on Captain Brineybeard, the latter will begin to whistle to call three different types of sea creatures to his aid: a shark that will invade almost all of the pier on which you are fighting, forcing you to position yourself on the far right limiting the your mobility, three sea lions that will horizontally cross the play area trying to hit you, and that you can quickly eliminate by shooting them, and a squid that will stand out in the background and, if it is not hit quickly until it submerges again, it will obscure the action game by throwing ink on the screen.
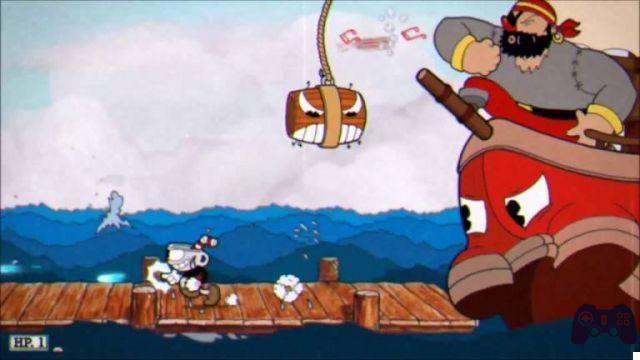
Continuing in the battle, all the aforementioned attacks will also be joined by the ship of Captain Brineybird who will start spitting cannonballs at you anticipated by a short animation. Stay calm, watch all the animations of the various attacks and keep in constant motion to avoid the chest above you. Use the "Charge" for this first phase in order to maximize the damage in the short windows that you have available and in a few minutes you will pass to the last part of the fight.
STEP 2: The captain's boat will be furious by hurling the captain into the open sea and taking control of the battle, resetting all the previous attack patterns except for the barrel which will remain present also in this last part of the clash. The boat will have only two attacks, both of which are easy to evade, and only her uvula will be vulnerable to your blows. The rotating spheres that it spits towards you will be easily dodged using the “Smoke Dodge” while you just need to lower yourself to avoid being hit by the laser beam that will periodically launch. Equip the "Roundabout" to keep damaging her constantly and in a few moments you will put an end to this frenetic battle.
Murine Corps
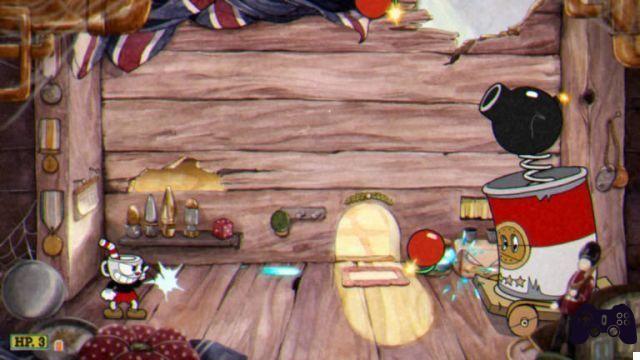
War veteran Werner Wernam will be Cuphead and Mugman's next opponent. The fight with the warmongering rodent will now be divided into three canonical phases of which only the intermediate one could prove to be a threat. Equip the "Lobber" and the "Spreader" for this fight, join the "Smoke Dodge", and get ready for battle
STEP 1: Werner will burrow into a rudimentary can-shaped tank and occupy one of the halves of the battle area by moving horizontally and attacking you in three different ways:
- A cannon will emerge from the roof of the can throwing bombs at you which, making an arc trajectory, will explode in contact with the ground, releasing side flames. Avoid them by moving sideways and jump on impact to avoid taking damage.
- A catapult will throw garbage at you, which you can dodge by positioning yourself at the edge of the play area. Without risking excessively, try to make a Parry on the pink Chewing Gums, which will be found together with the remaining garbage, to load your Super.
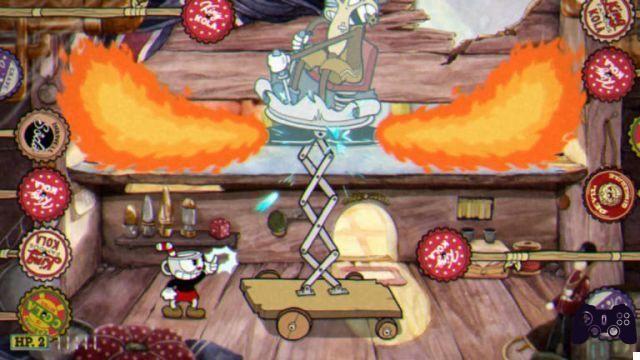
- Periodically, two pink trampolines will be launched from the can. This will indicate that Werner will soon be crossing the battlefield trying to charge you. With the Smoke Dodge equipped, simply jump and dodge when the rodent is in your vicinity. If you have decided to equip another Charm, you will have to perform a Parry on one of the trampolines combined with a dodge at the exact moment when Werner approaches you.
Follow these simple steps by continuing to shoot Werner with the "Lobber" when you get the chance, and in a short time you will move on to the next phase.
STEP 2: The level will change significantly as Werner positions himself in the center of the area, with the side walls being covered with circular saws, shaped like bottle caps, and an additional plane added to allow you more mobility. In this part of the fight you will have to avoid the flames that the rodent will launch from his chariot by moving on the plane that he will not occupy and at the same time you will have to pay attention to the saws that will randomly advance on the battlefield. Shoot Werner with the "Spreader" by constantly moving to avoid the caps and flames, Smoke Dodge to pass the mouse, moving to the other side, whenever the entire wall of saws advances towards you.
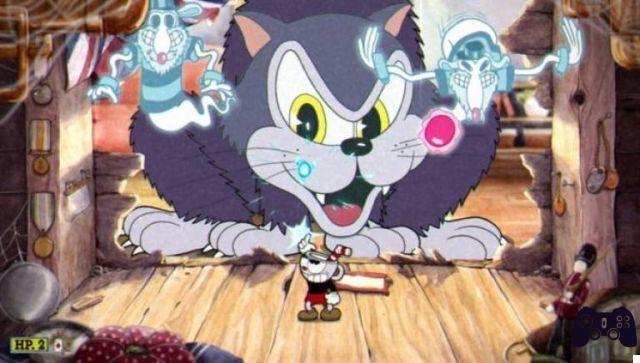
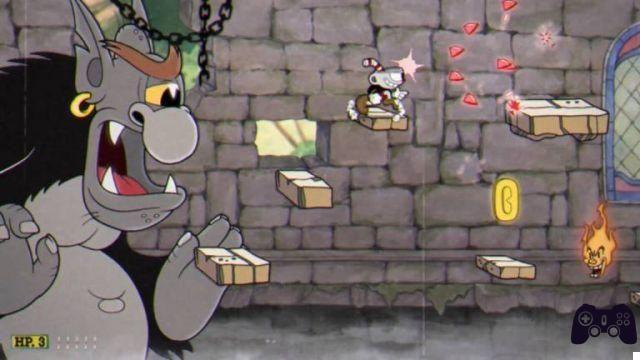
STEP 3: A huge cat will burst into the center of the screen, engulfing Werner and changing the battlefield again. The feline will have three very simple attacks to evade. First, it will advance one of its legs to the right or left, forcing you to move to the opposite end to avoid getting hit. Then he will spit two ghosts in the shape of Werner who will throw at you pink orbs on which you can perform a Parry. Quickly take them out as soon as they appear to keep them from starting their offensive. Finally, wooden planks will constantly fall from the ceiling, easily avoidable by moving sideways. Whenever you get the chance, position yourself under the cat's head and shoot him with the "Spreader" to briefly get Cuphead and Mugman a new contract for the devil.
SUGGESTED SKILLS: Lobber / Spreader / Smoke Dodge
Junkyard Jive
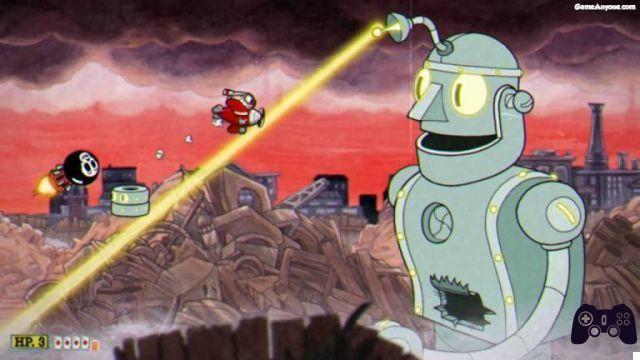
Get ready, because Dr. Kahl's robot encounter will be the most complex aerial battle you'll ever face in all of Cuphead. The robotic giant, and its crazy creator, will have numerous tricks up their sleeves to put a strain on your patience and your reflexes but knowing in advance what awaits you, you can get the better of them. We suggest you equip the Charm "Coffee" to keep the charge of your Super constant or alternatively, if you think you will suffer considerable damage, Twin Heart to guarantee you greater resistance.
STEP 1: The first part of the battle is divided into two quite chaotic portions where the metal giant will alternate numerous attacks that certainly represent the most complex part of the battle. The robot has, in fact, three parts of the body capable of producing constant offensive and that you will have to eliminate following a precise order to keep the battlefield as clean as possible. Immediately take care of the lower abdomen, of the mechanical giant, from which the missiles come out that zigzag up the play area. Pay attention to the laser that will constantly shoot you from the head and make sure to make a Parry on the mini droids that will come out of his chest, in order to avoid being hit by their energy beam. Once the lower part is fixed, take care of the chest quickly paying attention to the threats listed above and to the new search missiles that will come out from the belly of the robot. Once you see the giant's heart leaking, move to his head by repeatedly hitting the laser source until the face changes into a cannon from which gears will periodically be fired.
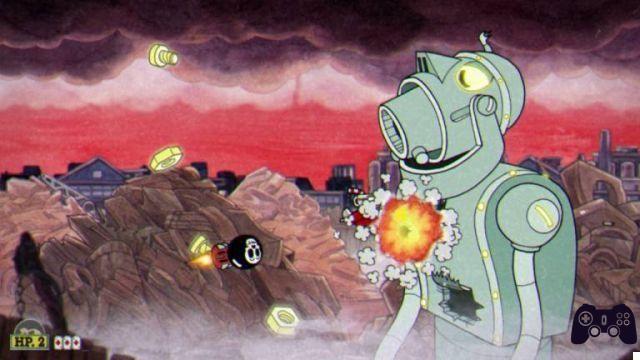
STEP 2: From this moment on you will have to think about hitting the heart of the robot, taking care of the missiles that will continue to exit from the belly, avoiding the gears that will shoot from your head and paying attention when Dr. Kahl's creature drops its arms outside the area of game. He could, in fact, place a magnet behind you to significantly reduce your mobility or swing his hands in the central part of the level by shooting you with balls of energy whenever you find yourself in the line of fire. Unfortunately, there is no strategic position to be completely safe in this phase of the fight, so stay focused, avoid attacks and keep hitting the heart until the robot's head finally detaches from its body.
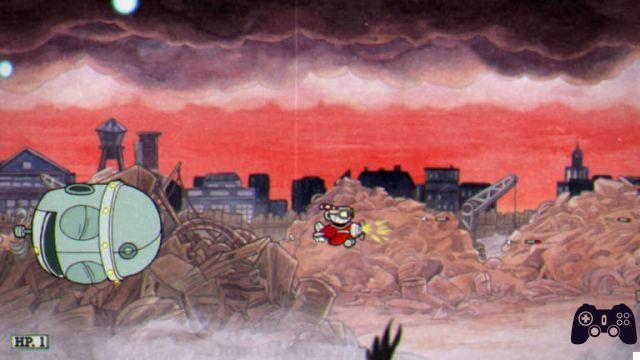
STEP 3: The robot's head will start to constantly go past the top and bottom of the level without ever attacking you directly but leaving the thankless task to the homing missiles that first came out of its belly. The latter will explode once hit, or if they collide with each other, risking damage if you are close to them. You will therefore have to stay away from them and shoot them to methodically clean up the airspace before you find yourself with significantly reduced mobility. Head into line of sight and activate the Super to deal a massive amount of damage to it and bomb it every time it passes the lower part of the level.
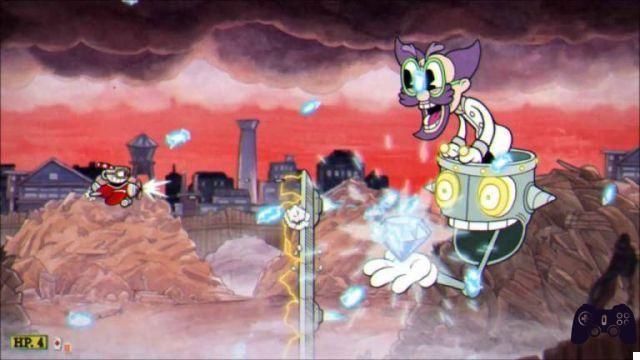
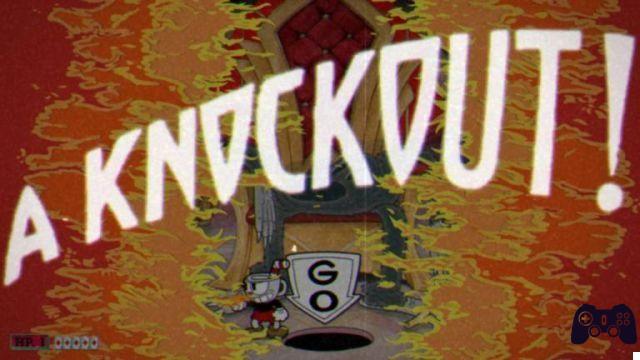
STEP 4: Dr. Kahl will finally come out of the robot's head and will do his best to attack you using energy bullets that will scatter the area at 360 degrees. Meanwhile, electrified vertical walls will appear from the top and bottom of the level, alternating cyclically and trying to close the flight space. Avoid the walls as you methodically dodge the bullets, continuing to shoot the evil scientist until a triumphant "Knockout" announces your victory.
SUGGESTED SKILLS: Coffee o Twin Heart
Hi Seas Hi-Jinx
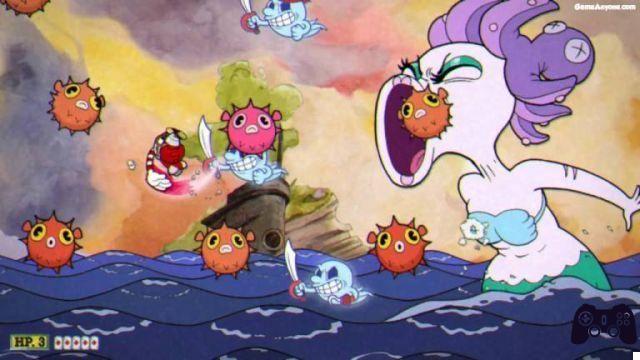
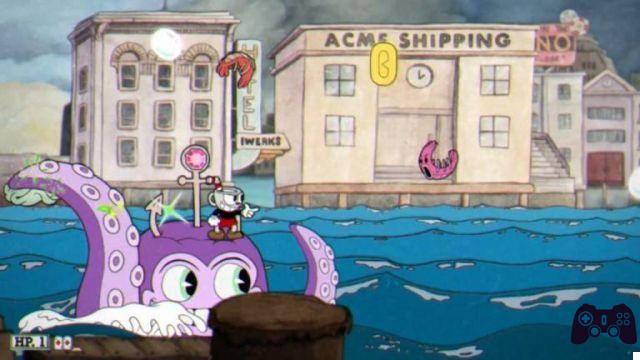
The fight with Cala Maria will represent the last aerial battle with a boss you will face in Cuphead. The attractive siren will not prove to be a particularly difficult opponent but, in the first phase of the fight, he will have numerous attacks at his disposal that you will need to learn to recognize in order to get the better of your opponent.
STEP 1: The first part of the fight with Cala Maria will also be the longest of the three. The siren, as we mentioned earlier, will have a very consistent number of attacks at its disposal that you will need to learn to recognize in order to evade them as best you can while shooting at your fierce opponent:
- A seahorse will emerge from the bottom of the sea and, running horizontally across the playing area, will spit a vertical stream of water that will not harm you but will push you upwards, reducing your mobility. Go through it constantly without stopping for too long.
- A turtle will come out of the depths to shoot flying mines from its shell. The latter will split into eight bullets that will scatter around the area. Stay out of his line of fire and get ready to dodge the metal shards that come towards you.
- When Cala Maria hugs a huge yellow fish, it will spit at you a smaller, electrified one, which will follow you for a few seconds.
- If the mermaid harnesses a goldfish, however, the latter will spit three waves of easily avoidable fire bullets at you.
- Some puffers may float vertically out of the ocean. Move horizontally to avoid getting hit and try Parrying the pink one to charge your Super.
- Cala Maria may spit on you a tri of pirate ghosts who will aim at you before charging you. Move to the far left of the play area, wait for their charge and quickly dodge them by moving vertically.
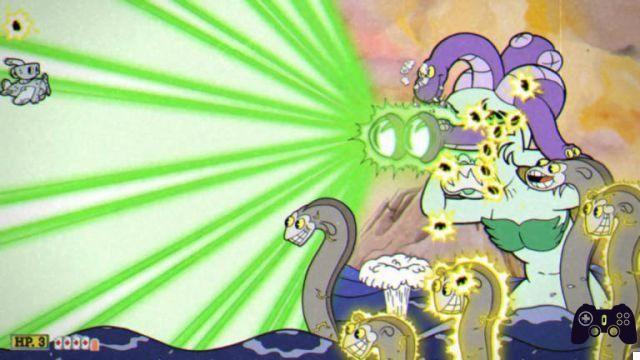
STEP 2: When a herd of electric eels attack Cala Maria your opponent will change, starting the second phase of the battle. In this part of the fight you will only have to worry about avoiding the numerous bullets, which will be fired at the area by the slimy capitons, and quickly move your joystick left and right whenever the petrifying beam of the siren hits you, in order to quickly regain the ability to move by freeing Cuphead and Mugman from the rock that will imprison them. Continue to shoot Cala Maria and bomb the eels to reduce their number, use your Super if you have it and in a few moments the head of the new Medusa will detach from the body.
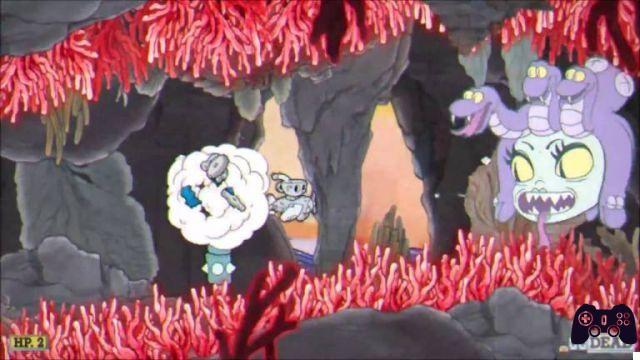
STEP 3: In the last part of the fight you will find yourself chasing the head of the Siren into a dark cave, dotted with colonnades that you will have to avoid in order not to take damage. Cala Maria will throw you green bubbles, with a ghostly skull inside, easily dodged and will cyclically launch a reduced version of its petrifying beam that you can avoid by moving vertically. Keep the fire steady on what's left of the siren, evading attacks and rocky conformations, until you win this fight as well.
SUGGESTED SKILLS: Coffee o Twin Heart
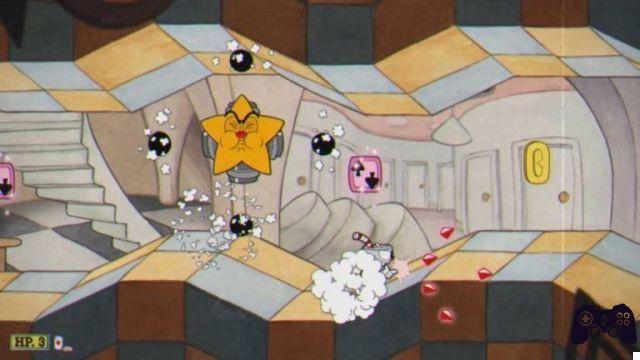
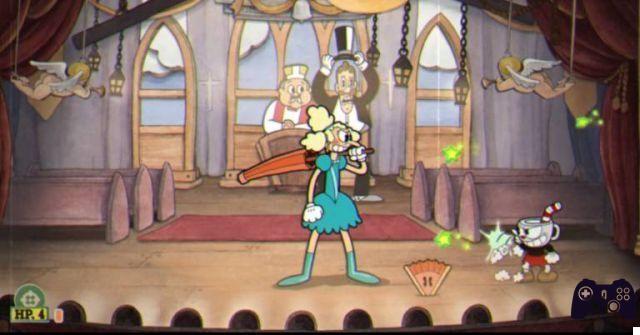
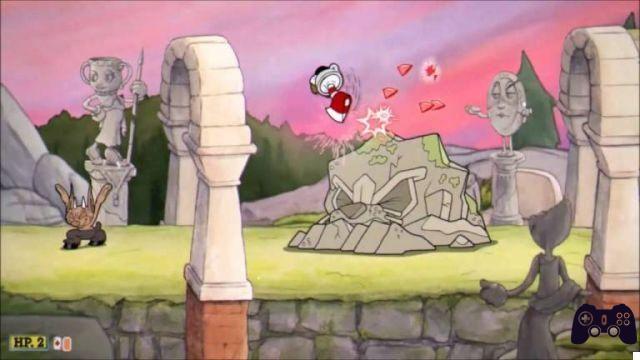
Dramatic Fanatic
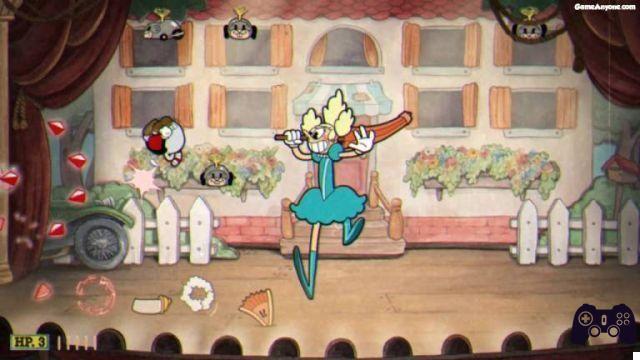
The time has come for Cuphead and Mugman to tread their first stage, challenging the fearsome Sally in the theater where she performs in the penultimate fight before they can have an audience with the Devil. Equip your "Charge" and be prepared to move constantly to avoid the offensives of the cruel theatrical.
STEP 1: Sally's main attack consists of jumping on you and pirottling graceful. Move horizontally to avoid it by shooting it whenever possible. In this first part of the fight, the theatrical may throw fans that will stick on the stage, reducing your mobility, disappear inside her umbrella, to suddenly swoop down on you, or send a pink heart against you that will swing horizontally. and on which you can make a Parry.
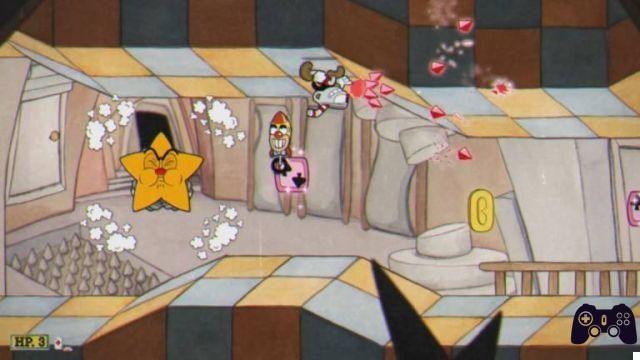
STEP 2: In the second act, to all the offensives already present in the first part of the fight, there will be added baby bottles, which will be constantly thrown by the babies who will look out of the windows in the background, and mechanical mice that Sally herself will drop from her umbrella and which they will walk the play area trying to hit you. Keep moving to dodge the numerous attacks using your Smoke Dodge and use the "Charge" to maximize damage whenever you have an opening to hit the actress.
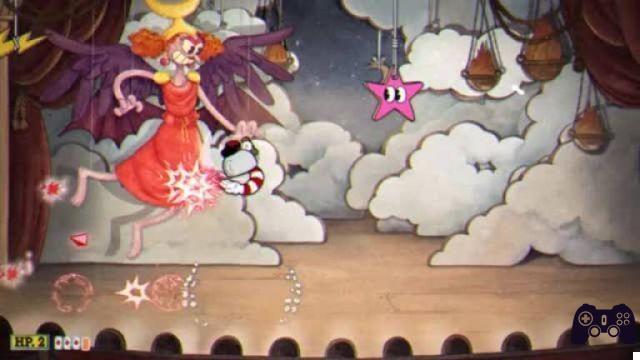
STEP 3: Sally will descend on the left side of the stage dressed as a Goddess, remaining motionless for the entire stage and thus becoming an easy target. His offensives will be only two and will be based on the use of scene elements designed to inflict damage on you. Look at the sign behind him, if it says "Lightning" be prepared to move left and right to avoid the wooden lightning that will be dropped on you. If the wording indicates “Meteor”, prepare your Smoke Dodge to avoid a huge wave of papier-mâché which, alternatively, can only be skipped by performing a Parry on the pink star that will appear on the right of the stage. Keep hitting her with your "Charge" and in a few moments move on to the frenetic final part of the battle.
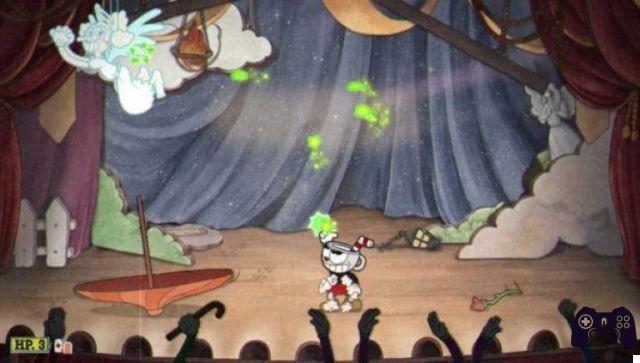
STEP 4: Sally Stageplay will start unleashing the top of the level by constantly throwing pink roses that you can dodge or hit with a Parry. In addition to the floral rain, the actress's umbrella will whirl horizontally across the stage surface following you and forcing you to jump over it, or dodge it with a Smoke Dodge, constantly. Load up your "Charge" and hit the actress whenever you get the chance or, alternatively, select the "Chaser" to fully concentrate on dodging the theatrical offensives until you complete this spectacular Cuphead battle.
SUGGESTED SKILLS: Charge / Chaser / Smoke Dodge
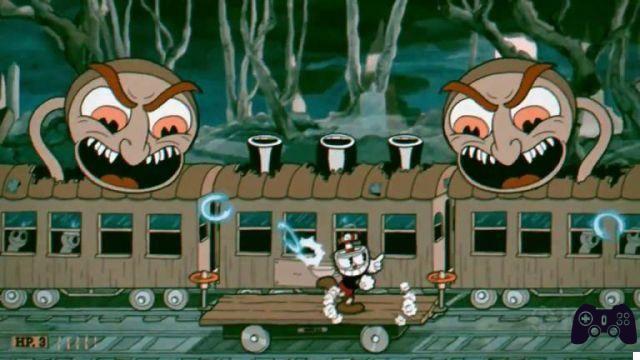
Railroad Wrath
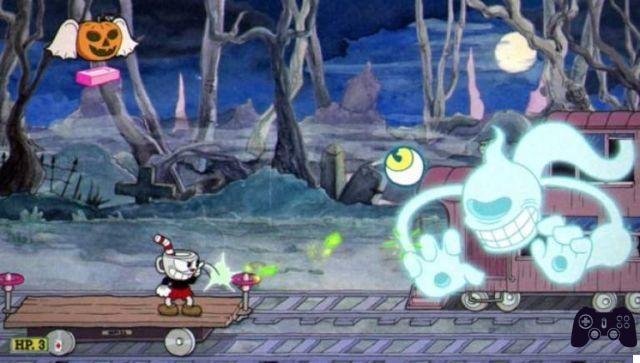
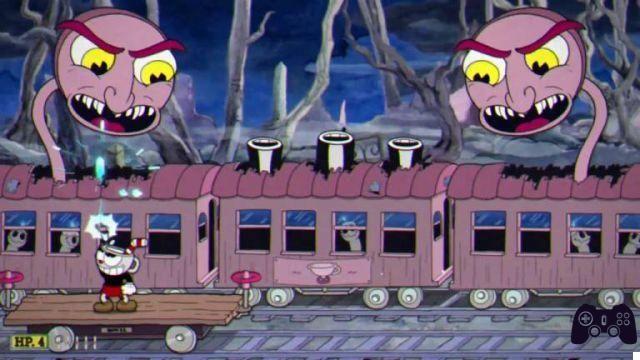
The last stop of Cuphead and Mugman, before scnedere in the playful Inferno, will be on board a railway carriage trying to stop the ghostly race of the Phantom Express. The ectoplasmic train, with its supernatural passengers, will prove to be a really tough opponent that will offer you one of the funniest and most varied battles in the entire title of Studio MDHR.
STEP 1: The first part of the fight will take place at the bottom of the train where a ghost will bombard you, from the last carriage, with a flood of bouncing eyes. The two pink valves, placed on the sides of the trolley that will act as a platform, can be hit by performing a Parry, consequently moving the means of transport to the left, center or right of the battlefield. Keeping the slide to the far left and, with your back to your opponent, constantly shoot with your “Roundabout” to maximize the damage you inflict on him. Constantly pay attention to the flying pumpkins that will drop pink bricks capable of hitting the valves placed on the sides of your vehicle, moving it against your will. You can evade the offensive of the pumpkins by shooting them, to eliminate them quickly, or by hitting the valves yourself early, providing a period of immunity to the latter by inhibiting the effect of the hostile bricks.
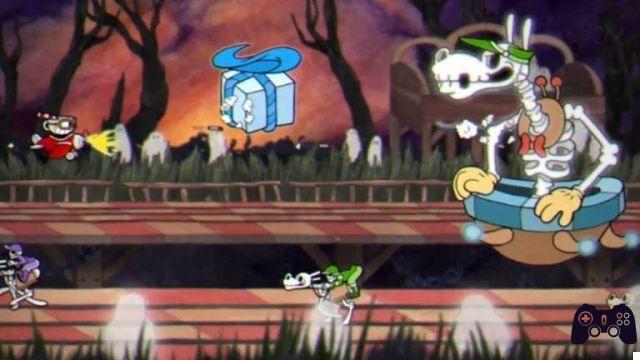
STEP 2: A skeletal conductor will rise from the center of the Phantom Express carriages trying to crush you with his hands. Your target will be the bony skull of the giant driver and to hit it you will have to keep constantly positioning the cart under it, to avoid the limbs that will crash to the ground and to be able to shoot him comfortably aiming upwards. Pay attention, even in this phase, to the bricks that will be dropped again by the flying pumpkins present in the previous part of the fight.

STEP 3: In this part of the fight you will have to pay attention to several elements. First of all, from the central carriage the three chimneys will make ghosts come out which, once hit, will drop their skulls to the ground. The latter, if it hits the valves of your trolley, will move it in a similar way to the bricks seen previously. From the side carriages, two monstrous faces will be your new targets. The two monstrosities will attack you, alternating, emitting an electric discharge from the mouth that will travel the perimeter of two wagons of the train. Always position yourself under the face opposite to the one that will attack you and hit it aiming upwards, systematically repositioning yourself based on where the next enemy offensive will start and paying attention to the ghosts that will continue to escape from the central carriage.
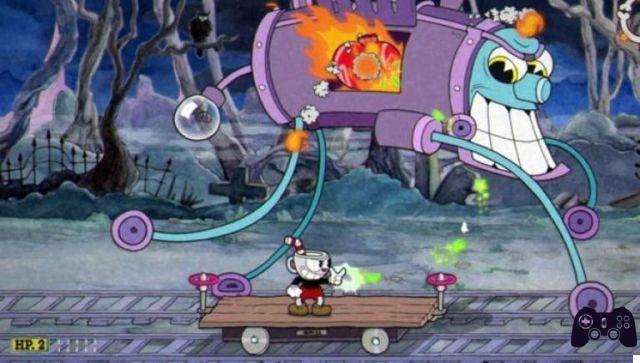
STEP 4: Finally you will be able to confront the possessed locomotive of the Phantom Express which, galloping horizontally in the background of the level, will throw at you flames from the random trajectory and rings of burning bones that will trace your position in a straight line. Waiting for the locomotive to reach the center of the level and make a Parry on its tail to open the boiler grate, use the few seconds you have to shoot at the heart of the metal beast, paying attention to the hot offensive and repeat this operation until when you don't get rid of this grim version of the more famous Orient Express.
SUGGESTED SKILLS: Roundabout / Chaser / Twin Heart
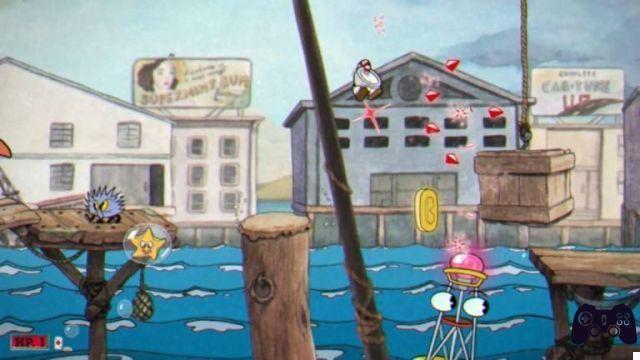
Perilous Piers – Run ‘n’ Gun
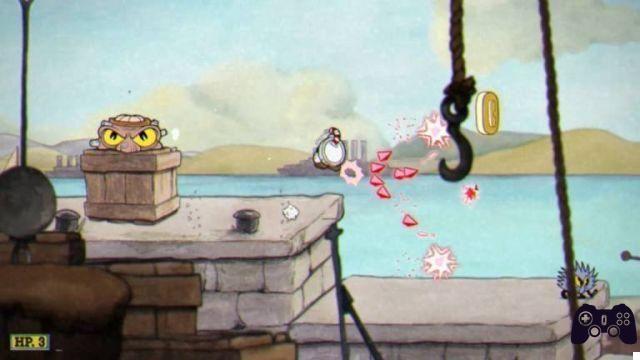
The penultimate Run 'n' Gun level in Cuphead will prove to be a particularly exciting challenge for all platformers. Before tackling the hectic level structure, keep these simple and useful tips in mind: Flying fish have infinite respawns, so keep your attention constantly when making jumps in the first half of the level; sea lobsters can be hit but have a very high resistance so just skip them remembering that they will make two complete passes, with attached lightning, before diving again; the crystal placed on the anchor skewered on the head of the octopus, which you can use to free the passage from the rocks, will have a short period in which you will not be able to hit it again after having activated it previously. Keep in mind the times so as not to be injured by the rocks that will block your passage.
Coins: Only the last two collectibles in Perilous Piers will require a minimum of attention to be collected. The fourth coin, in fact, will be hidden inside the cabin of a boat while to grab the fifth you will have to take advantage of the momentum given by making a Parry on the octopus anchor.

Rugged Ridge – Run ‘n’ Gun
As per the ancient videogame tradition, the last level Run 'n' Gun by Cuphead offers the most complex challenge of the sextet of the most traditional levels present in the title. The constant precision required by the jumps, the amount of enemies present in the Hellenic meadows and a gigantic cyclops that will chase you in the final stretch of the level, make Rugged Ridge a challenge capable of requiring constant rapidity of action for, about, three minutes necessary to complete it. Keep in mind that the miners have infinite "respawn" and that the golden plates will require you to constantly jump to not let them sink too much, thus preventing you from reaching your destination.
Coins: Pay attention to the third collectible in the level as it will require you to position yourself to the far right of the rocky platform and jump instantly as soon as you see it appear, if you don't want to go back through the level to collect it.

Coins and Secrets of Inkwell Isle Three
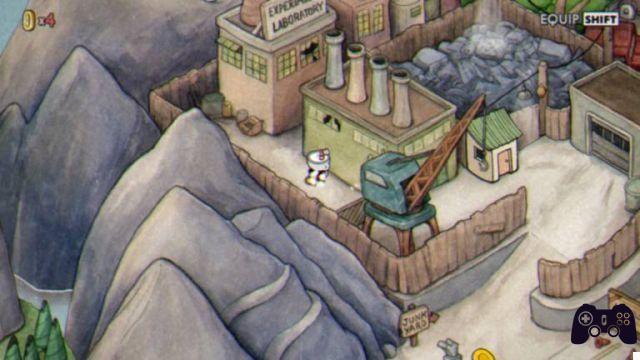
Behind the small kiosk located behind the shop, you can find the only coin hidden in the third map of Inkwell Isle.
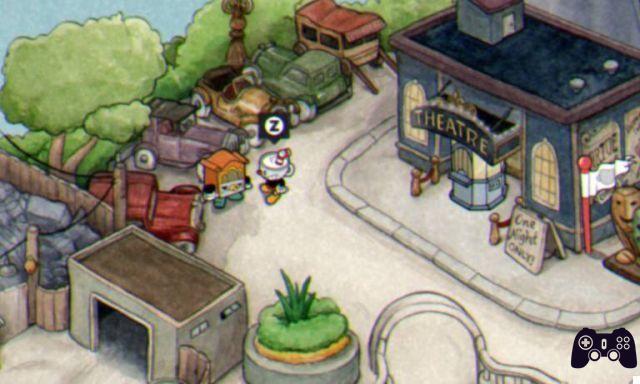
In the junkyard where you will face Dr. Kahl you can pass Cuphead under the crane to access a hidden shortcut that will allow you to reach the theater where Sally Stageplay is performing early.
The Gramophone stationed near the landfill will allow you to modify the soundtrack, which will accompany your outings on Inkwell Isle, with a much more minimal version of the same songs, performed only on the piano. At any time you can talk to Wolfgang, the jukebox located near the theater, to restore Cuphead's original soundtrack.
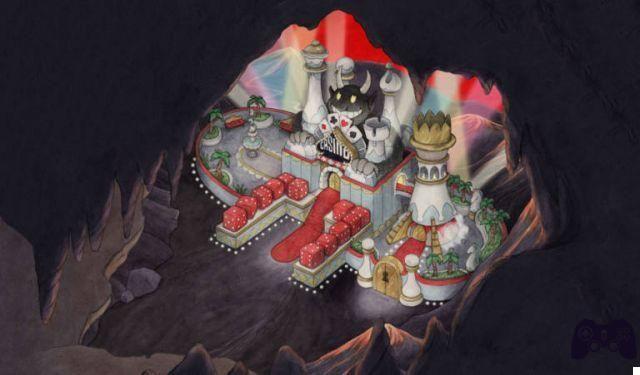
Inkwell Hell
You have finally arrived at the gates of the Devil's Casino, where the final stages of Cuphead and Mugman's adventure will take place. The most complex part of the whole game is about to begin and the vile King Dice is ready to direct it with his class of yesteryear.
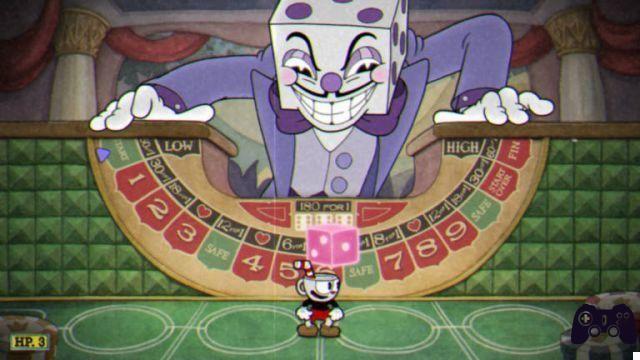
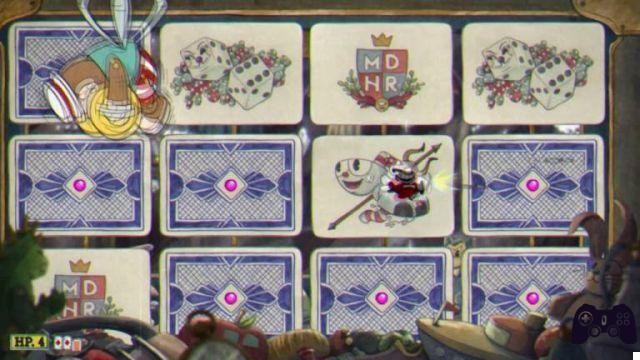
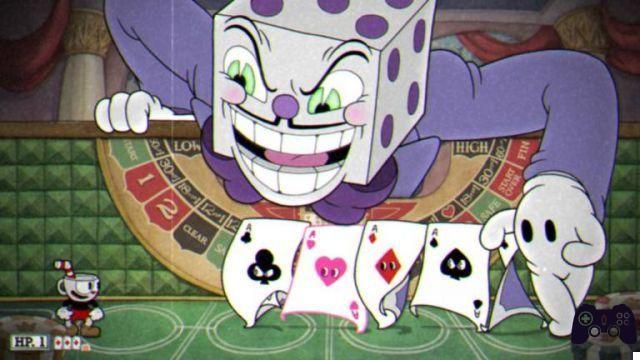
All Bets Are Off!
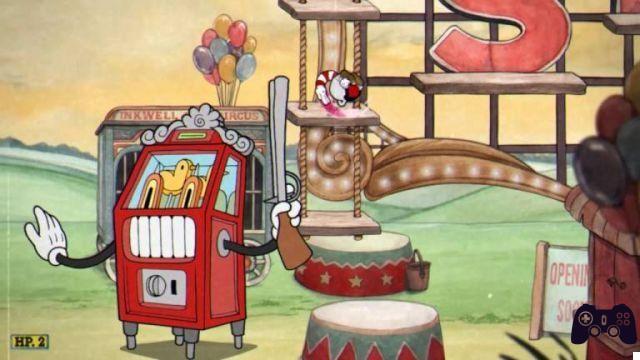
The clash with King Dice is one of the most structured battles of the entire Cuphead. Before you can face the director of the Casino of Meifstofele you will have to participate in a sadistic game where you will be asked to make a Parry on a dice. The result, from 1 to 3, will make you advance on a board deciding which of the nine minibosses, following King Dice, you will have to face. Knowing how to master the Parry technique to get the desired number, avoiding all sorts of randomness, will therefore be the first requirement in order not to make this subtle endurance test extremely long and exhausting.
Look at the board and try to reach the boxes that will offer you an extra heart, follow our guide to the mini bosses, so as not to suffer unnecessary damage, and try to emerge victorious from the King Dice challenge using four to five dice rolls. Don't be in a hurry, patience will be the only real key to not being overwhelmed by this Boss Rush.
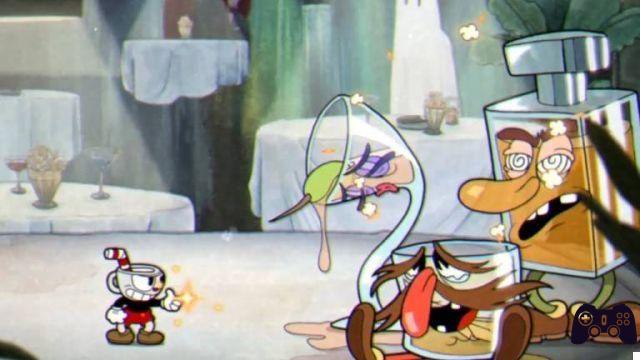
Tipsy Troop: These three drinking companions will be waiting for you on space number 1. The martini glass will release flying olives that you must take care to eliminate quickly, the whiskey glass will flood the ground with liquor and the bottle on the far right will launch a vertical stream of scotch that he will swoop down on the last position you will have on the playing area, at the moment of his attack. Equip the “Spreader” and, staying in the central position, continue to storm the three opponents with shots, avoiding the three offensives that will follow a cyclical but different pattern for each game.
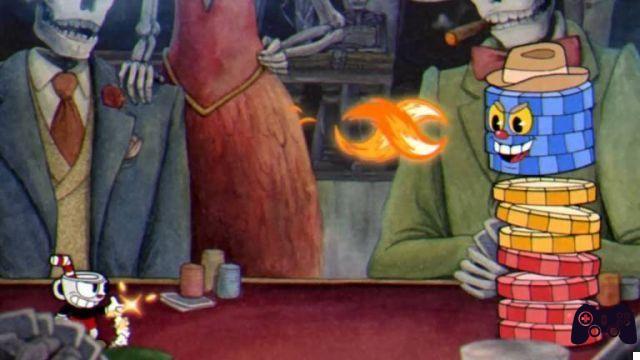
Chips Bettigan: This animated stack of chips, which will be waiting for you on box number 2, will move from right to left, breaking down into several parts. Jump, crouch or use the "Smoke Dodge" to avoid his movement and aim for the face with the "Spreader" or let the "Chaser" deal damage to your opponent while paying attention to avoid the enemy's movements.
Mr. Wheezy: Cell number 3 will house a huge cigar waiting to spit on you a triplet of fireballs that will move towards you following a circular and easily predictable trajectory. Equip the "Chaser", evade the enemy offensive and, using the "Smoke Dodge" to avoid being hit by the flying cigarettes that will float in the central area, move from one ashtray to another to stay at a safe distance from your opponent.

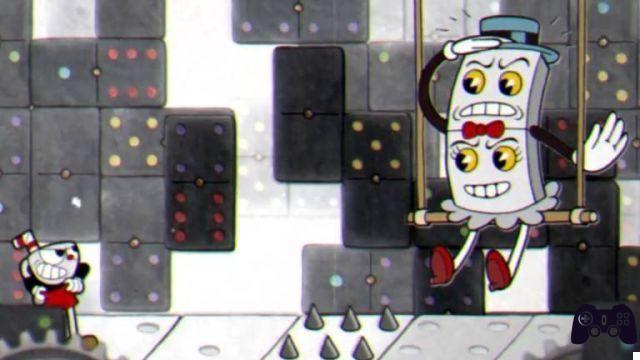
Pip And Dot: These two joyful pieces of dominoes will be waiting for you, aboard their swing, on space number 4. Equip your trusty "Chaser" again to continue inflicting damage on your opponents while you concentrate on jumping the spikes positioned on the treadmill on which you will fight and avoid the diamonds, and the birds, which the two dominoes will throw at you.
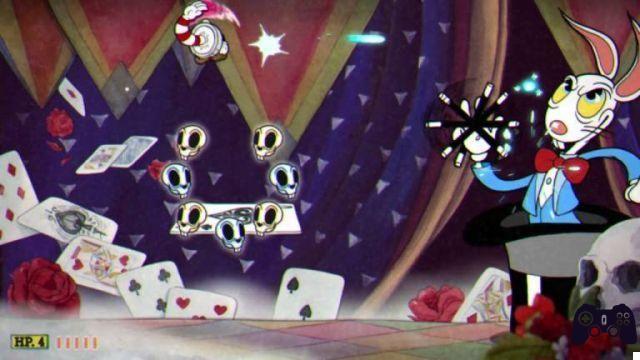
Hopus Pocus: The magician rabbit who occupies space number 5 could prove to be a particularly difficult opponent. Stand on the suspended card in the center of the area and shoot the wizard with your "Chaser". Dodge with the "Smoke Dodge" the circle of skulls that will summon around you, so as not to risk suffering unnecessary damage. Pay attention to the card symbols that will appear on the bottom or top of the level and spot the pink seeds to parry them and not get hurt by this otherwise unstoppable offensive.
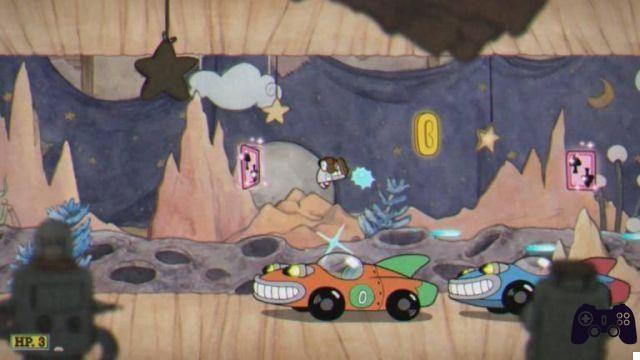
Pear Lap: The skeletal horse that will host box number 6 will take you back aboard your trusty airplane. Avoid the horseshoes that will come out of the packs and disperse 360 degrees and watch out for the jockeys that will pass at the bottom of the level as those dressed as Death will launch towards you if you enter their line of fire. Don't skimp on using the Super to speed up the timing and quickly win this short fight.
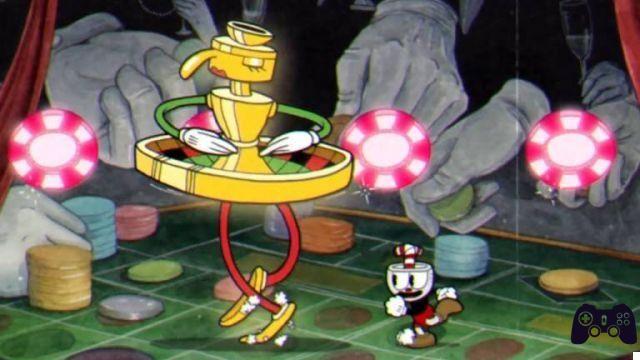
Pirouette: The occupant of cell number 7 could mislead you through the battlefield setting. Completely ignore the pink Chips lying in mid-air, or just use them to quickly reload the Super, and simply use the "Smoke Dodge" to pass through your opponent's legs as they cross the play area. Move sideways to avoid the marbles that will fall from the sky and shoot the graceful roulette wheel with your trusty "Chaser".
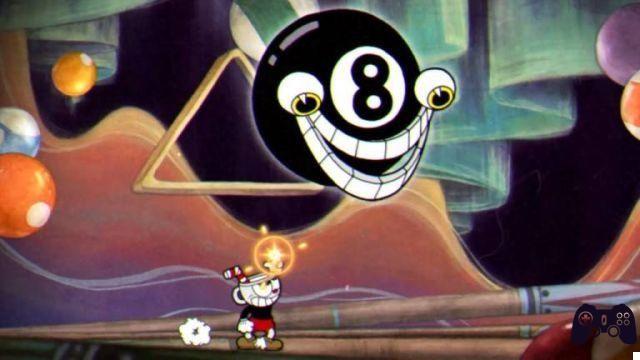
Mangosteen: Box number 8 is obviously occupied by the billiard ball of the same name. This is the simplest mini boss of the nine that you will be able to face in this part of Cuphead and will simply require you to avoid, by moving sideways, the animated chalks that will fall from the ceiling and jump on the playing area. Occasionally the number 8 ball itself will throw an easily eludable energy globe at you. Stay focused and sprat with the "Spreader" to the spherical opponent and in a few moments you will finish the fight in your favor.
Mr. Chimes: The mechanical monkey occupying cell number 9 offers a simple but tedious challenge. On board your airplane you will have to make a Parry on the various cards in the background trying to make a couple with a mechanic similar to the most canonical of the Memory Games. Once two figures are paired, the monkey will animate and you can hit it while it moves in disorder on the battlefield. Repeat this mechanic for all the cards in the background, making sure you avoid the opponent's movements and the notes he will throw at you sporadically.
Mister Says: Once you reach the last square of the board, the battle with the evil die will begin immediately without any preamble or recovery time, so stay alert and don't let your guard down. Mister Dice will have only one attack: he will randomly lower one of his hands on either end of the level and summon a row of playing cards that will cross the screen. You can evade them in two ways: by making a Parry on the pink colored ones, by calculating well the jump times so as not to be injured, and by helping yourself with a dodge to cover the space between one card and another, or by trying to learn the movements of He says and run in the direction he will lower his hand to perform a "Smoke Dodge" and find yourself behind it, completely evading the damage phase. Whatever tactic you use, at the end of each offensive phase you will have to attack the face of Mister Dice who will stand out in the center of the level. Use the "Spreader" if you are sure you can jump on the row of cards or the "Chaser" if you want to feel more free to move to guess in which direction the next offensive will start. Also try to get to this fight with a number of hearts between 5 and 6 to be able to guarantee that you do not fail and sadly have to start this long Cuphead Boss Rush from the beginning.
SUGGESTED SKILLS: Spreader / Chaser / Smoke Dodge
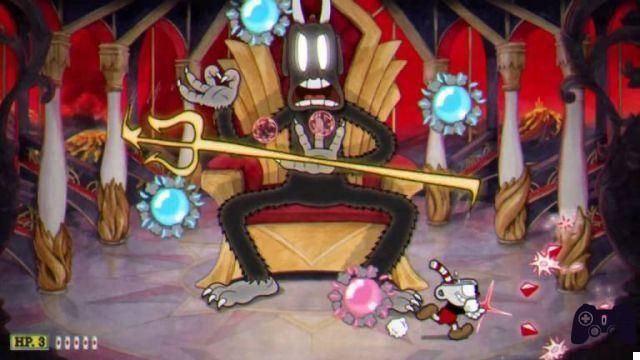
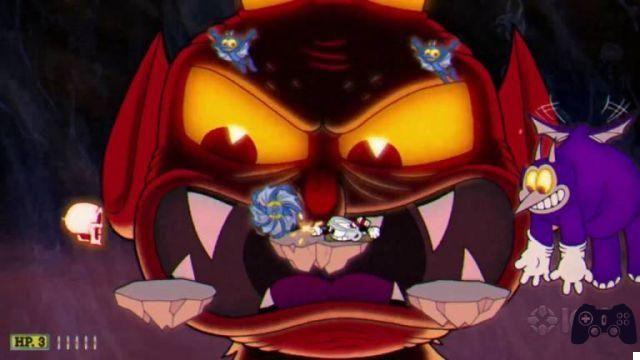
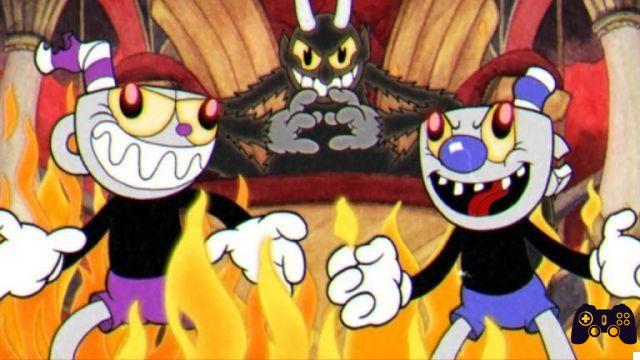
One Hell Of A Time
Here we are, your journey into the colorful world of Cuphead is about to end. You are finally in the presence of his sadness the Devil, ready to end his reign of terror by challenging him in a clash that will require steady nerves and reflexes ready to be easily overcome, finally restoring peace in the colorful Inkwell Isle. Load up your best shots, train your “Smoke Dodge” and get ready for the three frenetic phases of this hellish battle.
STEP 1: The throne room will be the scene of the longest part of your fight with the Devil. As seen previously with Cala Maria, the lord of the underworld will have numerous attacks at his disposal with which to stratify his offensive. Knowing how to evade his attacks will allow you to overcome this grueling first phase of the battle:
- If the Devil will stretch his arms horizontally towards the outside of the screen, simply duck down to avoid the two protrusions that will invade the level you are moving on.
- When the king of the underworld detaches his head, get ready to avoid his arachnid form, which will try to swoop down on you, moving sideways. Use this offensive to maximize the damage to his face with your trusty "Spreader".
- When Satan turns into a snake, stay focused to guess in which direction it will appear and move to the opposite end to be able to inflict damage on it while avoiding the attack.
- Constantly observe the sides of the throne on which the Devil sits to understand in which direction the demons will come that will emerge from behind the infernal seat. Eliminate them quickly with your “Spreader”.
- When the lord of the underworld will rotate his scepter, get ready to dodge and jump the various projectiles that he will launch at 360 degrees. They may be of various forms, search or dispersion, but they will not present a complex offensive to evade.
Keep your “Chaser” constantly active whenever you can't maximize the damage with the “Spreader” to see the Devil's skeleton slip from its earthly carcass in a short time. Now you can make an ethical choice: jump into the hole that has just been created, and continue the fight, or position yourself at the outer edge of the latter and continue shooting at the Devil's carcass until you finish the duel prematurely. We leave the tough choice to your integrity as a player.
STEP 2: As with the previous part of the fight, knowing the Devil's new attack patterns will give you a significant advantage. This phase will be divided into two short portions, one where you will have to dodge the axes that Satan will throw from his eye, and which will move following a circular trajectory, jumping from platform to platform avoiding the Fiche that will hit them cyclically and one where two demons will come to support the King of the underworld, reducing your room to maneuver to just three platforms and shooting skulls at you by increasing the threat level. Keep calm, jump on the platforms neatly while continuing to hit the huge face of the Devil, avoid the axes, make a Parry on the pink flying bombs that will periodically come out of Satan's ears and eliminate the demons as they appear. Do not use your Super for any reason as you will need it in the last phase of the fight.
STEP 3: Once there are only you, a platform and the Devil left, if you use your Super against him you will instantly win the fight. If you do not have your attack available, you will have to jump from the platform to the pink drop instead to take advantage of the Parry to avoid the chip that will fall on the only available platform and continue hitting the Devil with the "Spreader" to quickly eliminate him once per all. Get ready to celebrate because your adventure will finally be over… even though Inkwell Isle will still have a couple of challenges for only the hardcore players.

SUGGESTED SKILLS: Spreader / Chaser / Smoke Dodge
Coins and Secrets of Inkwell Hell
Only one coin is hidden in the private hell of Inkwell Isle, the last one obtainable on the Cuphead map, easily found by inspecting the row of red dice to the left of the entrance to the Devil's Casino.
Optional Missions and Mausoleums
Cuphead has some secondary missions, traceable in the third part of Inkwell Isle, which will require a knowledge of the levels and a dose of very high skills. These are completely optional activities, which will allow you to unlock purely aesthetic graphic filters, as well as a pair of Achievements to show proudly to your friends and the coveted 200% completion of Cuphead.

Unlock the Black and White Filter
The Turtle sitting on the dock of Inkwell Isle Three will confess that he will give the ability to see the world in black and white to those who will be able to show themselves a peaceful soul, obtaining the Pacifist rating in all six Run 'n' Gun levels. featured in Cuphead. Getting a "P Rank" means completing it without firing a single shot, approaching the level in a completely different way. Do not think of obtaining a "Grade P" if you have not previously unlocked certain essential upgrades to be able to proceed in this arduous undertaking:
- The "Smoke Dodge" will prove essential to avoid being hit by enemies during dodging or jumping in the most excited situations.
- The Super “Invincible”, obtainable in the second mausoleum, will prove to be indispensable to overcome the mini bosses that will hinder you at the end of the levels.
- Use the Parry whenever possible to be able to charge the Super bar.
- Assign the firing command to a different button to avoid any involuntary reflexes and not find yourself restarting the level due to an accidentally fired bullet.

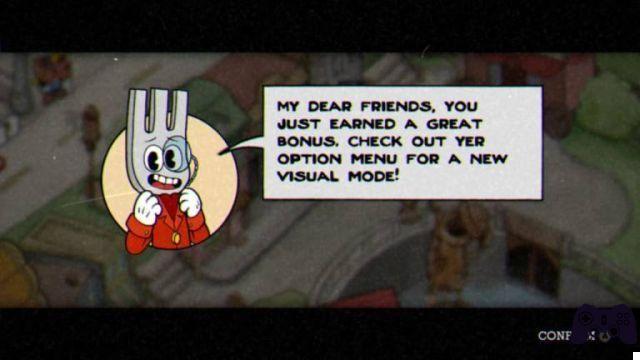
Unlock the 2-Tip Filter
This iconic color filter can be unlocked by talking to Forkington, the high-class fork that will be stationed near the Inkwell Isle Three store. The requirements for obtaining this color variant are as simple as they are complex: obtain at least 15 evaluations between A- and S. The requirements for obtaining this evaluation are as follows:
- Make at least three parries during a fight.
- End the battle with all life points, or at least three if you decide to use "Twin Heart".
- Finish a fight with the fully charged Super gauge.
The time it will take you to finish a battle will not significantly affect your final evaluation but there is no doubt that to obtain the coveted filter you will really have to know the patterns of your opponents by heart so as not to get caught in an impasse and perform every challenge at the limit of perfection.
"Expert" difficulty level
Once you have beaten the devil, you will be able to return all the fights with the Bosses of Cuphead on Expert level. The changes to these renewed battles will be as follows:
- Life of opponents doubled.
- Attack patterns executed faster.
- Bullets, and items thrown by bosses, plus.
Completing all of the Boss Battles, present in Cuphead, again at this renewed difficulty will allow you to unlock a specific “Achievement” and obtain a golden flag that will indicate your triumph on the game map.
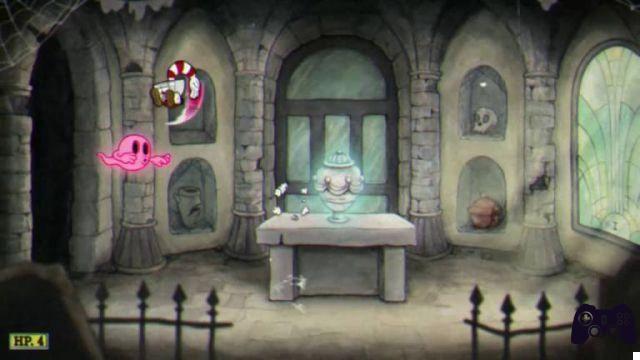
Mausoleums
The three Mausoleums, distributed in their respective parts of Inkwell Isle, are a challenge of simple scope, designed to provide a "divertissement" to relax the player between a fight with a Boss and a Cuphead Run 'n' Gun level. These will be short arenas in which you can train your skills with the Parry technique by jumping on the ghosts that will gradually invade the playing area trying to hit the jar placed in the center of it. At the end of these cute minigames you will unlock one of the three Super available in Cuphead. Focus on the timing of your jumps, don't equip the automatic Parry and prioritize ghosts that will move faster.
Negative ending
Surprisingly, if you decide during your last dialogue with the Devil to deliver the contracts of the souls of his debtors to him, you will not have to face the lord of the underworld by ending the game instantly and getting the Cuphead negative ending. Obviously this choice will not unlock the Expert mode and will bring you back to the doors of the clash with Satan in order to better reflect on your decision.
The Cuphead guide comes to an end: we hope you enjoyed the adventure, and that this guide was useful to you. Whether you have played it on Xbox One, on PC, on Mac or on Nintendo Switch, we are sure that Cuphead will have given you moments of great intensity and consequent fun. The invitation, as we have already asked you at the beginning, is to let us know if the guide was useful to you and if you consider Cuphead a really challenging game or not.
Cuphead is available for Xbox, PC, Mac and Nintendo Switch.
If you don't have a Nintendo Switch yet to play Cuphead, we recommend that you buy it by following this link, you will find an interesting offer waiting for you!


