


Please note:
The solution is based on the US version of the game. There may be divergences from the Spanish version.
Level 1
This is a training level. You will have to "unequip" the generic soldiers, avoiding their use - if possible. Also try to maximize the experience points accumulated per turn.
Level 2
This is a different level of training. Provide the Brass Sword to Hamil. Try to increase the level of Hamil and Tarte, so that they reach a level of at least 2-3. Try to get the bonus condition so that you can proceed for a total of 6 turns.
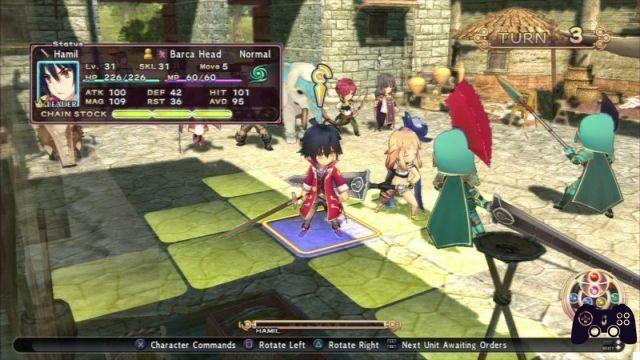
Level 3
Remove all equipment from Mono, Enneads and Dion, repositioning the equipment on Tarte and Hamil. Relocate Tarte and Hamil to the east / northeast to destroy the archer in the area as well as the nearby soldier, counterattacking Zaras' blows. Take advantage of the apples on Tarte to stay alive. Switch to moving Mono, Enne and Dion southwest to completely clear the play area to the west. Then move them east to help Tarte and Hamil.
Level 4
This is another level of training. You will have to place in the area of the Chalcus to maximize the effect of the bonus and complete the mission.
Level 5
Cast Nigredo first on Laelius. Complete the second round. Quickly hit Laelius, then move north. Tell Dion to go open the chest to the southwest and kill the nearby archer while assisting Melgart.
So locate the stones to the north-east and south-west, with some Ankh attached. Destroy one of the stones, then move along the next bridge. You will have to make sure that Jezebel is hit during the fall of the bridge, so as to kill her directly and recover the bonus. So try to move north, ahead of Izabel. Move on quickly so that Jezebel has no temptation to move north rather than east along the bridge. Open the chest to the northwest using the Wellies.
So start moving during the second turn. Have your entire party set up on the east side by turn 12. Lure Izabel to the first bridge, so she gets to the area at about turn 15. The rest of your party will have to move north along the east side. Dion will have to be on the north-east corner, on the opposite side of the bridge. Charis must be on the south side of Dion, outside the range of Izabel's Infernal Spear. When Izabel is therefore placed along the south side of the bridge, Dion can move beyond it and hit the stone to the west.
Level 6
As usual, Laelius will be equipped with a high level of "dodge" ability. We therefore recommend using a large amount of attacks with a high probability of hitting, together with spells and similar attacks. Try to "lure" him using a tank, so that he is then facing north. So attack him from behind. Also remember to retrieve the skill book from the central chest: it will reduce the possibility of being "targeted" and hit by enemies.
Level 7
Watch out for the orc that will appear on the second turn near the southern part of the map, next to the mine tunnel and Tanit's transformers. Get rid of the bat to the south as well as the orc reinforcements, making sure they don't attack the village members. You will therefore have to kill the next five enemies during the first 2 turns, trying to keep the rest of the village members alive.
We recommend proceeding to the chest to the east to retrieve the gold ores, to the chest to the northwest to retrieve the skill book. The Hydra in the next area will be very vulnerable to magic, so we recommend using the attacks of Kleito, Melgart and Enneads. These three will have to attack from a distance, while the normal ZoC tanks will have to take care of blocking. Hydra will go directly to attack one of the two tanks, and will not be able to move and hit your "castators". We also recommend that you turn your tanks to the side, so that Hydra does not move excessively. The Hydra will therefore die in two turns. Then try to wake Nigredo and / or raise his stats level to maximize tanking skills.
Level 8
This is a training level, where Charis will go to learn the "Charm" command. Try to lure the boss near 3EP, using the next two turns to kill him. We recommend using the Griffins, Tanit or Noa to inflict some hard blows.
Level 9
The magic will be particularly effective against knights. Enemy mages can hit almost any other enemy directly if they have enough magic buffs - so try to stay out of their range. Take advantage of Dion's abilities to hit the wizards and archers near the tower one by one, using your arrows and / or standard attacks. Then use the Arrow of Soul on the archer of the tower, so that the bishop goes to move towards the archer and you can kill him quickly. Move all units specializing in long range attacks to the crates. Now take advantage of the healing items on Artio as needed.
Level 10
As soon as Artio starts to move, have Dion go and open the chest immediately in front of them.

Try to sacrifice one of the "Charmed" enemies, so make sure that Saul does not proceed completely alone, trying to keep his HP level high.
Level 11
We recommend that you give Noa Gaudy Bracelet, then place it near the edge of the map, so that the village members stay away. You will have up to 11 turns, but with the right strategy you can take out the boss in 5-6 turns. At the third turn, a spider will arrive from the west between the two houses, while an Orcus Magi will arrive from the southeast. Moving on to the fourth round, another Orcus will arrive from the northeast, between the three houses. The boss will start moving south during the second phase. We recommend using "Forget" on the boss so that he doesn't use his web. So lure the boss into the area using a spider in your "possession" or a standard tank. So take advantage of Kleito's fish during the fifth round. So use a combination of Tarte, Noa, Hamil to cause a quick drop in the enemy's HP.
Level 12
First use the sword of Damascus, the staff of the Vision and the hat of the magician. We recommend starting the battle by trying to decrease Jezebel's Res, so as to maximize the damage per hit that will then be dealt. Jezebel will therefore take care of casting Hellfire. We therefore recommend using an Infernal Spear, taking advantage of Noa's abilities. We then recommend using as much RES as possible to ensure your survival. The rest of the level turns out to be pretty straightforward, as it is a combination of standard soldiers, octopuses and Laelius with a RES level of only 45. You will have to kill all the characters at maximum speed in order to reach Jezebel in time.
Level 13
Kleito and the other flying units will be able to fly quickly over the sand. When / if others step onto the sand, they will no longer be able to move and will automatically be moved towards the boss. Dion will then be "stuck" within the quicksand. Move Kleito and / or the Griffin north of Dion to prevent him from being moved towards the boss. When Kleito is placed next to Dion, she will be able to attack nearby enemies or cast "Forget" on the nearby boss. Divide the rest of your party to kill all the enemies present and open the chest. At the third turn, all the scorpions and lizards will start moving again. Get rid of the subjects on both sides, open the chest during the seventh round, then kill the boss during the eighth and ninth round. The boss will no longer move, so attack him from as far away as possible. Cast Forget as soon as he has magic points remaining.
Level 14
Elissa is a tank with high levels of HP and defense, able to make the most of her healing and recovery skills. Daphnis is instead able to use his crossbow, combining it with arrows capable of altering the status. In general, this level can be considered as a training level to "understand" how to best use Daphnis and Elissa. You will be able to take out most of the bandits before the fourth round.
Level 15
You will start the level in a very narrow area, ready to fight two orcs. Kill them quickly, then begin the "standard" battle against the rest of the bandits. We recommend that you stun the first group, then go around the boss as you proceed to the chest on the opposite side.
Level 16
You will find yourself fighting against a large group of lizards, scorpions, griffins, orcs and an Aemilia. Try to spread out across the play area to prevent the village members from being hit excessively. So proceed north. You will have 8 turns to kill 14 enemies. Griffins and wizards will be particularly detrimental to obtaining the "unarmed village members" bonus condition. You will need to have a good level of DPS to be able to repel them.
After you have eliminated the starting groups, we recommend that you "take" the wizards during the fourth round. Kill everyone except the boss within the seventh turn. Then proceed to the crates. Use the "March of Thieves" to reach the chest in the far north in time. Then get rid of the boss, he will only be level 20 so you shouldn't encounter any particular problems.
Level 17
Give Daphnis the red shoes. Place long-range units in the elevated area, the rest should be placed in the area below instead. Get rid of the nearby Knights Templar, then divide Elissa and Daphnis to the west, making them proceed towards Laelius. Instead, move Kleito and Aemilia east, bringing them closer to the Orcus Magi. After you take out Laelius, keep moving Elissa and Daphnis east to kill the sea gang. Then move Elissa to the south, then Daphnis to the crates to the east. Open the chest to the far east, using the Arrow of Soul.
Divide the tower team into an east and west section. Send Enneads, Hamil, Dion, Noa and Chalcus west to take out Laelius and open the chest to the west. When Laelius is dead, use the March of Thieves to go back and deal with Jezebel. Send Tarte and Charis east to kill Hermit Crab, Imperial Archier, and Orcus. Jezebel will then begin to move. As soon as the orc is dead, move Tarte and Charis west to return to Hamil and meet directly with Jezebel. We therefore recommend using the same strategy as in the last encounter with this enemy.
Level 18
Send Dion, Enneads and any of the other characters south to the chest visible in the corner. An Orcus Magi will therefore arrive in the area. Move to the bottom corner, approaching the chest. When the griffin is dead, use March of Thieves to send Enneads north. So send Dio the other aide to the chest, killing Orcus Magi. So get rid of nearby monsters, orcs and elemental monsters. Take advantage of the golem's "AOE" attack, killing them with speed.
Trailer - Western Presentation
Level 19
Use the red shoes on Dion. Divide and kill the enemy neighbors. You will have up to 15 rounds available in total, taking advantage of both bonuses. Move towards Jezebel from the ramp on the right, while Dion will have to run down the ramp on the left to open the chest.
Level 20
Use AOE magic to eliminate the enemies that come between you and Jezebel. So, hit the Hellfires available to Jezebel until she has no more magic points available. Hit her Hellfires quickly and repeatedly until her magic points are zero, then take her out quickly.
Level 21
The level will present you with a confrontation against a total of 13 enemies. You will also have to overcome a total of 8 rounds, including both bonuses. Provide both Enneads and Kleito with EX Hunting Lores to kill elephants and griffins at maximum speed. The boss will be equipped with a high level of attack, so only characters with the highest levels of HP and defense will be able to survive against this enemy.
Level 22
The maximum level of enemies in the area will be equal to 33. Therefore, avoid excessively increasing the level of your characters, especially in reference to Tarte. Provide additional experience points to the subject capable of dealing the greatest amount of damage. Start with March of Thieves, then split up and try to kill the opponent quickly. Avoid any kind of healing, unless your character is about to die. Most of the enemies will be equipped with a high level of RES, MAG, and ATK. Remember that the boss will start moving around turn number 7: having accumulated enough experience, you will be able to eliminate both him and his subordinates in a single turn. Then retrieve Elfin's helmet and Strong Fang from nearby crates.
Level 23
The main opponent has 1000 life points and 300 attack points, as well as a significant amount of defense points. We recommend using a combination of spells, Tanit, and avoiding the counterattack. We also recommend that you get help from Melgart to maximize the damage dealt.
Level 24
The boss will start moving on the third turn, and / or when any of the characters are within range. Try to open the chest during the first turn, so that most of the enemies go directly to charge you.
By the second turn, the group of enemies will have headed forward. Use Kleito's Ashlings to stand in front of the boss. Give Kleito a certain amount of + MAG to increase the chance of inflicting the hit. At the third turn, use Ashling on the monkey to the west. Since the boss will have a higher stamina than his defense level, we recommend using the debuff on his stamina. Thus, Enneads and Kleito will be able to inflict as much damage as possible using land magic. Additionally, Tarte, Hamil, Elissa and Saul will be able to assist you with medium to long range attacks.
Level 25
Most of the enemies in the area will be equipped with powerful AOE-type spells. We recommend taking advantage of Hamil's leader bonus combined with a healing spell to ensure survival. Kill the first of the Dark Elements first, as well as the reinforcements that will soon arrive in the area. Try to complete the kill within the fourth round. Then get rid of the second element and the two nearby rats during the sixth turn. When the Dark Element is dead, the boss will start moving. Take advantage of the March of Thieves during the seventh round. Get rid of Dullahan and the Skeleton Knight, so the two Lemurs during the next turn. There will therefore remain only a boss and a rat. Quickly get rid of the boss, then the rat, then open the two nearby chests during the next two turns. Retrieve the Thieves' Shoes from the chest on the left, and the Moonlight Crystal from the chest on the right. Take advantage of the boss's MAG and RST debuff. So avoid the hits of other enemies, while trying to maximize the level of your stats.
Level 26
Most of the enemies visible next to the boss will not move unless you go directly to "shoot" them. At the fifth turn, get rid of everything you can except the boss and the nearby Rampart. Also get rid of the Cyclops that will come from the portal on the right. At the eighth turn, an orc will also arrive from the lower left portal. Repeatedly hit the boss after he has earned enough magic points. Try to debuff his MAG level and lower his magic point level by using a combination of Kleito and Hamil's abilities. Wait a few seconds and then go and clean up the nearby ramps, thus getting rid of the boss permanently.
Finally, pay attention to the Lemurs visible along the ramps, they will teleport down and try to attack you. So spend the turns between 9 and 11 to open the nearby crates and eliminate the Ramparts in the area. Once all enemies have been defeated, take advantage of a medium to long range attack and / or Kleito's teleportation magic. Once this is done, go and hit the boss repeatedly.
Level 27
It will be a fairly simple level that will see you face "generic" enemies with high levels of defensive capabilities. Quickly go beyond the allies of the non-player characters to avoid all kinds of problems.
Level 28
It will be an extremely long level, where you will have to face 28 enemies in total, and the enemy with the highest level will be level 36. You will be required to go and "free" four segments of the map. Destroy the nearby flag to proceed to the opposite side. At the third part, retrieve the chest in the center of the map. Use Kleito's teleportation to proceed to the next unit. Kleito is also capable of floating beyond the ravine. So use March of the Thieves to quickly retrieve the crates.
Level 29
Here you will have 10 turns to kill all the enemies in the area and open the crates. You will find yourself facing a large amount of enemies with a high level of HP and a high level of defense. Take advantage of the March of Thieves during the first round, and divide your subjects into two small groups so you can kill enemies faster. Send Elissa, Noa, Dion and Charis north; while Hamil, Kleito, Enneads and Daphnis will have to be sent east. Get rid of the enemies to the south, then turn back to assist Tarte. Combine the skills of Charis and Hamil to buff Kleito. Gather your group and proceed to the northeast. By the fourth-fifth round, only one group will remain in the north-east. Use the March of Thieves to quickly move forward and kill those present in 10 turns.
Level 30
The level will simply consist of Hamil, Noa, Quadriga and Chalcus against three "fake" Tartes. They are equipped with a particularly low level of defense, so you will be able to eliminate them very quickly.
Level 31
Your bonus conditions require you to go and defeat the boss and open all nearby chests. Equip the Red Shoes first, using them on Daphnis. Take advantage of the March of Thieves, sending Enneads and Daphnis forward, to get them to retrieve the chest to the southeast. Get rid of the two enemies to the south, at maximum speed. Open the chest to the southeast using Daphnis during the second turn. Go back to your friends.
Send the rest of the subjects north. Split to get rid of the two enemies in the center, but always keep going north. Send one of the characters to the chest in the corner.
The group to the north will therefore have to kill the "Deep One", also opening the chest within the seventh round. Enneads will instead have to take care of killing the rest of the subjects in the area. Then use March of Thieves again to increase the speed of execution. We now recommend casting a MAG-type debuff, then using Kleito's abilities to reduce the opponent's magic points. Arriving at turn 12-13, you will have to take care of actually killing the enemy. Enneads and Charis will have to cast the spells at medium to long range, the rest will have to hit the enemies directly instead. Elissa will be able to attack from the north instead.
Level 32
Level that will see you fight against a group of sea creatures. Go through the first turn using March of Thieves and start killing those present. Send Enneads and Chalcus west, then the rest of the subjects north and west. Begin killing the Kraken around the fifth turn. We recommend focusing on one Kraken at a time, so as to quickly decrease the number of subjects that you will have to eliminate at the same time.
Level 33
You will have a maximum of 17 turns to be able to reach the chest below. We recommend using the Thieves' March repeatedly, killing enemies at maximum speed. Once you get close to the boss, he should have run out of all the most effective spells, so you should be able to take him out with ease. Then stun the nearby enemy while the archer takes care of opening the chest below.
Level 34
Here we recommend repeatedly using medium to long range attacks, which are especially important for fighting "aerial" enemies. At the sixth area, get rid of the flying boss that will appear from the northeast corner, paying attention to its high level of defense. First wait for the boss to move to a "solid" area, then use a buff on you and debuff the enemy, then hit the opponent repeatedly until he leaves. So get rid of the five remaining enemies by opening the last chest during the last 3 turns.
Level 35
Use Spirit Rage and Spirit Rage EX on subjects who are particularly capable of dealing damage. Pull each of the dragons towards you, killing them in a single turn, using CS-type attacks. Send one of your characters to retrieve the chest to the northeast.
Level 36
First of all, we recommend equipping subjects capable of inflicting considerable damage. Make Hamil the leader. During the first round, we recommend taking advantage of the March of Thieves. Get rid of the Dark and Holy type subjects using Hamil. Use the rest of the characters to destroy the astral element. Move Elissa towards the Red Dragon, preventing it from moving to the right.
Try to maximize the gain of experience points as you move towards the Gold Dragon. Place Saul and everyone else within range of the Hellfire to quickly increase this range. Move Dion to the Quadriga during the second turn. After you defeat Dion, you can place another unit in the area to increase the level during the second turn. Moving on to the third turn, reposition Dion to restore a March of Thieves. Have the Red Dragon go and cast Hellfire again, placing Noa and Elissa within enemy range. So take advantage of the dragon's DEF debuffs, then a buff on Elissa's attack during the second turn. Pull the Gold Dragon towards you during the third turn. Double Buff with ATK by combining the skills of Dion and Charis. Debuff the defense, then use the standard attacks from Saul, Hamil and Tarte.
The Gold Dragon must have died maximum in the fourth round. In case you have problems with this, try to increase the attack level of your characters, reloading the level to accumulate a greater amount of experience points. At the fifth turn, refocus your attacks on the Red Dragon. Take advantage of Elissa's 4CS, then try to move Tarte or Hamil towards the Quadriga. We highly recommend using Elissa, given her ability to deal up to 1800 damage thanks to her 4CS combined with an attack and defense buff.
Level 37
The level will contain a large amount of undead, but there will be no Miasma. Separate to kill everything possible to be able to reach the S level. Kleito can then proceed upwards. Beware of medium to long range attacks, especially Daphnis' Snipe. Also pay attention to the "Pain Reflector" skill available to the boss. We recommend equipping your "tanks" with an excellent level of HP rather than aiming to increase their attack level: it will be essential for you to be able to resist enemy hits.
Finally, try to cause a slow drop in the boss's magic points, progressively decreasing their HP to use particularly strong healing spells. So take advantage of the longer range to counterattack attacks.
Level 38
Head to the shop, getting some Asteria and Adamas. We recommend equipping your tankers with Hunting Lore and EX. Also equip Enneads and Kelito with Man Eater and EX to deal as much damage as possible. Try to get Elissa, Saul and Tarte to "build" a good amount of CS quickly. So take advantage of the combination of CS and Crowd Control to maximize the damage inflicted.
By the fourth turn, only 4-5 enemies should remain. Use sleep mode on one of the opponents, then opening the remaining crates. So complete the level before the gladiators reach you.
Level 39
After Golyat joins the group, proceed further further, eliminating the enemies to pass the level. We recommend equipping God Slayer to inflict the maximum amount of damage possible in the confrontation against Golems and Talos. So provide Elissa and Saul with a certain amount of God Slayer. So continue to cast March of Thieves, heading towards the obelisk, along with the E-Golems that will arrive in the area starting from the opposite side.
Beware of the defensive skills of the E-Golem leader, we recommend using at least 2 or 4 of your defense points to eliminate him. The chest to the north-east can instead be opened starting from the area beyond the watercourse.
After you have destroyed all the crystals in the area, you can directly damage the obelisk to complete the level.
Level 40
Beware of the debuff caused by the Obelisk. We recommend using the "Leader" bonus available to Hamil, therefore using a good amount of Charis and Dion's buffs to avoid the buffs of the other subjects. Avoid interacting with the pillars unless you have nothing else to hit. Attack the nearby pillars in order to reach a good level of CS, then proceeding to the next group of enemies.
Move clockwise, getting rid of the enemies in each of the quadrants. Try to avoid the MAG enemies in the area. Shoot the nearby archers with the sniper rifle. Try to keep one of the Grendels stunned while you take care of finishing the subjects placed near the remaining pillars.
Level 41
The level will feature a large amount of undead. We recommend taking advantage of the experience increase available to Reaper's Love, combining it with the typical moves of the Undead Dragon.
After you have dealt with the first groups of enemy reinforcements, you will have to start acting again. Take advantage of the March of Thieves first, getting rid of nearby enemies. Head to the center of the map, killing the reinforcements there. As soon as you start attacking, kill all the enemies in the area while avoiding the boss. At the fourth turn, immediately deal with Lemures and Dullahan with medium to long range attacks, also avoiding the breath of the dragon.
Place one of the characters to Nigredo's left or right, making him turn left or right to make his attacks easier. As soon as the dragon arrives in the area, take advantage of the buffs on him and kill him in the fifth turn.
Level 42
Kill everyone present until you reach the boss. By the tenth turn, there should be only one Wyvern and the boss left. He will start moving on the next turn, and will be endowed with some remarkably powerful spells. Try to keep Tarte and Kleito far enough away so that the opponent can't take them out. Send Daphins to the chest to the northwest while your party has to deal with the boss's spells. You will also need to have Daphnis solo the Wyvern visible to the west. As soon as the chest to the northwest has been opened, throw a few shots at the boss to successfully finish the level.
Trailer - Gameplay Video
Level 43
The level will see you battling some quicksand and 3 bosses. We recommend using Kleito as a leader, given his significant amount of magic points and resilience. We also recommend giving Dion a good amount of magic points so that he can endure the March of Thieves during the level. Your group of units will be able to pass smoothly along the quicksand, as long as they do not stop inside the sands. Kleito is able to teleport beyond quicksand when / if needed.
In the initial part, pay attention to quicksand. We recommend that you move along the right area, then quickly turn left and retrieve the Orchid, Golem, Talos and the nearby crates.
Beware of the Man Eater EX, with a significant amount of attack points. Pull it towards you using Noa, so that it faces one of the two sides. Then kill him quickly before anything bad can happen to your characters. After you kill him, move a small group southwest to kill the Golem and open the nearby chest.
Level 44
The level mostly includes some groups of undead and wizards. Get rid of the Gold Golmes coming from the southwest. So also get rid of the Golem that will come from the south with respect to the starting point.
Beware of the two nearby Golems that will move towards you, then try to eliminate Abraxas visible in the immediate vicinity. Get rid of the Silver Golem by using your "dark" spells. Then quickly kill Abraxas using his aura with two different attack "spheres", able to reduce all his stats by 50%. Then lure Abraxas back to you, killing him in one turn before he can cast Gravitas.
Level 45
Equip all subjects capable of inflicting damage with the God Slayer. So use the Holy Aegis on all characters with a low HP level. We recommend using it in a particularly "relevant" way on Tarte and Kleito. During the first few turns we recommend that you go to the back area and "build" a good amount of action points while getting rid of the incoming Zaphkiels. Then move to the first boss, using the debuff on both the DEF and its MAG. You will then move on to the second type of boss who will use his rotating attack, capable of inflicting a "poisonous" alteration to all present. We recommend focusing on the nearby Zaphkiels to survive the incoming attacks without any problems.
Video Solution - Playlist
Click here for the playlist!
Video Solution - Part One
Video Solution - Second Part
 Tears to Tiara II: Heir of the Overlord ps3
- ps3
Exit date: November 13, 2014


