


Please note:
The solution is based on the US version of Dragon Quest VI, so some terms may differ from the Spanish version.
Waver's Peak
After character creation and the following conversation, go north and talk to the light haired person at the top of the hill. At the end of a long intermission sequence, you find yourself at the castle. Climb the long staircase to the north and through the mist-clouded room to start the cut-scene that closes the prologue section.
When you resume you are in a house. Once you have everything you can, go out and explore the village, then visit the central building to the north - this is a church where you can save. Then visit the mayor at his home and answer "yes" to his question. Now if you want you can shop in stores. Before heading south, save.
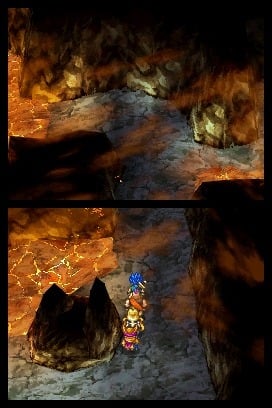
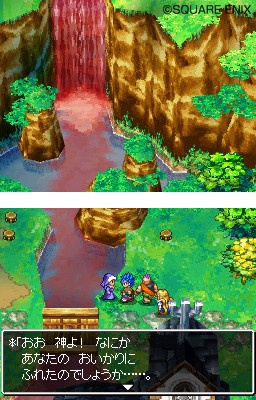
The Mountain Pass
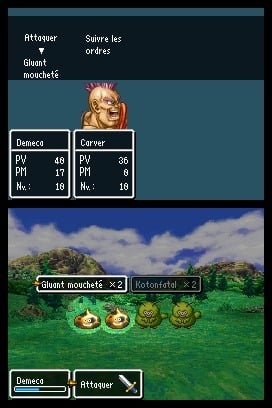
Cross the bridge to the southwest, go down the cliff and explore the cave, then go up and cross the bridge east to another cave. Collect the contents of the crates and go up the stairs, head down the east slope and drop into a cave. After emptying the crates, jump into the hole to the west. Exit south, then turn west to the inn where you can rest. Your next destination is south.
Haggleton
At the entrance you will find a church and an inn. Not far away is the bank: here you can deposit money so as not to lose it if you die. After that, talk to the girl in the hut to the northeast before heading to the market. Take advantage of the constant raises of the twins, Buck and Bill, to sell your wares. To buy instead, keep refusing the offers of the man with the turban in the west until you get a good price. After purchasing Thief's Key, enter the inn and open the blue door, then collect the Big Book of Beast from the drawer. Finally leave the city, head to the mountains to the northwest and help the man hanging from the rock face.
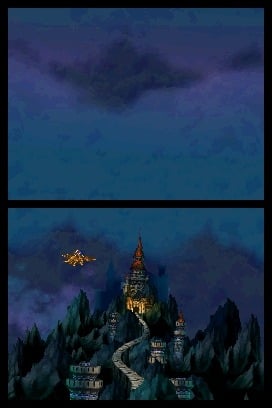
Welshire
Go past the church and explore all the houses you can get into, then drop down to the bottom of the well to find a first Mini Medal. Then head out of town to the northwest and enter the well next to the hut. From the place you exit, go back to Haggleton and look for the Crownsmith in the northeast area, which gives you the Spirit Crown. Then return to Waever's Peak and watch the cut-scene, then rest at your home. Upon awakening, go to the northeast where you witness the battle between Tania and Buddy. Then talk to the mayor and you will get the Entry Pass. After sleeping, return to Haggleton and follow the path south to Somnia.
Dreams
Loot all surrounding buildings first. In the well there is an Antique Ring, but to get it you will have to get the better of a Grim Grinner, the first mini-boss of the game. To proceed in the storyline, cross the bridge to the north and talk to the guard, then return to the village and talk to the man next to the priest. After the bell tolls, enter the castle and talk to the guard before going up the stairs. At the end of the cut-scene, leave the city and head southeast, then south.
Gardsbane Tower
On the first floor, avoid the spikes that can steal a lot of HP. After the fight with the guard upstairs, exit the screen to the west and avoid talking to the man near the east edge as he will push you down. Continue until you meet Carver the warrior. In the next room you find three men each facing a door. Talk to the soldier to get the puzzle description, then trust the old man in the center - his room is full of spikes. Then enter the door to the southeast, talk to the man inside to receive a Gold Ring, but refuse the proposal to return to the castle. Then explore the northwest door as well before continuing the climb. Then face the soldier, then pick up the Restless Heart. Then return to Somnia using a spell and go up to the second floor of the castle starting a cutscene. Then exit south and talk to the elder before returning to the World Map.
Head northwest later and Carver will join your party. Walk north-west, turn towards the mountains and enter the woods where, with the help of Carver, you will capture a horse. Back in Somnia talk to the old man next to the wagon again. After your conversation with the king, continue to the checkpoint north-east of Somnia, then go through Forest Chapel to a hut to the south. Enter and talk to its inhabitant by answering "no" to the first question and "yes" to all the others. After the cutscene, talk to the resident of the newly built hut before heading east, where pressing A in the bushes will find a passage that you can explore for treasure.
Return to the World Map and head southeast for a sign indicating the direction to Alltrades Abbey. Continue east until you come across a new hole in the ground. Jump into it, go north and slip into the lower world once more. Explore the ruins, then head southwest to Port Haven.
Port Haven
After saving and reading all the books in the church, talk to the mayor in his house in the southwest. Then explore the country, remembering the presence of Patty, the Party Planner, who is in the kitchen of the inn, along with some books you should read. At the exit a cut-scene introduces Johan. Answer his questions in the affirmative. Then go up north and look at the Casino. You can't enter it for now, so just explore the surrounding area, then go back to the mayor's house and talk to Ella for the first time, then follow her up the stairs and talk to her a second time. Then talk to the man near the church, then look for the blonde woman at the port. Finally save before leaving town with Milly, heading for a house with a blue roof.
Madame's Luca
Answer affirmatively to the question asked during the cut-scene, then let your character rest and when you wake up, talk to the woman reading the crystal ball. Answer "yes" to her question and Milly will join your party. Exit and look into the well to face a mini-boss. Well Whiser will cast a Fear in the first round, but being low on HP shouldn't be too much of a challenge. When you've won the fight, head to a church to save, then head south of Madame's Luca to the Lucid Grotto.
Lucid Grotto
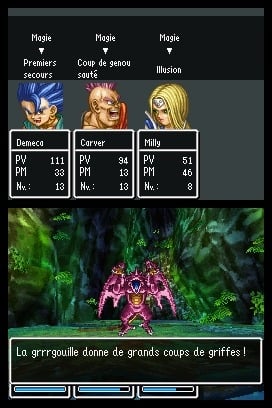
Proceed southwest and take the northwest fork at the fork, go up the steps and turn east, then take the south detour at the next fork. Approach the pool of water and head towards the stairway to the southeast. It is possible to encounter a Metal Slime nearby: in case you flee because at this level you are not yet able to defeat it. Head south, then west to another flight of stairs. A boss battle awaits you a short distance away, so heal the party. Keep in mind that you can't currently control Milly, so your skill will have to compensate for the wickedness of her moves.
Bloodcreeper often uses Dazzle which blinds your party for an entire turn. The clash does not require much strategy, rather resort to healing frequently and try to do as much damage as possible with your attacks, avoiding resorting to the Sap that would be canceled by the Boss Buff. At the end of the battle, return to the entrance of the cave, taking advantage of the opportunity to explore every corner and collect every object. Go to Madame Luca's and talk to her: now Milly is an active part of your party. Go back to Port Haven, save at the church, then talk to the mayor, answering both of his questions in the affirmative. Then go up to talk to Johan before going to the port where you buy three tickets. Before you leave you can play at the now open Casino, but make sure you save so that you have a restore save in case you lose all your money. Also you can face a secret mini-boss near Wellshire. Once you get to that location, enter Chief's house and talk to him, then head northeast on the World Map and enter the hut. Talk to the man inside and answer "yes", then refuse to pay the duty and get ready for battle. However, it is advisable to engage in this fight only in case you have had luck at the casino and have thus been able to invest the winnings in an equipment upgrade. In this case the battle will be really a walk: initially focus on Liddle, who is in charge of covering his partner Bigg. Then examine the girl and answer "no" to Chief to get 5000 Gold. Before embarking on Port Haven, use this amount to purchase good armor for Milly.
Once in Cape Somnia talk to Seaslime in the east, then save and return to Somnia. There isn't much else to do in Cape Somnia, unless you need to level.
Dreams
After saving, start exploring, noting how this Somnia looks a lot like its counterpart in the Dream World. Read the books in the church and explore the houses while keeping away from the well for now. Then go to the castle and talk to the guard answering affirmatively. Enter and talk to the guard, then explore the castle. Talk to the maid, the king and the queen. After the cut-scene you will be asked for a name: no matter which one you choose, you will still be kicked out of the castle. Then talk to the man with the white turban outside the castle who will tell you about Amor, indicating the direction to take to reach it.

Love
After a first superficial exploration, talk to the priest and save, then leave the city. When you return you will find a pastor inside the church to talk to. Then go to the back room and talk to Evgenya, then go to sleep. Upon awakening, leave the church to watch a cut-scene. Then continue with the exploration of the town and collect everything you can, finally talk to the man near the building to the north. Continue north to enter Armor Cave.
Armor Cave
The quarry develops downwards. Explore every corner on the way down until you reach the lowest point where you meet a character who will ask for your help. Accept and soon a boss battle will begin. This enemy is to be feared mainly due to the constant disorientation it can inflict on your party through the use of Dazzleflash and Fuddle Dance. However, its strength is nothing special and it won't take long to get the better of it, especially if you manage to use Carver's Flying Knee. Then talk to Ilya and agree to bring her back to the surface. Then go to Amor and talk to the man at the back of the church. Sleep there, as suggested by the man, and at the end of a cut-scene you will get a Mirror Key. After saving, head to Somnia, then continue around the lake in the direction of the yellow tower.
Moonmirror Tower
Looking into the mirror, you are immediately attacked by three Corpsickles. Your defense against the poison attacks they usually use is the Squelch that can throw Milly. Focus on the physical attacks and be ready to end the fight when their continued healing signals that they are on the verge of death.
As in all levels set in the towers, your goal is to reach the top, through a continuous up and down of stairs. Note that at some point you will meet an invisible girl that you will have to sprinkle some Dream Drew on in order for it to be seen again. Whenever you meet a pair of balls instead you will have to push them until they break. After a cut-scene Ashlynn will join your party, but her level is quite low, so you will want to get rid of her at the earliest opportunity. Next, examine the Ra's Mirror and return to Madame Luca's. Then talk to Luca's and you will get the Switch World spell. Use it to reach the Dream World Somnia, where Captain Blade awaits you at the castle. Give the mirror to the king, then wait for night to fall to talk to Captain Blade. Speak to the Chancellor afterwards to find out about the Underkeep, then make sure you have the right equipment for the challenge ahead - Platinum Armor and Dragon Shield are good choices. After saving, advance east past the swamp.
Underkeep
Even with the right equipment (see the advice at the end of the previous paragraph) this dungeon is really tough. You probably need to move up a few levels before facing the boss who is waiting for you at the end. If you don't feel ready, walk through the dungeon to the last flight of stairs leading to Murdaw, then retrace your steps, save and rest at the inn. The next day, face the battles again to strengthen your character and finally proceed to face to face. Remember to hit Murdaw with the Sap to increase the effect of your attacks, especially if he helps himself with the Buff. Answer yourself with the Buff and make sure Milly has Midheal. The boss's attacks, in reality, are not extremely strong, with the exception of the Flame Breath and the Sizzle.
At the end of the fight, watch the cutscene and return to Somnia, where you have to talk to the chancellor. After resting and talking to Shlyn, go back to the Real World Somnia, enter the castle and after a series of cutscenes talk to the king. Answer affirmatively to the first question, then "no" to the second. So follow the directions just received to reach Ghent.
Ghent
Explore the village: in particular, enter the house behind the shop and answer "yes" to the elderly inhabitant. At the end of the cutscene, enter the shrine, then board the ship where you can talk to Nevan, who joins the party, replacing Ashlynn. To leave the island you will have to resort to the Zoom, but for the moment it is advisable to dedicate yourself to improving the statistics of the characters. The Murdaw Island cave you are on is an ideal location.
Cave of the Isle of Murdaw
Moving in this environment it is important to never end up in the lava in order not to waste precious HP. Also know that by defeating the Cannibox you will collect Seed of Agility. After running into a group of corpses, enter the opening to start a sequence of cutscenes preceding the boss fight. Before setting out, however, make sure that your pary has reached a good level and has the right equipment: Magic Waters and Yggdrasil Leaves are excellent purchases.
Murdaw's Keep
Once you enter this area you will no longer be able to go back. If you die you will have to use the Zoom from Ghent to re-enter this area directly, as long as you have previously talked to Nevan. The main enemies of this area are the Sculptrices, but they are not a major obstacle. The Urnexpected instead come out surprisingly from the vessels that usually contain objects and are much more difficult. Before taking the steps leading to the boss battle, be warned of the imminent danger by Carver: follow his advice, heal yourself and get ready for the tough fight.
The first incarnation of Murdaw will not cause you any headaches: just avoid focusing on the minions because they will be revived if you kill them before Murdaw.
The real difficulty of the battle is represented by the second incarnation of Murdaw. This time he will be alone, but he will attack twice per turn on many occasions. The key to the fight is to make sure Nevan never dies, so you can always count on the Zing spell. If you have it, take advantage of the Fire Claw equipped on Carver. Finally heal with Milly or Nevan's Midheal, using Magic Waters on them if necessary.
At the end of the cutscenes that close the fight, go back to Madame Luca's and talk to her. Rest, then talk to her again to find out where the Abbey is, your next destination.
Alltrades Abbey
In the first environment, through the dialogues with the characters present, you will be able to learn about the vocations, as well as discover what progress you have made in that field, and possibly change yours if you do not like it. After saving, read the books on the shelf, then go down to talk to Patty the Party Planner, who is in charge of managing party members when they exceed four units. After exploring all the shops nearby, return to Port Haven and board the Providence, sailing north.
Scrimsley
Visit all the buildings in the village to make sure you have collected all the items available. In the house to the north-west, talk to Amos, the man lying in bed, then go to the inn and talk to the manager, answering first "no", then "yes". Wait for night to fall and climb to the roof to face the mini-boss, Scrimsley Terror, nothing challenging at this point in the game. Then go back to Amos and decide if you want to recruit him later. Finally, talk to the elder near the store before leaving the city heading northeast.
Hazy Heights
Enter the cave to the north and follow the path that slopes west to the fork, where you go south. After going up the staircase, go outside, go up more steps and enter a new cave that hides a Morning Star inside a chest to the west. Exit and enter the cave to the east, go up the stairs and exit to the south, continue west to other stairs that lead to a bridge. Exit yet another cave, climb to the top of the mountain and look for the Seed of Reason, but don't uproot the plant. Return to Scrimsley and talk to Amos to welcome him to your party, then set sail again east. On land, cross the bridge to the east to see your destination to the north.

Arkbolt
Talk to the guard and save before the next conversation that introduces the boss battle. Bronso, the boss, won't give you much trouble if you're protected by the Kabuff. However, it has a lot of HP, so make good use of Carver's Double Up.
After talking to the guy near the stairs, go up and explore the floor, noting how the red door is closed for now. Go down and read the books, go out south and meet the merchant under the stairs near the walls. When you are ready, go up two floors and answer yes to the guards to face Brick & Brock. The duo is little more insidious than Bronson - respond to the Kasab with the Kabuff and make sure you take out Brick first.
At the end of the fighting talk to the king and answer "yes". Then speak to Brutus twice to confront him. Brutus is definitely tougher than the opponents faced in this area, thanks to the variety of moves he can perform. As before, respond to the Kasab with the Kabuf, then take advantage of Carver who proves to be decisive at this juncture.
At the end of the fight, talk to the king and the councilor, then save and proceed northwest to a cave.
Wayfarer's Pass
Talk to all the characters you meet along the way, passing the checkpoints of the soldiers thanks to the coffin you carry with you. After defeating Hellraiser and Jimping Jackal, enter the cave and collect the Seed of Resilience. Destroy all of the Diethons' eggs and defeat the beast, then talk to it before reversing the path you have taken so far.
So go back to Arkbolt, talk to the merchant at the gates of the castle, then to the king. Next, explore the huts to the north to collect items, then go up the stairs to the west to Dream World. There, head south.
Desert Underpass
Explore the small town and sleep at the inn if you like before heading to Aridea.
Aridea
Explore the city by talking to all the characters you meet. After doing this, enter the central building and night will fall. Leave Aridea and head west to the floating island. Talk to the two men, then wander around the island again talking to anyone who comes within range. Then enter the inn and order a drink to set off the events that lead you to clash with Jamirus. His attacks are mainly based on fire. Use the double Kabuff to bolster your defenses and call upon Milly or Nevan's healing if necessary. Finally, a Sap on Jamirus should steer the fate of the meeting in your favor.
After the cut-scene that closes the battle, return to the island to talk to the elder, then look for the man in the white turban at the bar. Now you can use the island as a means of transportation. With this you sail west to a small island where you can converse with the hut's resident. Then move east, then south, and look for the well in the center of the great continent you are on. Before accessing it, take care of the whole party, as tough fights await you. After meeting the man in the west, exit and, from the World Map, go to the northeast to talk to another inhabitant of a hut. Using the island, travel southwest, then south across the narrow stream. Stop near the cave and talk to the man you meet, memorizing his information. Then move northwest of Haggleton in search of another well.
Madford's Manor
In this place you can sell all the Mini Medals collected so far. When you have finished this activity, sail south from Murdaw Island and stop at the beach. Go through the checkpoint to the east and talk to the man inside the house, then go southwest to the village, Howsworth. When you are done exploring, continue west towards the castle.
Howcastle
Explore the kitchens and neighboring environments, reading all the volumes you find along the way. Talk to Prince Howard, then head to the throne room and answer "yes" to the king's question. Search and find Howard in the barrel to the southeast downstairs. Then talk to the king a second time, then approach the lower floor to the south to meet up with Howard again, who will now join your party. Rest and save before proceeding south of Howcastle.
Hallowed Hollow
As soon as he sets foot in this setting, Howard runs away again. Collect it in Howsworth, in the house to the northwest, then retrace your steps and continue north up the staircase to face First Test, a rather easy mini-boss. Then go southeast, turn north and talk to Howie, who will join the party at the end of the cut-scene. You need Howie to open the door to the east. Below, Second Test awaits you: the challenge is now more demanding, moreover the opponent sends back to the sender every spell that is left against him. After this fight too, move south, then go north-east to find Howard. Go down and collect the contents of the three crates, then heal yourself and face the last boss, Third Test, to the north. This time things get complicated: the boss attacks twice per turn and uses the Kasap at every opportunity. Two moves are required: Milly to the Debuff and Nevan to the healing. The point to leverage is the boss's low HP.
Enter the door that the monster was guarding and watch the cutscene, then talk to Howard. Return to Howcastle and enter the throne room to talk to the king. With the key received, open the red doors: in the meantime, also enlist Goowain in your party.
Then head to the bridge to the southwest, from there approach the well, defeat the monster and look out to emerge in the Dream World.
Clearvale
First explore the Dream World Clearvale, collecting as many items as you can. Then use the southwest ladder to descend into the Real World. After exploring every corner here, go to the church and start a cutscene, then save and head northeast to talk to Mrs. Tress.
Destiny' Drop
Go to this location to the northeast and talk to the priest first. Explore the area as usual, looking in the crevasses and observing the graffiti decorating some of the walls. Often you will have to use the ice ax to make your way through the rocks. When you finally get to the Shard of Courage go back to Clearvale and talk to Mr. Tress. Rest at his home and when you wake up you will have a flying bed at your disposal. Now go to Dream World's Clearvale and talk to the monster behind the bank counter to add Healie to the party. Then exploit the potential of the flying bed - which travels over rocks and streams - to visit the surrounding area. Then go to the southwestern house to talk to Sharon Hope. Register the Drwam Card and examine the shelves. Continue north on the flying bed, visiting the huts along the way. Finally, enter the shaft northeast of Weaver's Peak and visit the area south of Dullerton.
Dullerton
After you cut your teeth with the strong enemies that are nearby, visit the village and collect everything you can, then return to the Dream World and fly to Amor. After the cut-scene, you enter the church, where another cutscene takes place. The next destination is Castle Swanstone, in the Real World.
Castle Swanstone
Explore shops and rooms until you find the chancellor: then converse with him and answer affirmatively. On the first floor, approach the door from which a moan comes out, then go back to talking to the king. Then use the Ra's Mirror next to the princess to start a cut-scene. Then speak once more with the king and the chancellor. After saving, move to the Dream World. Your destination is the tower that stands out in the desert southwest of the Underkeep.
Mirror spire
After summoning the Peep, enter and climb the tower to the top where Spiegel is. He initially launches the Bounce on himself to reflect your attacks, then soon disappears. Avoid Sap, which is basically useless, and instead focus on maintaining a high level of health of your party. When the boss is one step away from death, in fact, he begins to summon annoying Low Djinks, who also have an amount of HP that should not be underestimated. When you have managed to snatch the victory, return to Swanstone in the Real World to talk to the king. At the end of the cutscene, return to the throne room and start a new conversation with the ruler, obtaining the Floodgate Key.
Now is the time to return to sailing with the ship docked in Port Haven. Enter the shaft south of Castle Swanstone and talk to the frog. Then continue towards the village to the north-west.
Fish
Answer "no" to the man who greets you at the entrance, but make sure you speak to all the inhabitants you come across. After talking to the merchant at the fish shop, he will flee. Follow them to Rod's house and talk to the merchant, then the owner. Then follow Rod unnoticed to the cave. There you have to press the secret button on the bottom to start a movie. During the conversation then answer first "no", then "yes", then again "yes". Back on the ship, answer "yes" again, then head to the reef to the north where you receive Lorelei's Harp which allows you to navigate underwater. Quickly use this new ability to bypass the rocky obstacle between the continents to the northwest. Northeast of that point you come across a well that allows you to look out over the Dream World. There, proceed southeast to a shrine. Step on the yellow tile to open the dam that gives you access to Slimopolis.
Slimopolis
Battles between slimes take place in this area. It is a mini-game, but it can offer valuable rewards.
Seabed Shrine
This archipelago is located southeast of Pescado.
Visit the area, without being surprised by the Mimics, until you reach the yellow tile that blocks the stream. Things get tough from here on out, so consider taking a rest before continuing. The path that leads you to the boss is marked by tiles to step on, of the type already seen before, when you opened the dam.
Gracos doesn't seem like a tough opponent, but his abundant availability of HP combined with a gradual hardening of his offensive strategy makes this battle one of the longest and most exhausting. It would be very useful to have two Fire Claws during this fight. At the end of the video that closes the battle, explore the entire underwater area that until recently was inaccessible to you.
Undersea
First, go north of Pescado and explore the seabed: in that area there is in fact a sunken ship inside which you can collect the Ultimate Key, a useful key that opens the last cells still closed. Then head to the underwater palace south of Murdawe Island, where you talk to Rubiss. If you wish, this is the time to explore some areas previously closed and now accessible thanks to the Ultimate Key. Start in the area south of Turnscote. Take down treasures and talk to King Poseidon. Then return to Clearvale, sail along the river to the northwest and dive to find a sanctuary: don't forget to read the diary found on a corpse there. The next stop is another shrine, west of Hallowed Hollow, where a woman tells you about Sorceria, one of your next destinations. Once this is done you can point the sails towards the different cells that you can now open thanks to the Ultimate Key. If you want to test your strength, visit the underwater location east of Scrimsley instead, otherwise take note and come back when your party is at its most powerful. After that, designate Ashlynn as the party leader, for plot development.
Sorceria
First visit the well to the north-west, which contains another well, inside which you will find a Prayer Ring. Then enter the city and head northeast of the shop to start a cut-scene. Follow the staircase and enter the house to collect a Dreamscape, then talk to the elder before exiting. Back in the city center, after another cutscene, enter the large house recognizable by the red roof. After saving, start exploring. Head up northwest to Eldress's House and use the Sand Urn on the shimmering sand, making sure you've set Ashlyn as the party leader. If you followed the directions Ashlyn will get the Magic Burst Spell.
Now go back to Real World, Wellshire, and from there go south, dive to cross the narrow passage to the north and you will emerge near a house with a blue roof.
Chateu de Sass
This setting hosts a contest of elegance and, whether you like it or not, you will have to participate in it to obtain a fundamental object for the continuation of the game. So talk to Sass, then to the man at the bottom of the stairs to participate in the contest. You will have to win at least the first three levels of the competition, even if this involves eight. So choose your character with the highest Style value, probably Hero, and observe how this varies depending on the equipment you use. Raise the value to at least 220 - using the Fashion Forge if necessary - and win the third level to get the Plush Rug you need. Now that the item is in your possession, head to the Dream World Sorceria and talk to the old man in the house to the west to add the flying carpet to your transportation. Then use the boat to reach the area west of the southwest continent: the ruins you see on the map can only be reached using the flying carpet.
Castle Graceskull
After the opening cutscene, go up the stairs and talk to the soldiers. Go up again, explore the floor and answer affirmatively to the guard. Explore the kitchens and talk to the old lady, answer "yes". Then go into the ceremonial chamber, talk to the guard a couple of times, then go to the throne room. After the cutscene, talk to the guard in the throne room again and keep in mind the path to the Armor of Orgo that is indicated at this juncture. Back in the Real World, practice the instructions and use the ax to reveal the secret ladder in the training room. Collect the item, then return to the Dream World and enlist the Mottle Slime Spot in the easternmost area of the castle. Before leaving the castle, open a secret passage in the training room using the ax, exactly as you did in the Dream World.
Now that you have the first part of the four that make up the legendary gear, head to Felonia to look for clues about the missing parts.
Felony
After you have stocked up on items, go to the castle and talk to all the characters you meet as you wander around the halls. Visit all the places you have access to, from prisons to kitchens, paying attention to encounters with the Whacks, enemies not to be underestimated. Then speak to the king, and answer "no" to his question, then converse with the queen mother. After that, leave Felonia.
Cryptic Catacombs
Speaking to everyone in Felonia, you should have enough clues to find this location east of Amor without too many wanderings. Exploring this place leads you to what appears to be a dead end, in a grassy area. Instead, examine the ground and you will discover a secret staircase. Get off for the first time and stop. So go down three times, then go up two ramps. Following this bizarre sequence you should find a new flight of stairs to the south that leads even further south. Down the steps go east, north, then west and open the chest near the pedestal to get your hands on the Shield of Valora.
Mount Snowhere
This mountain is located in the snowy area west of Pescado. The first non-frozen person you meet is a soldier at the inn. Rest there if you like, then set off on a quick exploration of the village before heading to the sanctuary to the northeast. After talking to the girl, go back to Mt. Somewhere and enter the house to the northeast, where you should have met an elder earlier, and watch the cutscene. Talk to the man who lives there again, then return to the shrine to start another conversation with the girl. Answer her "yes", and do the same with Colburn, who you still meet in the usual house to the north-east. After talking to the man in the church, get ready to explore the group of caves to the north, without forgetting the information just gathered.
Everfrost Grotto
Examine the door and answer yes, then say these three sentences in this exact order:
-"I come possessing a heart of truth."
-"The blade that bears untold power..."
-"Unleash it from the icy depths!"
Once accessed, you can begin the descent. The simple puzzle you come across is solved by walking the tile to the north, then west, then east, and finally south, making sure you never step on the same tile twice. Then continue north where you get the Rusted Sword.
Once back in Mt. Snowhere talk to Ali Kazam in the church who will give you the Turnscote Pendant. Your next destination is the city from which the object takes its name.
Turnscote
After exploring the area a bit, including the casino, look into the well and then enter the house to collect Thef's Key from a cup. Use it to open the door of the building to the east of the Casino behind which is a girl dressed as a bunny: talk to her to improve the Style of the party leader by 5 points. Then access the house east of the casino from the roof to meet Mo the Mole, then go down and talk to Mo again near the bar to accept a hide and seek challenge. Find Mo first in the church, then at the Bunny Theater, and finally at the bar. Don't leave this last setting right away, but approach the two men conversing at the counter. After hearing their words, head to the well in downtown Turnscote and pay the 2000 Gold needed to get the information you need from Mo. Then head to the shrine to the north, talk to Welda, then return to town where you meet Welda again in her house: don't press any buttons while she looks you in the eye. So let Welda work on your sword while you make your way to Weaver's Peak.
Weaver's Peak
After disembarking talk to Judithe and continue to the entrance to Waver's Peak. After meeting Buddy, go out and head to Mayor Spindell's residence, talk to Maya, Mayor and finally Hero, then walk towards Mountain Pass. There, talk to Hero again, then return to Weaver's Peak. Face the monsters in the house to the southwest, on the second floor of the pub, in the house next to the pub itself, the one near the well and near the shop, then a last one inside the shop. Finally, save Buddy who was attacked by a monster at Tanya's house. So get treated by the priest in the church, then return to Tanya's house: talking to the monster you will face the stronger version of the boss, talking to Hero you will face a weaker version.
After the conversation that closes the fight, head to Somnia. At the end of the cut-scene, wait for the night, then go down the stairs and turn west towards the glitter. Then follow the path made of lights until you reach the throne room. If you did everything correctly in the morning you will get the Helm of Sebath. Then return to Turnscote to retrieve the sword, which in the meantime has become the Sword of Ramia. You now have all four parts of the legendary gear.
Do you remember the last underwater location that was mentioned some time ago? Well, if you haven't visited it yet, or if you have and came out with broken bones, your current skills should allow you to explore it without much difficulty.
Stormsgate Citadel
From Felonia you can reach the monastery to the north-west by ship. The signs on the ground make up a puzzle that involves the association between a sign and a piece of equipment: heart-armor, sun-helmet, lightning-sword, jingle of swords-shield. Solving the puzzle starts the fight with the boss, the Stormsgate Citadel itself. The citadel will erect defenses against magic, so focus on physical attacks. The clash is hard, but not impossible, even if the slightest lightness can cost you dearly.
After defeating the citadel you will have access to it. Observe the cut-scene, then go to the library where you can hear a conversation, then get on and take on an Uberkilling Machine and a Tortoise. Try to get rid of the car first, then do the Tortoise. Don't relax, as soon after you will be challenged by Terry. If you are equipped with armor that can protect you from fire, the battle will be very short. At the end HP and MP will be restored autonomously, just before being placed in front of a further boss battle. The opponent this time is Dhuran, whose main feature is the use of the Distrupting Wave that cancels all the positive effects on your party. Again focus on physical attacks while avoiding magical ones.
At the end of this sequence of fights Terry joins your party. Before continuing, go to Arkbolt and talk to a hacksaurus in the cell, on the second floor of the castle, to integrate him too into your group. Then move on to the Dream World and use the floating island to head south of Clearvalle.
Cloudsgate Castle
After the usual exploration, look into the well to find yourself in a sanctuary in the Real World. A few steps away is a tower. Since you already have the Ultimate Key, you are granted access. Arrived at the bottom of the dungeon, use the blue elevator to reach a statue: examining it you start a cut-scene that preludes a triple clash that. if passed, it rewards you with Celestial Reins. Bring the item to Lord Zenith at Cloudsgate Castle: thanks to its upgrade you can now access the Dread Realm by pressing X while on Pegasus. It goes without saying that the Dread Realm is your next destination.
Despairia
Explore the city, but refrain from conversing with the monster that dominates its center: as soon as you enter the Dread World your parameters will be reset and there is no need to face battles. Head west instead, explore the pub and follow the people wandering in circles, then peek into the well to return to the Real World. Head to Dullerton, far north on the World Map, and answer "yes" to the dog you are starting a conversation with. In possession of the Wynne's Tool, go back to Despairia and talk to Max Wynne, answer affirmatively and choose a piece of equipment, better armor or shield. Also note how now your HP / MP have been restored.
Before the final stage, explore the last city of the game.
Greedmore Valley
After exploring the city - quite an expensive experience as you pay to get in and out of the pub! - head to the mine to the east and walk through its tunnels until you reach the chest containing the information you need. Head out and back to the north house if you want to hear - for a fee, of course - a tip from Gainmore. Then look for the man sitting near a body of water in the forest to the west. Answer "yes" and go down to the cashier. Speaking with the man who watches her, you start the fight with Averill, an extremely simple opponent for this point of the game.
Talk to the man near the water again and he will drain the hollow a second time, but this time head down east and open the chest, then examine it to reveal a secret staircase. Collect the Silver Shield and continue up the staircase, then from the Dread World map go west, let the elder heal you and save. Return to Greedmore and enter the house above the weapon shop to get the Dragon Robe. You can now continue from where you saved and enter Gallows Moor.
Gallows Moor
The welcoming committee is made up of Gallows Giant, bosses who can completely nullify your ability to cast spells for a certain period of time. Hit hard right from the start and make sure you have a good amount of healing items in inventory.
After the battle, talk to the other giant to the north to get Janilor's Key. After the cut-scene inside the castle, move from your cell through the electrified floor until you reach Captain Balde. Use the Guard's Garb you received to head south undisturbed and converse with the guards. Talk to the woman at the cemetery, then explore the building to the southwest. Go up the stairs and enter Gallows Moor. Reach the top of the tower to the east and talk to the guard, then return to the guillotine area. Take off your guard uniform and talk to Patricia, who is behind the counter in the building to the east. After having answered affirmatively, look for the man in the north dressed in green: after having conversed with him, also chat with Magnus in the southeast. Return to the man in green and, after a cut-scene, face a pair of Prison Guard. Then take on Dogmus and Xoxagel. While you can theoretically win, through extreme character leveling, the defeat doesn't stop you from continuing the story. In fact, when you are thrown into the cell, you can talk to the guard to go out. Then talk to Erdrick too, collect the key and go up to Blackmar's room where another fight with Zozagel takes place, now much easier to defeat. Heal yourself and dress in the best gear you have before returning to battle Blackmar. The challenge is made even more difficult by the annoying presence of his minions: they will not only be revived once killed, but are also able to summon Cureslime. In case this happens, be sure to delete it as soon as possible. Win the tough fight, free Supreme Sage and take the Orb of Truth up the hill to the northwest.
Prison of Sorrow
Examine the corpse at the entrance, then the chained man. Go back to Gallows and talk to Sage to add him to your party temporarily, just long enough to have him by his side during the fight with Belleau and Vabot at the Prison of Sorrow. If you have survived the previous fight, you will not encounter any difficulties now: focus first on Belleau, then get rid of Cabot.
After the conversation with the two brothers, you will be able to access Mortamor's Dreadlair, the final location north of the Prison of Sorrow. Before heading there, make sure your entire party has the proper skills and equipment.
Mortamor's Dreadlair
In the first part of this section, access to the different areas that make it up is restricted by the pressure of some tiles. However, explore the area far and wide to get some of the best items in the game, such as the Metal King Sword.
The final boss, Mortamor, has three distinct forms.
The first is rather weak and does not represent a major obstacle. Just remember to cast the Kabuff a couple of times as all stat effects will carry over to the next fight.
The second incarnation of Mortamor instead has significantly higher offensive values than the previous one. Inferno and Roundhouse Kick, to give you an idea, deal 300 HP of damage to each party character.
The third and last version of the boss, as widely predictable, is the really difficult one, even if it must be admitted that the second already admitted very few distractions. As you will notice right away, Mortamor now uses two hands: your primary objective must be the destruction of his left hand to prevent him from using Kazing. Only after you have knocked out your right hand do you focus your attacks on Mortamor, but before that, your hands must be your only target.
At the end of the battle, the game requires an additional pilgrimage to some cities already visited to fully unravel the plot. So enjoy these last moments.
Congratulations, you have completed Dragon Quest VI!
 Dragon Quest VI ds
- ds
- snes
Exit date: May 20, 2011


