


Please note:
The solution is based on the US version of the game for Xbox 360. There may be divergences from the Spanish version and / or for other platforms.
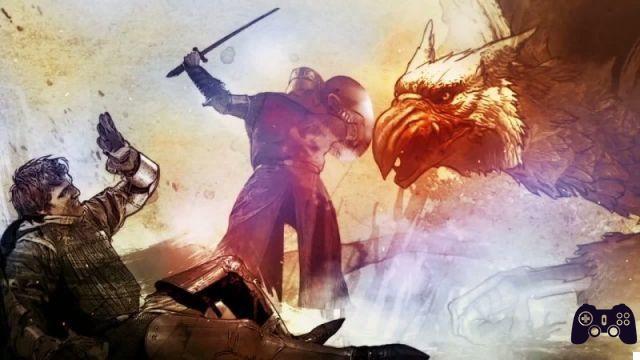
End of the Beginning
Enjoy the initial opening sequence as you proceed to make your way through the world of Dragon's Dogma; after taking control of your character, you will be prompted to obtain a light source. So activate your menu, equipping a lantern to be able to see the rest of the room. Follow Firm as he converses with you; you will find yourself almost immediately in front of - unfortunately - a huge Dragon. However, continue to follow Salde until you find yourself in the immediate vicinity of a stone; examine it to trigger another cutscene.
After the cutscene with Quince and Morganna as protagonists, proceed up the path, freeing yourself from the goblins around you. After Quince asks if there are any survivors, you will be shown a short cutscene - yet another, cutscenes seem to characterize these early stages of your progress in the world of Dragon's Dogma. However, once you have completed this scene, you will also need to complete a short tutorial which will be shown to you by examining the section at the bottom right of your screen. Having passed this test as well, continue upwards along the next path, then deviate to the right and immediately locate Ser Ashrore: you will have to save him from the threat of the enemies that surround him. Immediately after, approach him and speak to him immediately. So go up the nearby stairs, past the pile of bodies, watch the next cutscene. It will now be necessary to kill the bird that you were able to visualize during the scene itself - we strongly recommend that you take advantage of the help that is provided to you by your companions, rather than attempting a solitary action that could prove almost suicidal. In reality, depending on your natural level of cowardice, you may even decide to leave the task of eliminating the enemy almost entirely to your companions.
So approach the next portal, starting to observe it carefully. It will not be possible to overcome it immediately: it will first be necessary to kill the birds that appear to be visible on the outside. Let your allies lure them to land; after a short fight, the next portal will open and several of your allies will come out, who will be able to take care of the killing of the opponents in total autonomy, without you having to get your hands dirty - we know that such a statement can be considered not very politically correct, but it is necessary to take into account the lack of experience you have accumulated so far.
However, having destroyed this enemy as well, you can proceed along the usual path, passing the nearby door. Ser will guide you, offering you help along the way. After a cutscene, which turns out to be quite threatening, you will have to kill the Chimera that arrives in the area - unfortunately, this time you will be almost completely alone as the cutscene sees the Chimera devastating the soldiers who previously assisted you. Beware of its tail! It is capable of poisoning you, and at the moment you do not have special means to avoid poisoning. Fortunately, after some time, you will get the assistance of a group of allies - again, don't pay compliments and let yourself be assisted! Finally, when the lion stops moving completely, hit him with a spell. Your allies will repeatedly yell at you various "helpers" during the battle, so follow their directions!
Video - "Ur Dragon" Mode Trailer
Call of the Arisen
The first focus in this area will be character creation - as previously, the situation was not so clear. So choose your profession and the weapons you prefer. Then proceed beyond the door, observing an intermission scene. So continue, just as directed, towards the interior of the boarding house - immediately after you have taken control of your character.
You can thus recover various items that serve as bonuses. In case you can't find the guesthouse, refer to the only large building right after your house - it's hard to miss. However, then converse with Rojay, the visible subject near the watercourse - he will tell you about the presence of various monsters that must be finished as quickly as possible. Once this is done, approach the large gate nearby and watch the cutscene with Adaro as the protagonist. When you reach the outside of the gate, you will find yourself in front of some goblins after having made your way along part of the obligatory path. Kill them quickly, they are not particularly powerful elements. You will also be able to locate several rabbits, to kill without thinking too much (although it seems cowardly, it is one of the simplest methods to quickly gain several life-points). Once he has completely "cleaned up" the game area from the presence of hostile subjects, he goes to converse with Reynard. Go down the following wide path, always trying to keep the level of your life points (since these are the initial phases of the game anyway, it will be clearly signaled to you in the lower part of the screen if / when the life points available to you begin in short supply).
So approach the door, examining it to be quickly led to the next screen. Once you reach the camp, go up the stairs visible directly in front of you and then observe the cutscene that follows. Examine the recoverable tablet from the immediate surroundings; In this way you will get a considerable amount of information related to the Arisen, as well as the option to participate in the quest "Call of the Arisen".
Then approach the gate on the left, chatting with the guard in the area. Once this is done, proceed to the gate directly opposite the first - again, you will have to face a fight. You can also try a new type of skill: by pressing the square button, you can actually climb on the back of monsters, using them as a kind of transport and / or hitting them in the back of the head without them being able to respond (it is clear, however, that they will be able to search to throw you away!). We generally recommend that you keep a certain distance from your main enemy, always trying to strike from a distance. It is the only way to avoid taking a lot of damage in a very short time! Keeping this consideration in mind, and always acting accordingly with a certain calm, you will be able to finish this level without problems.
A Rude Awakening
Quickly return to the camp, go up the stairs to meet Ecbal - this is a subject that will be extremely useful for you, as it will allow you to improve your skills and get some well-deserved rest. So approach the tablet next to Ecbal; you will therefore be given the opportunity to customize one of your partners to proceed with your quest - choose in complete freedom, the only real advice we can give you is - try to create it in such a way that it is complementary to your primary character. After the next cutscene, ignore the game's advice regarding the necessary knowledge of your partner. Having reached the next checkpoint, you will find yourself in the middle of a kind of hiding place: here you can choose to recruit a few subjects to help your party. Having completed this recruitment, examine the kind of tablet that is nearby, then return to the camp. Talk to Ser Berne twice, then begin your training.
The first objective will see you actually hauling a load. The method of doing this is to repeatedly press the key that will be indicated on the screen - speed is the key parameter to successfully complete this goal, so press the key as fast as possible. Successfully completed the objective, you will have to pass a short training that tries to introduce you to combat. Make sure here that each of your classes deals with the enemies that belong to them; it is by no means decisive for the final victory, but it allows you to proceed more efficiently.
Once you have completed this short but necessary training, approach Mercedes to start a conversation with her. Among the various options available, select the one that allows you to rest. Having completed your rest, you will wake up in the middle of a real fight: you will have to deal with a Hydra. Although initially the battle seems too complex for the forces at your disposal, don't worry: after you hit the Hydra a few times, the battle will end anyway, even if you have managed to take away only a very few life points from the Hydra itself. . Then, conversing with Mercedes, select the first of the available options, completing the "Rude Awakening" quest definitively.
The Road to Gran Soren
Talk to Mercedes who is stationed near the gate - it will open. Your new quest, "Escort to the Capitol", will then become accessible. Continue down the path, killing the weak enemies in the area. You will therefore be ambushed by a group of birds: be ready to shoot at them using magic. After getting rid of this wave as well, heal immediately after the battle and continue up the path. You will find various enemies in the area associated with a low amount of life points, despite their apparent uselessness, we strongly recommend facing them: this is the only real way to be able to accumulate a good amount of experience. Then move along the path going upwards, overcoming a slope. After a while you will find yourself literally "chased" by a large boulder. Move sideways to dodge it.
Proceed straight along the only path available, then descend along the nearby slope. You will now find yourself in front of a goblin: eliminate it quickly, thus causing the opening of a huge portal in the immediate vicinity. Immediately beyond it, there will be more goblins to finish. So move forward along the same path, passing the two trees. You will then be faced with another wave of goblins - finish this quickly too, then get rid of the bandits nearby. Climbed to the top of the path, you will finally be able to enter the Gran Soren. Here you can view an extensive amount of cutscenes; having observed them all, you will therefore be assigned a new objective ("Courier"), as well as given access to the next quest, namely Lure of the Abyss.
Lure of the Abyss
Initially converse with Steffan - the man with the white beard. He will provide you with some useful information, also for an optimal continuation of the level. In case you want to get some new peculiar abilities, you can also converse with Asalam. A shop is also available in the area that allows you to buy new good quality equipment: we highly recommend taking a look! So talk to Sir Camillus, he will then give you access to the Guild where you can recruit (if you want) new members for your group. In any case, there will then be an intermission scene that will allow you to be introduced to Barnaby. After this quick cutscene, talk to Barnaby again, who will reveal some new information. Continue north, always following the map. Get rid of the simple creatures that will try to interrupt your progress along the next path, preferably trying to eliminate them from a distance to minimize your risk of taking damage.
Having reached the top of the path, we recommend that you pull the lever visible nearby to cause the gate to move. Afterwards, you can quickly save the game, as well as smoothly kill the following wave of undead that you have seen before. Then keep moving until the end of the passage, thus observing the cutscene in computer graphics, which shows the opening of your gate. Proceed east along the map, making sure you are not too far from your allies - you will then need their help to finish off opponents who attempt to invade your path. Go down the nearby stairs, thus reaching a save point. So go back and move in a circle along the same path, reaching the nth lever: pull it to make your way beyond the gate associated with it.
So continue north, passing the giant creature - we strongly advise against attempting a fight! Instead, simply move forward until you reach the end of the path. You will be moved to a loading screen, with an associated save point: in case there was a previous separation from your allies, you will now be reunited. Talk to Barnaby again to complete the quest.
Seeking Salvation
Before starting this quest, we strongly recommend that you rest a little and spend some money to earn the items necessary for the continuation of the quest. So talk to Meridith; he will tell you that Mason spends most of his day touring the shacks in the area. Before being able to find it, it will therefore be necessary to understand where these shacks are: this will not be too difficult - you can generally find them immediately after the barber shop, next to the aqueduct. Also found Mason (easily recognizable, given the icon positioned immediately above his head), proceed forward and then turn twice to the left, making your character turn the corner, thus reaching the gate that leads quickly to Gransys.
So move right along the beach until your allies locate a tower in the distance. Keep moving to the right; once you get to the edge of the game platform, you will be explained a situation that you have probably already recognized: the earth moves under your feet, so you will have to pay some attention to your movements. However, having overcome the enemies in the surroundings, we also advise you to proceed beyond the bridge, reaching Gran Soren. Enter the town, then follow the red circle visible on your map to reach Ser Sairus - then talk to him. He will ask you to reach the catacombs, which can be viewed in the north-west part of the game area. In case you deem it necessary, it is possible to try to "activate" some other soldier, having them accompany you - we personally recommend it in a lively way. However, once you reach the outside of the city, start moving towards the north-west. Use your soldiers to quickly end the hostilities that accumulate along the way. Also try to pay real attention to the communications that will be given to you by your allies.
Finally, you will find yourself near a decrepit building called the "Collapsed Meeting Room" - we recommend exploring it to retrieve the small but useful objects inside. So keep going northwest until you find the Deos hills. Examine the stones associated with them, saving the game. You will therefore get the possibility to change the positioning of your soldiers - drive yourself, in case you have had problems so far we recommend that you do so. I went down into the catacombs, pull the lever to open the door. Several enemies will come outside: we recommend equipping the lantern and moving slowly. Then press the switch at the end of the path, jump on the elevator and let yourself be transported to the save point. Go through the locked door, then use your spells to hit the group of ghosts in the area. So continue to follow the path that leads west, then south, trying to reach the red circle. We recommend that you take full advantage of the help your allies provide to eliminate undead enemies.
Go down far enough to the south, then carefully examine your surroundings as soon as the path begins to curve towards the east: you can in fact find a fair amount of treasures in the area. So, after hearing a voice beyond the door, proceed straight in the same direction, going to observe the meeting that will take place. Immediately after, you will be tested by a fight: given that it will be the last one you will have to overcome, we strongly recommend that you make the most of all the energy you have now left, even possibly "wasting" your mana. After yet another cutscene, you can put an end to the quest and head south-east to reach Gran Soren.
Mountain Waycastle and Beyond
Proceed to the outside of Gran Soren, following the path that proceeds south. Overcome the various waves of enemies, using your allies as a "side" - thanks to their warnings, you will always be able to anticipate the moment when an opponent will arrive on the scene, and therefore you can eliminate them without problems. After the fork, turn quickly to the left. So, when you reach the top of the ravine, you will find a cage completely surrounded by enemies: we recommend eliminating all the enemies in the surrounding area in order to then free the subject who is inside the cage, thus managing to indirectly complete the "Leave No Prisoners" sub-quest. Since the fight will be very fast, we recommend directing your allies to the immediate surroundings of the cage, so that they can quickly clear its "content".
Then cross the bridge to reach Mountain Waycastle. You will now find yourself in the immediate vicinity of a magic stone - you can therefore enter a space-time rift to eventually change the status of your troops. With that done, pull out the map to go locate the camp - which will be your next destination. Follow the path that goes around it; unfortunately, in the meantime, your life-point level will gradually decrease, so you will have to pay close attention to it. It will therefore be necessary here to fight against a boss - a kind of Cyclops. He is a tough boss: on the one hand, he has a huge amount of life points; on the other hand, its own blows are capable of inflicting enormous amounts of damage. We recommend that you always remain sufficiently far away and try to hit him repeatedly with some patience; one of the most useful attacks of all will be "High Ingle".
When you have managed to near-zero the Cyclops's HP bar, your allies will ask you to go hit his legs - but be careful! The Cyclops could in these cases go into Berserk, or suddenly go crazy - in this case, he would be able to cover a considerable distance on foot in a very short time and therefore inflict a considerable amount of damage. Having defeated the Cyclops, however, you can consider the quest "Ambush" as completed. Then talk to Nathaniel to learn new skills and / or buy something new - you can find him near the nearby group of tents.
Video - The Undead
Merchants and Monsters
Use the marker on the map to find the entrance to the so-called "Ancient Quarry". You will have to deal initially with a Troll, which you can however eliminate using blows such as Brontide and Comestion. Then proceed upwards along the path, until you enter an almost completely dark area. Go down the stone steps, then back down the next tunnel, near which you can find some goblins - also to be shot down without mercy.
Having therefore reached the next Ogre, we recommend recovering the explosive from the vicinity and throwing it at the enemy even before starting the fight, so as to kill him without any mercy. Then proceed along the path trying to reach the red sign visible on the map. Jump down the steps along the tunnel passage, then turn right. In case the surroundings are excessively "dark" and prevent you from seeing further, equip a lantern to improve the situation. Killed the Trolls (perhaps using repetitive magic attacks, generally more useful in this case), continue to proceed towards the interior of this game area, until your allies explicitly indicate a new path that they seem to be " Interesting". So look at the fractures along the rock wall. Follow the missing part of the path, finally reaching Gransys. Then talk to Alon.
Follow the map until you reach the red marker, while locating the ogres you may not have found. Now speak to Alon again, as soon as you are back outside. In this way you will get your reward, also going to automatically complete the quest "Merchant and Monsters".
A Fortress Besieged
The objective of the quest turns out to be quite simple: to recover the stone of the southwest, now lost due to the attackers of the goblin race. Despite the technical simplicity of the objective, completing it could be extremely complex, given the power of the opponents that you will find yourself having to face.
Use the marker on the map to locate the fortress and talk to the captain once you are in the area. Proceed along the whole area, get rid of the whole wave of bat-enemies. Then go up the nearby stairs, then proceed another flight of stairs. There will therefore be other enemies near the roof that you will have to eliminate promptly. Then jump along the various roofs, until you reach a goblin, practically solitary. Having eliminated it, you will therefore suffer various attacks from practically every side of the courtyard. To reach the missing level, which is also your ultimate goal, proceed to the large hut on the opposite side of the courtyard. If you then reach the area where the cells are located, you can retrieve the box. Having done so, quickly return to the entrance.
Make your way along the new path that has now been opened, thus visualizing an intermission scene during which the goblins will open the nearby door, from which they will exit quickly and suddenly. In this case, we strongly recommend targeting their boss: once he has been eliminated, his subordinates will lose all organizational skills and you can consequently eliminate them with extreme ease.
So continue forward to battle with the silver knights: during this short fight, you will automatically activate the following cutscene (it will be enough to attack their leader at least once). There will therefore remain only one objective to be able to successfully complete the quest in its entirety, that is to return to Gran Soren: use your map to quickly return to the area; the Captain will congratulate you and provide you with a fair amount of both experience and hard cash.
A Nameless Terror
The quest will see Arsen being chased by a group of Assassins. Your goal is to try to fight them at night, and then eliminate them. Proceed to Gran Soren, use the map to orient yourself and locate the south portal. Proceed to this area, then converse with Ser Rickhart. He'll give you a piece of paper, right after a short, but weird cutscene. In this way you will go to start the quest in an official way.
Proceed to the north-west from Gran Soren, cross the bridge and proceed upwards along the path and locate the killers near the group of skeletons. Eliminate them quickly, then quickly return to the Ancient Quarry. Proceed along its north side; you will locate your new target exactly outside this Ancient Quarry. Destroyed these skeletons as well, return to Great Soren and proceed along the path that goes back to Mountain Waycastle. Once in the area, proceed along the path that proceeds towards the camp. Then move further to the abandoned shop, examine the area immediately northwest.
After the victory, you will have to quickly return to Cassadris to fight against Zero, the great leader of the Assassins. The battle will be simpler than you imagine, we recommend a strongly offensive approach to complete it in a very short time!
Video Solution - Playlist
Click here for the playlist!
Video Solution - Prologue
Soluzione Video - End of the Beginning
 Dragon's Dogma x360
- x360
- ps3
Exit date: May 25, 2012


