


Please note:
The solution is based on the US PC version of the game. There may be divergences from the Spanish version and / or for other platforms.
The Legend of Dead Kel
First proceed north to reach Rathir, then deviate east to start near the lower city. Once in the area, enter the "Seafoam" tavern, located near the port. So go ahead, talk to Commodore Garrick - positioned in the right corner, in the back of the room, completely alone. After the quick conversation, exit the tavern and turn right, making your way forward to the end of the harbor. There you can interact with Brattigan, the captain. Once you have some information about your future proceed, enjoy the cutscene that follows.
Go inside and quickly talk to Brattigan, conversing about the destruction of the ship. Collect everything you can from the corpses, as well as all the objects near the wrecked boat to the north. So turn around and enter the cave visible to the south. Follow the next path, killing the giant rats that you will find along the way. So continue to follow Brattigan, along the same path. After Brattigan has placed the explosives in front of the checkpoint, try to back off for a moment to avoid getting hit by the huge explosion. So walk along the slope, then - at the crossroads - turn left. Kill the Scavenger located on the left, then continue along the next winding path, following it as it winds north. When you get to the next wall, try to back off waiting for the explosion - Brattigan will in fact pulverize the wall in front of you. So continue on, killing the ancient Leanashe. Recover all the gold in his pockets after making him a corpse. Continue along the path visible to the north. Kill the two Scavengers that go down about halfway across the bridge, then make your way forward again. Collect the contents of the crates on both sides of the barrier, then place the explosives in the mode that is clearly indicated on the screen.
Having pulverized the roadblock, make your way forward again. You can now destroy the huge rock on the right, locating a fair amount of crates, within which to take everything you can. Then head west, arriving at the final section of Gallows. Follow Brattigan as he makes his way into the village. Once in the area, you can go and have a conversation with Alder Malloi.
What Remains
Go talk to Brattigan, his location will be clearly marked on your map. After the conversation, move north to Scuttle Beach. Once in the area, you will have to fight Crudoks, along with a few other enemies, as you move west to reach Cliffbreak. After entering, go talk to Nina Malloi. After he agrees to join your party, retrieve the weapons from the container above. Turn around and go down the nearby slope. When you reach its end, turn around again and proceed south, going down another slope.
Kill the two Scavengers after turning the corner. Collect the contents of the crates on the right, continue down the path. You will find yourself in front of two other Scavengers, kill them and then recover the contents of the chest a little further on. Go down yet another slope, then retrieve the chest from the bottom of the small pool of water. Continue straight, enter the alcove on your right to find the Gallows End stone. Also take the nearby chest, then continue along the usual path. Enter the completely "open" area on the right, kill the group of Gortas, collect the contents of the chest and continue forward to locate Asa Arding.
After the rock pile is destroyed, head down the nearby slope and swerve south, now repelling Dead Kel. After the cutscene that follows, also eliminate the next group of Faer Gortas who will attempt to ambush you - knowing this, you will repel the ambush with speed and tranquility. So take everything you can from their bodies and the crates around you. Then quickly make your way back to the Cliffbreak Fasting entrance. Once outside Gallows End, go back to the harbor and talk to Brattigan, letting her know the conversation with Dead Kel - so enjoy the cutscene that ratifies the end of the mission.
Dark harbor
Go talk to Alder Malloi to start the Quest - you can find him near the harbor. After the quick discussion, proceed east to deliver the amulet to the Watcher, located inside Souldeep Fasting. Having delivered this amulet, examine the nearby chest and then exit towards Gallows End. North, talk to Quay, located at the top of the small mountain nearby.
After the quick conversation, swerve northwest to quickly reach Dark Harbor. Having reached the real "labyrinth" of bridges visible in the next area, you will know that you are in front of the headquarters in Faer Gorta. Fight through this headquarters to finally reach the entrance to the Dark Harbor. Once inside, you will have to proceed to raise the walls of the port by destroying the four gears that keep it locked. First, go straight, kill the two Faer Gortas on the left, open the chest. Proceed diagonally to the right, destroy the crates in front of the first gear, then attack the gear to cause its destruction. Repeat the same procedure for the next gear, so swerve to the right. After turning around, go up the nearby stairs and follow the path that proceeds to the left. Kill the two consecutive groups of Faer Gortas; therefore at the end of the path, destroy the last two switches in the area.
Leaving the Dark Harbor now, go back to Quay. There you will have to defeat Bloodgrin, who will summon Faer Gortas to help him, simultaneously using his scepter to try to hit you. Fortunately, his movement speed will turn out to be incredibly slow, so trying to always move, you will certainly be able to avoid all his hits and then finally defeat him. When his HP has zeroed, then press the keys in the sequence indicated on the screen, in this way you will be able to eliminate him for sure.
Following the fight, Quay will meet you near Dark Harbor. Ask him where Dead Kel is; after the quick conversation that will take place shortly thereafter, head to the boat to complete the quest definitively.
Video - Trailer
Until Death
After talking (for the umpteenth time) with Brattigan, make your way quickly to Souldeep Fasting. Once in the area, go talk to the Watcher. After hearing the news regarding Bridgette's madness, quickly head down the tunnel to the west. Go through the door of fate on the left. Jump off the platform, retrieve the chest inside the alcove to the right. Turn the corner and jump to the next platform. Pick up the chest on the right, then continue forward, then turn left. Destroy the crates in front of you to find a hidden pile of items attached to an ebony spear and the emperor's scepter. So take everything you can. After exiting, follow the path and kill the three Boggarts. Collect the contents of the crate near the left corner. Go through yet another door of fate.
Go up the nearby steps, grab the chest using the Dispel to neutralize the magical field around it. Drop down, then right, kill the two Scavengers. Collect the contents of the chest on the right to get a potion. Make your way through the next door. Go up the steps to the left, use the Dispel on the chest. Then turn to the right, eliminate the two Scavengers, go through the last door of fate. Turn left and retrieve the Gallows End stone, then turn right and proceed along the corridor. So take the contents of the two boxes, then go talk to Bridgette, who, as we said before, has now lost her mind. After asking her what Deal Kel talked to her about, you'll have to kill Bridgette herself, sadly.
During the fight, she will transform into a monster and also summon two Scanvengers. After this summoning, quickly kill the two Scavengers, also paying close attention to the purple fireballs that are fired by Bridgette: they can cause you serious damage. After Bridgette jumps off again, dodge the fireballs she throws and keep hitting her with direct attacks. Having finally reset her life points, move quickly towards her and complete the keystroke that will appear on the screen to KO her completely. So take everything you can from his corpse, go out to Gallows and then talk to Alder to complete the quest.
An Offering
You will now have to travel to the northern "tip" of the island, towards Aakara-Tor. There you will be able to find Brattigan again, climbing the stairs after passing the last bridge. After the conversation with Brattigan, proceed forward inside the Watcher ring. Chat with Dead Kel; soon after, you will find yourself dueling with the Baronet. Initially, it will be necessary to kill the two clones. Dodge the fireballs, thus using the magic attacks predominantly, thus killing the clones. Having eliminated them, the Baronet will teleport several times: we therefore advise against making combos, it is better to continue to rely on "standard" magic.
When your opponent's HP has zeroed, follow the on-screen prompts to defeat her - you'll basically have to complete a keystroke. So go talk to Quay. After selecting your favorite and / or preferable companion to go hunting for Dead Kel, descend into the maze of the ring. Go up the ramp, then go down the slope. Repel the three Urchins, retrieve the items inside the piles of debris visible along the path. Continue east following the usual path, kill the next two Boggards as you proceed forward. Eliminate the Crudock that will appear in the area, retrieve the objects from the heap on the right, continue to go down, rejecting the Leanashe. Using the altar of Gaea you can deactivate the spell that "covers" the chest near the right corner, thus recovering several fragments of objects.
When you reach the dead end, turn around and proceed to the left. Go up the north path, kill the two Urchins right after you turn the corner. Take out the other two at the top, then head down to the door on the right. Enter to kill the four Urchins, then turn right following the path that leads north. Go through the doors next to the alcove on the right, follow the path that proceeds forward killing the Bog Thresh near the next room. Examine his body carefully, then use the nearby Sigil stone to activate a spell. Now go up the stairs, turn right passing the doors, now open. Go down the nearby stairs, kill the Crudok. Go down another ramp, then turn left. When you get to the next area, get rid of the ancient Leanashe. Right, hit the chest, then keep going along the same path. Here you will have to battle with the Root Golem - a rather slow and not particularly awake subject. So run after him, dodging his hammers. When his HP has reduced to zero, use the keys that will appear on the screen to kill him definitively.
Go down the path to the south, hit the chest to the right. Kill the four incoming Faer Gortas, then the other two near the entrance that leads to the next area. Open the chest on the right to get some healing potions, proceed forward across the bridge and then talk to Akara.
The Exiles
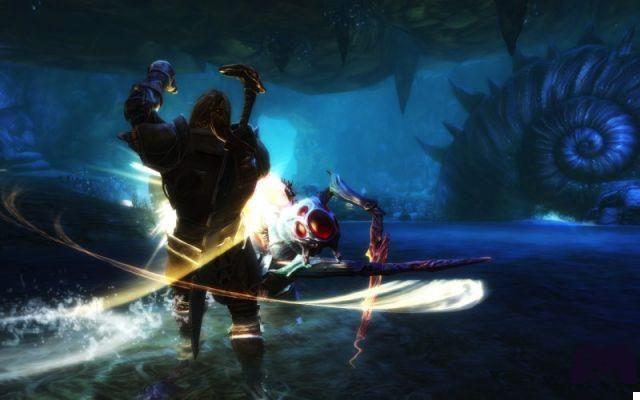
Dead Kel will suddenly appear, telling you that you must die. You can now start fighting it - it has two particular moves that are difficult to avoid, namely the attack based on the "spear" and a second attack based on the "sword" - the first is technically simple, it will simply move the spear towards you quickly and you will have to dodge it by moving sideways. The second, however, is more complex: the enemy will quickly slam the sword to the ground, you will have to move out of its range to avoid being "swallowed" by the black hole that will appear on the ground.
By successfully dodging these two hits, the rest of the battle will turn out to be very simple - you just have to be as aggressive as possible during the "break" moments between one hit and the next. Once his HP is zeroed, it will be necessary to complete one of the usual keystrokes to defeat him permanently. Then take the path to the west, while dodging the falling debris. Kill the Urchin right after you turn the corner, hit the chest near the alcove to the right. Go down the stairs, kill another Urchin after turning the corner again. Hit the crate on the opposite side of the ravine, keep going up the next path.
Once outside, make your way to the edge of the ravine and talk to your partner. After a cutscene, you will automatically return to the port: go talk to Quay to finally complete the Quest.
Gravehal Keep
Talk to Padrig Dower, near the north edge of Cape Solace - just before the bridge. He will tell you about a dream about Gravehal Keep - he will then ask for your assistance in understanding the underlying motivation. Then proceed to the fortress, north of the village. Once outside the walls, listen to Paddy's comments and then unlock the gate.
Enter the courtyard, get rid of the three Scavengers, also remembering to retrieve the objects in the chest nearby. After taking control of the Throne, you will have to defeat the Horrinox: it will be simple, remembering that its nature as an "ice" monster makes it weak to fire-based attacks. The quest will be considered completed after Horrinox's death.
Restoring Gravehal & Gravehal Armory & Gravehal Library
These are three very similar quests. In fact, you will always have to contact Paddy to proceed with the reconstruction of both the "base" of Gravehal, both the Armory and the Library. In general, what you will need can be identified among the following materials (to bring to Patty for each of the 3 items): 3 pieces of sailcloth, 3 pieces of amber wood, 2 pieces of beach stones.
In case you do not have the materials, the game will help you in a very obvious way, by marking on the map the areas where the materials you need are located. The construction of the "base" will take 3 days, while only one day will be enough for the armory and the library.
Gravehal Gallery
Also in this case it is a phase of the reconstruction project. You will need the following materials to be able to complete it (different from what we saw for the previous objects): four fragments of beach stones, three fragments of amber wood, 2 fragments of cloth for the sails, 3 fragments of sea steel. As explained above, if you do not have a sufficient amount of objects, the "source" areas will be clearly marked on the map.
Gravehal Tower
To complete this stage of the rebuilding process, Paddy will need the following materials: 3 pieces of beach stones, 4 pieces of bear skin, 3 pieces of amber wood, 3 pieces of sea steel. As usual, if you don't have enough material, it will appear clearly on the screen.
Master of the Keep
The quest will become available after completing the Gravehal Keep repair. It is made up of 17 sub-quests, each of which will be assigned to you by 17 different responsible parties (also called "Petitioners"). You can begin it by conversing with Padrig Dower; all sub-quests can then be started by sitting on the throne of the main hall.
- The first assignment will be given to you by the priestess Jacinda - she will ask you to locate the member of the brotherhood of Lyria who traveled on the same ship as Jacinda. First of all, you will have to look for Ceanna's body, located near the extreme north of the island, in the Jawbone area; from the corpse you can then retrieve the notice, which must be shown to Jacinda to complete the objective.
- The second assignment will be given to you by Ambrose Flora, the merchant of the fortress. She will ask you to retrieve some items she had hidden after she was shipwrecked on the island. The area where you can retrieve them will be clearly marked on the map, in the center of the north coast area. Having taken them, you can return victorious to Ambrose.
- The third assignment will be given to you by Cillian Keen. He will ask you for food, to raise more chickens. You will therefore have to take 3 pieces of meat; in general, you should already have that amount of meat, so the Quest can be completed immediately.
- The fourth assignment will be given to you by Zefwyn Lan. He will ask the Lord of Gravehard Keep to reach the lower part of Tidal Pools. To reach the Tidal Pools dungeon, your character will need to jump off the Gallows platform near Cape Solace. Arrived in this way inside the dungeon, you will have to proceed to eliminate the enemies to save Aled Powell; with his help, you can defeat the Root Golem and jump over the last two ravines, to finally reach the chosen play area.
- The fifth assignment will be assigned to you by Ollie Madsen, who wants to challenge the Lord of Gravehal Keep to a duel. The assignment will be completed after winning (or even losing, but without dying) the duel.
- The sixth assignment will be given to you by Padrig Dower, who asks for the materials needed to maintain your manor - these are two pieces of beach stones and two pieces of sea steel. In case you don't have enough material, Paddy will clearly mark the areas where you can find it on the map.
- The seventh assignment will be assigned to you by Calum Toomey, who will ask for assistance in resolving a monetary dispute. The debt is equal to 10000 gold coins - in general, depending on your persuasion capacity, you may be able to pay even nothing - or, with a particularly low level of persuasion, you will have to pay everything.
- The eighth assignment will be assigned by Deirdre Gwint, he wants to find all the legendary Dvergan-type stones present on the island. In the (rare) case that you haven't found them yet, they will be clearly marked on the map.
- The ninth assignment will be assigned by Benwick Athelm, who wants to recover a painting from the Mudhold area; to find the painting, you will have to descend until you reach the most remote depths of the fortress of Mudhold. There you will find it, next to a pile of objects.
- The tenth assignment will be assigned to you by Myfa Rhonwen, she will ask you for money to obtain clothes of higher lineage; he will ask for 7500 gold, but completing this objective will greatly increase your diplomacy level.
- The eleventh assignment will be assigned by Aled Powell: he wants to kill himself. It won't be difficult to avoid this extreme gesture - you just have to talk to him and try to make him feel better, telling him that you need him.
- The twelfth assignment requires interaction with Kail Murdagh, she will ask you for help to get the Nisarku out of the caves completely filled with water. You can actually locate the Nisarku near Castaway's lair, the area from which you came to the island - however, you will have to walk through the caves to gain access to this reality.
- The thirteenth assignment will be assigned by Adeline Kirk, she will ask you to bring a vial near Akara, to capture some of her "essence". To be able to satisfy this request it will be sufficient to position yourself near the "plate" that covers the entrance to that of Aakara-Tor.
- The fourteenth assignment will be assigned to you by Marten Strand, he will ask you to kill all his men, who have now become followers of Dead Kel. It will not be difficult, technically: the position of these men will be clearly marked on the map, you will have to head towards the marked areas and kill them mercilessly.
- The fifteenth assignment will be assigned to you by Bertrand Seznec, he will ask you to obtain three samples of Gallows pollen; retrieve them using the map as a reference, then bring them to him and wait a day (time needed to carry out the analysis), after which the mission will be considered as completed.
- The sixteenth assignment will be given to you by Erlen Vanik, he will ask you to kill a golem near the entrance to Scuttle Beach. So, head to Scuttle Beach and interact with the Golem, killing him.
- The seventeenth assignment will be assigned to you by Sunhilda Lorelle, who will ask you to accept her marriage proposal. After you have actually accepted, she will position herself in your character's room.
SIDE QUEST
Below is a list of the Side Quests included in this expansion.
Video - Second Trailer
An Infestation
In this case, you will find a married couple who asked for help. They want to kill the Scavengers who have positioned themselves in the Storm Point garden. You will have to follow them, trying to make sure that they arrive safely in the area. Immediately start running after them as soon as they move towards Storm Point. They will stop near the entrance to a small alcove, asking you to eliminate the Scavengers: before doing so, kill the animals around you, to prevent them from killing the two spouses.
So enter and eliminate the two pairs of Scavengers, preferably always moving and dodging their shots. When they are dead, talk to the Gwynedd to complete the quest.
Coveting Tragedy
Your goal will be to find Cadwallon (Nesta's husband) and Olaf, the latter being chased by Cadwallon himself. Both are proceeding towards Siren Den - the area is positioned along the north coast of Gallows Denn. Once there, you will find Cadwallon dying; after the dialogue, retrieve the knife from his corpse. Enter the lair, proceed along the path to the left to find Olaf, and kill him. Go back to Nesta to get the reward. Warning: in case you already know where the mermaids' lair is and you manage to run in its direction, you will be able to save Cadwallon. However, if you do so, you won't get any rewards from Nesta!
Justice Done
The objective of the quest is to kill the Scion, to make him pay for his betrayal. He is to the north, inside one of the ruins. Eliminate him, then retrieve Akara's clothing fragment from his corpse. Proceed to the north coast area to locate Tari Holstig and talk to him to complete the quest for good.
Scattered Fragments
The quest requires you to retrieve the fragments of the Aburey map in order to locate the treasures abandoned on the island by the Dverga. You can find in all four different maps, which can be assembled from the various pieces present along the game area. Below, we provide guidance on the positioning of these maps:
- The fragment showing the areas of the North coast is composed of three pieces: a first obtained from the quest of the north coast, a second recoverable from a chest immediately after the traps in that of Mudhold, a third to be recovered in the real meanders of Mudhold, eventually getting the Dvergan boots as a reward.
- The fragment showing the Scuttle Beach areas consists of three further pieces: a first will be given to you by Aubrey after you have recovered the previous treasure; a second can be found inside the "Undersea Fasting", in the box near the room to the far west; a third inside the "Undersea Fasting" proceeding along the walkway that starts from the tome room. You will get the Dvergan boots as a reward.
- The fragment showing the areas of Jawbone also consists of three pieces: the first will be given to you by Aubrey Gilcrest after you have recovered the previous treasure; the second can be recovered from the mermaid's lair by interacting with the chest in the far north; the third from "Souldeep Fasting", passing the door opened during "Until Death". As a reward, you will get a Dvergan armor.
- The fragment showing the areas of Cape Solace is always composed of three pieces: the first will be given to you by Aubrey, the second can be found in that of "Cliffbreak Fasting", the third near "Brigand Hideaway". You will get the Dvergan ceremonial helmet.
The Expedition
You will find yourself in front of an expedition of Gnomes that has arrived near Gallows End to recover a tome stolen by Papin Jamane. You will therefore have to head towards the Undersea Fasting; it is a rather linear dungeon. Pepin is right near the entrance, he will start following you after the conversation. You will find two levers to pull to clear your way forward. You will have to get rid of several Murghan and Scavenger in the meantime; reached the final door, you can open it and you will finally find the tome of Pepin. Unfortunately, he will immediately fall victim to a trap, effectively going to "impale himself". It is not possible to save him, so try to examine his corpse then, take the tome and return to Tancese to complete the quest.
The Prison Ship
A ship full of prisoners is adrift near the coast of Gallows End. You will find the only mercenary, named Olaf - stationary in a cage. To free it you need to find the key. The key in question is located above one of the crabs, inside the alcove visible to the west - finding it won't be too difficult, as there are only two alcoves in the area.
Having freed Olaf, he will run to Cape Solace. So go back to Nesta Gwynedd to complete the quest.
Ties that Bind
Your objective for this quest is to track down Angharad Glyndowr, currently located in the lower part of Mudhold. Proceed to go down, dodging all the traps in the area. Arriving near the lower part of this game area, Glyndowr will run towards you, thus starting to talk to you. You can then decide whether to kill Angharad or try to persuade her so that she comes back with you (this option is preferable, but you will need to have a good level of persuasion). So go back to Conrad to finish the quest and the game!
Video Solution - Playlist
Click here for the playlist!
Video Solution - Initial Phases
Video Solution - Central Phases
 Kingdoms of Amalur: Reckoning - The Legend of Kel the Dead x360
- x360
- pc
- ps3
Exit date: March 20 2012


