


Please note:
The solution is based on the US version of the game for Nintendo DS. There may be divergences from the Spanish version and / or for other platforms.
Green Grounds
Green Ground: Stage 1
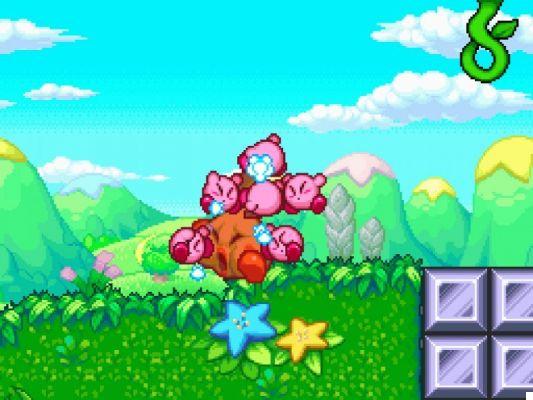
The initial stage of the level is basically a tutorial. After a first smattering of simple movements - running, flying - you will enter a new area where you will be instructed on how to destroy blocks first, and then defeat enemies.
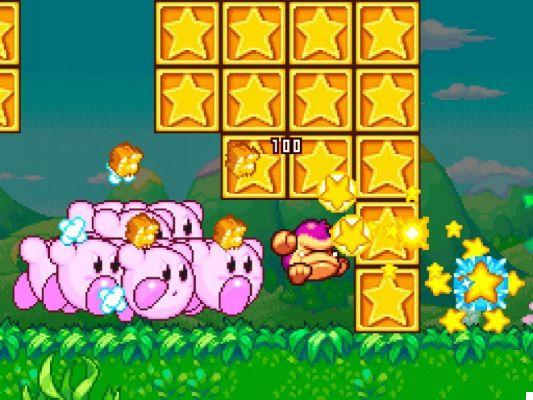
After going through another door, proceed by collecting the fruits and avoiding the boulders until you come across a large hanging fruit. Go past it and reach the tree where you can drop some fruit. Once you have reached the total of 100 fruits, you will gain control of a second Kirby. Shake the tree again until it collapses to the ground. Then collect all the fruits left on the ground and then proceed to the right to destroy the block that covers the exit door. Before leaving the level, you can go up to the raised part and collect the fruits necessary to obtain a third Kirby, with which you can now tear the vegetables from the ground and from the ceiling, thus revealing new enemies and new secrets. Continue further to the right and use the cannon to hit the bird, then hit the bubble further to the right revealing the rainbow leading to the exit.
Green Grounds: Stage 2
Hit the tops of large plants to cause them to collapse to the ground. Watch out for the bee and avoid hitting it as its arms rotate, instead waiting for the right moment to sink a blow. When you get to the plant that sways, wait for it to be at the lowest point to hit it and make it stay on the ground. Then wait for one of another color to appear in the series of red buttons to press it, then take the upper branch at the fork. In this area you get to know a new enemy, a bulb, but bombs will be the most concrete danger. Go through the door and past other plants and bees, then hit the brick with a key symbol on it. The large bulb that awaits you a short distance away is easily tackled if you have 4 or 5 Kirbys, which is very likely if you have collected all the fruit so far. Beyond the hill is the level exit.
Green Grounds: Stage 3
Step on the button with all the Kirbys to open the door, then have them run to the right to go through it before it closes. Hit the spider while preventing the Kirbys from being captured, then advance to the right freeing yourself from the spider and collecting the fruit until the cannon launches you into a new area. Get rid of the bird before it throws a spiked ball that can seriously injure the Kirbys. In short you will face a mini-boss, another bird, but the dynamics will be very similar to those of the fight just ended: just make sure to stay exactly under the bird so as not to be hit by the spiked ball.
At the end you will be transferred to a new area: here you can climb the cobwebs to get to the fruits.
Green Grounds: Stage 4
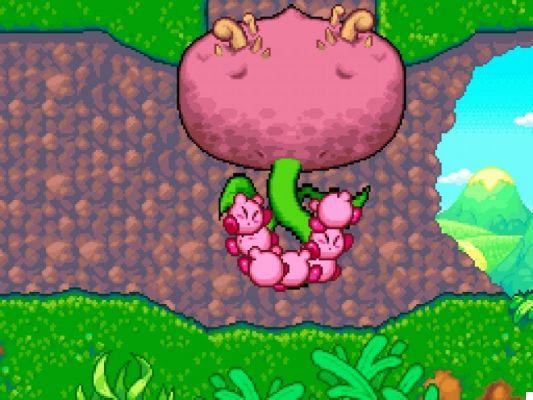
After dealing with the enemies and fruit, pull the hanging plant from the ceiling to access a new area. Then use the key you get, killing the enemies to open the chest. Beyond the door you find yourself stuck in an area with a plant: wait a few moments for it to transform before attacking it. Pulling it will then take you to a new area. Here, avoid the enemies, as you won't be able to hurt them, and the rolling balls. Break the blocks to face the monkeys on the right. Further to the right you find yourself clashing with a mini-boss. Wait for the bat to crash to the ground to jump on it. When you have eliminated it, cling to the plant that hangs from the ceiling, obtaining fruits and a cannon: touch the screen when it is oriented first to the right and then up.
In this new area, touch the screen with the stylus where the root emerging from the ground is, then press the icon on the screen. Go past the egg and continue to collect fruit until you reach the room where you find some vines. Grab one of them and drop down on the metal blocks to drop into a new area. The door on the right leads to the next level.
Green Grounds: Stage 5
Destroy the wooden block, then take the Kirbys to the platform-like to make it lower, revealing a new area of the level. Approach the metal block, then swipe the stylus to the right so that the rhino is destroyed by the block itself. Climb to the next block to make it lower, then run to be able to access the next area before the block rises. Use the cannon when it is at the lowest point of the screen, thus rubbing another rhino with cunning, then open the door.
When you reach the area where there are four bomb-spitting plants, fight them one at a time. Notice now that you can take out the Slugs by throwing the Kirbys. Further to the right, where you will feel like you are trapped, wait a few seconds to see an opening on the right. Beyond another door, you see the exit, but a rhino will move it and prevent you from going through it. Grab its tail and when the spikes are destroyed, press the center of the screen as quickly as possible.
Green Grounds: Stage 6
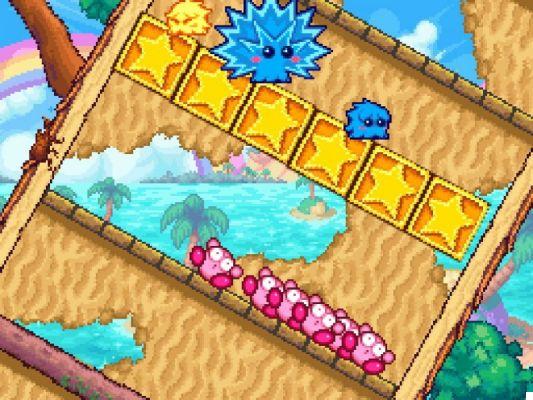
First, avoid bouncing off the trees, because as you can easily see this leaves the Kirbies stunned. Also, check out the new worm-like enemies that can be defeated by throwing the Kirbys where they emerge vertically. If the enemy-worm shows up wielding a bomb, make sure you don't throw the Kirbys at it. In the area with the red and green trees, just bounce against the first ones to reach the clouds, then wait for the bubble containing the door to appear and throw a Kirby at it to make it fall and cross it.
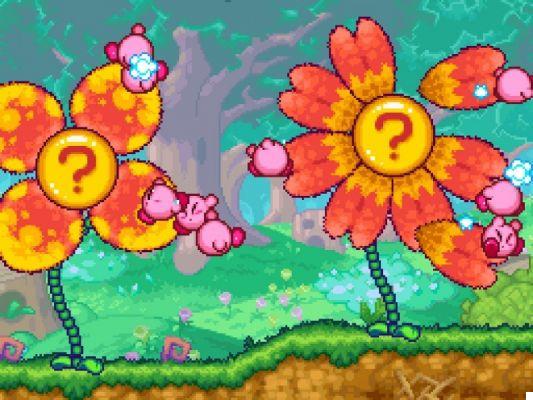
After going through another door, you will arrive in an area of the level characterized by huge flowers: hit every single petal to eliminate them. Further on, the flowers will have a particular poisonous petal, marked by the different color. At the dead end use the stylus to lead the Kirbys to the raised platform: before reaching the door in any case you will fall down thanks to a mole trap.
In the level section you get to, moles will start emerging from the walls. At first avoid the bombs and throw the Kirbys at the moles. Then be careful not to hit the moles protected by spikes. In short, a mole boss will appear, but his behavior will be completely identical to that of a normal mole, it will only take a few more hits to take him down.
Green Grounds: Stage 7
Throw the Kirbys at the buttons that emerge from the wall to make an elevator appear. Avoid the blocks as you go up, then take the Kirbys to the new area through the door. Here you have to throw the Kirbys at the puzzle piece corresponding to the one shown. Do this four times to complete the level.
Green Grounds: Stage 8
Note that if you stand by the trees for too long now, you will be thrown back, so try to run past these sections. Use the cannon to go through the metal plates. Beyond, pointed noses alternate with trees: pass only in the latter case. Then throw the Kirbys into the big tree and tap repeatedly in the center of the screen to make the plant explode and turn it into a raft. So use the raft to overcome the part on the water, but know that in some moments you will have to jump on the ground to avoid blocks and other pitfalls: however, do not lose the rhythm, otherwise you will not be able to get back on the raft. At the end of the path, throw the Kirbys at the tree to make it fall, thus creating a bridge to the new area.
Walk under the big enemy, trying to stay in the only point that guarantees your safety. Then grab the grass on the ceiling to get to a new area. Continue to the right, dodging the tree trunks, indeed using them to destroy the barriers. The cannon shoots you towards the exit.
Green Grounds: Stage 9
Break the lollipop at the beginning of the level to enlarge your Kirbys and make them invincible for a short time, which you will have to make the most of by pushing yourself as far as possible to the right. Then meet the mini-boss. Throw the Kirbys at the part of the boss-worm on which the exit door is represented which represents its weak point. Initially the worm only emerges from the floor, but after taking a certain amount of damage, it will begin to target from the ceiling as well.
Green Grounds: Stage 10
Throw the Kirbys into the water on the right, but keep an eye on the oxygen bar. Use the air bubbles to save more diving time. You can also find some inside the shells. The whirlpool that you encounter along the way throws you into a new area of the level. Kill the fish in the bubbles by throwing Kirbys at you. Don't forget to press the buttons on the ceiling to find fruits or lollipops with which to gain momentary invincibility. Beyond the door, find a metal block: drop it by moving it to the right, then push it to the left to make your way through the enemies. After passing a couple more bags, you find yourself face to face with a new mini-boss. To injure the turtle boss, simply throw Kirby at his stomach. The fight is not complicated, but you still have to keep an eye on the oxygen bar and dodge the jellyfish that the turtle throws at you.
Sandy Canyon
Sandy Canyon: Stage 1
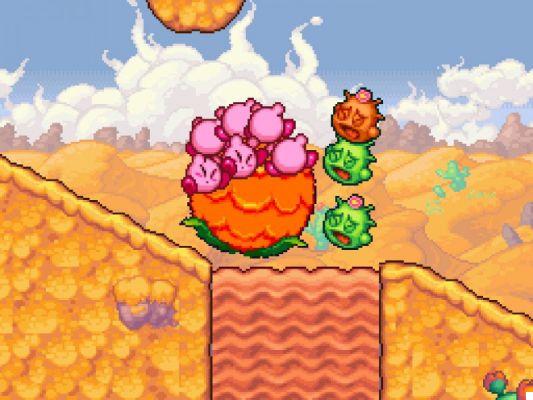
In this new world, leave with just one Kirby: to get others you will have to reap the rewards, as before. Also, notice how excessive staying on quicksand leads you to sink. Not only do you sink, but objects too, so be quick to grab them. Another novelty to report is the appearance of a new enemy, a cactus, which however can be defeated exactly like the others already met.
Sandy Canyon: Stage 2
Wait for the big cactus to stop swinging before hitting it on the head to kill it. Then note the clouds: these contain fruit in large quantities, which they release to the ground once you hit them with the Kirbys. Beyond the mid-level door, however, you will become acquainted with a hostile type of cloud: its rain will make enemies bigger and stronger, while lightning will occasionally try to hit you. To avoid inconvenience, try to finish off the enemies before the rain arrives. In fact, the cloud will follow you to the entrance to the next area.
Sandy Canyon: Stage 3
Hit the flashing button with one Kirby, do the same with the next one and continue like this until a door appears. Beyond the threshold, use a Kirby to pull the metal lever that raises the wall - be quick, because soon the wall will come down again. Then pull another lever and drop to the ground. Beyond the threshold, enemies will appear - these are concrete blocks that fall from the ceiling. Run to avoid their path. A mummy awaits you ahead: it will be as easy to eliminate as the other enemies, but be careful, as a few seconds after being hit, it will reform itself. Later you will also get acquainted with a larger variant of the normal cactus, which trembles after being hit: flee far away so as not to be injured. Beyond the door on the right, you will eventually encounter a mini-boss.
It is a cactus, to be defeated by throwing the Kirbys at its head. Be careful not to aim at the body, otherwise you will be hurt by the thorns. As you inflict hits on him, the boss's time on screen will be reduced; furthermore, towards the middle of the fight it will turn purple and spikes will sprout on its head: you will therefore have to wait for these to return to hit it again.
Sandy Canyon: Stage 4
Go past the quicksand, enter the lower door, then use the cannon to board the turtle. Then grab onto any flying object to damage the reptile's carapace and enter it.
Sandy Canyon: Stage 5
Go up using the elevator on the right and in the meantime, collect all the fruits without getting stuck between the objects. When the elevator has stopped, bring the Kirbys to the pump and quickly click on the center of the screen. Then get on the balloon and move sideways with the stylus to avoid obstacles. If you blow up all the balloons that keep you flying, you will fall and you will have to repeat this portion of the level.
Sandy Canyon: Stage 6
After a few steps in the level, you immediately meet the new enemy, a flying egg protected by a metal plate at the bottom. To eliminate him you will have to throw the Kirbys towards the white part. Pull the chain you encounter along the way to make the next area accessible. Beyond this area, the road will be blocked by a metal block that you have to move to the left to continue. Then grab the bird and pick up the ring it leaves on the ground after the crash, then hang the ring on the hook that hangs behind you to open a hole in the ground. Then push the wheel to the right, then hook all your Kirbys to the new hook you encounter to continue with the wheel to the mini-boss.
Your opponent is just a wheel. First, hit the Tikis on the left to be able to hit the boss effectively and undisturbed. Then aim for the blue point as long as you can, then return to focus on the Tikis, always to the left. Repeat this attack pattern until victory.
Sandy Canyon: Stage 7
In this level, let the sandstorm take care of the enemies. Take small steps and take cover as soon as possible to avoid damage.
Sandy Canyon: Stage 8
Get to know the new enemy immediately, a strange hooked eye. If it grabs one of your Kirbys with the hook, free it by hitting the enemy in the eye. Then dodge the cannonballs until you come to a hook that you have to grab onto with all the Kirbys to open a door. Send a Kirby over the threshold to defeat the egg-enemy, then use the ring the enemy leaves on the ground with the hook to allow the other Kirbys to proceed to the cannon that will launch you into the new area of the level.
Go up on the button to make a bomb appear that you have to push to the right; do the same with the next one until a mini-boss appears.
The eye ball with claws behaves exactly like the one armed with a hook you met earlier. To defeat her, push the bomb she releases under the hook to open a hole, then throw the Kirbys inside the exposed circle.
Sandy Canyon: Stage 9
Launch the Kirbys with the cannon and open the left door. Then grab the ring and run to the right, do the same with the next ring, then be quick to sneak away before the falling bricks hit you. Grab another ring to drop the floor and continue. Make your way by holding on to the rings until you come to a trio of doors. Open the one on your left and go down without getting stuck between the objects.
Sandy Canyon: Stage 10
Grab all the Kirbys on the first ring to start the sandstorm. As before, move extremely quickly so as not to be overwhelmed by the sand, moving from one door to another.
Sandy Canyon: Stage 11
Grab the top edge of the cage and tap the center of the screen as quickly as possible. After that you will be transferred to an arena where you face an egg: be careful not to hurt the birds.
In the next area pay close attention to the correct balance of weights. Then cling to the hanging root to make a new enemy appear that you must not touch for any reason, under pain of instant death. Move right up the hill and guide the Kirbys over the chasms using the stylus.
In the next area, hang at the root to open the door, then escape the enemy by heading to the door on the right. Then use the cannon to reach the end of the level.
Sandy Canyon: Boss
Move sideways to avoid being bitten by the carnivorous plant when it emerges from the ground. Then move to the other side to drop the platform on the boss's head. After the first hit, you will also have to worry about the enemies and objects that the boss throws at you. Finally attach the exposed bulb of the plant to finish it off.
Dedede Resort
Dedede Resort: Stage 1
Simple mini-game: launch the Kirbys at the bubbles to collect the rewards. Just make sure you avoid the bombs.
Dedede Resort: Stage 2
Pinball-like mini-game. There is no way to lose, so have fun.
Dedede Resort: Stage 3
Surf mini-game: collect the fruits and avoid the spikes.
Dedede Resort: Stage 4
Launch the Kirbys at the image corresponding to the one shown. Be careful because if you make a mistake, you will be bombarded by enemies.
Dedede Resort: Stage 5
Swim in circles until the enemy shows his tongue. Then hold on to the tongue itself and tap on the center of the screen until a door appears. Advance to the right, collecting the air from the bubbles. When you get to the mini-boss, grab onto the looped tentacle and tap the center of the screen very quickly. Immersed in the current, just worry about avoiding obstacles up to the pair of doors. Open the lower one and run to the right simply avoiding the enemies. In this section, the screen scrolls by itself, so be concerned with progressing rather than knocking out enemies.
Dedede Resort: Stage 6
Hit the bubble that contains the door, then hit it again before it hits the ground five times to finally be able to continue. Swim to the right. Be careful when dealing with moles: as long as they have not thrown the spike balls they will be invulnerable.
In the next section of the level, huge blocks appear that you can rotate by standing on either side, revealing a lot of fruit. Further on, an octopus appears that you can eliminate by clinging to the ringed tentacle.
A mini-game will then be activated: repeatedly tap the center of the screen when the line ends below the water level. After getting the door to continue this way, jump into the cannon and quickly swim to the right, avoiding the torpedo enemies that can't be hit. Beyond the door a mini-boss awaits you.
Initially all of your Kirbys are absorbed by the boss, except one. Let this cling to the compartments that make up the boss to free his fellow men. In this way you will also destroy the compartments themselves: pay attention that during the course of the fight some compartments will be covered with spikes and therefore cannot be hit.
Dedede Resort: Stage 7
Move inside the pirate ship waiting for the moment when the currents have subsided. Cling to the wheels to make doors appear or make platforms move. You basically have to move very quickly to the right, paying attention to the movement of the water. Beyond the cannon, you face a bat that can be defeated by having all your Kirbys cling to it. The red wheels that appear at this point in the level, unlike the blue ones, lower the water level.
Then face a mini-boss: first throw the Kirbys at the armor to destroy it, then cling to the enemy himself to injure him.
Dedede Resort: Stage 8
As you move into this winter level, you have to light the bonfires you encounter along the way. To do this you will have to be quick so that the Kirby's torches do not wear out along the way. When you arrive in front of a huge moving block, hit it with the Kirbys, then escape as it flashes to avoid being crushed.
Dedede Resort: Stage 9
Press the button to take on a huge ice T-Rex. You can't hit him - all you can do is run away from him, and dodge the free-falling ice objects. Finally, press the button you reach, after a reckless run to the right to get rid of the dinosaur threat.
Dedede Resort: Stage 10
Throw your Kirbys at the penultimate portrait of Mr. Dedede to make a door appear, go through it and proceed to the elevator on the right that leads to a mini-boss.
To get rid of the giant mouse, throw the Kirbys at the shield to destroy it, then hit the mini-boss like a normal enemy until it is eliminated.
Dedede Resort: Stage 11
Hit the bell to make the bird carry you to an area full of falling trees. Climb them quickly paying attention to the balance of the weight to get to the top where you will have to ring another bell. This activates a simple mini-game where in flight you have to avoid enemies and collect the rewards.
Dedede Resort: Boss
King Dedede will target you with bombs contained within bubbles. When the bomb is about to explode, throw a Kirby at the bubble to make it crash into Mr. Dedede. After a few hits, the boss will fall to the ground: take advantage of this moment to hit him directly with the Kirbys. Repeat this sequence until Mr. Dedede is defeated.
Volcano Valley
Volcano Valley: Stage 1
The first novelty of this new world is lava. Unlike other games it doesn't kill you instantly, but if you accidentally fall into it you can run for cover by immersing the Kirbys in water. Also, some enemies breathe fire this way. To deal with the lava enemies, simply pop the pockets of water above them to make them vulnerable to your blows. In the same way you will have to solidify the large lava pools that you will not be able to cross with a simple jump. As elsewhere, pull the root hanging from the ceiling to access the second part of the level. Avoid the monsters and spin the wheel to solidify the ground. Finally, the enemy eye remembers those previously dealt with: hit it only in the eye area, paying attention to the quills.
Volcano Valley: Stage 2
Use the cannon to enter the tank - the number of bullets you have depends on the number of Kirbys you control, as the Kirbys will become bullets themselves. They will re-enter the tank shortly after being fired, effectively reloading the cannon. Try to hit the incoming missiles and the objects blocking the passage: the vehicle can withstand a maximum of four hits before exploding. Blue cans restore the tank's health bar. During the final mini-boss fight, try to hit the colored buttons, without being reached by the missiles.
Volcano Valley: Stage 3
At the beginning of the level you will have to prevent the volcano's lapilli from hitting the Kirbys or the ground, destroying it. When the right wall is destroyed, you can finally proceed to the second part of the level. Move quickly to avoid the flying rocks and reach the elevator.

Volcano Valley: Stage 4
Quickly take out the flying pig before its blast of air pushes the Kirbys into danger. Also avoid the windy currents that constantly bring you back to the beginning of the level. The second part of the level takes place in diving.
Volcano Valley: Stage 5
Pay close attention to the carnivorous plant when it flashes, as it only takes one bite to kill a Kirby. Also, you can't kill it, just avoid it. Skulls and coffins, on the other hand, can be destroyed in the usual way. In the area where the lava rises you will need the Kirbys to move the wheel very quickly to move faster than the glowing river below you. When the big spike appears, let the platform sink, wait for the spike to move sideways on the screen, then resume your position in the blue wheel. Finally, enter the cannon on the right when the platform has finished moving.
Volcano Valley: Stage 6
Grab the red bow and continue to the next section of the level. The feature of this stage is the light / dark alternation. In general, in the light you will be safer, the passages will be clear and the enemies less aggressive, while in the dark things will get more complicated. Use the various buttons scattered around the level to illuminate the areas you pass.
Volcano Valley: Stage 7
The darkness in which the level is generally immersed is occasionally interrupted by the glow of a lightning: wait for these moments to get a better idea of where to go. Further on you will find a huge block in front of you: initially throw it at the Kirbys, on the wooden wall, until it rotates, then stop, wait for it to change sides again because throwing the Kirbys on the metal wall will not get any results. Further on, pay attention to which door you choose, as in moments of darkness the two thresholds will swap positions. The same mini-game will be repeated later.
The final mini-boss is a shadow from which you can only escape until you find a ring hanging from the ceiling: pulling it will bring up Shadow Kirby who will take care of the shadow.
Volcano Valley: Stage 8
Throw the Kirbys at the punch that pushes the walls to free yourself from the bad initial situation. Your goal now is to climb up the tower, balancing its balance as in the tree level discussed above. Climbing up the building, you will have to face the wife and children of the fist dealt earlier.
Volcano Valley: Stage 9
To enter this stage you must have previously completed stages 8 and 11. Move the gravestone to the right and go down to find three doors. The one on the left leads to a previously addressed mini-boss, the eel. The central door hides another mini-boss already faced, a large worm. Even the third and last turns out to be a passage towards another fight with a mini-boss, also this one already faced: the secret to success is to keep the plan in balance, destroying the excess weights.
The final door finally hides a new mini-boss. The bat is protected by metal armor, which it will however destroy itself by crashing to the ground a couple of times. At that point you can hit it. Pay attention to the appearance of other bats in the course of the fight.
Volcano Valley: Stage 10
In the early stage of the level, a group of aliens steal a blueprint that you need to recover. Parts of the project are scattered behind the three doors, blue, yellow and orange. In these three parts of the level you will be called to put into practice what you have learned so far: you move from moving the blocks to the underwater sections to alternating light / shadow. Nothing new, in short.
When you have reassembled all the pieces of the project, go back to the place where it was stolen. Hit the exclamation point bubble, then throw a Kirby at the wrench and tap the center of the screen repeatedly. Finally, throw the Kirby at the three buttons, corresponding to the three cannons, to defend the ship from debris and meteorites. Use the same technique to target the spaceship when it comes within range, paying attention to the right moment when you look for an opening in its defenses. Watch out for umbrellas reflecting blows against you.
Volcano Valley: Stage 11
This is the direct continuation of Stage 10. After the destruction of the ship, the Kirbys will move in space: little changes from the water levels, if not a greater slowness in the movements and the inability to drown.
In the second part of the level gravity will return, with the exception of the final phase where blue buttons will allow you to reset it momentarily to reach higher points.
Volcano Valley: Boss
Destroy any debris that the volcano spits into the air to prevent it from hitting you or the platform you are on. Then jump into the cannon and shoot the boss when he is in the right position. After a few hits you will repeat the previous pattern, but this time you will have to collect the debris in a large cup. The cannon phase and the cup phase will alternate until the boss is defeated.
Necro Nebula
Necro Nebula: Stage 1
This is a repeat of the fight with the first world boss, Green Grounds. Refer to that paragraph for strategy.
Necro Nebula: Stage 2
This is a repeat of the fight with the second world boss, Sandy Canyon. Refer to that paragraph for strategy.
Necro Nebula: Stage 3
It is a repetition of the fight with the boss of the third world, Dedede Resort. Refer to that paragraph for strategy.
Necro Nebula: Stage 4
This is a repeat of the fight with the fourth world boss, Volcano Valley. Refer to that paragraph for strategy.
Necro Nebula: Boss
Wait for the skull to hit the ground four times, thus getting stuck. From then on, you can throw the Kirbys at him to injure him. When the hand has formed a target, direct the Kirby's throws there until the hand collapses to the ground. Then enter the red bulb to go to the next stage.
In zero gravity, try to grab onto the boss's four weapons before they are used to destroy them. Then avoid the big ball of energy, then grab the boss's eye until he starts to shake. So run away to avoid being hit by the laser. Then deal with mini-skulls as you try to grab the boss's eye again. Keep it up until the boss is defeated.
Congratulations, you have finished Kirby Mass Attack!
 Kirby: Mass Attack ds
- ds
- WiiU
Exit date: October 28, 2011


