


Please note:
The solution is based on the US version of the game for 3DS, so there may be some differences compared to the Spanish version.
Prologue
After waking up from the dream, leave your home and talk to Grì, who wisely suggests you save at the nearby placeholder, while adding the first marker to your map. Follow the boy to the blacksmith's shop, his father, where you discover that the distracted captain of the guards has forgotten his trusty sword. Overcoming the distrust of you, the blacksmith entrusts you with the task of returning the sword to its owner, marking Hyrule Castle on the map to help you find your destination. Take advantage of the tranquility of Hyrule if you want to do some exploration before heading to the castle.
Once on the spot, events precipitate quickly. The captain is not at the castle, but at the sanctuary located higher and to the left of the place where you are. After talking to Sered and Dampé, you find yourself stuck outside the sanctuary. The only way out is through the graveyard where the dead are coming back to life. Luckily you have the captain's sword: don't hesitate to use it to make your way. So look for the only tombstone that you can move to access the underground dungeon and immediately collect the lantern from the chest. Use the oil lamp to light the two braziers on the sides of the door causing them to open, then walk past the closed door and go upstairs where you find a key inside a chest, then retrace your steps. Beyond the open door with the key you just won, use the lantern to spot the enemies floating around you, then reach the last room where there are two levers: the one on the left opens the way to the sanctuary, the one on the right makes you fall snakes in the room.
After the cut-scene Link wakes up in his house in front of Lavio, a bizarre merchant. In the course of the dialogue that follows, therefore, allow the man to use your home as a convenience store, receiving a bracelet in exchange, then head to the castle to warn Princess Zelda. After observing the strange murals that counterbalance the works of art inside the castle, Impa guides you upstairs in the presence of the princess, who will ask you to find the sage Sahasrahla at the Kariko Village. The wise old man occupies one of the houses in the Village, in the northern area and once he hears Link's story he reveals himself rather worried about the fate of his aide sent to investigate the East Palace.
The East Palace
What awaits Link on the horizon is the first real dungeon of the game, but before embarking on this challenge it is good that you explore what the Kariko Village has to offer: in particular, the purchase of the very useful shield sold by the merchant is highly recommended. local for the modest sum of 50 rupees. Before leaving, it may also be useful to visit the fortune teller to the north to receive the Mystical Glasses with which to turn to the spirits in case of need.
When it seems to you that you have carried out every preliminary action, you can set off towards the destination indicated on the map, to discover at the end of the journey that your walk has been in vain: the doors of the East Palace are barred, while at their side they stand out two columns on which an arch is represented. Retrace your steps and go to your home to ask Lavio for clarification, who will show you the practical system for renting objects that characterizes this chapter of Zelda.
At the end of the explanation you will therefore have the right tool to finally open the doors of the East Palace: throw two darts from the top of the platform in the direction of the two globes that act as switches and immediately cross the doors of the building. After meeting Osfala, Sahasrahla's aide, save at the nearby placeholder and go into the maze of the structure.
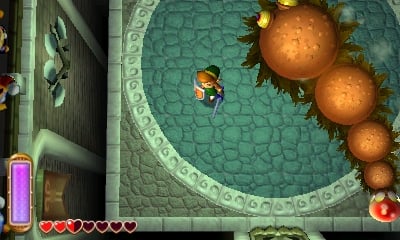
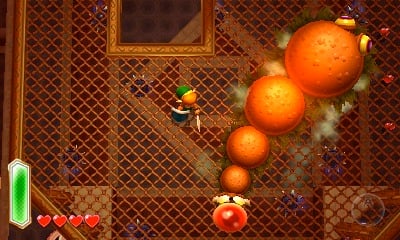
Inside the dungeon, walk on the protruding tile to open the door on the right that hides a chest. Back at the entrance, hit the globe beyond the chasm with an arrow: in the next room you find another switch on the left that opens a door behind which some rupees are hidden, but your real destination is further ahead. Avoid the rolling balls by studying their movements, then take advantage of the niche to escape their bigger pop. Then go down the stairs to the left and pound the tile to open the passage.
In front of the moving pillar, hit the left sphere with an arrow as it descends, then aim for the right sphere as it rises. Collect the key that appeared in the chest and return to the central room. Now go left, resisting the onslaught of the enemies, and open the chest that contains the compass: this object reveals the location of chests and doors on your mini-map. Go back to the central hall, step on the south tile to open the passage, and go up to the second floor. Moving once more on a tile, awaken the statues at the entrance. After going through the hall of arrows, go up to open the south door, then avoiding the new traps go left, avoiding other rolling orbs. Use the ladder on the bottom and run upstairs in front of the rolling sphere to go down on the opposite side always avoiding being crushed. Then step on the tile on the left to enter the room that precedes the fight with the boss: to open the doors hit with the arrows all the spheres / switches in the room. To get the better of the sorcerer hammered from distance with the arrows, then approach and rage with the sword when he is stunned. His attacks follow a predictable script at this juncture and are easy to avoid after observing them once.
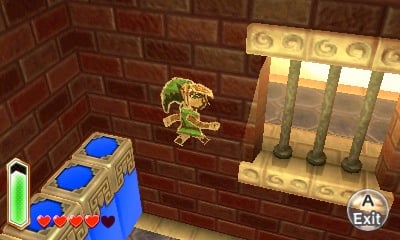
To exit the temple, at the end of the battle you will have to immediately put to use the power you have just obtained, that is the transformation into a two-dimensional drawing. Flattening yourself on the wall, reach the crack in the back of the room to reenter to the left. Back on the west side of the temple, go down using the platform and then enter the wall when possible. In the next area, wait for the two moving parts to come together to exploit the surface of this bridge to which you can adhere in two-dimensional form and thus reach the exit.
Finally, head to the castle to find that magical influences prevent you from entering. To break the spell it is necessary to get your hands on two pendants that are located in the Tower of Era and in the Palazzo del Vento. But wait before you head headlong towards one of the two destinations: whatever your first stop, you will still need a couple of items.
Fins, gloves and sandals
If you do not believe our words, try to reach the Palazzo del Vento independently: even with all the good will, your excursion will have to collide with the fact that Link at the moment still cannot swim. As advised by the strange fitness obsessed person you have no doubt met near the Palace, the only way to learn how to move in the water is to ask the Zora for advice, whose refuge is in a cave to the north-east, hidden behind. a waterfall. Proceeding in that direction, after crossing a bridge, you will be stopped by a witch, Irene, who will offer you her services in case you need to move quickly between one placeholder and another. Keep a mental note of this possibility and continue, flattening yourself on the wall to make up for the absence of the bridge.
Arriving at the waterfall that hides the entrance to the Zora cave, you will see a mysterious figure emerge who vanishes in a hurry. Enter therefore to discover that he was a thief and that his theft of the smooth stone has transformed the queen of the Zora into a huge creature. Now the hapless ruler is stuck in the room due to its size. So go hunting for the thief by running towards the Kakariko Village. The villain is not difficult to spot, but every time you get close he will run away: to surprise him flatten yourself on the wall of the house behind him and pop out at the last, precluding any possibility of escape. Once trapped, the dishonest will give you his Pegasus boots, objects that allow you not only to sprint, but also to crash into trees and stones, an event that will incredibly come in handy during the game to collect the Miamai puppies.
But what became of the stone? The thief sold it to the village merchant: you will need 200 rupees to buy it back, but it's money well spent. In fact, to reward you, the queen of the Zora will give you the gift of fins with which you can finally access the Wind Palace. To reach the tower of Hera instead you need gloves that allow you to lift the smaller rocks scattered around the scenario: you can get your hands on them by helping the Red at his mine which is located north-east of the Sanctuary.
At this point all that remains is to embark on an adventure. But be careful! To complete the two dungeons that await you you will need some specific objects that your faithful Lavio is ready to rent you: therefore, equip yourself with a hammer if you are heading to the Tower of Hera, or put the wind rod in your backpack if you intend to explore the Palace. of the East.
East Palace
Once you enter the building thanks to the wind rod, step on the switch thus starting the two fans. Using the wind wand now, get up in the air and let yourself be carried away by the draft, then in the next room jump into the chasm on the right to hit the switch and lower the right side. Back at the chasm you were in before, cross it by entering the wall in the form of a drawing to reach the door on the right: beyond it a series of enemies on fire await you. After defeating them using the wind wand, collect the key and exit through the upper right door. Move carefully, avoiding that Link is thrown into the void by one of the fans, and deal with the enemies in the room, then press the switch to turn off the fans.
Back in the main room, take the door at the bottom right: here you will have to press Link on the wall to allow him to climb on the moving blocks. One leads to the chest with the compass, another to the staircase that allows you to go up to the upper level. Before exiting to the right, remember to turn on the switch that turns on the fan. Do the same once you get on the walkway and use the airflow to reach the other walkway.
After collecting the rupees in the chest below you, head back to the main hall. At this point, move to the right on the walkway, then squeeze on the wall to reach the other walkway that leads you to the switch of the large central fan. Launch yourself above the current of air and go up to the second floor.
Up there, get past the spiked rolling bar using the wind wand, then drop down and destroy the jar on the right to reveal a button that, when pressed, will drop a key on one of the ceiling beams. To collect it you will have to enter the room on the right, defeat the enemies, go up the stairs and crush yourself on the wall to get to the beam. Then go out through the door at the bottom that leads to the external area of the building. There, move to the left and take advantage of the switches to get rid of the enemies. Then look for the switch on the far left to activate a platform that you can climb up using the wind wand. Then go up to the balcony on the right and pull the lever to get the big key, then use the moving platform to get to the locked door. There, enter the wall to move to another balcony on the left: pulling the lever will bring up a chest surrounded by flames inside which there is a key. Use it to open the closed door seen earlier.
Beyond the threshold a battle awaits you with two enemies on fire: use the wind wand to extinguish the fire, then hit them, being careful not to stay too long in front of them to avoid the charges. When you are done, go back to the central hall on the second floor. Moving under the walkways, go down the stairs and open the first door on the left. Here pay attention to the sequence of switches to step on so as not to be thrown into the void. Start from the second on the left, then the one above the platform you are moving on and again the one at the top to get to the door. Now move to the top of the screen to get to the switch that stops the fans, allowing you to move right again to another room. Head up the stairs and dash downstairs to face the enemy, who you can only hit when he opens his eye. Press the switch that activates the platform, then return to the ramp and enter the wall to get carried away by the moving platform and activate the switch of the large fan.
Go up to the third floor, press on the wall to avoid the air flows of the two fans and reach the room at the bottom left. After defeating the enemy, light the two braziers to open the door on the left, then move on and go down below to face two enemies. Once again you will have to put out their flames before you can hit them. To open the chest that appears at the end of the fight you will have to go back to the point from which you launched. Then open the last locked door and climb the platforms with the wind wand to get to the boss fight. To hit the big monster that you are in front of you will first have to climb on its back using the wind created by the wand and then hit it in the eye. After a few hits it will become too big to climb. At that point you will have to hold the sword and deal about ten blows to reduce its size. Being careful not to end up in the abyss, you shouldn't struggle too much in this battle. Having earned the victory, get ready for the next dungeon.
Tower of Hera
After setting the 3D switch on your console properly - this dungeon relies almost entirely on the sense of depth! - you are ready to go in search of the last pendant. Do you have the hammer with you? If yes, use it to hit the faces, otherwise go back to Lavio to rent it. Then use the switch to raise the gates, then climb on one of the faces on the left, previously crushed with the hammer, to be thrown on the upper edge. From there squeeze on the left wall and continue to the platform on the right where you can launch to the upper level using the faces again. Escaping the enemies, who can throw you down with a single shot, reach the center and go down to the lower level to open the chest with the compass. Back on the second floor, go to the left side of the room to go up to the third. Enter the wall and move to the blue switch that opens the gate then hit one of the switches again to be thrown over where the key is. Use it to open the door on the right and find yourself outside. As you move across the platform, get rid of the crows. On the way you will have to use the power of adhesion to the walls to stay on the platform.
Back in the Tower, get rid of the enemies, then hit a face to be thrown upstairs. Here lower the gate, climb on it and make it go up to be able to adhere to the wall and exit the window. Climb to another platform avoiding the spikes and adhering to the surfaces that block your passage. Then jump onto the platform that goes up. Back inside, get rid of the skeletons, after which use the pillar to go upstairs. Here the cracks in the floor signal that a hammer blow will create a passage to the lower floor: move to the upper left corner and deal a nice hammer to the ground to fall on the platform below where the key that opens the nearby door is located. on the left. Again outside, calculate the time it takes for the face to hurl yourself upward to land on the platform that passes above you. Continue in this way until you reach the ninth floor. Immediately raise the shield to protect yourself from the whirlwind of tiles, then climb onto the platform to carry honeycombs to the upper level. Here you will have to extricate yourself from a sea of enemies to activate all the switches before you can hit the big face that throws you on the eleventh floor: resign yourself, you will probably fall and have to retrace the road several times to this point. On the eleventh floor, however, calculate well the two jumps to the right and left to grab the key and open the boss door.
If you've played A Link to the Past, this boss will sound familiar to you. To defeat him, all you have to do is hit his red end and avoid his repeated attempts to throw you under. If you fall, you can go up using the different faces that frame the lower structure, obviously paying attention to the spikes. The only difficulty of this fight is given by the increasing speed of the boss as his life force decreases.
At the end of the battle you will finally be in possession of all three pendants. You just have to go in search of the Supreme Sword.
The Supreme Sword
Remember where you left the Master Sword at the end of A Link to the Past. No? Okay, we'll guide you. Reach the Lost Wood, in the upper left of the map. You will soon be joined by a group of Poe. Now you will have to pass three skill tests, illustrated by the Poe themselves. You will first have to take the direction in which the Poe speaking to you will move, then choose the path that is not followed by the two Poe who turn to you, finally identify the correct passage, that is the one that will not be taken by the three Poe who try to cheat you. In any case, you have all the attempts you want if you end up deceived by the circle of the Poe. When you have found the correct path you will finally reach the pedestal on which the mythical sword is located. Before returning to the castle, stop by Lavio to find out that now, for a few more rupees, you can also buy the objects on display on the counter.
Hyrule Castle
Now that you wield the Master Sword, you can break the spell that has so far prevented you from entering the Castle. First, quickly add the upper room via the external passage above the walls. There you will soon find yourself face to face with an enemy wielding a metal ball tied to a chain. Take on him from a distance using your bow or other wide-ranging weapon, then dispose of the guards in the adjacent room and head up. When you get rid of another squad the gate will open, giving you access to a corridor full of statues that will soon come to life. Defeat them and go through the balcony to go upstairs, just in time to witness the sad fate of Zelda.
Pursue Yuga upstairs taking care of the guards in the run up until you are once again face to face with the sorcerer.
The clash is the same as the previous one, only this time Yuga doubles and you will have to establish in a short time which of the two sorcerers is the real one. After defeating him again, chase him around the castle rooms. The race will lead you to a room where a cloth stands out: tear it up with a blow of the sword and observe the strange crack in the wall. Entering this passage you will find yourself for the first time in Lorule.
Lorule
Lorule Castle is very similar to Hyrule Castle. So follow Yuga into the lounge and watch the cut-scene that reveals key events for understanding the plot. At the end of this sequence in which you learn the importance of the seven sages, you awaken in a different blacksmith's house than the one in Hyrule. Beyond the threshold, the world of Lorule awaits you. There are seven dungeons to explore in any order you like, but also plenty of other interesting places to find rich loot. While exploring, you will find several passages connecting the two worlds, whose presence will be reflected on your mini-map. So take all the time you need: when you feel ready, move on to the next chapters in which we will deal with the seven main dungeons.
The Dark Palace
While Lorule's seven main dungeons can be tackled in any order, this dungeon is arguably the simplest of the deck, so we decided to explore it first. In case of course you have made other choices, find the guides relating to the other dungeons in the paragraphs below.
After renting the bombs from Lavio, enter one of the portals around the East Palace to go to the world of Lorule. To access the actual temple you will have to go through the palace of the Guards: observe their cone of vision and use the power to enter the walls to move unnoticed. If seen you will be sent to jail, but going through the bars and escaping will be child's play. Don't give in to the temptation of rupees for now: when you leave the dungeon you can move as you like without the hassle of the guards.
From the main room, drop a bomb on the switch on the left, then run to the platform in the center which will move after the explosion. Enter the next room and press the button on the left side to get a key, then before exiting don't forget to place a bomb near the crack in the wall to create a hole through which the light can pass. In the adjoining room, avoid the rolling obstacles and destroy the tiles where there is a crack to go downstairs and retrieve a key. Back upstairs move to the room on the right and free it from the enemies, then go down using the platform, move to the right and break the floor: in the lower room you will have to use the shadows to see the platform on which the key is. Then enter the room on the left. In this sort of labyrinth you should move in the form of murals attached to the walls to take advantage of the narrow passages and avoid the flames that the monsters blow. Your destination is the skull in the upper left under which a button is hidden: press it and a key will appear in the lower left.
Now go back to the room where the pillar is located, go up and from there throw a bomb on the wall below to open a secret passage, then take the walkway on the left that overlooks the rolling objects up to the room on the far left of the floor. Here you have to hit two switches almost simultaneously, even if they are on different floors. To succeed in this attempt you will have to take advantage of the movement of the pillar with timing. With both switches activated you will finally have access to the chest that contains the compass. Once this is done, go back to the main hall and go up to the second floor.
After studying the functioning of the revolving walls that can be activated via the switches, start destroying windows and parts of the floor to allow the rays of light to filter inside the building until they reach the two globes on the lower floor. Once the work is complete, you can return to the floor where the door leading to the boss is located. There, open the left door and drop bombs on the switches as you move across the platform to get the big key. Then defeat all the enemies to make the waypoint appear, then open the door at the bottom and enter the wall on the left to get to the last switch before the boss fight.
To defeat the big opponent in armor you will have to make sure that the braziers remain lit, since in the darkness the enemy is invincible and hammer him with bombs in full light, taking advantage of the moments of partial stun to sink a few more close shots. Throwing bombs in its path can be an excellent idea to get to victory as soon as possible.
Marsh Palace
The entrance to the Palazzo della Palude is blocked by a large boulder. To get it out of the way you will have to buy the bomb flower from the shop located at the top left of the map with respect to the swamp, just below the Village of Thieves. Then walk the flower up to the boulder, making sure it doesn't get hit, and blow it up nearby. The disappearance of the boulder will make the water flow freeing access.
After going down the entrance stairs you find yourself in front of a partially flooded room. Before proceeding make sure to adjust the 3D to your taste, as depth perception will be very important when exploring the dungeon.
First grab with the harpoon (don't you have it in inventory? Visit Lavio and come back at this point) the lever on the opposite side of the room causing the water level to rise, then swim across the room. Look around, notice the enemies, including those that can be extracted from the shell using the harpoon, and the lever that adjusts the water level is currently too high to reach. So move through the door on the right and here adhere to the wall to reach the opposite side. Use the floating boards to get to the stairs and up. Drop to ground level and watch out for the current, using the harpoon to get to the south switch that stops the waves. After collecting the key, proceed to the room on the left where the compass is located. Still on the left you find yourself near a key that you cannot reach. Use the harpoon to move on the mini-raft and collect the items scattered in the chests, then advance by accessing the door in the lower left. In this room, moving with the harpoon you can get to a chest that contains 300 rupees. Your real target however is in the room where you collected the compass, where there is a locked door that you can now open.
In the room now accessible you have to press the switch on the left: this gesture will allow you to access a sort of waterhole on the right through which you can approach the switch to hit. Then throw yourself into the new current thus created and then enter the wall to get to the last switch, opening your way to the first floor. After the climb, a mini-boss fight, an electrified jellyfish to be faced from a distance, precedes the appearance of the useful waypoint. After the victory go to the room on the right and press the switch to be able to overcome the chasm. On the other side, use a bomb to break the portion of the floor above the closed room downstairs. Repeat this action also in the room to the left of this one that has an identical crack in the ground to find yourself on a walkway. After grabbing the key with the harpoon and using it on the nearby closed door, you will finally find yourself in the presence of one of those mechanisms that regulate the water level. For now, lower the level and enter the lower left door, dodge the enemy laser by throwing yourself into the water and be quick to hit the lever with the harpoon before the laser returns. Repeat this action also with the second lever not far away to open a new passage. In the room you arrive in, start by jumping off the edge to hit the button that opens the door. After that stand near the pole with the harpoon symbol and shoot at the large wooden tile on the wall using the harpoon, then be quick to enter the wall when you are dragged towards the wall. Go to the opposite side of the hall and collect the key from the chest, then go back to the switch and raise the water level to exit.
In the room you enter from the door in the center the water is now at a higher level. Then open the chest on the left that contains a key, then move to the room on the far right and go downstairs to open the locked door. Let the water rise to the maximum level, then open the door at the bottom right. Here, after defeating the monsters, use the harpoon to get to the stairs leading to the first floor. Reach the water regulator by moving on the wall and lower the level to press the button that opens the door, then raise the water in the room to the maximum and return to the main room. Swim to the area full of skulls, then press the hidden button, then lower the water level to collect the key and see the boss. The key to defeating the big monster is to pluck out its many eyes using the harpoon. Be careful when the monster lights up and get ready to dodge the death ray. After depriving him of all eyes, the monster will start jumping trying to crush you. Use the shadow to dodge his attacks and sink slashes to finish him off.
The Desert Palace
To access this dungeon you must necessarily have completed the Thieves' Lair, since only in this way will you be able to find the sand wand at the Lavio shop, an indispensable object to extricate yourself among the puzzles of the desert. Indeed, the wand is also needed just to get closer to the entrance to the dungeon.
Once you have gained the entrance, create a sand bridge to reach the door to the north. There, go up the stairs to the right and enter the wall to proceed to the door away from the lasers. Advance until you can build a bridge to the platform on the right, then at the top of the stairs create a path that allows you to activate all four switches. Once this is done use the passage you just opened and build a wall of sand to protect yourself from the lasers as you move towards the door at the bottom. Now move the three statues to the three switches using sand bridges and open the door. Back in the main hall, have the sand rise under the hidden moving enemy and hit all of its parts to open a passage to the north.
This same strategy proves useful against enemies that create swirls in the sand, an annoying presence that you will come across soon. Go up the stairs on the opposite end of the room. Go down to the bottom side of the room you are in and go up to the left to collect the compass. After pulling the lever that causes the sand to fall, go back to the previous room, after which you can now access the chest in the center. With the key collected, open the door on the right, advance until you pull a lever that causes more sand to fall and use this event to create a bridge that leads you to the central platform. From there, reach the switch to the north which reveals a passage in the wall. Then move on the wall to collect the gloves of the titan, an object that allows you to move the large boulders scattered around the map.
Retrace your steps in the room where you see some large boulders, create a sand bridge to reach them, then move them thanks to the power of the object just collected and then collect the key. Open the door on the left, then the one at the bottom to exit. Go back through the cave and defend yourself with the shield from the tiles that take flight in the room. Then get rid of the two enemies that arrive using the sand wand and proceed along the path that opens after the appearance of the waypoint. At the top of the stairs create a sand passage to enter the wall on the left and continue. Use the sand again to protect yourself from the spikes and reach the door. Move right, then right again into a room full of gargoyles. Here you have to line up the arrow trap and switches to reach the key. Exit the room at the top, move left and build a sand passage where the rolling boulders can travel until they destroy the blocks. Go back to the previous room and witness the effect on the landscape imprinted by the waterfall of sand unleashed a little while ago: do not linger too long and grab the key in the center, after which move to the far left of the dungeon. Activate the laser beam and lift it with the sand to make it activate all the switches, then quickly grab the key and defeat all the enemies before climbing. Repeat what you did with the other laser, but this time be quick to get on the moving platform and adhere to the wall to reach the stairs.
In the room you arrive at, you can only open the door at the back. All the doors in the corridor are also closed, so turn your attention to the one unlocked at the bottom left. Collect the key and retrace your steps to open the door. After that break the cracked area with a bomb or enemy-bomb, then use the sand to raise another bomb to the height of the pillar, clearing the way for the arrows to hit the switch. Then use the moving platforms and pull the lever to access the boss fight area.
The boss is a giant bud that moves on the sand. Build sand bridges to move between platforms and get close to hit it, while eliminating the annoying flying enemies it releases. During the fight the enemy will blossom, undergoing two evolutions and strengthening his attacks. In the final stage he will be able to launch a beam with a circular effect. Always keep moving and try to move at the last to move in the opposite direction from the beam. The battle requires a lot of concentration as even falling off platforms can do you some damage. The enemy however moves according to a predetermined pattern in relation to your moves. Once you have found a winning movement pattern you can repeat it until you win without any problem.
The Lair of Thieves
To know the password that allows you to access the Lair of the Thieves you will have to listen to the songs that are sung in the Village of the Thieves: a visit to the store, the bar and the veteran's house should provide you with all the necessary elements for the resolution of the enigma.
Once inside, avoid the guard and move into the room to the left. Then hit the switch on the left to unlock the statue, moving it to position it on the switch beyond the arrow-shooting trap in the northwest area of this environment. Then hit the purple switch again, then quickly move up the walls to get to the last missing switch and proceed through the open door.
Ignore the fans for now and jump onto the catwalk below, then climb the steps and move on the belt to the precipice. Go through it by moving on the walls and hit the blue switch, reversing the direction of the ribbon. Then throw a bomb on the tape, destined for the switch and proceed through the door so open. Ignore the trap switch and return to the lower level of the main hall.
Now talk to the girl in the cell, then press the button and leave her prison to head to the nearby cell where you can collect the compass. Then go through the door opened earlier and use the explosive enemy to open a gap in the wall. Cross it and move left. In this area, press the switches to move the blue and red blocks to go up to the upper level of the room. Go through the narrow passage and go down to open a door that leads you to a fight with five enemies. Remember that your opponents can only be hit when their eye is open. Finally, collect the key and free the prisoner, then ask her to follow you. Move north and press both buttons with the two characters to open the door. Defend the girl, who in case she gets hit would go back to prison, and make your way towards the stairway that goes down. Reach the button that extends a bridge by moving on the wall. Then cross the bars to enter the wall: locate the platform flattened on the wall and exit at that point to spread it out. Then place both characters on the button, then swim south to lower the water level. Then take Link and the girl to the blue platform and let her up. Leave the girl there and, moving on the walls, unlock the walkways and then lead the young woman to the new pair of buttons where you will have to defend her from the enemies.
Back upstairs ask the girl to wait for you on the button while you go down to press her twin below, then run to defend her and continue to the left. When you are stopped by the enemies, go back one room and press the switch to make the attackers collapse into the abyss, then continue to the room with the conveyor belts: to be able to go up you will have to reverse the trend of the second before the passage of the girl. Activate the fans as the girl passes and continue left to the main hall. Climb on the two buttons to move the slab, then enter the wall to collect the key that leads to the boss.
Initially you can fool the big beast by crushing yourself on its shield and then hit it from behind. When he realizes the trick he will abandon the shield to leave himself in frontal attacks. At this point you will have to measure your movements to perform millimeter dodging at the end of which quickly sink the blows on the uncovered parts of the monster.
Wood of Skulls
Immediately after setting foot in the dungeon north of the Village of Thieves you will be greeted by the Wallmaster, a gigantic hand that will repeatedly try to crush you and then bring you back to the entrance of the dungeon. It's a big nuisance, but it will often come in handy for crushing enemies and pressing otherwise unreachable buttons.
Either way, start by going left and hit the button on the bottom that opens the door. To neutralize the enemy that approaches you, give it to the flames, transforming it into a skeleton. Then go through the next room and go outside. Go around the group of trees and cross the moving platforms to get to a chest that contains a key. Enter the room on the right and go to the northeast corner for the compass, then retrace your steps and open the lower left door.
Outside again, pass the first visible hole in the grass and look for a second one, camouflaged by bushes. Drop down and proceed to the left. Stop near the crack in the ground: you can create a passage to the lower level with the bomb or the hammer, or by luring the Wallmaster there. Go down and open the passage with the button, repeat what you have just done on the walkway on the left and collect the key. After stepping on the switch, you'll find yourself in the main room. Pull the nearby lever and walk up the staircase that has just appeared.
On the floor of the dungeon you are now on, start by reaching the opposite side of the room by moving on the wall. Then move the two gargoyles to the switches on the left and enter the wall that appeared to get to the lever that activates a new staircase. In the room you arrive to, press the switch to activate the moving platform that leads you below the walkway. Then lure the Wallmaster so that the hand tries to crush you, pressing the button above Link instead. Then use the new moving walkway and flip the last switch in this room. In the next you will have to defeat all the enemies: for those above you again rely on the Wallmaster. Once the waypoint is activated, access the door at the top of the room. Move on the movable block until you are safely under a walkway. Collect the key and move to the door that you can open. In the darkness access the lantern to reveal two enemies: defeat them and a door will appear. Upstairs, start by entering the wall on the right and collect the eye to throw it on its pedestal, thus making a chest appear. Once this is done find a way to reach the door on the bottom: the second eye is not far, but to reach it you will have to go back outside this area. To find it, jump into the hole in the ground hidden in the bushes on the right, then move up the wall towards the eye in the room you fell into. To bring the eye to its pedestal you will have to throw it on the platforms while you move crushed on the walls. Finally, collect the key and open the boss door.
This armored version of the Wallmaster can be annoying. Play his attacks early and have Link enter the surrounding walls to avoid getting hit. The final stages of the fight will be complicated by the missing floor parts, so move as often as possible in mural mode.
Turtle Rock
After helping the mother turtle to find her three babies, you can finally mount on her shell and use it as an unlikely means of transport to reach the access to the dungeon. Provided of course that you have the ice wand, which is essential to overcome the lava pools. You will find one right after the entrance: be quick to move forward because the portions of solidified lava will melt back rather quickly. First, explore the different rooms you can access, which are all dead ends for now. Then notice the swings that pop out of the lava: apparently they seem useless, but once frozen they can allow you an easy climb to the elevated walkways. Use the one on the right to reach the central platform, aided by a solidified lava pillar. Activate the four switches, then take the swing in the upper left and press the button in that area that opens the door below. Then go to the walkway on the right and enter the wall to access the room further to the right. Here the teleport takes you to another area. After you have raided the possible, go back to the central hall, adhere to the wall on the right walkway and thus arrive at a key. Then go to the left wall: once again immersed in the wall, move towards the end of the wall to press a switch that opens the door below you. Get rid of the enemies by waiting for them to expose the sensitive part outside the shell, then use the teleporter that leads to the room on the far left of the top level to get a key.
You should now have all the keys on this floor, so use the north door to go downstairs. Start the exploration from the room on the right: defend yourself from the laser using a column of solidified lava and grab the key. Go through the left door and take out the four burning gargoyles before returning to the central hall. Then use the swing to reach the lower left door, solidify the lava column to be able to move on its surface, then clear the passage at the bottom. Now start from the walkway on the left in the central hall and move on the wall until the platform resting on the right falls. Go down afterwards to activate the switch, thus causing the walkway to go up which now gives you access to the room where the key to the boss area is located. Then head to the final battle of the dungeon. Enter the lower right room and cross it creating a solid lava bridge, after which reach the button on the opposite side and press the button to join the two platforms. Once this is done, go back to the center of the room and destroy the skull by revealing the button below. By lowering the central pillar you can now launch into battle.
Start by hitting the enemy with ice balls and avoid the lava geysers until the monster reveals its nature as a large turtle. In this second phase his attacks intensify, but the solidified lava columns can be used to block him, or even stun him if you manage to hit them. It is best to attack it from a distance with the ice wand, but the sword can also be useful if you feel confident moving close to its shell.
Ice Ruins
Armed with a fire wand, make your entrance into the Ice Ruins, but be careful where you step, the ground is very slippery. So melt the block of ice that obstructs the passage and observe the rotating platforms that allow you to reach the different levels of the dungeon. First, go down to the lowest level and collect the key to access the boss area. Then go up, stopping on the second lower floor (B2) and untie everything you can to get your hands on a key. Then go up a floor, get rid of the enemies nearby and open the locked door using the key you just obtained. Pull the tongue of the left statue and kill the enemies that appear, do the same with the one on the right, then go through the door on the right.
Here for now you can only light the four braziers to drop a key, which is still out of range at the moment, so continue through the open door. You find yourself facing a chasm crossed by narrow beams. Pick up the compass and move carefully until you return to the room with the key which you can now grab by plunging into the wall. Then open the door and advance. Pull the statue's tongue to reveal a passage to floor B2. Jump and melt the objects in the room to reveal a button that opens a couple of doors. Then proceed towards the one placed at the top left, thus descending to level B4. Use the platform to move left and drop down. Eliminate the bats immediately, then locate the brazier to light. Then go to floor B3. Move down on the moving platforms, then when you come to a closed door move to the top of the screen and melt the ice blocks. Now you can reenter the room and access the switch that activates the platform to floor B2.
After resisting the enemies, destroy the skulls to find a hidden button, with which to open a new door. This passage leads to the lower level where you can collect a scroll that increases stamina. Then return to floor B3, near the ice-shooting traps and reach the area overlooking the two ice platforms. Go down to the small platform below to light a brazier and open the door to the central room. Take back a platform to reach the B2 floor, move to the room located in the highest area and pull the tongue of the statue, opening a passage towards B3. Following this path you will be surprised by a clash with a mini-boss: try not to get stuck against the wall and you will not have great difficulty in coming out as winners. After the waypoint appears, take the door on the left and cross the bridge of sagging ice only after defeating the enemies who will try to make you fall. Then pull the statue's tongue, then head to the room on the far right. Light the torch with the fire wand and step on the button to open the passage to the central hall. Nearby you notice a passage to the lower floor: go down and grab the key, then go down again to open a new passage towards the moving platforms area. Go up to B2 floor and open the closed door, then go down and melt the block of ice, thus letting in a strong current that will throw Link on the opposite side of the room. Pull the statue's tongue and as a result the platform in the adjacent room will drop to level B4. Climb down and move on the narrow icy planks first to the right, then down, so you can light the torch with a flick of the fire wand.
The clash takes place on slippery ground, from which it is easy to fall into the void. Obviously you'll have to hit the boss with fireballs to melt his frozen body, but in the meantime, you'll do well to keep an eye on the three orbs that gravitate around him. Occasionally these stop forming a triangle and releasing a freezing ray that hits everything inside. Once the ice around the boss has melted, you will have to approach him to inflict blows with the sword, but at that point the spheres to keep an eye on will become six, therefore capable of forming two distinct triangles.
Lorule Castle
After freeing the seven sages, your final destination is Lorule Castle. The initial part of the dungeon does not present major difficulties, however things soon get more complicated in the presence of four thematic rooms. To reach the final battle you will need several items, so it is good that you buy the entire supply offered by Lavio. If you don't have enough funds yet, wander around Lorule and Hyrule, exploring the secondary dungeons to expand your fortune.
The first is based on the use of bombs to activate switches. Nothing that you have not already done in the course of the game, however this time you will often have to use those two or three seconds that precede the explosion to move towards the wall that will move only after the activation of the switch. Also remember that by throwing the bombs you can also place them in places unreachable by Link, as well as make them overcome the lower walls. The last room of this room puts you again in front of the boss of the Tower of Hera: the mechanics to defeat him are exactly the same as described in the relevant paragraph.
In the lava room the first operation to be carried out is to build bridges to complete the path of the large boulder which begins to roll interacting with the sword. Once the obstacles are destroyed, new islands will emerge from the lava allowing you to continue. After resisting the storm of tiles, you will have to clear the path of a rolling boulder again to get the key needed to enter the fight with the already defeated enemy at the swamp.
In the lantern room, on the other hand, the dominant mechanics are those already tested at the Palazzo Oscuro. To proceed you will first have to light the lantern to learn the path to take, then return to the darkness to advance without the barriers. A good method is to use the skulls and other objects present to orient yourself. The final battle obviously sees you face the boss of the Dark palace.
The last area before the final clash finally marks the return of the Wallmaster, which you will have to use once again as an involuntary helper, especially in the final stages where only thanks to his blow can you get your hands on an object placed on a platform otherwise unattainable. After facing and defeating the swamp boss, the doors of the final challenge will open in front of you.
The final battle with Yuga is divided into three distinct phases. Initially you will have to on the left side, to avoid your shots being blocked by his trident. Then move around him in a circle, learning to read the signals that precede his lunges with timing. When you have used up half of his energy, Yuga will resort to two new attacks: the throwing of the trident and a series of energy bursts. Both can be avoided by moving around the scenario at the start of the attack.
In the second phase of the battle you will have to limit yourself to rejecting the energy spheres that Yuga throws at you with the sword, adapting to the increasing rhythm of the exchange. This segment will be repeated a second time later in the third phase of the fight, but on that occasion Yuga will use two orbs forcing you to perform even faster sword strikes.
In the third and last phase you will finally have to hit Yuga using the bow of Light, which can only be held, however, while you are in the form of a mural. In order for the arrows to be effective, however, you must first hit Yuga frontally to stun him, then go around the wall and inflict another blow to the back. After a series of his attacks, you will notice that this strategy will prove ineffective due to the charges with which Yuga will anticipate your front strike. So give up hitting him and exit the wall, then re-enter it immediately after his passage and surprise him again behind. Finally, for the third and final blow, it is necessary to throw the deadly dart from the opposite side of the room so that Yuga does not notice your presence. After defeating the last obstacle between you and the triforce, enjoy the movie that closes this wonderful adventure.
Congratulations, you have completed The Legend of Zelda: A Link Between Worlds!
 The Legend of Zelda: A Link Between Worlds 3ds
- 3ds
Exit date: November 22, 2013


