


GENERAL ADVICE
- Always have a plan: While it is always necessary to remain flexible, ranging between various options, especially if you are playing with new allies, always make sure you have an idea of how your character should be developed. Money is valuable, and you need to know in advance how to spend it and how not to. Always keep in mind which of your purchases can complement your weapon, your game mode, your race, and your objective.
- Be aware of your role: team play is very important in progressing through the levels Shadowrun. In case you are using Windows Vista, you will not be effective if you do not use the microphone. Talk to your teammates to find out who is doing what, and what support modalities will be needed. You won't always have the luxury of playing with your friends, so there will be times when you need to compromise on your plan. Whenever you make a purchase, let your peers know, and encourage them to behave in a similar way.
- Don't be selfish: in case one of your teammates owns a rocket launcher, and you have money that can't be spent in that round, buy them some more rockets. It is always an investment that will be good in the long run. If your teammates start demanding that someone buy the Tree of Life, don't hesitate to help those who can achieve this, especially if your character is suitable for frontal assault. In fact, in this case someone else will certainly be more suitable than you to use the weapon.
- Work in sync: Beyond the simple specialization of the skills of serving your team, it can be beneficial to form small teams of two or three men who remain close to each other. You will be able to keep an eye on enemies better this way, and you will also be much less vulnerable. In this way you will also have a great opportunity to compensate for the weaknesses of your companions, and combine skills to be more effective on the battlefield.
GAME MODE
attrition
This is a completely similar mode to team death match. In most cases, it will turn into a survival match with the aim of destroying all your enemies. In the event that a player has an artifact in their hand when the timer reaches zero, the player's team will win. Generally, it is best not to worry about the artifact until you have reached the final minutes of play.
Players are usually allowed some leeway, as marking territories isn't particularly important in this mode. Try to take advantage of this possibility. Stay in pretty tight teams of three or four players and grab everything you see near you. You will be much stronger as a group than alone.
Extraction
It is a variant of the normal "Capture the Flag". An artifact is placed in the center of the map, and players must bring it to the extraction point. If all the opponents are killed, the victory is still yours for the destruction of the enemy. The focal point to be able to win this type of match is the presence of a good defensive line. Take some of your men, and bring them to the target of the enemy, and do what is necessary to make it a very uninviting place. Summon a beast or two, and place a few trolls in a safe area, so you don't have any particular problems with enemies infiltrating your neighborhood. Some runners may also be of help to you, especially on small maps. Elves are the ideal choice, and good reflexes are essential, not only for the increase in speed, but also for the defensive properties possessed by the artifact. Don't be stupid though, the artifact and the exit point are usually presided over by a good amount of guards, so be sure to support your runner with other guards behind it, and destroy all defenses before they run towards you. .
Raid
It is a very similar mode to Extraction, but RNA is the designated defender, and Lineage is given the task of escaping with the artifact in hand. You will therefore have to play very differently, depending on the faction that is assigned to you. RNA defenders will have to set up a good amount of defense lines. Try to fortify the artifact, and keep the rest of your party very united, while trying to move towards the exit at the same time. Initially, it will be a waiting game; but they will sooner or later arrive in your neighborhood. They have to do this in order to proceed down the level. Don't think you can walk away with the artifact in hand. Form offense squads and destroy the defenders. Stealth tactics can be very effective as Raid Defense also involves a certain amount of camping. As the match progresses, and the defenses are destroyed, you may be able to do a clean run. Make sure you have a backup anyway, as always.
MAPS
To really be able to fully memorize the maps you need to experience them - no verbal help can fully replace the touch and see firsthand the structure of the playing area. It is therefore always recommended to play a solo match, without bots around, trying to run alone towards the artifact, and then position yourself in sniping positions, and proceed forward trying not to have problems. Similar strategies apply to similar geographical contexts. The higher platforms are the best location for snipers; caves and tunnels are perfect for grenades, and Strangle. The key to success is not to be unprepared, as nothing will ever go perfectly as it was planned.
Dig Site
Courtyard: this is the place where the exit to Lineage is located, together with the RNA respawn point. The area is strategically very important, so there will be a lot of action. The Teleportation can be useful to overcome the wall that divides the front of the courtyard from the back, and all platforms allow you to shoot downwards. There are two paths in the courtyard leading to the artifact, so RNA players should make it less accessible by casting "strangle" on it.
Dragon Hall: It is the location of the artifact. This is the central area in most of the matches you will play. It has a large amount of hotspots, so try to take your time to learn how to make the most of them. Entering the Dragon Hall from the lower paths can be harmful, as these entrances are visible from above. From above you can use your sniper rifle very easily, but this room contains so much action that this can be difficult on certain occasions.
Forum and Caves: these dungeons are easy to overcome, they connect some strategically considered "key" areas, so they can be of excellent tactical value. The caves are large, but the passages connecting them are narrow, and Strangle can be used to block a retreat.
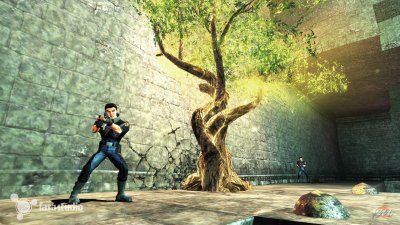
Red Room: excellent location for Lineage players, especially usable during matches in "Raid" mode. You can proceed along a path that proceeds from the caves to the courtyard, and it is a good place to place a Tree of Life to allow your teammates to recover some precious life points.
Power Plant
Front Yard: This is a great location from which to use your sniper rifle. A sniper with a glider or a tele transport shouldn't have much of a problem moving between a large number of high-positioned areas. The tower near the smoke block is the ideal place to start. With a teleporter you can get to the roof, where it will be really difficult to reach you, especially if your opponents are not more powerful than you. Avoid using the same position too many consecutive times, as sooner or later your opponents will understand your moves anyway.
Interior: This is the location of the artifact. The upper part has a certain advantage, and is recommended for those who protect the artifact. From here you'll be able to throw grenades, cast Strangle, and use the sniper rifle as you please. This is not a protected area, so avoid camping for an exaggerated amount of time. The office provides you with some coverage in case you need it, and it's not a bad place to use your tree.
Roof of the Station: This is the location of the exit point. In case you are playing with RNA, place someone on guard. Sniper fire will usually not be enough. Keep the ramp leading to the pad under control, and try to fortify everything that passes by.
Slum
Mission: this is the starting point of the RNA, as well as Lineage. The nearby tower offers you an optimal location from which to exploit your sniping skills, so it is recommended that Lineage players keep this possibility in mind, sending their teammates immediately to take control of the Tower.
Main square: the place where you will find the artifact. It is a large and open area, and one of the few parts of the Favela map that is not full of snipers. There are some platforms that snipers can use, but they aren't particularly covered. The use of stealth tactics is not particularly suitable for this location. However, this is an optimal position from which Minigun users can destroy crowds without particular discrimination. It is recommended that you take a group of people, and create a small area to start the Tree of Life from before running inside.
Streets: Favela's streets are narrow, and players who go through them are very vulnerable. There are many platforms that are exploitable, and it is recommended that you take advantage of their presence. They aren't just great for snipers - grenades can also be easily thrown from that position. Try not to waste too much time doing anything on the street.
Lobby
Courtyard: Most of the best locations to snipe from are difficult to access, so don't worry about them initially. You can still get to the top of the statue from here, as well as to the roof of the monorail. Most of the time, however, will have to be devoted to building your defensive capabilities.
Lobby: this is the location where the artifact "resides". Again, quite a tough place to use snipers; however, with the use of a glider and a teleporter, you can get to the top of a statue. Whether you have or don't have the opportunity without getting hit, you should give it a try. However, it is better to use a strategy that includes support from your teammates, both for the approach to this last location, and generally for locations with large amounts of traffic. You can also have fun with the rocket launcher present nearby, too.
Tower: Simpler layout than the courtyard. It is good to focus on the steps to defend yourself. There are no suitable locations to carry out a good sniping activity. A glider can take you to the outermost parts of the black wall, from which you will have a good view, but not a great cover. The defenders will therefore have to be extremely careful never to leave the area.
Maelstrom
Islands: Optimal location for platform lovers. A Glider is a great way to get past this map, as falling down can be very damaging. The Lineage exit is the large energy beam in the center of the map, but avoid jumping without having the artifact in hand, as it could be deadly. The VOTL in the vicinity is the goal for RNA players. Players are very vulnerable to the possibility of falling, so Gust could help.
Ring: This is a great place for teleportation, as you can travel in and out of walls, great for hit and run. The corridors around it are perfect for hitting subjects with grenades, and Strangle can also complicate things in some moments. The area is still easily accessible, and you can only defend it up to a certain point, so always keep an eye on the artifact, and never leave it for an excessive amount of time.
Ground floor: This is the lower level. There are generally not many people on call, especially compared to the Ring, and it can be one of the best entry points in case you are good at it. If you teleport through the ceiling, you can grab the artifact very quickly, before anyone can hit you.
Nerve Center
Atrium: This is the RNA house. It provides good access to the Lineage exit which is only accessible by a narrow staircase. This makes it very easy to defend yourself. The patio also leaves your enemies vulnerable to your guests' shots, which can knock them off the map; however, it is recommended not to let them get close, with the exception of Attrition matches.
Hangar: This is the section of the map where the largest amount of travel takes place. The Artifact is located in the lower part, and is hidden from view. Try to keep an eye on the ladders leading to the venue, as many runners will use them as a preferred way to enter your backcourt. You can descend to the artifact easily, and then proceed to the maintenance plan.
Control Room Hall and Reception Area: Lineage comes out of the Control Room. This is a somewhat hostile area to travel to, unless you have a teleporter or a glider. You can, however, easily shoot from most of the room; so it's not bad if you have good support. The defense is a little more difficult to coordinate, due to the accessibility of the exit from both sides; always keep this in mind.
Pinnacle
Executive Zone: This is the seat of the RNA. The patio marks this as an exit point, but defending it will be difficult, so make sure all players are always doing their duty to the full. The fortification of the entrance leading to the Executive side, rather than aiming at the patio, might appear to be a wiser choice; it is in fact a bottleneck for runners who want to proceed towards the artifact. The teleporters can access the area through the wall; try never to let your guard down.
Central part: There is no particularity, the map is drawn in a classic way. The artifact is very prominent and placed in a room with no particular distractions; the battle for its control will simply be in your killing of the enemy. Teleporters are useful as they are an element of surprise. Use them to destroy enemy snipers (a Katana should be what you need, as snipers don't usually look back)
Communications Area: This is a room built almost like a mirror with respect to the Executive Side; the tactics to be applied are therefore similar. The large plate can be an optimal position from which to carry out sniping work, in case you have a glider; the control room area is a good place to place the Tree of Life for your team.
Poco
Appartaments: place of emergence of Lineage. The roof of the apartment is a great location to snipe from, and they are also good for throwing grenades, especially at those using the narrow passage below you. The utility roof has speakers that you can use as a cover.
Billboard Building: This is the location where you will find the artifact. It is completely outdoors, and the roof is perfect for snipers. It is possible to teleport to the artifact starting from below; it is a good way to get on. To prevent your opponent from doing this, be sure to cast Strangle on the Artifact.
Backyard: This is the point from which you will exit Lineage. It is a difficult area to penetrate if your opponents are competent defenders. The ladder is a focal point for stopping the enemy invasion. Stealth and speed won't be particularly useful on offensive, brute strength is what it takes.
Temple Grounds
Front: One of the least homogeneous areas in the entire game. Some traits are tunnels for players at the top, obviously becoming death traps for anyone at the bottom. Avoid running from the front to the back. You don't have enough mobility to do this, no matter what race you choose. Proceed through the tower for best results. If you are at the top, the grenades and shotguns are perfect. The trenches below you are not safe at all, as the grenades will give you no escape if you throw them.
Side of the Tower: This is one of the best locations to get busy with the sniper rifle. However, the timing of the ascent is crucial, as you will be very vulnerable during it. Once you get to the top, cast Strangle on the bottom of the tower, and you're almost safe. It is also the best way to get to the top.
Interior of the Temple: The central node of the map. It will always be home to a big mess. The top has a certain advantage, and is a good location for snipers; But be careful not to keep your guard too low, as there are many entrances, and not many safe spots. The excavation site is a good way out. Try to block the path behind you with Strangle.
WEAPONS
Ares Predator Pistol
It is your starting weapon. It doesn't deal particularly high amounts of damage, and it can't fire fast, but the damage dealt is substantial, making it one of the most accurate firearms. Although it is recommended to use other weapons if available, it would be better to become familiar with the Ares Predator, for all those times that you will be forced to use it due to lack of alternatives. Always be methodical, and take the opportunity to use the greater speed allowed by the lightness of the weapon.
Ares HH.45 SMG
This is an inexpensive firearm, perfect for those with little aim, as it is not accurate but does a lot of damage up close. Headshots aren't much more effective than normal shots, so it's best to use them to kill opponents at medium range or very close. It offers better accuracy when used to perform series of interspersed shots rather than consecutive, but since its strength lies in the latter, it is impossible to combine accuracy and damage.
Racom 7.62mm Combat Rifle
Very inexpensive and very versatile weapon, especially suitable for those who prefer to use the same weapon for long periods of time. It is precise, powerful, and shoots in series of 3. It has a zoom function useful for hitting enemies from a distance, and is able to inflict double the amount of damage for headshots, making it a perfect compromise for all those. able to aim, but not good enough to use the sniper rifle with confidence. The price is also low, so it is usually considered ideal as a starter weapon. The biggest weakness is the need to reload very often.
Racom Gutter Cleaner Shotgun
Despite being completely useless from range, the Shotgun is deadly if it can hit directly. Perfect for getting behind your target, pausing for a moment to smile at the camera, and proceed to kill the unsuspecting victim.
katana
This is the best weapon if you like to play stealth. The only real choice belonging to the melee ensemble. If you manage to hit an opponent without being seen, he will start bleeding right away, and will be dead in the blink of an eye.
Vindicator Minigun
Large and not very pretty weapon, it can be very useful in the right situation, but is not recommended as a primary weapon. It can be a bit difficult to use if you are an elf, as their size can cause everyone with the exception of trolls to slow down. It is not particularly accurate, and it takes two seconds to reach maximum power. The Smartlink makes it a more attractive mode, as you don't have to worry about who hits you, and the accuracy is higher.
Kinetic Labs XM-20 Sniper Rifle
It offers two zoom levels, and is obviously the most accurate weapon in the entire game. The damage is doubled if you take a headshot. Destroy any enemy therefore with a single headshot. However, it is not possible to fire in rapid sequence due to the rather pronounced rebound.
Armtech Personal Rocket Launcher
The biggest limitation is the cost of ammunition. Beyond having to pay $ 1000 a bullet, it's still a real machine of destruction. Try not to waste precious rockets, and aim at your enemies to prevent the rocket from moving beyond them in case your aim is wrong. To be effective with this weapon you will need to be financially supported by your teammates.
Garnet
Grenades aren't as powerful as rockets, as they don't have the same range, but they can still be very effective. They are ideal for the destruction of localized opposition in tight spaces. You can also detonate them by shooting them. This is a perfect way to catch your enemy out of position. If you see a grenade close to you, Gust and Teleport will be what you need to use right away to avoid getting killed.
MAGIC AND TECH
They don't play particularly distinct roles. Try to think of them as two different parts of upgrades. They are useful ways to increase your skills during the procession of the rounds. Each skill has strategic advantages, and it is important to learn not only to exploit these skills but also to fight them when they appear in your enemies.
You have three slots available to equip magic and tech. Some skills are passive, just equip them and they will work automatically. Others have to be consciously activated. If you have a skill equipped, to activate it you will only have to press the shortcut key you have assigned to it. You can also use them without having them equipped, in which case you will simply have to choose the skill from the menu, and instead of pressing the shortcut key, press fire.
Three slots isn't a lot, so keep quick casting in mind when choosing your favorite skills. Teleport and Gust for example should always be associated with a shortcut, and other skills such as Resruccet and Tree of Life too.
Tree of Life
This is the preferred healing spell for the game. It is quite peculiar. When cast, it creates a large tree that heals anyone in its vicinity - be it friend or foe. It is therefore best to cast in safe areas. The tree decreases in vitality every time it takes a cure, eventually dying; Tree of Life can damage, too, so don't be afraid to sacrifice it to blow it up and send enemies away. Dwarves should be careful not to get too close to the trees, as their anti-magic abilities will destroy them quickly.
Resurrect
This is the key to your team's success or failure. It allows you to recover characters who have died in battle. You will lose a certain amount of Essence that was previously available to you, but the penalty does not increase if you revive a certain amount of friends higher than one, so the magic is really useful. In the event that you are the one who dies, however, all who have been resurrected by you will die.
Strangle
Strategically very useful magic. Create life-sucking vital crystals, you can use them to destroy a passage, protect the artifact, or keep your enemies at bay. These crystals will destroy the life points of everyone who touches them. They will then disappear in 90 seconds, after taking a certain amount of damage. It's great as a defensive spell, but it can also be used for offense, especially in areas where your opponent has limited movement. To counter it, we recommend the use of AntiMagicGenerator, or Grenades.
Gust
It is used to fire a "bullet" of wind at high speed from the palm of your hand. It doesn't seem to be immediately useful, at least not as useful as other similar spells, but it can be applied to achieve good effects. It is the only way to be able to inflict damage on your opponents who are using Smoke; if your opponent is using it right, Gust is what you are looking for to destroy it. It's also a good way to rock those that use gliders; another use (there are a plethora of them, as you can see) is to wipe an opponent off a platform. Gust is however also useful for detonating grenades around you, even this often essential skill.
Smoke
It will save your skin often. Once cast, Smoke transforms your body into a kind of cloud, and you will become invulnerable to any physical damage. You will also be more difficult to observe; it will not be possible to identify you with the Vision Enhancement. The offensive strategies are not many, however it is perfect to escape when the number of opponents becomes excessive; also great for avoiding being damaged in case you suffer a long fall. Beware of enemies who use Gust, as they can recognize and unmask you and eradicate you from the earth.
Teleport
Very useful if used well. It allows you to move forward 20 feet in the direction you are moving. It can go through walls, help you make impossible jumps, and make you a much more elusive target. Practice will make you perfect in its use. Learn to teleport via jumps to get to higher locations quickly. Learn to use shortcuts to get away quickly. Teleporting past an enemy, and hitting them from behind can be a perfect way to disorient them.
Summon
Summons are especially useful when your team is made up of not too many members. You can call in a very powerful beast to guard the area, or to fight a specific enemy. It can be useful for maintaining a guard circle around the Artifact, or other areas of strategic importance. Summoned beasts aren't particularly hard to destroy. They don't use weapons, so you just have to stay at a distance. The AntiMagicGenerators will destroy them quickly.
GADGET
Glider
This is a useful gadget that allows you to jump higher, and also allows you to go faster, and can save you from a very painful fall. The key to being able to use it properly is to have the correct timing, try to quickly press the jump button twice, so as to get very high. In case you wait too long, you will not get the vertical jump enhancement. Try to pay close attention once you are in the air. In fact the gadget is slow to move forward, and you will be a very easy target, so don't be afraid to get off in case you fall victim to enemy fire. Using the Gust is probably the best way to succeed in destroying those who use the glider. You will be able to make them come down from the sky. Snipers can take advantage of slow speeds and lack of coverage to destroy anyone who comes under their hands.
Vision improvement.
This way you can easily see the location of the enemies, even through walls. In all other FPS, this would be a cheat, but nevertheless this is only an addition to the combat possibilities here. The effect only lasts for a few seconds, but it recharges very quickly, and it would be really to use it very frequently. The improved vision helps you in both offense and defense, so it's recommended to make sure all players on your team can use this skill. You must also remember that your opponents themselves are willing to use the enhanced vision; you will see a red circle expanding across the screen, and assuming you are using a controller with force feedback, you will also hear a small jolt associated with it.
Smartlink
It is perfect for those who do not have perfect aim. Smartlink increases your accuracy, and allows you a good zoom with all possible weapons. For weapons that already possess this skill, SmartLink will allow an additional level. Even better, it will make sure you can't target your allies (although you can still harm them with splash damage from grenades). It is particularly useful for SMGs and those who use miniguns. However, there are problems in its use. In fact, it emits a laser light, which can tell enemies where you are. Disable Smartlink when you need to use your stealth powers. You can also aim at your enemy's torso, making it impossible to take headshots. Snipers should therefore avoid using this skill.
AntiMagicGenerator
These objects can be used in a very similar way to grenades, and will come out on all surfaces. Once entered, they will create a field that nullifies all magical effects and destroys the essence of your enemies. Gnomes naturally have this ability, but AM generators are particularly useful for other classes. It is great for destroying all the things inside the Tree of Life, Strangle, or summoned miners.
Reflexes Increased
They can be extremely useful to you whatever your class of choice. They also allow you to sacrifice a certain amount of life to increase your speed. If you use the katana, the reflections allow you to block a certain amount of fire coming from the front. It is a very useful companion for performing Artifact Runs.
STINGRAY
As you already know, there are four breeds in Shadowrun. All the weapons, spells and technologies are available for each of these races, but the characteristics of each of them are distinct, thus making each of them special. Try to learn the pros and cons of each of them, and create an appropriate play style by following your intuition.
Humans
They are a class not suitable for newbies. Their abilities are general, however they don't have any specific characteristics that stand out from the others. Initially, they own $ 2500, instead of $ 2000; this means that you can buy a skill and a weapon in the first round. They are also able to assign techs without their maximum Essence being decreased. Humans are the second fastest race, not far behind the elves; they are also quite strong. They can carry the Sniper Rifle, and keep the same speed as the Trolls; however, they are still a little behind in the use of the Minigun or the LanciRazzi. The real advantage of playing with them is adaptability. You can communicate with your team and immediately understand what role is needed, and a human will always be able to play it.
Elves
They are the perfect class for anyone who enjoys "hit and run" tactics. Not only are they the fastest with small arms, they also have the natural ability to regenerate life points when not hit. The amount of essence at their disposal is large, and therefore they are excellent magic casters. Of course, there are also disabilities associated with these positive points. In fact, Elves have a certain lack of strength and vitality. They have 22 percent less life than humans; however, this problem is easily compensated for by their ability to regenerate. The speed advantage wears off if you carry heavy weapons. Even the sniper rifle can cause problems in the mobility of an elf; let's not even talk about the Minigun and the Rocket Launcher either. Katanas and Shotguns are great companions for elves, as they are perfect for players who want to kill and escape quickly. In these cases, smoke can be of great help, not only for its stealth abilities, but also as an effective way to escape when the enemies are too many compared to you.
Troll
They are real living tanks. Large in size, slow, and strong as rock, with an armored skin. When they are hit, their skin automatically hardens, for a few seconds. Sniper rifles are still effective against this kind of method, but automatic firearms quickly lose their usefulness. Trolls are also the best class in case you want to use massive weapons. They can carry around a Mingun and / or a Rocket Launcher without having a speed problem. Obviously this means that, when free of baggage, they will not be the best of speed; however, this is a small price to pay for a feature that can come in really handy. Their size and low speed, however, make them a very easy target; it would therefore be optimal to use them in team formations, so that they are not targeted individually. With good cover from the sides, trolls can be the race that can deal the most damage ever.
Dwarves
They are neither particularly resistant nor particularly fast. Their ability therefore consists of the ability to resist magical attacks. When they get close to a spell, like Strangle or SUmmon, they can destroy it immediately. They can suck the essence of any being that comes close to them, both friend and foe. They depend on this last skill to be able to keep their Essence at good levels; their maximum capacity is quite high - higher than all other breeds. However, due to their inability to naturally regenerate, they are unsuitable for the use of teleportation due to its high frequency nature. They are great for carrying out resurrections, however. Given their constitution, this breed is still quite strong; they can also have an advantage over trolls in carrying large weapons, as their small size makes them more difficult targets, although their maximum speed at maximum capacity is lower than the trolls themselves.
Solution summary
Game mode
Maps:
Dig Site
Power Plant
Slum
Lobby
Maelstrom
Nerve Center
Pinnacle
Poco
Temple Grounds
Weapons
Magic & Tech
Gadget
Stingray
 Shadowrun x360
- x360
- pc
- snes
- md
- scd
Exit date: August 28 2007


