


Please note:
The solution is based on the US version of the game. There may be divergences from the Spanish version.
October 14, 1897
Below, the events of the first day of investigation.
Sherringford Hall - Internal
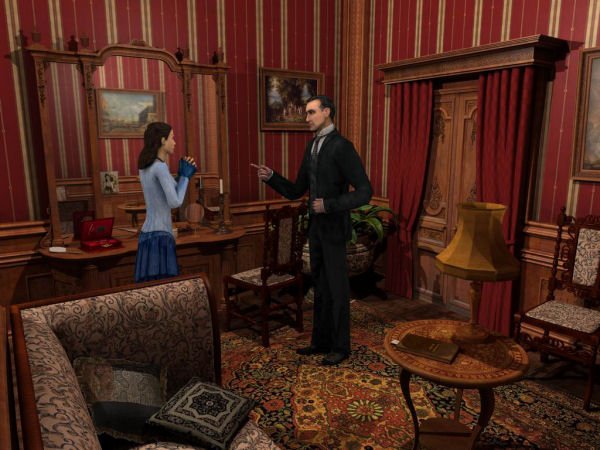
Ballroom
Retrieve the piece of paper from the floor, then open your inventory and read what is written on this piece. Then click on the diary, open the "Documents" section, click on the only slot on the left. Then close the diary and inventory again. Talk to the doctor, then to Grant Sweetney. Left, talk to Mayor Lockhart. Pick up the white piece of leather, then move around the room, talking to everyone present. Then click on the door next to which you found the piece of leather, proceed along the next corridor.
Aisle
Locate the black mark on the door you just closed; retrieve the meter from the inventory, use it on the sign. So look at the footprints on the ground. Retrieve the magnifying glass, click on the base of the armor, retrieve the black sheet from behind. Move again along the corridor, to the table with the mirror; move the pointer, causing a hand to appear. Equip the magnifying glass, click on the table to locate a black hair. Go back to where you entered, click on the door on the left.
Kitchen
Use the magnifying glass on the table; retrieve the button, then try to lift the dustbin on the left. Move to the opposite side of the table, talk to Pannister. When he has told you everything he knows, exit the kitchen using the usual door, then click on the only door you have not yet examined, reaching a different corridor.
Corridor - 2
Examine the area under the table using the magnifying glass. Collect the dust, then continue along the corridor to reach the bag. Get it, examine it in your inventory to get all of its contents. Retrieve the test tube, use it on the white powder on the ground. Proceed to the smoking room.
Smoking room
Examine the footprints on the floor; open the inventory and retrieve the meter, measure them. Click on the table, use the magnifying glass to recover some dust. Move left, go through the door to reach the bathroom. Click on the sink, use the magnifying glass to analyze the mustache scissors. Recover the red hair. Go back to the corridor and enter the women's locker room.
Women's locker room
Retrieve the photo of the young woman, then use another vial to retrieve a sample from the black stain on the table. Move to the sofa, retrieve the book, then retrieve the paper in French and put it in the inventory to read it. Having read it, go back to the corridor and open the door to the far north, reaching the stairs.
stairs
Talk to Mary, the cleaning lady - noting in particular how she tells you she only closed the dumpster once (which was opened twice). Enter the door on the left to reach the dining room.
Lunchroom
Take the piece of paper from the table, continue to the next screen, talk to Hermann Grimble and Lavinia - the daughter of the murdered. Avoid conversing with Herrington, he will not give you useful information. You will then immediately return to the ballroom.
Ballroom
Talk to Patterson, the colonel. Now you can also chat with Herrington, then with Hunter - the bartender - and again with Brimms. Having exhausted the conversation options, return to the dining room.
Dining room - 2
Try talking to Lavinia again - she won't react. Open the inventory, take the gun, give it to Lavinia. This time he will speak to you. Then converse with Grimble, a new conversation option will appear, dealing with Bromsby's speech. Exhausting this too, put up with the skit that will start automatically, which will lead you to the following game section.
Sherringford Hall - Exterior
Talk to Lamb, then proceed to the right. Talk to everyone in the area, especially Miss Lambert. Now go to Mr. Satterthwaite, then to Sue - the second maid. Then talk to all the subjects present in the nearby avenue. Completed all the conversation options, return to the area where Lamb acts as a guard; use the magnifying glass on the white spot in front of the sealed door. You will find a piece of cigarette, inscribed with the word "Chirr". Take it, then use the tape measure on the trace next to the piece of cigarette to measure its size. So look at the scene with Lestrade. Go back to Baker Street, using the appropriate icon.
Baker street
Having taken control of Watson, go through the bookshelf and click on all the shelves to read the books there - you'll need to read a ballistics book and a tobacco book. Moving on to Holmes, you will need to start using the chemistry kit. Take the piece of white leather from the inventory, then retrieve the water ball and place it on the tripod; retrieve the green bottle of soap and add it to the water, then click on the burner under the tripod to heat the soapy water. Take the piece of white leather, place it on the plate.
Now that the kit has been cleaned, take your water and place it back on the tripod, add the blue chemicals (fifth bottle from the left). Click on the lamp to better view the burner; place the white skin on the plate. Take the skin again and place it now on the microscope. Open the diary and click on the "Report" section. Take the black powder from the inventory, place it on the tripod plate, turn on the burner. Read the new report from the diary. Back in the inventory, click on the magnifying glass, then on the dust box. Take all three white powders, place them on the microscope - you will be told that they are all the same. You will get a pile of white powder; take it and place this on the tripod plate as well, turn on the burner.
Place the dish with the water on the tripod, light the burner again, add some powder to the dish; read the new report, it will tell you that it is rice powder. Hair samples remain to be analyzed. Take the black hair from the table in the first corridor, place it on the microscope. Repeat for red. Then leave the chem table to start the first quiz.
Quiz
For each question, you must first answer yes or no, then locate the pieces of evidence that substantiate your answer.
1 - Yes, use the second conversation with Patterson.
2 - No, use the conversation with Mary.
3 - No, use the report concerning the piece of cigarette (for the red), and the study on tobacco (for the green).
4 - No, use the conversation with Satterthwaite.
5 - No, use the conversation with Pannister and Miss Lambert.
6 - Yes, use the size of the dust spot (for red), and the article on ballistics (for green).
7 - Yes, use the conversation with Miss Lambert.
Close the diary to finish this first part of the investigation!
Second Day - October 15, 1897
Below, the events of the second day of investigation.
Video - Gameplay of the game
Baker street
Open the diary and read the reports in the Documents section. You will therefore have to head, together with Holmes, to Sherringford Hall to go to meet Lestrade - click on the corresponding icon on the map.
Sherringford Hall
Talk to Miss Lambert, you will then find yourself inside the ballroom.
Ballroom
Talk to Grimble, so try to put up with the discussion about polo. Back in control of the game, go to Holmes - located in the hallway, next to the armor. Click on the icon on the left to enter the kitchen.
Kitchen
Click on Carl, the cook. After the conversation, go back to the corridor and proceed north. Proceed along the doors to the left, reaching the men's smoking room.
Smoking room
Examine the white gloves on the table, placing them in the inventory.
Women's locker room
Retrieve Lavine's bag from the table, then - from the inventory - take its contents. Read the two articles, then open the diary and examine their contents, in the "Documents" section. Go back to the corridor, then to the ballroom.
Brombsby Ballroom & Office
Talk to Lavinia, more sociable this time. You will be transported directly to the Bromsby office. Examine the photographs on the table. Use the magnifying glass on the hand, noting how the person is wearing a ring with a Masonic emblem. Moving on to the second, take the letter to Bromsby and read it in your diary - especially the page that Fowlett has marked, concerning French art.
Open the drawer, take the pieces of burnt paper, read them inside the diary. Move away from the table, click on the portrait in the center of the wall. After the conversation, also click on the giant portrait of Bromsby, next to the office door - there is a lock, but you will not be able to open it for now.
Flatham
Flatham Station
Talk to Fletcher, proceeding with him to Fowlett's house. The key will be given to you by Graham, his neighbor. Enter the house.
Lounge
Examine the statue on the left, click on it to get some matches. Use them on the lamp on the right, illuminating the area. Examine the shoes on the floor next to the dragon, as well as the footprint - measuring it with the measuring tape.
Move the pointer along the bottom of the screen, move to the corner of the room. Notice the four paintings on the wall; you will have to try to locate the hidden image inside each painting. In the first painting you will see a roe deer hidden "inside" the tree. In the second painting you will notice a bear hiding in the hill on the left. In the third painting you can see a crab on the rocks. In the fourth painting you can see how water flows from the beak of an eagle. So locate the wooden toy under the table; get it. Left, click on the lower part of the book, reading poems. Then left again, heading towards the kitchen.
Kitchen
Examine the dust on the cupboard to the left of the oven, using the magnifying glass. Take the white powder you will find. Still left, examine the broken glass next to the gin bottle. Go back to the library, click on the door on the right to enter the corridor.
Aisle
Use the matches on the lamp on the floor. Examine the two doors on the left; open the unclosed one, reaching Fowlett's room.
Workshop & bedroom
Examine the window - held in place by a screwdriver. Right, click on Fowlett's bed, noting how the pillow is missing. Examine the basin in the corner, retrieve the fatty substance on the left. Then examine the nearby wall, with the portrait of Fowlett. Go back to the work table, examine the certificates on the wall, then locate a kind of chess board on the table itself. It is a kind of Sudoku: all rows, columns and diagonals must give the same result, being added together. This is number 55.
The positioning of the numbers must be as follows; we will divide it by lines.
Prima riga: 8-5-3-1-7-6-6-9-2-8.
Seconda riga: 10-3-1-4-7-3-8-7-3-9.
Terza riga: 10-6-8-3-2-8-1-7-5-5.
Quarta riga: 3-7-7-10-5-1-6-3-6-7.
Quinta riga: 3-8-2-9-3-6-10-3-8-3.
Sesta riga: 4-1-10-6-9-9-3-7-2-4.
Settima riga: 8-8-9-3-10-3-5-1-3-5.
Ottava riga: 4-3-3-8-1-10-9-4-8-5.
Nona riga: 2-7-3-6-6-5-5-6-8-7.
Take the token from the drawer, then go back to the living room and examine the automatic in the corner.
Lounge
Insert the coin into the slot machine, click on the left hand of the automatic. The puzzle will consist of three parts, which you must complete in its entirety. Pull the arm, causing three cards to appear near the chest of the automatic machine. You will have to "complete" the series of three cards that appears on the screen. On the first round, insert the ace of clubs. On the second round, place the 4 of diamonds. On the third round, place the 4 of clubs. Retrieve the piece of paper that will be given to you, and read the verses about Noah's Ark. Go back to the bedroom.
bedroom
You will need the piece of paper you just received to solve the puzzle from Noah's Ark. You will notice that, by clicking on the animals in the lower part of the ark, they will be "sent" to the door above. The first animal must be the crab. The second animal must be the roe deer. The third animal is the bear. The fourth is the eagle - but you have to first click on the rest of the animals, until only the eagle remains and finally click on it.
The lock will then open. Examine the damage the door has suffered, it appears to have been forced open. Get all the documents in view, close the diary, then talk to Watson - he will tell you that he found a key in the garden. Exit through the front door.
Garden
The key will appear in your inventory; you can use it to open the "locked" door inside the corridor of Fowlett's house. Do it, reaching the cellar.
Winery
After the cutscene, take out the measuring tape and measure the dead man's foot number. Take the piece of paper on the ground, read it inside the diary. Go outside and go back to the garden.
Garden
Move to the left, locating the footprint on the barrel; measure it. Go back to the fence, talk to Fletcher. Head back to Baker Street to take the quiz for yourself.
Quiz
1 - Yes, use the conversation with Graham.
2 - Yes, use the Lestrade report.
3 - No, use the third conversation with Hermann Grimble.
4 - Yes, use the letter from Bromsby to Fowlett.
5 - Yes, use Fowlett's bedroom remarks.
6 - Yes, first use Fowlett's bedroom report, then Fowlett's garden report.
Close the diary to complete the day!
Third Day: October 16, 1897
Below, the events of the third day of investigation.
Baker street
Using the chemical set, open the inventory and start using the scientific equipment to understand the composition of the strange fatty substance by placing it on the microscope. The other two objects will also need to be examined with the microscope - first the gloves, then the wooden toy. Then leave the microscope, returning to Flatham Station.
Flatham Station
Talk to the stationmaster next to you. After the conversation, take a moment to examine the bench inside the station, locating a white feather. Enter the train by clicking on the bottom of the screen, causing a platform to descend, then clicking on the cargo car door to enter. Walk along the entire wagon, carefully examining its contents. You will find another feather on the seats; then locate the hat under the next bench, along with some red hair.
At the end of the wagon, examine the dust and retrieve the Chirripaqui cigarette piece. Proceed outward.
Baker street
Back on Baker Street, watch the skit, then go straight back to Sherringford Hall, looking for Lavinia.
Sherringford Hall
Ballroom
Talk to both Lavinia and Sue. Complete the conversation, go through the two corridors that lead to the flight of stairs. Talk to Mary, then click on the stairs to join the next group inside Brombsby's office.
Bromsby office
Look closely at the lock - you will notice six slots with numbers placed next to them. By clicking on a slot, you can move the signs up and down, so that they correspond to different numbers. In the different lines, you will have to place the following numbers:
1) 1
2) 1
3) 1-1
4) 2-1
5) 1-2-1-1
Once this puzzle is complete, take everything you can (the key and the cards), then talk a little with Lestrade, to then head towards the Bromsby construction site.
Cement factory
Watch the conversation between Holmes and Goblet. He will give you a key to enter Grimble's office. Proceed to the building on the right, this is the office in question. Use the key that Goblet gave you. Leave Watson on the first floor, go up the stairs, retrieve the key from the floor, just below the table, at the top of the stairs. Still ahead towards the bridge, click on the drawings along the wall; go back down the stairs, move the pointer to make Holmes walk down the second flight of stairs, arriving at Grimble's office. Use the key you found under the table to enter. Click on the nearby cloakroom, Holmes will observe it. Then right, have Holmes walk towards the end of the room. Examine the statue of Ganesha on the left, examining both his mouth and his torso.
Then locate the desk in front of you; Click on the painting above the wall, moving it to reveal a lock. Use the key found in Bromsby's safe to open it. Take what you can, then retrieve the card from under the table to the right of the room. Read the content, then go back out of the office. Proceed back to the bridge model, retrieve the little Bromsby from the inventory, place him in the empty space on the bridge. After the mechanical sound, you will see a key come down from the bridge, coming to the floor. Get it, it's the key to Grimble's desk. Go back to his office, use it on the drawer. Examine everything possible, take the cards (only a few can be taken). You will hear a scream from Watson; you will return with him to Baker Street.
Baker street
Talk to Herrington, running out of options. After a cutscene, you'll need to go back to the cement factory.
Grimble's office
Click on the ladder, placing it on the wall. Click on its top to go up. On the opposite side, save your game. The goal is now simple: start where you are now to get to Grimble's office, without getting caught by Marty or his watchdogs. Wait for Marty to exit the screen, move the pointer to his bottom, then click and proceed forward.
Double click to make Holmes walk along the right side of the building, where you can see the wheelbarrow - stand behind it so you don't see yourself, then create a path to Grimble's office in the top corner To the right. Wait for the dog to pass; when he passes the lamp next to Grimble's office, run to the door following the newly created path. Retrieve the key from the inventory, enter. Save again. Go up the stairs and enter the office, remove the Ganeesh bust to retrieve the Bromsby figure, place this figure on the bridge model to get the table key. Open the drawer, take everything you can - key included - then read the letter available in your diary.
Go down the stairs, then - before leaving the office - open the inventory and place the warehouse key on the first "slot"; you will need to be able to retrieve it in speed. Click on the door, listen to Holmes' speech; when you see the dog go away, move the pointer towards the bottom of the screen, click on the footprints. From the bird's eye view you can see that just below Holmes an old covered carriage is visible, to be used as a hiding place so as not to be seen by Marty. More precisely, you will have to position yourself in correspondence with the dark area of land visible to the right of the carriage. Double click to make it run to this area.
While running, move the pointer towards the theater door, click on the footprints to complete the path; when you see Holmes almost reached the door, right click to open the inventory and - as quickly as possible - use the storage key on the theater door to open it. Save the game again, given the difficulty of the sequence just passed.
Fairfax Theater
Take the pack of matches from your inventory, use it on the lamp in front of you, lighting it. Move to the right, observe the footprints on the ground, measure them with the tape measure. Following the corridor, turn right, move along the wall to some double doors - blocked. Use the knife to unhinge them, then enter. Light the lamp on the right using the match.
Click on the carpet inside the container, look at the blood and black hair. Go left, get the keys from the door. Continue to the back of the room. Open the door using the keys you just took. Before entering, examine the white spot with the magnifying glass. Then forward, left, noting how the central carpet is connected to the ground by some pegs. Move the mouse over them, you will notice a hand appear on the central peg. Take the knife, cut the rope, uncovering a body.
Exit the room, go back to the double doors, take the gauze from the doctor's bag to the left of the door. Open the inventory, use the knife on the gauze to create a mask, then use it. Go back to the previous room, the mask will allow you to interact with the body. Pick up the shovel next to the door, use it on the body. It won't work right away; exit the room, go back to the back where you took the keys and the gauze, turn around and examine the door you just came out of - take the pole, go back to the corpse room. Use the pole on the body.
You will pick up two items and you will have to witness a long interlude sequence, which will eventually lead you back to Baker Street.
Quiz
Before starting, open your inventory and click on Johanssen's passport, reading the information carefully. So start the quiz.
1 - Yes, use the conversation with Goblet.
2 - Yes, use the photographs of Bromsby and the article on Lowrie's death.
3 - No, use the conversation with Mary (blue box) and the conversation with the audience (green box).
4 - Yes, use the letter from Lloyd and Masterson.
5 - Yes, use Johannsen's passport.
Then close the diary to complete the quiz and the chapter.
Fourth Day: October 17, 1897
Below, the events of the fourth day of investigation.
Baker street
Read the documents provided by Lestrade. Then close the diary, talk to Holmes, click on Hunter's house that will appear on the map.
Video - Game Trailer
Hunter's house
Internal
Talk to Appleby, then enter the bungalow. Examine the blood on the ground. Open the cabinet, look at the paintings - also noticing two completely new boards, on the left. Close the cabinet, walk to the window, measure the footprint. Go back outside.
Greenhouse
Click anywhere in the greenhouse to cause Holmes to move. When the perspective changes, click on the table, removing the two plants. Examine the documents. Give the ticket for the jewel to Watson so he can go get it. Go back to Baker Street.
Baker street
Open the inventory, click on the liquor bottle. Then click on the library; from the inventory, take an encyclopedia and transfer all the information to your diary - also transferring the note about the jewel. You will now have to disguise yourself; have Sherlock proceed along the apartment, locating the two doors on either side of the fire. Click on the door on the left. When Sherlock is back, open the diary at the map, click on Richmond Abbey.
Richmond Abbey
Gate
Move to the gate, click on the small window of the door on the right. When the monk appears, talk to him. Exhausted the conversation options.
The ruins
Proceed along the path that leads to the left, towards the woods. At the crossroads, take a right. Pass the pool on the left, then at the next fork take a left. To the next, right. Another, take the central path. At the following fork, take the uphill path. Save your game as soon as you hear Holmes claim he smells smoke.
You will reach the ruins, in flames. You will have a minute to recover some water. Turn around and run to the first fork on the right; retrieve the bucket on the left. At the next fork, left, then right, then left, take the bucket and click on the pool. Go back to the abbey, and throw a bucket of water to put out the fire. Save your game and enter the ruins.
Interior of the ruins
Light the candle on the right, click on the pile of books on the left. On the ground, next to the candle, there seems to be blood: take out the magnifying glass and examine it, it is ink. Continue to the inside of the ruins. Examine the footprints, measuring them. At the dead end, examine the "strange" brick. Take out the knife and use it on the brick, revealing some letters. Take the only readable. Go back to the area where you entered the ruins, follow the path that leads back to the abbey. Now click on the path that takes you out of the Abbey, back to Baker Street and - after a skit - to Sherringford.
Sherringford Hall
After a long cutscene, open the diary and read Mycroft's letter. Head to the women's locker room, exiting the door on the left. You will hear noises coming from the powder room. Enter, go past the table with the mirror. Talk to Lavinia and Herrington. When you are alone with Lavinia, take the photo of the woman out of your inventory and give it to Lavinia. After a skit, you will find yourself in Baker Street - Watson will show you the item received, which is an earring.
Quiz
1 - Yes, use Lestrade's report on Wung Jei.
2 - Yes, use the conversation with Appleby.
3 - Yes, use the conversation with the monk.
4 - Yes, first use the letter written to Grimble, signed "WC"; then the letter written to Bromsby, signed "W.".
5 - Yes, use Mycroft's letter.
Click on the diary to conclude this day of investigation too!
Fifth Day: October 18, 1897
Below, the events of the fifth day of investigation.
Aston Theater
Before entering, we recommend clicking on the poster on the left, reading the information regarding the performance that is about to be performed. So go inward.
Main corridor
After the conversation, proceed to the inside of the theater. Talk to everyone present. Also converse with Raleigh Wilcox; the actor in blue. Then with Miss Sullivan, the actress in purple; finally with Miss Carolyn. You will then proceed to the changing room.
Locker room
You'll find a drunk Doris here. Talk to her, trying to extract some information. Click on the door to the right of the dressing table, reaching the corridor again.
Aisle
Click on the bottom of the screen to proceed forward. Click on the door in front of Holmes and Watson, then talk to Richards, running out of conversation options. Take the silver earring from the inventory, use it on Richards, then turn around and look to the other end of the corridor, locating two doors - enter the second.
Office
Click on the book, then on the piece of paper. Proceed to the next room, click on the closet. Click again on the costume in the inventory, it seems that one is missing. Go back to Doris's room, open the alternative door down the hall.
Backstage
Talk to Adam Poole; after the long conversation, go back to Doris' room through the corridor. Talk to Bruce Aston. Grab the keys, then head back to the backstage and pass Poole, reaching the end of the wall. Look at Holmes, then use the keys on the door.
Secret room
Locate the two objects on the floor, in front of the large chest. Move them around to examine the chest, using the magnifying glass. Take the silver earring from the inventory, move it on the chest, noting how it perfectly matches the left side. It will be necessary to recover all the other earrings in order to open the chest and get the final clues.
Go down the stairs, returning to Doris' room. Talk to her to ask for the earring; go back to the corridor, approach Mrs. Small, showing her Veronica's earring. He will give you the earring, you can now go back to the secret room and place the three silver earrings in the appropriate slots, opening the chest. Take the photo of Veronica and the desperate notice, then - after a long cutscene - you will return to Baker Street.
Quiz
1 - Yes, use the first conversation with Bruce Aston.
2 - Yes, use the conversation with Miss Sullivan.
3 - Yes, use the Sherringfor Hall report and the Aston Theater report.
4 - Yes, use the document concerning the French business card and that of the antique dealer.
Close the diary, then forget about the other four questions (they can be skipped without the ending being affected) and enjoy the ending!
Video Solution - Playlist
Click here for the playlist!
Video Solution - Introduction
Video Solution - First day of investigation
 Sherlock Holmes: The Silver Earring wii
- Wii
Exit date: December 1 2011


