


Please note:
The solution is based on the American version of the game, so there may be differences for the Spanish version.
Chapter 1: Getting started
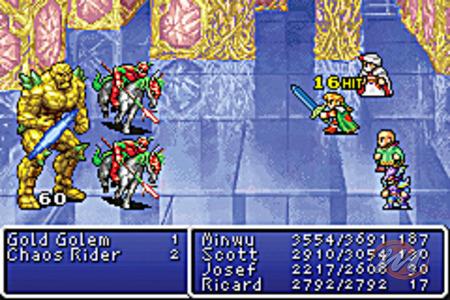
After the short presentation you will immediately find yourself projected into the mythical universe of Final Fantasy and thanks to this splendid version for Game Boy Advance you will be able to enjoy this first and second chapter of the saga. You will start by passing the city and heading into the castle, your first city is Corneria which is also the starting point of your adventure.
Climb the stairs and advance until you find a guard, talk to him and he will pass you into the royal hall. The king will talk to you and tell you that you are the chosen one of the crystals and that you will have to defeat the evil from the world (not very original I admit but remember this is the first episode). Before this, however, the king will ask you to free his daughter from a devil who has kidnapped her, but your efforts will be well rewarded, if you succeed the king will rebuild the bridge that keeps you stuck in this area of the world for now.
Now you can start seriously, my first advice and it should be the advice of every serious RPG player, is to train with random monsters from the very beginning of the game (yes I know it's boring but it's the only way to advance well in the game). Go to the village of Corneria and buy some equipment for your heroes, if you lack the money go out and face the monsters in the open, remember in case of difficulty to take refuge in the hotel that will heal you from any wound.
As soon as you feel ready for your first dungeon, head north and you will get there.
DUNGEON 1: TEMPLE OF CHAOS
This is really a simple dungeon, the enemies are strong but if you have trained well around the city there should be no major problems.
Your aim is the door in the center of the Dungeon directly in front of you, but first make your way around the four corners of the Dungeon to get the various items that are hidden inside the treasures. For now you can only get the ones in the two left corners so go left down and you will find a leather hat and left up a potion and a tent.
After taking the items, go to the room in the center, here you will find the demon Garland and the princess. Get ready to face it, save and fight!
BOSS: GARLAND (HP: 212, EXP: 130, Item left: Long sword)
To beat this simple Boss you can use Fire magic (the others are useless) and physical attacks. For this Boss there is little to say, with a couple of attacks you will defeat him and you will have saved your damsel.
You will now return to the castle and the king will thank you for saving his daughter and rebuild the destroyed bridge. Before leaving the castle, talk to the princess to receive a precious item: the flute.
Exit and go north across the bridge, a new cutscene will take you directly to Chapter 2.
Chapter 2: The True Beginning
Okay guys it's time to get serious, your aim now is to go to Pravoca, a city that is on the right side of the Continent. As soon as you see the mountains, take the path that takes you to the right to get to the city. Before getting there, however, I recommend a change of direction, as soon as you see the mountains go left until you reach a forest, pass it and you will find a cave. The cave of Matoya.
Be careful because the monsters in here are tough so if you don't have a good level come back when you are stronger. Go into the cave until you find a door, open it to find the Witch Matoya (owner of the cave), talk to her and she will ask you for a Crystal Eye that you will not have (but you will find very soon). Go left into the room and you will find three chests, open them to retrieve two potions and an antidote, after that you can also go out because you won't be able to do much more for now (okay maybe a useless trip but your experience in the meantime goes up ... ) and go to Pravoca.
You start by going to the hotel to treat yourself (I don't say this anymore, every city you enter and you need you will have to do it) and then go around the various shops to improve your equipment.
When the shopping is over, head to the upper left side of the city and talk to the pirate to engage in a terrible duel against nine ferocious pirates !!!
BOSS: NINE PIRATES (HP: 24 each, EXP: 60 each, item dropped: leather shield)
Lots of enemies but really too weak for your level (I hope). Hit them one by one and take them out without major problems.
After defeating the pirates, the chief pirate will give you a magnificent gift: his precious ship !!!
Remember that going with the ship will face the same as random encounters and the sea monsters are quite strong. My advice is to wander around Cornelia so that if you find yourself in trouble, you can easily take refuge in the village and recover your strength.
Attention now, a little trick that will allow you big prizes and big money. While on the ship, you will need to hold down Button A and press Button B 22 times (no it's not a joke, it works). You will find yourself as if by magic in a Final Fantasy subgame! Okay it's just a mini game (the game of 15 for your information) but if you are skilled you can have some Elixirs and really mountains of money.
Remember already that we are here that to view the Final Fantasy map you will have to hold down the B button and then press SELECT (remember this is important!).
Well after these tips we start the adventure again, go down with the ship until you find a new land to explore, bump into it and then go left until you find a port that will allow you to dock.
Watch out for new enemies and disembarking from the ship head down until you find a castle and the village of Elfheim just below, enter it.
Do a good expense of weapons and spells immediately, especially the latter will be excellent in this village, the magic Cura that will accompany you throughout the journey is mandatory. For weapons and armor, take the strongest in the shop.
Exit the village and head to Elven's Castle. Enter, go up the stairs and take the path that leads to the left to the end, then enter the room to the left at the top. You will see a person on the bed and another guy standing next to him, talk to him and he will tell you that you need to find a certain Astos to free the prince from the spell.
Exit the castle and go left, enter the passage that opens between the two mountains and you will be in a plain full of dangerous but generous monsters (they will give you a lot of experience).
There are now two places you need to visit, one is mandatory (to solve the quest) while the other is completely optional. Optional not so much because you will need it to finish the game well and gain experience which is always useful. So go without hesitation to the North following the line of the mountains, sooner or later you will see a hole in the ground, enter it and you will be in a nice Dungeon!
DUNGEON 2 : GROTTA MARSH
As soon as you enter go down, to get to the stairs leading to the second floor of the Dungeon you will have to enter the room through the door which is as far south as possible. If at the crossroads you decide to go to the right you will find three chests with objects that are not very useful in truth (some money, a sword and a dagger). Choose and see you on the second floor.
Here you will find the way to the third floor in the lower right passage, the monsters will be a little more dangerous so check your energies, get rid of any obstacles and go to the third level of the Dungeon.
This is the last level of the Dungeon and it is also the most dangerous, the encounters will be numerous and the chances of success are low (I told you to train well!). The top floor is nothing more than a grid of sixteen rooms, some empty and full of monsters, others full of treasures. Enter the first you see and take the Phoenix from the chest to resurrect, go in a straight line to the last room, enter and take the money from the chest, then go down a row of rooms.
Go left and skip the first two rooms, enter the third room and retrieve another Phoenix and a Villa. Left again and in the room take the bracelet and then go down one floor. Go left, skip the first room and also the second, but remember that in this last room is the Boss of the Dungeon. Enter the third and recover some money while in the fourth there will be another Phoenix.
Go down to the last level and immediately enter the room below you, there will be more money for you. Skip the next room and merge into the next one where you will get an Antidote, the last room contains a great item but for now you won't be able to enter.
Ok gentlemen it's time to go to the room above you and then to the right, open the chest and face the Boss !!!
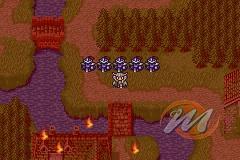
BOSS: PSYCHODEMONS (HP: 84 Each, EXP: 276 Each)
These cute monsters will be of variable numbers between 2 and 4, do not relax seeing the few HP they have, their attacks are powerful and they can knock you out in a few moments. Attack them with your weapons and use Thunder magic to get the best of them.
After beating them, do not move from your seat and just press the action button, you will take possession of a very important object for the rest of the game: The Crown !.
Exit the dungeon and heal yourself, now a journey awaits you to the new destination that you will need to complete the Quest. Go from the place where you are down until you find some ruins, go inside and enter the door on the left, here you will find the king who will tell you to retrieve a crown from a nearby dungeon (guess what? done).
Exit the room and go back inside, talk to the king again and give him the crown. Surprise! The king will turn into a monster that you will have to kill, yes, you got it right, it's a new Boss to face.
BOSS: ASTOS (HP: 420, EXP .: 2250, Item dropped: Mythril Sword)
This Boss is the first tough nut of the game, his experience is huge and his life points are also very high, he will also use a very powerful magic on you, Death that if he hits you will kill you instantly. Use the Speed spell on you and then heal the party each turn, use the Fire and Thunder spells and finish the Boss with your weapons. Good luck.
After killing him you will receive the crystal eye (remember? The witch Matoya). Exit and return to your ship and then reach the Matoya cave again.
Go inside and talk to the witch, give her the glass eye and you will receive in exchange the potion to cure the prince at Elven's castle. Go back to Elven's castle and give the potion to the servant next to the prince, he will thank you and the prince will be healed. For all of your work you will receive the Mystical Key, a very useful key with which you can open all the locked doors you have encountered so far (a great gift I assure you).
Its first use will be right inside the castle itself, exit the castle but not the screen, go left or right and follow the path until you find a door, enter inside and you will find a Mythril Hammer, a pair of Bronze Gloves and a lot of money for your purchases.
Now follow my instructions to retrieve the items you left (in spite of yourself) along the way. First, go back to where you fought Astos, the last Boss, here you will find various chests and you will get hold of a pair of Gloves, a Staff of Power and a Falchino Sword.
The next trip will take you back to the Marsh Cave Dungeon, go back to the third level and enter the lower left room, here you will find a Silver Bracelet, an Antidote and some money.
The last place to visit is the first Dungeon of the game, The Temple of Chaos, here in the two rooms on the right you will find a Werebane, a Runic Sword and a Golden Needle.
Once this is done you can safely return to Cornelia.
Go to the castle and just before entering, go left to find a narrow passage. Follow him and go to the back of the castle, continue until you find a wizard in the corner, ignore him and advance until you find two rooms (and two doors). In each room there will be three chests, take everything remembering in particular the Nitroglycerin (essential to continue the game) and the Mythril Knife.
Exit the castle and set sail again on the open sea, go up and to the right until you find a new docking point. From here continue on foot downwards following the coast, you will soon find some mountains and looking good you will also find a beautiful cave.
You have arrived in Duergar Mountain, magnificent objects await you here and then you can also advance with the game. Go up as soon as you enter and in the room take the two treasures that will give you good money, now take the path that leads downwards, follow it to the end to find eight treasures that you can pocket without problems. Now look around, you will see a small dwarf in the lower part of the cave, talk to him and he will use the nitroglycerin to blow up the cave and open new paths. After the explosion you can return to the ship and prepare for the third installment of the saga.
Chapter 3: The Earth Crystal
Now with your ship you can also visit the other continent, in truth there is not much to discover yet so head to Dwarf's Cave and then go left, you will find a new charming town: Melmond.
Grab everything you can afford with your money, especially healing spells and Firaga which is very, very powerful. After the shopping you can leave the city and head left and down, you will find a small passage that will take you to an island, you will find there a cave that you must necessarily visit.
DUNGEON 3: CAVE OF THE EARTH
Here guys you will get the bones, in fact this Dungeon is tremendously long and dangerous but you will get a lot of experience and you will become very strong (or you will die in the attempt of course).
A little trick before starting, if you go immediately to the left and take the corridor at the end, you will find tons of very bad and very dangerous monsters waiting for you (much more than in the rest of the Dungeon), be careful but with them the possibility to level up it is practically infinite. Fight for life and you will be the greatest.
Go straight up and continue along the path until you find a treasure with money inside, then go back and go down, here in two rooms you will find many treasures (money, potions and antidotes) and also several monsters waiting for you. , so be careful. Go back to the starting position and go right to find the stairs that will take you to the second floor.
In this second floor there will be various paths that will lead to as many treasures, if you go up and continue you will come to take three treasures: The Sword of Coral, a Tent and some money. If you take the one below only a shield and some money. After the search, take the middle path on the right to get to a staircase that will take you directly to the third floor.
New floor new gifts, go right until you see a treasure, at this point head up and you can get it, a very useful sleeping bag will join your items. Go back and take the passage that goes up, continue until you find a door on the left, enter to get hold of a lot of good money.
Back again and right again until you find a Golden Needle, then finally the last way down that takes you to the room with the Boss, if you stop in that first you will get a chest with money. Did I say Boss? Yes, get ready.
BOSS : VAMPIRO (HP : 280, EXP : 1200)
Easy this Boss, too few are his life points against your swords !!!
You eliminate it with physical attacks or if you really want to use the magic of fire.
After the shady figure's death, advance and open the chest to find the Ruby Star. Continue upwards and try to force the door in front of you, nothing to do is blocked, you just have to go back and go and get treated in Melmond (don't worry you will be back soon).
Exit Melmond and keep going right, you will soon activate a new cave. The Cave of the Giants.
Go up and you will meet a guy who is blocking your passage. He will ask you for the Ruby Star to pass, give it to him and then head down to find a room with three beautiful treasures: Money, a Great Ax and a Mythril Helm. Once this is done, head upwards until you find the stairs that will take you out of here.
There will be only one path to follow, do it until you find yourself in front of the Grotta del Saggio. Come in.
There is not much to do here go left and up until you find a nice character, talk to him and you will have the Staff of the Earth which will be indispensable for your adventure. At this point, go back to the Cave of the Earth and go where you killed the Vampire, continue and with the Staff of the Earth you can open the door that will take you to the fourth floor of the Cave.
Now go up to find some treasures that will give you money and a Staff, then down until you reach a new room with three other treasures: Money, a Tent and a Mythril Shield. Go up again but this time take the path that will take you to the left, after a while you will come to the stairs to the fifth and last level of this dungeon.
Head left on this last level until you see a passage going down, take it until you get to a room with a glowing crystal. Stop !!! Fix yourself physically (both the characters and you) and then save, you are about to meet the Boss and you have to be prepared. Go to the light and jump into the fight.
BOSS: LICH (HP: 1200, EXP: 2200, Item dropped: MP Potion)
And here gentlemen comes the best part. The Boss in question has a lot of HP and therefore you will no longer be able to eliminate him so easily. It also has quite strong magic that will seriously hurt you (Blizzara and Thundara above all). My advice is to use the Ice and Thunder Anti-Magic on the party and then attack en masse aside from the White Magician who will heal the needy. Very useful for this Boss is the Runic Sword, let the protagonist equip it.
After the fight your Earth Crystal will light up and you have solved the mission (but remember that there are still three crystals missing), use the light behind the Crystal to teleport out of the Dungeon and then straight to Melmond to regain your strength. A very exciting new Chapter awaits you shortly.
Chapter 4: The Fire Crystal
Go back to your ship and go left until you go around the world (check the map) at this point go down until you find a port where you will dock. Walk left until you find a new town surrounded by water: Crescent Lake
Usually I go to shops where you will get all the weapons made of Mythril that you are missing, then for the spells take that of the Thunder and the Earth. The sorceress would do well with Protection.
Now go out of the city but not completely and you will find a small bridge on the right, cross it and follow the path to the right to arrive in the middle of a meeting of old sages, talk to everyone until one gives you an incredibly useful object: The Canoe!!! The sage will also tell you to continue to Mount Gulg, do not be begged and leave immediately for your new destination.
Now a nice hellish trip awaits you, in fact you will have to get to the Volcano and if you are not really strong I think you will never be able to reach it (I assure you, here the monsters are very strong and along the river even worse).
Use your canoe on the river to the right near the town and follow it up going left at the first intersection. At the next intersection, go right and then immediately left until you reach a barren land. Continue to the left until you find the mountains, go inside and you will find yourself in the Dungeon.
DUNGEON 4 : MONTE GULG
Remember what I tell you, if you step on the lava you will not have random encounters but you will lose 1 HP for each step up to 1 (you cannot die). So be careful because sometimes it is better to lose HP than confront dangerous monsters (and here there are a lot of them).
On the first floor of the Dungeon you will not have chests to open, so you just have to hurry to find the way out that you will find always going straight to the left.
In this plane, however, the treasures will abound and now I will tell you how to recover them. Go right and take the second door you will see, inside you will find a chest with some money. At this point, go up until you meet another chest with a Mythril Helm, then up again until you find the last chest of the level, defeat the monster that stands guard and get yourself a very powerful weapon: The Marvelous Sword!
There are other chests scattered along the level both to the right where you entered (a Potion) and to the left (Money, Gloves, Helm, Shield, Mythril Ax) but they are items that you already have and you can go and get them just to make a little experience. To finish this long level and end up at the third level, head left all the way, pass the lava and take the stairs.
Another simple floor with no difficulty (and treasures), go right until you find the stairs to the fourth floor.
Still a huge but empty floor, the exit is at the bottom right and to get there you will have to take a lot of lava. Nothing more to say take the stairs.
Always a shortage of treasures but this time the fun lies in reaching the exit in this pseudo labyrinth. Go left, down, down again and left again.
After so much hunger for treasures in this place you will be handsomely rewarded, the room you will need most will be the one on the top right. Go there and you will find a Fire Shield and an Ice Lance (extremely useful against the Boss at the end of the Dungeon) waiting for you, as well as some Money and an Antidote. There are also other chests in this level but I swear to you that it is not worth taking them, they are well protected and will only yield you some money (few) and a poor staff.
Taken all the treasures you just have to take the passage down and get to the stairs that will take you to the last level of the Dungeon.
This great final level has a little game, on the left in the middle and on the right towards the top there will be three rooms with three treasures, you will have to open them one at a time and only in the last one you will find something. It's hard work and the reward is ridiculous, a poor Golden Needle. Now go back to the starting point and go left, keep going for a long time until you find a door. Go inside and after beating a couple of monsters you can get a super item: Fire Armor! Your defense will literally skyrocket!
Now you can go back with your new prey and take the passage that goes down to the left. After a nice walk you will arrive in a room with a beautiful fiery red Crystal. Does it remind you of anything? Yes, you can safely heal yourself and then save the game, you are about to deal with another nice and terrible Boss !!!
BOSS: MARILITH (HP: 1440, EXP: 2475 Item Left: Mela D'Oro)
This Boss as you can see has a great passion for fire, his HP is high and his spells are really strong. If you are thinking of attacking it with cold spells you are wrong, it is well defended even in this point. What you can do first is to protect yourself from its spells with a Protection spell, then physical attacks and spells only if you have level 3 or higher ones. Treat yourself often and be careful.
After defeating Marilith your Fire Crystal will light up and you will have solved this Quest too. Take the teleport to exit the Dungeon and then walk it to the nearest town to heal you, in the meantime I'm already going to Chapter 5.
Chapter 5: The Levitating Stone
Well guys where were we? Ah yes you are probably in Crescent Lake to heal and rest, if you want to take the spells that you weren't able to buy before and then go back to your ship.
Now go up and skirt the Continent you see on the left, until you find a small bay. Go inside and turn left to find a river, advance into the river (there are dangerous monsters, beware). First go up, then at the fork to the right, again up and then down to the last fork that you will have to take to the left to arrive in a clearing.
Continue along the path until you find a cave. The Ice Cave (Dungeon).
DUNGEON 5: THE ICE CAVE
This Dungeon is much simpler than the Fire Dungeon, the monsters are weaker and the path is shorter.
You will start on a floor with many chests but you will not be able to get a single one. You just have to continue towards the stairs that take you to the second floor.
No presents on this level, go left and down to find the exit on the third floor.
Another useless plan, slip into the next and finally there will be treasures.
Here it is a nice plan full of surprises! (OK only one but it's better than nothing). Enter the room and pay attention, do you see those nice cracks that are scattered around the room? That's right, they'll make you fall downstairs. There are three chests to open, do the side ones first, defeat the guard monsters and get the two prizes: Clothes and a Sword of Fire. Now take the path to get to the third chest, yes you can do nothing but step on the ice and end up below, don't worry it's the right way.
As soon as you touch the ground with your feet you will be attacked by a group of ghosts that you will quickly eliminate, exit the room and notice ice spikes on the ground along the way. They are the same as lava and will take an HP away from you with each step (but no monsters though), so adjust yourself. Go left and you will find two chests, beware of the monster that stands guard, it is a very dangerous White Dragon (its breath of ice takes away many HP), defeat it and you will take possession of a pair of Mythril Gloves and an Ice Armor ( very useful here). Go down and at the fork go left to get some money (there are six chests and therefore a lot of money for you, do not miss them). Go back and go right to get to a new level (actually it's always the first level but somewhere else).
Check the room and get the Ether from the chest. Go to the back room and you will also find some money, go right and at the crossroads there are two solutions: Go up to the right to find some stairs that will lead you out (only if you are desperate, in fact you will have to rebuild the Dungeon from scratch) or enter in the room next to you to get three treasures and clash with another Boss, the choice is yours. If you have chosen the room (and you will choose the room sooner or later) you will find three chests and some dangerous ice near them. Carefully grab the Money, the Sleeping Bag and the Ice Shield. Then heal yourself, save and try to take the stone that is among the chests, it seems done but after taking it a very bad Boss will be unleashed !!!
BOSS: EYE OF THE DEVIL (HP: 162, EXP: 3225)
The bad Boss is not there, here is just a little monster with very little life that you will eliminate in a moment. Attack him normally and use Thunder magic against him to destroy him. Just remember to be very careful about his Doom magic that will hurt you a lot, even if I think you will have destroyed it much sooner.
Once you have done this dirty work you can take the stone and if you go down you will have to fight back with the Boss (if you want a little more experience), then go up. You will have to make your way back to this same level and take the upper right path to exit the Dungeon.
Return to Crescent Lake to heal and regain your strength, then without delay go left and take the river that brought you to the Volcano again, only this time go straight down and right and down again. Soon you will arrive on the mainland and after a while you will find a beautiful desert waiting for you, advance and you will have an incredible surprise, the sands will move and a beautiful Airship will appear that you can take and use (goodbye little ship!).
Chapter 6: Role Changes
With your cool new airship you can go anywhere in the Final Fantasy World. Your first stop will be the Citadel of the Trial where at the end you will discover a fundamental object to enjoy the game 100%, an artifact that will allow your characters to change classes and become very powerful!
Go up and to the right until you find a new city in the mountains, Gaia the city of wizards. Here you will find very powerful spells and your equipment will improve in an incredible way, the only big problem is that here everything costs a lot and you probably won't be able to buy much (I hope you have saved enough), absolutely fill up on Potions because the place where we will go now it will be terribly dangerous.
Go back to the ship and go to the right of the city and then up, you should find a castle waiting for you. Small problem, you cannot land nearby because it is surrounded by mountains and woods (a small disadvantage of the Airship is that it can only land in the plains). Continue up and to the right sooner or later you will find a place to park your vehicle. Now a nice walk up to the castle awaits you, walk along the shore and sooner or later you will find it (be careful because the monsters here are incredibly strong, don't panic but save often and don't be ashamed to go back to your Airship to go to treat you in case of need).
Well, you have found the castle and you have also found your beautiful dungeon.
DUNGEON 6: THE CITADEL OF TEST
Advance into the castle until you find a character waiting for you, talk to him and since you have the Corona he will let you pass (remember this item? You received it millions of years ago).
Go up and enter the room on the left, climb the throne and you will be teleported into the Dungeon.
This plan is a bit complicated but we will try to get out of it quickly. You will start in the middle of the room, go down to find the first platform and from here you will come to the room with the second platform. Take it and in the new room you will find two passages, the right one is the lower one. For the fourth platform there are no problems, take it and in the next room between the two always choose the one below. The sixth platform is in the narrow corridor that goes down. Take it and in the new room go to the platform on the right. Now there is a fork, go up and enter the room to get some Gloves and then down to the last platform which will take you directly to the room with the stairs. It was tough but we did it !.
This last level consists of a single room surrounded by treasures, go around avoiding the one inside the room and you will find: Money, Ruby Bracelet, Ice Spear, and Gloves. Now heal, save and open the last chest to meet face to face with the Boss !!!
BOSS: ZOMBIE DRAGON (HP: 260 Each, EXP: 2331 Each, Item Drop: Megaelixir)
Take a stroll around these Bosses, attack them with physical attacks or magic and you will get rid of them quickly. There is very little else to add.
Now you will have taken possession of the mysterious object you need to complete the Quest, unfortunately it is not over yet and the difficult part is now, take the teleporter to get out in the open air and head to your Airship.
Heal yourself in a few towns and then head down to find small islands with holes that you can enter.
Do them all because there will be many treasures inside and you will gain a lot of experience, but the island you need to complete the Quest is the one with two holes, enter it and advance along the way (it is quite dangerous and the monsters are strong) until you reach some stairs that will take you to a large room. At the end of this you will find Bahamut a horrible monster that does not bode well.
Don't worry after you give him the Rat Tail (the mythical object found earlier) he will not attack you but will give you the opportunity to transform your warriors into a new and very strong version! Below is the list.
Transformations:
Warrior = Knight
Ladro = Ninja
Monaco = Master
Red Wizard = Red Wizard
White Wizard = White Sorcerer
Black Magician = Black Sorcerer
Now you can also use spells with the Warrior and the Rogue and the wizards will be very powerful. Don't say it didn't deserve the effort.
Chapter 7: The Water Crystal
To find the third crystal you will need to start your search from the city of Gaia. Do you remember? We had been there before. Take all the spells you didn't get that time and get ready.
Talk around and you will find out about the existence of fairies, then go talk to the guy on the side of the magic shop and you will hear about a substance called Oxyale.
Go back to your Airship and head right until you find a desert to the north near the coast. Go down and continue towards the largest desert, in the middle of the desert you will find a caravan, enter.
In this small town, enter the shop and see what it sells, yes, a Bottle with a Fairy inside which is what you needed (it won't be cheap, take your money with you).
After the purchase you can return to the city of Gaia and look for the source you need. The source will be at the top right but you will first have to go left and turn around to the right to find it. Go to your Item Menu and use the bottle on the source to free the Fairy, she will be so grateful to you that she will give you a bottle of Oxyale to thank you.
Now leave the city and go back to the place where you found the fairy, go through the desert either up or down (it doesn't matter) to the river and the land that is immediately after.
Here you can do two things now, go directly to the city of Onlak and restore your strength or make yourself a small dungeon that will give you more experience. I know you want to fight so get ready, use the canoe and go up against the current of the river within walking distance of the town of Onlak (to the left of the town to be precise). At the end of the path there will be a waterfall, enter inside to find the Waterfall Cave (original name).
DUNGEON 7: THE CAVE OF THE WATERFALL
An easy walk this Dungeon but full of really useful things, watch out for the monsters that are not exactly easy to beat but by now your levels should give you enough confidence. You will start in the upper right corner and you will have to get to the lower left corner.
To do this you will have to take the path that goes to the left and at the crossroads go down until you find the room with the treasures, that's all. The treasures, however, are worth the walk because in addition to the money you will find a Ribbon, a Magician's Staff and a Sword Defender. Inside the room there will also be a robot you can talk to (it's not dangerous).
Go back and head to the nearby town of Onrak.
No weapons in this town, but the two spells that you can buy are mandatory to continue.
Cross the stream that cuts the city in two and head to the right, a Siren will block your way to the submarine. Talk to her and after the short talk she will disappear. Enter the submarine and you will end up at the bottom of the sea and to your delight there will be a new and terrible Dungeon to face!
DUNGEON 8: UNDERWATER TOMB
Before we begin I will tell you what your goals are inside the dungeon. Number 1 find the Rosetta Stone and the second is to kill Kraken.
On the floor where you are, if you go up, you will go to the Stone while below you will go to the evil monster. I prefer to start from the Stone, you do as you like (from the Seguitemiii). Go up passing the various columns that you will find along the way, go right as soon as you see two black slabs to find a room with a chest with money inside. Continue down that street and then go up to find another door, inside you will find more money for you. Now going up you will find the two stairs, take the ones that lead upstairs.
Many objects for you on this floor and the enemies are within your reach (I would say rather weak), in the room above you will find the best object: The Diamond Armor. In the one in the middle there will be little money while in the one at the bottom left you will find a Light Ax. Go down to the right to find the stairs that take you upstairs not forgetting the next room that will give you a Magician's Staff and some Money.
No enemies on this floor and so you can take it easy, talk to the Siren but she won't give you much information and enjoy the 13 chests you can open. Open them all in order to find the most important of all: the mythical Rosetta Stone !!! Return to town with your teleporter or walk up the road and return to town to heal yourself, then return to the crossroads and take the stairs down.
In this new area you will see some treasures that you cannot take for now, the only thing to do is take the stairs to get to the new area. The latter is nothing more than a passage towards the lower area of the Dungeon.
Now open the first door and take the few money you find inside, then go through the other door to get to the second level.
Now that we are thinking, in this level you will find the treasures so dreamed of, at the bottom you will find a room with some money, go out and go to the room on the left, inside in addition to the money you will also find the magnificent fords of the giant.
Now move up and you will discover a new chest with a Light Ax, go out and in the room to the right of this you can get some Money and a Ribbon. Take it all and then head to the exit located in the left corner.
You have reached the last level and then also to the Boss, go left and then go up to a crossroads, here go left again until you see a door, go through it and continue to the second door. Yes the Boss is waiting for you in there, heal yourself and save a hard fight awaits you.
BOSS: KRAKEN (HP: 180, EXP: 4245, Item left: Kikuichimonki)
Just get to the Crystal and press the action button to start this battle. It will be hard I tell you right away, the Boss does not have many spells on his (only that of Thunder to be clear) but it will be lethal with his physical attacks while you if you put it on the physical plane you will only raise a few HP at a time (and 1800 HP are definitely many). However, you have a weapon on your side, those Gloves of the Giant that you found in the Dungeon, with those equipped you will do a lot of harm to the Boss and you will give him a good amount of HP. For other characters I recommend using spells that enhance attack and defense spells. The Boss is also vulnerable to Thunder spells so use them as often as you can. Watch out for his attack to make you blind, I hope you have the proper care.
After the battle, the Crystal will be yours, enter the teleporter and then go out to the city of Onrak to heal yourself and wait for the next Chapter.
Chapter 8: The Wind Crystal
We are the last Crystal and needless to say it will be the hardest of all, you will have to go through two Dungeons to catch it and you will not be able to take breaks between one and the other so maximum supply of Potions and other useful items.
You will have to go back to Melmond (if you don't know where it is, look at the map), as soon as you arrive go to the upper part of the city, cross the bridge and go right, here if you continue sooner or later you will see a gentleman, talk to him and he will be amazed of your Rosetta stone. After a short discussion, you will have learned a new language and can continue. Exit the city and return to the Airship, your aim is now to find the city of Lufenia.
Go to the Continent which is at the top right and you will see the city of Gaia, to the left of Gaia there is a large desert, you go to the south of the desert and then to the right, sooner or later you will find a wood with a peninsula, on the tip of the peninsula is the town of Lufenia. Have you seen it? Now forget it because the only point to land on this damned continent is the one in the north, at the top. Yes, you understood very well, you will have to get off there and walk all the way until you get to that damned city. It will be a long way and the monsters are certainly not simple. Good luck.
As soon as you enter, head to the upper right corner, you will see the absolute nothingness. Don't be afraid, go right until you find a magic shop, go inside to have the best spells in the game at your disposal! Flare for Black Magic and Total Heal for White Magic. A great purchase do not doubt.
The next step will be to find a character hanging out in the lower corner of the city, talk to him and he will give you the Bell. Go back to your beautiful Airship and find a city where you can heal yourself and fill up with Potions, now go to the desert that is nearby, look for them and you will find a tower, it will be the next goal but not being able to land you will have to go down until find a clearing and then walk back to the tower, the next dungeon is there.
DUNGEON 9: MIRAGE TOWER
Go through the door to the right and then left again to find another door, behind it are the stairs to get to the second level. Don't go there there are things to do here. The treasures are located in the middle of the level but you cannot go there directly, you will have to go around until you find the entrance, by doing this you will have: Tent, Helm of Health, Money, a Powerful Sword and an Aegis Shield. Once this is done you can move on to the second level.
Easy level but rather mushroom, follow the obligatory path until you get to a room, if you want the treasures go right and then down and enter the room to get the treasures: Money, Thor's Hammer, House, Sword of the Sun, Armor of the Dragon. Exit and go back up and you will see some stairs with a monster walking around them, these are the stairs you have to take to exit the level. Go down and enter the room, here before continuing you will have to deal with a Blue Dragon, strong but with low HP so a relatively simple opponent. After defeating him, continue and you will find a teleporter, pass over it and you will find yourself directly at the Flying Fortress (Other Dungeon, if when you pass nothing happens, you will have forgotten the Teleportation Cube at the falls).
DUNGEON 10: FLYING FORTRESS
To do this Dungeon there are two ways, the direct that leads to the Boss is fast and almost without danger. The other is slow and you will often collide with difficult monsters. The two differences are the treasures that will be in the second choice. Guess which one will we do? Yes, that's the tough one.
The first floor is a mine of treasures and now I will tell you how to get them all. As soon as you start go down and Eliminate the Boss Razer, it will be a quiet walk, you will only need a pious of shots. Go back and go left until you find the chests: Potion and Money. Still at the starting point and from here to the right to have other gifts: Money, Helmet of Health, Ring of Protection. Back again and up the stairs that will take you to the second level.
From where you start, head towards the center of the room, this will be the starting point for every expedition in the level. Now go to the upper left to find two treasures: Helm of Mythril and Villa. Back and now top right to get the Diamond Gloves. Still in the middle and go left for some Cash and right for a Ribbon and a Diamond Shield. Finally lower right for a White and a Black Vest and lower left for Adamantite. Once all this is done, go down and you will arrive at the next stairs.
Third level and other treasures, go right and walk until you find the treasures: Money, Clothes, Golden Needle, Protect Cloak. Go back and head up for a Protect Ring, a Potion and some money. Now back all the way to the left to get a Sasuke Sword, a Golden Needle, Money and the stairs that will lead you to the fourth level of the Dungeon.
Easy this level, head left twice and then down two more to find the stairs to the fifth floor. Here we are finally! Heal everyone, save your game and throw yourself on the crystal to face the Boss.
BOSS : TIAMAT (HP : 2400, EXP : 5496)
Strong in both physical and magic attacks (Thunder, Toxin) this Boss will be a really tough nut to crack. Use the Speed magic on the group and attack them with your most powerful weapons. Protect yourself with spells and use the Thunder Canceller to avoid its attack and Death Canceller can do its job too. It will take a long time but you will succeed.
After eliminating the beast, you will have your fourth Crystal and can use teleportation to get out of this hell.
Chapter 9: Back from the Future
We are almost at the end guys and to finish this game you will have to sweat, first of all go to a city and heal yourself, rest and recover physical and mental energies.
For the last phase of the game you will need to have your warriors with levels of 50 or less, if you don't have them go somewhere and fight until you reach them. There is no point in putting yourself in the last dungeon with low levels, you will be killed in a moment.
Buy everything you can and don't mind the expense as the money stays in the game and then go get the strongest sword of all, Excalibur !!! Do you have true Adamantite that was in the previous dungeon? Well done, now head to Dwarf's cave and in the upper room you will find a nice character, talk to him and give him the Adamantite, you will receive the legendary Excalibur in exchange.
Now go back to the old town of Cornelia, remember? It all started from there. Heal yourself and save your game, then exit and head to the Temple Of Chaos which is right above you, yes the first Dungeon in the game is also the last. Jokes of fate.
DUNGEON 11: TEMPLE OF CHAOS
Go straight to the central room and tap the crystal to begin.
Easy start, go to the lower right corner and take the stairs to the next level.
Same as above, go right until you find the stairs to the third level (no, it won't always be that simple).
Go down until you find the second room on the right, follow the columns to the central room, here an Eye of Death will attack you that you will kill mercilessly, advance to find your first treasures: Ether and elixir. Go back and stand in front of the stone that is in the middle of the room, use the Lute you got a long time ago and you will bring up some stairs that you have to take.
Exit the room and go right, then go up and reach the stairs at the top right.
Another useless level, advance to the upper left corner from where you are to find the stairs.
Here is the first of the four dangerous rooms of the game, go up, right and down to get to the stairs of the next floor, the only problem will be protected by Lich, the Boss of the Earth !!! Low HP but uses Flare to attack you so be very careful, defeat him to move on to the next floor.
Head down to get a Protect Ring, to the right of this item you will find another Ring. Right again and you will receive an Elixir. In the lower left, at the end of the level you will find a Sasuke Sword. Go back to the level entrance and go right until you find the roads leading down. First of course the Fire Boss Marilith that if you use the Fire Cancel it will be very easy. Proceed to the next level.
Water level this. No treasures, you just have to advance to the lower right corner to find the stairs. The Boss waiting for you is Kraken, only this time he is stronger and is immune to Thunder magic. Attack him with your weapons and defend yourself with Shield or Protect.
The last floor before the final Boss, here you are in the Wind level and you can take the sword that can help you for the final Boss: Masamune.
The road will be very hard and the encounters will be very close, get ready to start. Go down and pass the room, then jump to the right, continue in this direction until you see a narrow passage that goes to the right again. Take it and you will arrive in the room with the Masamute inside, also done this.
Go back where you came from (yes I know it's a pain but it's also the only way) and head to the top right corner to deal with Tiamat, the last Boss of the group. This time it's going to be really tough, the Boss casts all sorts of magic and is very powerful. Protect yourself from magic and use the Masamune which deals devastating damage. Eliminated the Boss you are ready for the last level of the game. Here we are at the last level, no monsters waiting for you apart from the final one, heal yourself to the maximum and get ready for the fight.
Go through the columns and go into the center of the level and talk to Garland who you already took out a long time ago. This time it won't be that easy, you will need all your strength and a bit of luck to take it out. Ok gentlemen FIGHT !!!
BOSS : CHAOS (HP : 20000)
This mountain of HP is not the only problem you will have, the sympathetic will heal very often and every time his HP will return to the maximum !!! What to do?
Then add that the spells tickle him (don't use them) and your magni will only serve you to heal yourself and use the Cancel All and Speed and Focus. The weapons they will have will be the healing sticks to heal the group. And then the only thing to do is attack like crazy, throw yourself at him with all the weapons you can and slaughter him with attacks. Also use all the Potions and Elixirs you have, this is the end.
After defeating him you will have finished the game, a really poor end where there will only be written to explain a couple of things. You finished the first Final Fantasy !!!
 Final Fantasy I & II: Dawn of Souls gba
- gba
Exit date: December 3 2004


