


LEVEL 1: ARCTIC ANTICS
As soon as you start, open the crates and grab the items, then kill the enemies. After passing the seals, go up to the crates, then destroy other fruits. Jump on the TNT crate, then leave before it explodes. Destroy the next crate, then jump over the gap and look at the Penguin from the other side. Go through it all to reach the first checkpoint. Go through the passage, then pass the other penguin, you will see two boxes that make you bounce. You also pass the frozen passage, seeing some crates not to be touched. Also use the box with the switch. You should find two more crates on the left and a penguin. Open the chests. When you get to the hole, jump over it and head to the crates. Take a high jump to reach the top and then, after getting the fruit, go through the other hole. At the other point of ice, jump again, use the body slam. Use the boxes to your advantage. Get higher, so be careful, as the enemies are very fast. Try to destroy the crates. As you keep moving forward, you will come to an area where there are penguins going back and forth. You will also arrive at another checkpoint. Then pass the holes. Make your way to the end of the tunnel to find a series of fruits that take you to a later checkpoin. Continue destroying the crates, and follow the fruits up the hill. You will come to a point with 5 islands. There are also two other platforms. One takes you to Bonus Round, another to Death Route. Beware that the Death Route will be available if and only if you haven't lost a single life. Break the crates in the nearby islands for now, and move on. After that, always continue forward, following the path. Break the crate, then grab the fruit, then smash the Nitro Switch. So you should have a Gem. If not, don't worry. You will still have finished the first level.
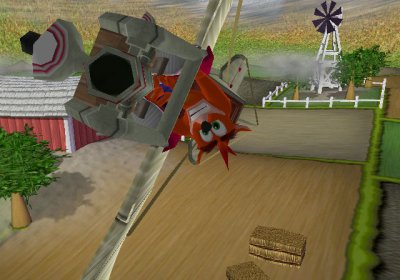
LEVEL 2: TORNADO ALLEY
This is Crash's first flying level, and the first time with Glider. You'll take control of the Glider, and you'll have to smash the generators. Be sure to get close to them before trying to tear them apart, as it is totally useless from a distance. However, there shouldn't be too many problems. The generators are located in a circle around the level, with one towards the center. Also destroy all the crates.
LEVEL 3: BAMBOOZLED
This level will also turn out to be quite simple. You will be in a hamster ball. Follow the platforms. After passing the first tree, you will find an elevator. Wait until it comes down, then climb to the top, and continue forward. Look for crates and break them as soon as you see them. Overcoming the path, continue along the edge, then pass it and continue in the spiral sections. Then go back to the platforms, and reach the first checkpoint. Break it and continue up the hill, smash the crates, then continue forward. At the fork, first left, finding the four crates, then go back and go right, taking the elevator and taking the four crates at the top. Arriving at the next area, similar to the previous one, you will come to have enough speed, break the crates, pass the S-shaped area, then go down the platforms, and you will find some fruits near the end of the screen. Two paths both lead to the exit.
LIVELLO 4: WIZARDS AND LIZARDS
This is the hardest level so far. You will have to memorize everything well for the Dragon Chase section. At the beginning, keep going and you will come to your first enemy, Knight. After there will be a Wizard, try to avoid the things that pulls you. The next is Bat, be careful, try to jump to avoid it. Then you will arrive at the first check. After the bridge, go get the crates, then go through the next well and run away from the Dragon. Go left first, then right. Go to the first door, and the dragon will stop. Don't stay near the door though. It will still keep chasing you, keep moving down and don't worry. Pay attention to the next holes. One is on the right, another on the left. Go to the next door to get the crate, then in the next section pay attention to the crates. Stay on the left. Once at the bridge, the Dragon will stop. Continue afterwards to the checkpoint. Try to avoid the bat nearby, then go to the knight to beat him. When you reach the fire, you will notice small fireballs. Don't worry, hit the Nitro Switch and detonate it. Be careful because the Wizards near the Nitro Crate could hit you.
LEVEL 5: COMPACTOR REACTOR
You will now have to go to a trolley; this is a fairly simple task that shouldn't take you a lot of time. Also look for the crates. Once you reach the end, you will come to a laboratory-like area. Go ahead, then wait and go under the cracks in the roof. You will meet the first enemy, it is a Bomb Bandit. After that, a Flame Thrower. Try to take note of his combat procedure to kill him quickly. Then there are some TNT crates, be careful. After the crates, another set of crepe. Get to other enemies, then more chests, and keep it up for a while. There will be two more such sections, at least. You will have to try to avoid some lasers in one of them, be careful. Finally, jump on the switch. Break the TNT crate to make it explode, causing the switch to activate. Then kill the next Bomb Bandit. Go through the next set of stairs, smashing the crates. You should see a corner with some enemies, they can be easily avoided. After avoiding the lasers the level will be over.
BOSS : RUMBLE IN THE ROKS (ROK-KO)
There will be rocks near Rok-Ko. There isn't much strategy. Watch out for the two rotating boulders. You will need to hit them both, then turn them blue. Be careful because your effect on the boulders is short-lived. If you wait a long time to hit the second boulder, it will go back to normal. After the first attack, three boulders will drop instantly. After defeating him, he will gain the Tip Toe power.
LEVEL 6: JUNGLE RUMBLE
It will be raining. Cross the river and get the crates along the bridge. Then, continue along the crates, arriving at a wall, also made of crates. After that, two more natives to kill. Now go to the Switch Box. Use it to hit. Keep moving forward, coming to some crates with Nitro behind them. Be careful not to hit it. At the first checkpoint, be careful in case you want to go behind the two stone buildings as there are two natives behind them. You will soon come to a mountain. Jump to get the crate that's in the air, then you'll come to a stack of crates, arranged in a ladder. Destroy as many as you can. You will then come to a river. . Smash the crates along the river. You should reach an area before a tunnel. On the right you will see some crates, and other boxes behind them. Smash the crates, then follow the river. You will come to the end of the river, and you will find another checkpoint. You should see a tree on the left, this is a platform for the bonus level. Pass it, and when you finish get into the jeep. Don't worry about avoiding all the crates. The best way to make sure you don't die is to follow the fruits. They will lead you to the ramps, and you should be able to continue through them. Try to stay in the central part of the path. As soon as you get close to the exit, stay to the left and you should find a chest to hit. The Rhino's are coming back and they're not far enough away for you to hit the crate safely.
LIVELLO 7: SEA SHELL SHENANIGANS
Pisces in front of you. They will continue to follow the same path, so you won't have any problems. . Smash the houses. The first box is in the sand, the other two hidden under the grasses. The next area has two fish that you will need to avoid. Two more crates will immediately appear. Go past the mines, swim in the tunnel. Be sure to smash the crates. Go through the next tunnel, and be sure to smash the crate inside it. On the other side, hit the checkpoint chest, then swim to the other tunnel. Be sure to smash the two crates in here. Exit, look at the mines on the right. Don't worry and follow the fruit, paying attention to the fish. Destroy the crates below, then move on. The rest of the section is simple. Keep going and watch out for the mines. When you get to the tunnel, follow it and break the TNT. Blow up the crates. After that, you will reach the area where there is a vertical tunnel, be careful. You should see a mine. After that, you will enter a steel tube, and a diver will come out. It's easy to use, you shouldn't have any problems with it. Shoot the missiles at it. All enemies along the way should die. Try to drop some charges to destroy the crates. When you reach the end, try to hit the checkpoint and move on. Hit the switch too afterward. Destroy the casee. Follow the fruit, arriving at the wall of crates. Break them, then continue through the tunnel. When you reach the second portion, you will find some Mines lined up at the top. After that, continue on to the next tunnel being careful not to hit the fish. Look for the switch, then press it and go back up.
LEVEL 8: BONZAI BONSAI
This is the first time you will control Crash's sister Coco. His moves are different from Crash's, but not excessively. Pay attention to the crane on your right at the beginning. Go through all the platforms, being careful not to hit the fish that come out of the water. After passing the entrance, you will find a pile of various things. Beyond the checkpoint there are two more platforms. Once you get past this set of platforms, you should wait a bit, then move on. Arrived at a kind of China Town, enter the small labyrinth, to come out to a bird's eye view. Now the game will be a 2d session. Now go on, trying to overcome all the gaps, and killing all the Ninja. As you continue forward, you will reach a platform that could be quite tough. Try to remain seated and wait until you come to crates of Nitroglycerin. Back in the third person, pay attention to the purple part of the floor. After you have to kill an enemy. Try to rotate and continue forward. Jump into the opening and you will reach the next checkpoint. After jumping on the crate, you will come to the roof. The roof is made of leather, so it is difficult to move on beyond a certain point. You will have some difficulty aligning with the fruit. You will also pass platforms. It might be a little annoying, given the fact that the jumps are a bit difficult. Along this balcony, you will see small crates of Nitroglycerin. Behind the circle, there is a chest with a life. Moving forward, you will find the box with the Nitro Switch. Hit it to destroy it.
LIVELLO 9: THAT SINKING FEELING
The level in question is not overly difficult, but annoying due to the fact that you are on the Firefly. This means that you will have to hold X until you have blocked an enemy. You will have to pay attention to the constant and annoying enemy fire. It is best to keep going in circles, moving in a zig zag way.
LEVEL 10: H2 OH NO
. Go through the first checkpoint, so watch out for the mines. Also beware of crates of dynamite. Once on the surface, you should be on foot again. Enter the cave. You will have to jump from the platform to the normal crate, then back from here to the next set of crates. You will come to another section with the green liquid. Go through the corridor. Again, green stuff to ignore. Kill the bandits too, then grab the chest on the left. When you get to the next area, more crates to break, and you will also have lasers to shoot with. Hit your Nitro Switch Box, so be careful to avoid the lasers.
BOSS 2: DRAIN DAMAGE (WA-WA)
To kill this boss you will have to hit him four times, and you will have to make big jumps. It has a low and a high attack. You will have to jump across the platforms, avoiding attacks. Jump again while you are turning.
LIVELLO 11: THE GAUNTLET
This level is quite similar to 4. Smash the crates nearby, then move on. Pay attention to the floors. Kill the knight, and move on. You will soon find a switch. Past the crates, you will find two sharp objects. Try to avoid them, it shouldn't be difficult. Follow the stairs, reaching the top. After the small gap, you will arrive at the first checkpoint. Go ahead and get past the hammers. In this way you will have saved a lot of time. Once this is done, destroy the crates immediately after jumping. You will find a strange structure inside the wall. Beyond that, there are platforms that go back and forth inside the wall. There is also a third one, but in case you miss it you will land on the one below. Back on the main path, you will find three crates behind a pillar. Two are almost invisible, but the third is a bit higher. After that, there are spunciotti coming out of the wall. Destroy the crates on top, then jump to get past them. After you will notice other crates in the background, go back to destroy them. Now follow the platforms with the fruits, and after the bonus level, you will reach another checkpoint. The first sections are a set of rotating blades. Run and double jump to overcome them. Immediately after there are speed balls. You should avoid problems by staying in the middle. Or take a simple double jump. If you look ahead, you should see the Death Route platform. At the top of the stairs, there is a section of steel crates, and other crates that you will need to break. Get to the top, then kill the wizard, then go back and destroy the crates. After the checkpoint, and the last set of TNT, continue on your way, waiting to get past the fire. When you get to the spiked wall, jump to the next platform to activate the Swtich Box. Then go back to where the steps just started. From here continue forward, then towards the end grab a Nitro Switch box. Hit him and you should have broken all the crates.
LEVEL 12: TSUNAMI
This level can be quite annoying due to the rain and darkness. After the tunnel, you will reach the first opening. You will find some crates in the middle. Smash them, and you should be able to hit the switch box. So watch out for the red truck. Continue now, paying attention to the speakers. Jump and do Coco's spin move, then you will see the buonus platform. Kill the fish. You may have problems once you are on the scooter. Pay attention to the wave, in particular. First, just follow the fruits. It shouldn't be hard. After the first red vehicle, there should be two small areas to walk on. When you reach the end, you will come to a square in front of a checkpoint. Break the crate, and move on. You will come to a blue gem. Smash the crate at the end of the level to finish.
LIVELLO 13: SMOKEY AND THE BANDICOOT
It is a kind of rush. All holes are located on the right, except one. When you get to the ramp, pay attention to the hole on the left this time. There is no particular strategy to follow at this level.
LEVEL 14: ESKIMO ROLL
You will be back inside the sphere. There will be many obstacles and many enemies this time. Go slow and carefully. After crossing the bridge, you will find holes on the left, try to avoid them. Attention also to Tony The Tiger immediately after; it moves back and forth trying to hit you. Smash the crates, and the checkpoint, then continue up the hill. Eventually you will come to another area with holes, be careful. Then avoid the penguins, arriving at a moving platform. Then sit on the gray blocks, and wait for Dingodile. Go a bit further, and you should face another Tiny the Tiger. If you have enough speed, you can simply move to the right, and climb the hill before heading back into the hole. Now you will have to pass some self-propelled platforms. Try to observe a little, it shouldn't be difficult for you to understand the movement. You will come to a chest with a life. Now, you will be in an area full of water and bridges. But try to stay on the main path. After the bridge, break the final crates to finish the level.
LEVEL 15: FAHRENHEIT FRENZY
After the checkpoint, try to stay away from everything. You will in fact be at great risk of being hit. Try to have the right timing to stay away from lasers. Then continue to the next checkpoint. Jump the hole, smashing the crates. Continue forward, until you reach a TNT chest. Blow it up, then smash the steel ones. Hit the switch box, then look to the left and you'll see some crates. Destroy them, then continue. Jump over the lasers, then you should see a chest with invisibility. Run through the lasers, then smash the Flamethrower, jump into the next hole, and you'll find more crates, break them. Now try to press them. Wait until they stop, then pass them. You will now find the bonus platform. Get over it, and jump over the fire pit, smash the robot. Break crates again, enter the X-ray chamber. Then run until you reach the final fire pit. Kill the flamethrower here too, then jump on the belt, then go to the X-ray chamber, with a chest inside. Hit it, then avoid the lasers by jumping on the lower ones, then kill the Flame Thrower with a turn attack. Jump into the next pit, kill the bandits, then hit the Nitro Switch behind them.
BOSS : CRASHES TO ASHES (PY-RO)
As soon as Py-Ro starts chasing you, run back. He will throw boulders at you, trying to hit you. It will soon reach your Mech, so follow Py-Ro. There are three rounds, all of which are pretty easy. Round three will see you trying to avoid boulders, but it won't be problematic anyway. Use the spray to take him out.
LEVEL 16: AVALANCHE
Watch out for the penguins ahead of you as you start the level. Wait for them to pass. You will now find some speakers and a switch. Jump to the top chest. Once you have crossed the bridge, pay attention to the next platforms. In the next steps, you will simply have to try to avoid the penguins. Go ahead and destroy the crates. Try to take your time. Pay attention to the speakers. After passing the checkpoint, you will have to go snowboarding. You will come to the end like this.
LEVEL 17: VOID DROID
Smash the crates, then jump. When you get to the other side, continue down the corridor. Avoid green lasers. Then you will find the lab assistant that you have to kill. After this section, you can have fun. Keep going, destroying various crates. Particularly, smash the box of dynamite. Once you get to the gray, continue maneuvering between the top and the bottom. As soon as you reach the first iron chest, you will notice one on the ceiling. Run next to it. Hit it to activate the box. Then wait until the electricity stops, then jump. Timing is essential here. Jump the gap to find your mech. Smash the next set of crates, then tear the robot apart. You should also see some green things. Continuing, you should find yourself with two lab assistants, tear them apart. Moving on, more robots to kill. Now go to the next checkpoint. Try to watch out for the enemies. After that, things are relatively simple. The only difficult parts turn out to be the jumps. Then take the purple gem. Try to take a look at the enemies, and shoot them if they get in your way. Once you have cleared all the jumps, you should be able to finish everything.
LEVEL 18: CRASHTEROIDS
You will have control of Coco again. You will have to destroy three space stations. There is a small, problem; the space station has shields that prevent you from proceeding. There are three for each station. This level is much simpler than the ninth. There are fewer enemies trying to hit you, in fact. There are also fourteen crates with small ships.
LEVEL 19: CORAL CANYON
You will find yourself under water again. You will start in a diving suit. There is not much to say, it is a simple level under water, similar to the previous ones. Try to avoid the mines, and take all the crates. There will be sprawling animals that could attack you. Getting to the first checkpoint is very easy. Kill the enemies nearby, and reach the second checkpoint. Go over the crates, then under them, and turn them over. Things should be pretty straightforward from now on. Hit the switches at the end to smash all the crates.
LIVELLO 20: WEATHERING HEIGHTS
Immediately head to the crates and break them. As soon as you reach the first pit, you will notice a purple tornado. Don't worry about it, as it won't do anything to you. Continue down the corridor, destroying the enemies that approach you. You should reach a straight path, with swords. Approach them, and wait until they stop. You should then see some booms hitting the ground. Stay to the right and kill the bandit. After the first checkpoint, you will find a Flame Launcher. Kill the enemy, then destroy all the crates. You should now be hesitant about what to do now. Jump close to the border, then you will find yourself in another grid. Beware of the robot. When you get to the second set of iron crates, you will see another robot. Keep going until you see it. Break the crate in the center of the pits, then hit the switch. Iron chests will be formed. Don't leave now, there is a TNT crate next to the life case. As you continue forward, pay attention to the path you take. At the end, drop down, then move on. You will find a robot that is expanding. Go back and blow it up. Jump over the hole and be careful. Keep going, then wait a moment. Keep going until you reach a checkpoint. You will now have to face an entire salon full of lasers. You will then find an invisible chest. Quickly run along the edge to avoid the lasers. Once outside, you will reach another room. This is a slightly more difficult stretch than the last, due to the two crates of Nitro. After that, there will be a similar area, but even more filled with crates. Go ahead, and smash the crates, hitting the switch, and jump into the warp.
BOSS 4: ATMOSPHERIC PRESSURE (LO-LO)
This battle may be easier than the previous ones. You will simply have to hit the boss with all your might, as he is vulnerable at the moment he makes his attacks. You should also be shooting steadily, as there is no ammo limit. Lo-Lo will move fast when you do a lot of damage to him.
LIVELLO 21: CRASH AND BURN
This level is a bit difficult. Smash the crates at the beginning, then continue forward and jump inside the little turtle. Then break the crates, and kill the crab at the end of the harbor. Going forward, pay attention to the gecko. Destroy the crates, and keep moving. You will come to a small Nitro Crate Field. The nearby wall will explode and fall apart. Jump from stone to stone, then continue along the lava. On the other side, you will come to a parrot. If you get close to him, he will knock you to the ground. Try to avoid it. You will be hit once, so try to avoid it. Destroy the crates in front of you, then wait a moment. Use everything you can to continue beyond the lava. Hit the switch to make some crates of Nitro appear. Continue along the path, and you will come to the bonus platform. Try to get close to the checkpoint near you, then wait for the stones to come out of the lava. There are two other lava rivers nearby that you need to cross. The first consists of a self-propelled platform that cannot go down. Jump up and continue, then jump down before it sinks again. Go down the path, then jump to the first chest, then go under the second and destroy it. Get off the elevator. You will notice a boulder coming down the platforms. This is the next hurdle you will face. After the boulder has reached the bottom, jump up and climb the first section, then approach the wall. Now run to the next platform. This is where the Death Route is located. Wait again for the boulder to arrive, then jump to the next platform, and you're done with this section. From here go up the stairs and arrive at the checkpont. You can also go up the stairs and arrive at the checkpoint. You will also notice a chest with a blue flame. Be careful as it will explode, and send small rocks everywhere. There are three along this path. Try to take your time and you should be able to overcome them without problems. Once you have passed these craters, you will come to a lava cascade. Use the stone to overcome it. So go ahead. Once you reach the bridge, head forward, and run forward, destroying the crates in the middle, then hitting the switch.
LEVEL 22: GOLD RUSH
As soon as you reach the second set of crates, watch out for the cactus. Then look at the crates with the TNT on top of them, at the top you should see an object, hit it with your bazooka. Don't get too close to the donkey, however. If you really want to kill him, hit him with the bazooka. As soon as you continue, pay attention to the cactus you will encounter. Now jump the gap and then continue. Smash the two boxes, so watch out for the Dynamite. You will then arrive at your first checkpoint. Keep going until you meet a donkey. Smash it with your bazooka, and continue ahead. You will soon reach platforms that you must necessarily overcome. Then cross the bridge, and then stop for a moment, smashing the crates of Nitro. Keep going until you reach the checkpoint. After that, go past the cells. Once you get to some kind of cart, make it go forward by continuously pressing the action key. When you get to the boxes, press square, or the corresponding button, to break them. Now, you will be back at the basic level. Keep going forward, then go right. You will find a Death Route platform before you get to the end of the path. Keep going forward, so watch out for the patrol at the end of the bridge. Kill the scorpions that will appear in succession. At the checkpint, you should go on until you enter a village. As soon as you go up the ramp, turn around and smash the crates. In the next grid, pay attention to the scorpion. When you reach the end, let yourself fall and continue. Try to have time, and you shouldn't have any problems. At the end of it all, use the TNT on top of the switch. There is also a final wall of crates, before you finish.
LEVEL 23: MEDIEVAL MADNESS
Crash is back inside the Atlas Sphere, this time in a castle. You will start the level on a ramp. Try to stay at the top of the screen. Below are three decks, the top one is cut in half, the middle one with a crate at its end, and the bottom one with three crates. Beware of the platform. You should have enough speed to overcome it if you are fast enough. Now go up the ramps until you reach the top near the crates. You should come close to a ramp, close to some crystals. Then, you should come across a circular arena. Pass the wheels too, waiting until one of them passes, and then follow it. You will now have to overcome Tiny, it is not too difficult to do so. Now go to the right, then take the left path, then go over the various ramps, and once you have overcome them, also climb over the following obstacles. You will now arrive at the next checkpoint. Wait for the platforms that are now moving up and down. You will notice some crates to your right. Do not worry. Next, you will have to pass an area with some windmills. Wait until you are on the other side. There is nothing on the left. Now head to the other side to find a checkpoint. Follow the fruits to pass Tiny, then drop off the main floor, then pass the nitroglycerin crates. You should come to a dead end, in which you should find some chests to open. After that, head back to the wooden platforms and follow the fruit arrows. Go past them, until you find a third full of crates. You will then have to overcome a kind of labyrinth. When you get to the end, you will find a kind of tube that is near the maze. If you have problems, follow the fruits. You should get some speed from them. Now go to your left to find the Nitro Swtich and other crates. Now go right to find your gem and warp.
LIVELLO 24: CRATE BALLS OF FIRE
For this level Crash will be back in space. Smash the crates ahead of you, then jump to the platform above you. Move around paying attention to the Nitro crates. Keep going until you find a Robot. When you reach the end, drop down, then jump to the next platform. At a circular, wait until the platforms are in the right position, then jump. Then drop down, and jump to the next platform. Grab the crate, then smash the robots. Once you reach the mech, jump inside and continue forward. When you get to the platform, you will notice that there is a door behind you. Come in. Once you get past the plasma, smash the checkpoint and go to the crates. Smash that too, so be careful as you keep moving. Now go left to find another checkpoint. Beware of enemies. Go through the platforms, then smash the Nitro Switch to finish the level.
LIVELLO 25: CORTEX VORTEX
Get over the electric field. Follow the fruits after jumping the hole, then jump over the hole again. You will come to a series of jumps and platforms. At their end you will find another electric field. Continue by grabbing the Aku Aku mask from one of the nearby crates. You will then find a lab assistant with a shield. Tear him apart with your bazooka. Pass the red platforms. Then smash the crates of Nitro in front of you. Again red platforms to jump. Try to avoid the electric bars, paying attention to the enemy who shoots you with a laser. Kill him with your bazooka. At another set of force fields, follow the fruit, coming to a switch. Hit it, then head right to detonate the TNT. The next checkpoint will be accompanied by a switch, which will drop some boxes to your left. Smash the one on the left, which is a TNT crate, then exit out of it. As you restart, stop and kill the lab assistant on the other side before you get to the second platform. At the third, you will find a green gem on your left, go along the path. Overrun again, trying to avoid the electric bars, then use your double jump to smash the TNT crate. You will find three more crates now, to break. Once you get through this section, you'll need to kill another shielded lab assistant. Also go through the hole and kill all the enemies you see in front of you. Wait until the power bar goes down, then double jump to get to the other side. Now hit the switch and get your gem.
BOSS : CRUNCH TIME (CRUNCH)
There are four attacks; after each round, Cruch will be tired and you will have to hit him with your bazooka. The first attack turns out to be with Rok-Ko, lava rocks will start falling down bombing the arena. Try to be as fast as possible. The next attack is with a Wa-Wa. There will be boulders of ice running all over the arena. After this attack, Crunch will send you some lava rocks, try to avoid them. After that, smash it with the Bazooka. Py-Ro is the next boss. Jump to the platform where you see Cortex. After its primary attack, there will also be some lava rocks. The fourth attack is with Lo-Lo, he will use small objects to fire lasers. After the attack, Crunch starts sending several other previous attacks towards you, and you must try to avoid them.
LEVEL 26: KNIGHT TIME
This is a very similar level to level 11, with some minor changes. Go up the stairs, kill the enemies, break the crates. Get to the first checkpoint, then go past the platforms, and you'll come to a section with trapped walls. Try to figure out the right timing to be able to cross the point without being harmed. Now jump on the platform, and you will come to another one of it. This one, however, moves. Wait until it gets there, then jump. As you continue down the corridor, go under the orbs. Now jump on the TNT chest, and then move on. You should go over an iron chest. By continuing, you shouldn't have any problems whatsoever. Be careful when you are close to the fire, as there is a wizard. Continue until you reach a set of stairs. Smash the Switch Box, then head left and smash the crates. Continue to the right, hit the Nitro Switch, get the gem.
LIVELLO 27: GHOST TOWN
Again, a level essentially focused on running. It is easy to win. To get all the crates, you have to go to each path first, and then take the two Outline boxes. A Nitro Box will then appear that you have to break.
LEVEL 28: ICE STATION BANDICOOT
This is another level where you basically have to run, in a kind of helicopter. The only problem may turn out to be the bear. The best method of passing this level turns out to be to go through the rings. The only damage that could be quite significant is that possibly resulting from the crates. Also try to take them.
LEVEL 29: SOLAR BOWLER
You will be using Crash's Atlas Sphere for this level. Head to the top of the screen, then break the crates, then go left. Go down the ramp, staying on the right, smashing the crates as well. Go back to the starting point and go down the ramp, then pay attention to the rotating platform. You will then meet Tiny, and to your right are the ramps leading down. Get past Tiny, moving forward. Pass the platforms as well, then you will return to the starting point. When you get to the ramp, go to the side of the screen. Follow the path. Pay attention to the moment when it will curve. Go through everything to get to a hidden gem. You will now have to follow the path to go back. Again, at the ramp, head to the bottom of the screen. Beware of obstacles. In the end, do not continue on the pipes, but on the ramp. Beware of the trail, as there is a checkpoint in the middle of it. Take one of the next two trails at random.
LIVELLO 30: FORCE OF NATURE
In this level you will control Coco again, on the snowboard. Follow the fruit. You will have to destroy all the crates. You may need a few tries. Beware of the gem. Continue along the path. Skip the crates. This will end the game.
Solution Summary
ARCTIC ANTICS
ALLEY TORNADO
Bamboozled
WIZARDS AND LIZARDS
COMPACTOR REACTOR
BOSS : RUMBLE IN THE ROKS (ROK-KO)
JUNGLE RUMBLE
SEA SHELL SHENANIGANS
BONZAI BONSAI
THAT SINKING FEELING
H2 OH NO
BOSS: DRAIN DAMAGE (WA-WA)
THE GAUNTLET
TSUNAMI
SMOKEY AND THE BANDICOOT
ESKIMO ROLL
FAHRENHEIT FRENZY
BOSS : CRASHES TO ASHES (PY-RO)
AVALANCHE
DROID VOID
CRASHTEROIDS
CORAL CANYON
WEATHERING HEIGHTS
BOSS : ATMOSPHERIC PRESSURE (LO-LO)
CRASH AND BURN
GOLD RUSH
MEDIEVAL MADNESS
CRATE BALLS OF FIRE
CORTEX VORTEX
BOSS : CRUNCH TIME (CRUNCH)
LEVEL 26: KNIGHT TIME
GHOST TOWN
ICE STATION BANDICOOT
SOLAR BOWLER
FORCE OF NATURE
 Crash Bandicoot: L'Ira di Cortex ps2
- ps2
- xbox
- gc
Exit date: November 23, 2003


