


Please note:
The solution is based on the American version of the game, so it is possible to find some differences in the Spanish version.
CAPITOLO 1: The Girl and the Firefly
Go to the right side of the screen and you will soon come to a sign that says "right to the Old Monastery", then continue right and you will fall into the tunnel with the box in the center, push it to the right side of the tunnel and use it to jump out. Continue to the right, go under the tree and you will come to another cave, ignore it and go back to the left, jump on the ledge and from there onto the tree. Follow the branches to the right and up to another sign, then continue to the right where the path will lead you to a house with a pink tree and a dialogue sequence will start. At the end of the dialogue, continue to the right past the pink tree and you will soon trigger a short tutorial on collecting wishes. Continue to the right and you will come to a large tree with a door on which there are three symbols and three scepters with the corresponding symbols emerge from the ground, use the Igniculus to light the scepters and move them so as to cover the symbols on the door with the projection of their shadows, so the door will open. Enter and take the sword from the statue and the first battle of the game will begin, follow the instructions to understand how it works and how to kill the monster. After the fight you will level up, use the skill point to upgrade your skills, then continue to the right. You will come to a dark cave, use the Igniculus to light the way, climb onto the ledge and push the box so you can jump to the next ledge and continue. You will find another sign and when you reach it the chapter will end.
CAPITOLO 2: The Queen of Light
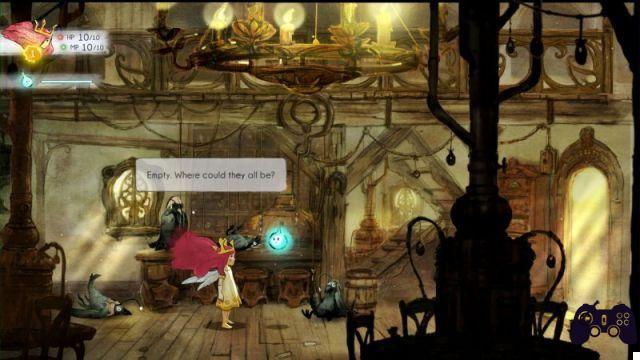
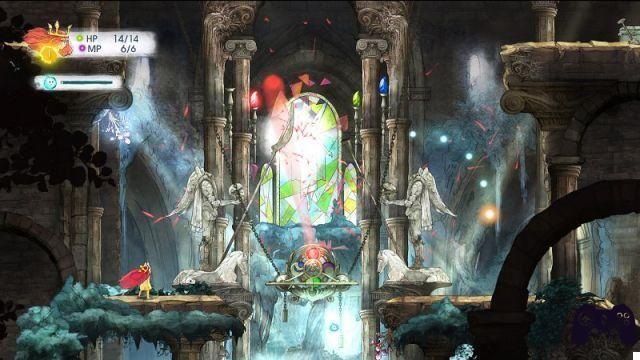
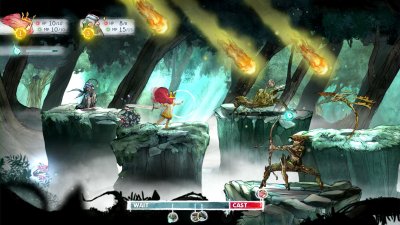
Go right, pass the carriage with the raven on it and shortly after you will come to a fountain with a patrolling ghost nearby, fight it (it is weak against light magic), then continue. Remember that if you go up the tree to the left of the fountain you will find a chest containing an Oculi, equip yourself with it and continue to the right. You will come to a dark tunnel, so use Igniculus to light your way, when you get to the point where the road splits in two and you can either jump onto the causeway or continue down to the right. The latter will lead you to a chest containing a Firefly Elixer. Get ready for the fight because on your way you will meet a hostile gargoyle. After opening the chest, go back to the other path mentioned earlier, then climb the adjacent one out of the tunnel and you will still find yourself outside in the middle of the stone path. On the left is a ledge that you cannot reach, so go right and you will come to a row of pillars and arches where you will find an impassable gate and a chest. You can't access the door right now, but you can push the crate back to the left to reach the ledge. You will arrive at a door guarded by a ghost, kill it and enter, you will find yourself in a large room in the center of which there is a platform with a blue circle, place the Igniculus above the circle and make it shine, you will activate an elevator that can go down or go up every time you trigger the circle. Go up the elevator and in a niche you will find a crate, push it onto the elevator and activate it so it will lower, then push the crate to the right until it presses against the platform on the right side of the screen. Climb on the platform and drop to the ground where you will find another chest that you can use to access the ledge on the right, then climb up on it and then go left to where the switch is. Activate it and a section of the floor below will begin to rise and fall at regular intervals. Go back and push the crate you used earlier onto this section of the floor, then climb up and push the crate on the right button on the ground, this will open a gate behind which is a door that you can use to exit the room. Go to the right and you will find a switch, activating it will open that gate that you could not access previously and will also open a hatch to the right from which you can descend to reach the gate now open. Go through it and you will enter a monastery with a large glass window. Go right and go up the ramps upstairs, you will find a device with four different colored lenses (red, blue, green, purple) and you will notice that there are three torches with colored glass flames on top. To proceed you will have to use Igniculus to light the glass torches with their corresponding lens, there is a crank on the left that you can use to rotate the lenses in order to illuminate what you need. Once all three torches are lit, a boss challenge will begin against a couple of giant statues. This fight is not too difficult but there are tricks, for example the statues like to cast Wings of Mercury to increase their speed. Beyond that, most of their moves consist of direct physical attacks that deal moderate damage and little else. Your strategy for fighting them won't have to be particularly fanciful, they are weak to light magic, so hit them with your spells until they run out, then use your sword and health if necessary until you've defeated them.
CHAPTER 3: Into the West
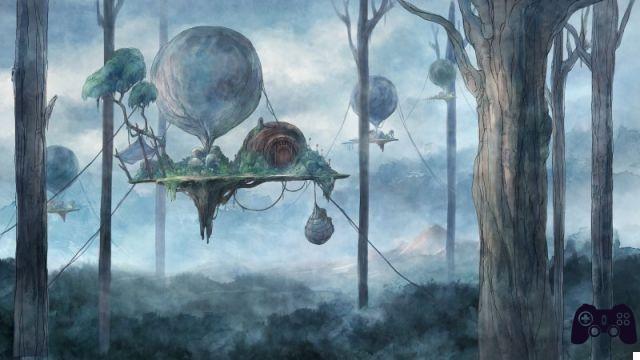
When the chapter begins, your goal will be to reach the Tree of Thorns, to do this you will have to go back to the Altar of Mahthildis, which is the starting point of when you started the game. When the chapter begins, you will find a sign that will direct you back to the Altar and almost immediately to the left there is a floating platform with some houses, use your wings to fly to the platform where you will meet the jester Rubella who will join yours. adventures and a new dialogue sequence will start. Then you can go ashore and if you want to reach the Altar on foot you can use the same path you followed to reach the Monastery in Chapter 2. Now we can spend some time exploring what you can now reach and that is a series of previously inaccessible areas.
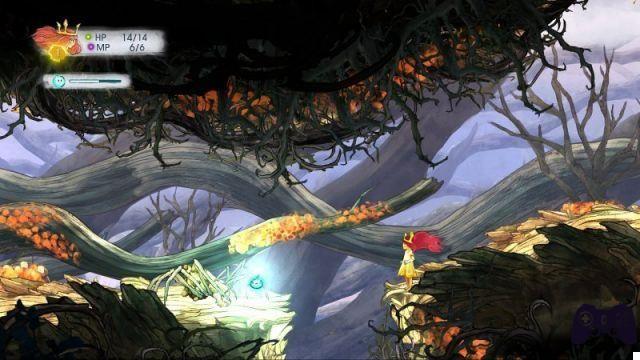
For example, approximately to the left of where you met Rubella is another platform with a house that you can enter to find a chest containing some Healing Tonics. Below you will find the list of other noteworthy points. From the house where you found the Tonics, fly to the left, if you stay in altitude more or less in the center of the screen, you should arrive at another floating section of land with a chest in the center, containing a Magic Potion. If you go down to the right of this area and keep going down, you should arrive at the chest at the top of the tree which also contains a Magic Potion. From here go down to the ground again, walk under the waterfall and enter the dark cave that you have already crossed earlier in the game, then climb to the top of the cave and you will see a spider hanging above, to its left is a ledge with a chest , fly up there, kill the spider and open the chest to find two Rough Sapphire Occuli. Go back to the area with the carriage and the crow on it, then fly right and you will come to a tree with a tunnel that will lead you inside. Continue to the right until you reach a house, enter and you will find an area full of thorns, avoid them to avoid damage and head to the lower left to find an HP Stardust element. Go to the lower right side of this area to find a chest containing a Rough Sapphire. If you keep flying at medium altitude towards the left side of the screen, you will come to a large group of trees, fly over it and you will find a platform with a house, inside which is a chest containing two Rough Emeralds. Also on the platform there is a chest with a Revive inside, while under the platform you will find a well at the bottom of which you can find a Defense Stardust element. Explore the side of this set of trees to find a tunnel, enter and grab the Strength Stardust item, then continue along the tunnel and drop to the ground below to find a chest guarded by a wolf. If you go to the left of that chest you will find yourself next to the tree with the three scepter puzzles you solved in Chapter 1, if you continue to the left you will return to the Mahthildis Altar. As you head towards the Altar you will find a sign on the edge of a cliff, jump to the ground below and go to the right, there is a hidden cave where you will find a wolf on a ledge guarding a chest. Fly up to it, take out the wolf and open the chest to collect two Magic Potions, then exit the cave and fly back to the treetops until you can fly higher. If you head left at this altitude, you will find various chests and containers with lots of presents and Oculi inside. Continue to the left and you will find your way back to the Mahthildis Altar. Continue left to get to where you can fly, or head towards the Tree of Thorns. Take a moment to fly, and you'll get to a couple of monster fights and a couple of chests. After you have cleared all the enemies and collected all the items, drop down and continue towards the Tree of Thorns, this will quickly lead you to encounter an orc, who will try to block your path. After a short dialogue sequence the boss fight will begin. Your fight with Ogre will be a little more difficult than the last boss fight with the two statues. It is accompanied by a pair of wolves who, while not a huge threat, can become an annoying distraction. The Ogre itself, meanwhile, will throw some powerful attacks at you, its Wrath ability is particularly insidious, as it will damage and slow down its target. Your best strategy will be to kill the wolves first and then focus your efforts on him. Avoid using magic attacks, because he will fight back, also remember Rubella's healing abilities when the Ogre's hits eat up substantial chunks of your health. When you have defeated him, you will arrive at the entrance to the Tree of Thorns, enter and fly to the left. The tree is full of thorny sections that can harm you, so move carefully and keep your eyes peeled for the various chests scattered around the area.
CAPITOLO 4: The Deep Dark Well
At the beginning of the chapter you will be at the entrance of the Capilli Village, look for the houses to find some chests full of various prizes. When you are done, head along the path indicated by the arrow and use it to continue into the village. When you enter the next section of the village go right and look for the houses with the loot, then go left and you will find a bearded man near a well and a dialogue sequence will start. You will receive the quest "Finn's Plight", enter the well and it will lead the bearded man, also known as Finn, to join your adventure. Enter the shaft and go down the tunnel opening which will eventually lead you to a large room with a bucket hanging in the center, under which is a small section of floor. The room continues left and right, if you head right you will have little time to get to the ascending tunnel which will lead you to a container of elements and a chest protected by some monsters and thorny traps. Go left and you will come to a room with a door closed by a puzzle, to solve it use Igniculus to light up the two scepters near the door and place their shadows on top of the corresponding symbols on the wall, then use the door now unlocked to continue on to the next one. area and go right.
You will find a thorny trap almost immediately and you should also notice a blue orb to its right, use Igniculus to illuminate the orb and the trap will stop for a moment, allowing you to safely pass it. Continue to the right being careful not to lose the small room on the ceiling right after the thorny trap, it is not necessary, but it would be a shame to lose two chests. Then continue to the right where you will come to a point where you can go down to the lower level to find some more chests, or move on. You will come to a large room with a statue head standing in the water on the floor. Talk to the crow on the head of the statue, then continue right until you reach the wall of the room, then go up to find a tunnel opening guarded by a wild boar monster, take it out and continue to the right, using Igniculus to overcome some thorny traps, at the end of which you will arrive in another large room where the boss fight will begin. This boss is a three-headed Hydra, each of which has a different color, these colors indicate their elemental alignment (fire, earth, water) and are the key to winning this fight. When the fight begins, switch with your fellow adventurers in order to use Finn and Rubella as well. Finn's elemental magic will be very helpful in Aurora's attacks, Rubella's quick, close-range hits and her healing powers will be useful in interrupting Hydra's attacks and keeping Finn healthy. Once the actual fight has begun, choose a head and focus on it, use Rubella's attacks to interrupt the Hydra if necessary, but do what you can to keep Finn focused on distributing elementary magic against the same head until to which it will not be defeated. As long as you can continue without dying, you should be able to eliminate the heads until you defeat them all. When the boss is defeated, a dialogue sequence will start and you will be transported to the village where all the crows have turned into people. Immediately to the right of your location is a man named Avo with an exclamation mark on his head, talk to him and he will give you a side quest that you can pursue at your leisure. If you don't feel like it right now, go left to trigger another dialogue sequence, once it's over, keep going left until you come to a sign. Go down to the right first to find a chest and then go down through the tunnel to find another container of items, then go back to the sign and continue to the left. Initially you can go both up and down, then if you try to go up you will be blocked by gusts of wind, so the only way to proceed will be through the tunnel on the left at the bottom of the screen. This tunnel is filled with gusts of wind, but they come and go at regular intervals, making it possible for you to seek shelter when they blow and advance when they're missing. At the end of the tunnel, instead of continuing to the left, it begins to rise.
CAPITOLO 5: An Unexpected Reunion
When the chapter begins, you will be on a cliff near a sign, jump to the ground below and a dialogue sequence will start, then continue left, pass under the falls, this will slow you down and force you to descend under their weight, you will arrive then to another cliff, go up on the ledge and go down to the area below and you will soon come to a broken track of a mine with a monster. Defeat it and fly down the track to find a chest containing two Lull Elixirs, then cross the track to go left where you will find another monster and an item container with two Quicken Elixirs. Once done, go up and you will find the other side of the broken track which will lead you to a trap with three rotating saws that you will have to go around in order to proceed, just wait for the passage of a blade and you can use the empty space before the next blade to fly through it.
Above the trap there is a switch, fly up there to activate it, then go down the trap and exit to the left, a dialogue sequence will start, at the end of which Norah will join your group. Take a moment to explore the area for crates and containers and to take out the various enemies, then go up to the upper left corner of the area and you will arrive on the mine track where you will find a chest at the top. To the left of the crate is a gap in the track through which a waterfall flows, push the crate through the gap on the cliff below, which has a pressure plate that opens a door when pressed, so use the crate on the plate to open the door on the left. Go through it and you will come to another saw trap, pass it and exit left to get to another large open area, explore it for hidden objects, then continue to the upper left corner to find another collapsed mine track which will lead you. inside another room with a saw trap. This is a bit different as it is stationary and only moves when you hit the switch above, to get past it you will need to rotate the saw so that the rounded part is facing up while the flat part with the toothed edge points down. . Once this is done, exit the door you entered first to go down to the door under the track, enter and go under the saw blade. You can exit to the left to continue, but there is also a tunnel (with thorny traps) that you can go down to find enemies and loot. When you continue, go down to the ground and continue to the left, you will find treasures and enemies and also Madame Capilli. At the end of the dialogue sequence fly to the top left, you will come to a giant, fly over its head and find the way to the city and the chapter will end.
CHAPTER 6: Of Mice and Magna
Go down to the village of Bolmus and spend a few minutes searching for chests and treasures. When you have cleared all the houses and roofs, go down the streets and walk to the left side of the village, you will come to a gate, enter and talk to the Mayor, then go out and meet Robert. After conversing with him, he will join your party and you will be transported to the face of the giant Magna. After another conversation, Magna will open his mouth so you can enter and activate a dialogue sequence, then go down the tunnel immediately to the left which will lead you to an area where you can discover the heart of Magna. You will notice that it is covered in cobwebs, to wipe them out you will have to find three giant monster spiders scattered inside Magna. Go down the tunnel to the left, it winds up a bit, but if you keep going right to the end, you will find a group of the aforementioned spiders, start fighting and you will find yourself facing three of them. They have no real weaknesses, and represent a real challenge, the best thing is to use Norah's time manipulation skills to slow down the spiders and speed up your companions. Then you can switch to Rubella to use her fast attacks and healing magic and to Robert who has some good skills to deal extra damage and perform group attacks. Do your best to try to stop their attacks, and of course focus on them one at a time. Go back to the room where the heart of Magna is and continue down the tunnel to the right, which will split: one road leads down and the other leads to the right. For the moment go down and pay attention to the monsters to be eliminated and the treasures you will encounter along the way, follow the tunnel to the end where you will find a second series of giant spiders. Kill them just like you did before, then head immediately to the left of where you found them, go down the short tunnel and you'll come to a large room with a giant vault. Use the switches to match the symbols on the door frame and three scepters will pop out from the vault, use Igniculus to light them up and the vault will open giving you access to a hidden treasure and thus completing Robert's secondary mission. Go back to the room of the heart, but do not enter the room itself, reach the point where the tunnel forked and this time go to the right, you will arrive in an area with fireballs shot back and forth between the ceiling and the floor, past which you will find the third group of spiders. After eliminating them, go back to the room with the heart and interact with the heart itself, thus activating the fight with the boss. In this battle you will face a giant sized spider and two smaller spiders that you have chased and fought inside Magna. Use Norah's or Robert's abilities to slow down the three enemies, then take out the two smaller ones to focus on the giant one. It features a powerful single target and hits the group in close range. It's not that hard to survive this, but be prepared to use Rubella to improve your health. You will have to hit the enemy constantly with slows / spells / attacks, allowing you to speed up every time you stop his attacks.
CAPITOLO 7: The Duke and the Duchess
Get off the hand of Magna and go left, you will find a sign "to the Temple of the Moon", pass it and continue to the left and you will arrive at a high cliff, fly over it and continue to rise in the air above, you will come to a series of floating platforms containing chests and monsters, clear them and keep climbing until you find an opening that will lead you to a new area. Go left and you will meet a circus carriage and a sad fool named Tristis, talk to him and after the dialogue sequence he will join your group, thus fulfilling a secondary mission of the game. Continue up, pass the thorns, you will arrive in a larger room full of monsters and platforms strewn with thorns. The space is tight, so you'll have to be very careful when moving around to avoid unnecessary damage.

Fly up to the left and you will find an ascending tunnel that will lead you out, follow it and eventually the boss fight will take place. You will have to face a giant Griffin accompanied by a couple of dark ghosts, eliminate these two first, they are sensitive to light magic so use Aurora's spells to defeat them quickly. Then use Norah or Robert to slow down the Griffin, it mainly uses close and breath attacks that can damage single and multiple targets quite effectively, plus it can cast a group slow spell every time you interrupt one of its attacks. Focus your attention on maintaining the usual strategy, reducing his health while maintaining that of your group, the Griffin is not the toughest of the opponents, so if you keep a constant offensive you should beat him in a short time. Once the match is over, enter the Temple of the Moon and a dialogue sequence will start, then head left. You will come to a large door in front of which you will see your companions crying, talk to each of them, then enter, you will find yourself in a large area, search the lower level for treasures, then fly up until you reach a platform with a mirror. Another dialogue sequence will start, then interact with the mirror, then head left until you find Norah again and another dialogue will start. At the end of this sequence you will find yourself in the fog in an area similar to a dream. After yet another dialogue, chase the fireflies to the right and then return to Aurora's mother to trigger another sequence that will conclude the chapter.
CAPITOLO 8: The Highest of the High
Exit the cage and Oengus will join your group, head left where you will come to a closed door that you cannot open, then you will have to go around it, nearby you will find an ascending passage, fly up and you will find yourself on the right of a large dark tree with some chests close by. Open the crates, then continue to the left where you can go down a kind of corridor that will lead you to an area that ends with a crossroads, if you go left you will have to overcome some thorny traps, eliminate some enemies and open a couple of crates; if you go down you will come to a contraption that now you cannot activate with Ignuculus, so at the moment go to the left side of the room where you will find a large red door, enter and you will see all your companions in a cage, then free them and exit. Go back to the contraption from before and use Ignuculus to reposition the gears so they can spin together and open the gate below. This will lead you to an area full of monsters and chests, make your way down where you will find your way to the door at the base of a set of stairs where Oengus will give you a side quest. You can enter through that door and complete the mission or head right to continue the chapter. Assuming the latter, continue to the right and you will trigger a dialogue sequence that will end with the boss fight. You will find yourself facing Cordelia in the form of a dragon, accompanied by a pair of reapers-like. Focus on the two reapers first, they are weak against light magic, so use Aurora's spells to damage them, while switching to Robert and Rubella to slow enemies and heal your party. After defeating the reapers you can dedicate yourself to Cordelia, she has some really bad close shots and has a bad habit of respawning every time you interrupt her attacks, but overall she is not a more difficult enemy than the others, as long as you drain her health with a constant barrage of attacks. Occasionally she can resurrect one of the reapers, but you already know how to proceed, kill him and then return to her. Once defeated, continue to the right and enter the Submerged Lands to end the chapter.
CAPITOLO 9: The Lowest of the Low
Exit the elevator and go left, you will see a white sphere that you can illuminate with Igniculus, thus opening a gate on the wall above, fly through it and you will find yourself in a secret room that contains a chest, open it to take the two Powerful Nectars of the Fairies. Go right and if you go all the way to the upper right corner you will activate a secondary mission, you can follow it if you want, then clear the area of monsters and treasures, then head to the center of the room where you will find a pillar of ice protruding. from a pit on the floor. Drop down from the pit and you will enter a new section where you will find more monsters and other chests. Go to the right and you will find the entrance to a separate area filled to the brim with thorns and containing many more chests and a powerful monster. To continue on your way go left and you will come to a cliff with a pile of ice that expands from the upper wall, fly from the cliff and go down to the area below where you can continue to the left, taking you to a large room with two waterfalls that descend from the ceiling. Climb up and you will find some protrusions that protrude from the wall, in the two highest there are crates, in the two below there are a switch and a monster. Kill the enemies, open the crates and use the switch, which will open a portal on the floor just below the switch itself.
Go through the portal to get to a large door sealed by a puzzle similar to the others previously solved, then use the statues to light up the sections of the door in the right order. If you look at the door you will see that there are four symbols from left to right in the upper section, there are corresponding symbols on two pairs of statues to the left and right of the room, each statue holds a blue element in the hand, following the sequence on the illuminated door each blue element and move the shadow to the corresponding section of the door. Make all four matches in the correct sequence and the door will open, if you make a mistake in the order you will have to start over. Use the door to enter the next area, go right and you will find a couple of doors, above the first there is a sphere that you can light up with Igniculus to open it momentarily, while to open the second you have to fly to the ceiling and find an opening to cross which you can use to reach the switch on the right. Using the switch you will open the door, it will also remain open for a few moments, so you will have to quickly open both doors and go through them in quick succession before they close again. Go right to the broken ladder and you will find a chest on a ledge, push it down and go right, you will find a switch to the right of which is a corner with a button underneath, push the chest on the button and a door will open behind the which you will find a treasure and a monster. When you have cleared the room, go up until you reach another gate with another switch nearby, activate it to open the passage, continue and a dialogue sequence will start. At the end of the dialogue the room will fill with a poisonous green gas that will drain your health, before you continue you will have to hit two switches hidden inside the rooms to the right and left of this room, this will allow you to open a path that leads to an ascending tunnel. Once the gas is gone and the road is clear, go up the tunnel paying attention to the thorns that will begin to emerge from the wall. Keep going up and you will come to a room with some chests, open them, replenish your health and head into the next room to start the boss fight. This meeting will be between you and the dragon of Nox, supported by a pair of tentacles. Nox is capable of some heavy melee attacks, but it's easy to set up a regular attack pattern to defeat her, all you have to do is use Finn's light attacks. It's up to you, if you want you can use group spells to hit all three Nox at once or you can just use a single target spell to damage one target at a time. As you do this, use Rubella's healing abilities and her quick attacks to keep Finn alive and to interrupt Nox's attacks. Just keep this in mind and you will soon have eliminated the two tentacles from the fight, then leave Rubella for Aurora (or another character if you prefer) and destroy Nox. A long dialogue sequence will start at the end of which you will have to face the final boss. This is the monstrous form of the evil Queen Umbra, flanked by two Imp creatures, all three are vulnerable to the magic of light, which means that you can use Aurora in this fight. As in the previous battle, I advise you to quickly choose whether to focus on one enemy at a time or if you want to use group attacks, obviously always keep Rubella's healing abilities within reach. There is no need to switch to the other characters or Rubella to stop the enemy's attacks, it is better that you concentrate on keeping Aurora healthy, also because Umbra is equipped with some counters that are best avoided.
Click here to see the entire video solution of the game!
 Child of Light ps4
- ps3
- x360
- pc
- ps4
- Xone
- WiiU
- Playstation Vita
- nsw
Exit date: April 30 2014


