


Please note:
The solution is based on the US 3DS version of the game. There may be divergences from the Spanish version and / or for other platforms.
Tutorial
Use the princess train to proceed to the next area of the dungeon. Walk around the room, trying to meet the princess's requirements. So listen to the conversations, and then go and defeat the two nearby skeletons with attacks based on "charges".
Also take one of the bamboo poles, then hit the skeletons until you are explicitly told to stop. During the following discussion, you will be informed about the ability to block / dodge / deflect bullets. Two worms will then begin to "spit" towards you - return to the surface, so that the princess begins to tell you about the subjects in the area, with the aim of increasing the level of your statistics. You will then get information about your first quest.
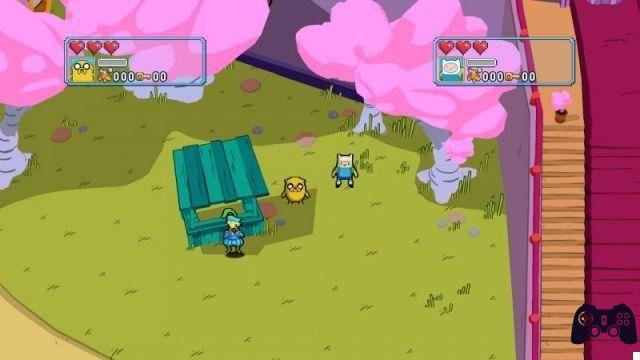
Candy Castle Grounds
This is a real "base camp" for your characters. Talk to the characters in the area, also chatting with Princess Bubblegum. During the early stages of the game, the only characters at your disposal will be Princess Bubblegum, Lady Rainicord, Mr. Cupcakes, Neptr and the Muscle Princess. As you continue forward, each time you pass the first ten floors, another character will be added to your party.
Each character has a specific "function" associated with it: Lady Rainicorn will improve your focus skills (the first upgrade will cost 100 treasures, the second 400.
Mr Cupcake will instead take care of improving the level of your HP bar; the cost will initially be 30 treasures, then 125, then 300. Muscle Princess will instead take care of improving your "quarrel" - which controls the amount of damage dealt, both with normal attacks and with your "charges". The first upgrade will cost 60 treasures; the second 200 treasures, the third 500.
Neptyr allows you to improve your imagination. This characteristic causes an increase in the damage caused by your special attacks (which go to use the "imagination" bar). This upgrade will initially cost 175 treasures, then 700.
Examine the treasure chest in the northeast corner, which summarizes all the "sub-weapons" you have recovered so far during your travels. You will thus be able to visualize everything that you are missing so far.
When you feel ready, talk to Princess Bubblegum, then proceed into the dungeon.
Secret Royal Dungeon
Unfortunately for us, the "floors" of the dungeon will be generated randomly every time you enter. The guide will therefore provide only general information about the enemies present in each of the "ten" floors that make up the game area. You will be able to "exit" the dungeon every five floors, while every ten floors you will be faced with a boss.
Let's start with the objective that you will have to set in each "floor" of your dungeon: if there is no boss, you will have to locate the stairs leading to the next floor. Most of the enemies will be "emitted" by the special generators scattered throughout the level. Along each floor you can (randomly) find food and / or treasures. Food has a healing effect - so try not to take it when your HP is at its highest. You will therefore also find various treasures and standard weapons.
Floors 1-10
You will first find yourself facing some skeletons and worms, near the initial play areas. These are low-ranking enemies that shouldn't bother you. You will start from the third floor, first of all locating birds capable of "diving" towards you. The best way to get rid of them is to always stay "out" of their range, wait for their dive, then throw yourself forward and kill them when they try to go back. So, when you have reached the sixth floor, you will suddenly find yourself in front of plants capable of "spitting" towards you. These are enemies not able to move, but who shoot bullets sideways and diagonally. They are also able to regenerate plants of "similar" type that are found in the surroundings, so when you kill one, we recommend that you also take care of all those in the immediate surroundings, to prevent them from bringing it back to life.
Boss: Demon Cat
On the XNUMXth floor you will find the first boss, the Demon Cat. The Demon Cat has two attacks - a kind of arched "lick" attack, capable of dealing damage to all subjects in front of or near the enemy's mouth; then fireballs from its tail. To avoid both attacks, we recommend placing yourself on one of the two sides of the Demon Cat, thus hitting it for the first time. It will then begin to spin around on itself, quickly making another attack. Strike once, then start moving. Having defeated the Demon Cat permanently, enjoy the cutscene that marks the end of this game zone.
Floors 11-20
A "new" enemy that you will find in these floors are the fairies (Faeries). These are enemies that can fly around the play area, but instead of "diving" like standard birds, they will fire bullets at your location. The bullets can be rejected by you, just kick them away.
Some "locked" exits will also appear in the area: you will need a key to unlock them. In case you don't have it, we recommend that you stand near the locked exit for a few seconds - a key dispenser should appear on the screen, and you can use it to get a key to exit.
Wolves and sticks of dynamite will appear along the screen. As for the wolves, they will "charge" towards you when you pass right in the middle of their field of vision. When / if they manage to hit you, you will be cursed and you will also take damage. Similar considerations apply to dynamite, but this will also begin to flash and then explode, immediately after the defeat. The explosion will then fire eight bullets, four towards the main cardinal points, four more along the diagonals - there is therefore no easy way to avoid them, except to stay outside the enemy field of vision.
Therefore, starting from the sixteenth floor, you will notice the appearance of several ice cream vendors along the particularly water-filled areas: these opponents will emerge from the water and shoot bullets at you. We recommend dodging their shots, or trying to hit them directly while they are along the surface of the body of water.
Video - Launch Trailer
Stampeding Prisoners
On the twentieth floor you will find yourself in front of a group of angry prisoners. Although their elimination is technically simple, your goal will also be to recover the treasures scattered throughout the game area - and precisely because of the ease of combat, it would be better for you if you could get as many as possible.
The prisoners will be positioned along three sections of the screen - top, middle and bottom section. They will normally charge to the right, so you will normally be forced to move in that direction to avoid the charge. Being "hit" by a charge of passengers will result in losing a "piece" of life points and respawning before the encounter zone. Your objective will therefore be to reach the bridge near the final area, shooting the prisoners down the ravine.
Along the way you will find a large amount of traps and switches. The switches turn electric fields on and off, or cause the traps to activate. The traps can instead cause the interruption of the movements, or the "curse" of your character with associated alteration of status.
In any case, you will then reach a completely frozen area of the dungeon, where Tree Trunks is hiding. You can therefore bring her back to the surface, where she will become one of the characters able to provide you with new quests (attention: her quests will always be slightly more difficult than those of the princess).
Ice Tunnels
You will now have to overcome a large amount of completely frozen floors - we recommend avoiding the dark blue areas, which indicate the presence of ice that can "slide" you too far forward. Attention also to the "bubblegum" worms that will periodically be thrown towards you: this time they will be equipped with a specific upgrade, repelling them will be slightly more difficult.
Floors 21-30
You will find yourself here facing the reindeer. These opponents move around the playing area in a semi-random manner, hitting everything they find along the way. A peculiarity: they cannot change direction during their charge, but will remain stunned when / if they hit something along the way; you will have to take advantage of these moments to eliminate them.
Along this play area you will also often find yourself in front of explosive treasure chests - they will "explode" every time you try to open them. It will be possible for you to avoid the explosion if you move sideways at maximum speed: the method we advise you to use sees you move away from the box every time you open one, so that - in the worst case - the explosion only hits you. smear.
These plans are also characterized by the presence of "timed" plans, that is associated with a timer. There are two types: the "monster" type and the "treasure" type. On "monster" plans, it will be necessary to survive until the timer reaches zero; while on the "treasure" planes you will have to survive until the timer reaches zero. Starting from the 26th floor, you will go to meet the "Piglets". Such opponents are equipped with a bullet-based attack; however, you can anticipate them thanks to the presence of a powerful gust of wind that will arrive in your direction a few moments before the emission of the bullet. Try to approach the opponent diagonally, avoiding too numerous groups of enemies.
Boss: Ice King - Fionna - Cake
The real goal in this fight is to eliminate the ice robot named "Fionna". She is a tough opponent, capable of hitting with considerable force and with two rather strong "friends" able to assist her. The Ice King will "just" fly and fire ice bullets at you. Since he will always try to stay away from you, you can avoid them quite easily.
Cake is more dangerous, however, as he will get close to you for melee attacks (and his icy mace can be lethal). After he has suffered a sufficient amount of damage, Fionna will go to repair him: in those moments Fionna will remain helpless, and you can attack her without problems. If / when your HP drops too low, you have to go hit Ice King, he will "throw up" the ice cream and you can use it to heal yourself.
Having passed the 30th floor, Ice King will also be unlocked - you can use it during the game. You will normally find it in the southeast corner of the courtyard, near Candy Castle. If not there, it will be around Bubblegum.
Floors 31-40
You will begin to encounter electric eels here. These are flying enemies who, when - if they identify you, will curl up and run electricity through their bodies. They will then begin to bounce across the screen, hitting anyone they touch. We recommend moving towards their back and / or waiting for them to stop bouncing and then strike at speed.
You will also find crate enemies in this area: they are similar to explosive crates, but the crate will not explode, but an opponent will come out - [b] do not [/ b] fight against this enemy, as it will be completely invisible. Continuing up to the 36th floor, you will find yourself facing the diving birds; each time you hit one, it will break into two more birds, and so on. In these game zones you can also meet death; when / if you stop for too long in a specific game area, it will try to attack you - we recommend running away at maximum speed, as it is able to "take away" as many as 3 HP bars.
Boss: Gunter's Love Child
On the XNUMXth floor, you will locate Gunter and his "assistant", a kitten. The cat will project itself around the play area, shooting psychic waves at you. Your goal will be to hit the penguins located near the kitten; when you have "connected" to one of them, the cat will start playing with it, damaging the main boss. Repeat this procedure a few times until the cat falls asleep, thereby achieving victory. Avoid approaching the kitten and hitting him, you will only suffer damage. Bacon pancakes will also be available in the area, allowing you to increase your HP. Defeating Gunter will unlock Princess Bubblegum's final quest, and little else. You will then have to project yourself towards the ancient ruins.
Floors 41-50
You will not find any other "new" enemies here, at least up to floor 46. Here you will be faced with the lub glubs - they are completely piglet-like opponents, mobile and capable of firing bullets at you.
Their bullets are a kind of explosive duck, which will cause you damage when / if they hit you on the move; when they fail to hit you, they will stop after a few seconds and then explode. You can generally attack these ducks, but we recommend that you avoid any contact.
Peculiar Enemies: Gloops
Upon reaching the fiftieth floor, you will find yourself facing Susan Strong. Talk to her to learn that subsequent Hyoomans are hiding in the shadows. Unfortunately for you, you will also find Gloops in the area. In the corridor in the area, you will find yourself in front of several eyes that "come out" from the black clouds - try to touch them to cause a kind of "explosion". After interacting with a Hyooman, it will be necessary to bring him back to Susan; when / if you project yourself too far forward, it will disappear behind the shadows; when / if you get too close to the shade, the Gloop will emerge and you must take it out.
When you save the Hyoomans, the Gloops will begin to reach your play area; we recommend luring them towards the corridors of the room, so that they can face them one by one, preferably hitting them in the forehead. After inflicting a certain amount of hits, run to the next corner, then repeating the procedure until you have "cleared" the entire room. After the XNUMXth floor, you will return to the surface, locating Susan Strong; activate the collection quest, and then proceed further.
Floors 51-60
Here you will find yourself facing a new enemy, "The Magic Man", with the ability to teleport and fire large projectiles at you. When / if they manage to "combine", they will cause you a curse - you will therefore need to pay close attention to this. It has a lot of HP, but when - after a lot of effort - you manage to kill it, it will drop gold bars on the ground, very precious.
Near the 55th floor you will find yourself in front of the "on fire" guards. Such opponents have only one melee attack, but take no damage when attacked from the front. We therefore recommend hitting them from the side or back. In the last areas of the game you will also find yourself facing the king-pigs; such enemies are similar to piglets, however they have the added ability to teleport. To be able to distinguish them from the rest of the subjects it will be sufficient to note their "French" hats.
Boss: Goliad - Stormo
When you reach the sixtieth floor, you will find yourself facing a fight between Goliad and Flock. You will not be able to interact with them in any way, so try to stay well away from both. Along the top of the screen you will notice a timer that marks 120 seconds as the "maximum" time - you will have to survive until it reaches zero. During the initial phase of the meeting you will notice the "waves" of psychic energy emanating from the two subjects. We recommend staying at the bottom of the screen to make the procedure easier.
Thus, the two subjects will be projected towards the side walls every 30 seconds, and white energy will be emitted from them. Run to one of the lower corners, staying in the area to avoid getting hit. Then a Lub Glub and a stick of dynamite will appear; get rid of it without being hit by the white rays. Eventually, the sticks of dynamite will approach you, and you must try to repel them as quickly as possible as soon as they arrive, keeping the Lub Glub aside for the next stages.
In general, these phases are repeated until the timer is reset; when it reaches zero (and you are still alive), you will have achieved victory. You can then save Mr. Pig, thus gaining access to his quests. You can also proceed to the Secret Lab.
Floors 61-70
Starting from the sixty-first floor, you will begin to find yourself in front of some kind of hairy humpbacks. Such enemies repeatedly jump across the play area, attacking you when you get too close. They normally carry out a fire-based attack, capable of hitting an entire play area; they are therefore able to hit you even when / if they are not directly facing you. You will have to attack them in speed as soon as you are within their range, to avoid being hit by one of their attacks. From the 65th floor on, you will find instead a modified version of the "bubblegum" worms, this time capable of firing not one, but 3 bullets.
Boss: Lemongrab I-II
Once on the seventieth floor, you will see it with a boss. Lemongrab has a rubber-shaped "appendix" that "hangs" from his left side, causing him major problems. Lemongrab II, on the other hand, will progressively get closer to you - we recommend hitting it lightly, with the aim of stuning it. As you complete this procedure, lemon "drops" will begin to fill the room. So try to get away from Lemongrab, hitting the lemon drops that will "get closer" to you. After a short time, the fan visible to the northeast will activate, sucking in everything around - quickly run in the opposite direction to avoid being "sucked in".
Lemongrab II will activate again. Repeat the above procedure two more times, causing the machine to explode - which will then stun Lemongrab. So approach its "external" part and cling to it, using "standard" weapons to destroy it. That specific part of the enemy cannot be attacked before the machine explodes, as it will deal no damage.
Having defeated the two Lemongrabs, you can unlock "Earl" as well as the Nightosphere in the northwest corner of the courtyard.
Floors 71-75
The skeletons will return to attack you starting from floor 71. They will now have a new attack that allows them to make a "circular" attack, that is to hit anything 360 ° around them. You will also find yourself faced with a new type of "Flame Guard", capable of leaving behind them a trail of flames that will cause you serious damage when / if you pass over them as they walk.
Video - Explore the Underground
Floors 76-90
Here you will find a new enemy, a kind of "rubber" that - when touched - will slow down your movements and "stick" to you, bringing you back when / if you stop your movements - to be able to "get rid" of the enemy will be it is necessary to put a considerable distance between you and him.
Prison Machine
The Flame Princess will be trapped inside a large generator; you can see it exactly in the center of the map, it will begin to rotate, damaging anyone in the immediate vicinity. Also locate the lights scattered along the upper floor; breaking the "lit" ones will cause the interruption of the current that feeds the generator. So run down, hitting the generator repeatedly to cause serious damage.
Once the repairs are completed, the generator will begin to "stack". Climb up, before the build-up is finished, starting to break the lights. Smash them, waiting for the generator to shut down, then run down and hit the lights again. Repeat this procedure until the machine is completely destroyed: in other words, you will always have to wait for the interruption of the current that powers the generator, and then hit it at maximum speed.
Having "cleared" the 81th floor, you will also unlock the Flame Princess - the last of the available characters. Therefore, starting from floor XNUMX, you will have to see it with some purple fairies; this type of fairies has "standard" bullets but also bullets with "charge", capable of inflicting double the damage compared to a standard shot. You can then proceed along the next ten floors, without encountering other "particular" enemies.
Boss: Gumball Guardians
When you reach the ninetieth floor, you will find yourself in front of Bubblegum - it will tell you that, finally, you have reached the end of the dungeon. He will therefore make you promise not to interact with his table, visible at the back of the laboratory. Accept the offer, thus examining the objects in the area.
After a short time, you will be interrupted by the arrival of the Gumball Guardians; these subjects move along the sides of the platform, and have three different attacks: the first sees them "shoot" a laser that will move in a zig-zag on the floor; the second will see them shoot an ice ball that will create a slippery area on the floor; the third will see them shooting a large amount of spheres at you, which will damage you particularly as soon as they hit you.
Focus on the Gumball closest to you, so that you can hit it fast with a melee attack, to which it is particularly sensitive. After inflicting three hits, we recommend preferring a defensive pose, dodging the attack that will surely come. So, repeat the procedure 3-4 times, eliminating first one, then the other Gumball. A blackboard with three switches and two ice cream cones will then appear on the screen. Eat the cones to heal yourself. A kind of "mathematical" problem will appear on the table; you can change the numbers by jumping on the corresponding platforms. The problem cannot be solved successfully; your goal will therefore be to let a sufficient amount of time "pass" while you fight the two Gumballs - you won't need to change your "standard" behavior.
After a short time you will be presented with a new mathematical problem: a simple addition. It will be possible for you to solve it without major problems: jump on the keys with the numbers corresponding to the solution, thus going to defeat the boss.
After the 90th floor, you can free Starchy, the last subject able to "provide" a quest. Before you can complete the quests you will need to get the missing broom. Track it down by examining all the crates scattered around the laboratory, you will find it in a short time.
Gum Hive
You will therefore find yourself inside the enemy's house. You will have to pay close attention to the pink tires scattered around the playing area.
Floors 91-100
This is a particularly suitable area for experimenting with your new upgrades, especially the area from floor 91 to floor 95. We recommend experimenting well with these "plans" before proceeding, so as to familiarize yourself with the level of difficulty you will find there. now to face.
Boss: Bubblegum's Dark Secret
First of all, we recommend using both Speedy Feet and Bubble Soap, since at this juncture the floor will be repeatedly covered with rubber and you will have to move forward at speed. The combat in question takes place in three phases.
During the first phase, the boss will place some skeleton generators and bubblegum tentacles. To damage the boss you will have to hit him in the face. The boss will often release rubbery objects on the ground, just avoid them, they will explode after a few minutes. During this phase, the boss will periodically "throw" two tentacles across the screen. Check them out to see which one starts "moving" first - and quickly run to the opposite side of the play area so the tentacle can't hit you. Then repeat the procedure, but taking the second tentacle as a reference.

When the face has taken enough damage, the boss will drop a kind of rubbery drool down the middle of the screen, effectively trapping you on either side - left or right. So, as soon as you notice this "rubberiness" descending towards you, we recommend that you start eliminating all the skeletons on one of the two sides of the play area.
After the "drool" has receded, you will move on to phase two. The boss will begin to extend his little hands to the outside of the central wall. After a few moments, the hands will be "shot" outwards, damaging anyone along the way. Then move along the boss's face, hitting him repeatedly. When his hands appear next to you, quickly run to the bottom of the screen to avoid the hits. You can then resume hitting the boss in the face, until the countdown is reset.
You will then move on to phase three: the boss will project you towards the lower part of the room, creating a green shield right in front of him. Unfortunately, the respawn of the enemies will proceed in a continuous cycle, and you will have to keep focusing on them. Your goal will therefore be to "trim" your imagination bar, to use the associated ability. The shield will pulverize and the "heart" of the boss will become visible. Run towards the heart, pressing the keys that will be indicated on the screen to damage it. The boss will throw you back and proceed to regenerate his shield. Repeat the procedure two more times to definitively defeat the enemy.
Video Solution - Playlist
Click here for the playlist!
Video Solution - Tutorial
Soluzione Video - Candy Castle Grounds
 Adventure Time: Explore the dungeons because ... WHAT DO I KNOW! 3ds
- ps3
- x360
- WiiU
- pc
- 3ds
Exit date: November 14, 2013


