


Grass Lands
After Finn & Jake awakens, go down to the left, then move right to talk to BMO and access the secret basement. Follow the instructions in the tutorial and go to the bottom of the setting on the right. Go down again and talk to NEPTR to learn how the stats work. Then leave the house and save at the nearby fountain.
Now you are in the overworld and the camera switches to an aerial view. Enter the Village of Housies on the left and talk to all the characters present here, then before exiting go up to the well and press down on the D-pad to drop inside and collect the Crystal Eye. Then go back to the overworld and go north, then turn west into the bush to find the BMO Cartridge: give it to the Princess at the Village of Housies and you will receive a first piece of annotation in exchange. Exit again to the overworld and reach the staircase to the north: here inside the dungeon, defeat all the enemies without falling into the abyss. At the exit save at the fountain, then continue east to the four bushes for the first boss battle. Donny is relatively easy to defeat: when he jumps move in the opposite direction, when he stops target him with your punches. With the receipt thus won, return to the postman at the Village of Housies to get a second piece of notation. Then visit the circular house to the east to meet the Hot Dog Princess and other village characters, then to the southwest, where you meet Tree Trunks in the tree-lined area. Then continue southeast and use the staircase to access another dungeon inside which you will find the Lumpy Space Princess.
Back outside in the overworld, meet the Raggedy Princess in her village to the south and talk to her to receive a stinky sock. This wacky item must be given to Tree Trunks (see above) to receive a cake in exchange, which will in turn serve as a bargaining chip with one of the villagers of the Village of Housie to get the last piece of the annotation in exchange. Then show the reassembled sheet to the detective on the left, then go back to Jake & Finn's house. Collect the golden sword under the bed, then exit and follow the path east, turn north and enter the dungeon via the staircase. Inside, open the raised chest to collect a Wizard Star with which to increase your stats (attack is probably the best choice at this point). Beware of giant worms you first encounter and the bullets they hurl at you. At the exit, head to the tree to the west for a more complex dungeon.
Open the door and save at the fountain. Note that access is only allowed if you have already picked up the sword. Go down the ladder to the base and open the door.
Go up the steps and use the moving platform to get past the flames, then open another door. Climb up again using the platform and exit. Move left and open the door, jump and use the current to reach yet another door over the chasm. Here, use the scan currents to reach the chest, cross the chasm and move to the back of the room on the left. Go up thanks to the platform. Now below you you can access a room that contains another Wizard Star. To do this, however, you will need the Beautous Wings to overcome the gusts of wind or Jake's shield ability which, however, you will get shortly. In fact, the northwest platform contains a key. Retracing your steps through a series of doors at the bottom right you will find yourself in front of a closed door: open it therefore to get the shield ability with which you can repel wind and bullets. Once out, go down, then cross the chasm and go right, using the shield against the wind to get to the threshold. Here, use the platforms and shield to reach the bottom of the area where a boss battle awaits. To beat this big bear armed with a chainsaw, watch out for its roar that precedes a charge. To dodge it, jump on the platforms. When it stops, sink a couple of shots, then run away to avoid being injured by the claws. The monsters he calls for support if defeated often drop hearts. Repeat this strategy until victory.
Before leaving the Grass Lands, go back to the Hot Dog Princess or northeast and talk to her: after the conversation Jake will get the ability to transform into a bridge. So take advantage of the newly acquired power to reach the access to the Candy Kingdom to the south.
Candy Kingdom
In the dungeon that gives you access to the Candy Kingdom, go right, avoiding the chasms and using the shield as a shelter against the wind. Then talk to Princess Bubblegum and go out into the overworld. Follow the path south, then go up northwest and enter the tavern. Talk to everyone, then exit again and head to the castle on the left. Explore all the rooms, talk to all the characters present and collect each item. Once you have exited your next destination will be the graveyard to the northeast. In the dungeon you will need the Beauteous Wings to reach the floating wad of money. Finally, talk to Starchy at the bottom of the dungeon and then exit. Go through the dungeon which is accessed from the staircase to the east by collecting the contents of the baskets. Once out, go west first, then southeast and explore another dungeon. Collect the currently accessible items, then go to the Duchy of Nuts on the way out. Talk to the Duke to get the certificate, then exit and reverse the previous dungeon.
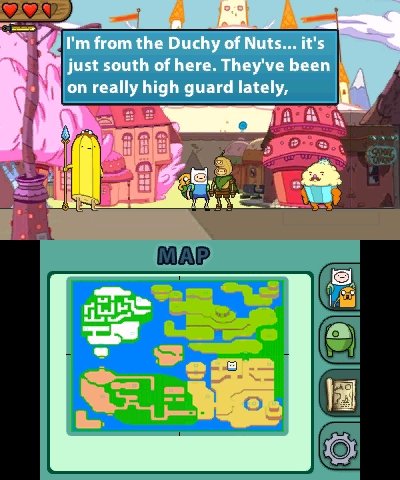
Back in the overworld, go west then north past the tower and use Jake as a bridge to reach the North Candy Path. Use the platforms to overcome the chasms, talk to the Lumpy Space Princess, then enter the prison. Talk to the prisoners to find out how to help them. The first needs the diary located inside Mr. Bank at the Housie Village. The second has to deliver the pizza to Starchy to get a receipt. The third requires a birth certificate from the Duke. First, go back to the Housie Village and talk to Mr. Bank to get the diary. Then go back to Starchy at the cemetery and give him the pizza to get the receipt in exchange. Finally, head to the castle and talk to the butler in the room on the left to receive a royal decree. Talk to Lemongrab later in the dungeon, pick up Second Nut Son and return to the Duke (refer to the upper paragraph for the way).
Following the conversation with the Duke you will receive the royal sponge. Stop by the tavern and talk to the chocolate-stained stranger, then head to the castle. Go right and talk to Dr. Ice Cram in his room, then exit and open the room to the right where Finn gets a new ability, Down Thrust. Quickly use it on the stone switch to open the chest. Collect the Ninja Cape then exit the castle and head south towards the tower.
Once inside the Tomb Dungeon, use Finn's ability again to open the door. Advance until you come across another stone: use Finn again to press the switch and open the chest containing the key. Continue to the right, then move on the moving platforms, repelling the bullets with Jake's shield. Reach the upper left door, then use Finn again to activate the switch, retrace your steps and cross the chasms to the upper right door. At the bottom, flip another switch, drop down and go back continuing down to the right. Go down to activate a switch, then return to the door you entered through. Go up and open the door now open. Inside you get the ability that allows you to destroy cracked blocks.
Before continuing to the right you can retrace your steps and use the Fist Smash you just obtained to open the previously inaccessible chests. Then advance using your recently acquired skills until you get to the door before the boss battle. The confrontation is simple. 100 clones of Gunter will be dropped from the pipes - one hit is enough to take them out. Pay attention to the light that signals the arrival of a clone from the pipe and do not get hit. The last of the hundred gunters will be more powerful, but still nothing too complicated.
Before continuing it is time to complete the outstanding issues in the Candy Kingdom. Collect another Wizard Star in the Nut Path with the Fist Smash, then talk to the princess at the castle to get a new ability for Jake whereby he can now become super strong in certain areas of the map. Quickly use this ability on the stone barrier to the west in the Grass Lands, defeat the Crystal Guardian with the Star of Frozen Rain, then advance further to get another Wizard Star. Now return to the Candy Kingdom and destroy the southwest barrier to proceed to the next continent.
Red Rock Pass
In the entrance dungeon, move to the left, paying attention to the coal and gnomes that flit around unpredictably. In addition to drawing dangerous trajectories, these evil dwarves are also able to steal items from your inventory. The chest on the raised edge can be reached thanks to the Beauteous Wings or with Jake's umbrella ability that you will get later. There is an Anti-Mind Control Gem in the chest. At the end of the dungeon, you encounter an insect that will ask you to find three more of its kind to form a band and let you access the Door Lord's room.
Outside in the overworld, enter the village to the west. Talk to the three Marauders inside and listen to their wishes. Soon you will have to set off to collect the items you need, but for now, head right and face the Marauder Leader. Avoid his charge by jumping him and hit him from behind. When it leaps into the air, instead, move to avoid being hit and be ready to blast the shockwaves. The reward for your success will be the Umbrella for Jake skill with which you can finally overcome the widest chasms. Once out of the village, head west to the shop. Here, by talking to Choose Goose, you get some children's shoes. Exit and enter the cave to the east near the fountain. Go through the dungeon using the Umbrella skill and enter the forest. Among the trees is BliBlob: to defeat him simply use Finn's Down Thrust ability.
Now return to the Candy Kingdom and take the stairway to the southeast of the cemetery. Open the door and collect another Royal Tart using the Umbrella ability, then exit and cross the chasms by going to the right. When you encounter the skeletons, deflect their blows with the shield. Once out of this area, drop to the ground and go right to pick up a habanero and a Candy Cane. Once out, head back to the cemetery dungeon and pick up another wad of money before returning to Grass Lands.
Take the staircase visible to the north-east, cross the forest and decide what to do with the Crystal Guardian; take it out with a Star of Frozen Rain or avoid it using platforms. Anyway, collect the bonsai in the chest and return to Red Rock Pass. Visit the shop and purchase a bomb by delivering three wads of money (if you are missing one, return to the cemetery dungeon), then return to the Marauders and give them the items collected in recent wanderings to receive three musical insects in return. Deliver these to the keeper of the Door Lord's door and enter. Here move using the Umbrella for the chasms until you reach the stone switch to activate with the Down Thrust, then retrace your steps and collect the Wizard Star from the chest. Exit and enter the cave to the north.
Proceed to the right, past the door, then right again to overcome the chasm, then go up and open the door. Go down for a Wizard Star, then go up and proceed to the right. Overcome gas and flames with the Umbrella, activate the stone switch, then proceed through the door. Activate the switch on the raised edge, then drop down and collect the key from the chest.

Move left and go down to open the locked door. Move left to get the Jake Roll. Use it now to get past the pool on the left and get rid of the gnomes. Use Roll and Umbrella again to access another door, beyond which you'll have to flip a switch. Then use the Roll to reach the platform, destroy the rocks, then use the Roll again to get the Nightosphere Amulet. Then proceed past the last door to face the boss battle.
In animal form, Marceline is immune to your attacks. Therefore, limit yourself to stoop to avoid it in the early stages of the battle. Resume attacking it when it returns to its usual shape. Move away when it takes off and watch out for the bats it releases. In the final phase of the fight he will permanently turn into a beast. To hit her you will have to deflect the energy balls towards her using the shield. The Demon Heart you get at the end of the fight must be given to the Marauder Leader. Now Jake can transform into a boat. At this point, if you want, you can explore all the territories that can only be reached by sea to collect Wizard Stars and other objects before heading to Ice Kingdom.
Ice Kingdom
Make your way right into the access dungeon, using the shield to protect yourself from the wind and the moving platforms to climb up. Ignore the inaccessible chest for now and continue to the right using the shield and platforms again to get to the exit. Enter the city to the northeast and talk to the Snow Golem to receive the Cloud Babe Drawing. From the overworld, head to the elevated area to the west and enter the Cloud Kingdom. Turn in the Cloud Babe Drawing to gain access and talk to the Party God on the left to get Jake the ability to get particularly tall in certain places on the map. Exit the dungeon and head south to the dock, transform Jake into a ship and reach Grass Lands. Move west, then northwest to the highest point and use Jake's new skill to climb into the Cloud Zone. Talk to the cloud, then jump across the platforms until you get to the chest that contains the first piece of cloud.
The next destination is in the Candy Kingdom. As before, reach the area to the southeast, from there go up to the Cloud Zone and collect a second piece of cloud after passing the platforms. The third piece is located in the Cloud Zone of Red Rock Pass, located to the north. Having all three cloud pieces, return to Ice Kingdom and enter the triangular cave to the northeast. Inside, continue east using the shield, then drop down and open the door to the second ice cave. Go down to the right and destroy the rocks, go left and go down, then use the ladder on the right to go down further and shelter from the wind to get to the door that leads to the third cave. Continue to the right, being careful of the enemies, to enter the Ice-O-Pede's Lair. Move between the platforms to never touch the enemy and collect the Wizard Star in the chest, then continue right towards the door to the fourth cave. Nothing complicated: the door of the fifth cave is on the left, use the shield to get there. In Ice Cave 5 destroy the rocks with the Fist Smash, then climb the ladder and climb right again, cross the chasm to get to another ladder and finally exit at the top of the depression that allows you to get to the Cloud Zone. Talk to the cloud at the entrance and move across the platforms to get to the fourth and final piece of cloud, then reverse the path through all five ice caverns.
Once out in Ice Kingdom go back to talk to Cloud Kingdom, pass the Party God and talk to Ms. Cloud Golem to his left. Once this is done, head to the Snow Golem House to the east, talk to the Snow Golem and introduce him to Ms. Cloud Golem, then pick up the Fire Wolf Pup and walk towards the Fire Kingdom. To get there you will need to use Jake as a boat from the south pier, head north, then east, dock at the Tree Dungeon, then climb the highest peak and use Jake's long legs to climb up to its doors. Then return the Fire Wolf Pup to the Flame Princess and get the Glowing Sword with which you can now break the ice blocks.
Back in Ice Kingdom, head to the ice cave by breaking blocks along the way for a Wizard Star. Break more ice blocks to get a Crystal Eye, then enter the second cave and between it and the third use the narrow passage to get to Ice Cave 8.

From here go down to the right breaking the rocks to access Ice cave 9. Then go up to the blocks of ice that contain the Crystal Gem Apple. After collecting it, retrace your steps, exit the Ice cave 8 and continue through the Ice Cave 3. Here too, break the ice blocks, collect the Goblet, then move on to the Ice Cave 6. Climb up breaking the rocks and using the Umbrella to get to Ice Cave 7. In this last ice cave finally go down to the door that leads to Ice King Castle.
Break the ice blocks to access the door, enter, save, then cross the wide chasm with the Umbrella to get to another door. Go right, climb the ramp and from the top use the wind to get to the edge on the left side. Use the Down Thrust to flip the switch and go down. Beyond the door, climb to the top of the stairs again to let the wind carry you over the chasm, then open the door and use the platforms to reach the bottom. Beyond the new door smash the rocks, flip the switch and climb up. Cross the water with the Roll then head down to the door. Watch out for the Ice Bull, smash the rocks and jump to be blown up by the wind to the raised area where you find the key to the dungeon.
Go left through the doors and use the Down Thrust to break the floor. Open the door, go up, use the wind and umbrella, then open the locked door. Now move left protected by the shield and go up on the moving platform. At the top of the pillar, turn right and drop down using the platform. Move across the ice until you get to a new platform. Then jump onto the platform that moves vertically as it approaches. At the top, use the Umbrella to move left. Break the rocks and open the door. Move from platform to platform using the wind again to another door. Here you go up, also using the ice blocks. At the top right, use the Doown Thrust to open the door. Move to the chest avoiding Ice-O-Pede and collect the key. Exit left, drop down and up, then use the top left Down Thrust again to reach the locked door. Use the Umbrella to get through this platforming stage, go to another door and watch out for the Ice Bulls. Jump and melt the first layer of ice, then climb up to the door. Go right and pick up another key from the chest, flip the switch, then continue left. After the door go down and open the door on the right. Advance using the shield and still avoiding Ice-O-Pede. Collect the Wizard, Star, save and proceed to the last boss battle.
In the first phase of the fight that sees you confront the Ice King destroy his armor, then pay attention to where the elder king bounces to avoid being hit. Be careful and avoid the ice bullets which become more lethal as you advance in the fight. To avoid a glitch that plagues the game, it is necessary to stay on the right side of Ice King. After you defeat Ice King for the first time, your opponent will change shape and a new battle will begin. Now he will try to hit you with his big fists: dodge them and target his hands. To escape the frozen breath instead, head to the raised platforms at the far end of the screen.
The real showdown however sees you in control of Lady Rainicorn against Lumpy Space Princess. Move up and down to avoid her bullets and respond by shooting her in turn, taking advantage of the moments in which she is sitting in the center of the screen. Arm yourself with patience, it will take 200 shots to take down Lumpy Space Princess!
 Adventure Time: Hey Ice King! Why'd You Steal Our Garbage?!! 3ds
- 3ds
- ds
Exit date: 2012


