


Defeating Sekiro's bosses requires patience more than anything else. In this guide we will reveal the tricks to defeat all the bosses of Sekiro: Shadows Die Twice
Here is the second part of our guide (here the first part) on boss di Sekiro: Shadows Die Twice. We continue to discover the tricks to defeat them in the simplest way possible. Let's begin!
Sekiro: Shadows Die Twice - How to defeat all bosses | Guide (Part 2)
Sekiro bosses are like that various and different from each other that there is no general advice to beat them all, as per From Software tradition. The important thing is to search for an area, if possible, to see how to get a sneak attack. Whereas most of the boss fights in Sekiro it can take hours, so arm yourself with patience.
Lonely Shadow (mini boss) | Sekiro - Boss Guide (Part 2)
First of all, you can enter with a stealth kill, passing the first entrance to the pit through a second hole in the ground, where you will find him standing still below. His position rapidly falters, so you can inflict hits whenever possible. When he tries his rotating stock, deflect or dodge forward and to his side, or stand behind him. After this kick it takes a long time to get back into position, so you can deal a lot of damage.
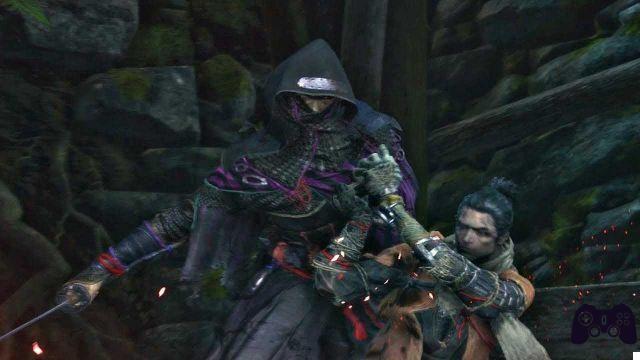
During the fight to dodge his sword, try this same kind of dodge, putting yourself on his side or behind him whenever possible. do caution at his football, which comes at the end of a series of kicks or after he deflects your attack (usually blocks your first two attacks and then counter attacks). You can't block it, but you can deflect it or, better yet, execute a Mikiri counter to unbalance it. The last thing to watch out for is hers sweep attack. When you see that sweep, jump and kick his head for extra damage to his stance.
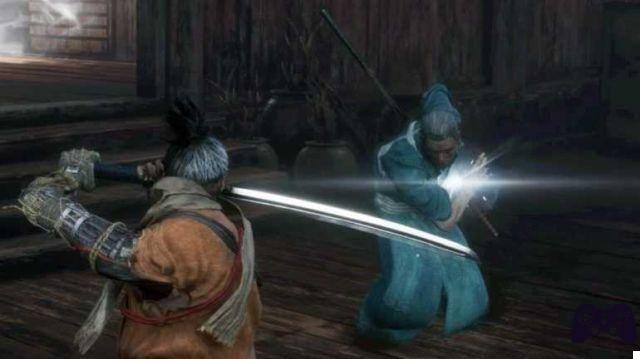
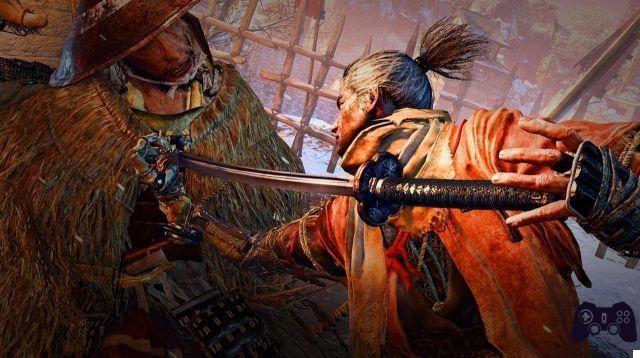
Ashina Elite (mini boss) | Sekiro - Boss Guide (Part 2)
This is a simple mini boss if you've mastered the fighting methods. He performs a double killing blow, but if you can quickly parry the two hits, deal massive damage to his position. Before he attacks, you'll see hers sword shimmer close to hers side: after this signal you will have to get ready to parry. Get ready to do it again soon after, because will try to do two or three of these attacks in a row. Three sets of saves should be enough to beat him.
Armored Warrior (mini boss) | Sekiro - Boss Guide (Part 2)
Il Armored Warrior he cannot be killed by a normal killing blow. Indeed, it is must perform a killing blow while near the edge of the bridge, which will push him out. First, you need to do it crash into the wall. The easiest point to do this is in the outcrop on the right side of the bridge. Dodge, face him, and then parry or block his slow attacks. Even if you're not injured, his blows continue to damage the walls behind you, opening them up until you drop down.
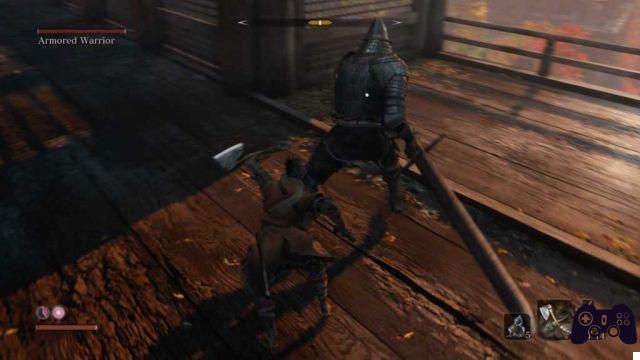
So, it's just a case of parrying his attacks and using your ax to deal massive damage to his balance. While you're understanding its attack rhythms, stay close to his legs and run around him when he attacks so that you end up behind him, where you can usually do an ax attack. When it starts slam to the ground in anger, escape, and do caution in the long run scope of his latest attack which you can parry once you know the timing of his attacks.
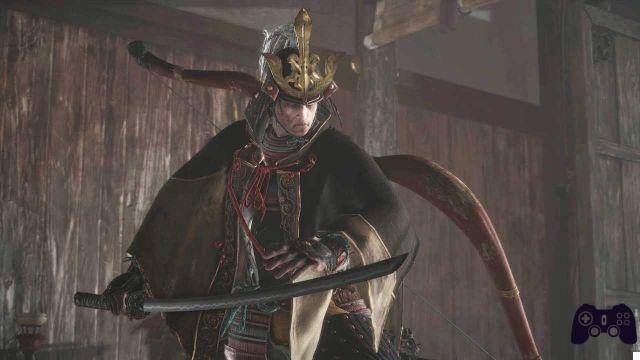
Genichiro Ashina (boss fight) | Sekiro - Boss Guide (Part 2)
This is our favorite boss but also one of the most difficult to break down. His balance is very precarious, so you can attack him whenever possible. The key to beating him is simply to learn his attack patterns. Play cautiously when you first face him and block his shots. The combo to watch for is eight or nine hits in a row, which starts with two spinning hits, then a pause, then a flurry of hits.
These attacks occur in quick succession and usually, perrendo as fast as possible, you are able to deviate, unbalancing it. When away, do caution at his attack with the arrow, which usually is following a roll forward and a subsequent sword attack. If he jumps up and then backwards, he is about to hit you with arrows, so try to make a parry. Also remember that shoot an arrow every time you try to heal yourself, then immediately hit the lock key after healing to avoid damage.
Keep an eye out for his thrusts, which can be countered for massive postural damage, and after a killing blow he'll also add an unblockable sweep. They are easy to tell apart, and the timing of both makes them easy to counter once their signals are recognized. Again, stay aggressive, and you should throw him off balance within a couple of minutes. When it reaches its second lightning-fast phase, you have two options.
It is essentially the same as its first phase, but with some extra lightning attacks, which you cannot block. You can use the same tactics of the first phase, but be sure to get away from its lightning bolts. You'll see sparks when he's charging them, which means it's time to dodge to the side. However, we have found that it is more reliable to keep distance and bait lightning strikes. The meter is impractical, but it will reliably eat a quarter of its health bar.
Basically, when it is about to attack, you must jump in the air, grab the lightning bolt and press R1 before it hits the ground. This will allow you to inflict lightning damage su Genichiro. The key to doing this isn't jumping too early: wait for some of his lightning animations to show up before jumping, stay calm and press R1 only after his attack connects. Four of these attacks should finish him off.
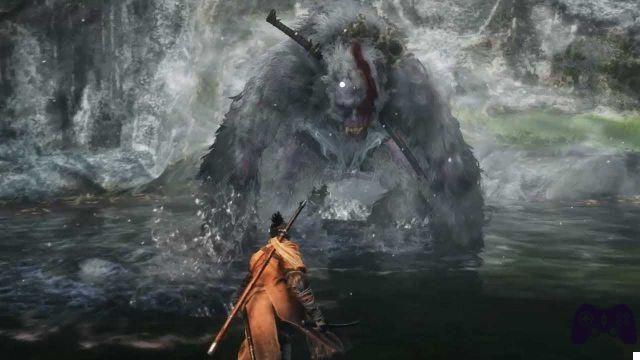
Guardian Monkey (boss fight) | Sekiro - Boss Guide (Part 2)
The key to fighting the Guardian Monkey is being aggressive. You may of course want to back off, but you have need to stay close to him to have an edge when he is tired. Also by staying close to him we will stop throwing his poison poop, which is perhaps his most attack difficult to counter. You can generally stand around his feet to counter his attacks and jump when the red symbol flashes on the screen since him will try to grab you. If you're not comfortable with parrying, simply hold down the lock button and let it let off steam - you can absorb just about anything.
When he is done with the combo, give a couple of hits and return to parry. Watch out for the attack where he spins on the ground, swings left to right, and can damage you as long as he moves. When he does, move behind his head, wait for him to stop rolling, and hit him a few timesor. If he throws the poison poop, make sure you are close to him - you can dash under him to avoid the attack. If you have trouble, use the firecracker which will stun him. Wait for it to lose its balance before attacking or it will fall on you. When you have decapitated him he will enter the second phase, carrying his head in one hand and a weapon in the other.
The main thing you will need avoid is his scream of terror, which deals damage and fills your terror gauge. One time filled you will die. Normally, it will do this when you stay close for an extended time. You will know which stands for get the scream when he will raise his severed head up to his neck. For this fight, purchase the Purple Pumpkin, which increases resistance to terror, from the merchant of Mibu village before starting the challenge.. Otherwise, you can follow the same tactics as in the first phase, that is, parrying once you know his cadence of his attacks. Its attacks are quite rhythmic once you get used to them.
You will be able to keep parrying until he will bridle carrying the sword over his head. By doing this he is about to perform a powerful attack, and it is crucial that you parry him instead of blocking him. If you are successful, he will collapse to the ground, exhausted, and you can deal five blows. In addition to the powerful attacks, you have to pay attention for his swooping move. When he dives forward, dodge towards him and to the right so that you are at his side to deal a few hits.
He also has a spin move where he turns and hits behind him. After doing this he will launch a quick attack and manage to rotate back, so stand still and block. The key is to unleash these powerful attacks and then deflect them, allowing you to deal massive damage.
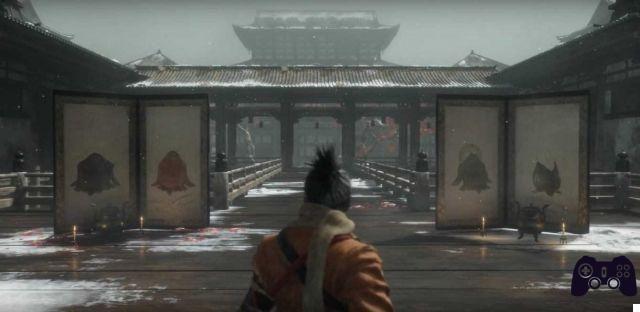
Monkeys of the Temple (boss fight) | Sekiro - Boss Guide (Part 2)
This is the weirdest boss of Sekiro: you have to kill four monkeys, a of which it is Invisible. They can't hurt you, but evoke ghost monkeys that attack you in packs and those attacks increase your terror. If that happens, forget about the four main monkeys and take out the ghost ones - they are easy to kill.
When you start, walk forward until you reach the height of the screens, turn around and back to where you were born again and swing the sword. You will need to swing it where the gold pots are on the floor to take out the invisible monkey.
Green monkey
To kill the green monkey, jump onto the tree in the middle of the level and then back forward to the branch directly in front of you, behind which there is a Bell. Wait for the green monkey to reach the platform you can see above, and rings the bell to stun her. Grab the platform and take the monkey offside.
Purple monkey
for purple monkey, you will have to climb on the roof of the building located in the bottom left corner of the map. Peek and the monkey will spot you and run away. Go down and open the door on the other side of the room. Now, you need to chase the monkey in the same room: follow the purple footprints, continues to chase it and eventually it will come back. When it does, it returns to the roof again. This time he won't see you and you can deliver a death blow from above.
Red monkey
La red monkey it's easy to get close, so all you need to do is locate it by scanning the roofs, stand behind her and stabbing her in the back. If you need to reset the monkeys, that's it ring the bell Illusive Hall at any time. Remember to look for the steps: the color of the track corresponds to the color of the monkey who left them.
Corrupted Monk (boss fight) | Sekiro - Boss Guide (Part 2)
The struggle with the Corrupted Monk it's a war of attrition. His posture recovers very quickly until he is under a third, or less, of his waist. Instead, I backed off and make him attacks. When he's done with his combos, hurry to hit him and then come back. At the start of each fight, go in immediately and deal a few hits. We recommend using the Mortal Draw skill, if you have already unlocked it, otherwise you will have to use the reel bar. You can use the divine confetti to deal more damage, but only use them when you know how the monk attacks. Confetti is rare, so use it only in specific cases.
Follow the same pattern of attacks, hurrying and backing away until the monk has reached a third of his health. Watch out for his two unblockable attacks: one sweep and one push. At the start of the fight, jump as soon as possible as soon as you see the red symbol. The monk will perform a jump attack to close the gap, but it is easy to parry and inflict a few hits. You can keep doing this until the monk is dead, but it is faster to parry when his health bar reaches a third of that.
Time to use that Mikiri token to avoid being stepped on and crushed by its thrusts and bounces. Has a couple of predictable moves that you will get used to recognizing once you have fought a couple of times. The best time to inflict damage on his posture is when he makes his whirl attack, which consists of four rounds followed by a fifth attack, you try to parry following the attacks. Remember that the final attack comes faster than the other four.
Sekiro: Shadows Die Twice - All Bosses | Guide (Part 2)
This second part of the Sekiro bosses guide: Shadows Die Twice has come to an end. To not miss the third and final part on the bosses of Sekiro: Shadows Die Twice, keep following the pages of Holygamerz!
- Guide to the Hirata Estate
- Where to find Rosary beads
- Better fighting strategies
- How to gain experience fast
- How to earn Sen credits and experience fast
- How to cure Dragon's sickness
- Like swimming underwater
- Where to find all Ninjutsu
- Where to find Pumpkin Seeds
- Where to find all fragments of the Mask of the Dancing Dragon
- Where to find the Carpe del Tesoro
- Where to find materials for Crafting
- How to unlock all endings
- The best skills


