


Please note:
The solution is based on the American version of the game, so it is possible to find some differences in the Spanish version.
The dragon's well
In this initial area you are required a few simple gestures, useful for becoming familiar with the mechanics of the game. Start moving towards the well and use the crank, then go up the ladder to access the well. Then use the action button on the mattress and open the door to go to the next screen. Soon you will have to choose between two wheels to turn: opt for the one on the right and advance towards the bridge at the bottom. After you've climbed the rope, pass the falls and keep going, but keep your eyes open to pick up the stick with the rope. Hide now using the bed, then retrace your steps and use the stick you just picked up with the non-functioning left wheel. Then cross the bridge and over the narrow passage go down the ladder, then use the alcove to take shelter from the passage of the boat, then pass to the one on the right and proceed further when possible. The bones under your feet are the signal that it is time to hide again using the bed. While moving on tiptoe try to make little noise, but as soon as the bed comes down from the ceiling, use it again to take cover. Then go up the ladder on the left to find an arch with which to hit the gear on the opposite side to be able to cross the bridge. Once this is done, turn the wheel you come across twice, pull the string to ring the bell, then turn the wheel once more and quickly reach the ladder leading to the mirror. In possession of the precious artifact it is time to escape from the dragon by crossing the bridge. Once in the water on a mattress, shoot the ropes to bring down the spiked beds (especially when the dragon's head comes out looking for you) and be ready to press the keys indicated on the screen in the QTE sequences. Back outside through the small door from which you entered the dungeon, you have three opportunities: you can choose the path of compassion and shoot an arrow at the gear to free the dragon, the path of courage by shooting a dart in the eye of the dragon or the way of wisdom by striking the bell to the right of the dragon.
Arrival
After the cutscene, take the path to the left and reach the tree with a bird's nest, inside which you can see a toolbox. Then go down to the right, then turn left and you should find yourself at the base of the tree. Shake it and pick up the hatchet that has fallen to the ground, then walk east. Beyond a few stones, you meet a merchant with whom you will start a conversation. In this case, any answer is fine. When you reach the river, cut down the tree with the ax and use the trunk as a bridge to continue along the winding path, then turning east to reach a door. Climb the wall on the right to enter the city. Here you can get a shield from the blacksmith, some bread from the baker or the round item in the magic shop. They are all okay to be delivered to the merchant outside the city: whether or not to leave a reward for what you take is your decision and leads to different outcomes in the conversations later on. Once you've delivered the item to the merchant, choose what you want in return.
Then continue east towards the river past the tree with the beehive. Take advantage of the distraction of the guards and shake the tree with the hive, then return to the west and use the ax on the large tree that stands out to the left. Then use the rope with the ground to the right of the tree and when indicated by the game, try to aim at the tree. Then move further east, try to cross the river using the stones and the log, then break up the log with the ax and make a raft out of it using the pieces of wood and the rope. The unsafe boat thus obtained will allow you to cross the river. On the opposite bank, now climb the hill that Manny left on until you reach the building in the distance.
Inside, answer the question asked however you like, then turn your attention to the horned man on the left and tell him your name. Then talk to the tall man on the right, then talk to Manny and ask him about Acorn.
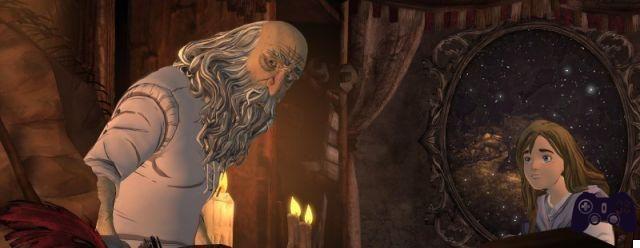
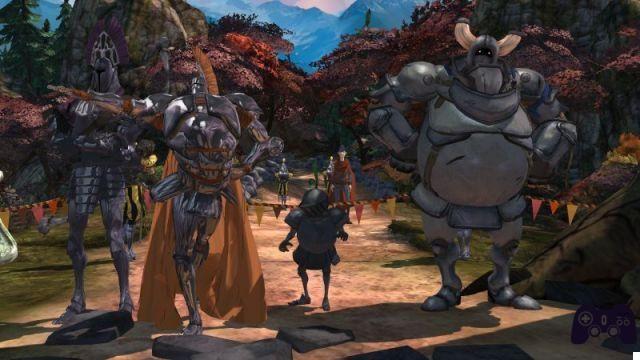
Talk to Acorn now and go after him by telling him you know what he's hiding. Then answer the question with the squirrel's name and approach the knight in the center of the room, strike a button revealing that you know his name is Whisper. Listen to the story the knight has to tell, then talk to the guard to try to pass the test. To be promoted you need this information:
- Manny can speak many languages;
- Achaka is the favorite for the tournament;
- Sir Walter Harris Ignatius Sally Percival Eduardo Ramon jr. the Third of Modesto is the fastest;
- Princess Madelin of Avalon is the name of the favorite company of the strongest rival.
Now that you have passed the test, you can retrace your steps, cross the new bridge, turn west at the carriage junction, then north past the pumpkins to finally reach the town of Daventry.
Welcome to Daventry
First, wander around the city for a while, becoming familiar with its conformation by visiting all the shops, perhaps taking advantage of the opportunity to chat with the managers. Now, before you dedicate yourself to the main mission of this section, which is to find an eye of the beast, take advantage of the tranquility to get your hands on a series of objects that will be needed soon. Take the south exit of the city and head to the king statue to the east. There, pick up the bell, then proceed north, approaching the dangling steak until the trap clicks, then interact with the button on the tree on the left to get hold of the steak. Then leave yourself in the hole covered with foliage always in the area of the traps and collect the particular mushrooms that grow on the earth wall. Then exit the hole and move east to the picnic area to read the notation lying on the table. Then continue your picnic outside the city heading south, on the pumpkin path, and make your own the tool to collect the fruits that you find on the left, leaning against a tree. Then move east and turn south to the area with the bushes: here, use the steak as a bait on the bush to track down and catch the badger. Use the big animal in the pumpkin path to extract the biggest pumpkin. Finally, go back to the picnic area and decide what to do with the hive and the fruits: you can collect the latter simply using the harvesting tool you got a little while ago, or drop the hive and leave it on the table. Once you've made the best (or funniest) decision, head back to town with the fruit in your inventory. Here you will have to decide how to face the mission of the eye of the beast. There are three ways again: compassion, courage or wisdom.
The eye - Path of wisdom
Enter the city and head to the Chester store. Swap the pumpkin (collected earlier) and the gold coin you already have in your inventory for a blue flame lantern. Then dip the lantern into the potion to change the color of the flame to purple.
Now go back to the guard outside the room where you took the test and give him the lantern to receive a photo of Achaka in exchange. After that (and all this can be done REGARDLESS OF THE ROAD CHOICE TO GET THE EYE), enter the wolf cave north of the area with the floating island signs and use the lantern to cross it. On the opposite side you will find a gold coin on the ground that you obviously have to collect.
The eye - Path of compassion
Enter Wente's shop and give him the fruits picked from the tree with the hive and the mushrooms found in the hole, along with a gold coin, to receive a "delicious" cake in exchange. Then head to the statue of the king, from there turn south and then east to cross the bridge and meet Olfie to whom you have to deliver the cake. After the cutscene, return to the room where the competition takes place. Afterwards (and all this can be done REGARDLESS OF THE ROAD CHOICE TO GET THE EYE), go back to the Olfie Bridge and cross it (calling it with the horn if it wasn't there) to find a gold coin on the opposite bank.
The eye - Path of courage
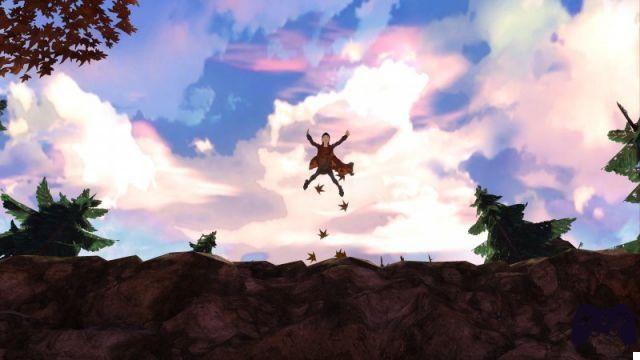
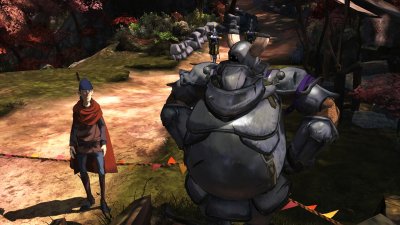
First enter the blacksmith's shop and use the gold coin you have in your inventory to buy the garden tool that stands out on the wall. Then leave the city by taking the north door until you reach the brambles that you can now cross using the garden tool you just obtained. Then make your way up to the well and enter. The well is the same as the prologue, so proceed east, use the wooden wheel on the right and advance until you see Achaka in front of you sliding down a cliff. At this point practically whatever you do, you will end up off the cliff too. To continue, just memorize the sequence of Achaka jumps. In case you have little memory, however, he himself will provide you with suggestions: move the stick left towards one of the two possible barrels to jump on and listen to what Achaba has to say. "Stalama" means no and "Affa Nata" means yes. These indications are valid for the first two sections. In the second, however, you will need to coordinate your efforts with the spiked club swinging over your head. In the third and last section, you just have to remember the correct sequence. If memory is not your forte, this time we will help you. Start by jumping on the red barrel in front of you, then move on to the blue one on the right, from there jump to the brown barrel in front of you, then take a few seconds to concentrate. The next three jumps (big and red barrel to the left, blue barrel to the left behind you, and yellow barrel always to the left) require some timing to perform correctly. Come on, you are well on your way, there is only one leap left on the blue barrel and one right on the brown one before reaching the end. Arrived to safety, an unexpectedly action section awaits you in which you are required to jump clinging to the different ledges and hide from the sight of the dragon. At the end of these steps you will fall into a hole along with Achaka. Here the basic notions on his language learned a little while ago will be useful. Shout "Stalama" at him to dissuade him from turning the knob, then indulge his will with "Affa Nata", both when he approaches the wooden wheel and when he approaches the knob again. Then go out the door and get ready to face a rather complex puzzle.
First interact with the shield on the ground, then say "Affa Nata" to Achaka, then cross the rope bridge and push the weapon locker to which the rope is tied, then warn your partner by saying the word "Stalama" . Now place the shield in its holder and say "Affa Nata" to Achaka. Use the "new" rope bridge to the south to cross the chasm, then once there, move the rope support to the right again and say "Stakana" to Achaka. Then retrace your steps, remove the shield and say "Affa Nata".
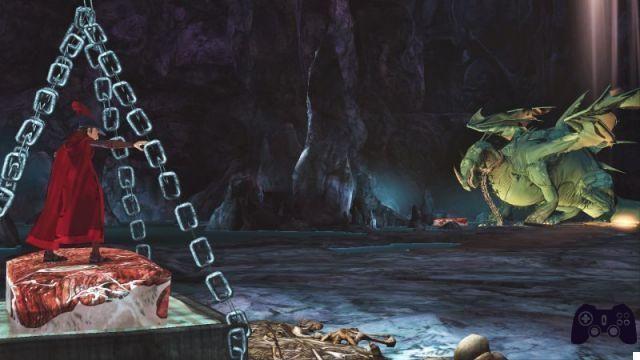
Once again use the new bridge and arrive on the islet in the center where you have to deposit the shield and say "Affa Nata" to Achaka. Finally, go back to Achaka's cage and pull the rope on the ceiling to make the bell ring. Then follow Achaka along the path and beyond the door at the bottom continue to the curve to the west, where you will find a wheel to turn to open the door to the dragon. Then try to shoot an arrow at the wooden plank and accept the help of Achaka, then enter the tunnel at the bottom and push the stuck dragon to exit.
Once in the presence of the sleeping dragon you have two possibilities: authorize Achaka to shoot an arrow by saying "Affa Nata" and thus obtain the eye of the dragon or pardon the beast by stopping Achaka with the word "Stalama" and continue the search.
Whichever was your choice, head now to the bulletin board next to the king statue and pick up Whisper's photo. Then head to the area outside the wolf's lair and from there go east to shoot a rope arrow at the tree on the other side and set up a bridge to reach the other side. Then follow Graham until you are attacked by the goblins. If you want, you can only hurt those who are about to attack you and then let them go away, but if you want to, you could also kill them all on the spot. The next step requires you to decide on the merchant's fate: save him or let him be taken away? Whatever your decision you will get a feather and a gold coin. Now you can buy everything that is available in the city (cake, candle and garden tool) and face the new challenges that await you.
Speed race
Before participating in the actual tender you must obtain the Work Order. Then cross the Olfie bridge and go north, lighting the way thanks to the lantern until you come across a large stone on which the Work Order you need stands out. Now retrace your steps and go through the wolf cave to find yourself in front of Triumph. Use the Work Order on him, then resume the path in reverse until Amara arrives. At that point, return to Triumph to start an intermission scene at the conclusion of which the speed race will start. In reality, you can't miss the race: all that is required of you is to press the indicated keys at the right time and distract your opponents. If you make a mistake, you will find yourself repeating the final lap until you manage to cross the finish line as winners. At the end of the race, give the picture to Whisper and ask him to collect a frog for you. Then give the frog to the couple in the mansion shop to get the Color Change Potion.
Competition of strength
Given your physique is certainly not impressive, to win this race you will have to resort to some stratagem. First get your hands on the Whisper photo and the Work Order (we have already explained how to get them above, search for them using the find function of your browser). From where you get the Work Order, proceed past the darkness, then south, then east along the edge of the terrain, then climb the rocks, back onto the path and through the large door. Then climb the part and use the ladder to go up and find a gold coin in the west. Then call Olfie, but instead of crossing the bridge, go east and go down the ladder, then continue east again to trigger a cutscene. Now you know the secret knocking sequence. So knock twice, then shake the bell shaft twice, then knock again and say "Truss me". During the conversation choose the option you want, then sound the bell when the button appears on the screen and as soon as possible say that you are about to take your mouthpiece. Grab the one on the right, which belongs to Waddle and leave. Finally go back to the bridge and use the horn to cross it.
Then use Waddle's pod on the horn and decide how to get rid of the croissants, using the feather or the hypnotic potion on Pillare. In any case, you will soon be able to get hold of the Pillare mouthpiece. So head to the floating island and instead of immediately climbing the ladder, first use Pillare's snorkel on the horn.
Well, now you can talk to the guard to start the actual strength contest. Initially you will be moved to the left, it is useless to press the button furiously. If you have blown Pillare's horn before, however, you will find his arms grabbing you. So sneak up behind Acorn and pull the ball of yarn. Press X repeatedly until Acorn starts rewinding it. At this point you have to trip him. Wrap the line around the poles taking into account its path and be ready to tighten the line as the rider tries to climb over it to make him trip badly. You will have to repeat this sequence three times, playing Waddle's and Olfie's horns as you swing from the thrust you received. Finally you will have to wave the sock in front of Acorn to make it hit all the poles and spread it out.
Once you have won the challenge, go back to town. Along the way you meet Acorn: give him a sock to make him your friend and you will get a pair in exchange. Not only that, the big knight will move the boulder for you allowing you to collect the Bitterroot. Give it to the baker right away for the Streudel, then indulge in the cunning contest.
Competition of cunning
Get rid of the Streudel immediately, handing it over to the pissed squirrels blocking your way, and the pair of socks, a welcome gift for the guard outside the competition hall door. Initially there is no way to win the challenge: you will be hypnotized and screwed. After the first attempt, when the guard proposes a rematch, use the color-changing potion on the cups and accept. At this point it is not possible to give you a precise guide, because Manny changes his moves from time to time, but having colored the liquid, at least you will know which to choose. Anyway, losing three times in a row the number of cups to choose from is reduced to two: at that point winning will be much easier since the drink with the hypnotic potion will end up in Manny who will be under your control during the first moves. of the match. After winning you just have to choose one of the merchants and complete some simple QTEs to close this first chapter of the game!
 King's Quest - Chapter 1: A Knight to Remember xone
- pc
- ps4
- Xone
- ps3
- x360
Exit date: July 29 2015


