Sometimes you will need to add a background image to a Word document to make it stand out. While not as powerful as Photoshop or as dedicated to multimedia presentations as PowerPoint, Word still has some tricks up its sleeve. Read on if you want to find out how to add background images to a Word document.
4 ways to convert PDF to Word
How does it work?
If you want to add a background to your Word document, there are two main ways to do it. The first and easiest way is to add an image as a custom image watermark. This path does not allow you to edit the image once inserted.
The other way to do this is the classic Insert Image method. If you choose this way, the image will remain editable and you can change its contrast, brightness and many other options.
Custom Watermark / Image Watermark
Adding a custom watermark image to a document in Microsoft Word is a quick and easy job. To do this, follow these steps:
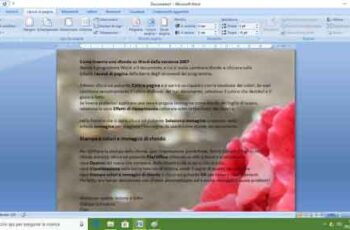
- Double-click the link and open Microsoft Word.
- Click the "File" tab and open the document to which you want to add a background image.
- Next, click on the “Design” tab in the main menu.
- Once the tab is open, you need to click on the “Watermark” option located in the “Page Background” segment. It will show you a drop-down menu where you can select a number of predefined watermarks. Scroll down, as “Custom Watermark…” is the option you are looking for. Click on it.
- A dialog box will open. First, you should click on the “Image Watermark” radio button.
- Then, click on the “Select Image” button. Search for the image you want to insert and click on "Insert".
- Next, you should choose the scale of the inserted image. Click on the "Scale" drop-down menu and choose the one you want. Options include Auto, 500%, 200%, 150%, 100% and 50%.
- Next to the drop-down menu, there is the “Washout” checkbox. Select this if you want the background image to appear washed out. Even if you don't select it, the image will appear a little washed out in the document. This is completely up to you, even if a washed-out image makes it easier to read the text in front of it.
- The following are the options for text watermarks. Since you will be adding a watermark to the image, you don't need it.
- After configuring the background image / watermark, click the “OK” button.
Note that the background image added this way will appear on every page of the document. This method applies and works the same for Microsoft Word 2010, 2013 and 2016.
How to use Microsoft Office Online
Enter image path
You should choose this path if you want to add a background image to one or two pages of your document. Also, if you want to have different background images throughout your document, you should choose this method. Here is the step by step guide:
- Double-click the icon and open Microsoft Word.
- Click the "File" tab and choose the document to which you want to add a background image.
- Click the "Insert" tab on the main menu.
- Click on the “Image” option and browse for the desired image. You can select an image from your computer or download one from the Internet.
- Once the image has been inserted into the document, you can resize and reposition it as you see fit.
- When you are satisfied with its position and size, click on the small “Layout Options” icon to the right of the image (Word 2013 and 2016). If you're using Word 2010, click the "Page Layout" tab and then click the "Wrap Text" option.
- This step is the same for all three versions of Word. Here, you should choose the “Behind the text” option. Note that your image is still editable, despite being in the background.
- Next, you should click on the "Format" tab and select the drop-down menu in the lower right corner of the "Picture Styles" segment.
- This will open a dialog that offers several ways to change the background image. You will be able to adjust the contrast and brightness with a couple of sliders. There is also a slider that allows you to soften or sharpen the background image as you wish. If you click on the “Presets” drop-down menu in the “Image Corrections” segment, you will also be able to select one of the pre-determined contrast and brightness settings. Other options such as “3D Format” and “3D Rotation” are also available, as well as the “Reflection” and “Glow and Soft Edges” options.
- When you are done, click on "Close". There is no “OK” button, as the changed settings are immediately applied to the image.
Equipping a Word document with a background image can enrich the reading experience and make it more enjoyable. Whichever way you choose to do it, your documents are sure to be a more interesting read.
Further Reading:
- How to convert a Word document to a JPG OR GIF image
- Recover unsaved Word documents, 6 solutions
- How to sign Word document
- How to open EPUB files on Windows
- How to create and combine sequences in Adobe Premiere