


The first mission we're going to face in Call of Duty WWII is D-Day, set on June 6, 1944 on French beaches. More commonly known as the Normandy Landing, during the operation we will have to repel the Nazis and conquer Omaha Beach. In this first guide we will get to know the protagonists and walk the mission step by step to face it in the best possible way
Call of duty wwii, another valid title that takes us back to the past, retraces the events of Second World War. The first mission we will face in the game is D-Day, which coincides precisely with the Disembarkation in Normandy.
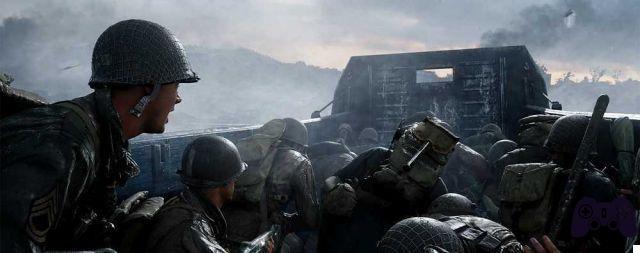
On an American military ship, sitting at a table before a briefing, we will impersonate the soldier Ronald Daniels area of 1st Infantry Division and we will make a quick acquaintance with our comrades in war, before catapulting ourselves to the conquest of Omaha Beach.
Before starting, we invite you to read our review of Call of duty wwii, viewable on This Page.
1st Infantry Division: our companions in Call of Duty WWII
Robert Zussman
Zussman, a first-class soldier with a keen sense of humor, is the best friend of Daniels and the team doctor. During the various missions in Call of Duty WWII it is always good not to lose sight of it, as when needed (and when you request it, after loading the relative bar) it will throw you some medical kits that you can use to heal yourself.
William Pierson
Pierson and the technical sergeant of the 1st Infantry Division, the classic man in one piece. In addition to insulting you most of the time, he (along with Joseph Turner) will give the orders and therefore you will have to submit to his decisions. It won't give you material support during Call of Duty WWII missions, but it will will report enemies so that you can also see them through the walls. This request can always be made after the relative bar has loaded. Also, it is good listen to his suggestions on how to move around the battlefield to avoid falling under enemy bullets.
Joseph Turner
Turner and the first lieutenant of the 1st Infantry Division and somewhat represents the "Dad" of the team. Unlike Pierson, he is much more sensitive and worries about the psychophysical well-being of his soldiers. He too, like Zussman and Pierson, proves to be a fundamental character in Call of Duty WWII, as during the missions there will replenish ammunition. As always the action is executable after loading the bar and he will give you too valuable advice on how to move around the battlefield.
Frank Aiello
Aiello, described by Daniels as the group's veteran lout, is a fifth grade technician which is engaged in 'grenade equipment. He too in Call of Duty WWII will support you during the various missions, throwing explosive, smoke and signal grenades at you.
Drew Stiles
"Stiles looks like Clark Kent in those glasses, the only difference is that if he takes them off he doesn't see the fuck." It is with these words that Daniels describes Stiles, soldier in charge of document the events and atrocities of the Second World War retraced in Call of Duty WWII. During the missions he will not provide you with direct support, but will always carry his trust with him camera to take pictures.
After a brief presentation of the characters we enter the heart of the conflict. Please be advised that from this point on there will, of course, be spoilers on the main Call of Duty WWII campaign. You are warned!
Call of Duty WWII – missione 1
D-Day
Omaha Beach, Francia
June 6 1944
After the introductory video we find ourselves on board the boat that will take us straight to the French beaches. In the very first minutes of the game we see one exchange of words between the soldiers and we can only move the camera to hear the dialogues. At a certain point the bombings start and the first soldiers begin to fall. For another fraction of time we can do nothing but look around, and only when the boat reaches the shore we take control of Daniels. After literally jumping out of the boat, Turner retrieves us from the water and gives us the order to reach the beach pushing us to the barrier.
Reach the beach to the barrier - goal 1
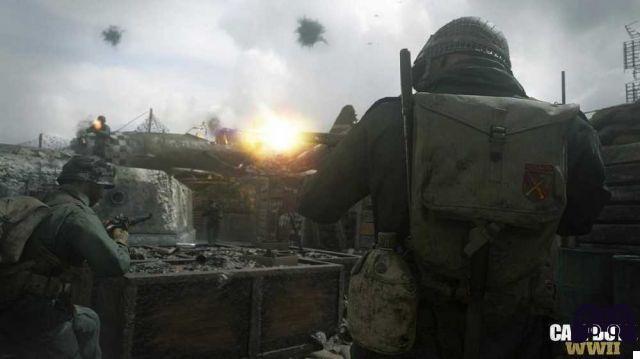
And it is at this point that Call of duty wwii starts showing hers real potential. Using the Bangalore torpedo we have to open one breach in the reef at the bottom of the beach, to allow the soldiers to pass e conquer the German bunkers. Our goal is about fifty meters away and to reach it we have to cross the beach, almost completely uncovered.
We encounter some enemies in front of us, but the most dangerous ones are the machine guns which are located at the top. The latter try to mow us down mercilessly, so we have to move as quickly as possible. There are some dilapidated structures on the beach that you can use for shelter, but don't stay still for too long. I advise you to listen to the voices of your companions who warn when the enemy is reloading, and it is precisely at that point that we must move. Be quick e take cover behind the protective structures staying low, but try not to stay still for too long.
We reach the barrier in the company of Zussman, and using the Bangalore torpedo (via quick-time event by pressing R2) we open a breach to pass.
Reach the Heights - Goal 2
Once we have passed, we enter the trenches leading to the German bunkers. The spaces are very tight and therefore you have to be very careful. Eliminate the first enemies that appear in front of you and enter the trench from theentrance on the left, as Zussman suggests. Avoid entering from the front, as if you do, you will be completely exposed and will be shot down immediately.
Before throwing yourself headlong into the trench, stay on the entrance and eliminate the enemies by staying low and taking cover. Once the threats are cleared, enter carefully with Zussman and the others. At this point you can request a medical kit to Zussman and, of course, I recommend you do it. Proceed by eliminating the enemies that stand in front of you sheltering behind the green bins and, if possible, try to always aim for the head. Follow the street and at a certain point you will see a pass tank friend on the bridge in front of you. At that point, on the right, find a medical kit.
Continue taking the stairs on the left and once up watch out for the machine gunners that are ahead, slightly higher than us. The hills are getting closer and closer, so take cover behind the crumbling walls and proceed.
Clear the bunkers - objective 3
The hills are now close, so go up the road and take out the enemies that stand in front of you. At this point Turner will order you to go to the first bunker with Zussman. There are 5 bunkers to free and always preceded by a entrenched courtyard chock full of enemies, so you have to take them out first.
> Bunker 1
In the first bunker you are advised to throw one granata and you do it. If you throw it in the right place (the one where you notice the most movement, about in the center) you will eliminate more enemies in one shot and this allows you to save a few hits. Also in this point Zussman could offer you a medical kit, you ask for it without thinking twice. Staying low and taking cover behind the bins, proceed and head towards the bunker proper. Once inside enemies appear from the corridor ahead, then stay behind the wall and take them out. The first bunker is cleared, so head to the next one.
> Bunker 2
Also for the second bunker follow the advice mentioned above: beware of tight spaces, stay low e take cover behind the scenery objects. Here you have the possibility to save one of your mates, thus performing aheroic action (optional). In this second bunker you will find two machine gunners blocking your way. Aiello will get your attention and you ask him for a smoke, launch it and then eliminate the machine gunners. Watch out for enemies around corners and, if necessary, use the table in the room as a cover positioning it with R3.
> Bunker 3
Once the second bunker is cleared proceed to the third, where you can use a flame thrower left by a fallen comrade. Use it to take out a good number of enemies. In this bunker, going up some stairs, you will find one ammunition supply crate it's a medical kit.
> Bunker 4
In the fourth bunker, once you enter, you can shoot one can of gasoline through a window. With this action you will eliminate more enemies, so it is advisable to perform it. Be careful though, as some hostile soldiers aren't killed by the blast, so you have to. Before leaving the bunker, take a tour of the room and retrieve some munitions it's a medical kit.
> Bunker 5
Under Pierson's order, the team splits. You team up with Zussman and another handful of soldiers for clean up the last bunker. As always, pass the entrenched courtyard and eliminate the enemies, staying low and taking cover behind the bins. Once you enter the bunker come attacked by an enemy and to free yourself quickly press the square button. Zussman takes the hostile soldier off you but is wounded by a stab, and at this point it's our turn. The enemy pounces on us and to avoid the stab, perform the quick-time event with the circle button. Then go back to pressing the square button quickly for resist. When you take down the enemy, another quick-time event with the triangle button allows you to permanently delete the German soldier.
Head to Zussman who is wounded and he warns you to be careful in front of you, where two enemy soldiers appear at the entrance to the bunker. Eliminateli with the gun e occupatevi di Zussmann, who cannot walk. You have to transport it to the medical station and to do so it will be necessary drag it along a stretch of road. Go through a courtyard and listen well the words of Zussman who shows you where the soldiers come from. All you have to do is eliminate them with the gun. On the way, the game makes you stop three or four times to support Zussman against barricades, so you are easier to shoot at hostile soldiers. Take a good look around to visualize the danger grenades e throw them back by pressing R1 when the command appears on the screen.
Reach the farm and destroy the enemy artillery - objective 4
Finally you reach the medical station with Zussman now in agony and, after giving him morphine, you must leave him in the care of the doctor. Pierson and Turner talk about a GPF cannon in German hands located at the farm, who is pounding the beach where our soldiers are. Obviously our goal is destroy it and subsequently attack the beach (Omaha Beach) to conquer it.
As Pierson continues to complain about our slowness, we make our way to the farm. Pay attention to the machine gunner located on the second floor of the barn in front of us, which will annoy you a lot. Some enemy soldiers come out of the building on the left and immediately go to take shelter behind the hay bundles in the middle of the courtyard. First approach the farm and take cover behind the wrecked car, taking out some hostile soldiers in the courtyard. The gunner is too far to take him down from this point, you have to get closer since you don't own a sniper rifle. Do not stay too long behind the car, because it explodes after a short time, under the shots of the machine gun at the barn window.
One tactic I have tested is that of enter the building on the left, obviously paying attention to the soldiers inside. Eliminate them and enter, then turn to the courtyard. Taking cover behind the building wall, take out the soldiers behind the hay bundles and take their places. You are now closer to the gunner but always be careful, as he is ahead of you by being higher than you. If you can get rid of it from this location it is likely that a soldier goes to replace the fallen comrade, so be careful.
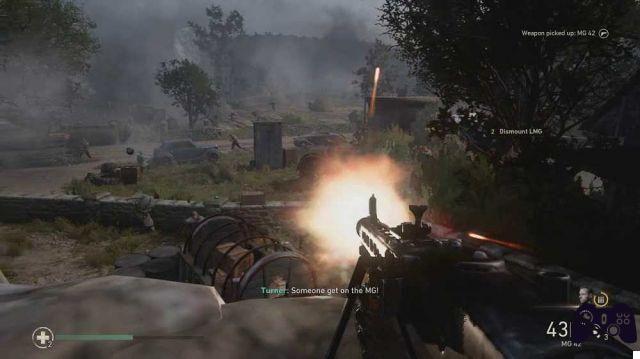
Eliminate all the enemies in the yard, Turner will give you the order kill the gunner, if you haven't already, and say appropriate his weapon. Then go inside the building, go up the stairs always staying low. Once at the top, retrieve the medical kit at the foot of the MG42 machine gun and immediately after use it. You can choose to detach it from the holder or keep it in a fixed position. In any case you have to use it to eliminate the last enemies left in the courtyard, and after a few minutes a American tank will come to give us a hand. After making a clean sweep, go down and go back to the courtyard for destroy German artillery with termite.
Meet your team on the beach - goal 5
Once this is done, the time has finally come regroup with your platoon at the beach. Pierson informs us that we have suffered a lot of losses, but we managed to conquer Omaha Beach. Once you have reached the meeting point we reunite with the good Zussman, a little bruised but alive. It will recover. Pierson approaches us and, with his always very encouraging maxims, accompanies us to the end of the first Call of Duty WWII mission, D-Day.
Welcome to the First Infantry. You are far from Texas, country man.
Call of Duty WWII - mission 1 report
D-Day
Omaha Beach, Francia
June 6 1944
I don't know who thought of reconquering Europe in this way. One thing is certain, though: he wasn't on the beach with us today.
Ronald “Red” Daniels


![Guides Sophia's Shop Guide [100%] - Persona 5 Strikers](/images/posts/1f5e1c7629d56d6c792ac770a5d6b182-0.jpg)