


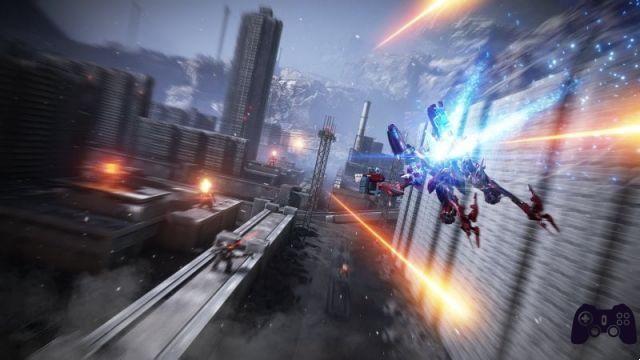
The Armored Core series is not exactly one of the easiest to approach: they are complex games, where much of the gameplay is based on the possibility of customize your mech as you like, and the player must commonly juggle between a sea of different parts and data that is not particularly well explained. Armored Core 6: Fires of Rubicon has made giant strides in this sense, also thanks to a series of rather useful tutorials that allow you to try various mech configurations and decide on the one closest to your tastes; However, it is not a walk in the park for beginners and we have therefore decided to offer you a useful one guide to quickly understand the fundamental points of assembling Armored Core 6: Fires of Rubicon.
Today we will try to explain how to best adapt your mech to various situations (or, simply, to your gaming style), without forgetting some useful advice related to the efficiency of some specific combinations. Maybe it won't be enough to get you through the game's bosses without any difficulty, but it's certainly a start.
Run away but don't run away
Let's start with the fundamentals: legs. The mech assembly goes through various pieces, but your "mechanical lower parts" are among the most important of all in Fires of Rubicon and the reason is really simple: they greatly influence the movement and transportable weight of the mech, so they are the backbone of your entire setup.
Heavier and stronger legs usually limit mobility, but allow your robot to mount heavy cannons, grenade launchers, and a lot of other weapons commonly ignored if you want to ride the robotic equivalent of a Formula 1 car; more than the statistics, however, in this Armored Core what matters is the type of legs selected, because it significantly changes the response of your mechanical alter ego. To clarify, the normal legs they are predictably the most balanced, as well as typically offering the greatest increases in movement speed as weight is lowered; the legs with inverted joints, for their part, they do not lose much mobility and allow you to make notable jumps from the ground, which guarantee you can dodge better if you are not in the air or reach a decent elevation more quickly; quadrupeds they are the exact opposite, and are not normally very mobile legs or suitable for quick configurations, but in the air they can "float" consuming very little energy, guaranteeing to riddle enemies from above without too many problems; the crawlers, finally, they are the most peculiar legs, given that they are very mobile on the ground, yet they struggle to curve instantly and in the air they are clumsy and problematic, so they counterbalance these shortcomings with a very high transportable weight and a large quantity of armor points (the your life points in practice) additional.
In short, to recap: do you want a mobile and balanced mech? Legs normal or with inverted joints; Do you love aerial combat and the advantage of verticality? Quadruped Mech (also these legs favor heavy weapons, since they are not affected by the recoil of shots); do you want a robot that is very resistant and capable of getting under you quickly while on the ground? Tank. What you choose from these options, obviously, will also influence the rest of the body, without major upheavals. We're big fans of inverted joints, both for their unique look and for the great combination of mobility and carryable weight of some of them, but any choice is valid.
Moving on to the rest of the parts, what you will have to take into consideration is more or less always the same: weight, armor points, energy, kinetic or explosive defense. Our advice is to buy at least one leg of each type, and a mix of medium, light and heavy pieces for the other parts of the body based on the defenses (mostly because you can't buy them at the checkpoints, so better prepare). The reason? Certain bosses are extremely vulnerable if hit from above, and against them a quadruped represents a guaranteed victory, while against some of them with the habit of using lasers a torso with high energy defense could save your life.
head and arms the situation is a little more complex, however: the skull of your mech regulates the speed and area of the scan, a non-essential element, but which can still help a lot in certain missions (normally it is a piece that we consider "aesthetic", but here too there are very useful choices due to their high defense); the arms, however, are more difficult to select, because not only do they have a specific carryable weight limit - separate from that of the legs, so heavy weapons that your legs support may not be supported by your arms - but also specializations related to the weapons. In short, selecting certain arms will increase your melee damage, while others with a high fire specialization will make weapon tracking faster (thus making the mech more precise when shooting from a distance). For the record, specialization doesn't change things in a "huge" way, so arms with fairly balanced statistics are usable in almost any build, if you want to do things perfectly, however, keep this in mind.
If you want to shoot, shoot, but don't miss your aim
Weapon specialization helps, but the most important component to fine-tune your accuracy is one and only one, il Fire Control System o FCS: this little computer inserted into the mech regulates the precision of the weapons based on the distance, and its choice is absolutely central to making your configuration work at its best. It bears repeating: "absolutely central". If you haphazardly place an FCS with low long range assist and your mech only mounts high range weapons, you will miss 90% of your shots and will probably run out of bullets before finishing the mission. Wisely select the component based on the guns equipped: each weapon has a maximum range and an ideal range, the latter is the distance within which it does maximum damage and its projectiles do not ricochet off enemy armor. In short, if you plan to use your attacks within a radius between 100 and 200 meters away, focus on an FCS with excellent assistance from medium distance, if instead you want to always stay glued to the enemy and quickly chop him up (or use melee weapons body) an FCS with assistance from the short shot, and so on. Be careful, one of the extra stats (not shown on the home screen) of the FCS affects the missile tracking: if you want to use a build that constantly fires hails of homing rockets, don't care about distances and focus everything on the component with the best missile tracking.
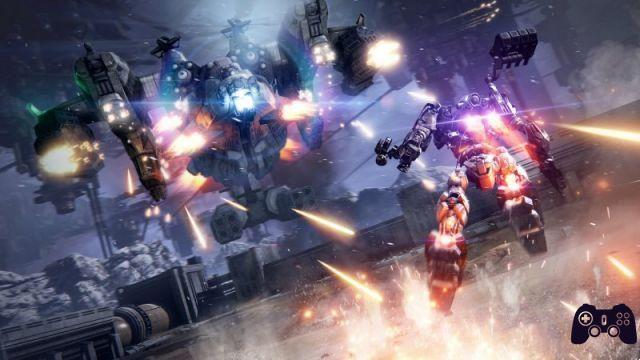
While we are talking about weapons, obviously these too must be selected with care, but pay particular attention to "what" they shoot. Weapons deal damage of three types: energetic, kinetic, explosive (there are also weapons that do fire damage, but they are few and are not central to resistances); choosing them depends mainly on how much of that type of damage they deal, their range, and the statistic called impact. The latter is particularly important in Armored Core 6, because it indicates how much that weapon is capable of filling the enemy's stability bar and stunning him. Considering that in this game you can equip and use four weapons at the same time, selecting a balanced mix of high stun weapons accompanied by guns with good damage is normally a certainty, but there are other factors to take into consideration.
The first is the so-called "direct hit modifier": it is a damage multiplier when the enemy is stunned; if in your build you aim to often break the stability of enemies, mounting a weapon that has a high modifier of this type can be an excellent way to maximize the damage inflicted in moments of opponent vulnerability. The second piece of data is the cumulative impact, mainly to be taken into consideration in weapons that hit multiple times, because it can greatly facilitate a rapid stunning if significant enough. Attention, the progression of weapons in Armored Core it is quite horizontal, and between the various types of guns it is often more a question of pros and cons than actual pure power; that said, it has always been a fairly unbalanced series and some choices unlocked at the end of the campaign are clearly better than others. The gatling, for example, is clearly the automatic weapon with the highest volume of fire and the highest damage among the kinetic ones, certain missile launchers simply have higher damage and danger than any other, and there is usually always a superior weapon to everything else in every single type available. Let's be clear, since enemies have weaknesses to certain types of damage (the boss called Baltheus, for example, is vulnerable to plasma and laser), always change them based on what you need at that moment.
Sul body to body the discussion varies a little. It is possible in the game to equip various types of energy shields and weapons designed for short distances, and the latter are particularly useful for not consuming bullets, given that many of them have infinite "ammo". However, Armored Core is, at its core, more of a shooter than anything else, so it is not advisable to tackle all the levels as a sort of mechanical knight. Additionally, shields cannot be activated at the same time as melee weapons, and both can only be equipped on the left side of the mech (no double blades for aspiring futuristic ninjas, sorry). If you want a build focused on a similar style, we recommend support weapons on the other side: throw napalm bombs for fire damage on the ground while circling the enemy, shoulder drones that fire automatically without forcing you to aim, or simply a flamethrower or shotgun to maximize damage while you are two steps away from your target. This should also be repeated: it is a build with many weaknesses, but it does enormous damage. Just keep in mind that if you miss with a melee weapon, you'll be left exposed for a few precious moments, so be precise.
Armored Core 6: Fires of Rubicon: generators and reactors
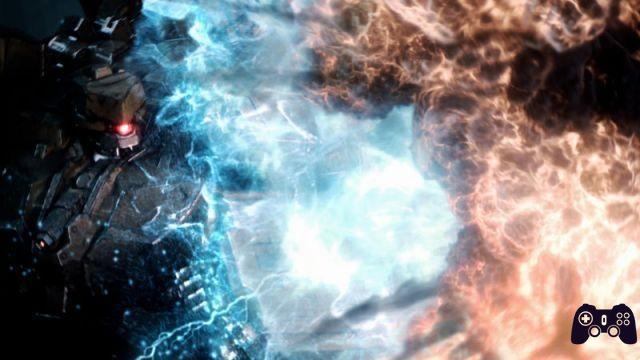
The last fundamental components, but no less important, are the mech's generators and reactors. Now, a generator must be taken into consideration for many characteristics, but the main ones are capacity and energy output. If the energy load your generator can tolerate is too low, you simply won't be able to equip modern weapons because you won't have the energy to run them. There are very balanced generators in the game, but they are usually also quite heavy; our advice is to focus on those despite their weight, due to the energy and charging advantages they offer. During the campaign you can adapt the generator as needed, optimizing its weight and other statistics if you decide to use weapons with a very low energy load, but normally in this field having many resources available is often a winning choice. There are also "special" reactors suitable for weapons of a certain type, with very high energy capacity, but very poor recharge. They are a fantastic choice for certain builds, because although they don't recharge quickly they allow you to abuse your energy bar by recharging most of it once it's depleted. You will only get them at the end of the game, however, so don't worry too much about them.
Reactors are another piece not to be underestimated: many will select them only for the speed of dodging, for the low energy consumption and for the speed of recharging, and we understand this very well, but this only applies to fast builds. With a super light mech, a reactor that allows you to dodge often and quickly is always the wisest choice, however be very careful about the weight, because certain reactors are not suitable for heavy mechs and their recharge time multiplies on them. Therefore, select the reactor only after having assembled all the rest of the robot, or you risk being able to rarely dodge. Another important thing, some reactors have a vertical thrust greater, although this usually leads them to have less mobility in other fields: if you use a quadruped or fight a lot in the air they are the smartest choice.
Finally, absolutely don't forget the extra abilities obtainable with the OS System (unlocked along with the arena after a short while). These powers also depend on how you approach the battle. Our advice for the campaign? L'pulse armor: it's a simple energy shield that protects you for a handful of seconds, but it will save your life in certain annoying missions (where you can be hit by homing lasers or annoyingly positioned enemies) and in duels against the CPU. Those who love the offensive will certainly use theassault armor, which hits in an area and inflicts a good stun (and will probably be used a lot in PVP, because it stops anyone who is too aggressive). Good too pulse shield positionable if you have a very static playstyle: it is literally the best barrier, but against many bosses it will not be easy to use it properly given their mobility and tendency to get closer. However, we have not found much use for thefinal armor; it doesn't have to be activated and it saves your life before dying (which can be fundamental against bosses), yet it lasts very little and doesn't seem up to par with the other skills (but perhaps we simply didn't grasp its real usefulness, having used it little ). Here too, however, now in the third run of the campaign you will have everything available, so change power as needed (and don't forget to equip it!).
These should suffice as basic knowledge; we realize how it may seem a bit excessive, but we assure you that once you enter the loop it becomes very natural to modify your mech. Now get into that robot, and have fun.
- Have you noticed any errors?


