Please note:
The solution is based on the American version of the game, so there may be differences with the Spanish one.
Introduction
Chaos Theory is the third episode of the adventure signed by Dontnod Entertainment with the collaboration of Square Enix. In the game you control an XNUMX year old girl named Max (yeah well ... maybe it's a male name), worried about school life. During the game you will discover its supernatural powers and the possibility of turning back time; this power will allow you to modify decisions and events that otherwise cannot be modified. The third episode in question, will make you face a plot that will take into account the decisions you made in the previous episodes. This solution will help you tackle the plot and the most essential issues. Inside you will also find details on important choices and their consequences.
Chapter 1
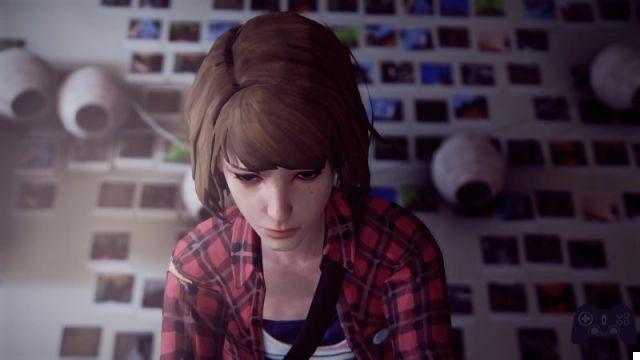
Once you have the character controls, look around and examine Max's room, you will find several interesting objects. The first of these is the plant that you will need to water. Once this is done, exit the room and go left. Follow the corridor and reach the bathroom where you will meet Taylor with whom you can talk. Selecting the "Comfort Her" dialog option will reveal a secret to you. Finally, you will have to promise to keep what you just heard for yourself.
After the chat with Taylor, leave the bathroom and head to Dana's room, talk to her about what happened with Kate and, of course, the conversation will take a different turn depending on whether Kate committed suicide or not in the episode. previous. During the chat, Dana will ask you to find the person responsible for Kate's decision and you can tell her if you accept this task or not.
After your chat with Dana, leave the dorm and head to the parking lot. Along the way, you will meet the drunken headmaster and, thanks to his current condition, you can walk past him without being seen. To do this, you will have to approach the alley on the left of which is the white porch and turn back time as much as possible, once you have done this, you will notice the headmaster trying to open the door with his back to you, you can then pass and reach the exit. without being seen.
Chapter 2
This chapter will start with a chat with Chloe who will reveal her secret plan to break into the director's office; follow her on the spot.
Breaking into the office won't be very easy and you'll have to solve a logic puzzle. Look around the room and find something that can help you open the door. Approach the wall on the right to find the hanging keys. Unfortunately the key you are looking for is not attached to that deck you just collected and you will have to look for another way to open the door. After betting with Chloe that you will find a way to get in before her, leave the room and head down the hall to the right.
Your goal will be to create a bomb, as suggested by Warren's text message. To make a craft explosive, you will need a few things:
Seltzer water (a Coke will do just fine)
Scotch tape
sugar
Sodium chloride
The first item, the Coke, can be found in the corridor at the red and orange vending machine. The second object, sugar, can be found in the chemistry laboratory, more precisely on the professor's table. Before continuing, move to the opposite side of the classroom and near the skeleton, you will find some sodium chloride, in other words the herbicide next to the closet.
The last item is in the class of Mr. Jefferson (the photographer). Approach the opposite end of the room to find the duct tape near the printer. Once you have collected all the items, go back to Chloe at the entrance to the principal's office and talk to her, selecting the dialogue option concerning the handcrafted explosive. Once the explosion is complete, enter the director's office and turn back the time just before you trigger the homemade explosive device. You can now open the door for Chloe from the inside.
After your conversation with Chloe, start your search inside the director's office. Approach cabinets and shelving to find all the documents you need. Two of these are on the shelves and one on the table. Once you have found all the documents, talk to Chloe. During the conversation with Chloe, the girl will find a lot of money inside the principal's drawer and intend to steal it; you will now face the first choice of plot.
Plot choice
Leave the money: You tell Chloe to leave the money. This option seems the safest, as the principal will notice the theft.
Steal the money: You will steal the money by helping Chloe pay off the debt.
Once you have made your decision, go to the pool with the girl.
Once there, talk to Chloe.

It won't matter which locker room you choose, however by selecting the men's locker room, you will be called "Perverted" by Chloe. Go to the main room and from here go to the office, you will notice a distribution group on the wall, approach it and turn on the electricity.
Leave the room and join Chloe, undress and dive into the water. Talk to your friend. During the chat some guards will break into the complex and start looking for you. Get out of the water, get dressed and head to the locker room you chose earlier.
To go unnoticed by the guards, you will have to wait for the moment during which they will not be facing you, then you will hide behind a locker (the flashlight beam will indicate which side the guard is facing). When security leaves the room, go back to the pool and exit the main exit after the guards.
Chapter 3
When you have finished escaping from the pool and waking up in your room, pick up the camera from the floor and take a nice selfie. Talk to Chloe and examine her room. In the wardrobe you will find the clothes that once belonged to Amber. Once you've changed, talk to Chloe again to be faced with another plot choice.
Plot choice
Kissing Chloe: Even Chloe herself will be surprised that you dared to do this.
Do not kiss Chloe: you will just refuse the effusion with your friend without major consequences.
Once downstairs, go to the phone and listen to the message on the answering machine. You can decide to delete the message even now without having to rewind time. If you decide to listen to the message, you will hear another scolding about Chloe and her mother, in the next room, will hear everything. To save your friend from potential big problems, rewind time (before the mother hears the message) and delete it.
Once you have analyzed everything that is interesting in the room, talk to Chloe's mother. You will be offered to choose what you prefer for breakfast, however you will need the ingredients. Milk can be found on the dining room table while eggs can be found at the front door inside the grocery bag. Once you have collected all the items you need to have a hearty breakfast, go back to Joyce and talk to her. Regardless of how the chat goes, make your way to the dining room and sit at the table to wait for Chloe's mother to serve breakfast. During the discussion between Chloe and Joyce, you can leave the room to look for evidence inside the garage.
Your goal will be to access Chloe's stepfather's computer. To do this you will have to try to know the password for the terminal. Look around for potential clues to the keyword, this is on the family table and is dated 11-27-08. While trying to find the password, your computer may freeze after a few failed login attempts, in this case just rewind the time to your liking.
Once you are done with the computer, go back to Chloe to talk. During the discussion between David and the girl, you will have to face another very important choice.
Plot choice
Side with David: You will side with David by approving his behavior.
Siding with Chloe: You will side with Chloe and accuse David of spying.
Regardless of the choice you make, the story will unfold in the same way. Approach Chloe at the front door and talk to her, then leave the house and go with her to the next situation.
Chapter 4
Once you get to the spot with Chloe, you'll need to find a way to sneak inside the RV in the parking lot. To do this, go to the diner and talk to the patrons inside. First talk to the police officer sitting at the counter, selecting the dialogue option "Nathan Prescott", the policeman will reveal his secret that can be used against the man. To get more information from the police officer, rewind the clock and select the "Prescott Deal" dialogue option.
You can use what you just found out from the police officer in your next conversation with Nathan. Select the cop information dialogue option while talking to Nathan. The man will reveal a secret about Frank, the Blood Oath.
Once the chat with Nathan is over, try to talk to Frank. First, use the information Frank gave you about the Blood Oath and when Frank reveals his secret, select the "Rachel's Photo" option. At this point Frank will empty his pockets along with the keys that you will have to collect immediately and then rewind time. Once all this is done, the keys will be in your possession and Frank will not suspect anything.
Leave the diner and return to Chloe at the RV, then select the "RV Keys" option. Once you open the door you will be attacked by a dog and you will have to throw a bone to attract its distant attention. For this action you will be offered two choices:
Throwing the bone on the road.
Throwing the bone in the parking lot.
Regardless of which one you choose, once the dog is away, enter the camper to look for some evidence.
To find the proof you need, go to Frank's bedroom and check the ventilation system, you will need a tool to open it. You will find a knife on the kitchen worktop, this will prove perfect for your purposes.

Once the ventilation system is open, pick up the notebook inside to uncover some remarkably interesting facts about Frank and Amber. Tell Chloe everything you have discovered.
Once you have finished the conversation with the girl and examined the photo, you will find out something really interesting about this and you will have to focus on it. To do this, use the two buttons shown on the screen, first arrange the photo with the "A" and "D" buttons, then the left and right mouse buttons to maximize the focus of the photo (clearly the buttons refer to the version for pc, for the other versions follow the keys indicated on the screen).
You will wake up as an XNUMX-year-old Max and be able to change the events that led to the death of Chloe's father. To do this, take the keys that are on the table next to the TV and pull them out the window. Enjoy the ending of the game during which you will discover that Chloe's father did not suffer the accident, but your friend suffered it for him.
Consequences of plot choices
First choice
The first important choice will take place in the first chapter of the episode. You will have to decide whether or not to steal the principal's money.
Leaving the money will not help Chloe pay her debt to Frank. However, it will not be difficult to convince the girl not to commit the theft since the risk of being discovered by the headmaster will be too high.
By stealing the principal's money, you are helping Chloe pay off the debt. Your friend's initial euphoria will soon be replaced by fear of being discovered in the next few episodes.
This choice will not have a real effect on the current episode and will only change some dialogue options with Chloe. Clearly the wisest choice seems to be not to steal the money, as you may have trouble with the law later on.
Second choice
The second important choice is whether or not to kiss Chloe.
By kissing Chloe you will prove to her that you are much more fearless than she herself thought.
Not kissing Chloe won't change anything.
Regardless of your choice, subsequent events will not change.
Third choice
The third choice will take place during the discussion between Chloe and David, in fact you will have to take sides on one of the two sides.
By siding with David and defending him from Chloe's attacks, you will make your friend very angry.
Siding with Chloe, you will openly attack David and reveal his secret to Joyce who will throw the man out of the house.
Regardless of your choice, future events will not change, the only difference will be some dialogue options with Chloe.
Fourth choice
The fourth important choice concerns Frank's dog and you will have to make it very quickly.
Throwing the bone on the road will cause the dog to be hit by a car, this is the far worst case scenario.
By throwing the bone into the parking lot, you will not cause any harm to the dog.
Fifth choice
The fifth choice will take place inside the camper in the parking lot and you can decide whether or not to leave the gun to Chloe. This choice will have no consequences within this episode.
 Life is Strange - Episode 3: Chaos Theory pc
- pc
- ps3
- ps4
- x360
- Xone
Exit date: May 19, 2015


