Please note:
The solution is based on the American version of the game, so there may be differences with the Spanish one.
Chapter 1
You will start this episode exactly where you left off the previous one. Due to the travel back in time and the consequent change of events, Chloe has suffered a bad accident that has irreparably paralyzed her body. The girl is now in a wheelchair and the episode will start with a chat in front of the sun.
Once you reach Chloe's house, approach her bed and try to talk to her. The girl will ask you for some water, the mug with the liquid is on the shelf to the right of the bed. Your friend will ask you to watch a film with her, the disc with the film that interests her can be found on the shelf to the left and under the television. Once the disc is collected, select the DVD player and run it.
When you wake up, speak to Chloe immediately. Your friend will inform you that she is having a migraine again and needs the morphine hidden in the bathroom. Exit the bedroom and reach the first floor, once in the bathroom, approach the cabinet above the toilet and take the medicine. Go back to Chloe's room and select the morphine option.
After a little chat with your friend, she will ask you to look at some old photographs. The album can be found on the cabinet next to the window. Once in possession of the precious album, return to Chloe and select the appropriate option to view photos with her. As you look at the old shots, turn the pages until you reach the first major plot choice of the episode. Chloe will ask you to put an end to her suffering by injecting her with a lethal dose of morphine.
Plot choice
Accept: you will fulfill your friend's wish by making her fall asleep forever.
Refuse: You will refuse to kill your friend by not exhausting her desire.
I don't know: you will avoid answering precisely by pretending to ignore what Chloe meant.
This choice would seem to be one of the most important in the game, but it is not. You can kill her or not, this choice will have no impact on the story to come. After the cutscene is over, look at the photo in the album and focus on it. To do this, simply press the directional buttons.
Chapter 2
After another change of events in the "space-time continuum", Chloe will revert to being the girl you met in the previous episode (before you changed events). Now you can take your first photo in the collection. Stand behind your friend sitting at the computer and select the "Chloe's photo" option. Take a look around the room and leave it to go down.
Texture note
Depending on the decision made in the previous episode (relating to David), the situation in the garage will be different. In both cases you will have to reach David's locker and get the information inside.
In the situation where David has been abandoned by Chloe's mom, the locker can be opened in two ways, the first using a crowbar that is next to the shelf. All you have to do is break the lock. The second way is to insert the code in the lock, this particular code could be found in the third episode of the series, when you were looking for the password for David's computer and it is 7171.
In the situation where David is still with Chloe's mom, everything will be the same except for the second way to open the locker. You will have to look for David's key, unfortunately you will have to distract the man, as he is right next to it. In the locker room, you will find a fuse box, grab one of these to distract David, go to the opposite side of the room and get the key from the cabinet. You can also decide to go back in time and get the keys before David enters the garage.
Texture note
The next part of the guide implies that you have saved Kate and prevented her from committing suicide. In case you haven't saved the girl, the next part of the game will not take place and once you leave Chloe's house, you will immediately reach the dormitory.
Once you have the information you need, go back to Chloe and together you will go to the hospital to visit Kate.

Approach the table in front of the bed and read the letter. Once you have read the sheet, you will have a new dialogue option during your conversation with Kate (select "Victoria" to have Kate help you identify Nathan's room number). Then select the "Nathan" and "Vortex Club" options to have another valuable ally in your investigation.
Once you get to the dorm, your job will be to gather information about Nathan. Before continuing, don't miss the opportunity to collect all the photos for the album. The first is located near the totem pole, approach the stacked rocks and select the "photo" option.
The second photo, depicting two squirrels, can be found by approaching Samuel and talking to him about the changes at Arcadia Bay. Select "squirrel" in the dialogue options to remind him that he must feed his animals. Once he throws some food, one of the squirrels will run forward while the second will stand by the fence. To take the photo, you will also have to lure the second squirrel by using the food that is next to Samuel and selecting the "lure" option.
Talk to the professor sitting next to Samuel once the photo is taken. Select the options "Nathan" and "You know him best" to learn several interesting things. Once the conversation is over, approach Chloe to enter the dormitory with her.
If you have prevented Kate from committing suicide, she will send you Nathan's room number, number 111 which will be on the left side of the hall. Once inside the room you will need to look for his phone. Approach the black sofa to find some swipes on the floor, select the "examine" option and after marking the sofa, select the "move" option. Once you've picked up the phone, go back to Chloe and leave the dorm.
Nathan himself will attack you, Warren will take your defense by starting to attack the boy. You will then have to make the second important decision of the episode.
Plot choice
Stay out of the fight: you will not interfere in the fight between Nathan and Warren and the latter will beat the boy in a really bad way.
Stop Warren: You will get in between the two fights so that the situation does not degenerate.
Regardless of your choice, the game will continue the same way, you and Chloe will leave the dorm.
Chapter 3
Once you leave the dorm, you and Chloe will go to Frank, before knocking on the boy's door, approach the beached whales and take a photo for your collection. Once ready, join your friend. Important!
The next part of the guide will describe the three possible endings. What you do and say will determine the ending of the chapter.
Chloe Kills Frank: Chloe will kill Frank and his dog (if you let that happen).
Chloe will injure Frank: Chloe will injure Frank by shooting him in the leg.
Nobody will be hurt: you will intervene and nobody will be hurt, you will receive Frank as a precious ally in your investigation.
1)
To get the worst ending (where Frank dies), you'll need to select the following dialogue options:
"You have already done it": this option will make Frank think that it was you who broke into his RV, the following situation will force Chloe to kill the boy and the dog.
2)
To get the second neutral ending (where Frank is just hurt), you'll need to select the following dialogue option while chatting with Chloe:
Be careful what you say.
During the conversation with Frank
No weapon.
Close the door.
Pompidou is really cute (after selecting this option, Frank will remember he never told you his dog's name and will attack you again).
3)
To get the best ending (no one gets bruised), you'll need to select the following dialogue option while chatting with Chloe:
Be careful what you say.
During the conversation with Frank
Close the door.
I'm sorry.
You scared me.
I love dogs.
She's a photo of Rachel.
The situation described above creates a whole and very important choice of plot.
Regardless of how you decide to handle the situation with Frank, you and Chloe will go home. You will then have to link all the clues collected so far into a single logical deduction. Point to the notebook on the left side and the piece of paper on the right.
For the second set of tests, select to show sheets of paper (white paper will show the appropriate indicators).
For the next group of clues you will have to indicate three. The first is represented by the coordinates, the second by the photo on the back of Nathan's car and the third by the photo of Nathan himself.
The next clues will be about David. Point to the sheet of paper in the lower right corner, the photo of a red car shown on the side and the second photo showing it on the back (on the right side of the table).
For clues about Nathan, point to the piece of paper inside, the SIM, the phone and the piece of paper on the left side. You will then have to unlock the boy's phone. You can type the right Pin that is inside the clues (more precisely in Nathan's school documents, the number is 0829), or the PUK that you can find on the SIM card itself. If you make a mistake three times to enter the PIN, you will be forced to enter the PUK represented by the numbers 8, 7, 8, 9, 7, 8, 0, 8.
Once Nathan's phone is unlocked, you will need to value all the information collected. Select the "investigate" option from the table on the right side and indicate the three necessary clues. The first will be the piece of paper in the center of the first column, the second will be the piece of paper on the right, and the third will be the second piece of paper from the right on the bottom column.
Chapter 4
You and Chloe will leave to reach the mysterious place obtained from the collected and ordered clues. Before looking for an alternate entrance to the shed, go left and take another photo for your album. You will find a yellow bird on the wooden fence, in case it flies away before you can take the photo, just rewind the time.
Once you have taken the photo for the album, turn around and walk towards the side wall of the shed. You will find a metal cover on which you will have to use the "move" command. Once inside, look around for anything suspicious.
You will walk on the hay inside the shed, but in some places your steps will tread on something metallic. Walk towards the wall with the opening at the top to discover the entrance to the basement on which a nice padlock has been placed.
After failing the first attempt to crack the lock, walk to the highest walkway and climb onto it. Once up, use the old engine to reach the first floor. You will find an owl of which you can take a photo for your collection.
While exploring the place, Max will decide to use a lever, rope and old motor to open the hatch on the floor. Go down and approach the hook, attach it to the padlock and go back to the top of the shed again.

The old engine will look perfect with the hook attached to the door. Go back in time when the engine was up, attach the rope and throw it down.
Once inside the basement, you will find yourself in front of a James Bond-style technological bunker. You will then have to find the access code to access the bunker itself. Max will inform you that some numbers on the numeric keypad are worn and that you will need to use the good try and fail method. If you are careful, you will remember seeing this combination before as the numbers can be found in Nathan's school records (marked in red). The number is 542. If you enter the wrong number three times, the mechanism will block forcing you to go back in time to try again.
Once inside the actual bunker, you will find yourself in front of a ready-made photographic set. You will find some clues that will suggest that Kate and Rachel have been drugged with powerful narcotics to stay in the pose. Some information, including photos, can be found on the computer. To find everything else, you'll need to go to the cabinet next to Chloe and grab the photo album.
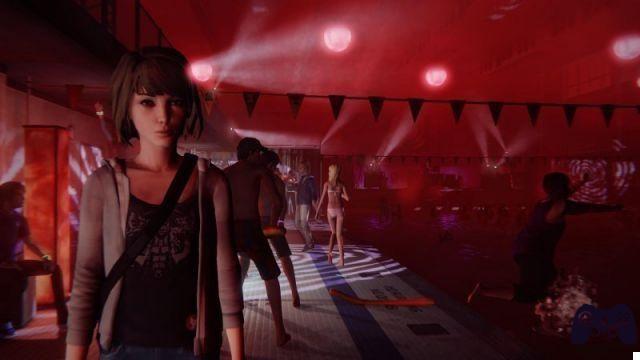
Once you escape the Bunker, you and Chloe will reach the party at Club Vortex. As soon as you pass the gate, reach the diving board and look to the right, you will be able to take the last photo for your collection.
Go left to the VIP section to find Alyssa, you can still warn her of the impending danger. Once you reach your destination, talk to the girl and ask her to let you access the closed part of the party. Once the refusal is collected, you will be forced to find an alternative way to reach the VIP section.
Go to the opposite side of the pool and push the block near the black crates. Once on the opposite side, turn back time so that everything falls into place.
Approach Victoria in the VIP section and tell her about Nathan. During the chat you can warn her about the Bunker and tell her that she will be the next victim or ignore it completely. Depending on the choices made in the previous episodes (those concerning Victoria), the girl can believe you and thank you for the warning, or ignore you. Regardless of what happens, go back to Chloe and leave the party together to reach Rachel Amber's burial site.
Once there, follow Chloe. During the exploration you will be attacked by an enemy who will inject you with drugs and kill your partner. The enemy will not be Nathan, but Mr. Jefferson.
 Life is Strange - Episode 4: Dark Room pc
- pc
- ps3
- ps4
- x360
- Xone
Exit date: July 28 2015


![Guides Sophia's Shop Guide [100%] - Persona 5 Strikers](/images/posts/1f5e1c7629d56d6c792ac770a5d6b182-0.jpg)