


CAUTION
The solution is based on the US version of the game for Xbox 360, so there may be differences in the Spanish version and / or the other platforms.
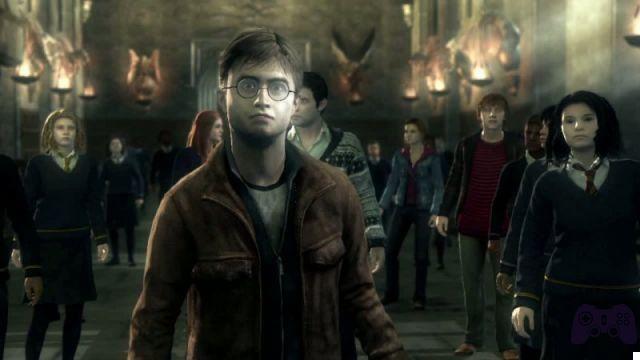
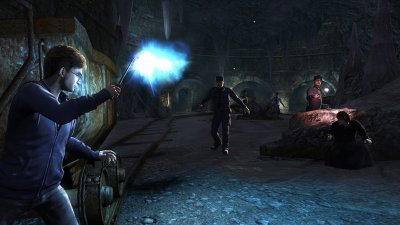
GRINGOTTS
Straight next to the bat, turn right up the hill, in the center of this area you will see a kind of water geyser with a blue sphere next to it, take it as it is one of the four objects to collect in this level. After you get it, head back down the hill and then along the path to the left, in the direction of Ron and Hermione. Go with them to the large closed door. The game will explain how pressing "back" will lead you to the objectives. Walk to the blue light on the ground to open the door and enter it.
Run into the cave, you will be told how to take cover behind the rock, so press "A" to do so. After the short cutscene, pull the left trigger to aim at the two guards and then repeatedly squeeze the right trigger to take them out. Once defeated, head right, not in Ron and Hermione's direction, to get another collectible, which will unlock a new challenge.
Rejoin Ron and Hermione and wait a minute while Hermione uses a spell to open the door, then enter the next area, where you will find a mine cart track above your head. Take cover on the nearby rock slab to prevent the cart from falling on you, and when it's gone, hold "A" to dash towards the end of this tunnel. Go through the door and defeat the two guards, then continue along the tunnel.
Sprint towards the end of the tracks and hold the "back" button to check out an event going on in the distance. When you have reassembled the trio, continue to the right, you will hear the guards coming, so take cover on a rock. Three guards will come out the door, defeat them with the Stupefy, as you have already done, then go through the door.
In the next area the gang will be bombed by a guy who shoots spells in bursts, press "LB" to activate a magical shield. The enemy beams will slowly destroy the shield, but will not completely eliminate it, so keep pushing forward until you come to a cover rock. Take cover and use spells against the enemy to defeat him. Keep going straight to encounter even more enemies, some of which will use regular magic attacks, others will use bursting ones. Use the shield to protect yourself from them and push yourself forward. Take out all the enemies, reinforcements will arrive, so take care of them as well. When everyone is defeated, a cut-scene will appear.
Take cover on the bridge and get rid of the guards trying to attack Ron and Hermione from here. When you have defeated enough, one of them will cast a powerful spell on the bridge, which will destroy it and knock Harry down towards Ron and Hermione. Take cover and take out the guards one by one, if they take cover don't be afraid to charge them with the shield activated and the Stupefy, which up close causes much more damage. When you have defeated all the guards, approach the door.
It seems that Hermione needs a little more time to unlock this door with her evil, demonic sorcery, and it will need to be defended. This is not very difficult, just block the few guards who will try to stop her, then she will open the door and you can enter. There are two enemies in this area who are on elevated ledges and they will cast spells like crazy. Use your shield to block their spells and take them out from a distance. Don't be afraid to take shelter if necessary. There will be a couple more guards on the ground, so take care of them too, and when the way is clear, continue along the path into the cave.
You will find a dragon surrounded by pillars. Use the pillars to avoid the dragon fire, as long as when the flames come, blow from behind one of the pillars to make them move to the next one. You will likely be able to handle two of them at a time. When you get to the middle, the dragon will destroy the pillar with its fire, and this will create a new shelter for Harry. Run to the cover and press "A" to cover behind it. Despite the flames, hold "LT" to aim and shoot one of the torches to cause a series of explosions. This will stop the dragon's fire and give you the opportunity to run behind the next pillar on the left. Level completed!
THE STREETS OF HOGSMEADE
Go ahead and defeat the enemies that come your way, again this is pretty much a straight-shot in this area. These enemies are Deatheaters and are much stronger than the guards you have encountered previously, and some of them have shields. Press "Y" to equip the Expelliarmus and then fire at them to disarm their shields. There will be a lot of Deatheaters in this section, so press "X" to go back to Stupefy to defeat them. Whenever one of them uses the shield, press "Y" and then the right trigger to get rid of him. Keep using this strategy until everyone is defeated, then continue to the closed gate.
The gate will open, continue down the alley and you will find another locked gate, but you will have to wait for Ron and Hermione for it to open, so continue on. There will be two wizards in the windows in the distance, who have powerful spells capable of shattering Harry's shield with a single blow. Take cover and then throw the Stupefy at him from a distance, if Harry takes too much damage he just needs to return to cover to regain his health and then return to casting spells at the enemies. When they are both defeated, run down the hill as the Deatheaters spawn behind our magical heroes. Disarm their shields, defeat them, and then head up the stairs nearby. A nice group of Deatheaters will appear, but you will also have a lot of cover at your disposal, so defeat them with the same strategy as before.
Now it's time to get to Honeyduck. Run to the door which will explode causing a group of Deatheaters to appear, take them out quickly and continue into the building.
Outside you will find another group of Deatheaters, defeat them too, then go into the next building and run to the door. Hermione will have to be defended once again as she tries to unlock the damn thing. Defeat the Deatheaters as they appear so Hermione will unlock the door and you can move on.
Defeat all the Deatheaters that are here, and when you have killed enough of them, run to the marker in the central structure. You will have to defend it from several Deatheaters invaders. Use the cover, disable the shields, and use the Stupefy to defeat them all. Harry, Ron and Hermione will be attacked by a group of Deatheaters.
A PROBLEM OF SECURITY
Boss: The Carrows
Professor Snape will be guarded by the Carrows, who will stick to each other, shoot Harry and also use shields. Disable their shields and when they are down, throw the Stupefy at them. To the right is a collectible, grab it before you're done with these two guys. When you have dealt enough damage, one of them will be defeated, so repeat the procedure for the second.
Boss: Piton
You'll see a couple more collectibles around here. You will control Professor McGonagall, she moves slowly, but the items are worth picking up. Snape is a really easy boss and McGanitt has Expulso at her disposal, which is essentially the equivalent of an Uzi. Snape will have the shield, disarm him and press "B" to equip the Expulso, and then press the right trigger to make it jump off.
He will teleport around, disarm his shields when he activates them and use Expulso. Eventually Snape will start teleporting to the ledges, always use the same strategy against him, and when you've dealt enough damage, he'll use his wand to throw a table at McGonagall. Quickly press "X" to win the QTE and avoid taking damage from the table.
So send Snape to hell.
THE BASILISK FANG
Ron will lead you down the tunnel using his glowing wand. There will be a couple of spiders in the distance, destroy them with the Stupefy to protect Ron. Follow Ron down the tunnel, then he will fall down and his health bar will appear at the top left of the screen.
Keep following Ron into this area, several spiders will try to jump on him, so use the shield to bounce them back and destroy them. Keep walking until you meet a closed door. Get back to back with Ron and hold the shield to bounce the spiders again, or use the Stupefy to destroy them.
Ron will open the door, so keep going, go right to stumble upon another collectible, then keep following Ron. Kill the spiders as they come and stand in Ron's light as he slowly walks into the Chamber of Secrets.
After you get to the checkpoint, take a left to get another collectible. When you meet the next spiders, Ron will tell you to use Expulso, so do it, you can kill them quite easily with the Stupefy too, but that's okay. Keep following Ron to the next locked door and protect him from spiders as he unlocks it.
Keep following Ron and killing those cursed spiders, and defend him when he has to unlock a door. Go through the door, turn around and kill the spiders as the door refuses to close. When they are all dead, go back with Ron to a very impressive area of the room. Run to the end of the chamber and interact with the Basilisk skeleton.
Water will pour into the area, use the left analog and hold it down to escape from it. Debris will fall in your direction, so move left and right to avoid bumping into it.
A JOB TO DO
You will now control Seamus! No, not the WWE Celtic warrior, but JKRowling's arsonist. Grab the collectible in front of the fountain, then go to the bridge, where Neville will block your way. Ginny will inform Seamus that he must place six magical charges on the bridge to send him to hell! So, go left.
Take cover on the rock, an indicator will show you exactly where you need to go. When Neville says so, move on to the next rock where the marker is. Wizards in the distance will cast spells that could kill Seamus with a single hit. Wait for the purple beams of magic to stop being shot at Seamus to run from cover to cover. When you reach the base of the bridge, wait for the wizard fire to stop so you can place a charge.
Head down the cliff, several Deatheaters will appear, so use the new Confringo spell to take them out. It is very effective and can easily destroy enemy shields. Keep fighting along the cliff until you reach the second charge to place.
Carry on to the third charge, there will be wizards in the distance that could cause serious damage. Use Confringo to defeat them, some Deatheaters will also appear, so defeat them too and then place the third charge.
Continue along the cliff. The cliff literally leads to the other side of the bridge, so blowing up the bridge would be completely pointless and pointless. It is possible to shoot torches near enemies to make them explode and kill them so easily. Make your way to the next charge, place it, then move on to the next one.
Once the fourth is placed, fight to the fifth, place it, then fight to the sixth and place it. Take a couple of steps to the right to go to Neville's control.
Like Neville, hit the Deatheaters from above, until they are all defeated, this will take a long time and will be a bit boring. Don't worry about Seamus dying, it's virtually impossible for him to happen during this segment. When they are all defeated, Neville will automatically move to the next position on the bridge to defend Seamus from above as he tries to make his way back to Hogwarts.
This part is much more difficult, Seamus will rarely be in cover and as a result will be destroyed by the Deatheaters' spells. Do your best to take them out, and when they are all defeated Neville will run to the next area where he will have to defend Seamus.
Now you can double press "X" to equip a spell that works like a sniper rifle, which will make it easier to defend Seamus. With this spell, killing Deatheaters from afar will be child's play, and you can also use Confringo to take down shields, even if there are two or more enemies together. Then Neville will run to the next position.
This time there will be a couple of Deatheaters shooting at you, defeat them first, they are near the bridge and not near Seamus. Cast spells until you defeat them.
The Deatheaters will go up on the bridge to attack Neville, charge them and defeat them all. There is an object to collect on the bridge behind some shelter, take it to unlock yet another challenge. When you are done, go back to Ginny and run in front of her.
Boss: Scabior
This boss is unique in that it incorporates a QTE similar to when you escaped from the water in the Chamber of Secrets during the previous mission. Press down on the left analog to escape, there is no debris to avoid this time, thankfully, so just focus on running and, of course, shooting.
When the bridge explodes, Scabior will run and shoot after Neville. Use the right analog to point the cursor over Scabior and then pull the right trigger to damage him and prevent him from hitting Neville. You can avoid his spells by moving left and right if necessary.
Just get to the end of the bridge to finish the boss fight and the level.
A GIANT PROBLEM
Boss: Giant
Press "B" twice to equip Impedimenta, then lock onto the Giant and fire a barrage with it. The two knights in front of you will try to fight the Giant. Launch magical attacks on the Giant as far as possible until the Deatheaters arrive, then fight them. They will stop appearing when the Giant is defeated by the knights.
Launch magic attacks on the Giant and continue until two other knights step in to help you. Repeat the process described in the paragraph above until the Giant's health is completely depleted and you find yourself at the end of the bridge. Then use Impedimenta to knock him off the bridge and defeat him!
We're safe ... Oh, wait, it's not like that!
Boss: Giant
Snipe the Giant from the end of the bridge, kill the Deatheaters when they arrive and use the shield as much as possible. Don't worry about shooting at the boulders that the Giant throws into the air, just dodge them, then return to attack him with a series of ranged spells.
The Giant will eventually get close enough to fight a couple of knights and allow you to drain the rest of his health, and when he is completely depleted press "B" twice and then cast the Impediment spell to defeat him.
The Deatheaters will charge from the bridge, defeat them from your current location with spells and Confringo, and when enough of them are defeated, a QTE will start. Press "Y" when prompted, then repeatedly press "LB" for the next step. Finally press "Y" once more to drop the Giant into the water below.
THE LOST DIADEM
Malfoy and his companions are in cover when this level begins. Use your shield to block their attacks and counterattack until they run away. Hermione, Ron and Harry will have a short conversation, and when they finish talking an indicator will appear, so press "back" to direct Harry's gaze at the indicator and when you walk towards it, Harry's scar will start to make whims. Hermione will reveal the path, so follow this new path and go right to get a collectible. Malfoy and his companions will appear again, defeat them, then use the indicators to overcome the next obstacles and go get another item. Run to the next marker, Harry's scar will react again and Hermione will reveal the next path, so follow it.
In this area the enemy will be sheltered in a bunker-like structure made of shelves and books. Stay in cover and throw the Stupefy at him, until the structure collapses on him, then run to the next marker to start another conversation. You will see another marker on some debris that you can walk on, so head over there.
Once again there is a bunker similar to the one from the battle with Malfoy, take cover and throw the Stupefy at him, it will take a little longer than the last time, but when you have damaged it enough, the bunker will collapse on him. Turn around to see the next marker, then run towards it and Harry's scar will react before it even reaches it. Once again Hermione will reveal the path. In the next area Malfoy and his companions will appear once again, throw the Stupefy at them and they will escape again. Go to the next marker, the scar goes crazy and Hermione will reveal the new path. Go to the new area and a cut-scene will start.
Another segment in which you will have to escape! Escape the flames using the left analog as you did before, just concentrate on running until a pile of debris flies through the air towards Harry. Point your cursor at these and press the right trigger to destroy them before they reach you. Keep doing this until you reunite with Ron and Hermione.
THE BATTLE OF HOGWARTS
We are nearing the end here, even if the title of this chapter gives us no indication of that. Well, go ahead and don't worry about exiting the path to the right or left, just head to the next checkpoint.
You will be bombed by Deatheaters, take them all out, then move on and more Deatheaters will burst from the wall. Go back and defeat them with the spells, and defeat the ones in the building as well.
When you have defeated them all, run into the huge hole in the wall they created. The next part is a giant man. You must press "RB" and use the left analog to launch Apparate and avoid enemy fire; use the shield as much as possible. Use Apparate on the gaps and fight the approaching Deatheaters. Defeat them as fast as possible as the spells coming from the Deatheater above you are extremely deadly and therefore you will need to deal with it calmly. Once they are defeated, go to the next marker, in front of the door to get another checkpoint.
While Hermione is busy opening the door, snipe the Deatheaters that hang out on the roof and windows. Then take cover and snipe the ones across the street. Hermione will unlock the door so the three of you can get through.
Go down the stairs, in the next corridor there will be a group of Deatheaters, defeat them and continue, others will burst from the wall, so take cover and take them out. Go right through the open door and defeat all the Deatheaters on the floor, then move the room up to where there are two or three Deatheaters on the bridge structure. Snipe them and once they are defeated press "back" to make Harry move to the next marker which is located right in front of a door, then enter it.
Once again Hermione will need you and Ron to defend herself from enemies as she opens the door. Your priority will be to snipe the Deatheaters who are on the scaffolding above you, which have very powerful magic that can defeat Harry with just a few hits. When they are defeated, take out the others as they stand before you and make sure you take cover while you do so. Once you've defeated them all, Hermione will be able to unlock the door, so follow her and Ron to the next indicated objective.
Follow the staircase and defeat the Deatheaters. There are a total of two items to collect, which will be in very clear view as you walk up the steps, so don't miss them. Defeat the Deatheaters and go to the bottom of the stairs to reunite with Ron and Hermione.
When you are back downstairs, go to the other side and take out the Deatheaters, then go up the stairs where the marker is and you will find an open door that will lead you to the next area.
Boss: Fenrir
Take cover and snipe the weakest wizards. Fenrir will shoot green spells at you. If you keep pressing the left trigger, Hermione will automatically aim at Fenrir, similar to Call of Duty. Do this to find him, then hit the torches near him for more damage. If he gets knocked out by the blast, attack him to increase the damage. It is possible that Fenrir can heal itself.
Regardless, keep attacking him as much as possible until his health is halved and he freaks out. Then return to attack him with magic.
When his health is completely gone, Fenrir will once again heal himself by about half health, so keep attacking him. Look at its smoke flying in the sky to know where it is going and take the opportunity to surprise it with your magical attacks. Don't give up, drain all of his health twice, and after that he'll heal by a quarter of health.
Charge him, throw magic attacks closer and closer, do not give up and shortly after he will be defeated.
With Fenrir dead, you regain control of Harry. Make your way up the staircase on the side of the island, defeat the Deatheaters that you will find on the road below and continue until you reach the bottom of the ladder to start another cutscene and finish the level.
SURRENDER
Run straight to the bridge, a couple of Deatheaters will appear, so take them out with magic and defeat the ones you find as you go down the bridge. For some unknown reason the Deatheaters you kill in this section die in slow motion. Keep fighting until you reach a downhill path. Defeat the Deatheaters that appear on the sides and keep running towards the indicated objective.
Walk along the path in the woods, four ghosts will join your path, and keep going until Harry talks to them. And so the level ends.
A TURN OF EVENTS
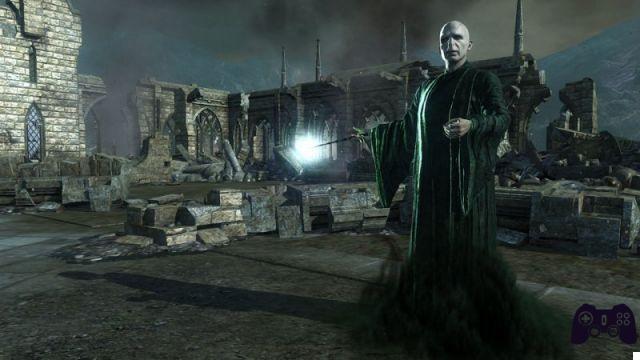
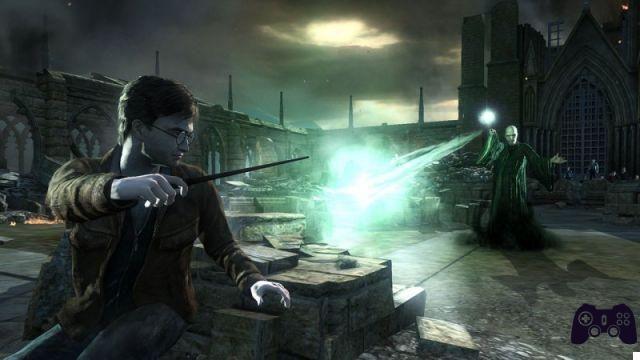
Boss: Voldemort
Cast magical spells at Voldemort while using the shield to protect yourself from his. Just pin him down with your magic until his health is depleted enough to trigger a short scene.
Voldemort can teleport anywhere with his black smoke, like a demon from the television series Supernatural. Wait for him to be on the ground to return to bombard him with spells and block his attacks, just like you did before.
Voldemort will be able to deflect a lot of spells, don't worry and keep hitting him, don't stop until his health is completely depleted.
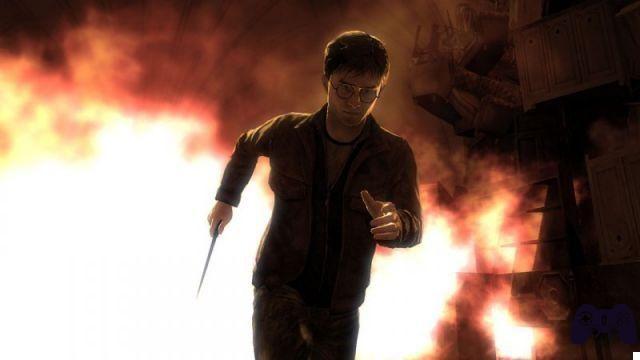
Get ready for a super difficult part! Voldemort's dark cloud will follow you, just press down on the left analog to escape from it, and then use the right analog to aim at the torches on the wall, armor and shelves to help stop Voldemort's advance. and its smoke.
You will now take control of Ron Weasly. Fight up the stairs, defeat the Deatheaters and check the left side of the stairs for an item to collect, then keep going up and taking out the Deatheaters you find in your path.
Then there is a small fire alcove that contains another collectible. Make your way to the next indicated objective to finish the level.
NOT MY DAUGHTER
You are now Ginny! Defeat all the Deatheaters and run around the courtyard, defend yourself and kill them all.
Many more Deatheaters will appear. On the left side of the courtyard (in front of the bridge) there is an object to collect in the rubble, take it and go back to kill the Deatheaters until they are all defeated and you will get another checkpoint.
Kill the other Deatheaters, and after you defeat them, many will spawn, and you will get a checkpoint. Defeat the newcomers and the fight is finally over! Escape back into Hogwarts.
Boss: Bellatrix
Bellatrix is basically just like every other boss you've encountered thus far. Equip the Expulso and strafe left and right of the center of this area and be careful where she appears. Hold the right trigger to quickly deal a significant amount of damage to her before she activates teleportation or shields again, and ignore her henchmen wizards at the bottom who have shields.
When you've dealt enough damage to her, you'll get a checkpoint. Continue to damage it, strafing left and right using Expulso. Once you've dealt enough damage to her, and her health bar is red, Bellatrix will try to throw something at Molly Weasly. Press "Y" when this QTE activates to destroy it before it can hit Molly and continue the battle.
Bellatrix will do the same things as before, teleport around and even retreat to high ground. Just bombard her with Expulso and everything will be fine, keep attacking her until her health is completely depleted.
VOLDEMORT'S LAST STAND
Boss: Voldemort
Cast lots of spells at him and don't bother using shields unless you're playing on a higher difficulty than normal. Just cast several spells at Voldemort until you've dealt enough damage to blow up a portion of the scaffolding you're standing on.
When this happens, immediately go right to get a collectible, and then go back to dealing with Voldemort. Return to the strategy of constantly using various spells on him to deal more damage. When only a quarter of his health remains, a scene will start.
Keep damaging him, trying as much as possible to use sniper attacks, as he is a bit far away, and another scene will start. Charge Voldemort and grab the collectible to his right, then hit him again. When his health is depleted, another cut-scene will start.
This QTE will require you to move the left analog to control the great beam of magic. Try to keep it focused on the center of the screen, right on Voldemort. After doing this for once, Harry will repeat it, but this time Voldemort will be able to block it. So do it again and Harry will finally be able to hit Voldemort.
Congratulations, you have completed the game! Hogwarts is safe!
Click here to see the entire video solution of the game!
 Harry Potter and the Deathly Hallows - Part 2 ps3
- x360
- ps3
- Wii
- pc
- ds
Exit date: July 15 2011


