


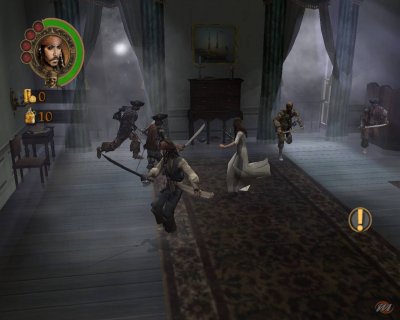
The Trouble with Treasure
01 The Trouble with Treasure
------------------------------
Go to the background and, following the instructions on the screen, open the chest you saw in the cutscene. Then go back and cross the bridge. Defeat the enemies and in the waterfall you will find another chest. Go to the gate and open it (for those playing on a PC, press the movement keys in the same direction that appears on the screen). Destroy the platforms to get rid of the enemies above them. Check the gate and you will find that a crank is missing. Go to the branches on the right and make a path. Defeat the enemies who are trying to open the chest and collect the map piece. Turn around and pick up the crank. Now you can go back to the gate and open it. After the fight, climb the rope. At the top of the fortress are a group of enemies, barrels and boxes. The latter can be thrown at enemies to stun them or they can be broken to collect gold. Behind there is a column of the fortress, closed with planks: breaking them you will find a chest. Continue in this way, fighting and smashing the crates, until you find another interaction icon. Turn around and you will see another column blocked by a plank. Break it and you will find another chest. Go back and activate the icon, then make your way through the enemies until a short video shows you your next target. Fight a little longer, open the gate, lift the Jolly Roger and your pirate friend will join you. Here is another battle, then a minigame to break down the door to the treasure room. You will need to match the icon with its buttons. The match is random and changes every time, so try it until you find the right one. After that, watch the cutscenes and remember to save.
The Hero Of Port Royal
02 The Hero of Port Royal
---------------------------
You will now have the ability to throw objects at your enemies. Jack can throw the grog, while Will will throw hatchets. The game is extremely linear. All you have to do is run, take out the enemies and in the meantime smash the crates and barrels along the way. After the first turn to the right, the path divides. Go right and interact with the well to get another piece of the map. To the right is an energy refill. Go ahead and enter the first courtyard, there is a barrel of grog in which Jack can replenish his supplies. In the second courtyard is a barrel of hatchets for Jack. Get rid of the three pirates on guard, and take the explosive barrel to the fence. Set it on fire with Jack's grog and move on. Ready to face your first boss?
Jacobey
Use Will's weapons against him, while avoiding the henchmen. Beware of bullets that are sometimes thrown at you. If you use Will you will be able to defeat him in less than a minute. There are barrels of hatchets and grogs to the right of the area.
Freeing Fort Charles
03 Freeing Fort Charles
-------------------------
You will see a man being chased by pirates. Eliminate them and you will see the man slip into a house and the pirates crawl past a barricade. While fighting the pirates, the man will bring out explosive barrels. Be careful not to hit these barrels, they will explode instantly. Instead, kill all the pirates and throw the barrels at the barricade. Continue until you reach the drawbridge. Here, use Will's shutters to disable the strings. Defeat all the pirates in the courtyard and remember to open the chest. Open the gate for the villagers, then open the outer gate as well. When they are gone, interact with the scaffolding. Defeat the pirates and on the left wall you will find a crack, just after an arch full of debris. Grab an explosive barrel and throw it at the crate to uncover a chest with another map piece. Continue along the path and use the cannons to get rid of the pirates before they land. You'll get 500 gold for each one you destroy, so the more you take out, the better!
Royal Damsel, Jack's Distress
04 Royal Damsel, Jack's Distress
----------------------------------
Here Will will inexplicably be replaced by Elizabeth, and you'll have to defeat the ghost pirates. After you get rid of the invaders an interaction icon will appear, don't bother (it will just make you go up the stairs) and keep clearing out the pirates. There are now two new interaction icons: activate them and the doors will open. When all four stairs show the interaction icon you will have to hit them all before they disappear, otherwise you will have to face other pirates. Once this is done, continue into the level. When you have eliminated the three gunslingers, the library will have an interaction icon. Play the button minigame and you will receive a piece of the map. Go down the stairs and you'll face another boss.
Pintel
Use Elizabeth, run, aim and throw hatchets at will. You don't have to defeat him completely, it will be enough to reduce his HP below 50%.
You now have just over a minute to escape (and complete a minigame) before everything blows up! Hurry up!
The Bigger the Boat...
05 The Bigger the Boat...
---------------------------
You have now obtained the Super Heavy Attack, which for Jack is a fire sword. Be careful because Super Light Attack costs 10 times as much. The lever opens a hatch, kill the enemy inside, and at the top of the stairs you'll find two dudes in glittering armor who won't let you through, so forget it for now. After killing the henchmen these two will come and attack you, so grind them to dust. You can now go up the stairs and interact with the levers to deactivate the ship. Don't forget to open the chest. Go down the stairs next to the camera, just behind it is an invisible chest. You will need to use gunpowder to blow it up and reveal another piece of the map. Go to the other end of the ship and check the crates. Then cut the ropes that hold the rowboat raised. Turn around and throw some grog on the ship's mast. Go to the other side of the ship and do the same thing. Ready for another boss?
Mr. Carrera de la Vega
Don't attack him right away, but have him do his Thousand-Strike Spin, making sure he hits the metal plates on the tree. Bring him closer to the tree and hit him with a combo. As soon as he fights back, set the tree on fire. Burn, honey, burn.
Silver Mine, Cloudy Lining
06 Silver Mine, Cloudy Lining
-------------------------------
At the beginning of the level there is a chest containing some gold. Go ahead and kick the cart to push it. Hit the switch, then kick the cart a second time. Before continuing, take a sharp right turn and you will see some crates blocking an energy refill. Follow the cart and play the button minigame to free the miner. He will ask you to free a colleague of his so that he can show Jack and Will the way out. Go back to where the energy refill was and turn around to the opposite side. There is another path, take it. Go back and meet the captive pirates who will drop an elevator. Climb on it and they will pick you up. At the top there will be numerous pairs of tracks. In this area you will need to look for niches closed by boards, as they may contain treasures. Send the cart to the right, then to the left, and you will find an energy refill. To find a piece of the map, send it left, right and left. To exit, instead, send him left, right, right.
Old Friends and Old Fiends
07 Old Friends and Old Fiends
-------------------------------
Now you can stab someone on the ground and kill them instantly, even if it's not a very valiant gesture. Defeat all the rogues and follow the pig: in short, follow the path. Here, in the town square, you will meet a group of scoundrels and an executioner. Show him how sharp your blade can be. After you have eliminated them all, a door will open. Enter it and follow the path. Turn left and you will see a burning barrel. Use it to blow up the well and reveal another piece of the map. Go back and go to the right. In the garden you will have to face another boss.
Small
He is the first boss you will have to face directly and, once again, I highly recommend using Will's hatchets. When you run out of them, move on to Jack's grog. After that all you have to do is hit it a couple of times. Watch out for when he jumps on rooftops and starts throwing bombs.
Trial by Tavern
08 Trial by Tavern
--------------------
What you basically need to do here is hit everyone big and not let Gibbs die. Throw some grog on the table with six candles and another piece of the map will appear in the center of the tavern. After the fight, Gibbs will tell you to go through the doors and meet Mr. Cotton and Marty the Dwarf. You will see pirates holding Mr. Cotton hostage, so you will have to face them. Once the fight is over, pick up the key and enter the door. Keep moving forward and you will come across a group of riflemen shooting with Marty locked in a barrel. Kill the pirates and Marty will warn you about El Grande, who is looking for you. Throw hatchets on the mechanisms on both sides, enter the next room and defeat the pirates.
Formosa Fling
09 Formosa Fling
------------------
Okay, now you play the role of pirates fighting a group of Chinese warriors. Defeat them and interact with the dragon statue. Continue and repeat the operation, until you meet another boss.
Madame Tang
It's a direct match, but it's also extremely easy. Hit it consistently and you'll defeat it quickly. If you use the hatchets well you will defeat it in less than 8 seconds.
After you defeat the rest of the guards, interact with the single icon that appears on the screen. More guards will arrive. Destroy the shelves and you will find another piece of the map. After the battle, go get the explosive crate, place it in front of the gate, blow it up and enter. Return to the beginning of the level and run up to the gate. Go back to where you fought Madame Tang and grab another explosive crate. Bring her back here, blow her up and go to the dragon fireworks wagon. Continue through the level and be careful to avoid the bamboo spikes. The one that will give you problems will be the lion statues, as they spit flames. Make your way along the path between the bamboo spikes and the fiery breath of the statues. Eventually you will see Madame Tang at the top of a flight of stairs, run towards her.
Temple Terror
10 Temple Terror
------------------
At the top there are some warriors made of clay, you have to throw them into the water that is at the edge of the area. Also take the chest found here. Then interact with the dragon statue. At the top there is an ambush waiting for you, so be on your guard. While fighting with these buffoons, you should see a chest. Go get it. Open it and a nice sword upgrade is waiting for you! Go ahead and face other clay soldiers. When you get rid of it, break everything in the room and you will get another piece of the map, then interact with the dragon statue. Continue on and you will find Madame Tang trying to channel the powers of the Dragon's Eye into herself. At this point you must interact with the columns on both sides and stop the flow of energy. Ready for the boss?
Madame Tang
Now it has split into three bodies. It would also be a blast if only he didn't try to kill you. Use the same tactic as before, but apply the concept to multiple targets. At some point it will return to being one body, then it will divide again. It also has higher HP, so be especially careful. When divided into three bodies, Jack's grog works perfectly.
After the battle you will have to escape from the dragon. Run as fast as possible and avoid the coffins. Cut the ropes along the path to slow it down.
Stop Blowing Holes in my Ship!
11 Stop Blowing Holes in my Ship!
-----------------------------------
At the beginning of the level you will receive information on the Reversal technique. Get rid of the scum. Now you'll have to hit the rafters under Pequeno's toady, then pick up the key he drops when he dies. Enter the doors located on the side of the area. In the next courtyard, follow the path and hit the crate barriers along the way. Take the energy refill and turn around. Do you see those ropes holding the ramp up? Follow them up to their tops on the ground, cut them and go up the ramp. Along the way there is a support with two pirates on top. Eliminate them and move on. Immediately after, you will find an indestructible chest. Find a barrel of gunpowder and tear it to pieces. Don't forget the golden casket at the bottom of the basin. Go up the stairs avoiding the barrels. You have to hurry, the Interceptor is losing energy very quickly. Get up to the men at the cannons and take them out. Collect the gunpowder barrels and throw them at the cannons. You will need two for each cannon. Now you can take care of the rest of the pirates.
Sizing Up Trouble
12 Sizing Up Trouble
----------------------
This level consists of only one boss fight.
Peuqeno
This is the first battle where the axes won't be enough. Use the grog to slow down his cannon's fire and then run towards him and start attacking him. Hold on and you will see that it will go down quickly. Sometimes it will climb walls. Beware of the shock waves it causes when it lands. If you are quick enough to throw a barrel of gunpowder at the wall you will inflict massive damage on it.
To get the map piece, throw the barrels at Pequeno three times while he is on the wall.
Viking Landing
13 Viking Landing
-------------------
To get the map piece in this level you have to destroy every single stalagmite. These ice buffoons use shields, so you'll need two heavy attacks to destroy them, but kill the one with the torch first. Then pick up the gunpowder barrel and throw it away, for example in the face of an ice skeleton. Now get all the gunpowder barrels out of here. Remember to check the chest, and push the snowball down the hill. There is a chest at the entrance to the cave. Enter and there will be an ambush waiting for you, but also a golden casket. At this point the path splits: go left and roll the snowball down. Take the energy refill. Run on the ice and take the path. Here you will have to fight some enemies and the King's minions. The grog works very well against the ice elementals. Then use Jack's Super Heavy Attack to bring down the king's throne. Ready for the boss?
Ice Viking King
It's a very easy fight. Keep hitting him and you will defeat him without problems.
Interact with the ice wall and return to the frozen lake.
From Frozen to Freedom
14 From Frozen to Freedom
---------------------------
Okay, you are running down the path when ... ambush! Look to the left and you will see a frozen mammoth along with a piece of the map. Use the grog to thaw the map piece, the mammoth cannot be released. Keep running and you'll get another ambush at the bridge. You can drop enemies to kill them in one fell swoop. Go ahead and grab the chest around the corner and the one containing some gold. A little further on, another ambush awaits you, but this time with many more enemies. Defeat them and run to the edge.
The Damsel and the Dead
15 The Damsel and the Dead
----------------------------
Go back to the pirates without shields and armor and show them why a shield would suit them. Keep going until you reach a cannon. Use it to break through the wall. Cross the room and cut the spider webs. In the next area you can knock the pirates off the ledge. Use Will's hatchets to take out the shooters in the background. Continue and you will see a barricade with cannons. Run to the right and you will find a path that goes up and goes around the cannons. Cut the cobwebs, but watch out for spiders attacking you. Knock down the boulder, go back and go through the barricade you destroyed. Go down a path to the left to collect an energy refill and another indestructible chest that contains another piece of the map, then find some gunpowder and blow it up. At the top are a cannon and a pirate on an unreachable platform. Before you can use the cannon to blow up the wall you will have to interact with the boulder to move it. Now knock the wall down and be careful. Along the path there are parts of the barricade with windows for the cannons. Avoid the fire and make your way by killing the pirates who shoot you.
Sacked Without a Shot
16 Sacked Without a Shot
--------------------------
Will is replaced by Elizabeth. Check the chest in this area and move on. Free the man trapped under the beam and he will run to put out the fire. Run to the left side of the area, fight the bad guys and free the lady, who will join the freed man a little while ago. Run to the well in the courtyard and interact with it. Play the minigame and the two will put out the fire with a single bucket. You will now encounter Blacksmoke James and find another piece of the map. Run along the docks and enter the opening on the right. Defeat the pirates and move on. Save the falling lady by pushing the cart under her and killing all the pirates. Grab the gunpowder and use it to blow up the fence. Go back to where you entered the docks and grab the map piece. Now go back to the well and repeat the operation to put out the fire again. Lead the villagers to where you exited the docks and go right to the area you haven't been to yet.
Where There's Fire, There's Blacksmoke
17 Where There's Fire, There's Blacksmoke
-------------------------------------------
In this level you will have to run a lot. Make your way through the pirates and the dock in front of you will be blown away. Use Elizabeth's hatchets to knock down the ledges around you and create a path. Before continuing, take a look at the water on your left. Do you see that buoy? Set it on fire. There are four more scattered around the level, if you find them all you will get another piece of the map. Keep fighting pirates and avoiding holes. You'll soon encounter side docks - drop down into the first one to collect a grog barrel and two buoys on either side. Continue and at the next turn right, there is another buoy on the right. Go straight along the docks and you will reach a section with an energy refill. In the background is the last buoy: to reach it, go south and take down the ledges with Elizabeth's hatchets. Climb aboard the ship using the ramp and you will find another minigame with cannons. Shoot the approaching boats and get ready to face the boss.
Blacksmoke James
Once again hit him and throw the hatchets at him. He will create a large cloud of smoke, so you have to move to the bottom of the map, grab a barrel of gunpowder and throw it into the smoke, from which he shoots you. After you hit it a few times, the smoke screen will lift. Use this tactic until he's dead. When he has low health he will start throwing bombs instead of shooting. They are easy to avoid, but still be careful as they do a lot of damage.
Prisoners of the Pearl
18 Prisoners of the Pearl
---------------------------
Kill these pirates, shortly after they are dead there is a boss waiting for you.
Mallot
Pretty easy, just hit it hard.
In the next area, you'll need to prevent the Interceptor from being destroyed again. Same tactic as before. Kill the ones controlling the cannons, grab the keys from the two big guys and use the gunpowder to destroy the cannons. Fixed the gunners, eliminate the rest of the pirates. Enter the door on the right, collect the energy refill and go up the stairs. Here's another boss.
Koehler
Hit it abundantly.
Go back to the bridge and open the cell. Yet another boss ...
Mallot
It's stronger now, so use hatchets. Watch out for its combo, it deals massive damage. Better still if you don't get hit at all: all of his attacks are very dangerous. During the fight, open the chest in his cell to retrieve another piece of the map.
Broadsides
19 Broadsides
---------------
This mission is quite straightforward. Run up and down while slaughtering enemy pirates. After a while you will find yourself on the Black Pearl, also kill the pirates who are here. Go right and you will see a switch. Pressing it will lower a few barrels of gunpowder. Take one up the stairs and tear up the indestructible chest to get another piece of the map. After you have eliminated all the pirates, it is time to face the boss.
Bo'Sun
This is a pretty tough nut to crack. Hit him and throw hatchets at him. When you have dealt enough damage to him, he will be stunned. Go to the lower end of the ship and access the interaction icon. Your crew will launch a cannon shot at it for more damage.
Sand, Sky, Rum and Gold
20 Sand, Sky, Rum and Gold
----------------------------
At the beginning of the level you will be attacked by spiders. They are weak enemies, so it will be enough for you to make your way through them. Tear apart the vines covering the jungle entrance and keep making your way through spiders and vines. At the bridge you will find giant spiders, but they won't give you any problems either. After that you will meet some traps made from swaying trunks, pass through them and you will reach a point blocked by creepers. Cut them out and behind them you will find a chest containing another piece of the map. In the inlet you will get to know some carnivorous plants: don't go on them but throw grog at them. After them, on the right, is a small niche with a chest that contains another sword upgrade. Before you is the treasure. Interact with the icon and you will have to face some earth elementals. They are identical to those of ice, so get rid of them quickly. However, remember that Jack's fire sword doesn't work against them. Go back to the beach. Along the way you will encounter other earth elementals. You already know how to behave.
Dauntless Derring-Do
21 Dauntless Derring-Do
-------------------------
Fight to get back to the ship and eliminate the pirates on board. Collect the two halves of the bell and interact with the pirate hanging from the plank to get another piece of the map. Keep hitting Ragetti until his eye falls out. Collect it and go and reassemble the bell. Now try to survive until the red coats return. Go down the stairs and access the 3 icons. Now you just have to kill all the pirates.
Pirates Cursed and Even Worse
22 Pirates Cursed and Even Worse
----------------------------------
From the starting point, go left and collect the gold in the chest. Make your way up the path. To the left of the cannon is a chest blocked by two boulders, so you'll need some gunpowder to free it. Use the cannon to destroy the wall ahead, grab the chest and continue. Use Elizabeth's hatchets to deal with enemies that are out of range. Go through this area by interacting with each door at the bottom of each platform. Another boss arrives.
Serpente de Muerta
Just worry about throwing hatchets at him and you won't have any problems.
Step over his corpse and enter the cave.
The Last Shot
23 The Last Shot
------------------
Kill all the pirates that are here. After you do this, it will have an interaction icon on the treasure heap in the center of the area. Use it and you will not receive curses, which means that you will take half the damage than normal. Go after Barbarossa and open the chests along the way. Fight the spiders, cut their webs with the sword and take the chests they contain. To the right of the web is a support ledge. Throw one of Will's hatchets and you'll lower a ramp. Thorn the boulder and check the left side of the fire, where you will find a chest containing a piece of the map. Keep going and Barbarossa will activate a secret tunnel in the treasure room. Follow him and, in the next room, take out his bodyguards. Once this is done you will have to fight against Barbarossa.
Barbarossa
It has a lot of HP, so hit it often and use a lot of hatchets. Eventually it will die. Sometimes he might grab a shield, in which case destroy it. It is the longest fight in the entire game.
SUMMARY OF THE SOLUTION
Solution summary
Content index
The Trouble with Treasure
The Hero Of Port Royal
Freeing Fort Charles
Royal Damsel, Jack's Distress
The Bigger The Boat...
Silver Mine, Cloudy Lining
Old Friends And Old Fiends
Trial By Tavern
Formosa Fling
Temple Terror
Stop Blowing Holes In My Ship
Sizing Up Trouble
Viking Landing
From Frozen To Freedom
The Damsel And The Dead
Sacked Without A Shot
Where There's Fire, There's Blacksmoke
Prisoners Of The Pearl
Broadsides
Sand, Sky, Rum, And Gold
Dauntless Derring-Do
Pirates Cursed And Even Worse
The Last Shot
Escaping The Truth
Escaping the Truth
24 Escaping the Truth
-----------------------
Let's start with a boss fight right away!
Chaves Brothers
Use the same tactic as all the other bosses - hit them hard. At the beginning there will be only Alberto, then Benito will join him, and finally Celio will arrive too. Take them all out. Jack's grog is incredibly useful as it allows you to hit all three of them in one shot. When you have defeated them, collect the three keys.
Go to the main gate, collect the explosive barrels and run to the docks on the other side of the fort. Here you will find another indestructible chest: blow it up and take the map piece. Return to the Black Pearl and use its cannons to destroy the fortress. Once this is done, you will have finished the game. Congratulations!
 Pirates of the Caribbean: The Legend of Jack Sparrow ps2
- pc
- ps2
Exit date: July 21 2006


