


Please note:
The solution is based on the US version of the game. There may be divergences from the Spanish version.
Albatros
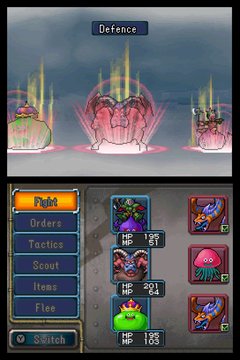
After the opening scene, press A to exit the box and go up the stairs. After being discovered and brought back below, you will need to introduce yourself to all crew members. Find Lily, Melonie and Eugene on the main deck, Rory in engine room and Archie in the cargo bay. With that done, talk to Captain Mayday on the bridge. After that talk to Rory, then again to the Captain. Once awakened, head to the Albatross, climb the vines and observe the situation inside, then go outside and talk to Rory. The girl transfers the last monster to the enclosure, which you can now enter into the party via the computer. The monster assigned to you will be chosen randomly. Thank the girl and go and discover the contents of the red chest in the engine room. Exit again to face the first fight. Then check out the Scout Stone and learn how to zoom before accessing the world map.
Treepidation
Head north to find a Healing Stone that can heal the party. Note that the northeast exit is currently impassable and proceed north. You will not find it hard to recognize the Wormonger, a gigantic monster, which for the moment you should simply avoid. In the next area wait for the Wormonger to approach, then jump into the hole created by the flying monster to land on a platform inside a cave where you find a red chest. Once out of the cave, continue north, past the swamp where a clay mannequin asks you to find the Heart of Mud to proceed. Then wait for the appearance of the Wormonger and pick up the bag dropped by the flying monster, which contains the object you have just been requested.
After meeting Archie and Rory, take refuge in the cave for the night, exploring to the southeast. Climb the vines you encounter along the way to enjoy an elevated view of the labyrinth you are progressing through. Take the north exit to continue, but be aware that in the east you can return to the Albatross.
After collecting the Healing Stone, go up the ladder to enter the cave to the east, where you can collect Stone Claws from a red chest.

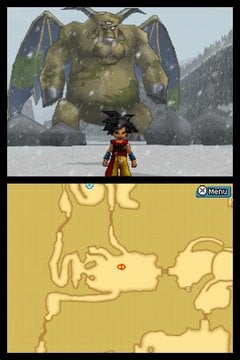
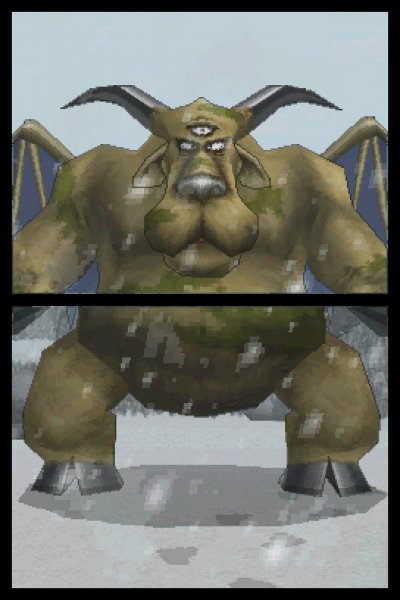
Retrace your steps and exit west, activate the Zip Portal - which allows you to use the Zip to return to that spot whenever you want - then follow the log to find a red chest containing a Seed of Skill. Watch out for the Troll as you go north. On the way a Scout Stone will teach you how to use the Zip. The final boss of this area is at the end of the corridor.
Retracing your steps, before the Healing Stone and the ladder, on rainy days you will be able to access an area to the west where some rather powerful monsters keep a Sludgehammer inside the red chest.
Doubtback
After a few steps, you immediately become acquainted with the giant monster that controls this area, the Missing Lynx. You can get around in peace during the day, but beware of its night flights. Either way, avoid being attacked by slipping away and seek refuge inside the cave to the northwest. Here, too, you have to watch out for hostile presences, such as Meddle Slime during the day.
As you advance into the next area, notice the access to another winding cavern to the west. Advance and collect the Healing Stone. If you have entered this area at night, beware of the Meddle Slimes in the south tunnels. However, fearlessly explore the southern area to collect the Iron Lance from the red chest, then exit north-east.
You are now out in the open again, so make sure you are sheltered from the Missing Lynx as you proceed southwest. The area you enter guides your path thanks to the presence of a red arrow. Go around the Hades Condor nest to the north to get to the southwest exit. Here, circumnavigate the area clockwise to find and activate the Zip Portal, then proceed to the exit.
Look north for access to a cave, but before you can cross it, a mole will block your progress, ordering you to go to Mole's Den, which you access from the southeast corner beyond the red arrow mentioned earlier. .
Sand
In the first environment you enter, the difference between the red and blue crates is explained to you: basically, the red crates contain Seed of Skill. Soon after, you will be called to rescue Eugene: some moles hold the boy prisoner and it's up to you to eliminate the beasts. Combat is pretty straightforward: moles just attack without any strategy, so by assigning one of the monsters in your party the role of healer, you'll get away with it without too much complication. Following the victory, you will meet Don Mole, chief administrator of the Monster Scout Challenge, and Dr Lump, who provides assistance in the synthesis of monsters. Anyway, for now, all you can do is chat with Eugene and go back to the Albatross. Sleep and wait for a new day to rise to continue.
Look for Dr. Lump in the Monster Pen on the Albatross where you can finally dedicate yourself to synthesis. However it may be a good idea to first go to Iceolation where you can observe some new monsters. Also, be aware that in order to be synthesized, monsters must be at least level 10.
If you pop into the adjoining room, then you may encounter an old acquaintance: Martha, the clay mannequin you have dealt with earlier. She is in charge of administering the Monster Scout Proficiency Test, through which the different aspects of the game are illustrated in the form of side-quests. At this point in the game it is probably worth giving it some time.
A little while ago we mentioned Iceolation, the next game area to be explored. To access it you will need to pass level F of the Monster Scout Challenge. You won't have any difficulty doing this, so hurry up and head to the Arena. If you want, you can carry on and pass even level E, even this not very demanding: sooner or later you will have to overcome them all.
Once this is done, continue exploring.
Iceolation
Balance up the slope until you reach some vines to the northeast that allow you to descend. In the lower area you will find a red chest containing a Seed of Defense. Walk down the path to meet Lily further on. The girl is besieged by Hellhound, so hurry up and rush to her aid. The fight will not be easy at all, but at the end you can fully recover your strength thanks to a Healing Stone.
Continue the advance until you come across a Scout Stone through which you learn the Heal All spell. Then retrace your steps and stop in front of the pine cone placed in front of an ice wall. Talk to Lily and she will light the wood, but attract a monster, Bjorn, who will break the ice wall to reach you. Then take the exit to the west where you are faced with another pile of wood and an ice wall. You don't have any torches, so enter the cave to the south.
Inside, explore the northeast corner, where a chest contains a Silver Slime and a Metal Slime. Ignore the north exit, which takes you back to an area you have already visited, and advance south. Near the bonfire, find a torch that you must use with the pine cone that you passed a little while ago. Watch out for enemies along the way and avoid them as much as you can, otherwise you risk making the torch go out. By lighting the wooden pinecone, you will again attract Bjork's attention and he will destroy another barrier of ice.
Proceed past the spot where you collected the torch to come across a new wooden pinecone. From there, walk north - or east if you want to return to the Metal Slime - where Lily is once again targeted by Hellshound. Save it, collect the Healing Stone, light the torch and go back to setting the wooden pine cone on fire.
Then enter the cave through the north-east passage. Here you will find a Healing Stone, a Zip Portal and a Yggdrasil Leaf. From this point as you advance northeast you come face to face with the boss, Baby Bjorn. At the end of the battle, you find yourself at the Albatros. The next region to explore is unlockable by clearing Monster Scout Challenge level D.
Gragavation
Head east to locate the ladder and go up. Explore the area to the northwest, with no exit, to find a Hades Condor nest. To continue instead, head northeast, then climb north until you find access to a cave to the east. Explore the interior to collect a Healing Stone and a Metal Ticket inside a red chest. When you have finished exploring the cave, exit and continue north. You notice in the distance Melonie and Captain Mayday, but these seem unreachable. To get to the other side of the area where they are, go through the cave whose entrance is in the southwest corner. After you have collected everything you can in this area of the level, including the Metal Slime and the Jumbo Insulade, use the north exit and proceed until you find a detour to the northeast.
Around the Zip Portal you will find two exits: initially take the one closest to the portal to get near a Scout Stone from which you can learn the Nose for Treasure. Retrace your steps and now use the other exit, the north-east one, then continue along the path to the north-west collecting the Healing Stone along the way. Climbing to the top you first encounter Jamirus, the mini-boss, then the final boss at the top. Before climbing up there, take advantage of the passage to the south to collect a Phoenix Scepter from a red chest.
Unshore
Approach Countessand to end up in an automatic fight against a Tentickle. Be careful because it is a more difficult opponent than normal enemies. While it does not pose an insurmountable threat, it will try to put you in trouble by weakening you with status effects. Consider it a workout, as as you continue you will find yourself facing others. Exit west and climb the climbing wall to tackle another Tentickle. Climb other vines and browse behind the rock to the south to find a red chest. Continue west and face another Tentickle, then pick up the Metal Ticket to the southwest. There is also a Healing Stone in this area. Then go down using the vines and defeat the Tentickle, then go up to other plants and before exiting to the east collect the Metal Slime. Advance paying attention to the numerous Bona Costricotors who live in this area. Reach the northernmost part of this area where you find a Metal Slime on a platform. Then exit northwest to find the Zip Portal. Then go down the ladder to face the last Tentickle in this area. Finally, follow the stream south-east to lead you to a chest containing a War Hammer. Inside the stream you will then find a hole to the northeast that allows you to descend to the final area of the level. Quickly pick up the Healing Stone to the southeast, the Plus Scepter to the north, before facing the boss Khalamari in the middle.
At the end of this level, you will need to unlock Monster Scout Challenge level A in order to proceed.
Bemusoleum
In the area you initially access, you will find two doors, one red and one blue, which can be opened by pressing the keys of the same color that are located in the east and west areas of the level. You can reach these areas through the teleporters located in the central hall. Note that the red buttons can only be pressed on sunny days, while the blue buttons can only be pressed on rainy days.
First, go up the stairs and collect the Metal Ticket at the end of the corridor accessible from the west exit. Then go back to the central area and press the two yellow buttons to the north to open the door of the same color. Ignore the monster, blocked by the barrier, and go west, using the teleporter that takes you in front of a ladder. Go down and cross the aqueduct, then exit northwest. Use the ladder to go up and press the red button.
Go back to the central area and use the teleporter to the north. At the place you arrive, go east, go up the ladder, then head south to find a point to drop back down. Cross the aqueduct to the south and press the red button.
Now at the beginning of the level you can access the door you just unlocked. Beyond is a mini-boss who, once defeated, lowers the barrier that protects the monster mentioned earlier. So go and defeat that monster too then go north and pick up the Medal or Merit.
So wait for a rainy day and from the central hall use the teleporter to the northwest. In the area you enter, move clockwise until you can go through the door to the south. After defeating the Liquid Metal Slime, go through the boxes to reach the blue button.
Go back to the central hall and use the teleporter to the southeast. Follow the path to the northeast exit, then face another Liquid Metal Slime and exit northwest to find the last blue button on the east wall.
Now open the blue door you have unlocked. Use the Scout Stone to learn Vanish, then battle the bosses to get the Medal of Merit.
Once this is done, you can return to the Arena to talk to Don Mole and Mynos. At the end of the conversation you will find yourself facing two more Bosses for the S level of the Monster Scout Challenge, but this time you can use the items and issue orders. After the victory, return to the front of the painting located in the starting area of Bemusoleum and talk to Mynos to access the next level.
Necropolis
Simply follow the path until you come to a green teleporter that takes you to the next area. Go southeast and go down the stairs, then use another teleporter. In the area you enter, move counterclockwise. Use the green teleporter for a Scout Stone, then go back to that same room and proceed via the elevator in the center.
Let the path lead you to the southwest room and look for the hidden door, marked by two red eyes in the wall, which allows you to collect an Obsidian Sword. Advance and choose whether to skip the next section, where some hidden doors allow you to collect useful items, using teleportation, or walk through the door.
Either way you still need to use that teleporter to get to the next area where you pick up a Yggdrasil Leaf from a chest before continuing through another teleporter. In this room, move clockwise, defeat the Liquid Metal Slime and go down using the elevator, then proceed north for a teleporter that takes you to a Zip Portal. Collect the Healing Stone and advance to the last teleporter that brings you face to face with the boss. After defeating him, talk to Don Mole and Rory at the Albatross. In short, you will face the latest challenge of the Monster Scout Challenge, Solitaire, without orders or items. After defeating him, the credits will start.
Congratulations, you have finished Dragon Quest Monster: Joker 2!
 Dragon Quest Monsters: Joker 2 ds
- ds
Exit date: October 7, 2011


