


Please note:
The solution is based on the US version of the game. There may be divergences from the Spanish version.
Konohana
Look at the two skits; therefore, trace the shape of the Koyomigami to gain access to the magic - it allows you to restore the level of your HP. Follow the arrows during the next scene, talk to the villagers, then exit and proceed along the path on the right, reaching the top of the mountain. Draw a sun to illuminate the area. Watch the event, then the following skit. Enter the portal, use the Y button to eliminate the demon rocks, then walk along the golden path. Press X to leave Kuninushi, then press the gold button. Continue along the following paths, paying attention to the spikes (avoid the rickety red bridges). Turn left, walk along the starry path, towards the statue. Retrieve the second brush god. You will then participate in an event that will show you how to use a new skill - the path skill. To do this, you will have to press X to bring down Kuninushi, then use the celestial brush to create a path, which starts from Kuni and reaches the chest - when the line turns red, you will know that the connection has been made in the right way.
Head outside, so watch out for the spikes when you try to reach the gate key - Kuninushi will have to stop before hitting them in a ruinous way. So, there will be another brush event: you will have to reposition the flower of the Izanagi statue, obtaining Celestial Slash - you can press L or R to create a horizontal line on the rocks and / or monsters. Go down the path to the left, enter the portal to return to the village.
Kamiki
Watch the skit, then hit the objects along the way to recover some bonuses. Enter Kushinushi's house, repair his sake barrel. Go talk to Susanoo, then to the girl crying by the river, then back to Susanoo. Enter his house (the largest on the right side of the town, next to a gate). Retrieve the sake hidden in his attic, using Celestial Slash to drop it (it will not be possible to retrieve it directly). Give the sake to Susanoo, he'll get drunk. Break the rock, exit Konohana, turn left, reaching Namo's house. Talk to him, obtaining a quest that requires the recovery of five minerals. Exit his house, reach the side, locating a broken handle. Fix it, go talk to Namo, get out of his house and watch the skit. Enter the cave, break the rocks and make the crates your own. Reposition the painting on the right, then review it and draw the sun. Keep going straight; when you get to the two switches, tell Kuni to place yourself on one of them, while you have to position yourself on the other, then kill the frog and continue forward. Collect the healing items from the chest on the left, the minerals from the one on the right.
Still ahead, destroy the rocks and use them as steps, up to the falls. Have Kuni move as you progress along the red switches. Look at the scene, after which you will be given the opportunity to create flowers, trees and small lawns by drawing a circle with your celestial brush. Fill the whole area with grass and flowers, you will need it to open a door later. You will then have to eliminate a monster - Clamhead. Destroy his eyes first, after the core - so he won't be able to defend himself. Look at the scene, enter the door that will open. Leave Kuni on the red button, while Chibi will have to press the golden one. Another door will open. Hit the first two pillars, creating a path. So put the third one back, and then hit it. Let the plants bloom, the ball will float to the next room. Move it upwards, so that it reaches the pedestal; the water will be slowly sucked out.
Try to grow the seed, you will immediately notice that it is not easy. Try to "talk to us", then go up to the balcony and draw a sun. Try growing the seed again, it won't work. Fight monsters, clearing a path. Go through it, save your game, then you will have to face the first boss.
Boss: Oogamanoke
Immediately start hitting the boss, paying attention to his tongue, which he uses as a counterattack. Wait for his jump, dodge the fall, then use Celestial Slash on his navel - it's the weak point. After a skit, Kuninushi will be back in your party. Have him move the stones that are spat out by the frog, then attack him as he tries to stop Kuni - in case he gets very close to the stones, hit his tongue so he can't suck them. To finish it, you'll have to hit its belly three times. The first two attempts will be successful without too many problems. For the third, you will have to pay attention to a shell that will cover the navel - therefore, as soon as it jumps, jump with it and remove the shell with a punch from the bottom up; when it starts to go down, hit its bare navel. Leave the cave, retrieving the minerals and talking to Namo.
Shinsui Fields
Go back to the village, and give the mirror to the crying girl. Look at the skit. So begin the work of placing the trees: they must be as dense as possible. On your way out of the village, go talk to the merchant inside the purple tent - we recommend buying some items from him. Once you are gone, you will display a skit. Go back to Namo, cross the bridge, break the rock next to the tent, revealing a cave. Climb up the mountainous path, using the SOS sign as a sign. Along the way, we recommend letting the two completely empty pieces of turf bloom. At the source of the smoke, enter the house and talk to Tamaya. Once the conversation is complete, leave.
You will have to face the Skull-Spinner: eliminate it using the Celestial Slash, applied to its skull. Go over the bridge, then the Torii gate (red). Go down the hill, retrieve the crate, then make the grassy glimpse at the end of the water path bloom. Go back up, taking the road that goes up to the left. Break the rock, enter the hole to get a new magic. Head back to Konohana, talk to the pig along the way. Enter the flashing hole next to the village entrance, make the plant bloom, jump on it and enter the tunnel. Watch the scene, then enter the main building. Eliminate the two monsters, exit the house, draw the sun, return and talk to Akahige.
After another cutscene, go back to Tamaya and give him the pumpkin containing the combustible powder. You will be given a new quest; open the map and reach all the monsters marked with a circle. After destroying them, recover the bombs in their possession. Return to Tayama, then to the village of Ayame. Look at the skit, you will be given a new skill: the ability to create bombs. Use the tunnel near the Torii gate to continue to the next play area.
Agata forest
Talk to Kariudo, getting the fishing pole quest. Take the path to the right and make the Sakuya tree bloom. Move to the temple, then right, and make the lotus bloom. So bomb the pillar to proceed. Kill the monster, then move towards the direction the smoke is coming from. Watch the scene with Kokkari, go up the hill, retrieve the item, then go back to the Torii gate. At Hitoshio's spring, make the grass bloom, retrieve the next item, then give the clairvoyant $ 500. Go out, and draw a star with more lines.
Video --Trailer di Ryo
Demon Lair
You can choose whether or not to create your own demonic mask - the left option to do so, the right option to decline. Talk to the subject near the gate, then the demon flashing red on the back. Choose the left option, go back to the guardian, continue forward. Retrieve the chest, then converse with the next guardians and the blue floating object. Examine the tree on the left, exit the room, returning to the previous market. Talk to the white statue, enter the room with the bulletin boards. Read the notice board on the right, go back to the gate, save your game. Talk to the guardian, choose the second option, then the third, then the first, then the one on the left. Save your game, take a left.
Boss: Onibaba
Start bombing her back; after a while, small red demons will appear, whose task is to restore Onibaba's HP level. Get Kuni to stand above them so they can't attack. Keep hitting the enemy until they die - no particularly elaborate strategies are needed in this case. Get the girl out of the den, watch the skit.
Agata Forest: Go Save Kuninushi!
Take the key, climb to the roof of the sanctuary, participate in the event to get a new ability: you can draw a line from a source to any other area, making the water flow in that direction. Go down, buy the necessary items, then turn off the torches to pass through the spines without running risks. Pick up the chest with one of the fishing rods. Throw some water in the "free" area, the quills will go down and you can continue. In the new room, press A to examine the bars, then create a water line from Nanami towards the torch. Drop down, then use Nanami again to put out the flames. Go down the stairs again, and tell Nanami to press the button that will cause the bridge to go down. Throw some water at the spikes, go down, bomb the wall on the left, hit the switch on the right.
Go ahead, throw some water on the crate, grab it and keep going. Jump through the spikes, kill the frogs, then shoot water at the rocks to continue. Move Nanami's jet so that it extinguishes all fires. Get her to grab the crate (drive it closely - dodging the lines of fire), then have her hit the switch so the quills disappear. Retrieve the crates from the room above, then go down the stairs, and take out the metal foxes. Collect the contents of the chest, go through the door, bomb the giant shell, enter, talk to the statue. After the event, you will get a new skill: you will be able to create a line that, starting from you, reaches the floating lotus flowers. Enter the hole to the south, create a line from yourself to the larger flower. So, get close to the flowers; while falling, quickly draw yourself on the second flower. Examine the water, then have Nanami move and hook yourself with the whip to her; make it proceed to the right, where it will have to press a switch; bring her back, place her on the opposite side, then reconnect to her with the whip to retrieve the chest.
Follow the path to the top right, examine the statue, then retrieve the new weapon from the chest. Go down the stairs, use your new skills to go up the vines in the upper left, up to the flames. Turn off everything, then hook the two hooks, jump to the opposite side. Move Nanami to one of the switches, hook onto her, move her to the next switch. Get over the flames, bombarding the enemies. Have Nanami continue along the path until she is forcibly blocked. Move to the next room, without her. Avoid the flames, join the two hooks, take the pearl, go down the stairs and approach the door. Along with Nanami, press the light switch. Destroy the monsters, then grab some healing items and save your game - you'll have to face the end-of-level boss.
Boss: Oonamazu
Right from the start, try to hook his tongue to the hook visible above. This way, you can attack him without fear of retaliation. When she starts moving again, have Nanami swim to the nearest islet, and hook onto her to move quickly. Pay attention to the appearance of the kanji letters on the screen: in this case, stop your attack and start moving, avoiding it landing on you. Keep hooking your tongue and hitting the opponent until he leaves.
Ryoushima Coast
Follow the only path available, bombing when necessary. Move the water from spring to spring, parallel to your upward path. Blast the sacred tree with color, then go explore the Ryoushima coast. Visit the temple, then head to Seian.
Seian City: lower neighborhoods
Immediately make your way to the palace, saving Kagura. So watch the skit after you leave Seian headquarters. Save the girl from the monsters southwest of the city, then have Kagura walk over the transport panels, and have Chibi move upwards using the vines. Repair the door, enter the house, watch the scene, proceed north. Use the vines and whip to make Ayame proceed, attack the pedestal, then use the arrows to speed up the jump. In the next room, use Celestial Slash to send the rocks back to those who shoot them. Position yourself on a switch, place Ayane on the next, then move progressively so that at least one is always pressed. After a skit, you will acquire the ability to move fire (analogous to what you have already experienced with water). Go back to the room where the giant gear is stationed, watch the scene. Go up the stairs, continue south and take out the monster. Repair the turtle shell in the room to the left. North, battle to save the girl, then go back south and go down the stairs. Save, getting ready for a pretty tough boss.
Boss: Senryou & Manryou
Fighting the first doll, we recommend fending off the nails, dodging everything else. Fighting the second, it is necessary to melt the ice to be able to have a certain advantage. Against the third, Kagura will have to use all the most powerful spells at her disposal - watch out for the opponent's hands, if they can reach you they will "steal" Kagura; in this case, to regain control of the character, you will have to place bombs next to the doll's hands, so that they explode just at the moment of approach. As for attacks, spells are recommended in all three cases.
Watch the skits, then head to the Seian Inner gate, north. Another scene, so you will have to purify Blossom and visit the Kimono merchant's house. Continue to the main street, watch the scene, and proceed back to Seian. Retrieve the contents of the treasure chest from the bridge - a new weapon. Another scene, then exit the city and take the path to the left.
Ryoushima North Field
Follow the rocky path uphill, watch the scene, then stop the digging machines. At the bridge, create a line from Kurou to the opposite side. Use the whip to propel yourself towards the vines on the opposite side.
Chigaisebu
Go left twice, up, deflect the demon attacks with Celestial Slash, then drop down. Retrieve the chest, then left, open the door surrounded by pearls. Deflect a second group of monsters, then - during the scene - draw a U to magnetize the objects, and an inverted U to demagnetize them. So locate the moon gate with the hooks: draw a> then a <and then join the central hooks, press B and select the option in the center.
Left, jump to the small platform. Press the metal ball from the bottom room to the top one, trying to make it as close as possible to the room with the blocked balls; then demagnetize them with an inverted U, and make sure that they are separated from each other. Repeat for the topmost sphere. You will have to defeat a Skull-type mini-boss: wait for him to throw the red balls, so that you can deflect them (there is no other way to damage him). When his ribs split open, throw bombs at the core.
Agata Forest - III
Talk to the clairvoyant, then chase the two monsters marked by the red circle on the map. Go back inside the portal, then go find Onibaba. Draw the masks, then talk to the demon, fighting for the lost wings. Continue to the Onibaba residence, watch the scene.
Raien Iriguchi
You will have to participate in a mini-game based on the wind: blow away the clouds full of rain, so as to clear your way to the top. At the end of the path, a second mini-game awaits you: hit all the notes, before they manage to reach the top. You will then visualize a skit, during which you will be given a new ability: to draw a line of lightning from any area to any other area. You should therefore receive a toy battery, which allows you not to be affected by electricity. Then take a left to continue to the next area.
Chigaisebu --II
Watch the skit with Kurou, then follow the arrows. When you reach the door with several rooms around it, simply walk from right to left to get to the "exact" area. You will have to fight a mini-boss, Skull - you have already faced him, fortunately, so the strategies are known. So a puzzle will interrupt you - the solution is to connect the two hooks at the top, and the two hooks at the bottom; then press B, and choose the middle option. Watch the skit with the mechanic, which will be followed by a boss fight.
Boss: Onryou-ou
Take advantage of the wind immediately to try to make it fall; dodge his shots as much as possible, which are quite powerful but also remarkably slow. Whenever it doesn't flash yellow, you can attack it without taking too many risks; when it starts flashing purple, it will become almost completely invincible - we recommend running away without hesitation. As soon as he starts flying, you know he is about to use his Ultimate. Letting it act undisturbed will cause you damage for 3/4 of your HP bar - we therefore recommend creating a line from Kurou to the yellow flute as soon as you see the opponent hovering upwards; in this way, Kuro can literally suck energy from the enemy, preventing him from accumulating enough to unleash his lethal charge. At this point, the enemy will split into two identical copies: massively exploited wind-based spells, which allow you to hit both "copies" simultaneously. Beware of the giant hand, which will occasionally be thrown towards you. After defeating him, watch the skit. Use the mirror to reach Seian City. Immediately take left, then north, enter the building whose front has a blue mark. Talk to Aohige.
Yakushi Village
After the conversation with Aohige, teleport to Yakushi. Enter the portal next to the rescue mirror; walk all the way, until you reach the last house - watch the scene. It will now be time to go and visit a new merchant: reach the area marked by the letter kanji on the Yakushi map. We especially recommend buying the spells, they are new versions much more powerful than the previous ones. Teleport to Seian, then walk towards the fire; turn left to view a skit. Create a line from the ghost to the unconscious man, using electricity to regain consciousness. So, reach the gates of the Seian palace, enter the tower on the left, look at yet another cutscene. Make your way to the back of the tower, then grow the vines to climb to the top. Watch the scene with Genai, then proceed to Ryoushima.
Go up the rocky path on the right, watch the skit involving the girl and Kurou. Reuniting with the latter, go back to Genai's mechanic - another skit. He's creating a teleportation machine.
Kouraimaru
Talk to the captain, then to the old gentleman in the cabin, who will give you more information about Akuro-ou. Go back and talk to the captain, he will ask you to retrieve some more information. Travel to the lower part of the ship, talk to Benkei, then try to maneuver the cannon. Open the portal to the south, collect all the contents of the next room, then follow the path to the exit. Give the shell to the captain, he will use it to call Otohime. Look at the skit and the event, then draw the sun.
Video - Trailer GamesCom
Chigoku Shrine
Move along the edges of the sanctuary until you find a purple shell hidden behind a group of rocks. Make it bloom to retrieve the lucky mallet, then watch the skit. Enter and defeat the water lady - use the wind to sweep the incoming water, then hit the red gem repeatedly. Jump into the muddy stream, getting ready for a little swimming mini-game. We recommend taking advantage of the lower path, which is much simpler than all the alternatives.
To take out the starfish, dodge all the bubbles and attack the tentacles - they will turn red and explode. Keep doing this until the opponent has lost all the tentacles, so he can freely hit his core. Check out the skit, which introduces you to a small mini-game based on a hide-and-seek: in the first room, Hikaru will be behind the piles of paper, on the right. Walk towards the rotating display case, and hook the hook on the left to the hook on the statue in the center. Then examine the bottom right stack of paper, hit the folding screen, and hook the two hooks back. Head to the tent, talk to the woman, who will let you access the Hyougoku. Look at the skit.
Kouraimaru
After several scenes, you will return to Kouraimaru. The captain will tell you to destroy the seven monsters that haunt the ship. The first two are immediately outside, one is in the cabin, the other three just down the stairs. Also try to fix Benkei's boat, he'll be grateful. Return to Kurou to view a cutscene.
Izayoi Palace
Watch the scene, then swerve to the left, as the door will be locked. At the end of the path, retrieve the items and continue forward. Enter the third room, then continue to the last room of the next corridor, where Kurou will be captured. Enter the elevator in the center, hit the only subject there. Fill the cup with water, then continue downstairs. Destroy the scroll, revealing the presence of a switch. Talk to the two demons, make them accept the fight proposal. Defeat them, retrieve the key, and go save Kurou.
Go down to the lowest floor of everything. Join the two hooks, opening the door. Go inside, explore the area, watch the scene. Get the treasure, then go back to talk to the monster guarding Orochi's room. Continue to the area where you filled the cup, talk to the monster positioned on the bridge, at the end of the conveyor belt run. It will provide you with useful information to KO the guard. After several more cutscenes, you will be thrown into the past.
Kamiki Village - 100 years ago
Go talk to Sakuya, then proceed towards the center of the village. Help Izanami by pouring water into the sake barrel. Leave the village, then go up the hill towards the Torii shrine. Watch the scene, go to Orochi's house, talk to the unconscious boy. Go outside, then go talk to the character stationed near the Kamiki village gate; he will give you an item to give to Pot-Boy; after doing so, he will become your new game partner. Take him to the door of Izayoi, watch the scene, then walk towards Himuro.
Himuro
Immediately retrieve the chest near the entrance, it contains a red pearl, it will be necessary for the continuation. Use the Pot-Boy as a source for fire. Once you reach the cannons, repeatedly press A to charge the Pot-Boy and use his fire as a method of ignition. You will come to an icy path, have your partner walk, creating a path for him. When you reach the room full of water, break the pillars, creating a path. Take the three pearls, continue to the dinosaur - ignore it, go straight. At the end of the path, open the last treasure chest, save your game, go back to the dinosaur room to join a battle.
Boss: Mizuchi
Hit his head immediately, so as to stun him; when it is, hit the piece of ice and shoot it at him. At the same time, you will have to periodically run to the opposite side to load Fat-Boy into the cannon, which will act as a second source of damage. At some point, it will create a wall of ice: draw a line of fire with Fat-Boy to cause it to melt. Once the battle is complete, watch the skit.
Izayoi Palace --Gran Finale
Rather linear level: go straight ahead, participating in the inevitable battles - but avoid any optional combat. You will reach Okka, save him, so watch the scene. At this point, the final fight will begin. Initially, you will have to eliminate lower-ranking enemies, including some of the bosses you faced at the beginning of the game. Also be sure to retrieve the contents of any crates you find around. The first real new boss will be Kurou-kun.
Boss: Kurou-kun
For most of the game time, it will not be possible to attack him directly. Focus on avoiding his blows; when he tries to eliminate you with the sword, deflect the attempt. This will also be the only time you can actually hit him: he will stop for a moment after his shots have been blocked. Repeat this procedure until it is destroyed.
Boss: Akuro-Ou --I
The boss will constantly change the preferred element, going from fire, to ice, to lightning, to dark. To damage the "fire" and "lightning" forms, use the wind to remove his aura, then jump and hit him directly. When using an ice-type spell, draw the symbol associated with infinity (an 8 rotated 90 °). When a U-shaped symbol appears on his hands, you will need to draw a U facing down to demagnetize his shot. When it starts to have a purple tint, you will know that it is about to enter dark mode. In that case, quickly run towards him, and hit him as much as possible until he is stunned: if you let him charge his attack, he will be able to reset your HP with a single hit.
Boss: Akuro-Ou --II
A more complex version of the previous fight. The basic strategies will have to be the same, but your attack rate will have to increase further if you want to be truly effective. In this form, the most destructive magic is undoubtedly associated with ice, so you will always have to resort to the infinite symbol to neutralize it. Periodically, it will draw a black sun, which will neutralize all your abilities: hit it repeatedly until it stuns it, then draw a "standard" sun to bring everything back to normal. So enjoy the ending of the game!
Video Solution - Playlist
Click here for the playlist!
Video Solution - Introduction
Video Solution - Hana Valley
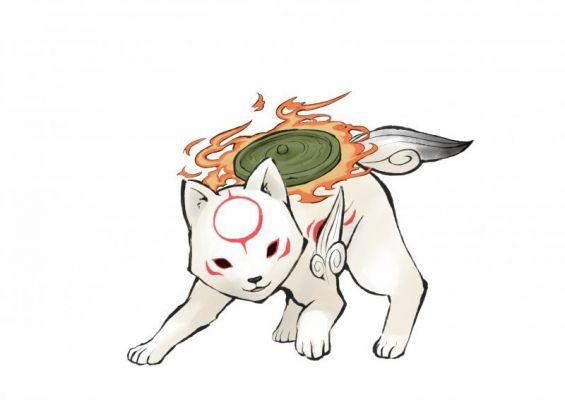
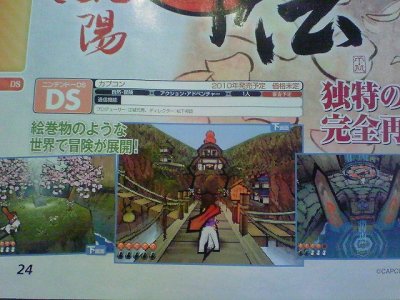 Okamiden ds
- ds
Exit date: March 18 2011


