


Please note:
The solution is based on the US version for Wii U of the game, so there may be differences with the Spanish version.
The Armies of Ruin
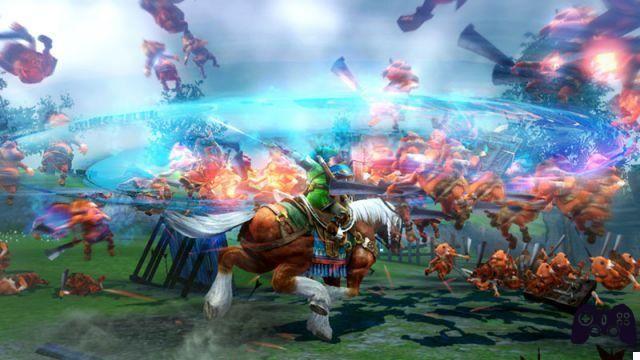
Follow the first steps of the tutorial towards the fight with the Volga, during which its weak point will be pointed out. On the way to the abandoned fort go to rescue Captain Goron, as indicated by the new objective. Then take advantage of the opening of the mines to get the bombs, with which to destroy the blocks of stones that obstruct the path, such as the one on the road to Zelda that starts from the starting point of the level. Then move on to the next indicated objective, making a detour north in case you want to get a piece of the heart right away. With that done, reunite with Zelda to the south, possibly taking over the enemy-held outpost along the way. When you arrive at the fountain of the fairies, enter the magic circle to eliminate most of the enemy armies, then move away to face King Dodongo. To defeat him, wait for him to open his mouth for his fiery breath and hit his jaws with a precise throw of bombs. Repeat this sequence until you defeat him.
The Seikah Tribesman
Choose Impa as a character to take advantage of his ability with the water element and walk towards the north outpost marked by the objective, then rejoin the Captain of Hyrule marked on the map. To do this you will have to go through the central area, accessible only after knocking down a wall with bombs, and conquer it. After that you will have to rush towards the point from which the radio mine begins its path and escort it to its destination, killing all the enemies who try to destroy it. At this point new enemies appear to the south. In reality, it is not strictly necessary that you launch yourself towards them to stop them, but at this juncture a series of battles can only bring you benefits in terms of rupees, items acquired and experience on the field. In addition, you will ensure the stability of the outposts in your possession, which constantly generate soldiers for your faction and guarantee the health of your army. In any case, after gaining control of Tunnel Square, the path to the inside of the structure will open up where you will have to venture to defeat The Spirit of the Cave. At this point you just have to wait for the indication of the appearance of another radio mine to be escorted, this time also threatened by the appearance of some wizards. After doing your job you can dedicate yourself to conquering the last remaining spaces before reaching the exit of the cave and concluding the mission.
The Sorceress of the Woods
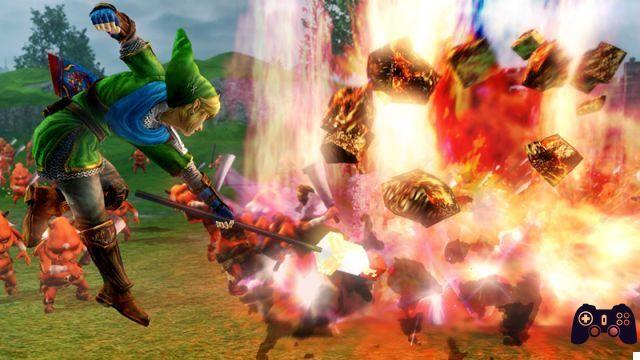
Choose the character taking into account that the most important element in this level is fire. To defeat the Deku Baba who represent your first objectives, however, you will need the bow. Initially, you will only be shown the generic area in which the weapon is located, but do not despair and wait for more precise indications: in any case, to speed things up, open the chest located to the southwest behind a large tree. Then defeat the Gibdo in the area of the tree where Lana took refuge. Following the fire of the Great Deku Tree, you will now have to go to the north-east where the fairy fountain is located to enter the magic circle and summon the fairy that will unleash a saving rain.
Here you will also meet a large chicken: hitting it several times will unleash its anger and also evoke the appearance of a myriad of other chickens, rather angry that will follow you around the scenario until their complete elimination. But not even then you can rest assured, because Cucoo, a mechanical chicken, will arrive last. We have warned you: pay attention to your actions!
Your real target, however, is Wizzro which is to the north-west. Head towards him, conquering outposts along the way, and face him. After decreasing his energy bar, Wizzro will flee leaving you with Gohma, a large spider. To defeat him you will have to aim at the eye with the bow, but only while he is firing his beam or when he is preparing to launch a charge, the only moment in which he is vulnerable. After taking a certain number of hits, Gohma moves near the large Deku Tree and here you will have to speed up your offensive action to defeat it before your base is conquered, which causes your defeat.
The Sorceress of the Valley
Choose the character taking into account that the most important element in this level is the lightning bolt. Initially, your goal is to conquer the two forts to the east and west. Meanwhile, Impa will deal with Volga and a darknut, but if you want, you can anticipate them and defeat them yourself to maximize your loot. As for the two forts, you will meet here for the first time some Beamo, or the equivalent of the turrets in the world of Hyrule Warriors. To destroy them in any way you just need to target them with bombs. After the conquest of the forts continue to eliminate enemies, perhaps conquering outposts, until you are updated on your next objective which is represented by an engineer who needs your escort. By leading the engineer to his destination, the bridge to the east will be lowered, but before heading in that direction make sure that the forts and outposts you have are well defended from the onslaught of the summoners that appear on the map. Reassure yourself about the strength of your defenses, enter the ruins area and defeat the head of the fort to get the boomerang that is in the chest that appears after his defeat. Use it to destroy the climbing plants, including those in the center of the ruins that protect the Gatekeeper: defeating him will open the gate in the central area. Then head to Cia and after the cut-scene get ready for the end-of-level battle with Manhandle. Hit him with your boomerang when his heads are green, then target the exposed weak spot. At that point the boss throws five pods for the scenario: destroy them with the boomerang, then repeat the sequence above to finally defeat Manhandle.
Land of Myth (Ocarina of Time)
Make your way up to the left or right, dodging the boulders that the Gorons throw below and killing the Deku Bamba along the way. Conquer the two forts on either side, then reach Boulder Bridge and defeat the enemy army by taking control of the area. After that, intercept Darunia heading towards your base and stop him before he does damage. The pitfalls are not over because soon an army of Gorons will start moving towards your base, receiving the support of Darunia who in the meantime will have recovered his strength just in time to launch himself in the assault of the areas under your direct control. Protect the battlefield by running around to make sure your bases don't fall under enemy control. Defend the west fort and if necessary clear the road from the Deku Baba to facilitate the passage of Impa towards the Boulder Keep from which it will launch an attack towards the enemy base. Take advantage of the passage created inside the base by the rain of boulders and launch towards the army that tries to escape before it can reach your outposts. Don't get distracted, however, and intercept the Goron radio mines, defeating the operators that control them to be able to divert them to the base of the Goron Chief. At that point you just have to cancel the attacks of three other groups of Gorono before facing Darunia for the last time and defeating him once and for all.
Land of Twilight (Twilight Princess)
After capturing the closest outpost to the starting point, head southwest as the game updates your directions by pointing out where Agitha is. Save her and enjoy the cut-scene, then escort her across the map to conquer outposts along the way. At the conclusion of another cutscene, face Midna's army and take possession of the fort in the west camp. Climb northwest, seizing forts along the way, until you are warned of an attack on your base. Once the enemy attack is stopped, you can enjoy a few moments of tranquility before your goal becomes the defeat of Midna. You can face it at any time, but first we advise you to conquer the outposts still in the hands of the enemy, thus freeing them from the Twilight and strongly weakening your opponent. To expose her weak point, however, you must first get rid of the summoners and the panther that protects her.
Land in the Sky (Skyward Sword)
After receiving the updated objective, make your way to Fi at the statue and escort her to Levias. Then defend your base from the onslaught of the enemies, among which you will also see the enemy captain Ghirahim. He's not a particularly tough opponent, but he has a number of combos that could hurt you quite a bit, so pay attention and be prepared to dodge his attacks when you see them go off. As you continue to escort Fi, try to conquer outposts along the way, including the indispensable Academy Keep.
To do this, you'll need to get rid of three Aeralfos and its boss. Meanwhile Fi continues southwest on a path populated by Deku Baba: keep the bow close at hand and render them harmless before they can harm Fi. After getting your hands on the western fort, Fi turns north, where he delivers the miracle soup to Levias, who opens another passage for you. As you set out to conquer nearby enemy outposts, the mission objective changes, asking you now to eliminate Volga. In this battle you can count, at least in the initial phase, on the help of Fi, useful to allow you to wander around the map a bit and perhaps recover the piece of heart in the fort to the north. However, Fi's survival is one of the prerequisites for victory, so don't overdo it. After you have eliminated much of the Volga's health, your opponent will change shape, and at that point you will only have to resort to the help of the fairies once again. Then get rid of the goblins and Aeralfos to access the fountain, then return to Volga and end the fight to end the mission.
Water Temple (Ocarina of Time)
Move south, conquering the areas around you and defending Ruto from the besieging army, focusing initially on the Lazalfos, before escorting her to Lakeside. Arrived at your destination, capture the fort and Ruto will activate the mechanism that reveals the access to the temple. In short, Ruto ends up as a prisoner in the center of time, and to free her you just have to open all the dams. Start from the first control in the southeast, reaching it as soon as possible and activating it to avoid the appearance of more powerful enemies. Once done, eliminate the summoners and conquer the nearby outposts. Repeat the same mechanic with the one to the southwest, grabbing if you want the optional east and west rooms now open. As always, they won't be used to win, but they will help your army replenish the ranks. Anyway, with the southeast and southwest taps open you can go face the Gatekeeper in the center of the temple and free Ruto. However, the mission does not end there: at this point you are asked to defeat Zelda. As you make your way towards her, conquer the adjacent areas and break the jars to replenish health and magic. In the early stages of the fight, Zelda summons King Dodongo - you know how to defeat him, so don't waste your time. After settling the score with the ape, return to Zelda, temporarily held at bay by your army, and get ready to avoid the AoE attack that launches after each combo to take advantage of the weak point bar that appears at that juncture.
The Shadow King (Twilight Princess)
Move east and even if the target tells you to conquer the lower levels, take a detour to the upper one on that side of the level to get the Hook Shot, which allows you to climb certain portions of the levels. Then move west, using the Hook Shot, and clear the field for Midna's arrival. Right now you will have to split between two fronts: the base under attack, where it is advisable to kill the biggest monsters to make things easier for your soldiers, and the West Square to conquer. Then enter the magic circle created by Midna to injure the dragon, then run towards Agitha and defeat the enemies who try to kidnap her (if they succeed they will keep her prisoner in the North Palace). When Argorok arrives, return to the central square and help Midna, then enter the magic circle again to deal another blow to the dragon. Soon you will be prompted to enter the magic circle near the fountain a third time. At this point you just have to defeat Argorok: wait for the tail to turn blue and hit it with the Hook Shot to knock it to the ground and expose its weak point. Once defeated, it will be Zant's turn, but his slowness and predictability makes him an unlikely opponent at this point.
Sealed Ambition (Skyward Sword)
Reinforce your presence on the ground initially as several of your allies will soon turn out to be traitors, attacking you when you least expect it. To stop the attack you will need to find their leader. To help you, Fi will show you an area that will shrink over time, but in the meantime the traitors will attack your base and your camp. Once the attack is defeated, Ghirahim will summon The Imprisoned, a gigantic enemy that you will have to defeat by targeting his toes to make him lose his balance. After that, occupy the fort to the west to use its catapults when the beast approaches it.
Repeat the same feat with the fort to the east: if you want, you can still attach the fingers of the Imprisoned along the way, but beware of the shock wave of its steps. Knocked down The Imprisoned with a last attack of the catapults, throw yourself in pursuit of Ghirahim, but not before having defended your base from the assault of his army. Ghirahim is not particularly strong, but he is defended by Moblin and Stalmaster: it can be a good idea to defeat his two helpers first to get hold of the materials they leave on the ground.
The Sacred Sword
Upgrade Link (the only usable character) before the mission, then first focus on the Ghost Forces that appear on the battlefield while your allies find the three statues that need to be activated. Once you get the signal of a statue, rush to the ally to escort him safely to their destination. At this point, take out the nearby summoners before setting out to find the leader of the Ghost Units who is hiding as Lana. On your map, therefore, it will be marked as an allied captain: the first suspect must be the captain who wanders alone, with no soldiers around. When you defeat him, you will finally have access to the temple. Make your way up to the gate that separates you from the Master Sword and take out the Gatekeeper. After the cutscene, confront Wizzro forcing him to retreat, then join Zelda outside and defend her from the onslaught of the Dark Force captains as she moves towards the temple. Finally, Wizzro will also make his return and his defeat will mark the end of this mission.
A War of Spirit
Once again Link will be the only playable character. Your first objective is to conquer the marked forts: as you fight for their possession, ReDeadKnights appear moving towards Zelda. These will continue to spawn until you have gained control of all the forts marked on the map. Throw the Dark Link into the Sorceress' Room, moving around him with the shield up and responding to attacks. The first Dark Link is soon joined by other evil copies of your character, eventually joined by Ganondorf with his army. After defeating two Dark Links, the other two appear to disappear. Don't be fooled, one will soon reappear next to you, while another will reappear in Cia's room. After defeating him, a cut-scene serves as a prelude to the confrontation with Ganondorf and his men. After defeating those around you, follow the march of your army helping it to continue and eliminating the enemies that threaten its advance. Keep an eye on Zelda as she too will soon end up surrounded by some of Ganondorf's henchmen. Finally, the final battle puts you in front of Ganondorf himself. Its weak point is highlighted after its special shot, although the main difficulty will be keeping at bay the numerous enemies that threaten you. For this reason, the use of bombs, better if upgraded, can be an excellent idea.
Shining Beacon
Start by occupying the nearby fort, then make your way to the East Sanctum discovered by Zelda which shares your target on the map along with its counterpart in the west. This level is quite hectic and requires you to constantly move between fort and fort to help allies. Along the way you will meet some Dinolfos, enemies that raise the morale of the troops close to them: try to eliminate all those who come within range. In short, at each m, odo, you will be signaled to the third Sanctum to be conquered which is located to the south. Conquering the three Sanctums will give morale to your troops while weakening the enemy ones. Take advantage of this temporary advantage to strengthen the position of your allies before the CIA opens the Gate of Souls.
At this point, intercept the two Dinolfos who will try to conquer the Sanctum to the east and west, after which head towards the fountain to summon the fairy by entering the magic circle. Once this is done you will have to face Volga, in a clash very similar to the one already won previously. Defeated Volga you will have to resist a wave of enemies at the end of which it will present itself on the CIA battlefield. The key to victory, in the first part, lies in the ability to remain attached to the CIA to attack its weak point which is exposed while generating the Dark Links with which it tries to annoy you. The complications come at the end, when the CIA generates three clones, identical to her, which must be defeated individually. At this juncture try to stay on the medium distance and rely on the bombs to hold off the closest opponents.
Ganondorf's Return
The first stop is the fort in the southwest indicated on the map, but since the road is closed you just have to retrace your steps and head to the fort now accessible in the center of the map. After capturing it, move to South Oasis, thus activating the advance of the enemy army from the north and south. While you await their arrival, defeat the Prison Gatekeepers, marked in yellow on the map, to replenish your ranks. Then move on to conquering the marked camps, always keeping an eye on the positions occupied by your allies. In short, the game will signal the appearance of four Aeralfos, but along the way you will be notified of the arrival of King Dodongo at the South Oasis. Immediately move south to defeat the big monster (remember how to do it right ?!). Only at this point should you go up to the northeast to fight the Aeralfos: be careful because after entering the Sacred Grounds you will be closed inside them until the four Aeralfos are defeated. This is actually just the prelude to the final showdown of the level: Gohma appears in the west and moves towards Manhandla in the south. Intercept and defeat them, using bow and boomerang respectively.
March of the Demon King
While you await the notification of the first objective, conquer the nearby West Ruins. Then plan your plan of salvation for Ghirahim and Zant, drawn and imprisoned in the temples to the east and west. Note that the south gates are closed, so the east temple will only be accessible from the side gate, while the west one will need to be approached from the north, where a summoner awaits you. Saving your allies you will have to deal with a series of Impa clones: defeating the original will cause the immediate disappearance of all copies, unfortunately there is no way to understand which is the real one in the pile so you just have to rely on luck . Impa also brings some Goron Captains who will haunt the ruins that you must defeat to fulfill the mission objective. If you still haven't found Impa at this point, she will find you. If you want to defeat its shadows first to accumulate materials, let yourself be chased around the scenario. To visualize the weak point of the real Impa, wait for it to execute its attack in midair. Upon the defeat of all the Goron Captains you will be called to face Lana: after a first battle your opponent will take refuge near the fountain where it will divide into two copies, each however with half its HP. In this final phase you will have to be quick in inflicting defeat to prevent her escape which will coincide with your defeat.
Battle of the Triforce
Keep close to Zant, protecting him from the captains' attacks, stepping away just to take out the summoner in Mountain Keep that complicates your life. The next objective requires you to defeat Link before he kills all of your Lizalfos. In this fight, it is essential that you learn the timing of his attacks early, which all occur at set intervals, keeping your guard up and using dodges to inflict powerful immediate counterattacks. When you have defeated Link, start moving towards Impa to prevent her from reaching the fountain. This is not a real confrontation but rather a chase. Despite your blows, Impa will not stop, but will continue indomitable towards its destination, so you will have to chase it. If it reaches the fountain you will be granted a few precious moments to close the battle before the complete recharge of the magic circle: if you fail your base will be conquered and you will have to face the mission again. Your success instead triggers the return to battle of Link and Zelda who will advance towards your base. Intercept them on the way, minimizing their HP, then let them continue and wait for them to arrive at your base, where you will get rid of them in a short time. This strategy is justified by the demand to defeat them together, and this is only possible when both join their paths at your base. In the case you manage to eliminate one of the two previously veiled you will still find yourself faced later with a new completely full HP bar.
Enduring Resolve
When signaled, reach Ghirahim to the south and bring his HP to a critical level to cause him to escape. Let him go and instead focus on the Big Poe threatening Lana, whose health is already affected by the intolerable heat of the desert. To do this, make sure you occupy the South Oasis, defeating the two Deku Baba and the Keep Boss - possessing it will help your allies cope with the heat better. For the same reason it is good that you also conquer the North Oasis as soon as possible. Now you can reach Ghirahim and finally inflict the defeat he deserves. The appearance of Zant, however, immediately gives you other problems. So follow the path east and turn south to Clifftop Keep where you have to defeat the Shield Moblin and capture the base to be able to jump below where Zant is.

Despite his frequent teleports, try to defeat him as quickly as possible to open the area where the fight takes place and reach Lana. After the cut-scene you can indulge yourself in a maxi confrontation that sees you face an imposing enemy army menacingly marching towards your base. After the first skirmishes, however, your attention will be drawn to Zant and Ghirahim, back on the battlefield. As you reach them by marching towards the Sacred Grounds, conquer all the encampments and outposts you cross along the way. The fight itself will not cause you major headaches: you have already defeated them individually and in this new battle their attack mechanics do not change.
Liberation of the Triforce
Head immediately to the two Argoroks that appear on the battlefield and try to eliminate them as soon as possible. It won't be easy either because of the massive army supporting them and the short-ranged summoner. Shortly, however, Darunia will appear with a radio mine that you will have to escort to the West Field Keep. The radio mine will be hampered by the forces of Ganondorf, but also by the surviving Argoroks. After having led the radio mine to its destination, enter the West Field Keep and conquer it, preparing you for a decided worsening of your fortunes. The entry into the field of Ganondorf in fact provides the enemy army with a huge boost in power. Ignore what happens to your allies momentarily and head for Castle Keep, defeat its Gatekeepr, then deal with Stalmaster and dinolfos. Finally, kill the Keep Boss to break the big sword that amplifies Ganondorf's power. At this point you just have to defeat Ganondorf in the first, simple encounter of this last level. The biggest difficulty is the short window of time that his weak point bar remains visible during his charging attack. The best thing, therefore, is to keep a fairly close distance, but as you know this involves a number of risks. After the defeat of Ganondorf it is Ganon's turn. This battle is quite fun because it will require you to recognize the type of its attacks, similar to those of other monsters faced during the adventure, and use the right tool to counter them. After destroying his four parts using bombs, Hook Shot, boomerangs and arrows Ganon returns to his main form: dodge his energy attacks and charges, being careful during this last type of attack during which Ganon's crystal will remain exposed . Hit the crystal with your new arrows and take advantage of the short time the weak spot bar will remain visible. Repeat this mechanic until the kingdom of Hyrule is liberated.
Congratulations, you have finished Hyrule Warriors!
 Hyrule Warriors wiiu
- WiiU
Exit date: 19 September 2014


