


Please note:
The solution is based on the American version of the game, so it is possible to find differences in the Spanish version.
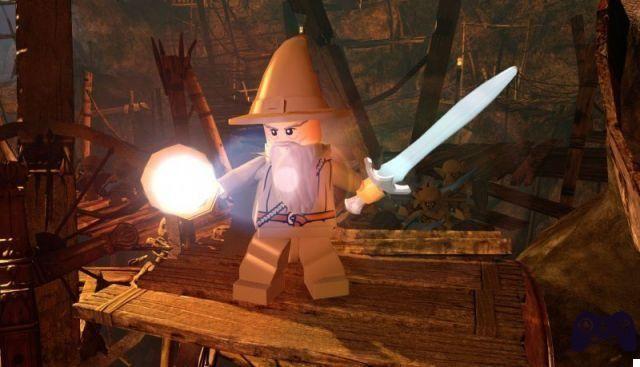
First Level - Lonely Mountain
Having taken control of Thorin, then deviate to the stairs to the right. Approach the portal by pressing the button that will appear on the screen to create the structure.
Examine all question marks in the area for clues. Switch to using Thrain. Approach the newly constructed object, hitting it with the hammer. Move it to the right, moving forward. Proceed forward. When you get close to three "dwarves", examine the interactive rock, activating the aiming ability. Observe the cut scene.
Hold on to the lever. You will now have to look for the second lever. Position yourself in such a way as to hang from the top, pressing the key necessary for the "exchange" of the characters. Use Thorin again. Examine the area to the right, near the closed door. Locate the lever, jump to the area. The passage will be unlocked, you can continue towards the corridor. Launch yourself to the platform above. Repeat the key sequence that will appear on the screen, closing the valve. Wait for the lava flow to stop.
Approach the anvil, using it to create the key to the locked gate, completing the key sequence that will appear on the screen. Get rid of the enemies inside the mine. Retrieve the item from the tables, using Bofur to proceed. Stop near one of the blue circles, pressing the indicated button to refuel the dwarf.
Use the ax to hit the bricks by completing the associated mini-game. Place yourself on the plate on the left. Place a mark on the following objects: two ropes, four wooden units, four copper units. After yet another minigame, you'll need to expand the nearby facility.
You will now need to use the menus to select the objects included in the plan. As soon as Thorin and Bofur proceed along the "ropes", use Thorin's equipment to destroy the bricks and begin the mining work. You will then get the artifact you were looking for, namely the Arkenstone.
First Level - Smaug's Attack
Once you regain control of Thorin, approach the statue closest to you to save the game. Press the key indicated on the screen. Continue to the right, reaching the fallen pillar. Switch to using Dori, having him equip the Flail. Continue up to the barriers.
Use the ax to remove the concrete piece. Select the small ax as the "active" object, moving closer to the visible elements on the ground. Press the action key to get rid of it. Approach the debris. Select one of the dwarves in the area. Press the keys that will appear on the screen. Position yourself on the fallen elements, pressing the action key, then proceeding to the right and observing the corresponding cutscene. Then stop again near the barrier, selecting Dori.
Use the club to break through the debris. Go down the stairs, rejoining the two previous characters. Jump to the concrete piece by pressing the action key. Drop down, approaching the portal. Having regained control of the allies, destroy the elements in the area. Select Dori, using her club to hit the target on the right. Press the keys indicated on the screen. Using the structure fragments, create a small clock.
So send one of the characters to retrieve the elves' hammer. Approach the newly created block, pressing the action key to move it forward, unlocking the door. Approach the statue, using Dori. Use the club to destroy the nearby structure. Approach the statue, reaching a small platform and creating a bridge by pressing the appropriate button.
After the cutscene, walk along the bridge to the right, taking advantage of Dori. Hook onto the hook and throw yourself forward by pressing the action key. Continue to the platform, positioning yourself next to the edge and allowing Dori to get closer. Press the "jump" button to project yourself forward. Make your way along the next handles. Walk to the pillar. Once you have chosen one of the characters, project yourself up to the candlestick. Using the dwarf near you, jump forward again, waiting for the candlestick to be destroyed.
Towards the end of the level, you will need to take control of Thorin and / or King Thror. Proceed to the back. While escaping from the dragon, we recommend that you stay in constant motion, moving to the sides to avoid attacks. At the end of the path, retrieve the mini-kit. Continue forward towards the end of the level. You will then need to head to Bilbo Baggins' residence area in the Shire. So follow the tracks of blue spheres, which will lead you directly to your destination.
Retrieve the key, using it on the door. Select the dwarf, smashing the nearby objects. Retrieve the key, using it on the door nearby. Continue to the hut. Destroy the objects on the right, pressing the necessary button to reposition the fragment near the door.
Approach the closet blocking your passage. Equip Dwaling's hammer. Press the action key, hitting the obstacle, so that it moves to the right. Observe the cutscene regarding the appearance of Balin.
Second Level - The dining room
Walk to the room on the left, destroying the elements along the way.
Use the "debris" to create a kitchen table by completing an associated minigame. After yet another cutscene, you will take control of two new characters - Kili and Fili. Select Kili, equipping Kili's bow. Walk to the north room, starting to aim at the interactive target. When you hit it, the flesh will fall to the ground. Grab it and walk to the dining room. Place yourself on the table, giving the meat to your guests.
Return to the kitchenette, destroying the remaining items, also locating the cheese and retrieving it quickly, then return to the dining room. Give all the items to your guests (who have come to the area for the party).
So, during the final phase, complete the dance minigame by pressing in sequence the keys that will appear on the screen.
Third Level - Introduction to Azog the Defiler
During this phase of the mission, you will gain access to Bilbo and Oin. Begin to proceed by clearing the camp of all "breakable" objects. Using Oin, position yourself near the ravine, equipping the appropriate bracket. Hit the switch. Switch to Bilbo. Climb above him, reaching the platform above.
So create a "tower" using Nori and Oin, and then use Bilbo to proceed further on the shoulders of one of these characters. Nori will therefore join the rest of the available characters. Create a ladder, thus allowing Oin to reach the platform. Go to the new platform and press the associated button.
Quickly project yourself towards Bilbo now. Approach the dwarves, and climb on top of them, reaching the platform above. So start destroying the items on your right.
In this way, Bilbo will be able to unlock the nearby hole, which must be used by the dwarves, who will reach the platform. So use the ax to destroy the piece of concrete.
Pick up a ladder using the two nearby characters as support, moving to the left. By holding down the button indicated on the screen, create a playlist. Select one of the other characters at your disposal, placing yourself to the right of the lineup. After your character retrieves it, move to the end of the ladder and hit the nearby switch. Bring the ladder to the left. It will now be necessary to build a real "tower" of dwarves. At this point, Bifur will join your party. Select it immediately, making sure it has the appropriate spear.
Approach the ravine and press the keys that will appear on the screen. Therefore, both Oin and Nori will have to "climb" above Bifur. Now select Bilbo, making him walk on the dwarves. You will reach the platform at the top. Approach the tree on the right, destroy it and retrieve the red fruit. Return to the camp, approach one of the horses, placing yourself in the center of the blue circle and pressing the associated button. After the cutscene, another level will begin.
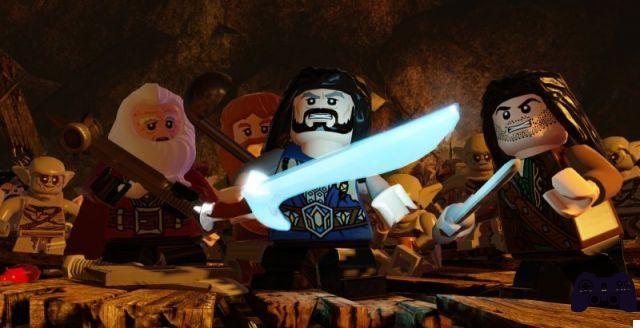
Third Level - The Battle with Azog
First, you can eliminate the orcs with "standard" attacks. After you've defeated a total of 10 orcs, a corridor will form, allowing you to proceed to the next arena. First destroy the objects around you to get the other orbs. Move to the following arena.
Upon reaching the battlefield, an even larger orc will arrive on the scene. Avoid attacking him: instead place two of the playable characters, one next to the other, and press the button that causes them to "merge". So approach the orc to start damaging it.
Still taking advantage of this "union" mode, approach the tower containing the two dwarves. So you will immediately notice how the two "new" orcs are equipped with golden armor. They will therefore be more difficult to defeat than the "standard" orcs. Having eliminated the orc-warriors, switch to using Dori, making sure he is equipped with a club. Approach the tower and press the indicated keys, causing Dori to project towards the golden area, above. Repeat pressing the same button over and over again, damaging the tower and causing a subsequent group of orcs to appear.
So begin to destroy the "lower" wall of the tower, using either of the two dwarves. So get rid of the three orcs with golden armor, then destroy the highest wall of the tower thanks to Dori's mace. When you have also eliminated the three orc-archers (with green armor), you will be able to deal directly with Azog.
The battle against Azog will have as participants the same characters that you controlled during the phase of the level immediately preceding. During the initial stages of the game, we recommend that you use your time to retrieve the objects in the area. Walk towards the arena. Start attacking by rhythmically pressing the button that will appear on the screen. Azog will then flee to the upper left area of the level.
During the first phase of the game, you will have to pay attention to the attack from afar which makes Azog particularly dangerous. The opponent will throw large boulders at you, and you will have to keep moving to avoid such boulders. So, to reach the platform where Azog is, place yourself on the largest block.
So switch to using Dwalin, using the hammer to move the block forward (thanks to the action key), so that he goes to hit the boss. Repeat this procedure until the third part of the battle is reached, which will take place as soon as Azog moves to the upper right corner of the play area. At this point, you will have to select Dori and activate the club. Use the club on the golden area, walking towards the pillar to get to the platform above. Attack the opponent several times, thus ending him.
Fourth Level - Free the Horses
First, move to the troll camp. Wait for one of the trolls to light up the area, then stop. Using Krili, also activating the bow and arrow set. Shoot at the target on the right. The troll will then return to the camp. Moving on to using Bilbo, give him the fishing rod. Place yourself on the dock, actually starting to fish.
A lobster will appear. Retrieve it, thus activating the "aim" mode. Destroy the objects near the first horse visible in the area by holding down the key indicated on the screen. Shoot the marble objects in the area. Then move to the left. Activate Fili, using his shovel. Start digging. Retrieve the interactive object. Aim at the cauldron, and throw the item.
Continue to the second horse. Create a target. Switch to using Ori, using his slingshot to hit the target three times. Once the second horse is freed, the second part of the level will be unlocked.
Turn to the camp on the right. Press and hold the key that will appear on the screen, creating a catapult. Switch to using Kili and select the bow. Shoot at the target. Approach one of the dwarves. After one of your characters projects towards one of the allies, have him make an automatic attack to cause the first troll to be eliminated.
Complete the keystrokes associated with the cutscene. Dodge the heavy objects thrown by the last troll. So switch to using Kili. Use Kili's bow to hit the lair. Now approach the monster. Fili and Bombur will be the characters to use during the final stage. You will have to defeat five allies, imprisoned by the trolls. Use the rescue statue to save the game. Hit objects near the starting area.
Retrieve the club from the ground. Use it towards the golden object visible on the left, destroying the cages. Switch to Fili, selecting his shovel. Dig to locate the second dwarf and bring it back to the ground. Then take the knob, insert it into the mechanism. Turn the knob, freeing the third ally, visible in the cage on the left. Recover the arc visible on the ground.
Destroy the cage. Create a dish, interact with it. Collect nearby items. Gandalf will appear almost immediately, near the area just above the camp. Use it now, using its special attack to get rid of nearby subjects and complete this objective. Moving on to the next stage, proceed along the path to the south, trying to reach the cave. Interact with the plate next to the cave. Destroy the bricks nearby.
Pulverize the objects in the area, recovering the wood. When it turns gold, switch to Bofur (who should have an ax at this point). Use the ax on the neighboring bricks. You will therefore have to complete yet another mini-game. As with the previous one, it will be necessary to find a "match" with the elements that will be underlined on the screen. A huge key will then be built. Retrieve its front. Switch to using another character, also recovering the back of the key. Proceed to the gate, using the key to open it.
So begin to explore the cave of the trolls, recovering the three chests with the swords of the elves. Destroy all the interactive objects in the immediate vicinity of the cave. Switch to using Dori, using his mace to finish off the subjects in the surroundings. Then move on to a subsequent character. Press the key indicated on the screen to launch towards Dori. After the cage is lifted, let yourself go. Switch to using the dwarf, selecting his ax as the "active" object. Use it to cut the dish into pieces. Therefore, project yourself to the right. Stop near the area containing the spiders, switch to use Bombur. Send the spiders away by interacting with the red blanket. Approach the circle, interacting with Bombur. Give the fish and carrots to your ally.
Switch to using Dori, approach the Bombur and feed him, jumping on his head. Hook to the edge of the platform, climbing onto it. Attack the skeleton on the right while holding the "build" key. The entire building will then be pulverized (visible on the left).
Fourth Level - Final Boss
Select the club, approaching the left edge of the playing area. Repeatedly press the key that will appear on the screen. Launch yourself to the platform on the left, previously inaccessible.
Walk through the hole below to get to the platform. Break the objects around you, unlocking access to the following hole. Switch to using Thorin, walking through the hole below. Continue to the upper left platform. Open the silver chest, recovering the second sword of the elves.
Switch to using Gandalf again. Walk to the cave. Smash the interactive objects around you, starting to build along the left area of the cave. Then switch back to using Ori, using the slingshot to hit the following target. You will then arrive at the last chest. Hold the switch that will be indicated on the screen, creating the stairs and then moving on to use Bilbo. Go up the stairs, opening the last of the series of crates. You will then get the sword of the elves.
Video - Launch Trailer
Fifth Level - Save the Rabbits
During the Big Green Forest scene, you can take control of any of your characters. Your initial goal should be to rescue the rabbits. Attack the werewolves, trying to hit them only when they are a danger to you. Save your game near the statue on the left.
You will now have to "retrieve" the various rabbits, following an order established by you. After retrieving the first two rabbits, you may encounter some additional difficulties with the third, partially placed under the ground. Having recovered it, you will have to heal it thanks to Radagast. So two additional rabbits will arrive, you will have to save them too and doing it will be slightly more complex than expected. Switch to using Dwalin first, immediately selecting his war hammer. Examine the top of the platform, hitting the huge block with your hammer. When it has moved to the left, jump onto the block and attack the wolf that has "retrieved" one of the rabbits. Quickly project yourself towards the wolf, kill him, approach (still using Radagast) the rabbit and heal him.
Then examine the right side of the lawn, using Dori. Use the club, repeatedly press the button indicated on the screen, then interact with the plate.
After providing the resources, you will start the minigame avoiding making too many mistakes. Approach the rotating mechanism. Press the green panel. Wait for the rabbit to arrive, heal it and switch to using Radagast. Having saved all the rabbits, the second part of the level will also be completed.
Fifth Level - The Orcs
At the third part of the level, use Radagast to chase the subjects in the area. Pay attention to the nearby object, which you can destroy. You will then get two mini-kits. Then get rid of the nearby three orcs. Wait for the enemy to approach, pressing the action key to reach him, and thus completing the sequence of keys that will appear on the screen. Once the ogre is gone, start exploring the surrounding area.
Then proceed along the passage that proceeds to the right. Once you reach the seemingly indestructible wall, combine the powers of your two characters to take it down. Still to the right, kill the next "standard" orcs as well. Switch to using Kili, using Kili's bow to hit the two nearby targets and the large rock. Use the bricks (which will have fallen to the ground in the meantime) to create a kind of bait. Switch to using Dori, using her club on the bait. Press the keys on the screen, waiting for the boulder to fall to the ground. Jump on it, proceed to the right, then quickly jump down.
Begin the procedure by freeing the entire play area from all kinds of objects, thus recovering a good amount of beads. So get rid of both orcs and wolves nearby.
A great leader of the orcs will arrive on the scene: it is an intermediate boss. Switch immediately to using Kili, using a combination of bow and arrow to inflict damage on the enemy. Having reset the opponent's HP, the level can be said to be completed.
Sixth Level
The characters will be divided here into two groups. A first group will include Thorin and a second will include Bilbo. First use the characters of the first group, pulverizing the objects in the area. Select the ax from your inventory, using it to cut the "plate" visible on the right. Move in this direction, thus locating the knob.
Approach the large structure nearby. It will now be necessary to create a tower, taking advantage of your main characters. We recommend that you mainly select characters with particularly "long" weapons - namely Nori (with a club) or Oin (with a stirrup). You will therefore have to create a tower made up of three dwarves.
Then select any of the characters from the first group, recovering the object you found earlier. Go up, arriving at the highest part of the structure. Place the object in the appropriate slot, interacting with it. A chest will drop down, and you can switch to use the second group. Start breaking interactive objects in the play area right away. Switch to using Dori, select the club and proceed to the right. Approach the golden area near the wall. Press the key that will be indicated on the screen. So create a bridge and an anchor.
Now create a bridge. Destroy the crate and press the button, creating another bridge. Walk along the bridge, turn right. Stop near the interactive objects and break them. Press and hold the switch again. Wait for the huge anchor in the area to be built.
Right, dodge the incoming stones. Smash the interactive objects in the area. Combine the elements you have created to create a new object. With that done, move on to using the dwarf with the ax. Stand on the nearby plate, jump to the ground and hit the plate repeatedly, immediately after your jump. So go back to the second group, selecting one of its characters. Proceed to the right, there you will notice how a small platform has been unlocked. Jump on it, reaching the next play area, to then reach a large wall. So combine the skills of two of the characters, making sure that they go to break the wall. Jump to the nearby blue chest, then to the platform above.
Create a crate, which will then be attached to the rest of the structure. Keep moving to the right, coming close to the metal rope. Hook to it, then throw yourself down at full speed. Switch back to group 1. Take control of Dwalin, move to the right. Destroy the objects in the area. When you get to the cart, stop and use Dwalin's war hammer to unlock the passage.
Climb along your allies, using the knob and destroying the objects in the area, approaching the larger structure. Repeat the action performed during the initial game phases again: first select the characters with the largest weapons, reposition them in such a way that they are similar to a tower. After placing three characters on the "tower", switch to using the fourth and start climbing the tower. At the top, interact with the knob / switch, causing the case to move upward. So use the resources accumulated so far to destroy all the crates. Jump down and start construction on the nearby building. Interact with the neighbor "plate".
Then jump down, starting the construction of the next building. Interact with the pot, thus activating the mini-game. Once the construction is complete, turn right. Move to the stone giant's head. Interact with the statue, then jump to the next platform on the right. Go up to the next platform. Having broken the objects in the area, move to the plants on the left. Jump to the platform below. Project to the next platform, then jump to the ladder and climb up. Observe the cutscene. Move the carriage forward. Left, select the ax from your inventory. Use it to destroy the plate, clearing your way. Left, switch to using Dwalin. Once near the wall, use the ax to destroy it.
Observe a skit, moving towards the platform. Switch to using Dori, using the iron club to get to the top lure. Wait for Dori to "hang" on the chain. Project yourself towards Dori. Place yourself near the crate, holding down the key needed to build the ladder.
Before using the ladder, destroy the nearby objects. Grab the second item and move left. Throw it towards the flowers. Press and hold the key that will appear on the screen. Jump to the interactive platform above, holding on to it. Use Dori's club to pull out the stone block. Jump onto the block, then onto the platform.
Right, look at the cutscene about the battle of the giants. After it ends, walk to the right. You will therefore have to use two characters in conjunction to overcome this area: approach the cracked plate (hooked to one of the giant's legs) and hit it repeatedly. Observe the following intermission scene. You will therefore have to save Bilbo and Thorin during the fall: complete the sequence that will appear on the screen to succeed.
Then proceed again along the narrow mountain path. Once near one of the stone giants, switch to using the character with the bracket. Move on to the next, and then project yourself to the platform above. You will therefore have to repeat the procedure of "destruction" of the neighboring plate, using the skills of two of your characters in combination. You will eventually come to a cave, which will lead to the seventh level.
Seventh Level - Cooperation with the Goblin
The level will begin with you using Bilbo and a confused goblin. Start destroying the objects around you after taking control of any of the other characters.
You will then come to the raised balcony. Walk to the right, using the sword (you can retrieve it from the Hobbit's inventory) to cause the skeleton to fall. Go back to the lower level, recovering the skull. Right, throw the skull towards the barrier. When it has been destroyed, hold down the building button. You will gain access to three small platforms, which you can use to get to the top platform and continue exploring the cave.
Now take control of the "confused" goblin. Use it to climb the next wall. Break the barrier next to the ravine. In doing so, you will create a bridge that Bilbo can cross. Retrieve the nearby skull, and start construction again. You will have to overcome yet another mini-game. Approach the catapult, jump on it and let yourself be launched forward. Make a "normal" attack to activate the catapult, entering the next cave, where you will find yourself in front of Gollum.
You will now have to solve Gollum's three "puzzles". To do this it will be necessary to reposition the objects visible in the area. Destroy the items on the right first, then rebuild a small "mountain" of items. So staying in the area, switch to using Goblin to get to the balcony at the top. Destroy the objects by going down to the lower level. You will have solved the first puzzle, and you will automatically move on to the next.
Start by building the main mechanism, taking possession of the knob (visible on the ground) and placing it in the appropriate slot. Turn it repeatedly by pressing the associated key (which will appear on the screen). So you are going to build a fan. So examine the area around the fan you just built, locating an interactive object. Pick it up, proceed to the left and throw the item towards the chest. Wait for the crate to drop down. Switch to using Bilbo, walk forward. At the upper level, break the objects to create a ladder.
At the top, hook onto the two nearby chains. Wait for the nearby structure to fall apart. Press and hold the construction key, thus creating a plate. So use your supplies to complete a short mini-game. The third of Gollum's puzzles will be completed.
You will now have to deal with Great Goblin. First, start targeting the little goblins, which otherwise will be a distraction for you. Once this is done, wait for Gandalf to appear near the arena. Press the special attack button. After the cutscene, you will find yourself in the arena. As soon as you notice the "big" boss taking possession of a large chest, switch to using Kili, using his bow to hit the nearby target. The Grand Goblin will therefore remain stunned.
Join your companion now to attack the Grand Goblin. When the Goblin takes possession of the huge chest and throws it at you, you will know that you have almost reached the end of the level. Take control of Gandalf by firing magic bullets towards the blue area. When the boss is stunned, hit him along with the rest of your team.
Seventh Level - The escape from the city of the Goblins
Save your game using the statue, then continue to the right. Get rid of the weaker goblins. Jump to the platform below, throw yourself forward repeatedly. Stop by the cart, switch to Dwalin and use his war hammer to move the cart forward. Jump on the cart, moving towards the drawbridge.
Stop near the area where you will see an additional group of Goblins. Take control of Gandalf, fire magic bullets at the wooden objects. Quickly run forward, then right, reaching an interactive mechanism. Use the knob to unlock a bridge and proceed forward. Get rid of the Goblins, reaching an area characterized by the presence of three objectives. It will now be necessary to solve a simple puzzle: you will have to make sure that the colors next to the objectives correspond to the colors of the ropes "hooked" to the wooden platforms.
Having done your homework following the plan, the three platforms will move upward and you can move forward. Move to the interactive area, then complete the key sequence that allows you to cause the drawbridge to descend.
Quickly get rid of the nearby Goblins. Locate the strings on the left. Cut them, project yourself to the ladder and "hook" it with one of your characters. Switch to the next one and hook onto the other side of the ladder. Bring it to the back, placing it vertically. Climb up to the balcony and use the ax to pulverize the plate.
Retrieve the flashlight on the right. Move to the rotating mechanism, setting it on fire. Use Kili to reach the platform. Jump on it. Use the bow on the targets to the right. Destroyed the barrier, continue to the next platform, getting rid of the goblins and continuing to the right. Now create a mechanism, then using the knob on the left to cause the bridge to rise.
Walk on the bridge. Right, get rid of the following group of Goblins. Create a "tower" of dwarves. Switch to Bombur, jumping on your allies. Unfortunately, after a short skit, the Goblins will take over your character. Press the keys on the screen to free yourself. Destroy the objects in the area, move towards the plate and complete the associated short mini-game.
Kill the goblins on the right. Switch to Gandalf, aiming at the blue shard visible on the ceiling (just above the goblins). Fire some magic bullets in the direction, gaining access to yet another plate. Approach and jump on it with one of the dwarves. Right, reaching the Grand Goblin again. First start running around the arena to avoid his blows, especially his club blows. When the Goblin throws himself on the ground, you will have to move quickly to one of the two side areas.
In doing so, the Goblin will be completely stunned. From now on, the battle against the Goblin will be identical to the previous one. When you have eliminated it, you will participate in an interactive skit that will see you fall on a platform. Try to get rid of the Goblins located on the platform to quickly finish the level.
Eighth Level - The Escape of the Orcs
Start the level by running quickly to the bottom of the screen, then moving quickly to the left. Once in the forest, first of all pay attention to the wolves in the area, who will repeatedly try to attack you: remember, as previously done, that you will simply have to try to send the wolves away rather than keep hitting them until they are completely KO'd.
Go on to observe the "group" of blocks in the area. Destroy the items on the left, then hit the build button. Switch to using Dori, hitting the nearby object with his club. You will then go to destroy a fragment of the wall, unlocking a passage. Come in. Once on the balcony, smash the next objects in the area. Right, use Dori's club again. Switch to using Dwalin, placing yourself on the platform and waiting for Dori to arrive. Grab onto Dori, and throw yourself to the platform on the right. Approach the block, moving it forward with Dwalin's war hammer.
Jump onto the block. Get rid of the wolves, then jump down. Retrieve the object, throw it towards the tree on the left. Approach the tree, then press the button that will appear on the screen to create an interactive platform.
Climb from the edge. Hold on to the ropes, moving progressively upwards. At the top, observe the cutscene. At the tree, take control of Kili and shoot at the nearest target. Cling to the rope, throwing yourself to the left. Use your bow and arrow again.
At one of the tree platforms, take control of Bifur. Position yourself near the area "highlighted" by the game. Take advantage of one of the alternate characters by climbing above Bifur. After a short cutscene, a tree will fall in the area.
Follow it to proceed then forward. Throw the flammable objects at the monsters in the area. Use the reticle to quickly hit the wolves that will appear at the foot of the tree.
Eighth Level - The Battle with Azog
First destroy all interactive objects nearby. Then approach the boss, pressing the action key to grab on to him. Then repeatedly press the keys that will appear on the screen, thus stunning the white wolf. The boss will now start walking forward.
Having dealt enough damage to Azog, he will shoot towards the area to the left. So begin to attack his "subordinates", dodging the boulders thrown by him towards you. After a short time, Azog will reposition himself on the white wolf.
After passing the cutscene, a second part of the level will come. You will now have to destroy the five orcs that "ride" the wolves. You must first cause one of the orcs to fall from the associated wolf. You can then ride the wolf yourself. This way, you can maximize both your movement speed and your effectiveness in hitting opponents. After you have eliminated the entire group of orcs, Azog will summon five more and you will have to finish them following the same procedure.
At the end of the battle, Azog will jump down and start attacking Bilbo. You will therefore have to press in sequence all the keys that appear on the screen, until the yellow circle is completely "full": once this is done, the hobbit will be safe and the level can be said to be completed.
Ninth Level - The Bear Attack
Quickly move left and right to proceed with the chase. You will then arrive at the hut. Save your game, then follow the bee to the right. Destroyed the hive, pulverize the flower pot (which will be the next hiding place of the bee).
Left, examine the hive near the portal. Switch to Dori, using his club to destroy him. Select Gandalf, then jumping to the dwarf. Thus, the bee will project to the right, remaining in possession of the key. Repeat the procedure previously done with Dori, destroying the root base.
Wait for the red carpet to appear, use Bombur and throw the carpet down. Having chosen another character, approach Bombur, give him the candy. Jump on top of Bombur. Project yourself towards the platform. Go down the ladder, proceed to the left and retrieve the key. Jump down, use the key.
Tenth Level - The Dark Forest
Destroy the forest, pulverizing the objects. Avoid the swamps. Destroy the bush on the right. Climb up to Bifur, then tell Dwalin to proceed upward. Throw to the platform forward, reaching the block on the left, hit it with Dwalin's war hammer to destroy it.
Jump to the left. Follow the path straight ahead. Use Ori, using the slingshot to hit the target. Jump up, using the slingshot on the next target, to the opposite side. Take control of Bilbo. Destroy the skeleton, complete the mini-game, recover the torch that will fall to the ground. Get closer to the flames. Jump across the platforms in front of you. Head to the barrier, use the flashlight to "ignite" it. Now, still keeping control of Bilbo, enter the inventory and select the ring and place it on it.
Approach the object on the ground, completing its construction. Switch to Dwalin to completely complete the work. Switch to Ori, selecting his slingshot again. Aim and shoot, so that the whole structure begins to rotate. Jump to the nearby platform. Switch to using Bilbo. Jump forward, still using the ring, to come to a circular platform. When you get to the spider cave, you need to save five of your allies. Start by using Bilbo. Save your game, put on the ring, quickly kill the spider on the right. Go to Dori on the right, wait for the arrival of the spider that "hangs" from the cobweb at the top. Use Dori's club. Repeatedly press the keys on the screen, clearing the way to the right.
Observe the objects on the ground, using them to create a new bait. Move in its direction. Once the barrier has pulverized, enter the hole on the right. Bilbo will now have to put the ring back on. You will have to eliminate a successful group of spiders. Switch to Dori, using his club to reach the next area. With that done, switch to Bilbo and jump to your ally near the chain. Jump to the next platform, activating the ring to take out the spider. Move straight along the hole.
At the final part of the mission, you will have to free three other allies. Save the game, observe the areas around you, destroy the objects. Begin your progress from the left side of the cave. Switch to using Bilbo, putting on the ring. Position yourself in the area, destroy the block on the left.
Switch to using Legolas, selecting the bow from the inventory. Use it to shoot an arrow into the "slot" created by Bilbo. Jump to the arrow inserted in the tree. Jump to the upper left ledge. Get rid of the creature, kill the spider. Using the elf, place yourself on the point marked in green, near the central part of the cave. Quickly jump up. Then throw yourself forward. You will still have to explore the right side of the cave. Destroy this area, then start building and project forward like Dori.
At the platform above, move to the left, then forward to the platform containing the last of the allies.
Eleventh Level - The Uncontrollable Barrels
Your goal in this area is to retrieve three additional barrels for the main characters. Left, take the golden valve and throw it towards the weight, so that it falls down and the first barrel arrives on the scene. Jump on it, rolling it towards the others.
Go back to the left, and locate the bar-shaped lever in the center of the cellar. Cling to it, causing another barrel to appear. Switch to using the character with bow and arrow, aiming for the next barrel. It will fall, and you can move it forward. Move to the area behind the barrels. Break the objects, switch to using Bilbo and have him put on the ring. Begin the construction. Remove the ring, setting one of the elements in the area on fire.
Once you have chosen one of the characters, swim forward and press the button indicated on the screen to jump out of the barrel. Walk forward again. Save the game. Move up the hill to the left. Get rid of the Goblins, even taking the bow. Go down the stairs, stopping by the river. Aim your bow at the target. After hitting it, the weight will drop down and eliminate all visible subjects immediately below. You can walk towards the dam.
Complete the minigame by pressing in sequence the keys that will be shown on the screen. When the party reaches the bay, ignore the enemies in the water. Instead, focus on Bombur, which came on stage from the beach. Destroy the items in the area. Left, walk along the bridge. Stop near the central area.
Twelfth Level - The Armory
First switch to using any of the dwarves available for this mission. Destroy the area next to the armory, paying attention to the window on the left. Once this is destroyed, press and hold the building button again. You can now change the positioning of the dwarves, using alternately "long" weapons, or a plate of green and blue. So create a tower by climbing it with Dwalin. Now jump to the armory.
Inside the armory you will need to recover a total of five weapon fragments. There is no pre-established order to be able to recover them, you can choose it freely. However, we recommend starting from the central area of the building. After destroying enough items, the option to "rebuild" a fragment will appear on the screen. You can switch to using Dwalin, moving the fire forward with your war hammer: move it first to the left, then to the back, then to the left again.
Interact with the mechanism on the left, causing the flames to appear. Pick up the flashlight. Right, moving along the darkened area. Use the torch on the fire. Destroy the weapons on the left. Pick up the sword, get rid of the guards. Examine the area to the right. Jump into the catapult. Switch to using another dwarf, placing yourself on the left. Press the attack button. Begin to the right. Switch to using Ori. Hit the target three times, causing the nearby grate to rise. Destroy the weapons by taking the shield.
So stay close to the central area of the balcony. Combine two trolls, moving across the plate. Hold down the "construction" key, creating a ladder. Switch to using Dori, using the club to destroy the treasure. Collect your weapons. Now examine the left side of the armory. Press and hold the construction key, thus creating an interactive chest. Use the club to get to the chest and activate the spear.
Walk forward, coming to the chain and projecting to the upper left area of the balcony. Retrieve the sword from the last weapon cabinet.
Video - Announcement Trailer
Twelfth Level - The Port
The objective of the mission is to locate the pig with medicine. You will therefore have to explore the three game areas nearby. Proceed first to the right, destroying all the elements in the area. Then move to the ship. Save your game, move along the bricks. Interact with the building, creating a ladder.
One of the two characters will have to cling to one of the two limits, while the other will have to cling to the other. So walk towards the back, waiting for the ladder to be placed upwards. So go up the ladder arriving at the balcony. Jump onto the rotating mechanism, throwing yourself counter-clockwise.
Jump down, to the right, stopping by the next pen. Switch to Fili, recovering his shovel from the inventory. Start digging the soil. Retrieve the knob, and combine it with the mechanism on the left. Right, jump beyond. Approach the basket containing the bricks. Throw items to the chest on the left, then right. Then press the buttons that appear on the screen to complete the operation.
You will therefore have to deal with eight "standard" type goblins. Having killed them, jump to the arena below. Attack the elves repeatedly, waiting for the camera to focus on you and the boss. So start pressing the buttons that will appear on the screen, following the rhythm of the song.
Bolg will try to leave. Start chasing the boss. Place yourself near the area where there are green and yellow leaves, repeatedly pressing the button associated with the jump, reaching the platform at the top. Jump to the balcony, walking carefully along the two ropes. Jump again repeatedly along the "bars" that come out of the wall. When you reach the roof, turn right, descending towards the rope below.
Continue to the roof, selecting the arch from the inventory. Shoot an arrow at the interactive area. Jump to the arrow "hooked" to the wall, continuing to chase Bolg. At the harbor, walk to the right and attack the goblins. When you defeat them, Bolg will appear. Keep attacking him until he escapes by boat.
Walk to the right and jump forward from platform to platform, floating along the stream. At the ship, jump to the mainmast on the left. Swap characters, clinging to the right side of the mast. You will then go to sail, taking control of the ship. Then move towards the small port on the right, getting rid of the four goblins and the Bolg.
Thirteenth Level - The mountain path
Moving towards the entrance to the tomb, destroy the game elements in the area, avoiding falling into the ravines. Right, jump along the partially destroyed stair fragments. Stop near the "wider" ravine, examining the ravine itself. Locate the two ropes: you will have to make sure that a specific character clings to each one. So place yourself near the interactive areas near the stairs, holding down the construction button. The right edge will rebuild, and you can jump forward.
Go up the stairs, arriving at the barrier. Use the staff of one of the wizards, aiming at the blue block. Fire a bullet towards the block, reaching the following play area. Use the bracket again. Launch a bullet towards the blue wall, revealing the presence of an interactive lever. Jump into the area.
Wait for your character to project towards the lever, revealing the presence of a blue target on the left. Switch to using the "alternate" wizard, destroying the target with your staff. Left, move towards the barrier, use the stirrup to hit the blue objects. Walk along the wooden area. At the platform, locate the raven and use Radagast's special ability. Wait for the Raven to fly away, unlocking a passage that can be used by wizards.
Now proceed to the right, stopping near the stairs and holding down the "build" button, creating a pole that allows you to "connect" to the stairs. Walk down the tube, then project yourself to the platform above, and walk to the next one. Use the bracket to unlock the tomb.
Fourteenth Level - The exterior of the fortress
To leave the bridge, you will have to use the staff of one of the wizards, combining it with the blue barrier. Then destroy the main square, recreating a tower. Stand in front of it, firing magic bullets.
A stream of light will head towards the closest target, unblocking the passage to the stairs. You will therefore have to activate three new towers. First, examine the area on the left. Use the staff on one of the wizards. Wait for the cage to break, approach it. Jump to the roof of the cage, arriving at the balcony on the left. Interact with the objects, creating a new tower. Shoot the magic bullets towards the tower, making sure that the flow of energy reaches the target.
Jump down, then right, creating a ladder to the balcony on the right. Switch to using Radagast, examining the central area. Treat the two birds. Fly forward, then drop down, approaching the building to build the last tower. You can then proceed forward. Destroy the chest, retrieving an ax. Interact with the rotating mechanism on the left, using it to propel yourself upward.
Go up the stairs to the left. Destroy the cage, using the skeleton. Remove the knob. Use it on the nearby mechanism, causing the grates to open, thus managing to get out of the area.
Jump down, exploring the right side of the room. Smash the nearby plate with the ax. Jump to the shelf, then to the balcony on the right, reaching the edge. Left, project yourself towards yet another knob. Interact with it.
Fourteenth Level - The Battle with Azog
Quickly run to Azog, allowing him to "hang on" to the character. After the wizard is "taken" by the boss, switch to the alternative character and attack him repeatedly using the combination of keys that will appear on the screen. After the cutscene, you will start fighting Sauron.
Fourteenth Level - The Battle with Sauron
This is the most complex battle in the game and you will have to pay particular attention because some of Sauron's moves are able to reset your HP. We particularly recommend dodging the blue and violet bullets, trying to stay on the move and avoiding any contact with the orcs.
You will have to wait for the moment in which Sauron will "charge" and then groped to shoot a real "cluster" of blue bullets. You will have to stop in a specific area and press the keys that will appear on the screen, first creating a force field, and then pressing the action key repeatedly.
Interactive bricks will appear along the arena. Run towards them and quickly press the keys on the screen to build a tower. You will now have to "shoot" a large amount of magic bullets towards the tower, so that it goes to "channel" them towards Sauron, inflicting a large amount of damage to the enemy.
During the next phase of the battle, it will be necessary to repeat the entire procedure outlined above; when a second ray has also hit Sauron, the battle will be over.
Fourteenth Level - The Climb
First break all the objects near the starting area. Then move on to using Bilbo. Activate the inventory by putting the ring on it. Get closer to the bricks, create an interactive chest. Switch to Dori, use his club to destroy the chest and get a turret that will allow you to proceed upwards.
Switch to one of the dwarves with a "long" weapon. Climb up to the platforms above. Place yourself in the area indicated by the game, by pressing the associated key. Take advantage of another character and jump on his partner to create a tower.
Select one of the others, climb the dwarf that creates the tower and reach the platforms above. Pulverize the bush on the right, creating a ladder that will allow your allies to proceed.
Switch to using Dwalin, exploring the area near the ladder. Move the block forward using Dwalin's war hammer. Right, use a combination of the two characters with "long" swords to create a tower. Climb up the tower with another character, arriving at the platform above. Go up, enter the hole, continue on the platform. Use the ax, breaking the plate. Go up again, then continue along the stairs to the left. Observe the cutscene. Use Dori's club repeatedly, then switch to another character, jump to Dori and try to "add" some weight to the nearby mechanism, then move forward along the hole.
Select Ori's slingshot, starting to hit targets in the area. You will need to make sure that the colors (just above the objectives) match the colors of the mechanisms.
Then jump down, using the bridge that leads to the left. At the next plate, use the ax to break it. Switch to Dwalin, use the war hammer to move the block to the right. Jump on the clock, continuing to climb and then using the ladder. Save, use the spinning mechanism to propel yourself up.
Switch to the character placed on the platform, then right. Locate the treasure in the lower left, interact with it to cause the platform in the center to rise. Always straight, stopping close to yet another platform. Switch to the character above. Jump to the right. Approach the mechanism, interacting with the knob.
Sixteenth level - The cave
Destroy all objects in the area, not worrying too much about Smaug initially. Once the area on the right is pulverized, create a playlist using the appropriate button. Keep dodging the lit areas, so as not to be spotted. When Smaug has turned, proceed to the right. When you reach the lower level, move on to use Balin: with his ax he can destroy the plate on the right. Pick up the club and it will fall to the ground. Use it to get to the golden statue. Repeatedly press the onscreen button, then right, waiting for Bilbo and Balin to get to the lower level.
Right, pulverize yet another dish using the ax. Create the ramp to the right using the ax. Use it immediately, smashing the objects in the new game area and creating a chest. So use the club to destroy the chest. Go down to the lower level, select the ax again, breaking the plate again. Destroy the weapons, take the bow and hit the nearby target.
Wait again for Smaug to arrive, move to the right. Dodge the area being examined by Smaug. Quickly run to the right, hiding behind the wall. As soon as you have the green light, project yourself towards the Arkenstone: interacting with it, the final fight will start.
Sixteenth Level - Defeat Smaug
First destroy the objects in the area, using the statue to save the game. Switch to using Dwalin, walk right. Use the war hammer to move the block forward. Press and hold the building key.
Switch to using Dori, proceeding to the left. When you get to the box, hit it with the iron club. Press the keys indicated on the screen, repeatedly, to complete the construction of the table.
After the cutscene, destroy the objects in the area, switching to use Nori. Place it in the illuminated area, then move on to use Bilbo. Climb on the dwarf, jumping to the balcony. Destroy the item on the left. Go down, create a new ladder, then go up to the upper level.
Along the way, you will always have to stop by the flames, waiting until Smaug goes to stop the fire. Then use Bilbo to activate the ring. Switch to Nori, climb onto the dwarf's shoulders. Project yourself to the edge. Right, stop on the mechanism, break the objects in the area. Once you've made the target visible, switch to using Ori's slingshot. You will have to make sure that above the left and right objective there is a red circle, while above the central objective there must be a blue circle. Interact with the table on the right. Yet another cutscene, so wait for the monster's head to be in your "line" of fire. Shoot the dragon five times.
After yet another cutscene, break the objects in the area, examine the central area and hold down the construction button. A target will be created: switch to Ori and use his slingshot to hit the target three times. Climb the ladder to get to the building above.
Using Dori again, move to the left balcony area. Use the iron club towards the chest. Press the keys on the screen repeatedly, a bridge will appear. Walk to the left, ordering Dori to defend him.
Climb the ladder, locating the knob, which must be placed in the slot of the nearby mechanism. So jump to the load (now lowered) and continue to the balcony on the right. Switch to using Ori and place it in the area that will be highlighted on the screen. Repeat the procedure, this time using Nori. Then switch to Bilbo, climb onto Nori's back and jump to the balcony. Destroy the chain by going up to the balcony. Switch back to Nori, using the ax on the plate to the left. So using Nori again, reach the last of the allies to activate the final cutscene!
Video Solution - Playlist
Click here for the playlist!
Video Solution - First level
Video Solution - First Level - Second Part
 LEGO The Hobbit ps4
- ps3
- x360
- 3ds
- WiiU
- pc
- Xone
- ps4
- Playstation Vita
Exit date: April 11 2014


