


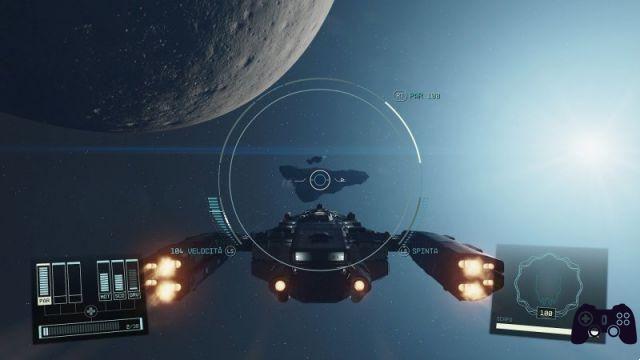
Starfield welcomes, alongside its mammoth RPG offering, a series of systems and mechanics designed to make staying in colonized systems pleasant for dozens of different gamers. There are those who get lost for hours walking along the procedural surfaces of the planets, there are those who only have eyes for the missions and factions, there are those who can't wait to find the perfect place to build a planetary outpost . Everyone, on the other hand, must necessarily dedicate themselves to a common problem: obtaining a spaceship powerful and solid enough to carry them safely to the edge of the cosmos.
One of the most successful elements of the box is the ship construction system, which provides hundreds of unique pieces ready to modify the aesthetics, statistics and even the interiors of the house among the stars. Even if the integration of the phases on board the ships proved to be less effective than expected, there is enough material to remain locked up for hours inside the spaceports: on this page we have created a Complete guide to ship building, explaining in detail how it works and including the projects to create a variant with all the statistics at their maximum.
Here, however, you can find many other suggestions on this vast space epic.
Before we start

Most places with a spaceport - that is, cities, space stations and named landing zones - host a Naval Services Technician to talk to near the docking platform. In some places, such as Akila City, the technician is located in a small dedicated cubicle. Each of these NPCs can repair the ship in exchange for 1000 credits, but more importantly they offer a selection of ships for sale as well as access to Builder Mode. By building an outpost on a planetary surface, it is possible to set up a special landing platform that hosts a private Naval Services Technician, ready to put at your disposal most of the pieces you have discovered during your travels.
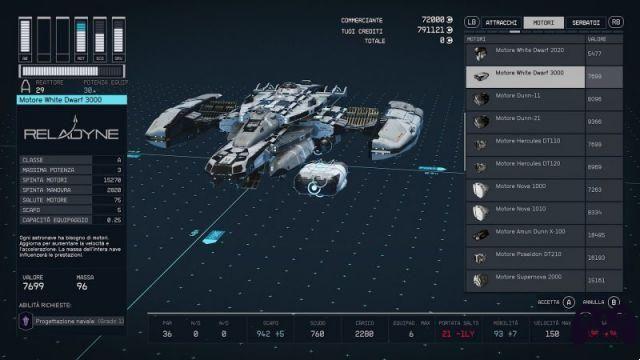
As soon as you enter the build menu, there's a big difference to take into account. By selecting "I want to see and edit my ships" you will be able to access the Manufacturer, but also to the Update mode: by pressing A on the desired ship instead of In essence it is a fast and almost "arcade" method to improve everything that can be improved without getting too lost in the construction mode. To manually add any kind of piece, you must instead access Builder Mode.
Before diving into the mechanics, it is necessary to answer some of the questions you asked us most frequently during the live broadcasts and in the Telegram group. First of all, it is absolutely not possible to create a ship from scratch, and you must always take a vehicle in your garage as a starting point; the simplest solution is to open the ship you are least interested in and remove all the pieces one by one until you obtain a blank canvas, which will also allow you to pocket some extra credit generated by the sale of the components.
For the rest, the Manufacturer It does not impose major limits: the ship can be completely asymmetrical, totally unbalanced, it can be punctured in the center in such a way as to miss the shots of your attackers, in short, you can also create a flying cube of 45x45 meters. Of course, there are rules to respect, but we will analyze them later talking specifically about the modules; the only thing to take into account, a serious shortcoming in our opinion, is the fact that the pieces cannot be rotated at will but only mirrored horizontally, significantly limiting the options regarding aesthetics. Wings and ailerons, for example, can be "reflexed" to become perfectly symmetrical, but they cannot be rotated and therefore attached to the front or rear of the ship.
Finally, if you want to get some free ships As you complete missions, there are two specific activities you'll need to watch out for: the Mantis Haven mission rewards you with a great warship to start with, while the Freestar Ranger faction mission ends with the Star Eagle, one of the best ships in Absolute class A.
Fundamental rules of ship creation
That said, there are a number of rules that must absolutely be respected to be able to pilot a created ship. Each Starfield ship must have: a cockpit, a reactor, an engine, a grav jump system, a fuel tank, a docking system, a complete landing system and a habitation module. All other pieces are completely optional, including the shield and weapons, while the absence of even one of the aforementioned pieces will not allow you to save the project.
Another thing to keep in mind while is that the cockpit must always and in any case guarantee access to both the docking module and the landing module, so that you can physically enter and exit the ship, and there is no way to achieve this without adding at least one habitation module. In this regard, by joining two "habs" vertically a staircase is created inside the ship, while by placing them horizontally a door is created. The attack system is very simple to understand, and it is enough to keep in mind that some points of contact are reserved for weapons only, others for hab modules while still others for "structural" modifications, i.e. those usually oriented towards aesthetics.
In this regard it is fundamental become familiar with "Flight Control". In addition to allowing you to rename the ship, this feature represents a kind of "check up" of your vehicle, a troubleshooting system that alerts you to what is wrong and what may not work on your vehicle. In the message sheet we talk about the lack of fundamental components, the lack of connection between modules such as the cockpit and the docking hatch, or perhaps even the non-exploitation of certain weapons fire groups. One of the messages you will encounter most often, on the other hand, concerns errors related to the ship's class, and we will now analyze it in detail.
Ship classes: A, B and C
If you are used to other sci-fi video games, you are very likely to make the mistake of thinking that a Class A module is of a "higher" rank than a Class C one. Nothing could be more wrong: in Starfield, each ship is assigned a Class determined by its reactor - i.e. A, B or C. Class A reactors produce a good amount of power, but are very light and add no mass to the hull (i.e. strength and weight) of the ship. Class C ships typically produce more power, but are much heavier and add a lot of mass to the ship's hull. Ultimately, if you want to build a larger and heavier ship you have to take the C-Class as a model, while the A-Class represents the ideal when it comes to more agile fighters and spaceships.
La Class also indicates the level of the Piloting skill necessary to be able to pilot the ship: to pilot a Class B ship, you will have to bring the Piloting skill up to rank 3, while Class C ships can only be used after reaching rank 4 of the same skill. Most ship components are associated with a specific class, and your reactor determines the parts you can install: Class A reactors can only use Class A components; Class B reactors can use Class A and B components; Class C reactors can use all kinds of components. Ultimately, when Flight Control warns you that "Exceed Reactor Class" modules, it means that you have installed modules of a higher class than the class of the reactor installed. You can check the Class of the module before installing it in the handy menu on the left.
Ship statistics in detail
Every single piece that you decide to install on your ship, including apparently only aesthetic ones, they modify a series of statistics which are not visible at first glance. These are: mass, cargo, mobility, hull, gravitational pull and jump distance. The hull is practically the integrity of the ship: once the shields are depleted, the hull statistic influences the durability of your ship under enemy hits; the cargo is obviously the size of the hold, and is not only influenced by the warehouses, but also by living modules such as cockpits, warehouses and living areas; the gravitational thrust is a ratio between the power of the engines and the mass of the ship: if it does not exceed a certain threshold, the ship will not even be able to take off.
La mass is already more important: the weight of the ship affects many other characteristics, namely the maximum speed, the jumping distance, and also the mobility, which will reduce in a directly proportional manner as the mass increases. The impact of the mass can become such that it forces you to improve an expensive piece such as the reactor, because a greater mass also requires greater energy to operate modules such as engines, and this is one of the main problems encountered when creating a C-class ship.
Don't underestimate it jumping distance: if in the initial stages of the adventure you will have no problem moving only with the Frontier, there are systems such as Charybdis, Serpente and others that require ships capable of jumping beyond 24 light years; you can see this feature in the Ship Builder, indicated with the unit of measurement LY. Keep in mind that Constellation's main mission itself also requires the use of a ship capable of making particularly distant jumps, and must also be equipped with sufficiently large tanks.
Last but not least, there is obviously energy: Since the reactor is the heart of your ship, it is essential that it emits enough energy to power all the modules you have installed. A Class A reactor will hardly be able to power 4 weapons platforms hosting E Rays for example, so you must always keep an eye on the total amount of energy in relation to the demand for each individual piece. Simply put, forget about driving a ship if the energy required by modules such as the shield, weapons or engines exceeds the maximum capacity of your reactor.
All the modules in detail and where to find them
The first thing to know when it comes to forms is that you can't buy them all at first: in order to access the complete catalogue, it is essential upgrade your Naval Engineering skill present in the tree dedicated to Technology. Usually the best Class B or C pieces, along with the most effective weapons, require this level of expertise, so if you intend to put a lot of time into building we recommend getting them as soon as possible.
The modules can be found for sale at any Naval Technician in each destination equipped with a landing platform. This means that you will not only find them in New Atlantis, Akila City, Neon and Cydonia, but also in New Home on Titan, the Red Mile on Porrima III, the Stroud Eklund space station, practically any place you can go, and each of them will offer a unique inventory. However, most parts are always available in Outposts, if you have built the landing platform.
Let's see a list of places where it is possible to find unique pieces for your ships:
- Moduli Nova Galactic - Visit the Moon Titan orbiting Saturn in the Solar System to reach New Home.
- Moduli Stroud Eklund - Travel to the Stroud-Eklund Shipyard which orbits the planet Dalvik in the Narion Star System.
- Moduli Hopetech - Visit the planet Polvo in the Valo system, which is located near the Narion system.
- Moduli Deimos - Go to the Deimos Star Shipyard that orbits Deimos in the Solar System to obtain military parts.
- Moduli Taiyo - These modules can be purchased in the city of Neon in the Volii system. Once you arrive in the city, reach Taiyo Astroneering and interact with Veronica Young.
- Pirate Modules - You can purchase modules that bypass scanners at the Key station in the Kryx system. To be able to dock, however, you will need to have joined the ranks of the Red Fleet through the appropriate faction mission.
- Vanguard Military Modules - Completing the UC Vanguard faction will unlock access to a variety of special modules.
- Top of the range modules - The Red Mile spaceport, a bar located on Porrima III in the Porrima system, offers some really high-end pieces if you want to build a ship with maxed out stats.
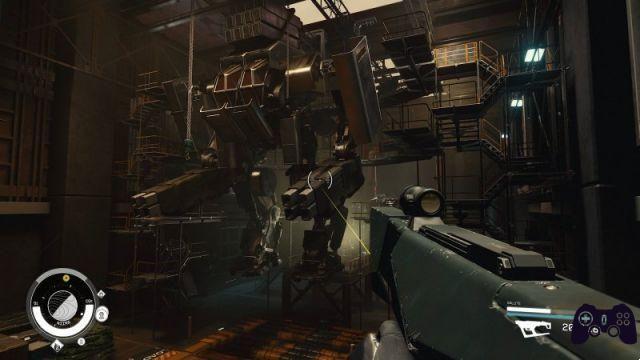
Before analyzing all the types of ship modules in detail, it is worth giving you a couple of tips on a fundamental element of the construction, namely thearsenal of weapons. Starfield initially recommends using different types of weapons: lasers are effective against shields, ballistic weapons against hulls, while missiles allow you to inflict significant damage. Our suggestion is to move away from this pattern as soon as possible: a ship armed with 4 E Rays it is much stronger than a ship with 2 Lasers, 1 Cannon and 1 Turret. Using a single weapon slot it is much easier to fire at enemy ships, while at the same time inflicting very heavy damage to both hulls and shields, without having to focus too much on energy and resource management. This is the motto you must follow: there is nothing that a good dose of E Rays cannot break down.
We see the modules in detail of Starfield ships. At this link you can find a photo that includes all the structural elements (i.e. cosmetics) divided by manufacturer.
- Reactor: the reactor is, as mentioned several times, the heart of the ship, which determines its Class (A, B or C) and therefore not only the maximum energy available which must not exceed that required by the individual modules, but also the Class of all the other modules you can equip.
- Landing sections: The landing section must necessarily be positioned in the lower part of the ship and must touch the ground level, otherwise you will not be able to complete the ship.
- Cockpit: It goes without saying that the interior is indispensable. However, some of them come with additional features: those with multiple seats can accommodate up to 2 additional crew members, while others can increase the load of your ship.
- Docking: The dock must be located on the top or side of the ship, and must be connected to the cockpit via a hab. If the docking and landing section are not reachable from the cockpit, your ship cannot be completed.
- Motor: The engine affects the top speed and mobility of your ship, the effects of multiple engines add up, but you have to keep two things in mind: engines weigh a lot, so they could even reduce your mobility, also you cannot outrun any way the maximum speed of 150 without upgrading the skill rank.
- Tanks: Each ship must have at least one Helium 3 tank. Fuel capacity affects your ability to make gravitational jumps in light of the ship's mass: if you don't have enough fuel, you won't be able to reach certain systems that are further away than normal. This mechanic seems to suggest that sooner or later we will see a Survival mode that also involves fuel consumption.
- Steve: Holds are... holds. Use them to expand your ship's inventory and purchase shielded variants to evade security checks.
- carts: Landing gear, or landing trains, are supports that allow your ship to touch the ground. They must always be positioned so that they align perfectly with the chosen landing section, and they must be large enough to support the weight of the ship. Trolleys represent the only case in which it is important to take into account the balance and weight of your ship, and they are one of the fundamental pieces without which you will not be able to finish the construction.
- Gravimotors: While on the one hand the gravimotor influences the distance of the gravitational jumps - which you can check by examining the "LY Jump Range" statistic - it is also and above all the mass that influences this distance. This means that a light ship can make jumps of up to 30 LY with a less powerful engine, while a heavier one will have a much harder time. Jump distance is a key feature of the ship: if your ship jumps below 25 LY, you will not be able to reach most of the systems located in the Outer Rim, some of which host unique missions, such as the splendid mission in the system Charybdis.
- Shields: There is little to say, shields influence the power of shields.
- Weapons: Weapons are warfare modules that you can install attached to any module that has a circular connection. The choice of arsenal is entirely yours, but our advice is to try E Rays, which prove extremely effective in the most difficult situations, such as hunting legendary ships. Remember to always check the Class of the weapon, which must not exceed that of the reactor, and above all the energy consumed, since it is very easy to exceed the total limit of the reactor.
- Structural: These are purely aesthetic modules that you can use as you prefer to embellish your ship, but if used intelligently they allow you to position weapons in strategic points. Wings, for example, often offer the possibility of mounting lateral armament which could free up some space in the most important positions.
- bedrooms: We'll talk about habs in the next section .
The habs or housing modules
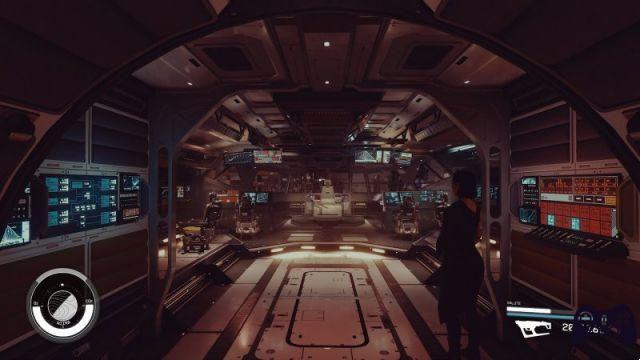
The habs, or living modules, are first of all the sections of your ship where the crew moves, and more importantly they represent the "ties" that hold the structure together, that is, the corridors that you will have to cross to reach the three fundamental elements: the cockpit, the docking and the landing section. To connect these three elements it is essential that the ship has at least one hab installed, and the type of hab you choose could profoundly change the characteristics of the ship's interior.
The Passage is the main module, a 1x1 square with four links, perfect for filling any kind of hole. The same goes for the Warehouse, which has the same dimensions and houses deposits. The berths, on the other hand, tend to occupy 2x1 or 3x1 spaces and increase the passenger slots and crew stations; you can check them at any time passenger slots and crew stations by analyzing the menu on the left in Builder Mode. If your goal is to increase your crew, look for the Control Center, a module that allows you to add up to 4 slots to hire new members.
There are, then, a whole series of specific modules which almost unequivocally suggest what you will find inside: the infirmary, for example, houses a pharmaceutical bench and a research laboratory, while the workshop offers the industrial workbench, one for space suits and one for modifying the weapons. Basically it's up to you to choose how to organize your ship: if you want to always have the workbenches you prefer at hand you should certainly equip yourself with dedicated hab modules.
There are only two things that we invite you to always take into consideration: first of all that the way in which you position the habs, i.e. the navigable sections, they affect the architecture of your ship. If you put ten habs on top of each other, you will have to climb ten flights of stairs each time, so it is a good idea to plan the structure intelligently, to avoid getting lost inside your home. Also, if you want to bring several crew members with you, always keep an eye on the quantity of stations offered from each piece, because you could find yourself accidentally assembling housing modules designed for passengers - i.e. customers to be moved towards a specific decision - rather than for your companions on the raid.
How to create a ship with all stats maxed
There are several methods to make ships with maximized stats, and in any case it is not such an important objective to achieve: everyone is free to give complete vent to their imagination and create the vehicle of their dreams, perhaps imitating the projects taken from the science fiction works they love most. However, in this section, we will analyze the simplest and fastest method to build a ship equipped with everything you could want, if not for one small detail: to obtain these results, the presence of a bed was sacrificed.
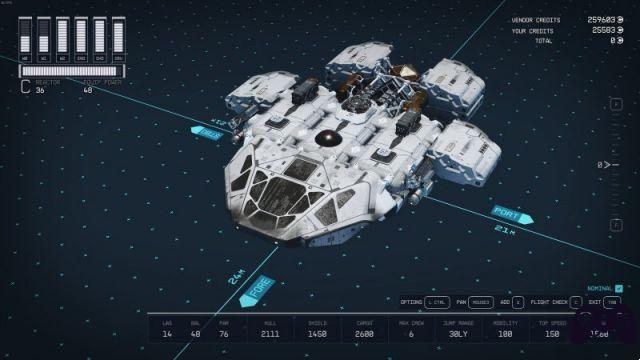
It should be noted that this specific ship requires a character equipped with Rank 4 Piloting and Rank 4 Naval Engineering skills. The ship has a turbo speed of 700 and doesn't sacrifice any of the other core features, maxing them all out in the version optimized by Redditor Echolog. The statistics in detail are: 2111 Hull, 1450 Shields, 2600 Cargo, 6 Crew, 30LY Jump Distance, 100 Mobility, 150 Speed, 700 Boost Speed, 36 Energy. If you have some leeway in aesthetics, the total mass could instead influence performance.
We see all the essential components and where to find them, considering that incredibly you only need to visit two spaceports to get them all:
New house (Titan, Solar System)
- Abitacolo: Cabot C4 Bridge
- Carrelli: 2x NG-20 Landing Gear - Fore
- (Many pieces listed below can be purchased here)
Red Mile (Porrima III, Porrima)
- Engines: Slayton Aerospace - 6x SA-4330
- Reactor: Xiang - Punch 8A (Class C, 36 Energy)
- Gravity Engine: Deep Core - Apollo GV200 (Class C, 45 Thrust)
- (You can also buy scanner jammers here if you are a smuggler)
Other pieces
- Shields: UC Vanguard Bulwark (Reward for the UC Vanguard faction quest)
- Hab: 3x Nova Galactic 2x1 (Nova)
- Landing Section: NG-6 (Nova)
- Stiva: 2x Galleon S202 (Protectorate Systems)
- Attracco: Connect-Pro (Stroud Eklund)
- Serbatoi: 2x H20 Atlas He3 (Dogstar)
- Stiva Schermata: 2x 200CM Ballast (Sextant)


