


Please note:
The solution is based on the American version of the game, so it is possible to find some differences in the Spanish version.
Premise
Episode Two gives a brief summary of what happened in Episode One, showing spoilers, of course. At the start of the game, George is visiting an art gallery as an insurer for a number of works, including the painting "La Maledicció". A thief breaks in, steals "La Maledicció" and kills the gallery owner. George is tasked with getting the painting from his company, but also Inspector Langham from Interpol. George enlisted the help of his journalist friend, Nico. They soon learn that the painting is owned by a certain Mr. Medovsky, the same man who owns the security company that installed the gallery's faulty security system. Nico also meets a man named Marques, who claims to be the real owner of the painting, and who can prove it through an old family photograph. George and Nico track down the painting's restorer, Hobbs, and learn that he has found a secret level in "La Maledicció" depicting an Ouroboros. A priest, Father Simeone, who was present at the moment of the murder of the owner of the gallery warns that "La Maledicció" is the work of the devil; this priest too is murdered by a stranger. George and Nico finally take the painting to Hobbs' studio; he has both the original and a fake that he created to hide the original. They find Hobbs dead, and soon after discovering the real "La Maledicció" they are trapped in the studio by a fire. George and Nico escape through a skylight with the painting and see Inspector Langham walking away from the fire. They realize that he is looking for the painting, but not to catch the killer, he is the killer. The painting is important because it is essentially a map of an ancient artifact, the Tabula Veritatis, which is a powerful religious element that is said to be capable of evoking Lucifer. George and Nico are determined to find the Tabula before Langham or anyone else with bad intentions.
PART 1
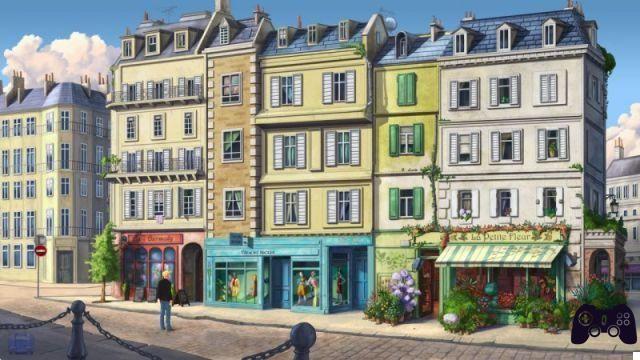
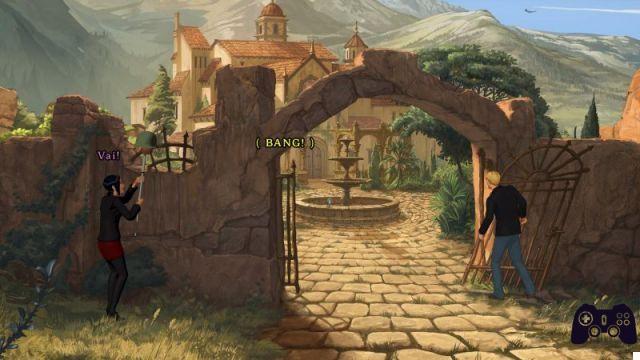
After escaping from Hobbs' studio while it is on fire, George and Nico arrive at the Castell des Sants in Spain, where the Tabula Veritatis is supposed to be. Even though it looks deserted, once they reach the door, someone fires a shot at them. Someone joined them at the Castell, but they must necessarily enter. George is about to sneak inside while Nico distracts the gunman. You'll take control of Nico first. Grab the helmet next to Nico in the grass. In your inventory, combine the helmet with the cloth to obtain a helmeted cloth. Where Nico was standing there is a crumbled part of the wall with a metal grate. Use the helmet in this section of the wall. Nico distracts the sniper and George runs into the garden. Now you will control George who is face to face with an old "friend", a goat. You will have to distract the sniper again. Try to get an apple from the tree next to it. The goat will hit George and throw him back. Interact with the tree again. George prepares for the goat attack by turning around and saying "Oh, heck!" Quickly move the cursor under George and click when he says "Dodge". George will dodge the goat that will go against the apple tree. Take the apples off the ground. If you want to clean up your inventory a bit, you can give the goat the flowers and he'll eat them. If you interact with her a couple of times, she'll eat Hobbs' sketch and Nico's photograph. In your inventory, select apples and use them on the pile of bottles next to the car. The goat will approach to eat the apple. Quickly click on the tire. George will move closer to the apple pile. Use the apples on the apple pile. The goat can now reach the pile and will be distracted for a while. George will throw the rest of his apples on the pile. Take the side mirror of the car. In your inventory, select the mirror and use it against the sun in the sky (it is located in the upper central part of the screen). George will use the mirror to momentarily blind the sniper and create a passage to the house. Talk to the old man. Select "friend", then "Marques". A young woman will appear who will provide George with a gun.
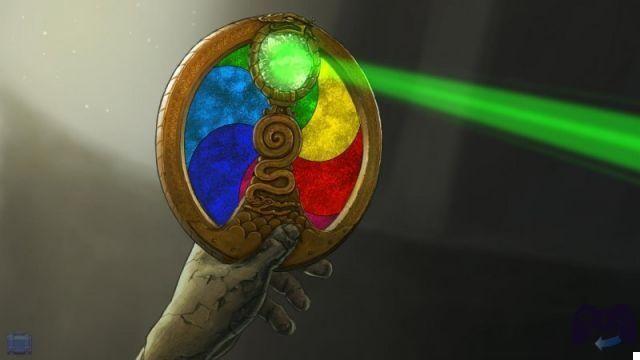
Select "Eva", then "Marques". He will ask you for proof that you know Marques, his father. Show her "The Curse", she will take you to Marques. He places the painting over the fireplace and says that if it is in the right place, the path of the Tabula will be revealed. However, the room has changed since the last time the painting was here and he enlisted George's help in figuring out the secret. In your inventory, look at the photograph of the Marques family (right click on it). You will go into the detail of the photo. Examine the statues on the mantel. Get out of photography. Examine the fireplace, you will go into detail. Examine the plinths and exit the photograph. Talk to Marques, select "painting" twice, then "Castell des Sants", twice "Tabula Veritatis", now select "Medallion", "Hobbs sketch" and exit the conversation. Go left and grab the green statue from the ground, then go through the door and grab the broken green statue from the wall. Return to the main room, then exit through the front door to the garden. Eva and Nico are having a conversation outside. Apparently Eva and her father don't really get along; she doesn't believe in Gnosticism. Nico goes inside to explore while Eva stands guard. Get the blue statue from the ground and the broken blue statue from the fountain. Examine the sundial, you will learn that the main doors of the house face north. Go back inside the house and talk to Nico. He will tell you that the fireplace is the same one in the photograph of the Marques family. In the inventory, examine the sheets of Simeone (right click on them), you will enter into the detail of the sentences. The second part is that of our interest. He says that "dressed in blue", the Perfecti looks towards the rising sun (east). And "dressed in green", the Credentes look towards the setting sun (west). Use the photograph of the Marques family on the mantel to go into detail again. We know from the sundial that the front door of this room faces north. So if a statue faces right on the mantelpiece, it faces north. Place the broken green statue on the left plinth. Interact with the base 6 times to turn it west (only turn counterclockwise). Put the blue statue on the right base. Interact with this base 6 times to turn it east. Once you have the statues in the right position, a secret entrance will open in the fireplace and George and Marques will enter. Nico is left outside and a piece of paper with the word "WOLFRAM" will fly out of the fireplace. Ramon says he curses that name, Nico speaks to Ramon. Select "Wolfram", then "Xavier", twice "Gehnen" and "Castell dels Sants". Now select "Library". Ramon will say that he lost the key in the bookcase, he hid it but after drinking he forgot where he hid it. You will now take control of Nico, who must find the key. If you talk to Ramon again and ask him about the library, he will tell you that he woke up in the old car. Exit to the garden, and go to the old car (where the goat is). Interact with the goat, which Nico seems to like, then interact with the old car. Nico will open it and you will see a detail of the interior. Interact with the seat, take the book from under it. It is Ramon's diary, where he writes that he has hidden the key and loves a woman with blue eyes. After reading, the goat will steal the diary. Exit the detail and return to the fountain. Examine the wind chimes for details, then examine the tin can, take the key inside. This is the key to the Castell library. Go back and exit through the door that leads to the outer area. Open your inventory and select the Castell library key to use on the door here. Examine the trunk in the corner for more detail and grab the map. Nico looks at it and finds a lot of scribbles and scribbles. You will now go to George and Marques in the chapel. Marques tells George the story of what the fresco in the chapel depicts: his people, the Cathars fleeing on a crusade meant to wipe them out. Only a few survived, but they kept the secret of the Tabula Veritatis with them. George thinks there must be a reason the painting brought them to this chapel, they must find its secret. Talk to Marques and select "fresh". Marques sees that each of the Cathars in the painting are carrying Tabulas, it must have been to hide the destination of the real one. Feel free to ask anything else, then finish the conversation. Examine one of the two statues on either side of the fresco. Marques explains that they are Jehovah and Lucifer and that the Gnostics worship them together in balance. Examine the glass lens held by Jehovah, George notes that it can be rotated. Examine the glass lens again to go into detail. Interact with the leather cover, George will remove it and a light will shine through the fresco. Get out of the detail and do the same thing with the Lucifer lens: examine the glass lens, then examine it again to get into the detail. Remove the leather cover to allow the light to pass and exit the detail. Examine the fresco, you can go into detail and George will read the Latin inscriptions. It will be possible to examine the different parts of the fresco individually to learn a little more about it. The light coming from the lenses is creating yellow spots all over the fresco. Get out of the detail. If you want, talk to Marques again, even if it's not necessary. There will be a lot more dialogue options now. You will need to get the right light color on the fresco. If you remember Simeon's papers, they said "pure light, white light will win". In equal measure, green, blue and red will create white. Review the lenses and operate them to rotate the disc. Make Jehovah's lens green and Lucifer's blue. Get out of the detail. In the inventory, select the matches and use them on the candlestick. George will light the candle. Now in your inventory select the medallion and use it on the candlestick. The light will shine on the fresco and will visualize the true path of the Tabula. It is the city in the southern part of the fresco, with an armed army shield. Make a mental note of this shield: blue with white birds and red and white stripes. George and Marques leave the chapel, Nico calls George to the library and asks him to bring the painting. Take it by detaching it from the mantel. You will have "La Maledicció" again. To the left of the door leading to the library, examine the shield that matches the one in the fresco. It is located in the upper left corner of the room, it reads "Berga". Go out the door to the library, Marques will send Eva with George and the two of you will enter the library. Nico shows them Gehnen's map; she believes he is comparing the painting to the map, believing it leads to the Tabula. Examine the map for details. You will now have to find the four positions that correspond to the spheres in "La Maledicció". You don't know all the locations yet. Exit the detail, examine the log in the corner and lift the hat to move it. Pick up the shirt to move it, there is a note under it. Collect the note to receive the telegram. In your inventory, examine the telegram (right click on it). To decrypt the telegram, click on a letter in the note and then click on the row of keys to replace a letter. All letters in the telegram will be automatically replaced with the new letter.
You will not know the figure, but you will be able to guess what it is. Change the first three words to read "The Tabula Veritatis". Continue replacing the letters that make sense until you have filled in all the fields. The telegram says: "The Tabula Veritatis was smuggled out of Montesgur in Catalonia by a group of Cathar survivors - STOP - They confirmed this to me from confessions extracted from the Dominican inquisitor Eymerich of Girona - STOP - Wolfram - STOP -" Get out of the detail of the trunk . Examine the map again, you will now know the four locations.
1) You will know that Berga is one of the locations thanks to the shield. Take a pin by clicking on the pin box and click on Berga to place it. 2) Monsegur (north of Berga) was a key location for the fresco. Put a pin on Monsegur. 3) The telegram says that Girona (far east side of the map) was important; put a pin on Girona. 4) The fourth position is Sant Ramon. Ramon was named after San Ramon, who had a lock on his mouth, the same as the one depicted on "La Maledicció".
Once you have placed all four pins, the line created will point to Montserrat, a monastery in the mountains. Just then, Langham, who is really Gehnen, grandson of the original Gehnen, appears and kidnaps Marques. He intends to find the tabula and summon Lucifer. He will lock the library doors and leave George, Nico and Eva trapped inside. Examine the bullet hole in the wall, George will notice that there is light. Interact with the bullet hole, George will activate the false wall and the three can escape outside. Now go to Montserrat.
PART 2
George and Nico have discovered the secret of "La Maledicció" and who was behind all the murders: Langham, aka Gehnen. They must now hurry to the location of the Tabula Veritatis, Montserrat, in order to find the tabula before Gehnen and save Marques.
Montserrat is a monastery on a mountain, but there's a thriving tourist destination just below it. When you arrive, there are strangely no tourists, just a few thugs with guns. If you talk to the guards, they will give you an apology not to let you reach the monastery. You can try to use Nico's charm, but with no luck. So for now, you won't be able to get past the guards. Go down the stairs southeast of the guards, near the bench. George, Nico and Eva will take the cable car further down the mountain.
Go inside the cable car building. As you are walking towards the door, Langham will come out with another guard. Our heroes will quickly hide and listen that all roads to the monastery are closed and that they are questioning Marques further. Apparently they haven't found the Tabula yet. Eva decides to follow Langham alone, hoping to enter. George and Nico decide instead to find another way.
Examine the glitter in the cable car. George doesn't have time to see what it is. Interact with the telescope, you will go into detail from where you can look at the areas more closely. To move the telescope lens, click on an area and drag the lens towards it.
Drag it to the left until you come to a rock face and examine it. George will say that it is the same face as that of "La Maledicció". He realizes that the Tabula is probably near that mountain, not the monastery. Langham won't know this as his copy of "La Maledicció" is forged and has no face. Interact with the telescope again, move it left over the rock wall until you see the Santa Cova chapel. Examine it.
Drag the lens to the right until you see the suspended yellow cable car. Examine the glitter, George will notice that there are Duane and Pearl Henderson (from previous episodes of Broken Sword). Examine the glitter again and George will understand that he will have to point them out again. Move the lens slightly up and examine the cable car. Exit the telescope magnification.
In your inventory, select the side mirror and use it on the gleam of the cable car. George will give Pearl signals. Interact with the telescope again. You will automatically see Pearl writing a message on the cable car door. It will say they are locked and the door code is 0797. Exit the magnifying telescope and enter the door of the cable car station where Langham just exited.
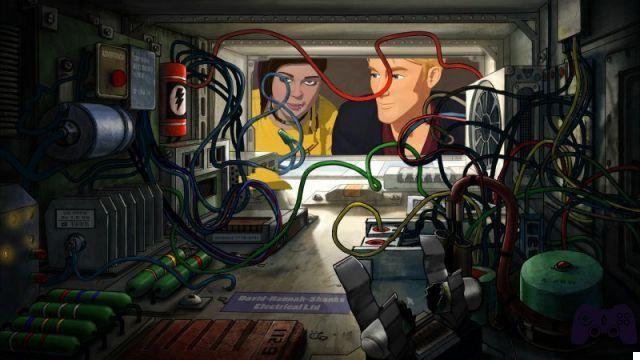
Take the lunch box that is on the ground near the counter, you still won't have the key to open it. Interact with the closet, you will find a person inside. Talk to the closet; the woman inside refuses to go out until she feels safe. You interact with the console on the left side of the screen, but it's too complicated for George. Then interact with the lever, the gears will move, but some will jam. Interact with the hatch on the front of the console. George will open it, but even that will be too complex for him. Open your inventory and combine the paper clip with the lunch box. Apparently the lock is too well designed to open ...
In your inventory, select the lunch box and use it on the gears in the lower right corner of the room. Interact with the lever once more to move the gear teeth that will open the lunch box. Pick up the open box, George will get the two way radio inside. Duane and Pearl are on the other side and apparently they know the girl who is locked in the closet, Kat.
Select the radio in the inventory and use it on the cabinet door. Pearl persuades Kat to get out of the closet. She shows George the sabotaged console; the fuse in the back needs to be reconnected somehow, but you also need a way to get to the fuse without getting blown. Walk to the gears where the lunch box is, there is some obstruction on one of the gears.
Use the paper clip on the jam, so as to obtain an adhesive paper clip.
Examine the console's open hatch again.
Use the box containing the cockroach on the front of the console. You will see "Front" when you place the mouse over it.
Now select the piece of tea biscuit in your inventory and use it on the poles of the fuse that has been destroyed. George will throw the cookie on the spikes and Trevor will follow him. The paper clip will get stuck in the teeth and complete the circuit. The cable cars will be moving again and George and Nico will automatically head up the mountain with their faces. You will now control Nico. Enter the door of the chapel. You will then move on to check on George again, for some reason. Pearl and Duane Henderson are inside, complaining about their vacation ruined. Go right and talk to Duane. Ask for "Duane". Ask for "Pearl". Ask for the "Chapel of Santa Cova". Ask about the "spiritual experience". George learns that Pearl knows all about Santa Cova, but she is now too upset to talk about it. A great spiritual experience was expected here, but the building is empty and under construction. Talk to Duane again, ask about the "whistle", as Duane was whistling Schubert's "Ave Maria", one of Pearl's favorite songs. Exit the conversation. If you've noticed Duane's whistle, the musical notes are visible above his head and are: "G, F #, G, B, A, G" Interact with the toolbox behind Duane to get Mason's hammer. Take the turpentine bottle off the shelf. Collect the wood chips from the ground and interact with the gallows. Anything that shakes and makes a "sweet noise," according to George. After shaking the gallows it is now possible to interact with its individual objects. In your inventory, select Mason's hammer and use it on one of the paint cans. The hammer will be your permanent active element for now. The paint cans make the "A" sound, the oil drum makes the "G" sound, the fire extinguisher makes the "B" sound. Click outside the scaffolding area to stop using the hammer. In your inventory, select the turpentine bottle and use it on the second paint can (the one that hangs slightly below). If you hit it with the hammer it will produce "F #". Equip the hammer and hit the items in this order: oil drum, turpentine paint can, oil drum, fire extinguisher, empty paint can, oil drum. When you start hitting objects, Nico will start walking and will not be able to do anything while he is walking. Once she is next to you, start over and do the whole sequence at once. Eventually, Nico will ask you to rehearse and she will automatically play the melody. You will still have to try the "smelling" part of the experience. Walk left to where the Madonna is and examine the candelabra near the ceiling. Use the crank on the wall to lower the candlesticks. In your inventory, select matches and use them on the candlestick to light it. Use the side mirror on the candlestick and the wire on the candlestick and the side mirror. George will tie the mirror to the candlestick. In your inventory, select the eau de toilette and use it on the wood chips to make potpourri. Use potpourri on the builder cup on the altar and then the matches on the cup containing potpourri. The sweet smell will begin to fill the room. Now use the crank to raise the candlestick again. Once at the top, all three aspects (landscape, smells, and bells) will be in place. Note: If you take too long or use the hammer on another object, Nico may stop performing the "Ave Maria". If this happens, you will have to do it again so she will do it again too. Pearl will pray to Our Lady and then return to normal, talk to her. Select "Black Madonna". Select "Santa Cova." Select the sketches of Hobbs or La Malediciò. Pearl will comment on the painting and say that somewhere in the chapel is an Ouroboros, although the workers covered it up when they did the renovations in the early 20th century. Now you will have to find it. In your inventory, select Mason's hammer and use it on the altar. George will break the plaster and discover the Ouroboros.
Stroll to the candles where Pearl used to stand in front of you. Take a candle, go back to the altar and use the candle on the recess in the wall above the altar. Use the matches on the recess with the candle. George will hear a noise after lighting the candle. You will now only have one match in your inventory. Interact with the Ouroboros symbol again. A secret passage in the rock face will open, Nico and George will enter a dark cave and close the door behind them. Nico tries to find a way to open the door as George goes forward into the dark cave. There are a lot of mysterious objects to examine in the dark, but you will need to find a light source to proceed. Examine the stone object on the right side of the room. George describes what a candle or a torch looks like. In your inventory, select the match and use it on the stone object on the right side of the screen. The room will be illuminated and George and Nico will find not only the dead body of Gehnen (the original Gehnen), but a Gnostic shrine of Mary Magdalene. You will still need to find a way out of the sanctuary. Examine the board where Gehnen is located and take the artifact. If I turn to the Table of Truth. Take the photograph. You will now have Gehnen's photograph; it is a translation of the symbols on the tabula. Grab the map to get the Gehnen map, then grab the gun to get the revolver. Use Gehnen's map on the table lamp. The words will disappear and hidden letters will appear instead. George believes they match the positions on the photograph. Open your inventory and combine the Tabula Veritatis with Gehnen's photograph, George will be able to decipher the Tabula with the clues that Gehnen left behind. Similar to the number puzzle, you will need to click on one of the tabula inscriptions and then select the corresponding word from the list on the right side of the screen. There are three pages of words available that you can scroll through. Gehnen's translations are at the bottom; you will need to use them to understand what the individual symbols mean. For example, an inverted triangle means "God", while the standing triangle means "mountain". The final sentence to decipher is: "Begin / Sun City / Travel / Five / Day / East / River / Travel / South / Six / Day / Desert / Source / Four / River" Once you have finished deciphering all the symbols, George will read them aloud and then Nico will say that he found a secret button in the Tabula mural. However, pushing seems to do nothing for the moment. Examine the lamp next to Gehnen again. In your inventory, select the medallion and use it on the watermark carved above the lamp. Place it at the top. The light will illuminate Lucifer on the wall. Examine the statue of Mary Magdalene. It will now be possible to interact with it to turn it. Turn the statue once so that it faces right. Press the secret key on the wall, you will hear more promising sound. Examine the lamp again, lift the medallion and then place it in the bottom slot of the watermark. Exit the detail, turn the statue two more times so that it is facing left. Press the secret button again, examine the lamp once more and remove the medallion to insert it into the final slot in the lower left part of the watermark frame. It is now necessary to illuminate the red figures. Exit the detail and rotate the statue once more so that it faces forward. Press the secret key and the door will finally open. Examine the lamp and retrieve the medallion, then exit the cave. When you reenter the chapel, Langham will be there with Eva and Marques. He is threatening them as he wants to know from Marques where the Tabula is. In your inventory, select the revolver and use it on Langham. George will pretend to hold the gun against him, but Langham will notice it is broken. At this point he demands the Tabula. Select "Lies" and Langham will threaten to kill Marques. Select "Truth" and George will put his hands on the Tabula. Langham will kill Marques anyway and take Eva with him. Just before Marques dies, he will say that the location George discovered, the place in the desert with four rivers, is the Garden of Eden. George and Nico must exit the chapel and follow Langham there. If you try to get out the front door, the guard will stop. Talk to Nico and she will try to persuade him with her charm, but with no luck. Go out to the balcony. Interact with the exhaust pipe and grab it. Click under George on the eaves when he says "Down" to go down. In your inventory, select the radio. At the bottom of the drain pipe, use the radio, George will place it in the drain and Nico will call the guard. When the guard approaches the door below, select Mason's hammer in your inventory and use it on the guard. If it takes too long the guard will come back, just enter the chapel again, talk to Nico, and then go back to the foot of the balcony again. Call the guard back and try again.
Select the cable from your inventory and use it on the door. George will pull the door to open it. Interact with the door to enter the cable car. Nico is still stuck outside, use the window; George will try to get Nico in, but there will be a barrage of bullets coming from the cable car and Nico will be knocked out. Medovsky appears and wants the painting back. You will now take control of Nico, who hangs over the side of the cable car. Medovsky's henchman is in the cable car next to her. Talk to the henchman, Shears.
Select "Shears" twice. Select "Chelsea". Select "Topiary". Select "Free willl". Select "Determinism". Select "Henri". Select "Henri" again. Select "Redemption".
The henchman will decide to redeem himself, killing Medovsky. The three will arrive at the cable car station again. Shears says he can fly them to the Garden of Eden in Iraq. George has a dream in which Marques, Father Simeon and Hobbs discuss which religious belief is correct. Marques tells George that he has to keep his balance and that he has the power to do it in his hands. He wakes up on the plane upon their arrival in Iraq, with the medallion in his hand. They disembark and head for Eden.
PART 3
George, Nico and Shears arrive in Iraq near the entrance to Eden. Langham got there before them, but only slightly. They have to make sure to stop him before he carries out his plans. Examine the fig tree. George will notice the goat and get nervous. Nico and Shears tell him he's exaggerating and Nico strokes the goat. Take the figs from the tree branch above the goat to receive a handful of figs. Walk left past the giant statue, then keep going until George notices the henchmen sitting nearby. You will need to create a diversion to get past the henchmen. Go back right past the goat and then up the hill. Examine the back of the truck, go to the back of the truck to get the backpack. Use the backpack on Shears, you can open it and go into detail. Take all the objects from the backpack, you will end up with TNT, dynamite, duct tape, electric wire, sausage and a lighter. In your inventory, combine electric wire and dynamite to make a charge of dynamite. Then combine the wire with the sausage to make a detonating sausage. Use it on the goat together with the lighter. George will light the fake dynamite. Go back to the guards. In your inventory, select the handful of figs and use it on Langham's henchmen. George will throw a fig at them, but they won't notice. Now use the handful of figs at the bottom of the path. George will be on top to throw a fig down. Finally, use the figs on the path next to the truck. George will walk down next to the goat and throw another fig; the goat will follow the path of figs towards the henchmen who will run away seeing it loaded with fake dynamite. You will now be able to access the entrance to the mountain where Langham is located. Use the lighter on the dark entrance hole of the cave. Nico will stop you to get the TNT and dynamite. Note: If you have tried to use any of these items previously, Nico has probably already confiscated them from you and won't stop you now. Use the lighter on the hole. George and Nico will enter the cave and see Langham praying at the altar and Eve nearby. The cave begins to tremble; you'll have to deal with Langham before he summons Lucifer. Langham will use a ladder to cross the collapsed bridge where some vineyards are tangled. Use the lighter on the bush near the ladder, George will light the fire. Now use the eau de toilette on the burning bush. The fire will reach the vineyards freeing the staircase. Interact with the ladder so George will cross the bridge to Langham. He will now automatically start a conversation with him. Select "Tabula Veritatis", then "Eden" and finally "Decide". Langham will throw George off the altar. You will now control Nico. Interact with the ladder to reach the altar. George is still alive, but stuck in the floor. Eva will say that her father always said that "pure light" is the answer. In your inventory, select the TNT and use it on the large crevice to the right of the altar. Nico will throw the TNT into the slot and orders Eva to run; then a movie will start. Enjoy the final scenes and ...
Click here to see the entire video solution of the game!
 Broken Sword 5: The Serpent's Curse - Episode Two psvita
- pc
- Playstation Vita
- iphone
- ipad
- android
Exit date: January 2014


