Whenever you make changes on your Android smartphone or when you try to develop an app, a particular hidden option/mode appears called Debug USB or USB Debugging. In this article we will try to explain to you in a simple and quick way what it is, how USB Debugging works and how to enable it.
Pista:
- What is USB debugging and how does it work?
- In which cases it is necessary to enable USB debugging
- How to enable USB debugging
- How to enable USB debugging with broken screen
What is USB debugging and how does it work?
Il Debug USB It is a mode present in Android since the first versions of this operating system. This mode was created to give developers more complete control over their Android device's operating system and running apps. This term literally indicates "finding and correction of ERRORS" (i.e. defects) in the software.
This particular mode allows developers to test applications during their development, in order to identify and fix any defects. It also allows you to have strong control over the operating system and exploit programs that intervene to unlock the bootloader. For these reasons you usually hear about it every time you perform one of these operations.
In early versions of Android, Google recommended enabling it because using the option had a strong impact on performance (the slowdown until Android Gingerbread was evident). Today the impact on performance is negligible, given the power of current devices and Google has inserted the item in the developers menu. This menu is normally hidden, but in the following paragraphs we will see how to make it visible.
Use the USB debugging mode You must connect the Android device via USB cable to the computer and have installed ADB (Android Debug Bridge).
In which cases it is necessary to enable USB debugging
In general, more than 90% of Android terminal owners will never feel the need to enable this option. The operating system created by Google already comes from the factory very free and allows strong customization. USB debugging is a specific mode disabled by default, but accessible from the menu. Options developer which as mentioned above is hidden.
The typical cases in which it is used are several, such as:
- a developer who needs to test their application;
- who needs to unlock the bootloader;
- install a modified recovery (such as TWRP);
- those who want to use a tool to gain root privileges;
- to install apps remotely (useful for TVbox and Fire TV).
In exceptional cases, enabling the option can also solve problems when connecting some terminals via USB to the PC.
How to enable USB debugging
Enabling the option is particularly simple, it just depends on the Android version of your device.
On previous versions of Android 4.0 (Ice Cream Sandwich) you must:
- open the "Settings" menu;
- then press "Applications" and enter the "Development" item;
- Finally press the “USB Debugging” option to enable it.
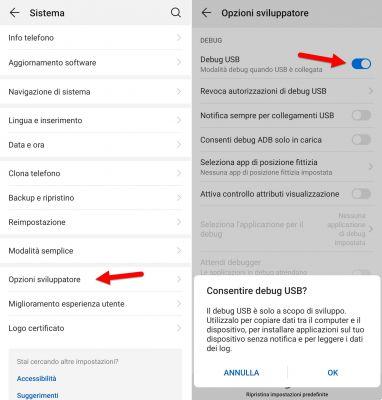
In later versions of Android you must:
- open the "Settings" menu and go to the "System" item;
- go to the "Device information" or "Phone information" item;
- within this menu, click 7 times on the "Build number" or "Build version" item;
- If you have done everything correctly you will see a message that says "You are now a developer";
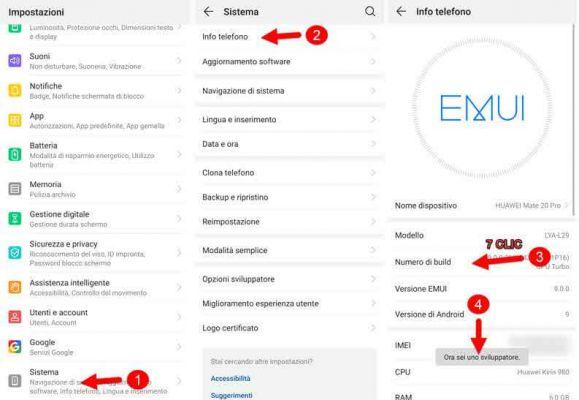
Now, going back to “Settings”, scrolling down you will find the new menu “Developer Options", in which you will finally find the item "USB Debugging" that can be activated from the side button. Upon activation, a confirmation notice will appear and press "OK".
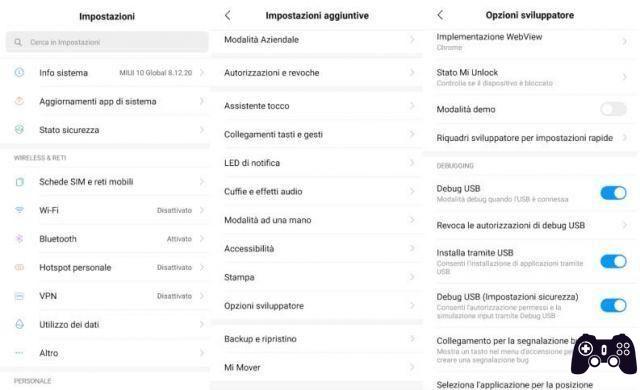
In some custom interfaces, the procedure is slightly different, but still very similar. In the case of Xiaomi's MIUI, for example, it is necessary:
- open the "Settings" menu;
- go to the "System Information" item;
- press 7 times on the "MIUI Version" item;
- return to "Settings";
- enter “Additional settings”;
- then go to “Developer options”;
- Finally activate the “USB Debugging” option, when activated a confirmation notice will appear, press “Yes”.
How to enable USB debugging with broken screen
It may happen that the screen of your Android device no longer works. In this case, since we cannot use the touch screen to perform the steps indicated above, we will have to resort to a small but simple trick to solve this problem.
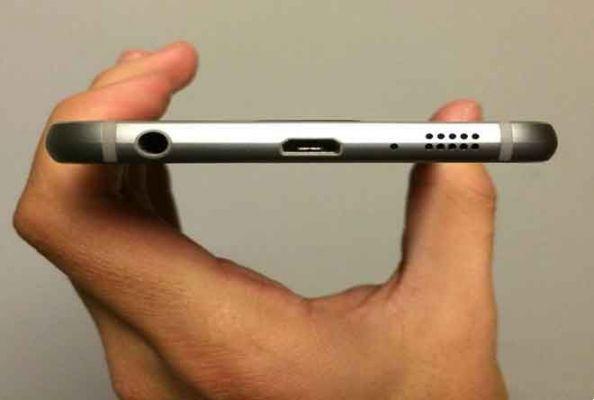
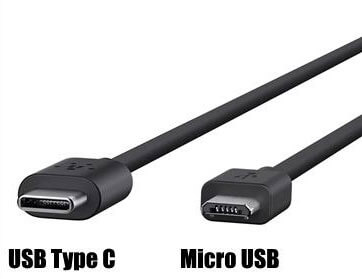
By enable USB debugging with broken screenyou need to get a OTG adapter equipped on one hand with a female USB type A port (the classic USB port present on all computers so to speak) and on the other hand with a micro USB or USB type C connector, this will depend on the USB port present on your smartphone or tablet. To understand the type of USB port on your device, you can check the type of cable that can be connected to it.
If you don't have an OTG adapter, you can easily purchase one on Amazon, among which we recommend below:
USB OTG Adapter - Micro USB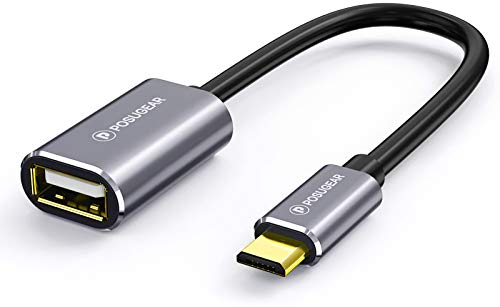 price: -- (4772 customer reviews) See offer on AmazonUSB OTG Adapter - USB Type C
 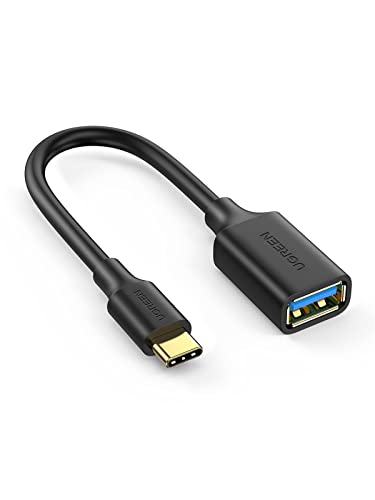 price: 9,99 €
 (10015 customer reviews) See offer on Amazon
In addition to the OTG adapter, the only thing you need is a very common and easy to find USB mouse, like this one below:
AmazonBasics USB Mouse, 3 presses
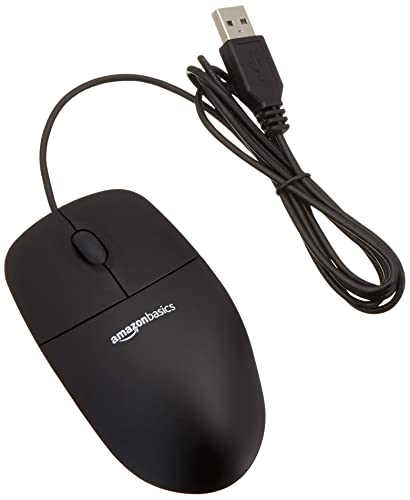 price: 9,04 € (75691 customer reviews) See offer on Amazon
Now that we have everything, we can proceed to enable USB debugging with broken screen on your Android device.
First connect the OTG adapter (micro USB or USB Type-C) to the charging port of your device (smartphone or tablet). On the opposite side of the adapter, connect the mouse. If everything works correctly, the mouse pointer should appear on your smartphone screen. At this point you can use the mouse to follow all the steps explained in the previous paragraph.
The discussion gets complicated if you want. enable USB debugging with black screen Since you can't see what you click on, it will be impossible to turn on USB debugging.
Finally, we remind you that the procedure to activate USB Debugging works regardless of the manufacturer of the smartphone or tablet (Samsung, Huawei, Honor, LG, Sony, Motorola, Nokia, OnePlus, Xiaomi).
USB debugging: what it is, how it works and how to activate it