


Please note:
The solution is based on the American version of the game, therefore there may be differences from the Spanish version.
Homecoming
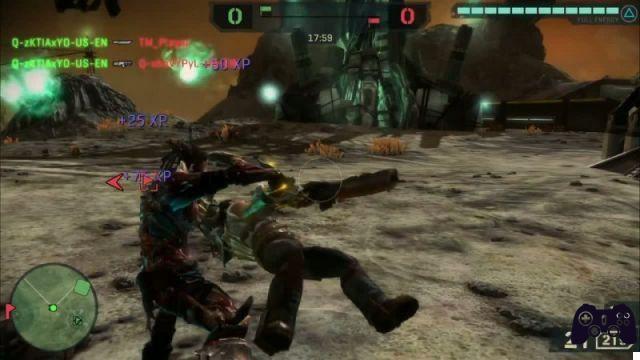
Approach the Sidewinter and press the Square button to board, then drive through the canyon until you reach the first site where you will have to deal with a handful of Scabs. To add a weapon to your inventory, you can climb to the roof of the building before continuing. At the second construction site, follow Tracy, using her help in the fight against the Scabs. Advance further to the next site. Suddenly as you advance, an explosion panics the entire area. Quickly move to the right, crouching to avoid enemy fire. From that position aim at the two clearly visible Scabs, then move a little to deal with another Scab intent on crossing the barrier.
Proceed a little further towards the indicated place: when you have reached the point of interest, the instructions for building the Rig will appear on the screen. Subsequently you will have to dedicate yourself to the collection of Rift Energy, as well as obviously taking care of the Scabs. First, however, open the barrels that your companions push below to collect Rift Energy, the primary element for the construction. Don't get distracted though and keep repelling the Scab attacks at the same time. When you hear the Scrappers scream in the air, turn to the white wall as the attack of numerous waves of enemies will come from that very side. Don't forget to rebuild the walls when they are destroyed.
After the report arrives, exit the walls and call a Sidewinder, then follow the signs to the fuel depot, proceeding as fast as possible. At the depot you discover that the Scabs have preceded you and you will therefore have to get rid of them, naturally taking advantage of the protection given by the walls and the help that the turrets can provide. Once you've cleared the area, it's time to take care of the Hawks. But first you'll need Rift Energy to set up a bunker. You better be quick because the three Hawks will arrive pretty quickly. To take them down you will need a MAW Rock Launcher: follow the instructions on the screen to build it, then take aim and wait for the target to be perfectly locked before firing.
The Freightway
Answer Cutter's call and move to your Hawk. Once you are near the Mech, get on board and press the Circle key to switch to flight mode. Then follow the commands given on the screen to complete the calibration and finally land on the platform placed in front of you as required by the instructions.
After a cut-scene you are still flying aboard a Hawk. So make another landing, putting into practice what you learned a little while ago and watch a new video. When the game resumes you will find yourself in flight again, this time however you will be engaged in a chase. To shorten the distance between you and the fugitive, you can press the R2 button which activates the Turbo, which however is not infinite: therefore make sure not to use up too quickly the possibility of sprinting at your disposal by keeping under control the bar that indicates the on-screen availability. In short, you will be given instructions on the screen to shoot your target: the attack system is rather automated, but in any case you will still have to try to align your Hawk in the center of the fence and keep it in that position for as long as necessary. Continue in the pursuit until you manage to take down your target to move on to the next objective.
In fact, Cutter tells you where the Scout arrived from. Obviously your job is to head there. Follow the markers that show you the way and prepare for the arrival of more Hawks, this time armed with Swarm Lasers.
Your enemies on this occasion are two, so you will not have a simple life as before. Learn to perform Barrell Roll (X + directional key), Power Slide (L2 + R2) and Flip Turn (X + up / down).
After you get rid of your opponents, hurry up to your destination, then head to the icon that appears after the dialogue with Emmet to collect some missiles. You will immediately have the opportunity to test the new weapons. Chase the Outcast Hawk and lock it by holding down the R1 button until you hear eight "beeps": then let go of the button and witness the destructive power of the Swarm Missile. The challenge now becomes complicated: first you will have to face it against a new pair of enemies, then against a group of four. In these situations, the skill with which you will be able to use the evasive maneuvers described above will be decisive. In case you suffer too much damage during the fight Cutter will guide you to some silos where, by collecting an icon, you can restore your Hawk to maximum efficiency. When you have destroyed all the enemies the mission will end.
Harvest Season
Since you did very well against four Hawks in the last mission, you now find yourself facing five. Remember all the maneuvers learned previously, especially taking advantage of the strategic advantage that can guarantee you a well-executed Power Slide. Also remember that Swarm Missiles can hit multiple enemies at a time. After destroying all the enemies, perform the landing and get ready for a new series of encounters, this time on the ground.
First get familiar with the R3 key which allows you to kick the ground with your Mech. This move is especially useful against small enemies like Scabs. Providentially, in these first moments you will have to face it against a wave of Scab. Once you have secured the Cargo Area, you can move to the station using the ramp. Approach the indicated door and wait for Cutter to open it by hacking the security system. Meanwhile you can deal with other Scabs, this time equipped with rocket launchers. To help you, place some turrets and a wall if necessary. Know that you will have to withstand four enemy waves. As soon as Cutter manages to open the door, jump inside and press the switch to activate the airlock. Move quickly and go around the structure in front of Emmett, then seek cover on the other side and crouch in a safe area to make sure the road is safe, then run to the indicated area and reactivate the defense system. Now go down the ramp and turn left, ready to face a new wave of Scab appearing from behind a door. Then walk down the corridor to return to the airlock and interact with the controls again. Then go left, down the ramp, and exit the Rift. Along the way you will have to see it with numerous Scabs and some turrets. Hold on until Cutter gives you the Signal Rig that you will have to place on top of the Rift Energy.
You will now have to defend three different landing spots as several waves of Scab and Scrapper besiege you. Protect the Signal Rig with turrets and make extensive use of walls to keep enemies away. After a first phase, an enemy Mech will appear on the battlefield that you will have to keep at bay using the MAW Missiles. At this point of the fight, find a place to shelter and occasionally exit the cover without exposing yourself excessively. If you need supplies, run to the Supply Depot.
When you take down the Mech, replace the Supply Depot with a Launch Pad and fly back. Then follow the directions via radio to collect the new missiles that Cutter makes available to you.
The Pipeline
As soon as you get back to the ground, proceed towards the group of workers on the left, not before having removed the Drop Pod with the Square button, and observe the devastation work done by the Scabs in the distance.
After the conversation with Cutter, you get a Watchtower. Place it immediately and enter it, then pick up the sniper rifle and familiarize yourself with the new weapon by aiming at the three Scabs on the bridge. After you eliminate this first group, more will arrive.
When you're done with the Scabs, Cutter will contact you again with a problem with the pipeline. Head to the crash site, taking care of the Scabs along the way. Once calm is back, turn to the left side of the building you are in front of, go up the ramp on the right and finally turn left. There you will find a ladder: use it to reach the top of the structure. There, activate the switch, then go down and start placing turrets nearby: do not delay, as soon as you will be surrounded by Scab and Scrapper.
Now you can head to the second landing spot and start preparing the defenses. Place some turrets and erect at least one wall in view of the incoming waves. After the first two waves of enemies, you are warned by Cutter that a new enemy is on the way, an Apex Warrior. So leave your position without hesitation and rush towards the indicated point.
It will take several gunshots to take down an Apex Warrior, but it's not impossible.
Keep dealing with the Scabs until the Launch Pad is available. Then place one and head to the Mech Platform. Soon the air is hot with the arrival of some Rifters. First try to pick up some other weapons, especially Cluster Bombs - useful for destroying targets on the ground while in the air - and missiles. Beware of anti-aircraft mines: they are marked with a red light and individually they can't hurt you too much, but if you accidentally end up in an area where there are a lot of them, you could come out pretty damaged.
After Rifter and Bomber, you will have to deal with three other groups of Scabs armed with rocket launchers: the Cluster Bombs mentioned above are very useful on this occasion. Then another air section awaits you against some Fighters: remember that your primary objective is to defend the pipeline, so try to take the fight as far as possible from that strategic point.
At the end of this section you will be given a brief moment to rebuild your defenses before a new wave of Outcast. Hold on for a few minutes, until Cutter calls: at that point you can place a Shield Generator in the indicated point and eliminate the last remaining enemies to conclude the mission.
Ballad's Crossing
After being thrown into the middle of the war zone, you find yourself facing a large group of Scraper. Try to eliminate a good number of them immediately before they scatter using the bombs. It is possible that in this initial juncture you run out of ammunition and have to resort to the knife. When you can, advance to the Rift that is in front of you. Then place a Rift Collector, then listen to Emmett's advice and also add a Garage and an Outpost: thanks to the first you can use the Razorback, a rather fast vehicle, while through the Outpost you can call some Aliens for help.
Soon the time will come to use the Razorback: note that you can drive the vehicle yourself by sitting in the driver's seat - wait a few moments before leaving so that your allies can get on board - or you can let an NPC guide you while you take another seat with weapons in hand.
When you get to the second rift, first focus on the Watchtower, where there are a couple of snipers. You can use the vehicle's weapons to destroy both this building and the Rift Collector. When you are done, place your Rift Collector and move on to the next objective.
The Third Rift is located to the south and is less protected than the previous ones, but the Scabs present there and the walls will still keep you busy for some time.
The second part of the mission now sees you engaged in the defense of the Rift Extractors. A big help will come from Cutter who will provide you with a new tool, called Arm, thanks to which you can repair all the damage suffered by your Razorback. You will need it a lot to defend yourself from assaults. The most targeted areas will be those near Boulder and Juction Extractor, so place some automatic turrets there. In short, you will also have to deal with some enemy Razorbacks.
You will then be asked to go to the Orbital Lifter as soon as possible. Drive at breakneck speed to the goal, using the rocket launcher to clear the way of any obstacles. Near the Lifter you will have to break down a wall behind which some Scabs and Scrappers will pop up. Then place an outpost near the Lifter along with a Supply Depot. Then secure your position with a wall surmounted by a turret. The first wave of Razorback will be stopped by the defenses you have installed. The next will be composed of Scab and Scrapper: take advantage of the Depot and place some turrets on its top as soon as possible. The third wave will finally be composed again of Razorback and now you will probably have to rely on the rocket launcher. The MAW will also be a useful ally in the final phase of the mission when you have to deal with an Outpost and a Hawk.
Train Robbery
After landing, immediately run to the opposite side of the platform, avoiding the Scab fire. Request some reinforcement as soon as possible to make things easier for you. Once you arrive at your destination, build the Vulture Station, then take to the skies using the Jet Packs, which guarantee you greater agility than you have been used to in the past. Your goal is to destroy the eight surrounding turrets. The first three are easy targets from where you start from, for the others you will have to work a little harder. So use the crates to overcome the chasm and reach the opposite side of the platform and take care of the Outcasts and turrets that are there. Climb to the upper level and use the protection offered by the pillars to bypass the Outcasts and surprise them so you can kill them using the knife while saving some precious ammunition. Finally reach the top of the level thanks to the Vulture and take out the last turret with a couple of missiles.
Your next task is the destruction of the Outcast Dropship. Start by building a Launch Pad, then look around for missiles that will soon be very useful. At that point you can go to the area where the Dropships are located to destroy them.
You will then be asked to secure a cargo. First, build walls in the area where the Outcasts appear to slow them down, then add a couple of Beam Turrets to protect them: all this will guarantee you a fair amount of room to maneuver even in the excited phase you are about to face.

After the arrival of the first Outcasts, a one-minute countdown signals the imminent invasion of Hawk. Heat up the missiles and don't get caught unprepared. In fact, you must get rid of the Hawks as soon as possible so as not to have to face them together with the Mechs that will arrive shortly after. For the latter, prepare some new Beam Turrets.
As if that were not enough, four more waves of enemies will populate the battlefield: first simple Scabas, then Scabs equipped with Jetpacks, then Apex Warrior and finally other Hawks. In this phase you will have to take advantage of all the help that the Auto Turrets can provide you.
At the start of the self-destruct countdown, let go of all hesitation and run to the marker.
the pit
Enter the base and face the Outcasts you encounter along the way. If you want, you can also use one of the Razorbacks you find on the street. While dealing with enemies you can also stay in the passenger seat, but for the next section make sure you are behind the wheel if you don't want to waste a lot of time. Then cross the bridge and continue beyond the lintel, gathering your companions on board along the way. Get to the platform in front of you and free it from the enemies before requesting an Outpost and a Launch Pad. To continue beyond this area you will have to destroy all the enemy structures: focus first on the Launch Pad, from which new enemy Mechs are constantly joining. battle, after which you raze the Outpost as well, but not before making sure that no Apex Warriors are left alive.
Then continue towards the hatch indicated by the indicator, which is however blocked. While Cutter thinks of a way to remedy this problem, organize some defense to resist the small group of Outcasts that will be waiting for you. You'll have to last about three minutes before Cutter's Rift Bomb opens the hatch - just make sure you're not near the red circle drawn around the bomb when it detonates. Meanwhile Hawk and Pod will also reach the area. Don't overlook the treacherous rocket-wielding Scabs lurking on the surrounding rooftops.
After the explosion, enter the pipeline and prepare for a mass attack by some Scrapers as soon as you hit the ground. Don't hesitate too much, but start your ascent, as the bottom of the well will quickly fill with acid. Go up a couple of stairs and look around for the Volture Platforms which will allow you to use Jetpacks to climb more easily.
Ashes
After the opening cut-scene, go up the knoll and take out all the Outcasts that are up there. Then go down to the other side and head to the White Sands area, now overrun by groups of Outcast. Fend off all attacks until an explosion blasts the sheriff's office to the ground. As soon as possible, run towards the Saloon and build some defenses to protect the building, favoring Beam and Auto Turret, but without forgetting some walls.
When the situation at the Saloon has calmed down, head to the Mechanic on the right. Be sure to pick up the rocket launcher located at the base of the stairs as you will soon have to deal with an enemy tank. Take advantage of any cover the scenario offers, because a couple of tank hits are enough to knock you out. Then check the state of the defenses positioned in front of the Saloon as a wave of Scab will soon peep into that area. Then talk to Jonas and get ready for three more enemy waves. You have about a minute to organize before Pod, Razorback, and another tank arrive on the battlefield. Make sure you have Rift Energy available, then place more Auto Turrets and set up new walls. If you can, also create a Supply Depot whose support will surely make you comfortable in a short time. The enemy assault is really impressive and initially you should resort to the MAW to free the field from the abundant number of enemy units. Before the end of the battle you will necessarily have to resort to a Supply Depot to resist the simultaneous assault of three Scab Tanks. As before, seek refuge behind every protection offered by the scenario and rely on the trusty MAW Rocket Launcher.
Once the battle is over, return to the town where you are greeted by a new wave of Outcast.
Probably at this point in the fight the defenses set up around the Saloon will be giving way so you will have to take care of their reconstruction. This time rely on some Beam Turrets, an excellent remedy against the Hawks and Apexes that are coming. Stay away from the Pods, who will soon join the fight, so as not to end up in range of their flamethrower. Before the end of the mission you will have to resist another enemy Tank - face it with your Ox Tank if this is still intact, otherwise use the classic rocket launcher - as well as a trio of Apex Warriors, which will however turn out to be little thing after all you have had to. face in this mission.
Sever
At the beginning of this mission you find yourself surrounded by several groups of Outcats. Your primary objective therefore becomes the destruction of the Dopships from which they emerge. Try to stay airborne, and if you must land on the Loading Platform, make sure you wipe out any nearby snipers with Cluster Bombs earlier. Do not miss the opportunity to collect Air Mine with which you can easily get rid of any pursuers. When you're done with the first, head to the second Landing Platform, where the Outcasts will place a Shield Generator. So listen to Cutter's suggestions and retrace your steps to stock up on Torped with which to penetrate inside the shield.
At this point, a new, gigantic enemy ship will appear, heavily armed and covered by numerous turrets. To deal with it you will have to resort to Cluster Bombs. Land on one of the nearby asteroids and place a Launch Pad, ARM and Outpost. Try to eliminate a turret as soon as possible so you can land on the ship and take care of the others directly from there using the Mech.
Then move to the point indicated by the indicator and place a Beam Turret there, protecting it with an Outpost, a Supply Depot and a Launch Pad, as well as all the walls you deem necessary. Be sure to place the turret as the last structure though, as its activation will attract a flock of Outcasts.
When the situation around the turret has calmed down, use the Hawk again to assault the mothership. In this final juncture you will also have to resist three waves of Pod and Apex. If you can also get an Auto Turret. The final phase of the mission is therefore reduced to a continuous shuttle between the mother ship and the turret to verify that this is still intact.
The Source
Move to the right until you come across the group of Scab who survived the previous massacre. Weapons in hand, eliminate them all one by one, then pass the wreckage and make your entrance into the tunnel where other Scabs are waiting for you. After getting rid of them, continue the climb towards the indicated point, collecting along the way the L3 Railgun that you can soon try against the three Scabs not far away. After a short descent, you come across four other Scabs; beyond this point, to the left of the ramp, there is a decent supply of bullets.
In the next area you are greeted by two Apex Warriors who drop bombs at you from the opposite side. The freshly picked up L3 Railgun is a great weapon to keep them at bay. Once the fight is over, proceed again to the Rift Core where you face Logan.
Start by hammering your opponent, who will produce continuous lateral movements to the right and left in search of places to protect himself. The fight does not require much inventiveness, you need to never loosen your grip and keep shooting at Logan. After a certain amount of hits, the game will freeze showing a rash of Rift energy. After the fifth interruption, Logan will fall to the ground defeated.
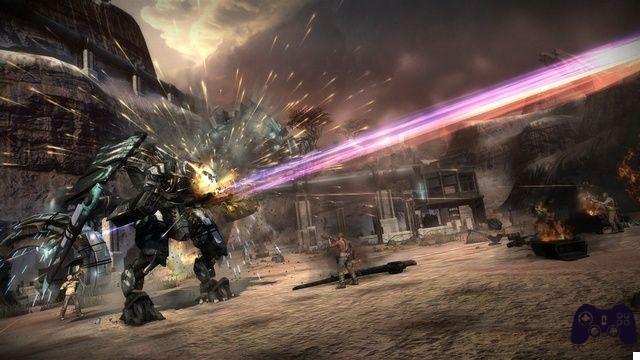
At the end of the movie that shows the consequences of the clash and you will find yourself facing a new monster, gigantic and horrible that basically emerges from the Rift in which Logan has ended up sucked. In the meantime, however, Cutter has managed to get back in touch with you, which gives you new strategic options for the battle that is about to begin. Take advantage of his return now by requesting an Outpost so you can count on some allies in battle. Then turn to Beam Turret and any other offensive or defensive tools you think will benefit you. To deal with the big monster, there is no strategy that works more than others. Target it with everything you have and try to escape the meteor shower that cyclically unleashes in the battle area. In any case, make sure that the Beam Turret remains intact to be able to count on its support during the final battle.
After taming her for the first time, the giant entity will return angrier than before. Memorize the route it takes and look for areas where you can shelter from the rain of debris and meteorites. As soon as possible, make a Launch Pad and a second Beam Turret. After some time the beast will retreat back into the Rift: take advantage of the opportunity and place a Rift Extractor on it, but be ready for the immediate onslaught of the Scabs. In short, the monster will return to the scene and its attacks will be more lethal than ever. Don't rely too much on support structures at this juncture, as they will likely end up wiped out in the first few moments when the fight resumes. Your only resource is therefore the Beam Turrets: scatter as many of them as you can and their crossfire will weaken the monster until it is finally knocked down. When that happens, lay one last Rift Extractor on top of him and enjoy the final cutscene.
Congratulations, you are done with Starhawk!
 Starhawk ps3
- ps3
Exit date: May 9, 2012


