


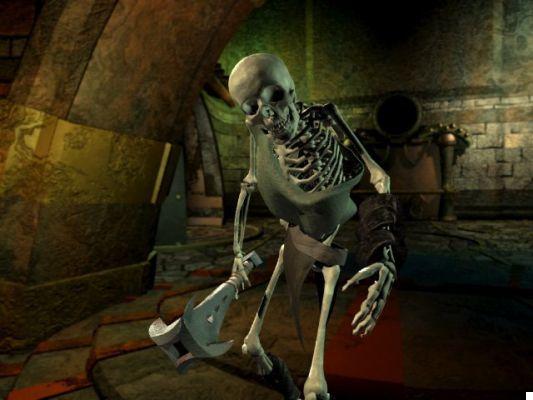
The Mortuary
Your first goal is to find a scalpel; take a look over the tables in the room where you are, you will recover it in no time. Eliminate the zombies, recover the key from the corpse of one of them. Exit outside, using the door to the northwest. Examine zombie 965, then exit through the door immediately north. Use the scalpel on zombie 1201, retrieving a note. Decrypt the code (top-right, bottom-right, top-left, top-right). Talk to Dhall, then exit through the door to the northeast. Retrieve the page from the zombie 1664. Use the scalpel on the zombie 506, recovering the needle and thread that you must then give to Ei-Vene. Talk to her, then continue southeast. Also converse with the zombie 821, so south. Retrieve the two vessels of embalming fluid, return one to Ei-Vene. Go back to the room, go up the stairs. Here you can start (if you want) to kill the Dustments, breaking their necks from their shoulders. Take needle and thread, then break the lock on the table to take possession of the "Bone Charm", the key needed to activate the portal.
Then examine the bookcase next to the stairs to the west to retrieve a very useful key. South, examine zombie 79. You can now return to zombie 821 (the spy). Have him dress up, then talk to Dhall about him. Go back to the preparation room (southeast), destroy the lock on the desk next to the stairs. Retrieve the earring, then go down to the first floor. Walk north-west, at Memorial Hall you can converse with Deionarra. Examine the skeletons to gain some experience, then cross the road that you proceed under the arch next to Deionarra, thus opening the access to the portal. Collect the items from the hidden room, then exit southwest to reach the Hive.
The Hive
Try talking to Debus, then enter Angyar's house in the southeast corner. Talk to him too, then to his wife. They will assign you a quest, which is to try to free Angyar from his "Dead Contract". Then try to talk to Ingress, the crazy woman who runs along the Hive. She will ask you to help her, a situation that will make up a quest. Another person to talk to: Baen, next to the black monolith, in the north section of the quadrant. Same thing for Sev'Tai which is located in the vicinity of the monolith. Then enter the bar (called "The Gathering Dust Bar"). Talk to Emoric, the owner. Ask him about Pharod; then converse with Norochj, to get more information and a quest, chase a thief disguised as Dustman. Keep talking to Norochj, he will tell you to investigate the living dead in the mausoleum. Start completing the quests: just north of Norochj, you can talk to Gravesend, to get Angyar's contract. Go back to his house, where you can tear up the contract itself. Now proceed to the southeast quadrant, a new party member must be retrieved before proceeding. Enter the inn called "The Smoldering Corpse Bar". Start by talking to Drusilla, then Ignus, then Ebb and Candrian. Talk to Ingress, telling her that Candrian will come to help her shortly. After the interaction, you will be able to retrieve Ingress's Teeth.
So talk to the bartender, Barkis; you can buy your eye from him for 300 coins. You can use the market, just outside the West Gate, to sell some items and recover the necessary money. Then go back to talk to Barkis, he will offer you a quest, solve a payment problem. Talk to Mochai, near the east wall of the bar, you will easily convince her. So talk to the character with the sword, Dak'kon. He will join your party. So, starting from the East Gate, walk north. You should meet such an Ash-Mantle, a Dustmen-thief. Tell him to go to the "Gathering Dust" bar; it will try to steal your wallet, you stand still and watch for extra experience and improve your shoplifting skills. Try to take his hand and get angry at his attempt, telling him to stop. Now is the time to enter the so-called "Alley of Dangerous Angles". Do not worry about the two rival gangs, for now it is not necessary to take either side. Instead, enter the cathedral to the southeast. Located at the point where the outer wall "makes a corner", you may have some trouble locating the door precisely. Talk to the priest, Asokar, to gain a lot of experience. Go outside, go back to the central section of the alley; enter the ruins to the north, where you can meet Blackrose; he will ask you to kill Rotten William, leader of the "dark" faction between the two facing each other in the alley. Also converse with Krystall, leader of the Razor Angels, he will tell you exactly the same task.
Eliminate Rotten William, also taking advantage of the blows of his opponents (wait until they have almost eliminated him, then give you the final blow). Talk to Krystall again, he'll give you experience and tell you he wants to talk to Blackrose. Go back to the Blackrose, he will tell you to kill Krystall, you have to kill him and go back to Krystall to get even more experience and money. It is now time to enter the portal that was created next to the Mausoleum.
The Mausoleum
Talk to the Guardian Spirit, telling him that you agree to help him - you will have to defeat the intruder. Start eliminating the undead until you reach the southeast exit. In this way, you will be able to follow the path that leads to the southwest corner, which - ultimately - will lead you to the Inner Chamber of the mausoleum. Eliminate Strahan, then exit the Mausoleum and head to "The Gathering Dust" bar. Talk to Norochj, then talk to Emoric; approach Awaiting-Death, talk to him. So go back to conversing with Emoric, he will tell you to continue the chain of dialogues - the destination this time will have to be Sere. So go back to Emoric, recover the experience points. Head to Ragpicker's Square.
Ragpicker's Square
To reach it, you will have to proceed north, starting from the north-west quadrant. Start talking to Yellow Fingers first; in exchange for some money, it will provide you with potentially very useful information. So look for Nodd, also a Collector. You agree to help him after hearing his story. Before proceeding in search of his beauty, visit the tent to the north, where Mebbeth is located. Get your energy back, then talk to Amarysse near the entrance to the "Smoldering Corpse" bar. He will tell you to bring copper to Nodd for himself. Do this, so talk to Mourns-for-Trees about the seeds.
Go back to Ragpicker's Square. Give the herbs to Mebbeth, he will tell you to find Giscorl. You can find it in the southwest quadrant, among the Hive Merchants. Negotiate - you will be able to spend around 500 sous - to retrieve the object Mebbeth requested. Bring it back to him, unfortunately you will be immediately assigned a new quest; you will need to get information from Kossah-Jai. The latter will direct you towards Meir'am; it is located near the "Office of Vermin and Disease Control". Retrieve an ink bottle from one of the merchants, then return to Meir'am and take it to Mebbeth. In doing so, the sorceress will teach you (if you wish) to control Magic. Now is the time to find Pharod; proceed west along the half-destroyed wooden bridges. Enter the portal next to the arch.
The Thras Warrens
Proceed south, noticing a villager who will run away as soon as he sees you. Follow it, reaching a room where you can retrieve the "Cranium Rat Charm", which can be used as a key. Kill the hostile villagers, then approach the arch they were apparently protecting. Explore the room inside the portal, then exit and continue southeast. A man will approach you; tell him you want to meet Pharod. Go down the nearby stairs.
The Buried Village
Enter Marta's house, in the western part of the town. Tell her to examine your internal organs, she will give you your own gut. Then talk to Ku'uyin, near Ojo's house. He will ask you to retrieve his name. Walk south, you will meet Radline; talk to her to get Ku'uyin's name and number. You will now be able to enter Ojo's house. Try talking to him, then try to overhear the conversation between the guards in the southeast door. Then exit the buried village, using the Northeast Gate. Talk to the guards, they will take you to Pharod's Court. He will immediately assign you a quest - recover the bronze sphere. So go back to the south door, talk to Barr, he will allow you to proceed beyond it.
The Weeping Stone Catacombs
Begin to freely explore the game area; just west of the entrance, a strange subject will ask for your help (a certain Glyve, characterized by his stone face). So you need to talk to Chad. You can't do it for now, so don't worry. Explore the various crypts, recovering the objects present in them; the only essential is the "Crypt of Dismemberment", go down the stairs, then examine the corpse on the right (the least decomposed). You will get an arm, apparently it is yours. Walk towards Dead Nati.
Video - Trailer
The Dead Nations
Proceed south, conversing with the "Doubtful Skeleton". Then turn west, reaching the zombie residence area. Try to communicate with Stale Mary. From here, east, coming near the Skeleton Merchant. You can sell / buy items at your convenience. Go therefore to speak with Soego; try to distract him by talking about the Doubting Skeleton. So look at his diary and then talk to him again; you will have to fight. After the victory, retrieve his skull and take it to Hargrimm. He will not let you talk to the King yet, you will have to forcibly eliminate all the Cranium Rats present in the Dead Nations. Head to the crater, near the entrance to this game area. Kill the Cranium Rats there; then talk to Hargrimm again. Swerve a moment to the Weeping Stone Catacombs, to speak to the corpse on the ground, as soon as you enter. This is Chad; Kill the nearby monsters (called Vargouilles) on his behalf, then go back to Chad to get some clues. At this point, it is advisable to speak also with another subject; one of the corpses that populate the Buried Village, near the exit - Burt. He will tell you about his mate Gris, lost in Crypt of the Embraced. There you can find him and hear his story. Now is the time to reach the Drowned Nations.
The Drowned Nations
Locate the two Ghouls in the east room; talk to them, then west and then south. Proceed down the corridor and help the two Ghouls defeat the Trocopotaca. North, three more Trocos to be exterminated. West, enemies again, then south. Several Vargouilles will be trying to take out a Troco; it is advisable to eliminate the Vargouilles first, helping the potential opponent. East, two more Trocos, retrieve the items from their corpses. Go back to the fork, this time turning east, reaching a cross-shaped room. Eliminate the two Ghouls, then east, entering a kind of Turkish bath. This is the room that Chad told you about. Kill the Vargouilles and take the item from the pile of corpses to the north. Before continuing, it is necessary to explore the Secret Tomb; enter the area of your map marked as a "sealed passage".
Secret Tomb
Proceed first into the room in the center; you will be teleported. Retrieve the key from the tomb in the center of the new room. So go straight ahead, letting yourself die. You will return to the entrance of the tomb; reach the central room again, using the teleporter. You will be launched towards a different room than what you saw before; from here you can take a second key. Repeat the procedure, thus being led to a third room. Get the key here too, then use the room to finally get to the final section of the tomb. Examine the writing on the wall carefully, starting with the west corner. Press each panel, then examine the sarcophagus to cause it to open. Enter the southwest room, then use the portal to exit the room.
Aftermath
Talk to Barr, showing him the orb. Go to Pharod, give him the orb. Ask him everything you can; will introduce you to Annah who should know how / where you "died".
Annah
Talk to her about everything you can; will then join your party. Together with her, you can all return to the Hive together - more specifically, to the usual bar "The Gathering Dust". Talk to Emoric, telling him about Soego. Then move to the south-east quadrant; Go into Fell's tattoo parlor and ask him about the tattoo on your arm. Ask Dak'kon to act as a translator; be careful: he will lie to you about the content of the translation - make this your doubt clear to get some experience points for free. Exit the tattoo parlor, continuing to talk to Dak'kon. Then approach the door that leads to the Tenement of Thugs; Annah will advise you on methods of neutralizing the magic. You can therefore easily enter.
The Tenement of Thugs
Locate and walk through the southeast room which gives you access to the main game area. Enter the door to the northeast; Kill Tiresias, then move on until you meet Sybil. He will ask you to find a key to exit the Tenement. Go back to the corridor, go up the stairs, enter the southeast door. Follow the road, retrieve the "Bloody Fly Charm" from the bathroom. Go back to the room with the crates, enter the only door you can access. Go up the stairs, tell Annah to neutralize the trap on the left. Go up the stairs on the opposite side of the room; Kill the Wizard, recovering the Tenement Key from his corpse. You can now return to the first floor, using the key to access a second door. Try not to be spotted by the Chaosmen, who are too powerful for your current experience level. Following the new passage, you will find yourself at the "Alley of Lingering Sighs".
Alley of Lingering Sighs
Walk west, until you meet a Dabus; a little further on, a building in which we recommend entering. Retrieve the hammer from the corpse, then exit south. Exit through the southeast door. Watch the animated sequence, you will be asked to eliminate the Dabus. Go back to him, but don't kill him: instead, talk to him about the corpse from which you recovered the hammer. Go back to the alley; you will be assigned other tasks - you will have to remove all the "improvements" the Dabus has made on the alley. Use the hammer to destroy them (most of them are upstairs, go up the stairs to see them). You will be allowed access to the Upper Wards; before proceeding, transfer all Death items to the other characters.
Lower Ward
Talk to Kuror, if you want he can greatly improve the experience level of your characters specialized in combat. So, turn north-east, reaching Sebastion. Accept his quest (eliminate Grosuk). Then talk to Byron, near the Thokola. He will send you to Lenny, just south of the siege tower. Talk to him too, asking for information about the theft just happened. Then move north, locating the Great Foundry. Before proceeding inside, it is advisable to go and free Death. Locate "A Wrecked House" in the south section of the Lower Ward.
Go down the stairs, starting to hear Death's screams. Talk to Lothar, telling him that the crypt he is interested in is actually completely empty. Before "giving you back" Death, Lothard wants you to find a valuable skull for him. It is recommended that you give him the Soego Skull that you should still have in your inventory. Talk to Lothar a little longer, then step outside to re-encounter Death. You can now teach Grosuk a lesson; you can locate it slightly east of the siege tower. Kill him, then go back to Sebastion. Then proceed towards the interior of the Great Foundry.
The Great Foundry
Proceed northeast, reaching Godsmen Hall. Talk to Sarossa, then go up the stairs to the north. Talk to Sarossa and Bedai-Lihn, then go down the stairs and up the staircase immediately to the northeast. Chat with Keldor (the man behind the desk), asking him about the Godsmen. Try to get close to any of them to be introduced to the use of the foundry's central furnace. There is a completely unused one in the southwest. After forging the item that suits you best, return to Keldor, showing him your work in exchange for a certain number of experience points. Accept the following quest, consisting in solving the case of the killing of Avildon. Begin the resolution by talking to Alissa who will inform you of possible suspects: Thildon, Saros, Bedai-Lihn. Talk to Thildon, then to Saros; return to Thildon with the item given to you by Saros. Talk to Saros again, then to Thildon again, then to Bedai-Lihn. Again with Saros, so twice with Thildon. You can now choose whether or not to let Thildon go. You still have one obligation to fulfill before you can become Godsman: to prevent Sandoz from killing himself. Talk to Sarossa about her father (Sandoz), learning some information about it. Then go up the stairs behind Xander, talking to Sandoz from behind the door. You will easily be able to prevent his suicide. You can now finally join the Goldsmen, talking to Kaldor for the umpteenth time. Then exit the Great Foundry, reaching Clerk's Ward.
Clerk's Ward
Walk north-east from the Porta, reaching Malmaner. Talk to him, he will assign you a quest. Talk to Goncalves and take the costume to give to Malmaner. You will now need to get a second. The procedure is exactly the same, but the experience points obtained will grow exponentially. So go talk to Jolmi, near the closed house. So, proceed south, where you will surely find a small café. Talk to the drunken wizard, then Able Ponder-Though. Aasimar can give you Nemelle's name, as well as the keyword to activate the Decanter and a quest - you'll need to find Aelwyn on Nemelle's behalf. Proceed south, reaching Clerk's Ward; enter the bar next to the pharmacy. There you will find Aelwyn; return to Nemelle to recover a bang of experience points. Then move to the north-east corner of the game area, where the town hall is located. Call the guards to avoid the fight between Annah and Sarhava.
The Civic Festhall
Talk to Splinder, then proceed to the central section of the building, where you can interact with the warriors in training. Talk to one of those at rest to find out where their head coach is. It is located in the northeast section, inside his room. Talk to him to get some useful moves and experience points. Then go outside, locating the thieves trainer, trying to convince him to go back inside - it will cost you 500 copper, but you will get 12 experience points, a huge amount. Then go back to talk to Splinter, asking him to escort you to the Public Sensorium. Talk to Mrs. Thorncombe, then to Salabesh, then back to Mrs. Thorncombe. Then explore the various rooms to participate, as a passive spectator, in the lessons - you will get a lot of information about the storyline and your past. Then enter the dorms, moving east. Turn left, entering the first room. Talk to the woman there (Unfulfilled-Desire is her name). At this point you can ask for the keys to your old room from one of the "janitors" in the area. Retrieve the dodecahedron, try - unsuccessfully for now - to solve the puzzle. We therefore recommend that you visit Iannis briefly, before proceeding to Finam, the linguist. Ask him to translate the dodecahedron language for you. Before he can do that, his notes will need to be retrieved; use the Stories-Bones-Tell about the ashes of the linguist's father (above the table) to decipher the language. So read the inscription on the dodecahedron to earn a fair amount of experience points.
Go back to Iannis, asking him about your past. Then enter the shop called "Curiosity Shoppe". It is necessary here to buy the "Fiend's Tongue", the "Modron Cube", "Chocolate Quasit", "Deva's Tears", "Elixir of Horrific Separation". Then enter the pharmacy, chatting with Klinn - give him an elixir to get many experience points in return. From Ioannis you can also retrieve Mertwyn's head, and then return it to the owner, inside the Festhall. Chat with Splinter, asking him to be taken into the Private Sensorium. Locate Quell, go talk to him to receive a Chocolate Quasit. Talk to him again, he will ask you to find the key to Ravel's labyrinth. Then try to examine all the stones in the area. So go back to Iannis, trying to get the legacy of Deionarra. Go back to Festhall, talk to Splinter about what Iannis told you. Get permission to use the scented stones, so give Iannis the good news to get more valuable experience points. Your next target is the closed house.
The Brothel of Slating Intellectual Lust
Talk to Fall-from Grace, he will tell you to talk to the 10 students of the brothel. Enter the first room, clockwise from the entrance. Talk to Luis, then to Juliette. Exit the locked house, returning to Finam - to which you can now give the book back. So stop for a moment near the Festhall, where you can converse with Montague. Now go back to the locked house, reporting everything to Juliette. Meet Vivian and Nenny (Nenny owns Vivian's perfume, in case you want to help her find it), so here it is. The next will be Dolora who will be able to provide you with information about Ecco. Enter the room to the north (partially hidden). Go up the stairs, recover what you can from the room, then go down and continue your path clockwise. You will find Marissa, who will deny having taken possession of Vivian's perfume; however, he will tell you to find his red veil. Talk to Nenny about this, then continue your visits clockwise - next destination: Kesai-Serris, hence Kimasxi. Go back to Nenny, then try to accuse Luis. Retrieve Marissa's veil and Vivian's perfume; talk to both of them to get a shower of experience points.
Now summon Dolora, she will ask you to bring back the "keys to her heart". Go back to Festhall, to talk to Merriman. Give him the Dark Bird of Ochantus, receiving Dolora's keys in exchange. So ask her about Behold and Ravel. Go back to Behold, telling her that you have now found a way to give her voice back. While talking to her, grab the "Fiend's Tongue" and use "Deva's Tears". Continue the round of conversations, this time aiming at Yves (in the first room from the entrance, but counterclockwise). Ask about Ravel. Then enter the Curio Gallery to meet Yvana. Listen to her, proceed towards the residence of Dolora, therefore of Juliette, then Kimasxi. Finally, conclude the matter by reporting everything to Kessai. Go back to Kimasxi for a moment, he will tell you to go talk to Cambio, the father of both. Kessai will speak to him at your request and you will gain a plethora of experience points.
The Hive - The Return
Talk to Leena, giving her the password; he will tell you to go kill Vorten. Head down southwest to meet Reekwind again. He will tell you another story. Then southeast, entering the usual bar "The Smoldering Corpse". Give the note to Barkis, then go and free Ignus, using the Endless Decanter.
Ignus
Talk to Grace, then to Ignus. Tell him you want to talk about the fire element, then ask him who taught him the Art. So ask to be taught some tricks. Keep learning as long as your life total allows, so remove Ignus from the party. Then continue to the buried village, entering Pharod's court. Grab the items on the ground (especially the Bronze Sphere), then enter the northwest portal. Collect what you can from this room, then return to Giltspur for the last time, talking to Barkis. Enter the Clerk's Ward again and activate the Unfolding Portal, thus meeting Ravel.
Ravel's Maze
Begin to explore the maze well, locating the two portals on the sides. Ravel is located right in the middle of the small and easy maze. Touch her back after she touches you to recover the memory. He will therefore ask you to steal further information about an elusive "angel". Continue to question her, asking her about her past. Try to leave, Ravel will try to stop you, you can fight and defeat her to take possession of large amounts of experience points. So exit the portal to the northeast.
Video - Introduction
Curst
Talk to Kyse to get information about where you are, then with nearby Roberta. Then stop inside the tavern "The Traitor's Gate", where you can chat with Marquez - one of Harmonium's guards. Then approach the bartender, he will ask you to assemble a key on his behalf. Go back to Marquez, this time he will give you much more information, suggesting the position of the corrupt guards. Exit the bar, proceed north, entering the alley where there are the corrupt Marquez spoke of. Kill them and recover Barse's daughter Jasilya. So go back to the tavern, talk to Marquez to get the first part of the key. A little further north-east you can interact with Kitla. She will ask you to bring her the legacy of Kester and Crumplepunch. Talk to them to get their inheritances - you can then decide whether to share them with them or actually give them to Kitla. So talk to Nabat, near the southern section of the bar. So with Kyse, to understand who is threatening him. Reach Wernet, in the north of the city (next to the carriages). Head back to Kyse who has been attacked by several enemies in the meantime. Collect a plethora of experience points from Nabat.
Your next target will have to be Dallan, in the east section of the tavern - he's talking to a friend of his. Get the quest, then approach the prison door to interact with An'izius. Try to mediate between Siabha and An'izius, by raising their offers - then you choose who to actually report. Return to Dallan to get the reward for solving the quest. It remains to recover the last part of the key, from Dona Quisho. It is next to Kitla; you will have to try to free his spirit. Enter the silo-granary, north of the tavern. Examine the magic scroll, then the pentagram upstairs. Return to Quisho for the reward. You can now speak to Barse and reach Curst's dungeon.
Curst Underground
West, going through the tunnels; then north, as soon as possible. Talk to Hermit for some valuable information, then Voorsha near the chambers immediately south. Kill the Gehreleth on his behalf, then head north, encountering two groups of enemies - take them out. Then talk to Tek'elach; after the conversation, take him out and proceed to the inside of Curst's prison.
Curst Prison
West, then South, fight the oncoming group of guards. You will locate a door leading to the Deva prison. Interact with Trias, he will ask you to take his sword, only then can he be released. Open the nearby gate and start fighting the oncoming horde of guards. Once in the central section of the prison, you can fight with Cassius, who possesses the sword of Trias. Retrieve it, then return to Trias to proceed to its release. He will tell you to go find Fhjull; enter the door to the northwest, previously blocked. Activate the portal, continue inside.
The Outlands
Enter the belly of the giant skeleton, where Fhjull resides. Talk to him about everything you can. Then use the portal in the skeleton's left arm to reach Baator.
Baator
Go down to the southeast, where the Pillar of Skulls is, your target. Ask him one question, concerning the "Tower of Regrets". You will then have to go back to Curst to talk to Trias. To do this, you will first need to interact with Fhjull; will tell you that the portal to return to Curst is located under the tailbone of the skeleton.
Prisons
Reach the Porta delle Carceri, proceeding inside. Immediately to the northwest, you will notice a group of people under attack by some Gehreleths, eliminate them to recover a lot of experience points. Then off to the northeast, where Kyse is located. Talk to him, also to get some pretty powerful magic. At this point, north; save Jasilya from the enemy attack. Head up to the warehouse, stopping the jackals in action. Talk to the leader of the anarchists, he will give you quite powerful magic. Then enter the distillery, where you will have to save Kester from the looming presence of several Thugs. Enter the barracks, saving the group of guards who try (in vain) to fight a Sohmien. Exit the administration offices, locating a Curst officer. Kill the guards next to you, then proceed to the central section of the Prisons.
Fight all the enemies until you reach the top floor. When you reach Trias, use Death's Skull Mob ability, Grace's Call Lightning, and Dak'kon's Magic Missiles to quickly end the fight. You can then decide whether to save Trias's life, or end it permanently. A portal will then appear that will take you back to the Hive.
The Hive - The Second Return
Return to the Mortuary, to the room where your adventure began. Head to the center and follow the on-screen directions to inscribe the prayer on your skin. Enter the portal that will thus be created.
Fortress of Regrets
Before entering the fortress, converse with Deionarra - located in the southeast corner of this pleasant play area. Show her the ring you recovered from her inheritance. So enter the fortress; go up the stairs to the southeast. Examine the clock there, reading the inscribed message. Start using the cannons, starting with the first one - north-east of the clock in the room. Pull the lever, then watch the scene. You will automatically be teleported to another section of the fortress. Walk southeast to locate the next cannon near the flight of stairs. Pull the lever, watch the scene with Annah. You will be teleported again. Then go down the stairs to the southeast, returning to the floor you came from.
Activate the cannon to the north, still pulling the lever. You will be teleported again; Go down the stairs to the southeast, then go up the ramp on the opposite side and locate the cannon on your right. Pull the lever, last teleport. Go back, towards the room where you were previously, continuing inside the portal that will have just been created. A fight with Ignus awaits you; we recommend the use of Infernal Shield for a quick destruction of the opponent. So locate and activate the nearby floating crystal.
Maze of Reflections
You will automatically be transported to the Labyrinth of Reflections, surrounded by Larry, Curly and Moe - they are your old reincarnations. Talk to each of them to reabsorb them, then converse with Deionarra. It will take you to the Transcendent One.
The Trascendent One
Talk to the final enemy. You can choose several options here:
1) Join the Transcendent One - to do so, you will need to or threaten it with the Blade of Immortal; use the Bronze Sphere to "force" the union; or threaten to kill you. This is the best ending, recommended.
2) Kill yourself - to do so, you will have to use the Blade of Immortal or use your will to destroy yourself from within.
3) Kill the Transcendent One - you will either have to activate the Bronze Sphere and use your will to kill it from within, or kill it yourself with weapons (difficult), or resurrect one of your companions - preferable Death & Dakkon - to get man strong and cauterize it in speed.
Video Solution - Playlist
Click here for the playlist!
Video Solution - The Awakening
Video Solution - Looking for Jhelai
 Planescape: Torment pc
- pc
Exit date: November 30, 1999


![Guides Sophia's Shop Guide [100%] - Persona 5 Strikers](/images/posts/1f5e1c7629d56d6c792ac770a5d6b182-0.jpg)