


Please note:
The solution is based on the US version of the game for PlayStation 4. There may be divergences from the Spanish version and / or for other platforms.
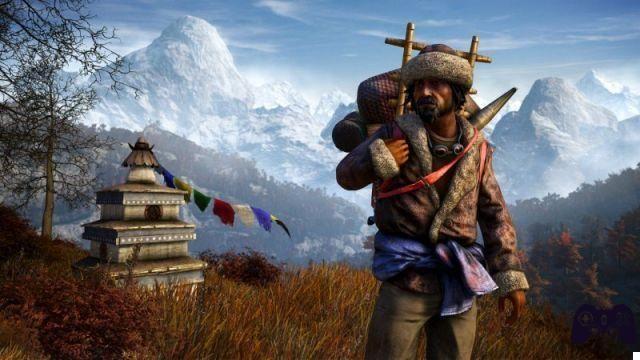
Welcome to Kyrat
Observe the opening cutscene, then go to meet Pagan Min. After the conversation, proceed forward, going down to the basement where you will see a Darpan being tortured. There is nothing you can do, so proceed to the next door to find yourself in the golden path. Exit the door, moving towards the truck and entering. Go down the road, recovering the weapon and defending the truck, until you are hit by a second truck.
After you have safely emerged from the accident, proceed on foot along the golden path, trying to stay on the right to avoid the three opponents that will come from the center. You will therefore find yourself facing a single immobile opponent. Throw a rock to make it move, kill it, swim immediately below to avoid being seen, killing the two subjects looking towards the water. Collect their ammunition, then stay on the right and cast the bait to attract the predators who will attack the subjects below you. Continue to the next village, getting rid of the four subjects in the area. Then continue forward until a rope is thrown at you, jump on it and get ready to defend until the avalanche arrives.
Den of the Wolves
After you have completed the exploration of Banapur, go find the woman named Amita, near the archers area. Talk to her, then continue to the checkpoint and talk to the elderly lady nearby. Continue to the den; just before entering, get rid of the two enemies immediately outside. Go down, push back the wolf that will come in the area. Enter the cave, get rid of the next wolf too. Collect nearby items, especially in the cave. Examine the barrel inside the cave, causing the lair to be destroyed. Go back to the old lady.
Propaganda Machine
After you have finished the conversation with Sabal, keep moving forward until you locate a wire that allows you to go down, reaching the checkpoint. When you have arrived, locate the corpse and launch yourself towards the hook, use everything to proceed upwards, then upwards again, projecting forward, therefore still forward, therefore still upwards, locating the two boys in the near the tower. Get rid of it, then enter the tower. Locate the rope hanging down, climb up, then locate the pipe leading to the next area (you won't be able to jump). Break the wood that leads outside. Continue up, turn off the signal to complete the level.
Meeting Longinus
Head to Longinus after talking to Sabal. Having reached the checkpoint, proceed to the inside of the door and observe the cutscene. So go back to Banapur while the opponents are attacked. Avoid the various checkpoints entered by the enemies, returning to Banaput. Once in the village, pay attention to the enemies in the area, there will in fact be many - some of which will throw Molotov cocktails, so pay particular attention to these. Keep running to avoid taking damage, waiting for the opponents to send their support into the area. Also get rid of the support, so project yourself forward to try to go and save Bharda, preventing him from dying. Continue towards the house, observing the area to the left, climb up, then right into the house. Drop down, saving the girl and activating the next cutscene.
Hostage Rescue
Amita will tell you to go and rescue the hostages taken by Banapur. Head to the checkpoint, then swerve right using the camera to tag all the enemies. Reach the boy closest to you, then the next one slightly ahead. So, from the area where you killed the second enemy, swerve to the right trying to locate the stairs. Move along the stairs, hit the enemy on the right, continue up, then left, then go to free the hostages to complete the mission.
Outpost Liberation
Sabal wants you to take possession of an outpost so that you can proceed towards the golden path. Before reaching the outpost, head left and climb up the hills, getting a view of the nearby areas. So try to locate the elephant and shoot in his direction, so that he gets angry and goes to attack your allies visible near the outpost.
Rebel Yell
The goal will be the defense against a new type of enemy called "The Hunter". These opponents are fast and very quiet, and use crossbows as weapons, which inflict damage exactly equal to the sniper rifle. Reached the new checkpoint, take a good amount of ammo / mines, place the mines near the trees, wait for the timer to reach zero, jump on the machine gun and kill the nearby Hunter. Once this is done, Sabal will tell you to reach the next camp, previously completely destroyed. Here you will find a total of six hunters - 2 on your left, 2 on the top, and 2 on the right. After you kill them the mission will be over.
A Cultural Exchange
Head to the monastery and talk to the man in the area. Take the basket and follow him. Before proceeding, it will be necessary for you to eliminate four enemies. The first is in front of you, immediately after the entrance; the second on the left, the third on the right, the last one immediately behind the first. Head to the right and look at the sacrifice. Wait for the opponent to kneel, then proceed to the outside.
Once outside, you will notice how the monastery is under attack. You will have to avoid that the 3 zones in the vicinity explode. Locate the bombed enemies, then quickly head forward to kill the subject placing the bomb. Keep repeating this procedure until you complete the mission, also remembering to retrieve the crates of ammunition scattered nearby.
Video - "Arena Master" Trailer
Mouth of Madness
To reach this area you will first need to talk to Bharda, to get information about the family. You will therefore have to reach Bharda to obtain information on your origins. After you open the door, observe the cutscene.
You will wake up completely naked, inside an arena, and you will have to fight against a few waves of opponents. To repel the first wave, look for the opponent closest to you and kill him to retrieve his weapon, then eliminate the rest as well, then continue to change the rifles as soon as you have no more ammo. Moving on to the second wave, you will find yourself facing a much greater amount of opponents, we recommend running in circles so as to minimize the likelihood of them hitting you.
The third wave will see you face 12 opponents and a tiger, all of which will try to eliminate you, you will have to finish them at maximum speed. Moving on to the fourth wave, you will find yourself facing 6 opponents of very heavy tonnage; we recommend eliminating the smaller ones first (always among the big ones), and then concentrating on the big ones when you can "focus" your firepower. After you have achieved the victory, you will be able to observe the cutscene.
Sermon on the Mount
Try to pay attention from the very beginning. In fact, you will have to proceed next to a fortress, from which attacks will begin to "rain" as soon as you approach, especially by a group of snipers who will open fire as soon as you are near the nearby checkpoint. Then look to the right to locate a plain, project up to meet Longinus.
After you finish talking to him, talk to Sherpa and continue towards the mountains. Try to stay on the right side, hitting the first opponent. Then move to the nearby rocks to get an elevated view. Get rid of the two opponents at the bottom right, therefore of all the "side" enemies in the vicinity. Enter the tent, retrieving the oxygen mask. Use the GPS to locate the box. Once you reach the body, you will find it completely devoid of useful objects, so you will have to explore at least three other areas.
So pass the first box, staying on the right and waiting for the two snow machines to pass you. Get rid of the three opponents visible at the top right. Quickly jump to the right, remembering to retrieve the orange crates on the ground - they are your oxygen supply, needed to survive this level. Project to the right, killing the wolves.
Continue towards the ravine, projecting up to the left, getting rid of the snow leopards. Examine the body and retrieve the items. You will then have to reach the following body which is located in the caves below. Go down to these caves, so once you enter keep moving forward until you reach the bear. You will therefore find yourself at a crossroads, on the right you can find the chest, take it out. Continue to the outside of the cave, facing 7 enemies. We do not recommend fighting them: instead move sideways, avoiding any contact with them, to reach the end of the mission.
The Protectors Arrival
Talk to Reggie and Yogi, getting information about parents and the gifted path. Continue to the checkpoint. Reached the entrance, get rid of the two Hunter in the area, as well as the next visible inside. Keep going up, locating three more Hunters. Continue to the door, look up and project yourself into the area. Continue towards the end of the rope, then "detach" quickly to avoid falling into the water. Look to the right to speed upward. Look to the left and throw up again, then detach and reattach at speed, throw yourself forward again reaching the crate.
After waking up you will find yourself in a kind of dream. Drop down and then be teleported into the water. Keep swimming until you reach the Shangri-La surface, proceeding forward until you meet the White Tiger. Grab the knife, continuing to move forward until you are attacked and then saved by the White Tiger. Go up the stairs, get rid of the opponents in the center. You will then have to activate the wheels visible to the right and left. You will therefore go to meet the Sorcerer. Kill both him and all nearby subjects, then use the Takedown to quickly KO him. Keep moving upwards, locating another sorcerer with 4 subjects associated, then repeat the whole procedure, then go to free Bell and end the cutscene.
Lost and Confused
Talk to Reggie and Yogi. After you wake up, you will have neither weapons nor items. Proceed to the outside of the bear's lair, locating a corpse. Pick up his weapons and continue to the next checkpoint. Explosive monkeys will appear. You will therefore have to examine the various checkpoints in the area, finally going to locate Reggie and Yogi. After you find them, the mission will be considered complete.
Burn it Down
Before reaching the camp, look to the right and locate the guard subject. Deactivate the sprinklers and eliminate the person guarding the playing area. Blow up the whole thing, then continue towards the main building visible in the area, freeing yourself of the subsequent subjects that will arrive nearby. Once inside, find all the heroin in the area. Continue to the outside, reaching the balcony and retrieving the mortar to kill the enemies. Continue on to the next camp, visible behind you. Kill the subjects guarding him.
The Sleeping Saints
Use the hook to climb to the top. Once in the area, you will suffer the explosion of a statue. Pay attention immediately to the snipers that you can locate near the statues. Eliminate them first, and then the following opponents later. Then explore the area where the snipers were, deactivating the bomb that was in the area.
After you deactivate the bomb, you will have to defend the playing area for several minutes. So use the mines to cover the area on the left and right. Watch out for the snipers near the head of the statue, get rid of them first, then locate the helicopters in the air that will release a large amount of enemies. Repeatedly keep killing them, until you are able to activate the fire at the hands of the statues. Use the hook again to climb up and light the statues.
City of Pain
Head towards the checkpoint, keeping to the left of the building and finishing off the only enemy present. Climb along the back area of the building, thus reaching the roof. Enter the hole on the left, drop down to the truck.
Get carried by the truck to the right, locate the two enemies in front of you, so watch out for the next opponent who will descend the nearby stairs. Get rid of him too, so head to the tower and throw yourself inside the hole. Move up, finish the enemy present, enter the building, free the slave by killing her guardian. Go back to the back of the tower, then hit the opponent near the wall. To his right you can quickly free yourself from the two subjects present, continuing towards the last slave, freeing him too. You can now make your way to Paul's office, locating a group of guys dancing. Then locate the fence on the right, combined with a hole, killing the opponent beyond the hole. Continue forward to the back building, then observe the cutscene near the door.
After the cutscene you will need to bring Paul's body to the vehicle. We recommend using a hunting syringe to quickly locate all enemies and kill them without problems. Once you reach the car, throw Paul's body in the trunk and travel along the checkpoints until you reach the Golden Path.
Basic Chemistry
Head to the checkpoint and talk to the only person in the area. So go talk to their boss who will ask you to destroy the support cables. Get rid of the elephants on the left and right, attacking them so that you only have to kill the last one at the top.
Disarm all alarms by destroying cables. The trucks will then start coming from below, dodge them and keep hitting the cables nearby. After they have all been destroyed, use the explosives to clear your way to the next level. Drop down, then get rid of both the two enemies behind you and the next ones on the left. So place the explosives nearby, blowing up the building as soon as you are ready.
Free Willis
After the phone call, head to the airport from the east side. When you reach the airport, look to the right to locate a path leading to the mortar. Here you have to start getting rid of the snipers - a first to the left in the tower behind you, a second just below the tower to the left, another near the control tower on the far left, another to the right of the control tower; therefore a sixth in front of you, in the building moved slightly to the right.
After you take out all the snipers, move to the control tower and wait for Willis to land. Report as many people as possible with your camera, then wait for Willis to give you the okay to shoot. Collect the sniper rifle, arrows and grenade launcher. Get rid of all the enemies that are attacking Willis. When a helicopter arrives, use the Z93 to destroy it. After you kill everyone, talk to Willis.
Kill or be Killed
Proceed to the portal. When you reach it, there will be two opponents on the left, behind a group of rocks. There will be another one on the right, near the building. Then a subsequent one in the center, then some others still on the left. If / when the helicopter sees you, you will have to get rid of the two subjects released by it, also taking a photo of the objective that you will find yourself locating. Then head to the monastery. Turn the corner, freeing yourself first of the two enemies in the center, therefore of the next one on the right, therefore of the other two immediately above the center.
Continue to the monastery, getting rid of the two enemies near the stairs and the nearby sniper just to the left of them. Swerve to the right before the gate, go up the ladder, reaching the inside of the building and hitting the sniper on top of the building in front of you. So right, 3 other opponents nearby, then another group on top of the roof. Retrieve the key, open the door, continue towards the cave. Once inside, first get rid of the opponents below, and then move on to those immediately above.
Once out of the caves, you will find yourself along the mountains. Exit, then throw yourself behind the nearest cover. Get rid of the two enemies on the left, then the snipers, then the subsequent opponents on the far right and the other 15 nearby. Try to stay in position, the surrounding columns will protect you from 90% of the enemy's hits, and you can eliminate them one by one with the necessary calm. When they are all dead, proceed to the opposite side to retrieve the photo and complete the objective.
Death from Above
Use your suit to quickly fly down. Once you land, move to the right and go up the hill. At the top, move left to interact with the first visible subject in the area. Then move to the left, freeing yourself of the two subjects that will descend from the sloping area. Approach the opponent on the back, take him out, then do the same on the next one in the front area. Then move to the other two on the left, inside the house. Move to the right, killing both the man and the dog who will descend from the sloping area. Watch out for the snow leopard, it can kill you very quickly.
Keep moving towards the central room, getting rid of the four subjects in the area and recovering the painting. Once this is done, move around the camp, jumping down and using your suit to go down the mountains. Beware of snipers who will try to hit you from all sides, dodge them by moving in a zig-zag way. Then increase your speed to avoid the oncoming avalanche. Once outside, approach Willis to view the cutscene that will conclude the chapter.
Don't Look Down
After the cutscene, follow the shadow until you reach the portal. Then locate the hook, using it to build the rope - you can find it near the altar. When you have the item, you will have to repeat the procedure near the other side of the portal. Having built a kind of hook that allows you to go down, proceed along the mountain. Once down the mountain, get rid of the dog and the flamer, keeping the latter on the left, while the dog will move to the right. When they are far enough away from each other, start climbing the building. Once in the area, get rid of the enemy on the left, then move quickly to the right and stay on that side, going down. Activate the second alarm, retrieve the gun nearby, as well as the arch to the right just behind the sign. You will now find yourself in front of 8 enemies: given the near end of the level, we advise you to run at maximum speed towards the last door and shoot with the Shotgun to destroy it, then go through it and complete the level.
Shoot the Messenger
Head towards the crowd. Once in the area, try to proceed through the front area. Look to the right to locate the ravine, move up, then head for the back door.
Continue to the control room, locating the characters in the area. Kill them all, then release the animals, killing any nearby fighters. Once this is done, Noore will send some guards to the area to try to kill you. Then exit to the left, getting rid of the three opponents in the area. Move along the corridor, trying to avoid the tiger cages. At the ravine, look up and jump to the hook, projecting forward and seeing it with Noore. You can freely decide whether to kill her or leave her alive.
Video - Cinematic Trailer
Key to the North
Head to the bridge to the east, then look west and project across the ravine using your suit. Get rid of the enemies in the area, then jump into the truck and proceed to the checkpoint. Once in the area, continue towards the king's bridge, blowing up the nearby wall. Once inside this new game zone, you will be attacked by a large number of opponents. Continue towards the building closest to you, getting rid of all the subjects that will enter the area, also trying to avoid the mortar rounds. After you have killed all the enemies, continue towards the red building, using the mines on all the subjects that will try to enter, also hitting all the opponents that will come from the windows in the area. After you have killed everyone, go and meet the rebels near the initial area of the bridge to finish the mission.
Truth and Justice
Head to the checkpoint, go through the door and watch the cutscene. Afterwards, go out and kill the two opponents in front of you, then retrieve the Buzzer and move towards the opponent, killing him.
Payback
Once out of the tent, head towards the mines. As soon as the path splits, head to the left and retrieve the note from the table. Observe the cut scene. Follow the flow of blood continuing to the top, being blocked by a portal. Project yourself up using the hook, overcoming the wall. Retrieve the crossbow, then move beyond the portal, shoot the vase beyond the portal to make it explode. Move up again, projecting yourself to the right, then up, then left, trying to act like a spider man to project yourself to the opposite side. Once in the flow of blood, keep moving upwards until you are interrupted by an intermission scene.
You will now have to quickly reach the goal and eliminate it, also getting rid of the hunters nearby. Watch out for the White Tiger too, then enjoy the cutscene.
Cease and Desist
You will have to rush towards the temple, locating the snipers coming from the east and eliminating them in speed. Pay attention to the subjects below, to be eliminated at maximum speed, as well as the next 4 subjects visible near the tower combined with the machine guns. So start deactivating the bombs. The first will be located near the tower, the second in the basement (you will have to use the stairs to reach it and repel the two enemies).
Then return to the top, starting to defend yourself from the waves of incoming enemies. Continue to the gun turret near the tower, where the first real wave of opponents will reach you. Get rid of all the ships nearby, heading towards the turret visible behind you, repelling the next waves in the area. Return to the gun turret, hitting the nearby helicopters. After you have killed all the subjects in the area, return to the grenade turret and use it in combination with the machine gun to reset the last wave of opponents.
Take Cover
After you have taken control of the tower, you will need to return to the village to help the subjects in the area. So beware of roadblocks, you must absolutely avoid them. Once you reach the village, you will have to take care of its defense. Try to load a good amount of ammunition, using the crates nearby. After you have killed all the enemies nearby, hurl yourself to the nearest cover from the artillery shells. Head to the checkpoint to hide. Get rid of the enemies around the checkpoint, then hide near the last corner available, getting rid of the nearby Sabal.
Reap what you Sow
Head to the checkpoint and kill all the Amitas. Once this is done, continue to the door, observing the cutscene. You can therefore freely choose whether to kill the opponent or keep him alive.
A
You must now begin your attack on Pagan Min. Attack his residence, starting from the outer wall, where you must first eliminate a dozen opponents. Once this is done, move up and explode the door, using your explosives. Move up again, clearing 15 other opponents, paying special attention to the enemies visible on top of the buildings. Blow up the door, then quickly head towards each of the areas marked in yellow.
Stay in the area until all the areas marked in yellow have been captured, then proceeding to the next two areas as well. Having taken control of all three areas, you will have to repel the last Pagan Min counterattack, then head towards the golden statue to reach the elevated point. Push back the trucks, heading towards the main road and eliminating the opponents that will show up in the area. Watch out for the helicopters that will release the opponents. When you have cleared these too, quickly destroy the Pagan Min statue.
Farewall Old Ajay
Head to Pagan Min Castle, enter the area, go down until you see an intermission scene.
You will now have the option to kill or leave the opponent alive, if you decide to kill him move outwards and continue towards the sanctuary. If not, he will take you to the shrine, tell you what happened to your family and leave you alone.
The King is Dead
If you killed the king, he will try to fly away and you will have to try to take him out with a quick shot. If you decide to leave him alive, he will tell you that you can have the whole nation at your disposal, but that he will own the helicopter and leave. Quickly fire at the enemy to KO him.
Video Solution - Playlist
Click here for the playlist!
Video Solution - Pagan Min
Video Solution - Incursion
 Far Cry 4 ps4
- ps3
- x360
- pc
- ps4
- Xone
Exit date: November 18, 2014


![Guides Sophia's Shop Guide [100%] - Persona 5 Strikers](/images/posts/1f5e1c7629d56d6c792ac770a5d6b182-0.jpg)