


Please note:
The solution is based on the US version of the game for Xbox 360. There may be divergences from the Spanish version and / or for other platforms.
Prologue
During the initial stages, move east and jump to the trunk. Then move east, locating in the Ori area. After the short cutscene, you will take control of Ori. Move east, exiting the cave. Continue east again, locating Naru. Continue east, arriving at a small swimming pool. After the cutscene, you will have a bridge at your disposal.
Move west, reading the text as you go along. After another cutscene, you will take control of Naru. Exit to the east, observe the cutscene. Go back to the cave, to the west.
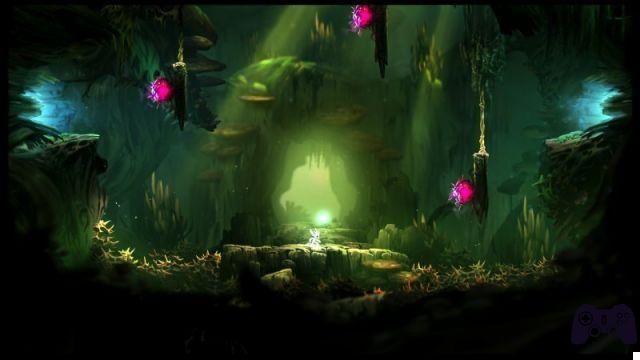
Sunken Glades
Move west. At the jump, throw yourself forward. Continue west, dropping towards the trunk. Press the "down" key, then jumping to the trunk below. Continue west, jumping down again. West, locate the purple plants. Continue west, jumping along the logs. Open one of the plants to recover some HP.
Proceed west, continuing beyond the purple plants, recovering the energy cell. Save your game by creating a Soul Link. So, jump down and go west. Locate the wall, then - always staying close to the wall - quickly jump up. The ram will hit the wall, and then cause a rock to fall.
Now continue west, jumping on the log, recovering the ability to use Spirit Flame. Move east, locating the frogs. Press the Spirit Flame button repeatedly to damage enemies. Next, examine the log to the west, locating a Spirit Container.
Interact with the plant to the west. Your spirit bar will suddenly fill up. When this happens, you will get an additional skill point: to access it you will have to place yourself near a Soul Link, press the corresponding button, then select one of the skills.
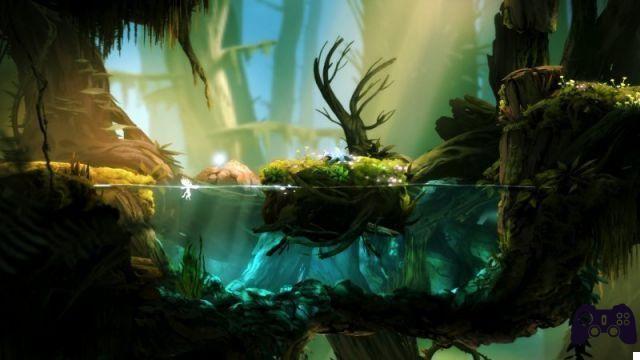
West, go back to the water. Jump along the logs to get to the opposite side, paying attention to the enemy who will try to hit you from above. You will have to dodge the bullets, pressing the Spirit Flame to finish the opponent. Proceed along the stream. Destroy the purple plants, then move forward to find a spirit well.
Now use the wind plant, holding the jump button to jump higher and higher. After you land on the wooden post, use the Spirit Flame on the slime in front of you, dodging its projectiles with an upward jump. So jump on the log, moving east to locate the hidden area, containing the Spirit Container. Move east, jump to the rock, then back to the purple mushroom. Jump along the following plants.
Continue west, destroying the purple plants, then clearing the slime. West, go down to the stone. You will locate a small hidden area: at its end, you can recover the Keystone. Go back to the stone and jump to the log. Jump to the right, destroying the slime. Jump along the next logs until you reach the second Keystone. Retrieve the Keystone, go down to the Spirit Gate. West, then East once you get to the signal. Get rid of the frog, then jump across the mushroom platforms. Go up, then west, recovering the first Life Cell.
Go back to the sign, this time heading west. Go down to the log, then turn west, then go down to the next log. Collect the stone to the east. Retrieve the Keystone to the east, then go back to the west, climb along the trunk, continue west, destroy all the purple plants. Drop down, then get rid of the purple plants blocking the path. At the lower part, move west and get rid of the slime near the wall. Jump along the plants, continue west to the next tree. Jump along the wall, then move along the wall to the west, finding the first energy cell that will allow you to increase your energy level.
When you get to the area where you came down, move along the walls to go up. So move west, getting rid of the slimes and frogs. You will come to an area with spinning spikes. Press the stone to the west, killing the frog. Continue forward, retrieving the Spirit Container on the left. Jump along the stones, then climb up to the rotating levers. Press the stone beyond the quills.
Once this is done, jump over the stone, then jump to the next Keystone. West, jump along the wall to the Spirit Container. Go down, hit the purple plants. Go past the nearby lever, press it to cause a log to descend. Jump to the top of the log, then east, to the fragment. Get rid of the slime on the ceiling. Go back to the Map Stone. Insert it, revealing the Sunken Glades map. Go up a few levels, then move west to the Spirit Gate. Insert the two Keystones. West, up to the next platforms.
Climb to the third level, retrieving a Keystone to the northwest. Climb again, veering west, climbing along the platforms to the east. Jump along the wall, then continue to the next level. Move east, using the wall to move up. Use the wall on the opposite side to "slide" down to nearby Keystone, recovering it without any problems. West to the log platform. Also recover the Keystone here. Pass the Spirit Gate, continuing towards the center of the play area.
Video - Trailer
Hollow Grove
You will first have to recover the "Charge Flame" skill. To get it, you will have to lure the nearby frog towards you, making sure that it hits the "cracked" area near the ground.
So move east, destroying the wall with Charge Flame. Jump to the tree, then over the trunk. Jump to the right, then continue to the lever, pressing it forward, causing a vertical log to descend. Drop to the south, then return to the trunk. Jump along the wall, along the tree. Get rid of the slime.
Jump to the top of the tree, dropping to the opposite side. Get rid of yet another slime. Move west, destroying the wall with "Charge Flame". Jump along the wall, then to the left, killing the spider in the area. Then keep jumping up, then right. Overcome the rock, using Charge Flame to destroy the rock that "holds" the cocoon. You will have to use the cocoon as a platform.
Drop down, then hit the spider on your left. Dodge the bullet he threw. Move to the ledge on the left, then jump to the left and retrieve the energy cell. Climb the cocoon again, jumping east. Run to the spider. East, towards the contaminated water. Kill the spider and use the plants to level up. Kill the slime, also destroying the purple plants. Jump up, using the wind plants to reach the top of the tree. Destroy all the purple plants above.
On the opposite side, drop down and retrieve the tree fragment. Drop down, returning to the opposite side of the tree. Continue east, inserting the map fragment into the map itself. Use the wind plants to return to the west, arriving at the signal.
Thornfelt Swamp
Kill the slime to the east, then wall jump to the spinning spikes. Pull the stone towards you, then move towards the Spirit Well to the east. Go back to the stone, moving it to the left. Jump to the stone, then jump to the wall. At the top, east, observing the interlude scene with Gumon.
East, getting rid of the slimes along the way. Move west, placing yourself along a partially destroyed area. Go to the flashing platform. Position yourself in such a way that the ground slime shoots a bullet at you, revealing the presence of another ground slime. Move to the purple wall. Wait a few moments in its vicinity, then proceed forward as soon as the ground slime shoots at you. Move west towards Moon Grotto.
Moon Grotto
Go full speed along the first group of lasers to maximize the chance of survival. Jump to the wall and drop down past the laser. Run to the right, jump along the wall, then continue east and drop down the wooden platform. East, use the Spirit Well. West, finding Gumon again. Follow it down, ignoring the left and right areas. Open the energy portal, then continue to the bridge. You will gain direct access to Gumo's hideout.
East, past the spines, to the moving platforms. Place yourself near the first play area. Drop down beyond the moving stone platforms. Right, overcoming them. At the bottom, avoid reaching the ground, preferring to move to the right. Continue east to get to the first boss. To defeat him you will have to move sideways, then repeatedly exploit the Spirit Flame and dodge the incoming bullets. Repeat this procedure until the enemy is defeated.
Jump along the wall to the right and retrieve the Keystone. Go back to the previous area, then recover the fragments of the map. Continue to the stone to the west. From here, continue east along the horizontal stone platforms. So jump to the pillar on the left right after it hits the ceiling, then jump back when both pillars reach the central area.
Continue to the Spirit Gate, opening it. Go past the spike platform. Descend to the bottom, acquiring the ability to perform the "double jump". Immediately try to use the double jump near the ravine, next to the platforms with the spikes. At the top, get past the spikes and drop down to the Energy Cell.
Go back to the central area, containing the Map Stone. Double jump to the wall on the right, then to the vertical trunk. Right, west, go down and kill the spider. Move along the next passage, then slide along the wall and double jump when you are near the spines, recovering the Ability Cell. Return to the center, opening the portal. Move the stone, making it block the laser. Climb up, moving to the opposite side. Kill the spider by pressing the stone towards the laser below.
Go down to the lower level. West, dodge the bullets, then climb along the west wall, pressing the lever. The laser will turn off and you can move the stone down, moving it down again. Your next goal will be to reach the Ginso Tree. Move east, past the spikes and moving pillars. You will find yourself in front of Gumon again. Press the lever, clearing your way on the ground to the left, to return to the area. Jump forward, following Gumon along the passage. Gumon will pull a lever which will cause the rocks to fall.
We therefore recommend staying close to the wall, avoiding the areas where rocks fall. At the top, keep following Gumon as he "spits" the stream of water. The water vein will allow you to enter the Ginso Tree. To return to the Ginso Tree, double jump to the northwest area.
Ginso Tree
The initial goal will be to proceed along the tree. Destroy the purple plant, then jump along the wall to the blue portal. Go through the portal, arriving at the opposite side of the screen. Jump to the woody area, then right, passing the portal. Get rid of the slime on the right. Pass the blue portal, reaching the platforms shaped like creepers.
Jump to the platform in front of you, then to the portal on the right. So jump along the last two platforms, continuing to the portal on the left. Jump to the wind plant, passing the portal, then jumping to the wall to the right.
Double jump to the blue portal. You will reach the bullet plant. Left, breaking the tree blocking the path. Press the stone towards the portal, returning it to its original area. Jump to the upper left area, knocking the nearby stone down. Make the other portal go down along the central platform, so that it breaks through the wall. Pull the stone away on the ground to make sure you don't get hit by moving along the portal. Break the crystal, then proceed beyond the portal at the top to get to the upper level. You will have to fight a second boss here. The fight will be similar to the previous one. Stand in the center of the platform throughout the fight, moving to either side when your enemy is about to fire a bullet. Move to either side as you hit the slime on the ground.
After the fight, jump to the right and move beyond the portal. The level will feature two Keystones, near the partially destroyed plants. Move to the portal below, making a double jump to the platform in the center. Drop down, then double jump again to the lower right portal. Move beyond the umpteenth portal, then double jump to the right, recovering the Keystone. Move beyond the next two portals, double jump to the central platform. Move beyond the portal at the top left.
Move to the platform west of the Spirit Gate. Go down, making a double jump to the left. Move beyond the portal. Double jump to the left. At the root, double jump to the left. Use the wind plant to move beyond the portal at the top left. Retrieve the second Keystone. Move beyond the east portal, returning to the Spirit Gate. Insert all the Keystones, moving beyond the portal. You will get the "Bash" power: use it on the lantern on the left to reach the portal in the upper left.
Wall jump to the next level, reaching the bullet plant. Wait for the bullet to be in the center, then jump to it and use it to move to the right. Do a wall jump, then hit the root of the tree. You will reach an area with a bullet that "shoots" down, with a portal to the left. You will have to hit the bullet through the portal, so that it then exits to the right and goes to hit the wall in the center.
Move up until you reach the slime above. So move to the left center of the screen, deflecting the bullet to the left area. A new path will open up, proceed beyond it, so continue beyond the portal. Go up, use Bash on the lantern, recovering the Keystone. Use Bash to proceed beyond the portal on the left. Climb to the Keystone above, then return to the previous lantern, retrieving the Keystone. Double jump to the central lantern, hit the Keystone on the left, then move along the lanterns to get to the raised level. Use the Keystones to clear your way to the Spirit Gate.
You will then reach the third boss. He shoots bullets at you. The only way to damage him is to shoot "back" the bullets he launched, using the nearby platforms as support.
Then move beyond the portal to the right, saving near the Spirit Well. Return to the central platform. Locate the lantern by double jumping towards it. In the next room, you will find the "heart" of a tree, infected with some purple plants. You will have to destroy all the purple plants, moving towards each side of the heart and destroying them. We recommend starting on the west side. Use enemy bullets as "thrusters" to reach the top. Then move along the new opening, using the Spirit Flame on the purple plants. Return to the center, then moving east.
Here you will have to use the projectiles of the plant to destroy the wall in the upper left area of the screen. In order for the bullet to reach this area, you will have to smash all the "redirection" stones. We recommend that you only hit the hole in each stone, it does not need to go all the way through. When you reach the third stone, you will have to proceed horizontally to reach it quickly. You will therefore have to throw the bullet upwards, through the stone. So double jump to get to the left side of the room. From here, hit the bullet upward, so that it proceeds through the nearby stone and breaks the wall. When the wall is destroyed, move forward and destroy the opposite side of the purple plants. Drop down in front of the tree.
During the initial phase of the escape, we recommend using the lanterns to proceed upwards. Later, you will have to rely forcibly on the enemies and the bullets they fire, the only way to project yourself upwards effectively. Try to double jump often.
Thornfelt Swamp
Jump into the water, starting the path that will take you to retrieve the two Keystones. Break everything along the way, especially the fish and the purple rounds. Try to visit each of the alcoves in the area to "get some air", and then continue swimming downwards. Retrieve the Keystone from the alcove. Swim down, turning east. Swim along the stone pillars, then move to the next alcove.
Double jump to get past the spikes, then jump to the central platform. Kill the two Slimes and retrieve the second Keystone. Before returning to the Spirit Gate, retrieve the map fragment visible in the water.
Return to the surface and insert the stone fragment, revealing the map for the area. Then open the Spirit Gate. Jump along the planks, using the bullet on the ground to move up. Do a wall jump and smash the lantern to get to the east area. You will find an ancestral tree that will allow you to gain access to Stomp, a move that allows you to break through "weak" floors. Then move east, reaching the Ancestral Tree.
Use the bullet on the ground to move to the right, opening the passage below. Go down to the locked portal. So dive into the water, recovering the Spirit Container in the alcove on the right.
Continue back to the central area, hitting the tree and retrieving the Spirit Container from the chest below. Move towards the stone, climbing up the wall on the left. West, hit the ground and retrieve the skill cell. Go down into the water, then deviate to the first passage on the left, reaching some partially destroyed plants. Jump to the upper right corner, open the energy crystal, charging the flame. Jump into the air and charge the flame. You will cause the water to drop. Go back to the stone, hitting the ground on the left. Head west, reaching Moon Grotto.
Valley of the Wind
The Valley of the Wind is located west of the Spirit Well. First break the tree, recovering the Ability Cell. So begin to move progressively towards the west. Double jump across the water, using the lanterns to climb to the top. Then left, up to the sign. Then move north to Sorrow Pass. From here, continue east, locating the sign to Sorrow Pass, which you will need to follow. Project yourself beyond the lanterns, thus hitting the birds. Jump to the left, hitting the rocks. Launch to the right, then jump to the left, do a quick double jump, then glide to the left side of the valley. West, coming to Misty Wood.
Misty Wood
Project forward to the Shrouded Lantern. You will have to find a way to be able to turn it on. Hit the enemies in the west. Get past the frog and jump up through the air. Jump to the wall, then move up, then left. Hit the bullets, then glide forward to wait for the next bullet. Once on the ground, avoid hitting the Slime in the area. Double jump to the spines on the left. Continue west, then retrieve the Keystone. Head back east, going down the passage. Glide forward, making a double jump. West, get rid of the slime by retrieving the Keystone. East, opening yet another passage. West, gliding repeatedly to descend to the bottom. Get rid of the slime, then hit the lanterns. Jump down to the left, then wall jump to the tree. Use Spirit Flame repeatedly to run out of slimes. Glide down the area to the left, then double jump along the wall. Get rid of the slimes, then retrieve the Ancestral Tree.
East, climbing along the wall, then jumping upwards. Jump along the walls, then kill the frog. Continue east, then jump to the plant in front of you. Double jump to reach the plant, then climb up. Do another double jump to the last wall, then land to the right. Get rid of the slime, then continue east.
At the top, get rid of the frog, then continue east. At the Keystone, glide along the vineyards, then go down the ravine. Jump forward, move up to reach the wall. Keep following the wall, killing the frog and proceeding east. You will now have to glide downwards, avoiding the spikes. At the bottom, move east and hit the slime. Hit the lanterns in sequence, then double jump to the left, retrieving the Keystone on the right.
Go past the spikes, then climb up to the energy cell. Retrieve it, then go down again. Back on the ground, you will have to proceed upwards again, hitting the slime bullets. So go up the wall to get to the top. Head east to get to the ravine. Climb to the top, making double jumps along the ravine.
At the top, turn right and then go up. Kill the frog, then continue west. East, go down, then use the green plant projectiles. Do a quick double jump. Then let yourself fall down, returning to the central area. Now, rather than glide down to the alcove, glide west until you reach a boss fight. Get rid of the two slimes in the area, running to avoid their hits. The portal on the left will open. Move beyond the portal, open the Spirit Gate with the Keystones. Collect Atsu's torch soon after. Press the keys indicated on the screen, making Ori hold the flashlight. Make a quick jump, using the Spirit Flame. Retrieve the item, returning it to the lantern.
Place the sphere in the center, recovering the Gumon Seal, which can be used to open the ruins of Forlorn. Then go back to the checkpoint visible on the map. Move east to reach the valley of the wind. Jump down, then head west. At the end of the path, recover the fragment of the Map Stone. Turn east, following the path to the lever. Press it, then drop down and head west. Hit the ground, dropping yourself again. Retrieve yet another fragment. Try to "pull" the ram towards the wall to make it break it into a thousand pieces. Follow the next steps. When you reach the lower area, you will find yourself in front of a wall of snow. Locate the lever above you. To reach it, you will need to lure the ram into the area and make it hit the highest area, and then double jump to the lever. Pull it to open the portal that leads to the opposite side. Continue west to the Forlorn Ruins.
Video - Prologue
Forlorn Ruins
Double jump west to retrieve the light ship. After recovering it, walk along the walls and onto the roof. Move left, jumping on the floating stone and passing the wall on the left. At the roof, release the Light Vessel to descend. Kill the slime, then head back east to get to the pillars. Continue to the roof, getting rid of the two slimes. Drop down, killing the slime in the area.
West, leave the Vessel, then double jump to the spider. Hit him with the bullets, then move to the left. You will now see a Keystone above you. You can't get it right away, so go up a level by moving along the stones to the west. Climb along the wall, then let yourself be carried to the ceiling. Next to the magnet you can observe a Keystone. Before interacting with it, you will have to move to the right, along the various stones in the area. Then walk along the wall to the right.
Walk along the magnet to the east, then jump down. You will land on the central magnet. Therefore, project yourself towards the magnet on the far left. Continue to the map on the right, inserting the fragment to reveal the map of the next area.
Jump back onto the magnet, then flying to the left. Save, then walk along the ceiling, moving to the right and getting rid of the two frost slimes. Drop down, then climb up the wall to the right, killing the slime. Jump on the magnet, then fly to the right.
When you reach the magnet on the right, walk around it and retrieve the stone. Fly up, then kill the Slime in the area. At the area on the left, jump down and retrieve the Keystone. Right, drop down to get to the Map Stone. Move east, arriving at the Spirit Gate. Open it, then drop to the center. Go back to the left, crossing the stone bridge again. Walk along the nearby stone platforms, then continue northwest. Before reaching the top, double jump to the right, entering the alcove. Hit the switch to get to the portal above. Move beyond it, then jump on the stones, dodging the lasers. Retrieve the Life Cells.
Go back and climb to the top of the play area, using the Wall Climb and Double Jump. Jump across the various stone platforms to the crystal in the center.
Fuga dalle Forlorn Ruins
Jump forward and glide. At the top, glide forward again to make the ceiling drop down. Jump to the right, climbing up the wall. Wait for the slime to fire the bullet, then double jump to the right until the roof above you falls apart. Dodge the geysers, then drop down and move to one side. By continuing straight for a short time, you will be able to leave the ruins.
After the cutscene, you'll find yourself on the ground with Kuro trying to track you down. Hit the ground to the right, swimming underwater. Run to the right, then jump out to find yourself behind a tree. Now locate the roots to the left of the spider. Hit the spider's bullets, causing the tree to partially descend. Jump to the wall on the right. Double jump to the left, entering the tree. Climb up the tree. Move east, locating the green wall blocking the way.
Go past the green wall, dropping the logs and placing yourself beyond the tree. Jump to the right, then run forward. You will now have to pass the Sorrow Pass to reach the last objective.
Sorrow Pass
Move left, past the lasers and enemies. Retrieve the Keystone from the corner. Return to the center and move up to reach the next Keystone. Go back down, then jump up twice.
Move west. At the wind tunnel, drop to the right. Get rid of the slime, find the Keystone in the area. Hit the falling slime, get over the wall. Drop down, open the Spirit Gate. Glide along the passage, hitting the ground. West, hit the spider, moving along the wind tunnel. At the top, double jump to the right.
Right, kill the slime. Jump to the Keystone to the left, then up to find three more Keystones. Left, retrieve the energy cell. Right, activate the portal. Right, hit the ground. Drop down, then left and move along the wind tunnel. Jump to the brown orb. Move it to the right, making it fall down. Press it to the right again, causing the lasers to stop. Jump up, right, drop to the sphere. Hit it to the left, causing the laser to freeze. Left, hit the ball to the right. You can now move to the center of the wind tunnel. Hit the ground, then fly up. Retrieve the Keystones. Right, look at the roof, then retrieve yet another Keystone in the area.
Glide down, insert the Keystones. Go ahead, kill the two enemies. West, up to the ancestral tree. Take advantage of the Charge Jump immediately. Right, up to the partially destroyed roof. Charge it to tear it apart. Double jump, grabbing the right wall. Break the wall, then double jump to the top.
Jump to the roof on the right, bypassing the spikes and landing on the platform. Double jump to the right, climb the wall, then move the spider's projectile to the wall above. So use the bullets of the spider to move to the right. Right, towards the passage of the wind. Drop down, stopping at the second level on the right. Get rid of the slime, then jump to the roof, breaking it. Double jump to the left and find the map again. So left, recovering the fragment of the map. Also take the cells of life.
So move on to the Sorrow Pass. At the top, west, towards the Sunstone. You will therefore have to proceed towards Mount Huru.
Mount Horu
To reach the mountain you will first have to proceed along the north side of Hollow Grove. Go past the laser elemental, then have the rhino run to the left so it crashes into the wall. Go over the wall, dodge the bullets to proceed west. Jump up, then continue to the next elemental. Continue west until you reach Mount Horu. Enter the Sunstone and then enter.
You will first have to climb to the top. Hit the lantern in the northwest, then the fire, then get past the lava. Double jump, then glide to the left. One more double jump, then glide to the left again. Hit the bullets, until you reach the lever at the top right. Hit the elemental so he fires a bullet at you. Throw up, double jump, then keep climbing using the elemental projectiles to get past the spikes. Go down to the entrance, then try to move the nearby platforms using the lever. Drop down to the platform on the right, then double jump to the lantern on the left, hitting the lever.
You will now have to go up to the top left without hitting the lasers. Pull the lever, jump to the nearest platform. Hit the bullets, then begin to descend stopping the lava flow. Then go back to the central area, starting to hit the right area. You'll need to retrieve the fire elemental and then shoot a bullet at the wall below.
Go through the door, go down to the quills, hit the lantern. Project to the right using the elemental projectile. Use Sein's light to drop the nearby boulder, stopping the lava flow. Climb along the wall, double jump to the last energy cell. Return to the central area, proceed beyond the lava, climb along the falling rocks. Back in the center, go down a level and start exploring the area to the right.
You will now have to take care of eliminating the Elementals in the area. Destroy the elemental on the right, opening the portal. Go through the portal, start destroying the elementals one by one.
Now go back to the gate at the top. After it opens, charge up and hit the stone on the left, causing the boulder to descend. Kill the Slime, causing the laser to spin. Avoid the laser by moving to the right. Double jump to the left. Locate the stone behind the wall by pressing it towards the floor below. Wait for the laser to "pass" you, then press everything to the right, towards the lava at the bottom right. Go back to the center, glide to the lower left door.
Use the Soul Link, then hit the ground to the left. At the platform, go west, repelling the bullets. At the top, use Sein's light to cause the boulder to fall. Back in the center, jump to the door. East, enter the lower right door. Kill the slimes. Double jump to the right. "Charge" to the boulder above, then double jump to the left until you reach the lever. Pull the lever, jump to the right, dodging the lasers. At the top, jump to the right, hitting the slimes. Drop down, then right, so that the slime falls into the lava.
Right, dash towards the wall, dodging the lasers. Jump to the left, then double jump to the right, hitting the ground. Left, then charge northeast. Right, up to the next level. Move the boulder relative to the center, making it rise to the upper level. Jump to the platform above, throw the boulder, making it hit the platform nearby. West, kill the slime, using Sein's light to cause the boulder to fall.
You will therefore need to focus on the lower left area. Hit the lanterns as you move west, staying high above the lava. Kill the frog, then drop down and hit the lantern repeatedly, moving left. Kill the slime, double jump and throw to the left. You will now have to go back to where you came from, moving left and killing the Slime. West, go through the door, then double jump to the raised level.
Fuga da Mount Horu
You will have to proceed quickly along the playing area, otherwise Kuro will project towards you and kill you. If this happens, you will have to start your escape all over again. First jump to the right, reaching a cave. Jump into the lava, then double jump to the boulder on the right. Continue to the right, making more double jumps along all the platforms, dodging the falling boulders. Continue west, making yet another double jump and hitting the lanterns.
Right, hit the ground. Throw yourself towards the wall on the left, jumping towards the wall on the right, breaking it into a thousand pieces. Right, past the three roots. Drop down, then drop into the water, swimming to the right. Go past the fish, run past the flames to the right. Double jump, glide down, then continue to the platform. Hit the lantern, then hit the falling rocks. Right, reaching the end of the level and the game!
Video Solution - Playlist
Click here for the playlist!
Video Solution - First Chapter
Video Solution - Second Chapter
 Ori and the Blind Forest xone
- Xone
- pc
- x360
Exit date: March 11 2015


