


Please note:
The solution is based on the US version of the game. There may be divergences from the Spanish version.
Homeworld
Begin the mission by following the on-screen instructions to familiarize yourself with the game's controls. Return to the launch pad and project yourself to the real start of the first level of play. Once outside, try to access the map by pressing the button on the back of the controller (it is also possible to assign specific buttons to specific skills, so you can "recover" them quickly). So move to the right, locating two ships trying to get past the tentacles. Enter the only "open" cave on the right, dodging the pipes that emit the steam flow, harmful to you. You will reach a duct where the direction of the air is opposite to the standard (i.e. it moves downwards) - don't be afraid, it is advisable to continue in the same direction, i.e. to the right. Then enter the second tunnel.
Keep going, enter the yellow orb and save your game. Visit the blue drill briefly, gaining a new skill. Destroyed the tentacles, move to the left, returning to the area where you first noticed the two ships "aground": thanks to the new ability you can easily make your way along this path. Head down to a new tunnel. You will find two more ships, which fortunately will be destroyed by the enemy rocks without you having to do anything. Beware of the possibility that you are hit by the same rocks yourself: recover the yellow orbs at the bottom to make sure you keep your life points high. So jump inside one of the rescue circles, always necessary.
Move along the tunnel again, arriving at a ship. Right, save to cause the destruction of a part of the cave: this way you can visit a new area and recover an "arm" for your ship, which will constitute a new skill for you. Use it immediately to remove the rocks above you, clearing your way (beware of the possibility that some of them fall on you). Climb and continue towards the rocky path, a new ship will arrive in the area, moving to the left. Move the visible rock above you, swerving to the left, then continuing forward towards a very short puzzle: move the "moving" rock to the right, so that you can make your way to the left, then upwards. Destroy the enemy rocks, take the rock that is blocking the course of the "moving" rock and move it sideways. Now go back, under the moving rock, from here then quickly move it to the left.
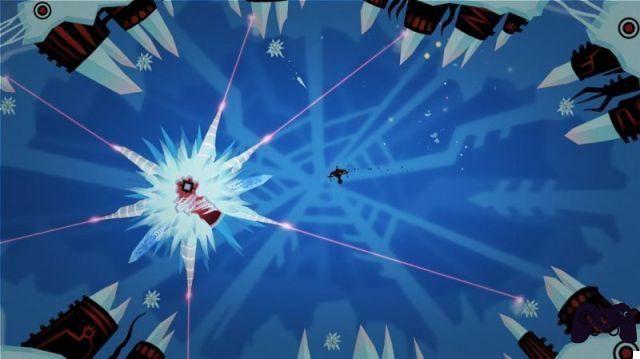
Go back up, then locate the tentacles on the right, which block your progress (the target should be the tunnel below). Pulverize them but pay attention to their tendency to grow back quickly. Retrieve the yellow orb using your movable arm to complete the level.
Video - Trailer
Organic
Explore the play area immediately adjacent to the starting area; before proceeding to the left (to start the level), we recommend moving to the right, locating some floating blue creatures: destroy them to improve your life point level (be careful, they can damage you in case of impact). Continue to the right again, reaching a large orange worm. You will locate a rock in the immediate surroundings. Use the mechanical arm to cause interaction between the rock and the worm, which should "suck" it, killing itself. Then continue to move to the right, recovering a second work of art. Back at the beginning of the level, make your way to the left this time, noting three worms blocking your path. As before, you can throw rocks towards their mouths to make them desist quickly. Left again, arriving at one of the blue floating creatures hostile to you: pay attention to its arms, hit it repeatedly to finish it without major problems.
Always left, you will be stopped by a group of turrets throwing rocks. Pulverize them, then move quickly to the left, as the turrets will tend to regenerate. Once you reach the opening that leads to the next room, we recommend proceeding downwards, so you can get your hands on both different objects capable of increasing your HP, and on the first of three artifacts. Pulverize the rocks on the left (or grab them and use them to destroy other rocks in the area). You can therefore choose again whether to proceed downwards or continue to the left: we recommend going down, thus recovering the other art. Then make your way back to the left; the objective - also marked on the map of the level - is the yellow sphere, which allows you to reach the second level of skill. Dodge the rocks and the lousy creature that tries to lure you towards it, preferring to make your way to the left - we recommend moving as fast as possible, it is better not to be hit than to be able to destroy everything possible.
Past another group of turrets, you will reach a large (huge) cave. You will have to forcibly make your way up, given the impossibility of going down to the bottom right or left. Pulverize the tentacles on the left, pass the next turrets, climb towards the sphere above you. The path that allows you to proceed is blocked by a huge tree associated with a rock. Move the rock to the left, making sure that the tree is also tilted. Recovered the improvement, reposition the rock inside the space near the tree. Always continue to the left, noticing how the path is blocked by another of the usual worms - you will have to move downwards. Pass the bats and turrets as well, reaching the second artifact. By deviating to the left, you can throw a rock at one of the worms to deactivate it, so as to return to the main path without having to forcibly proceed backwards along the path just passed. You will then be prompted to recover the shield ability. Move left, enter the first tunnel at the top, follow your map until you reach a large spider that will try to "suck" you and throw rocks at you. Dodge the rocks, after a while the spider will end its attack attempt, you can proceed undisturbed by going to retrieve the shield.
Now, to get the third artifact, you'll have to go down the tunnel to the left of the area you just visited to get the shield. After taking the artifact, we recommend that you go back along the same road you have just taken, the rest of the area is a dead end. Make your way to the destination indicated on the map - some enemies with shields will initially seem unbeatable, but you can skewer them using your arm. Also remember to visit the alcove on the left, to recover the artistic content. Then go past the turrets, go down the tunnel visible in the lower part of the level: at its end there is another artifact. Then go back up and keep moving straight. Finally, you will find yourself in front of a kind of end-of-level boss. Start fighting by shooting at his eye, after having suffered a few shots he will reveal his true "form": to defeat him, you will have to shoot at the tentacles - when they are hit they tend to retract, exposing the eye completely, towards which you can then shoot . Repeat the whole procedure for each of his eyes.
When they have all been destroyed, it is advisable to move sideways, as the enemy will carry out a kamikaze attack before his final demise. Then continue going down, using the shield to repel the poisonous gas spread over the stream. Down, left, you will find another artifact; then, slightly to the right, another. Go back where you came from - then right, go down the level, to a huge drill. Cling to the "arms" that come out of it to deactivate it (you will have to circumnavigate the drill to be able to hook yourself to all the arms around it). Then distract the bats by heating one of the blue rocks near the flame; Collect the main component of the drill so you can make your way through the rocks in the area. At this point we recommend that you return to the area of the map on the far left: given the availability of the new ability, you can drill the rock to reach a hidden wall, in the upper left corner, which contains an artifact. A second artifact can be found near the huge jackhammer, towards the center of the map: dig down when you are in its vicinity and you can take it without problems.
Once this is done, go back to the right side of the map to reach your final destination. Once the wall is sufficiently perforated, you will be "hit" by a strong wind. Use the mechanical arm to grab onto the trees marked with red circles, so you don't get catapulted to the opposite end of the tunnel. Keep moving along the tunnel itself, reaching the boss. Follow the path traced by the red energy, starting from the right side. Shoot the radar disc, after destroying some walls, so that the energy is no longer supplied to the boss himself. You can then break the last set of walls that separates you from the end of the level.
Ocean
Immediately above the initial cave, you can begin retrieving the first artifact and art. Move along the left side of the waterfall, enter the space on the right, then use your jackhammer pointing it upwards, thus picking up both the art and the artifact. Next, move to the series of tunnels located in the lower right section of the cave. Go with the flow, avoiding being hit by objects around you. When the current stops flowing, drop down, then left, then up. You will come to a small cave, inside which there is also a jellyfish. Take some bubbles, place them under the jellyfish, just so she will move and you can acquire a new skill.
Go back and keep getting carried away by the current. Deviate downwards twice, reaching a crossroads. Cling to the tree with the orange "tip", locate the small alcove that contains an art piece. Make your way upstream again. Follow it again, reaching a huge cave. To its far right, you will notice a large jellyfish. It will therefore be necessary to recover a good amount of bubbles before being able to remove it from the feet. Once this is done, continue your path towards the inside of the tunnel on the right, recovering the artifact. So go back to where you came from, this time preferring to move upwards along the tunnel. At the crossroads, grab the tree and climb up. You will find yourself facing another skill at the end of this path. Go back to the current again, let yourself be carried downwards this time. Another crossroads: use the tree to throw yourself to the right, automatically reaching an artistic piece.
Return to the second huge cave; go down the passage below, rather than moving to the right. You will proceed beyond a portal, reaching a boss, which you can finish with relative ease: swim alongside the enemies in the upper left and lower left corners, first making sure that the boss is not trying to "suck" at him. So use your arms to hook onto one of the tentacles, while the missiles are sucked in by the boss, damaging him seriously. Repeat this procedure several times until you are sucked into the passage, where you will find a new ability - the ability to fire rockets.
You can use it immediately: approach the tunnel at the top of the cave, use the rocket to go through it, making yourself explode on the red circle - beyond it you will find an artifact. Go back to the area to the left of the cave, fire the rocket towards another red circle, opening the passage to the new game area. Move around the cave, locating three open passages. Take three of the creatures that look like blue berries, place them on the passages to close any access.
A path will open up that leads to the following room, a cave with a truly remarkable volume. Proceed to the tunnel at the bottom right, there will also be some pipes / passages to cover. Back to the cave, move to the top left: use the rocket to navigate through the tunnel in the area, but be careful of the continuous detours, you will have to concentrate as much as possible to avoid impacting the walls. When you reach another cave, go down to its lowest part and cover the two pipes using the usual blue creatures. Destroy the rocks that make up the left wall of the cave, gaining access to a tap. Open it with your arm, then retrieve one of the berry-shaped creatures (visiting the upper left area of the cave), drop it into the pool of water to the left of the newly opened tap. It will increase in volume, and you can use it to cover the last of the tubes.
Then go back to the central cave - its lower part should be accessible. You can make your way to the ocean - blow up the sacks next to the berry creature, then use the rocket to counter the rocket launcher - much more effective than your "standard" gun. Move to the far right of the cave, retrieve three other berry creatures, then bring them back (a good method is to hit the rocket launcher, throw the berry into the pool of water on the left, then reposition it near the tentacles, causing them to explode) .
Before proceeding inside the tube that concludes the level, we recommend visiting the lower part of the cave, where you can recover a valuable piece of art.
Ice
Approach the center of the global map, where all the portals come together. Start moving towards the frozen region, open the door by moving the yellow crystal visible on the floor. The wall will pulverize. To destroy the next barrier you will have to follow a very similar procedure - place the yellow crystal in the fracture on the left, then another in the fracture on the ceiling, then a blue crystal in the fracture on the right. Another barrier will be pulverized. Slightly higher you can also find an artifact: shoot the block of ice using a rocket, then proceed forward, then to the left. Climb up and fire a rocket through the tunnel, then enter the alcove on the right to retrieve a new skill. You will then have to make your way through the diamond puzzle. Have four lasers point to the huge blue diamond so it falls on the orange below. It is advisable to start with the laser at the bottom left, then burn all the ice starting from that area, and place one of the yellow diamonds in the flashing crack that will be created.
Head to the upper left corner. Place a yellow diamond in the flashing slot, then a green one in the slot immediately above. Orient the diamond so that the laser reflects to the left, then place a green diamond in the upper left crack so that the laser moves down, then to the right. Go back to the blue diamond, place a green one in the crack on the right, you will see two blinking sections next to the blue diamond. Enter the cave at the top right, place a yellow diamond in the hole in the ceiling (flashing), a blue one in the crack immediately below. You will notice that as many as three sections of the largest diamond are flashing - so place the yellow diamond in the crack on the left to fill in the very last section as well.
Before dropping the diamond, however, you will have to defeat the boss. Move left, pulverize the crystal barriers. Place a yellow diamond in the first flashing slot, green diamonds in all the others. The barrier will be pulverized (remember that if the lasers are not aligned, you can simply remove the diamonds and orient them in the right direction). Now the boss will appear. First, try to dodge his laser by using the shield. Then shoot the blue crystals, so that they resonate and the ice inside them is pulverized. Fire a rocket towards the boss's entrails, repeat it a few times until the enemy perishes. So move to the left. Remember to retrieve the skill in the upper right cave.
Then use the laser to destroy all the structures that hold the cave upright. The whole thing will then fall apart. You will find yourself in front of some huge drills, with an artifact in the lower left corner, and an improvement in the upper right corner. Another improvement can be recovered from the passage that leads back to the huge blue diamond.
Before making your way to the end of the level, we recommend that you go and retrieve two pieces of art. A first can be found in the room just above the cave that contains the piercers. For a second you will have to go back to the ice map, place yourself to the right of the huge red diamond, noting a passage that proceeds upwards. Grab one of the yellow fruits growing at the top of the cave, lure the dragon outside, then hold on to his hands and get carried away to the opening. Retrieve the art, then take the diamond back and place it in the only "uncovered" slot near the huge red diamond.
Video - Gameplay
Mechanical
Retrieve the "Movement" skill - allows you to move enemies in such a way that they are no longer in your path. Immediately move the first enemies away, then move the blocks onto the square "containers" in the area. Take one of the blocks and take it to the room where there is a pipe moving upwards, then attach it to the wall on the right, opening the gate. Use the movement skill again to place the block in the next room, on the square switch. Move through the tube to get the artwork.
Going back, you will have to pass a cube through the debris in the next cave, so that it reaches the square switch. For the next section you will have to grab onto the alcove and pull yourself out of the pile of debris, then continue forward. As you will notice, you cannot move blocks. Go down the tunnel to the river of debris. Hook to the cubes, then launch from cube to cube. Enter the first available tube, moving towards the final destination.
Hook to whatever is colored orange, move the blocks marked in purple instead. Arrange the electrical cables in an optimal manner, so that you can use the gears. You will find yourself faced with a puzzle: your goal is to pulverize - using the laser - a block that prevents you from proceeding. To do this, you will first have to free the trolleys above you, initially "hindered" by the presence of some plants. Remove the plants, then reflect the laser at your target, and continue forward. You will be bored by another puzzle: you will have to use the movement skill to remove the pipes; Proceed down the tunnel, remove all pipe covers, then remember to retrieve the upgrade in the upper right section of the room. Finally, you will reach an area of the tunnel where you can use rockets to hit a huge piece of ice. Do it, then move forward again. You may notice a kind of small switch between two huge rotating gears: pull it, then remove the cover from the tube. Grab the gear you need, bring it back to the central room.
Make your way to the following game section; fire the rocket to the next area, then move to the huge gear. Use the movement skill to slide the two pieces in opposite directions, so that the fragment you need falls on you. Repeat these steps twice to get everything you need. Having now everything you need, move the cubes towards the fragment, so that it moves the two gears at the same time. When they have completed their run, keep pushing the piece, reaching two kinds of screwdrivers. Turn the gear to the left of the screwdrivers in the opposite direction from the previous ones, so that the fragment continues to fall and you can finally catch it. Then take him to the central hall, then the fight against a boss awaits you.
You will notice two purple spheres on the floor. Hook to them, then wait for the boss to arrive: just before that, another purple sphere will come out of the wall on the right. Destroy it immediately. One of the spheres on the ground will begin to flash: using the movement skill, hook onto the sphere on the opposite side and move away from the debris. When the boss enters the scene, hook onto his nose, watching as the floor begins to flash periodically - the areas where it flashes indicate the possible appearance of debris, so dodge them as much as possible. Take out the sphere present in the rib cage of the boss, destroy it. Repeat this move three times to complete the fight more or less definitively.
Go back to the gates marked on the map by some "lightning bolts". You can now open them, thanks to the corresponding skill (ie the ability to throw lightning). This is the last skill you will acquire. Before proceeding to the new level, we recommend going back to the portals and moving the gear, recovering the artwork beyond it.
Electrical
Proceed towards the inside of the tunnel, using your electrical ability to pulverize the first barrier. You will find a floating blue object in the area, take it. From now on, it will have to be hooked up to the barriers so that you can use the electricity to destroy them. After the monster finishes its pursuit attempt, swerve to the left to catch up on an improvement. Continue forward to the next room, use the electricity to open the gate in the upper left corner. Shoot the sprawling monster with your laser, preventing it from chasing you. Still carrying the blue object with you, try to reach the fork. Take a left, connect the object to the electrical outlet, use the electricity itself to open the path to the next section of the map.
Enter the tunnel to the right of the central room, then connect your object to the junctions that are still free. Use electricity to short-circuit everything by repeating this procedure four times. Reach the following junction, repeat everything also in the area. Remember to visit the small alcove on the left side of the room to retrieve a work of art.
Locate an object behind you, lead it to the last junction, deactivating the barrier leading to the boss. You can then start fighting it; his defeat involves connecting the objects to the four junctions in the room, then using electricity to destroy them, while avoiding the charges of the enemies. When the junction is exploded, all the other enemies will be released and will start chasing you. To kill them we recommend using the laser; then repeat the whole procedure four times, thus definitively defeating the enemy.
Final Boss
You will now finally find yourself facing the final boss. Shoot his eye immediately, then move on to the tentacles - or rather, the "eyes" on the tentacles. We recommend starting with the largest tentacles, then moving on to smaller and smaller tentacles, while dodging all swimmers.
Then equip the shield, move down as the lasers evaporate, using the shield as soon as the missiles get too close. Hit the eye again, then place your ship inside the triangles in the center of the play area, minimizing your vulnerability. The eye will appear on the scene: shoot it with your main weapon, dodging the shots. You will then be sucked into the center of the planet: wait a few seconds to get the last ability, which allows you to destroy the planet by completing the game!
Video Solution - Playlist
Click here for the playlist!
Video Solution - Homeworld
Video Solution - Organic
 Insanely Twisted Shadow Planet x360
- x360
- pc
Exit date: July 27 2011


