


Please note:
The solution is based on the American version of the game, so it is possible to find differences in the Spanish version.
Link's house
After the introductory movie, you will be at Link's house and witness another short skit. Once you regain control of Link, go talk to Fado and he will tell you to go get Epona. Go to the upper right path (look at the map) to arrive in a new area.
Here go by sled until you find a crossroads, go right towards the lake that you will see on the map and from there to the source. Talk to Ilia who will have done you the pleasure of washing Epona. Talk to her again and she will ask you to take a blade of grass and whistle at us. Grab the blade of grass nearby and then play Epona's song. After doing this, talk to Ilia before boarding Epona.
On the back of the mare you can return to the southern area near the house. Advance to the village of Ordon.
Once here, follow the path that goes south, go up the hill and you will arrive at the Ordon Ranch.
Here go to Fado and he will ask you to take the flock of sheep and bring them to the stable. Say yes and this mini game will start. There will be 10 goats to take, go towards them and use the A key to direct them inside the stable, after putting them all in Fado will thank you for the help and open a couple of enclosures to allow you to ride with Epona, when you want to leave, jump the fence at the end of the Ranch and you will return to the village, also save.
The next morning some guys will call Link, go down the stairs and go to the ground floor and then exit the house. Outside, go down the stairs and talk to the group of children from the sling that sells the village shop. Talk to Colin who is near Epona and he will tell you he made a fishing rod. Eventually go to the village.
Ordon village
Now that you are on foot you can visit the village, go forward passing the shop and as you pass by some vine plants, the man on the platform above will call you. Use the Z button to frame him and talk to him, climb the plants and talk to him face to face. It will give you another blade of grass that you can use to play.
Jump to the next ledge and grab the grass then whistle to call a hawk near you. Use the stick to look around and then aim using the scope, from here you can hit the hive in the three trees along the way. From here, jump to the roof of the shop and a couple of more platforms, use the grass on the last one to call the hawk again. This time look across the water to see a monkey dancing on the far dais with a wooden cradle over its head.
Aim at the monkey and press A, the hawk will take the cradle for you. With the cradle in hand, go back to the first platform where the man was and go down to the ground. Walk along the stream and you will find a woman nearby. As you approach, give her the cradle you just found and then follow her to the reward. Once in the house she will give you a fishing rod, the one made by Colin as a thank you.
Now go to the left side of the village on the other side of the stream and you will find a cat as the man from earlier indicated. Approach the stream and use the fishing rod with B and after a while a fish will approach. When the colored float is all under water, pull it and see if you have caught the fish or not. Land the first fish caught and then catch another one, the cat will catch your prey and run into the shop.
Before continuing you will have to take some money (cliff). To find them in the grass, among the rocks, in the trees after you have broken the hives, climb to the top of the Mayor's house. Once you have at least 30 Rupe, go inside to Sera's shop.
Talk to her and she will be very happy that her cat has returned to her, to thank me she will give you a half-full bottle of milk, also buy the sling and then go out. You will have nothing else to do so you can go back to your home.
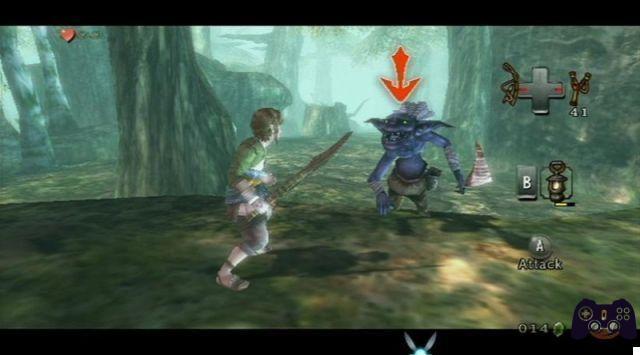
As soon as you get here Rusl will tell you that he left a gift for you inside, after the dialogue, talk to the children nearby and they will see that you have bought the sling. Do the slingshot tutorial by taking down all the targets (even the spiders on the stairs and roof) and then go up the stairs and enter. Inside, open Rusl's chest to receive a wooden sword, go out and talk to the children to do another tutorial, once finished a monkey will appear and the children will follow. Once you regain control, go up to Epona and go to the northeast area.
Ordon Woods
Go up and you will find one of the children at the fork by the pond. Talk to him and then cross the bridge to get to the Faron Woods.
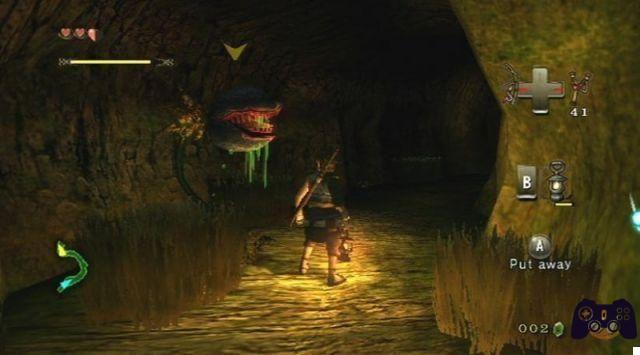
Here pass the grass with Epona to take the cliff and then pass the fence to the north, arrived at the water go left along the path that will take you to a cave. Pass it and then at the fork go left. Move forward and you will see a house with a guy sitting outside. He is Coro and after talking to him you will receive a lantern. He will ask you to light the fire in the pot nearby, use the lantern and light the fire. Chorus will tell you that to use the lantern you will need fuel that you can buy from him.
Now go back to the fork and eliminate the Deku Baba, then go up the hill. You will find the wooden sword of Talo, one of the children, continue to the next area and in the cave use the lantern and use it to light up the room, pass the grass and eliminate the Keese and the Deku Baba along the way, when a spider web is there. it will block the way, use it to burn it and continue. Advance eliminating the mouse and then at the fork go right for 10 Rupe and then go back and go north to burn another spider web and then exit the cave.
Go north and eliminate everyone and eventually you will enter another cave, kill everyone and then open the chest for a key. Turn on the two torches to make a chest appear in the platform above, open it to receive a piece of heart. Exit and go to the bottom right, eliminate the guards and unlock the door with the key, continue eliminating the enemies and if you need to buy the fuel for the lamp in the shop of Trill, go north and open the chest on the right for more. 10 Cliff.
At the narrow passage you will find Talo and the monkey in a cage, kill the guards around the cage and then destroy the cage to free Talo. After the scene and the explanations, a new day will come.

Ordon Ranch
Talk to Fado and then go to the Ranch and get Epona, talk to Fado again when you are riding and another goat game will begin. This time you will have to take 20, be careful not to piss them off or they will charge you. After you're done, jump over the fence and head back to town.
On your way to the city you will stop to talk to the Mayor and Ilia, after the discussion you will have to go home.
Arrived here talk to Colin, at the end of the dialogue he will follow you, go to the source and after the dialogue you will be inside the source with Colin.
Go north and then right at the fork to find the source. You will not be able to enter as Ilia will block your access so go south and check the wall on the right to find a tunnel. Crawl inside to find the source, eventually you will talk to Ilia and get Epona back.
Immediately after that some enemies will knock you out and take Ilia and Colin, get up and go into the portal to get to the Twilight World. After a scene Link will become a wolf, save.
The Castle Dungeon (Twilight)
Move around as soon as you can but to no avail, a guy will come and there will be a new scene, at the end you will see a box in the corner of the cell, attach it and then use the dig command to exit the cell. After escaping, the girl will want to help you and get on top of you. Go to the nearby cell and after the dialogue use the A key to bite the chain and free your path.
In the next area go into the narrow corridor until you arrive in a new room, the maiden will point to the light in the corner and you will have to use your senses to find the spirits and their thoughts. Follow the passage to the crossroads go right for delle Rupe while on the left you can continue.
Go through the door and go up and you will see thorns to the north and enemies around. Go south until you find the button that will allow you to raise the water level so you can swim past the spines. Now go north to the next fork and then to the right use the button to fill the whole area with water.
Go left and the girl will pass through the bars instructing you on how to proceed. Go to the bars and to the left you will find a hole, go there and you will rejoin it. Go left, go up the stairs but soon they will give way. Climb again and talk to the girl, with her help jump up to the end and you will come to the door. Kill the bats and then examine the pile of debris to see a scene. Press up and after a couple more jumps you will reach the exit.
Hyrule Castle (Twilight)
Talk to the girl and then follow the passage north and once you find the spirit, examine it and then go up to the next box. Jump to the top dais and drop to the other side, move forward and then take out the enemy before going north, jump over the wall and take out another enemy. After the second fight go right and after a couple of jumps you will be on a blue roof.
Kill the birds and then go down and break some boxes to refuel if you need it. Go north and then right and jump on the ledge to enter the tower.
Here you go down and then up the stairs, go through the door and a scene will start in the room, after the explanations (your friend is called Midna) you will discover that the mysterious figure is none other than Princess Zelda who will tell you to run away because A guard will come. Exit and go down the stairs, use the window to escape and once on the roof Midna will talk to you about how to get home.
Go back to the source but you will not change shape, go left and after the explanations go south to the new area.
Here eliminate the enemies and then go to the village, before you go a squirrel will talk to you, after the speech go to the village.
In the village, talk to the brown cuckoo and he will tell you to stay away from people to avoid problems. Pass the stream and listen to the children's conversations a couple of times, when you have all the information Midna will show you an open window that you can access from the roof and will suggest that you can enter from there.
If you pass the vines near the stream the hawk will attack you so run north. Go behind the house to the north and Midna will call you, with her help go up to the roof and then go to the platform where the man is and throw him down. From here jump on the mill wheel and then on the roof of the house and finally go through the window.
Inside the house, go down to the lower room and jump onto the table. Jump on the dais when Midna tells you. Jump twice at the shield to make it fall, grab it and then exit. There will be a skit with Rusl patrolling the path, with his wife outside the house it will be a joke to go inside. Go to the back and then go up the hill and on the right side of the house you will see a platform and behind a hole in the wall, use it to enter.
Here take the sword and then you will talk to Midna and at the end go out and go into the woods to the north.
Ordon Wood
Here go north to the crossroads, when you arrive you will hear a voice, go to the source and eliminate the enemy who will be waiting for you here. After the battle the voice will have a name, Ordana. After the explanation go left and then north across the bridge, after a while you will find a portal, enter it.
Wood of Faron
Go north all the way and in the end you will have to fight three enemies, after Midna's explanation you will succeed. Go north again and when you get to the waterfall talk to the spirit who will ask you and eventually give you the container of light and a new area will light up on the map. Go left along the path and in the narrow passage use your senses to find the insects, at the fork you will find a blocked portal, use the other way and go to the house entering through the hole, you will find another insect there.
Head back south and then up the hill to the wooden dais, press up at the right moment and then jump on the window and enter Coro's house. Go down and eliminate the two insects, go out and go back to the fork, to the right of the gate there will be a hole under the fence, dig and you will be on the other side. Once you get rid of the bugs and then enter the cave, pass it killing everyone and at the crossroads go north to exit. Go left and use your senses to eliminate two more bugs by hitting the wall and then go north but you can't pass the fog, go left and use the command to pass a series of platforms and then up the columns to get to the center of the area. , use your senses and eliminate the three insects you will find here.
Climb the hill and use Midna for a series of long jumps, at the last jump there will be a giant pendulum, jump at the right time and once you get to the ground eliminate the insects to get the tears.
After you have done everything go through the open gate to get to a new area, kill the enemies here and then advance to the narrow passage where Talo used to be and you will find the last two bugs. Kill them and talk to the monkey spirit.
There will be a cutscene and then you will become human again and Midna will leave you, as soon as you can use the protagonist again go left and you will find a portal stuck at the fork. Go north and enter Coro's shop, talk to him and he will give you a small key to open the portal. If you have money, gladly spend 100 Rupe for a full recharge and once ready go back to the fork and open the gate to enter the cave. Advance eliminating everyone and then go north at the fork to enter a new fork, this time the field will be covered in dense fog and you will not be able to cross it. Use the lantern and the monkey will appear, follow the monkey into the fog and kill the enemies along the way.
Arrived in the new area the monkey will leave the lantern and run away, take it and continue, advance further and arrived at Trill's shop you will have to fill the lantern and then continue north until you see the golden wolf. Approach and there will be a cutscene, at the end a skeleton will appear and at the end of the fight you will have learned a new super blow, the Ending Blow.
After the scene, go up the narrow passage to the entrance of the temple, take out the guard and then finally enter the first temple.
The Temple of the Forest
As soon as you start, advance and beat the enemies, you will see a monkey trapped in front of you, free it, eliminate the spiders that do not allow you to reach it and then climb the vines to get in front of a door that you will have to pass. Here go down and then go to the center of the platform and kill the spider, use the lantern to light the 4 torches. Stairs will appear that you have to take, then go left to the dungeon map and finally enter the next room.
A giant monkey will destroy the bridge, go back and follow the monkey to the center of the room then follow it by jumping to another room. Go right and kill the spider, advance and break the pots to find a strange creature that if used will take you out of the dungeon.
Take the other path until you find the spider web, burn it with the lantern and advance.
Follow the monkey by jumping between the platforms and then go to the north room, pass the swing bridge and continue into the room ahead of you, here use the key on the chest, then go back a couple of rooms and then use the slingshot to kill the Spider left, jump and unlock the door, then enter.
Here you will find another monkey trapped, cross the bridge that will give way and then go to the center of the room and talk to the monkey. Go to the pedestal and make sure to drop the cage freeing the monkey. Eliminate the guard above and then follow the monkey, cross the bridge and exit the same door you came with.
Now go to the second room of the Temple, go to the central platform and use the monkey to go to the right platform, go through the door and then go down and eliminate the enemy, take the stairs and eliminate the spiders using the shield then use the bombs on the flowers to free your path. At the end use the bomb to make a door appear, don't enter but go right to find some vines, shoot the spider and then go upstairs and enter the room there.
Kill the plant and get the key, then free the monkey and exit. Go back and enter the room you avoided earlier. Here you will see two pools, go down to the one below to get the chest with the key, cross the bridge avoiding the enemies and then use the lantern to light the torches and make a ladder appear that you will climb. Jump upstairs and unlock the door to free another monkey, exit and go back to the second room of the Dungeon.
Use the monkey to get to the central platform and then go north, use the monkeys to get to the other side and then go through the door to find the great monkey. To beat it, wait for it to stop to throw the boomerang, go to the columns and the boomerang will hit the monkey and you can take advantage and wound it with your sword. Do this a couple of times and then you'll get the boomerang as a reward for defeating her.
Now look up to see some propellers, use the new weapon to destroy them and eventually you can go through the door and go to the new area. Go back and then go right across the bridge and killing the enemies then use the boomerang on the rope to free the monkey. Go south and return to the usual room.
Once here, use the boomerang in the middle to get to a chest with the compass. Take the door on the left and then go left and kill the spider on the vines, go up and go right to the wooden bridge. Jump on the dais and use the boomerang on the propellers to open the gate, open the chest and you will have the big key, go north to the next room. Here run on the rotating bridge and open the door on the opposite side, kill the spiders on the ceiling and then burn the cobweb on the left and use it to go down.
You will end up near a cage, free the monkey and then go up the vines and go through the door. Go to the bridge and then use the boomerang to end up on the platform on the right, take out the guard and then take out the spiders using the slingshot, climb the vines and finally go through the door.
Here eliminate the enemy and then go up the ramp in front of you and use the boomerang to continue, go up the vines and eliminate the enemies, use the boomerang to destroy the wall on the right freeing another monkey. Pull the boomerang to be able to use the platform and then jump on it to get the small key from the chest.
Exit and use the boomerang to return to the south room and then use the swing bridge to get to the room on the left. Here use the boomerang and the sword to take out the enemies and then use the tunnel and at the end kill the big spider and hit the little one on the vines. Climb up to find the last monkey, free it and then exit the room, go to the rotating bridge and then go north.
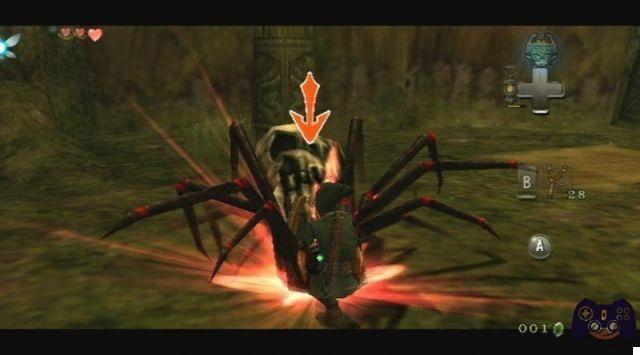
Here all the monkeys will form a chain to allow you to go to the other side, go over and you will come to the Boss Diababa. Beat him and strike the first Shadow. Two more pieces to find, talk to Midna and leave the Temple.
Arrived here the spirit of light will speak to you again, will tell you to go left to meet Eldin. After Midna calls you, you will be in control of the character again. Exit the woods and go to the top left where Coro was. You will exit and you will be in the next area.
Camp of Hyrule
At the end you will come out of the woods, go left from Eldin, along the road a postman will stop you and after an argument will give you a letter, at the end Midna will ask you if you are ready, say yes to return wolf. Advance and you will find a tree trunk, smell it to learn the smell of Youth, use your senses to follow the scent and continue until you find three shadows, eliminate them and then you will see the bridge.
Midna will explain portals to you, use them to teleport into the woods of Faron.
Faron Woods
At your destination you will see the giant bridge, talk to Midna and you will return to the Kakariko Gorge.
Finally you can cross the bridge without problems, advance further west to the gate, dig to end up under it (left) and on the other side eliminate the enemies and then continue to the village of Kakariko.
As you get to the village you will have to deal with three other shadows, eliminate them and then talk to the spirit near the pond. Talk to him a couple of times and you'll have to do a mission for him.
Enter the house to the north and use the wheelbarrow and Midna to get to the roof. From there you advance to fall into the house, inside use your senses for a scene and then use the fire to light all the candles. Climb and jump to turn on more lights and eventually you can go to the cellar to kill the beetles and get the tears. Go north, exit the house and you will be near the cemetery.
The cemetery
Kill the bats and then use your senses to find the bugs, dig and kill them and then go right to reenter the village.
Kakariko village
From the cemetery go right to the shop, check the right side and you will find a hole to enter, do it and then inside use your senses to kill the bug. Exit and go up the hill behind the shop, at the top jump on the ledges and enter the next building. Go to the ground floor and grab the stick, jump on the table and light it and then go to the corner to let the bug out, take it out and then go to the next room.
Eliminate the enemies here and then go up the stairs and take out another enemy, use your senses and kill the insect and then exit. Go down the hill and on the left you will see a row of houses, go to the one further south and then use the platform to reach the roof. Jump to the third house, enter and push the block to kill the bug then exit using Midna.
Go north passing the first sign and immediately after the second use the platforms to go up and jump into the window. Inside the bomb shop go upstairs and go against the closet to be able to kill the bug, kill it and exit.
Here go northwest and you will see an insect enter a building, enter using the hole and take the stick, light it using the flashlight and then light the furnace to reveal three insects. Quickly escape the flames and then when they are extinguished you can catch the tears of dead insects.
Go up the hill and use the hole to enter another building, kill the insect inside and then exit, go north into the mountains of death.
As soon as you arrive you will not be able to pass, go left and use Midna to climb the wall, continue killing the enemies and when you reach the second wall use the blocks to continue. Advance avoiding the vapors and then use the sense to find the bug, dig and kill it.
Use the statue to call the golden wolf and return human, mark the place you will need 'ahead. Go north and then take out the four shadows and use the senses on the north wall to find an insect, kill it and then use Midna on the left dais to climb upstairs.
Follow the path until you find a ramp on the right, go up it and continue jumping and at the end use your senses to kill the insect.
Now that you have all the tears you will automatically return to the spirit. After the dialogue and the explanations you will return to normal, you will get to know the villagers and talk to the Shaman Renado. In the end you go to the night on the mountain.
Mountain of Death
Here go up the opposite wall to get to know Goron, talk to him and at the end since you can't go back to the village.
Talk to Renado who will tell you about Bo, go south and after the skit and the little test you can use Epona again. Go to the lower right to the next destination.
Go to the gate with Epona and jump over the gate, advance and you will be stopped by the postman who will call you again. Continue down to the right until you reach the Boschi di Faron. Once there, head south to the village of Ordon.
Once here, go south until you find Bo. Talk to him and then follow him into the back room. Do wrestling training and throw him out of the ring to win. Beat Bo twice and you will get the iron boots in the chest as a gift. Exit the village.
Ordon Wood
Go to the source and then to the golden wolf, here the skeleton warrior will teach you the second fighting skill, the Shield Attack. Carry on.
Here some monsters will kidnap Colin, go north through the gate to get to the Hyrule Camp.
Here will be the scene with Colin's kidnappers, at the end chase the leader with Epona and use the sword to attack him when you are close to him. After hitting him a few times he will escape, follow him and throw him off the bridge, eventually you will return to the village.
Talk to Colin and Renado and then finally enter the shop and buy Hylian's Shield, as soon as you are ready go north to Death Mountain.
This time advance and climb the wall to get to the platform above, when you face Goron use the iron boots to point to the ground and then grab him and climb over him, at the end remove the boots and continue along the path using the boot trick every time. a Goron will come to block your way.
In the steam area, watch out for enemies who shoot fire arrows. Advance to the area with the Goros, go down below being careful of their attacks and fireballs. Now use the shield technique to block the Goron and then choose the direction and let yourself be thrown into the air, use the technique to reach the platform above.
Go right and use the Goron behind the hill to get to the platform above, go right and use the spring to recover energy, talk to the Gorons and use the shop if you need to. Use the Goron on the dais to go up and then in the area with the steam use the iron boots and continue using the Gorons to the top.
Now go to the cave and after the scene you will have to deal with the Chief, let yourself be beaten the first time while the second time use the boots and defeat him. After the dialogue, enter the mountain for the dungeon.
Goron mines
Advance and then jump onto the dais and onto the other, use the sword to destroy the wooden barricade and then press the button on the floor. Take off your boots and go north before you get hit and then hit the second button and go north again.
Jump and go right and then use the south ladder to go up and go south and then left, jump two platforms and at the wall go right and kill the enemy and then activate the button and go north using the footboards. When you get to the fence area, go right and continue.
Jump to the platform to the right of the door and use the boots to get through the door. In the next room advance to the fork and then go left to get the small key, go back and go right until you find the turntable. Go forward and unlock the locked door then enter.
Here go down and use the platforms to get to the north area. Kill everyone and then go against the far wall, here wait for the right moment, jump on the platforms and then go left and then go to the wall, avoid the collapse and enter the room.
Use the iron boots to get to the bottom of the pool and press the button to activate a new mechanism that will allow you to walk on the ceiling. Walk and eventually take off your boots and go through the door. You will find the first Goron who will give you a piece of key, open the chest nearby for the Dungeon map and then go up the ladder and continue. Grab the vase to find Ooccoo and then go through the door.
Here use the boots and walk on the blue wall, take out the enemies and then go to the next room, advance to the button and then go down to the right and then to the left and up to the left. At the end of the journey, let yourself fall and continue.
Walk on the platform and eliminate the enemies, use the switch to change the gravity of the room and then go left and north and finally drop down, activate the other button to get to the second level of the dungeon, drop down and pass the brings.
Advance by killing the enemies and then use the boots in the water to find a key. Go right and down again to move a block and then exit the water and activate the nearby magnet. Go to the ceiling and follow the blue path and then drop to the platform.
Hit the other button and walk on the grate putting on the boots. Drop down below and then up the wall to the crystal button to open the door to the north. As you activate it, jump down to the lower platform and go through the door.
Here, avoid the statues and go to the right side of the room. Walk up the wall in your boots and then go right. Land on the platform for a piece of heart and then go back up the road and go left. Go to the platform and then north by cutting the rope that will bring the bridge down to the door below. Go down and go to the room to the north.
Follow the passage to the north avoiding the shots of the enemies, at the fork go right and in the right corner take the key from the chest. Now go left and unlock the door to the next room, here use the bridge and go upstairs.
Use the boots to cross the rotating bridge and enter the room where you will meet Ezibo who will give you another piece of key. After the dialogue, use the stairs to continue. Go back and then into the south room to find a mini-boss. Use your boots to win. After the fight, go down and open the big chest for a new weapon. Shoot the bowstring to open the bridge and then go through the next half of the room. Head down to activate the room and then go back to the entrance and shoot the statue's eyes to beat it and be able to move it. Move the statue to the right to find the compass and then the statue to the left to find a room. Here, talk to the last Goron to get the last piece of the key and you will automatically have the large key.
Exit and go back to the Beamos room and then destroy the statue and enter the new room, take out the enemies and then jump on the platform and continue to the right shooting at the tail of the enemies. Advance to the next platform and take the Hero's Bow. Destroy everything and get to the locked door, go through it and then press the button with your boots and on the ceiling continue breaking the crystal that will unlock the door. Go back to the door and go through.
Go right and get the money from the chest and then shoot the door to open the bridge to the north. Advance and activate the button and after magnetization go north and eventually drop down. Continue to the north room and break the crystal to open the door and advance to the next room. Here, take out the enemies and then step onto the ledge to the north and enter the room. Go north by eliminating other enemies and at the fork go right. Destroy the statue and then put it at the bottom to open a secret passage on the wall.
Go up the ramp and activate the button. Activate it and then go back down and go north, use your boots to go to the bridge to the northeast and when the bridge falls wait and then enter the room to the right. Beat the archers and then go north and shoot the rope and then cross the bridge you just lowered. Advance until you meet Boss Fyrus and after beating him you will talk to Midna to exit.
You see the scene and then go north and get the bomb kit from the shop, after that take Epona and go north to return to Hyrule Camp.
After meeting the postman, cross the bridge and then use the bombs to open the way, the bridge will be destroyed and you will have to eliminate the three shadows. Go back to Epona and go north and eventually you will return wolf. Go right and use your sense of smell to smell Ilia and then advance until Midna points to the Castle.
Continue down to the right, cross the bridge and at the end of the journey you will arrive at the castle city.
City Castle
As soon as you arrive, listen to the two spirits and then go left, pass the fountain and at the end you will arrive at the Telma Bar. Here look at the map on the table and after the discussions go out, go up the stairs and go north to the central square, from here go right to get out of the city.
Cross the bridge and go right and then go down south until you get to the Great Bridge. Cross the bridge and after the scene jump into the lake below.
Hylia Lake
Listen to the spirits and then go to the building at the bottom of the lake and talk to the spirit, after the discussion go to the upper left and eliminate the enemies to be able to use the bird to get to a new area.
Here there will be a mini game that you will have to face aboard the bird, it will not be difficult but make no mistake or you will end up below and you will have to start all over again.
When you arrive, enter the nearby building and then head downstairs and right on the frozen path to go to Zora.
Domains of Zora
Advance and go north after Midna's advice, go up using Midna and after passing the dais you will arrive at the top and then north into the room. Eliminate the shadows and open the portal by teleporting to the Mountain of Death. Go to Goron and get the stones, go back to the Zora Domains. After the scene with the queen, jump off the waterfall and swim to Lake Hylia.
Hylia Lake
Enter the cave and talk to the spirit for the usual mission of tears, go right at the end and cross the bridge to the first insect. Another bridge, kill the enemies and then up right inside the building, here take the tear from the insect. Go back and go south and finally use your senses on the tree and dig for the tear.
Go back to the cave and swim left to find another insect, then use the bird nearby to get to the river.
Zora River
Kill the four bugs in the air and then when you arrive go to the house and talk to the spirit and then kill the insect. Go north and use the wolf statue to get it on the map and then go east to return to the Zora Domains.
Domain of Zora
Here advance to the central area and then swim to the islets and kill the insects. Go right and up and then drop down to the area below and advance to the insect you kill. Go back and go right and then climb the dais near the waterfall and advance to the throne room.
Here go left and use your senses to find the bugs and then use the water to get to the next area, go down the waterfall and back to the river. Go left and pass underneath to reach a new land that will take you to the Hyrule Camp.
Exit the water and then down to the right to the next area and then south to the castle walls. Eliminate the shadows and cross the bridge back to town. As soon as you arrive, go south to the fork, go left and in the boxes in the corner if you use your senses you will find an insect. Talk to Midna and you will go to the lake.
Hylia Lake
When you get here you will have to beat the giant insect for the last tear. Do that and then return to the spirit and after the scene exit the source. Go right and then north across the bridges, talk to the clown and enter the house, then exit the door to return to Camp Hyrule. Advance and then call Epona, go north and after the postman you will unlock the water bombs and fishing.
Continue north and at the fork go north and then left. Continue to the left until you find the vines to climb, do it to find the golden wolf and you will learn the third ability, the Back Slice, now go left across the bridge to return to the castle town.
As soon as you enter, go south and then when you arrive at the Telma Bar enter and talk to everyone and at the end go out and after another scene you will escort the carriage on the journey. Follow her to the bridge and then kill the enemies and get the two gate keys.
Defend yourself as you go to the gate and pass it, when you get to the second gate open it and kill everyone, finished the job go back to Kakariko.
Another scene and then follow the spirit to the cemetery. Here, keep following him and then enter the passage and talk to the Queen. Equip yourself with Zora's armor and then head back. Go to the bomb shop and get the water bombs, after that go back to the cemetery.
Go back to where you got the armor and use it together with the boots and then destroy the stone to the north with the water bomb and you will arrive at the lake directly.
Hylia Lake and Lake Temple
Go right and follow the blue dot on the map to find the Temple. Go north into the tunnel and eventually enter the temple and use the lever to go through the door. Advance and after talking to Midna use the bombs to clear the way and then go down and use the stalactites to continue. Go through the door, take out the enemies and enter the main chamber. Go down the stairs and finally pull the lever and go up the stairs. Go right and activate another lever and then drop down, right again and get the Map from the chest, then enter the room on the left.
Go into the corridor to the left and then into the room go right and enter the cave, go right and follow the platforms until you get the small key. Go left and go through the door, go back up the stairs and go left, unlock the door and go left to get to the next room. Go north and after the obstacles enter the room on the left.
Here go through the door and take the small key, go through the door and enter the door to the north and then to the left. Here you unlock the portal and then go down, go left and go up the vines, go up the ladder and after various obstacles go right and you will end up in a room in the lower right. Go down and enter to the left, at the end go to the ledge to the north and in the new room go left to find a chest with a small key.
Go back and enter the door on the left, unlock the door and then swim until you find the mini-boss. Defeat it and you will have a new item that will allow you to continue. With this make yourself the new passage and then exit the room to the South. Now go right and use the new object in various points to be able to continue in the Dungeon, eventually you will arrive in a huge room where you will have to deal with the super Boss. After beating Morpheel there will be a cutscene and eventually you will exit.
After exiting you will return to the wolf, go right and then south until you find a point, here go left and you will enter the Citta 'Castello. Go south and then west entering the bar, after the scene talk to the cat and enter the bar, at the end talk to the ghost who will open a passage for you to the sewers.
Castle sewers
Kill the enemies and then go north for a couple of rooms and use the fire to burn the web. Use the fire again and then go to the upper left and burn another spider web. Other enemies to eliminate and then dig to return to the initial dungeon, go north and then west and finally exit the door to be out.
Go north and then use the platforms and roofs and eventually you will be at the castle tower. Go up the stairs and at the top go through the door to Zelda's room, scene and then at the end you have to go to the Woods of Faron.
Faron Woods
Use the teleporter to get there and then go north and you will see the monkey and some enemies, take them out and then go behind the waterfall and make your way all the way until you get to the golden wolf statue. Continue south to get to the Sacred Wood.
Sacred Wood
Advance and go left to a stone where you can play the melody. Continue to the enemy to kill and then in the new area follow him and be patient because if you are too fast you will have to start over. Use the stone in the new area and after solving the puzzle you can enter the last area of the Wood.
Watch the scene and then transform into a wolf and teleport to the castle entrance.
Once you get out of the castle go back human and then advance until you meet the postman, cross the bridge and you will be in the city. Go to the Telma Bar and after the scene you have to go south to get the fourth ability from the golden wolf. Then go to the lake and cross the bridge to the south, go up the ladder and then left towards the statue. Become a wolf and then use the statue and finally as a human climb the tower and talk to Auru at the top.
After the story, go down and use the new item to end up in a new area.
Deserto at Gerudo
After the scene, go to the bottom right and use the Clawshot on the trees to climb, eliminate the enemies and then teleport to Eldin to repair the bridge, once done go back to Geruso Mesa which is at the bottom right of the desert.
From here go north and shoot the enemies with your bow, at the end of the path learn the Mortal Draw skill from the skeleton and then advance to the next area. Watch out for the snipers you have to kill before continuing, go up the hill to the right and continue into the enemy camp. In each part of the camp eliminate the enemies and in the last area kill the enemy to get the small key.
Go back and unlock the south gate with the key, go through to get tons of enemies, take them out and then go to the north gate to get out of this slaughter and end up in the Prison.
The prison
Advance up to the quicksand, beware that if you sink too much you will return to the beginning of the level. Use the Clawshot to pass through, push the lever and go through the north gate. Climb upstairs and at the fork go right and destroy the obstacles, take the key and then unlock the door to the north and enter.
Here use the lantern and eventually transform into a wolf to continue. After killing the first monster, go north to find the chest with the map, go left and then go down the stairs. In the room below take out the enemy with the bombs and then grab the key from the chest and go to the room to the north. Eliminate the enemies and then return wolf and use your senses to kill the second Poe, now go back to the main room and unlock the door on the left and then enter.
Use the platforms to pass the sand and then climb up and use the block to get to the lever you will pull. Once pulled advance to the second floor killing everyone, take the compass from the chest. Push the statue and then destroy the obstacles you will find on the left, kill the enemy and take the small key from the chest. Then go right, unlock the door and continue.
Kill the enemies and then become a wolf and use your senses to find a hole in the wall and at the end a lever, pull it and you will find the Poe, kill him and then return human and go north and on the right take the small key from the chest. Kill the enemy by becoming a wolf and then unlock the door at the bottom and use the candlestick to get to the platform and continue. Go downstairs and pull the lever to the maximum then quickly go through the door to the right.
Advance and go south, light the torches on the sides and then go through the door, become a wolf and take the fourth Poe. You will now have lit all the torches in the main room and will be able to access the north room on the first floor. Go north as a human and you will return to the torch room, advance north and then enter the room on the left, use the mechanism to open the door on the right where you will find a small key.
Go back and use the mechanism three times, unlock the door to the south, enter and as a wolf go right and kill the enemies, as a human pull the lever in the south corner and then again as a wolf continue north. Go to the room to the south and then to the right, go all the way down the corridor and finally enter the room to the north, kill the enemies and then use the platform on the left to continue. Advance north and then cut one of the ropes for a skit, kill the Boss Swordsman and once beaten go to the room to the north to receive another useful item, the Spinner, in the chest. You can use it to pass the sand and exit the room by going through the door to the South. Go back one room and use the spinner on the right wall and then go to the room to the right.
Here you advance with the spinner and make a long way avoiding the obstacles to get to the end in the room on the left. Advance to the big chest to receive the final key, use the spinner to move the wall north and then go into that room, at the top jump on the platform in the middle and light the two torches, go through the Boss door for a tough battle .
After beating him use the platform to exit the tower, go up the stairs and to the top and eliminate the five enemies, climb the statue with the spinner to find the mirror in a thousand pieces, enjoy the scene and at the end when you regain control of your hero go back to Città Castello.
As a human, cross the bridge to meet the postman and to find that Barnes is selling a new type of bomb, go to Kakariko to get it and then head to Castle Town.
Go to the bar and talk to Telma, at the end of the speech check the map on the table to find that your next place is the Domains of Zora. Once here swim to the next area and then as humans go down the waterfall and swim to the right, enter the cave.
Snow-capped peak
Talk to Ashei as soon as you see him and then go back to the Domains of Zora, at the entrance of the cave show the object to the guards and after the dialogue go to Kakariko and from there to the cemetery.
Cemetery
Here go left and enter the tomb, show the prince the item given by Ashel and you will receive a hook for your fishing rod, now go back to the Domains of Zora.
Domains of Zora
Go south and jump from the waterfall as a human, swim left and at the end you will see an islet where the fish you are looking for swim nearby, use the fishing rod to catch one and then use the wolf's senses to remember the smell. go back human and swim right, here go back to the Snowy Peak.
Back here you will see that the wind will be too strong, turn into a wolf and follow the smell of the fish. Jump along the path to avoid the obstacles and then eliminate the white wolves, arrived at a dead end hit the wall to make the snow fall and create a passage, go up and then go left to find the usual statue of the wolf, go south and dig to enter the cave, return human and go up the ladder and finally through the door to be outside.
Follow the smell like wolf and then eliminate the shadows to find a teleportation point, return human and talk to the Yeti nearby, he will tell you to follow you, do it and after the arcade sequence you will arrive at the house and after the dialogue with Midna enter the next dungeon: The Snowy Ruins.
The Snow Covered Ruins
Advance by killing the enemies and then kill the Poe as a wolf, go north and talk to the Yeti's wife to get the Dungeon map. Go left and talk to the Yeti for some soup and then go north. Here solve the simple puzzle and then go through the door to the right, become a wolf and dig right to get to the courtyard.
Eliminate the enemies and take the small key from the chest, as humans go left and unlock the door to the north, enter. Kill the enemies to get the door open, go through it and then take the south door after taking out the guards and here from the chest get the Ordon Pumpkin. Talk to Midna and then go south, climb up and then south until you find the Yeti, talk to him and give him the Ordon Pumpkin.
Go right and talk to the Yeti's wife, go through the door to the north and then up to the right and go through the window, then go through the door to the new room. Here go forward and grab the cannonball, make the way up to the cannon, use it south to clear the path and then go through the door to the south. Kill the enemies and get the compass from the chest in the corner.
Go back to the courtyard and you will see a chest at the top right, dig to receive a small key, unlock the door on the right as a human, enter and use the cannonballs to destroy the enemy and immediately afterwards go through the door to the north.
Here you will find two statues, after the scene you will have to beat the knight and at the end you will receive a new weapon as a prize. Go north and use it to break the ice by revealing a chest with another ingredient. Go back to the wife of the Yeti and after the dialogue bring the ingredient to the Yeti, talk now with the wife of the Yeti and at the end she will open the door on the right, pass it and then eliminate the monsters with the new weapon and at the end behind the ice you will find a cannon.
Go to the north room and after beating the enemies use your skills to reach a chest with a small key, exit and go south and then left to unlock the door, enter and always using your skills as soon as you get through the room upstairs where you will find an ice room, go north and you will have to overcome another puzzle, after unlocking the blocks in the right way you will open the door on the second floor, go there.
In the room on the right, go north and then climb to get to the room on the left, go through the platforms until you find one with a chest containing a small key. Go south until you find a door in the upper right that you need to unlock. Go right and press the blocks to continue, at the bottom go to the door to the north. Here, use the cannon and the balls and then throw one into the hole on the left.
Go left and go upstairs, use the cannonball to the north and then go through the door nearby and from there use the cannon to destroy the enemy in the corner, go back and go right and then north to climb a ladder , go through the door to the right and eliminate all the enemies to open the door, enter the room to the north to receive the bedroom key from the chest, go out and talk to the wife of the Yeti, then unlock the door and after the scene you will have to fight the wife of the Yeti possessed as the Boss.
Eventually you will receive another mirror fragment, talk to Midna and go back.
Once here, cross the bridge to meet the postman then go to the Città Castello. Go back to the bar and talk to Telma, check the map on the table for the next objective, the Wood of Faron.
Go north and go up the hill to find Rusi, talk to him and after the scene you will fly passing between the platforms until you find a bridge. Advance further until you find the Holy Ground to the south.
Sacred Ground
Advance and kill the enemy, go through the tunnel to continue the fight and after beating the skeleton you will open a new passage, advance and push the block, go north until you get to the Sword, use your sword and then go back south and eliminate the five shadows to have the portal.
Go to the lower left and go upstairs, open the door and then go through the portal to get to the Temple of Time. Go north and grab the sword again to make stairs appear in front of you, go up.
Temple of Time
Advance into the main room and then go north and become a wolf, use your senses and then as a human use the button and then follow the passage to the left to the torches, use the lantern to light them and then open the chest and take the small key. Go up the stairs to the south and unlock the door.
Kill the enemies and open the portals to advance, use the arrows to do so and then head upstairs to the next set of stairs and kill the enemies. At the end, kill the last enemy and then take the Dungeon map from the chest. Open the other gate and then go through the door to continue.
Go up the stairs and use the spinner to continue, at the top use the metal things on the switches to advance, you have to be quick and finally enter the room to the south, eliminate the enemies and take the small key from the chest. Go back and go north to unlock the door, go inside.
Hit the crystal and then the ring with the arrow, go over and open the chest to get the compass. Reattach the ring and then go up the stairs and from here hit the crystal and go up again until you pass the door. Kill the enemies and then climb up again and finally go through the door to the south.
Advance killing everyone and then advance until you get the small key from the chest. Go to the top left and then remove the electric barrier and go up the stairs to the XNUMXth floor. Eliminate the enemies to unlock the portal and then go up to the right and unlock the door, enter. Advance and kill the strong enemy, eventually get the Dominion Staff from the chest. With this you can move the statues, hit the statue above the chest and then go to the door on the left.
Use the Staff to control the statue and then destroy the portal. Use the statue to go all the way down and then after various puzzles use the spinner to go to the room to the right. Kill everyone and after pressing various buttons you will receive the big key from the chest. Follow the path you will find on the map to reach the Boss door, unlock it and fight him.
After defeating him you will receive another fragment, talk to Midna and exit. Go south and then return to the Castle Town as usual.
Arrived advanced to be stopped by the usual postman, take the letter and then go to the bar and talk to Telma who will tell you to go to Kakariko. Do it.
As a human enter Renado's house, talk to him and then return to the Castle Town. Go back to Telma and talk to her, give her the letter and then go out and go to the leftmost building. Go inside and talk to the doctor, eventually transform into a wolf to get to know the smell of the medicine. Follow the trail and eventually you will come to Telma, talk to her and then exit south.
Wait until night comes and then go to the courtyard to the south, kill the dogs and you will have the statue, go back to Kakariko and enter Renado's room and give him the statue. Once this is done, go out and with Epona go north.
Hidden Village
Go to the top left and cross the bridge following the red dot on the map, at the end talk to Goron in the cave and then continue into the village. Eliminate all the enemies here and after taking out all 20 an old woman named Impaz will come out and after talking to her you will have an item from Ilia. Go back to Kakariko and Renado and show him the item, Ilia will talk to you for a while and then take Epona back and return to the Hidden Village.
Go to the house to the south and talk to Impaz, he will give you a book. Return to Kakariko and show the book to Shad, then you will find that the Staff of Dominion has recharged.
Now you will have to travel the world to find the statues, there are six of them and they will be found in Faron Wood, Gerudo Desert, Eldin Province (2), Castle Town and Lake Hylia. After the tour you will receive a message and the postman will arrive with a message from Shad, go back to Kakariko.
Go to Renado and show the book to Shad, after the scene move the statues with the stick and then pass them to enter the hidden room, talk to Shad again and then use the cannon to get to the lake. Go to Fyer and talk to him. give him the money to repair the cannon and then you'll get to the city in the sky.
City in the Sky
Talk to Ooccoo and after the scene go left into the shop and talk to the Ooccoo on the left for a useful item. Exit and go back and then shoot the crystal to open the door to enter the dungeon.
Use Oocca to fly and then pass the platforms to pass the door to the north.
Advance and then south and go through the lower right window, use the spinner and after crossing the bridge enter the room to the right. Use the platforms and at the end open the chest for the small key, exit and cross the bridge for a scene and return to the main room. Here enter the room on the left and then exit to make another bridge appear, go north and cross the bridge, unlock the door and enter.
Go north and use the iron boots to continue into the room on the left, open the chest to find the dungeon map and then go back. Go down and left and then hit the crystal and then go to the upper right room and use the blue rock to finish down. Continue south and then pass the narrow passage eliminating the enemy, ending up entering the lower left room. Jump on the platform and kill the enemies to unlock the door, go there and then into the room to the north.
Fly to the right and after various obstacles use the same Oocca to fly to the left side and pass the hole in the wall then enter the room to the north. Use the bird to go to the upper left and then go around to end up in the room on the left.
Go down to stop the fan and then you have to beat the Mini Boss, after defeating him go through the gate to the right, advance and at the end go through the door to the right and exit. Use the skills to open the door on the left and eventually enter the room on the right. Advance until you return to the central area and then pass the door to the right and advance along the path killing everyone and at the end pass the gate and after several puzzles finally on a platform you will find the big key in a chest.
Take it and then advance to the top floor, hit the crystal and jump on the ledge, open the door with the big key and continue until you meet the Boss, Argorok the Dragon. After defeating him you will have the last fragment. Talk to Midna and then return to the lake.
Lago Hylia
From here, use the teleporter to get to the Mirror Chamber in the Garudo Desert. Go to the mirror and after the scene there will be a portal that will take you to the Twilight Palace.
Twilight Palace
Once here, go to the top right and then into the central area and from there only to the right passing the door to the next room. Here go north killing everyone and then you will return wolf, kill everyone and then take the small key from the chest, unlock the door to the north and go through. Go into the fog to return wolf and after killing everyone take the compass from the chest on the bottom left and the small key from the one above, now go through the door after unlocking it.
Eliminate the illusion of Zant in the next room and then go north and get the Sol, use it a little further to make some stairs appear. Be quick and use the G again to continue, go up the stairs and then return to the previous room. Continue being careful not to get caught and after passing a couple of rooms you will exit the first area.
Put the Sol in one of the holes in the ground and then go left to use the platform that will take you through the door to the north. Kill the enemies here and then take the key from the chest and enter the room to the north. Return wolf using the fog and kill the three shadows to make a chest appear at the top, reach it to find a small key and the map of the Dungeon. Go back north and after killing other enemies take the Sol and escape as before, continue running and at the end exit and use this Sol in the last hole and you will have the power to cut the fog.
Go up the central corridor and clear the fog, go through the door to the north and then continue until you find the chest with the small key, take it and then unlock the door on the right and enter. Jump from platform to platform to the end and after killing all the enemies open the chest to get another small key. Go forward and use it on the door on the left and then go up from platform to platform until you find the chest with the Great Key.
Advance again by cutting the fog and before entering the Boss room you will have to kill several enemies, pass the various waves use the key and sail you will see the Twilight King Boss waiting for you here. Defeat him and then after the scene talk to Midna who will tell you to go to Hyrule Castle, go south and enter the portal.
Room of the Mirror
Back here, go to the Hyrule Camp, go left and cross the bridge to get to the city. Go to the central square and then north, as you get to the castle Midna will destroy the barrier and you can enter.
Hyrule Castle
From the courtyard go to the upper right and kill everyone, continue and advance to the next barrier, kill other enemies and go right along the wall, when you reach the gate use the chain to continue and then pass going up to the left. Another barrier with other enemies, defeat them and you will have the small key, go south and go up the stairs, go down to the left and go back to the courtyard.
Go left and defeat more enemies, then go through the upper left door and kill more enemies in the courtyard. Go north and advance killing everyone, at the end solve the puzzle and you can continue by opening the chest with the map of the Dungeon. Dig as a wolf to access the cemetery, go to the tree and use your senses and then as a human put a bomb, press the button to open the gate on the left.
Light the torches here to get access to two statues to pass and then use the chain to continue. Go back to the middle of the courtyard and go north where you can finally enter the castle, eliminate everyone and at the top left open the chest to get the compass. Keep going by lighting the torches and solving the puzzles and obstacles, in the end you will end up in an ambush but your friends will help you solve this problem.
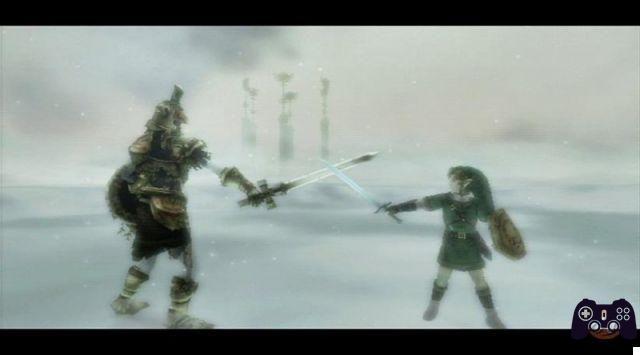
Go to the bottom right and open the chest to get the Great Key, with this you advance into the castle until you find the Boss door, unlock it with the key and you will find yourself outside, after a long scene with Ganondorf and Princess Zelda you will have to beat this quest last in the hands of Ganondorf.
After defeating her there will be another scene and you will have to beat a very dangerous super Boss, in the end thanks to Midna Zelda will revive and you will get out of this hell.
Outside, however, Ganondorf awaits you on a horse in its most terrible form, get on Epona with Zelda and you will have to face the next battle, after having knocked the enemy off the horse you will have to eliminate Ganondorf forever from the face of the earth (until the next Zelda of course ). After defeating him Midna will return to his true form and you will witness the final scenes of the game. Congratulations, you made it to finish this very long and beautiful Zelda.
 The Legend of Zelda: Twilight Princess wii
- Wii
- gc
Exit date: December 8 2006


![Guides Sophia's Shop Guide [100%] - Persona 5 Strikers](/images/posts/1f5e1c7629d56d6c792ac770a5d6b182-0.jpg)