


Please note:
The solution is based on the US version of the game. There may be divergences from the Spanish version.
MUSHROOM CUP
Below, the circuits contained within the Mushroom Cup.
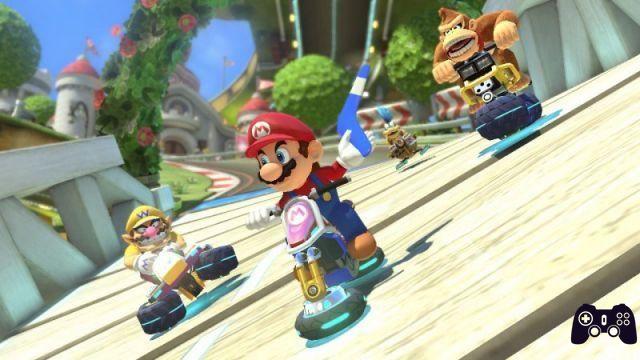
Mario Kart Stadium
Proceed straight ahead first, then turning right, locating the first group of crates. Continuing further, you will reach a right turn: it can be cut using a mushroom.
You will reach the antigravity area. Locate a second group of crates just after the left curve. The next real "obstacle" will be a right turn followed by a U turn, then a ramp: off the ramp you will have to quickly turn left, do not be surprised.
We therefore recommend that you move along the outer side of the turn, so as to reach a ramp that you can use to project yourself towards the finish line.
Water Park
Pay attention to the pillars near the entrance to the first "building". After you enter, there will be a 90 ° turn to the right, then you will have to maximize your speed so that you are the first to exit the "aquatic" area, moving in circles along the next play area. Try to impact with the submarines in the area, so as to make you project forward, recovering a second group of objects.
Once back in the water, you will be abandoned by the antigravity. We therefore recommend that you "cut" through the curve to the left, again using a mushroom, and then project yourself at maximum speed towards the next ramp.
Sweet Sweet Canyon
Throw straight ahead, until you reach a right turn - get ready to retrieve the objects visible along the turn.
Once in the cave, the path will curve to the left and you will be launched forward by a cannon. Landed on the cake, the path will immediately curve to the right: go through the following boxes, arriving at a crossroads: proceed at speed along one of the two ramps available.
You will now find yourself in front of two different paths, one blue (on the left) and one pink (on the right). We recommend proceeding along the slightly shorter blue path and then prepare to retrieve the crates.
During the following left turn, watch out for the piranha plant on the outside that will project towards you: if you want, you can use the mushroom to quickly propel yourself forward, so that the piranha plant cannot bite into it.
bad thwomp
Move along the first row of crates, in front of you. A left turn will follow, but we recommend using your mushroom to quickly proceed beyond the grass on the left, using the ramp to propel yourself forward.
When you get to the ruins, use the anti-gravity section on the right to throw yourself along the wall, using the boosts in the area. Then deviate to the left, exiting the cave and recovering the second "row" of crates. At the fork, we recommend proceeding along the path to the right, using the boost pads in the area. So be careful of the rock that will fall from the wall: avoid it, and then use the ramp in the center, so as to project yourself beyond the central building, reaching directly the area where the two paths converge.
Once in the anti-gravity area, the path will turn left. Retrieve all the objects in the area as the path "turns" to the right, then immediately return to the left, dodging another falling boulder. Then go up the narrow ramp to the left, and use the mushroom to cut the curve to the left. At the next ramp-slide, quickly throw forward and skid along the platform below, easily reaching the end of the level.
FLOWER CUP
Below, the circuits contained within the Flower Cup.
Mario Circuit
Immediately divert to the left to retrieve all the crates in the area. Then continue to follow the left curve to arrive at Peach's Castle. Quickly swerve to the right past the antigravity zone. So locate the grass on the left and quickly "cut" the area with a mushroom.
During the following straight, we recommend using all the ramps, two on the sides, followed by one exactly in the center. The track will then curve to the right, eventually arriving at a row of crates. After the bridge, turn right and, if possible, use the mushroom to "cut" along the sandy area. Then slide down the next ramp. Avoid the Goomba towers, proceeding straight to the goal.
Video - Launch Trailer
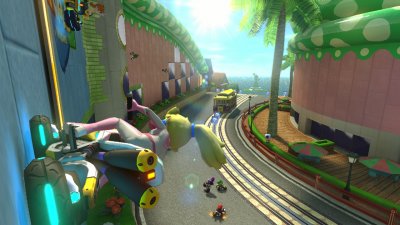
Toad Harbor
Move along the path in front of you, then turning right and using the grass to walk to the nearby lawn. Now left, along the bridge, thus taking the ramp to the left and crossing the watercourse.
After the bridge, move along the path below, preparing for a right turn. At the end of the ramp, jump up to perform a quick trick.
When the path splits, move along its right side. At the crossroads, we recommend proceeding along the lower path. You will come a little further on to another crossroads. Swerve to the left, using the antigravity to move along the walls of the following buildings, recovering the objects in the area. Landed again, go down the slope, avoiding the cars in the area.
So project yourself along the next two ramps, also using the pad near the buildings on the left. At the end of the path, turn left along the alley so as to "cut" and finally locate the end of the path straight in front of you.
Twisted Mansion
Enter the mansion in front of you, choosing one of the two paths as you like, as they are very similar to each other: in both you will face anti-gravity areas and in both you can proceed without problems along the walls.
When the paths have rejoined, you will have to overcome a large U-bend to the left - to avoid wasting time, we recommend using a mushroom to project yourself into the middle of the visible bookcase just before the turn.
You will reach a second "anti-gravity" section: use it to reach a second row of crates, go through it, and then arrive at an underwater area.
Once underwater, turn twice to the right, then to the left. The paths will therefore separate, along two "mirror" walls - one path will curve to the left, the other to the right, but both paths will contain the same types of objects. So quickly slide along the courtyard below, dropping down to reach one of the two paths available. We recommend the "lower" path, as it has less treacherous curves. After the paths converge, pay attention to the statues that line the path.
At the final line, we recommend using a mushroom to "cut" the grass on the right, thus avoiding the last curve.
Shy Guy Falls
Move along the first group of objects, then swerve to the left, and then to the right, using a mushroom if necessary to proceed along the grassy area without slowing down. When the path deviates to the right, remember to proceed along the ramp, avoiding the waterfall.
Also remember to use the various pads in the area to maximize your speed. When you reach the top of the waterfall, you will reach a second group of boxes, then a wooden bridge: watch out for the U-turn to the left located immediately after the wooden bridge.
After the bridge, you will reach a waterfall, which will eventually lead to a ramp, and then to a path further below. Now enter the nearby cave, staying first on the left, then right, then left again, recovering the various boxes. Finally, project over the nearby ramp, retrieving the crates at the top.
We therefore recommend using the mushroom to quickly cover the nearby grassy area, using the ramp to perform tricks. Use the next two ramps to maximize speed, then use the mushroom to swerve to the right, cutting along the grassy area.
Star Cup
Initially move slightly to the right, then to the left, projecting yourself over the ramp to get to the first terminal, recovering the crates.
Once outside, jump along the side of the conveyor belt, avoiding the crates, to maximize your speed. So pass the plane, then proceed along the ramp to get to the section above. Move along the ramp to get to the elevated path, remembering to retrieve all the crates nearby.
The path will therefore move slightly to the right, try to stay adjacent inside the curve, so as to recover all the boxes in the area. After passing the plane, the path will curve slightly to the right: move towards the raised area, to minimize the amount of space to cover. Again, the path will tend to deviate to the left, and you will be thrown down a ramp that will throw you into the air. There will therefore be a left turn: we recommend using a mushroom a few moments before the turn, cutting through the grassy area to reach the next ramp.
At the anti-gravity path, move along the path that curves to the right, using the boosts on the ground to maintain a sufficiently high speed. Then go down to the helipad, and follow the path to the left, returning to the terminal, thus arriving at the line that determines the end of the path.
Dolphin Shoals
Move upwards, along the initial part of the path, then letting yourself fall into the water again, you can't do anything else. Pay attention to the ramps, there are two on each side of the track, then you will find one in the center near the final area. We also recommend using the ring that you will automatically go through when you are thrown up from the ramp.
Upon reaching the cave, you will notice how it is "separated" into a large amount of sub-paths. We recommend proceeding along the path in the center, taking advantage of the various tubes that emit the currents to avoid falling into the holes below.
Right, use the tube to project yourself to the next platform. So try to stay above the eel, performing tricks while you are in this area. Afterward, you'll need to get past the short anti-gravity zone and make your way up the next ramp, selling upwards as well. Finally, you will reach the third area, containing a certain amount of boxes, as well as an immediately following ramp, which we strongly recommend to take in order to take advantage of the immediately following antigravity.
Then slide forward along the path, following it to the left, using the mud at the bottom to proceed and a mushroom to project yourself beyond the grassy area, making it to the finish.
Electrodrome
First, project yourself along the nearby ramp, landing on the circuit below. Make your way around the left curve, then move along the anti-gravity area and the next curve to the right. Take advantage of the two antigravity nodes on the side to make you shoot upwards.
When the circuit splits into two sub-circuits, we recommend proceeding along the pink colored circuit. You will find yourself in front of a path that will curve to the right, and then proceed along the musical area, which will therefore turn to the left.
So continue to walk the purple path, turning slightly to the right after the third row of crates of objects, always remaining to the right, going down the steps and therefore projecting yourself beyond the ramp, finally taking advantage of the antigravity to successfully complete the challenge. Finally, you will reach a circular landing zone, with a path that will lead you slightly forward.
Use the ramp in front of you to perform some tricks, then swerve along the path to the left, also using a mushroom to quickly pass the area to the left.
Mount Wario
You will initially find yourself inside a helicopter: don't worry and move straight forward, using the ramp to perform tricks, landing on the snow below.
You will then have to take a right, one left, and another right. Use the nearby ramp to perform tricks, but be careful not to fall into the ravine on the right. During the next curve to the right, you will be suddenly "interrupted" by the presence of a ravine: therefore try not to lose too much speed, so as not to fall into the ravine.
You will then return to the left, and you can use the two pads on the raised / raised area. There will therefore be a curve to the right: pay close attention to the ravine that will be present both on your right and on your left, you should preferably stay in the center of the track. Finally, at the last of the series of jumps, we recommend using the small platform at the bottom as a "springboard" to be able to complete it with ease.
You will then immediately move on to the second section. During the initial stages, you will need to collect all the crates as you enter the cave, passing a section characterized by anti-gravity. The path will then curve along the wall to the right, arriving at a platform where you can perform a large amount of tricks.
Landed on the next platform, try to stay in the center so you can proceed along the "slippery" ramp. Move to the cave visible on the left, using the rocks to perform tricks.
Landed in the water, you will find yourself in front of a ramp, and you will be projected towards the inside of a dam: you will now have to try to pass over all the boosts present in the area, and then let yourself fall towards the flow of water visible below. .
Once in the forest, you will notice the presence of a path both to your right and to your left. There will also be a ramp in the center, along which you can "slide" freely, then reaching a mushroom near the snowy area.
Once past the big rock, keep your eyes peeled, as a boost pad will materialize nearby, which we highly recommend using to gain some advantage before the end of this section. After the convergence of the various paths, we recommend staying in the center of the path to retrieve the fourth row of boxes. Moving on to the third section, pay attention to when the path curves to the left, that is where you will find the fifth row of crates, just on the left.
So do some tricks near the ramp, but try to always stay in its center, so that you can also reach a second ramp immediately following. You will therefore have to face a series of curves: right, left, right, left, right. After this last curve, you will find a row of crates straight in front of you. Retrieve them, so you will have to overcome some small platforms: perform some quick tricks as you proceed, then turn left, passing an anti-gravity area. Take advantage of the various pads by proceeding downwards, projecting yourself towards the ramp and recovering the third row of speakers, reaching an anti-gravity area: we recommend using the various "rings" to keep yourself at the right distance from the opponents.
Move down, eventually proceeding up the ramp and reaching the seventh row of items. Finally you will come to an anti-gravity section: project yourself towards the floating rings, then move towards the pile of snow and use the mushroom to project yourself forward, crossing the end line.
SPECIAL CUP
Below, the circuits contained within the Special Cup.
Cloudtop Cruise
Turn to the right and proceed along the ramp, retrieving the nearby items and jumping to the next platform. There will therefore be a large turn to the right, followed by a large turn to the left: we recommend "cutting" in both cases along the grassy area. Another possibility is to jump to the next platform so as not to waste too much time.
So do some tricks near the ramp containing the second row of boxes, in front of you. Follow the path that curves to the right. Use some tricks to overcome the umpteenth ramp, landing on the plane. You will then be fired from a cannon towards an anti-gravity area, located in the middle of some clouds that herald the arrival of a storm.
The track will then curve to the left, project yourself along the pads and dodge the lightning bolts. At the end of the path, move along the ramp and try to "center" the third row of crates, in this way you will land at the very end of the anti-gravity section.
The following ramp will launch you to either side of the block with a "?" to the side; afterwards, we recommend jumping on one of the leaves visible on the right, thus performing a quick trick that will allow you to cut the large "U" curve visible in the next room. Then turn left, thus reaching the end of the level.
Bone-Dry Dunes
After a short straight, the route will turn slightly to the left, then to the right, up to a crossroads. We recommend using the mushroom to project yourself into the middle of the fork, thus locating a ramp that will allow you to proceed forward. Then follow the path to the right, then turn left and use some tricks on the nearby ramp.
Continuing towards the area in the center, the path will split in two, with rows of objects on both sides - we therefore recommend choosing one of the two sides, with the aim of recovering all the visible objects along that "row".
Then pay attention to the bone piranha, go under it to avoid taking damage. The path will divide again: we recommend proceeding along the left path, paying attention to the large hole that you will find in front of you, and then turn along the path to the left, avoiding the Piranhas in the area.
At the end of the path you will find a ramp, you can slide along this ramp to quickly retrieve the third row of boxes without interrupting your run.
Finally you will reach the entrance to a cave: make your entrance, so pay attention immediately to the direction that will be taken by the path, since it will turn immediately to the left, and you will have to pay attention to the monsters "Dry Bones" that will try to capture you in this area. If you have a mushroom, we highly recommend using it in these moments, perhaps to go through the sandy area on the left.
Bowser's Castle
Proceeding straight, you will automatically enter the castle and go to retrieve the first crates of items. Always inside, you must therefore avoid the statues that emit the lasers, following the path visible on the right.
Swerve twice to the left, reaching an anti-gravity area. Follow the path to the right, then quickly turning left and using the nearby platform to perform some tricks. Move to the next platform again, coming near a second row of crates.
The track will therefore curve to the left: locate the platform immediately to perform some tricks in its vicinity. Continue up, coming to a crossroads, right in front of the giant stone Bowser. He will "hit" the two accesses to the paths with a punch, so try to proceed towards the path he just hit, so as not to suffer the blows.
Finally, you will reach a ramp that will also act as a conclusion to the anti-gravity area, taking you out of the castle. Then turn left, follow the path to the right, avoiding the boulders that roll along the path.
When the path divides, we recommend that you proceed along the elevated path: there will be a jump at its end, but the rest of the path will be a straight one, and you will gain a lot of time.
Rainbow Road
First turn to the right, picking up the items in the first row of crates. The path will then curve slightly to the left, then following a circular path to the right: pay attention to the inner part of the path, given the total absence of railings which could cause you some difficulties.
After the following ramp, you will land on a satellite, and there the anti-gravity zone will also end. The path will then curve slightly to the right, but avoid "cutting" as you would surely fall down. Let yourself be projected upwards from the ramp, then go down and find yourself in front of the choice between two possible paths:
- Left path: move along the left ramp, covering the raised area, passing the anti-gravity area and then bending slightly to the right, then continuing along some boosts that you will have to try to make the most of.
- Right path: use the ramp on the right, thus descending towards the path below. After the curve to the right, use the two boosts to continue forward and therefore always stay along the right side of the track, so as to recover all the speakers in the area.
Both paths end near the area where the antigravity "ends", and then proceed along the left turn, dotted with boosts: try to "catch" them all, so as to reach the end-of-level line without problems.
SHELL CUP
Below, the circuits contained within the Shell Cup.
Wii Moo Moo Meadows
First, follow the path to the first row of crates, then move to the left and throw yourself forward using the mushroom. Beware of the cows, which will move along the track, you will have to try to avoid them especially during the laps following the first one, when they will really "invade" the track.
You can then go through the second row of crates, then quickly turn right and go straight along the ramp. Immediately after the ramp, turn left to the outside, then continue up and project forward again.
Turn, and try to dodge the Monty Moles in the area, also avoiding running into the grassy areas, which tend to slow you down. Immediately after the last grassy area there will be a curve to the left that will project you towards the area of the end of the level: we recommend staying near the central part of the track, so that you can use the ramp positioned there to quickly project yourself forward, gliding along. the entire playing area, landing at the bottom and then swerving to the left.
GBA Mario Circuit
Try not to increase your speed too much during the initial straight, as it will be followed by a left turn, then immediately a right turn. A ramp will therefore follow, during the next "jump" we recommend staying in the center of the playing area.
Move to the anti-gravity section. Follow the tracks up to the U-turn as it proceeds to the left, using the ramp to perform some tricks and land on the back, completing the anti-gravity area.
After the curves to the right and left, which can be overcome thanks to the use of the mushroom, you can quickly project yourself along the ramp, going to reach some crates - in this case we recommend using the mushroom to retrieve them.
Finally, pay attention to the oil stain on the right, avoid it and then move slightly to the left. Finally, you will find the final line in front of you; there will also be a narrow path to the right, after which a pad that allows you to significantly increase your speed.
DS Cheep Cheep Beach
Move forward towards the harbor, then following it to the right until you reach the first "row" of items. Therefore, project yourself over the ramp, letting yourself fall towards the next beach.
Follow the beach as it proceeds to the right, passing the large rock. You will therefore find yourself in front of a second ramp, follow it and move towards the following beach, which will then proceed to the right. You will notice water on both sides of the playing area: therefore avoid using mushrooms to "cut" the curves, you would almost certainly fall into the "sea" below.
Follow the beach until you reach the lighthouse, using the various ramps to perform the tricks. So pay attention to the long curve to the right that makes up most of the beach, you can still freely choose whether to follow the direction or deviate to the left, preferring this time to dive into the water.
In both cases, you will find yourself inside a jungle: position yourself along the right side of the path in order to avoid impact with the trees in the area. Then turn left after the end of the next area of the trail. Move along the next two ramps, trying to use tricks to speed up the maneuver and reach the final area without problems.
N64 Toad's Turnpike
The path can be described as a kind of big "8". Unfortunately, the path taken by the machines will change constantly and will be "reset" every time you start the track again, so we cannot provide you with exact information about it.
First follow the road as it curves to the left, passing an initial anti-gravity section (you can see it on the wall to the right). So use the pads on the walls to increase your speed. Once out of the anti-gravity area, continue to follow the path until it deviates slightly to the right, if you want you can use your mushroom here to "cut" through the grass in the area.
When you reach the final line, you will have to pay close attention to be able to avoid all the cars in the area, while dodging the anti-gravity areas. Also pay attention to the ramps from which real trucks can "jump".
BANANA CUP
Below, the circuits contained within the Banana Cup.
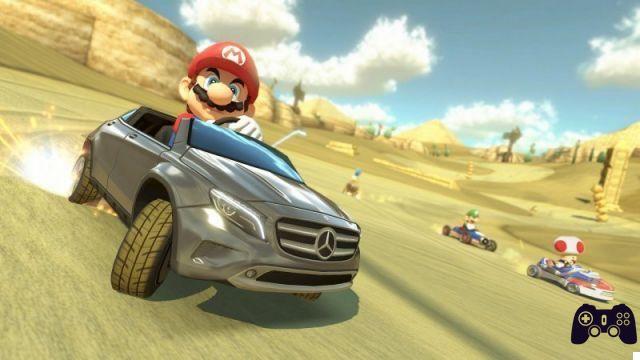
GCN Dry Dry Desert
Immediately follow the path in front of you straight ahead to get to the first row of boxes. As the next part of the path will proceed in a zigzag pattern, we highly recommend using a mushroom to "cut" through the zigzags.
You will therefore find yourself in front of a second row of crates containing objects, as well as a "trap" made of sand: we recommend using a mushroom to quickly project yourself beyond the trap. If you do not have a mushroom, we recommend using the column that you will find "inserted" into the sand as a support, on which you can perform tricks to proceed towards the right side of the path.
After the ravine, stay on the right to retrieve the crates. At the oasis, jump into the water and use the algae to perform tricks. Once out of the water, follow the path to the right, using the mushroom to perform a quick trick on the pillar visible on the left. So move forward until you reach the line that indicates the end of the level.
SNES Donut Plains 3
Pass the first group of boxes, then follow the path to the right to go beyond the bridge. The path will then turn right again, and you will reach another bridge, this time partially broken.
You will therefore have to move on the water, arriving at a second row of objects. Here you will have to turn left, then right, and then left again. Remember that it is not possible to "cut" with the mushroom, otherwise it will fall into the ravine below.
There will therefore be a straight, populated by some Monty Mole: avoid them, then follow the path as it curves slightly to the right, recovering the crates. Then get ready for a sharp curve to the left, then turn right again until you make your way to the end of the level area.
Video - Upside Down Test
N64 Royal Raceway
Proceed first straight ahead, then turn slightly to the left, arriving at a first row of boxes. Swerve left again, using the mushroom (if possible) to cut through the grassy area.
There will therefore be another curve to the right, and therefore the umpteenth to the left. The path will then move to the left again, arriving near a second row of crates: we recommend using the mushroom to "cut" along the grassy area on the left, then using the ramp to retrieve all the crates nearby.
Immediately after the speakers you will have to turn to the right again, then increase the speed to the maximum along the various successive boost pads, until you reach a ramp from which you can project yourself without problems. Pay attention to the balloons, avoiding to "hit" them and thus landing on the path below.
Turn left to get to the third row of crates. The path will then curve to the left, then to the right, then again to the left, reaching the end of the level line: these three curves can be "cut" using the mushroom.
3DS DK Jungle
First follow the path as it curves to the right, retrieving the first row of objects. So immediately turn left. Use the roots of the nearby tree to perform tricks and throw yourself up, avoiding opponents as you proceed down first, then left. When you reach the second row of boxes, turn to the right, then let yourself go to the left, projecting yourself beyond the pillar, always to the left.
Use the next two ramps to perform a large amount of tricks, up to an anti-gravity area. The path will therefore proceed towards a temple, will turn to the right, and then make a kind of U-turn, always proceeding to the right.
Use the nearby ramp to do some tricks, get past the banana. So project down the ramp, avoiding the three large statues and landing beyond the water.
As you continue forward, remember to stay on the left, as the path will split and you will want to stay along the left area to avoid problems.
The inner part of the path will be placed slightly lower than the outer one. In both cases, you will find yourself having to face a jump, so try to keep the speed at a high level. Immediately after, you will find yourself in the vicinity of the finish line.
LEAF CUP
Below, the circuits contained within the Leaf Cup.
DS Wario Stadium
Pass the first row of crates, following the path as it proceeds to the left, then to the right and then again quickly to the left, reaching a ramp where you can pick up speed. There will then be another turn to the left that will lead to a ramp from which you can easily project yourself upwards. Landed, turn left and use the boosts to get past the sandy area.
Then turn left, again using the boosts on the two nearby hills and thus passing the rings of fire. The path will therefore deviate slightly to the left as you proceed towards the anti-gravity area; try to keep to the left to follow the path exactly, so at the end of this area you will have to deviate immediately to the right.
Use the nearby platform to perform a certain amount of tricks, landing back on the ground, which will complete this section. Then turn left again and use the nearby pad to get a speed boost.
After two quick tricks, we recommend going underwater, thus locating two short ramps. Follow them both, then make a left turn and slowly slide down the following ramp.
GCN Sherbet Land
Follow the path to the right, passing the first row of boxes. Then turn left once you reach the first frozen area. You now have two options: stay in the frozen area, or drop into the watery area to the right.
We recommend staying in the frozen area. Going through it, you will therefore find yourself inside a cave. Once there, the path will proceed to the right, and then divide again into two sub-paths near an ice formation. There will therefore be a turn to the left, and you can retrieve the second row of crates resting on the ground.
There will therefore be two turns, one to the left and one to the right. You will then exit the cave. Then turn left again, then right. Turn right again reaching a third row of crates, reaching a second frozen area, characterized by the presence of many holes.
The path will turn first right, then left, then right again up to the end of level line. It will also be possible for you to use the mushrooms to "cut" through the snowy area that you can see immediately to the left of the last curve, reaching the end line more quickly.
3DS Music Park
First, move straight ahead, reaching a first group of speakers, then bending slightly to the right and then to the left, moving along the piano keys.
At the end of the piano, let yourself fall quietly downwards, then proceed forward to avoid the piranha plants on the sides - to do this, you must clearly position yourself exactly in the center of the playing area.
Then turn right, finding yourself above a xylophone. Use its slightly raised "notes" to perform some quick tricks. You will then reach a second row of speakers, then turn left and move along another xylophone - the "raised" keys will be visible on the left this time. So follow the path to the right, arriving near a second ramp, built by some sub-sections: among them, we recommend always selecting the ramps where you can slide, so as to maximize your speed.
After the third note, you will have to go down slightly and follow the path as it "creates" a kind of U-turn to the right. As often happens in these situations, if you have a mushroom you can also "cut" along the nearby grass. Then follow the path to the left, passing the end of the level line.
N64 Yoshi Valley
The peculiarity of this track is the large number of possible "crossroads" that you can choose. They will be denoted in the following way: A for the path of the fork leading to the left, B for the one leading to the right. Then there will also be all the possible combinations, so an AAB path will correspond to the left-left-right choice. Path AA: along the narrow bridge, perform some tricks at its end, thus returning to "connect" to the path AB.
Path AB: go straight ahead to return to interact with path AA. After a quick descent, you will turn right and descend along two platforms, arriving at a second row of crates.
Path AC: Follow the first path to the right, then deviate slightly to the left, finally reaching the cave, to rejoin the BAB path.
Path B: right at the first crossroads, you will then immediately find yourself in front of a second crossroads - on the left you will take the BA path, on the right the BB path.
BA path: drop down immediately, so you will immediately have to make another choice - on the left is the BAA path, straight ahead the BAB path.
BAA Route: This route proceeds "underneath" all the other routes - after a slow curve to the right it will join the AB route and then reach a second platform and make its way along a line of crates.

Path BAB: you will reach a cave that will "move" then to the left, you can go down from the platform and recover the second "row" of boxes that you will find in front of you.
Path BB: Proceed along the path as it moves left, past the mountain, to reach a cannon. Get fired from the cannon to get to the area where paths AA and AB converge.
At this point, all the paths will have merged into a single path. So follow the path forward as it creates a U-turn to the left, then backtrack to the right. There will therefore be another turn to the left, and you will find yourself in front of yet another row of crates, beyond which there will also be a giant rotating egg. Avoid the egg by crossing the bridge in front of you.
A slight turn to the left will await you, then return to the right, and again to the left until the end of the path. In general, the AA route turns out to be the fastest, but also the riskiest, as the roads will be much narrower and it will be much easier for you to fall down. The BB path is the slowest, but you will get 2 extra items and your chance of falling down will be remarkably low.
LIGHTNING CUP
Below, the circuits contained within the Lightning Cup.
DS Tick Tock Clock
Follow the path by first moving forward, then left, using tricks on the nearby ramp to get to the clock, trying to avoid its central area, where there will be a "hole".
Then go down the nearby ramp, avoiding the pendulum. Turn right, reaching the nearby ramp while using the pendulum, thus moving the second row of crates. Swerve right to get to the next ramp, slide down the ramp and pass the gears.
Move to the crates, swerve to the right, then left. Once near the second clock, move along its "arms", thus performing a quick trick along the central area. Past the clock, you will find two vertical gears moving in opposite directions: proceed along the moving clock, thus getting help in increasing the speed, completing the level.
3DS Piranha Plant Slide
Proceed forward, performing tricks on the ramp in front of you, and then drop sideways. Follow the path forward along the following curve, there will therefore be a jump that will lead you to an underwater area, you can perform quick tricks in the area.
Then follow the stream to the left, avoiding the piranha plant in the center. After passing it, turn left, avoiding the Goombas. Use the nearby ramps to propel yourself forward.
Then locate the pipe on the ground, using it to perform tricks to the right, then also using the next pipe and moving along the anti-gravity section. Head down, using the two platforms nearby to perform tricks. Follow the road, then turning left avoiding the current that will come from both left and right. Then use the ramp near the nearby path (on the right) to then see it with a giant piranha plant in the center of the play area. Avoid it as you did for the first, thus reaching the second row of crates.
As soon as you land, gravity will return to being there. Follow the path to the right, then turn left avoiding the Goombas, so as to reach the final area without too many obstacles.
Wii Grumble Volcano
Proceed forward and use the nearby platform to perform tricks, eventually reaching the first row of crates. Follow the path that proceeds slightly to the right, then to the left, then quickly turn right. Use the platform to perform a trick, then enter the next cave.
Keep to the left, then continue to the right and move along the path below, going all the way to the second row of crates. Once out of the cave, drop to the moving platform, trying to proceed along the next ramp and finally arriving at the island and the next moving platform.
You will therefore find yet another crossroads: we recommend proceeding along the elevated path, so that you can then use the nearby pad to quickly project yourself forward.
During the flight, we recommend that you turn slightly to the right, so as to land directly on a new platform, where you can perform a certain number of tricks. Having avoided the fire snakes, you will then have to choose which path to proceed towards: we recommend proceeding to the left, you will first have to overcome a quick path upwards, but you can then turn right and project yourself along a ramp that will lead you directly to the line end of level.
N64 Rainbow Road
Proceed straight ahead along the anti-gravity area. Let yourself be carried down the path, using the various boosts, one on the left, one on the right, and one in the center. When the anti-gravity effect is over, move along the air loops to the left, then to the right, landing in front of the last anti-gravity zone. Follow the path to the right, then straight using the tricks.
This will bring you to the second section of the game: immediately turn left quickly, thus projecting yourself along the anti-gravity area. Follow the path to the right, moving along the circle, trying to stay off the track to be able to recover all the crates of items. Completed the anti-gravity area you will have to overcome the umpteenth section composed of curves, dodging the Chomp. Go through the fourth row of crates to get to the third section.
Turn right here, then left, arriving at the fifth row of crates. Follow the path to the right, then turn left again passing the sixth row of boxes. After the track curves to the right, be prepared to overcome a ramp, after which there will be a short anti-gravity path. In this area, we recommend that you step on the accelerator, as the final area will be straight in front of you.
Video Solution - Playlist
Click here for the playlist!
Video Solution - Mushroom Cup
Video Solution - Flower Cup
 Mario kart 8 wiiu
- WiiU
Exit date: May 30, 2014


