


Please note:
The solution is based on the US version of the game. There may be divergences from the Spanish version.
Introduction
After the opening scene, proceed to the area marked by the golden exclamation mark. So leave the tavern, arriving at the Kingdom of Caldisla. Approach the palace at the top of the town. So talk to the King. Proceed south out of the city. Continue to the cave to the northwest, arriving at the ruins of Norende. Make your way to the left. Go down the lower path, retrieving the chest with the potion. Then proceed along the elevated path. Continue to the left, to the cave. Observe the cutscene, only to be faced with the game's first "Boss" - the Sky Dueler.
Mini-Boss: Sky Dueler
You will fight with Sky Dueler and Sky Archer at the same time. The Boss has 81 HP and has a weakness towards lightning-based strikes. We recommend using "Default" right away to reach a minimum BP level. Then attack both members of your party. After the turn, you will have to make a quadruple attack using both components of the party. Having dealt enough damage, we recommend continuing the attack again.
Mini-Boss: Sky Archer
The boss is very similar to the previous one, and you will fight them at the same time. During the battle, you will have to try to defeat them in sequence. First use the Default to increase the BP level, then move on to a quadruple attack. So go out of the cave and go back to the king, in that of Caldisla. You will be asked to proceed to the lake, southwest of the city. There you will find yourself facing two other bosses, Barras and Holly.
Boss: Bars
The boss has 405 HP and has no particular "weaknesses". As for the potential optimal strategy, we recommend initially using "Default" to increase the BP level up to 3. You will then have to attack 4 times, consecutively. When / if your HP drops too much, we recommend using potions. When / if the HP drops particularly, Barras will use Invigorate to inflict 90 points-damage to all characters present in battle - even to himself. We therefore recommend that you let him do so, so that he will KO himself.
Boss: Holly
The boss has 337 HP, and is human. Holly is able to use "heal" (heals 80 HP), "aero" (deals 50 wind damage) and "guard" (increases her physical defense capabilities). Here you will have to pay attention to his remarkable attacking abilities, especially in moments of "despair" ie when his HP has decreased considerably. In those cases, we recommend using a quadruple attack before finally knocking her out. So go back to Caldisla, making sure to buy the healing scroll in the meantime, so that you can heal yourself.
Video - Launch Trailer
Center Keep
Return to the Overworld, continuing north-east, arriving at Centro Keep. Enter the room to the right by activating the switch. Go up the stairs, arriving on the second floor. Continue to the next room, go down the stairs and flip the switch. Go up to the third floor.
Go down, right, proceed towards the central alley, activating the switch. Still straight, go down again, activating the switch. Go through the door, now unlocked. Save and go down. Talk to Edea, then see her with Omnias.
Boss: Ominas
The HP of this boss is 2430. It is a human race boss. Omnias is a dark wizard; his spells include "Fire", "Sleep", "Silence", "Poison". The easiest way to defeat the magician is to use your "Default" magic on the two nearby subjects, waiting for their BP level to drop to 3. You will then have to make a quick quadruple attack, while the white magician will have to use a combination. of "Heal" and "Poison" to heal neighbors and remove all status ailments (if / when necessary). So use the Echo Erbs to "remove" the silence, if / when your curators will be "silenced" by other subjects.
Edea does not possess specializations during the early stages, but is still able to inflict considerable damage on everyone present, taking advantage of its abilities to make those present fall asleep. To prevent this from causing you any problems, you will need to have your white wizard attack your party member who has been asleep (you will clearly have to use not too "powerful" magic to avoid serious damage to your subject).
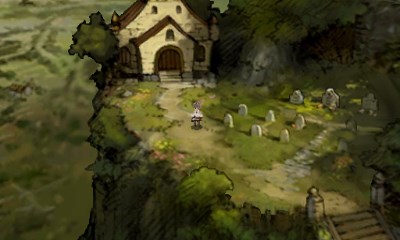
After the battle, you will be given the opportunity to change "jobs" by becoming a black mage. You will then have to return to the Caldisla palace. You will be notified of the king's absence. Inside your party, only Edea will remain. Proceed to the cemetery, observing the cutscene. Your party will then regroup.
Villa Away
Before proceeding, you will need to change the class of one of the characters, making him a black wizard. You will also need to buy the scroll that allows you to learn "Thunder" magic. You will then have to make your way through the "Centro" castle. In the area, Edea will open the door leading to the first floor. You can therefore proceed forward, then turning north, entering the tower that leads to the villa di Lontano. After entering, you will be confronted with three different mini-bosses at the same time.
Mini-Boss: Sky Dueler/Pikeman/Archer
Each of the opponents will have 162 life points, and are weak to lightning-type spells. As for the game strategy, you will have to start using the Black Wizard. He will have to use "Brave" three times, then attack all enemies four times using "Thunder". The battle should be completed in a single turn. After the battle, move counterclockwise around the outside of the room, retrieving the chest containing the Ether.
Then proceed to the stairs that lead to the second floor.
Mini-Boss: Sky Dueler/Pikeman/Archer(2)
Also in this section, each subject has 162 life points each. They are all weak to lightning. The strategy will have to be similar to what has been seen previously. However, you will have to face four enemies, not three. The Black Wizard will have to use "Brave" three times, and then attack all enemies with lightning.
Then enter the door on the left. Then right, facing the next boss, Heinkel.
Boss: Heinkel e 2 Sky Archers
The "main" boss has 3240 HP and is weak to thunder. The Sky Archers are equipped with 162 HP each and are also weak to thunder. Your strategy will see you get rid of the Sky Archers first, using thunder at least once. The main boss mainly uses two attacks, Shield Strike and Stomp. The former is able to increase its defense level, while the latter decreases the same defense level. A potential strategy of yours is to use the Default repeatedly, until you reach 3 bonus points. You will therefore have to make a quick quadruple attack. The "recommended" party includes a white wizard, a black wizard and two other attacking players. We also recommend that you bring a poison antidote with you, it is very likely that you will suffer poisoning.
Having defeated Henkel, the knight class (specialized in melee, with considerable defense) will activate.
So go back to the Caldisla palace to complete this first part of the story.
Chapter 1
Ancheim
Exit the ship, proceeding south to locate Evenim. Make your way to the guesthouse, resting until the day comes. Continue to the palace, observing an intermission scene. Then examine the Mill Door to locate the Aether. Go down to the bottom of the stairs and retrieve the Hi-Potion. Then proceed south, arriving at the Temple of the Wind.
Temple of the Wind
Enter the temple, turn left. Go back to locate a chest containing a Wind Charm. Right, go down the stairs to the first floor. Following the path, retrieve the remedy from the chest. Continuing until the crossroads. Go down, take the Turbo Ether from the nth chest. Right, follow the path to yet another crossroads, this time preferring the path on the left. Go up the stairs, arriving at the first floor. Continue along the path, reaching the flight of stairs that leads to the second floor. Go up, turn right and continue along the path. Then continue to the far left, make your way to the chest containing the Mythril Rod. Go back to the right, then go down the stairs to the first floor. Swerve to the left, use the lever to open the nearby door. From the lever, swerve to the left, then drop down to locate the chest containing the Mythril Dagger. Activate the save point, enter the door in front of you. Examine the altar, then go back to reach the room with the golden bubble.
Yulyana Woods
Upon exiting the temple, proceed towards the air ship, projecting towards the golden area visible on the map. Enter the city, observing the cut scene. Swerve to the left, recovering the peace ring. Examine the basket nearby, thus catching the Antarctic wind. Exit the city, moving clockwise along the lake, entering the cave that leads to Vestment. After the first detour, proceed along the upper left path. Continue to the left, then drop down to get a chest with a potion. Go back to the fork, following the stairs to the second underground floor. Go down again, recovering yet another chest. At the crossroads, left. Continue to the left, go up to retrieve yet another chest. Go down to the second floor, recover the chest on the right. Go up, right. Yet another crossroads, proceed along the path at the bottom right to get to the third floor. Save, proceed forward to begin the battle against the Dragon.
Boss: Dragon
It has 10125 life points, is sensitive to water and immune to fire. The dragon is endowed with a remarkable attack capacity, as well as moves capable of inflicting strong direct damage (eg Bully, Mow Down). We recommend using Default right away, so as to "build" your BPs. When you have enough, you can attack four consecutive times. If / when the Dragon uses critical moves, we recommend the massive use of Phoenix Down to revive characters who have lost a lot of HP.
Since the Dragon has poor defensive skills, the combined use of Monks, Knights and Black Mages is strongly recommended. When / if you take an excessive amount of damage, we recommend casting Protect, always using your White Mage. After the battle, return to Yulyana Woods to parry with the sage. After the cutscene, return to the Temple of the Wind.
The Wind Crystal
Approach the altar, near the save point. Before facing the boss, we recommend that you have reached a level of at least 20.
BOSS: Othros
The opponent has 6750 HP for each of the heads. The blue head will be weak to fire and immune to water, the red head weak to water and immune to fire. Both heads can use powerful ice and fire attacks, both "physical" and "special". They are also able to hit the whole party. As indicated above, you will have to try to hit the blue head with fire-based shots, the red head with water-based shots. Try to "equip" all skills based on fire and / or water resistance at your disposal. The heads have poor defense capabilities, so you can alternatively use both physical and magical attacks. We recommend that you KO one of the two heads before proceeding to the next one, so as not to have to attack them at the same time.
Once the boss is down, watch the cutscene, repeatedly pressing the X button to "wake up" the crystal when prompted. In this way you will get extra "points". Once this phase is completed, new "slots" will be inserted, necessary for the support skills. You can therefore return to Hannoim. Observe the cutscene, then exit Archeim. Approach the air ship, then continue to the forest northeast of Evenim.
Chapter 2
Miasma Woods
Avoid entering the poison lakes, to avoid - in fact - being poisoned. It is preferable to proceed along the path instead. Deviate at the second fork, proceeding beyond the chest, recovering the remedy from inside. Then continue towards the north exit. Right, follow the path to the right to retrieve the chest. Turn the corner, take the scimitar. Go back to the first fork, turn upwards and continue straight along the path.
Take the potion, then - going down - enter the first right turn. Get the chest containing the potion. Left, get off. At the intersection, throw yourself down the elevated path, picking up a chest of Ether. So make your way completely to the left, following the path. At the last crossroads, right, then up to exit the forest.
Flower
Make your way to Florem, crossing the bridges on the left. Once in the city, proceed upwards, then right to enter. After the cutscene, exit and descend to the water temple. Straight ahead. After the cutscene, exit the temple, returning to Florem. Go back to the building you visited earlier. Left, talk to the girl to the right of the fork. Enter the item shop. Talk to the blue-haired girl on the left. Go down, talk to the only man present. Talk to the girl still on the left. Go back to the previous building, talk to the matriarch.
Revisiting Yulyana
Once in the alternate world, make your way to the forests of Yulyana on the right. Enter the cave, reaching Mount Fragmentum. Left, follow the path and retrieve the chest. Back, proceed along the street to the right. Take the chest with the remedy. Straight ahead, proceed along the street on the right, another chest. Come on, take the nearby cash box containing the money. Continue along the elevated path. Follow him forward, to a chest with an Aether. Continue to the top right exit, retrieving the chest with the Nodachi. Go back, proceeding along the exit at the bottom right. Save the game. Right, dealing with the Land Turtle.
BOSS: Land Turtle
The Boss in question has 20250 HP, and is weak to water attacks. The opponent is endowed with a remarkable "physical" defense capacity, but a poor "magical" defense capacity. The use of magic is therefore the most popular option. One exception remains: if / when the boss proceeds to cast Reflection Angle on you (with the goal of actually "reflecting" the spells back at you), you'll have to prefer melee instead.
Then exit the cave, continuing towards the Yulyana Woods. After the cutscene, return to Florem through the cave. Proceed to the square, using the elevated exit. After the cutscene, continue to the guesthouse.
Looking for Olivia
Make your way to the area west of Florem, entering the ruins. Forward, then right. Go back, flip the switch and proceed along the path to the left. Continue to the following crossroads. Left, flip the green switch. Go up, locating the chest with the Aether. Flip the green switch, then head east to the first floor. Activate the yellow switch, go down. Got everything you can, go back and flip the red switch, then the green switch. Proceed along the fork on the left. At the next fork, go down and follow the path down. Other cash. Go back, then left, going down the stairs.
Continue along the fork to the right. Activate the green switch, take out the chest. Activate the green switch again, then the yellow. Go up the path to the left, flip the blue switch. Go up and retrieve the chest with Hermes sandals. Go back, flip the blue switch. Follow the central path. Keep going up to the chest with the Aether. Activate the red switch. Go back, left, go up and proceed to the first underground floor.
At the fork, right twice. Activate the red switch. Left, go up to the chest and get the potion. Go back to the first fork by activating the green, then yellow switch. Left. Activate the blue, then left and take the chest with the Dark Charm. Activate the blue again, then right. Save your game, go up the stairs. So you will have to deal with two different bosses - but don't worry, it is not possible to win and the fight will come to its "automatic" end after 4 turns.
Water Temple
Return to the water temple to proceed. First, proceed to the left, then go down to retrieve the chest with the remedy. Go up, then left, then down again. Go down to the next two crates, picking up the Phoenix Down and the Hi-Potion. Save your game, approach the altar, to then face the boss.
BOSS: Mermaid
It has 40500 life points, and is weak compared to "lightning" type spells. As for the optimal strategy, he is able to use the magic "Charm" as well as "Seep". You will have to pay particular attention to this second spell, capable of making you completely helpless, that of inflicting considerable damage, as well as "summoning" clones with 2700 life points. We recommend ignoring the clones, focusing on attacking the "real" Rusalka.
Starting the battle, we recommend using Examine. Take Aquatic Slayer with you, then try to take advantage of the "lightning" damage to make the battle faster.
After the fight, you will wake up inside a water crystal. Repeatedly press the X button to recover extra points, to be used for support skills. Exit the water temple to continue with the story. Approach the air ship with the question mark.
Chapter 3
Eisenberg
Approach the ship, enter. Go up and approach the area marked by the bubble and the question mark. Talk to Zatz. Go back to the upper deck, enter the tavern. Talk to Zatz again. Exit the tavern, then right, exiting the ship. Continue towards the port. Right, exit the building. Follow the path along the coast. Then northwest, arriving in the city. Exit left to Hartschild. Enter the commander's residence. After the cutscene, exit the city and return to the bridge. Then continue towards Grapp Keep, to the north-east.
Grapp Keep
Activate the lever on the right. Make your way up the open path, climbing the stairs to the second floor. Retrieve the money from inside the chest. Go up and activate the lever. Go down the stairs to the top of the first floor. Activate the lever, go back to the first flight of stairs. Go through the nearby door, retrieving the Turbo Ether from the chest. Approach the stairs in front of the entrance. Go up to the second floor. Go left up to the third floor. Left, follow the path to the chest with the Rebuff Locket. Right, go down the stairs, then continue to the left, activating a lever. Go back to the stairs, retrieve the chest with the bomb, on the right. Go up, then left, take the Bacchus wine from the box. Go up again, then go down to the first floor. Activate the lever. Go back to the third floor. Save your game and examine the bright area.
Boss: Automaton
The opponent has 13500 life points, and is weak to thunder-type spells. As for the "general" strategy, we recommend using characters with considerable defensive ability, the opponent must in fact be "cooked on a slow fire" given his high HP combined with his poor ability to cause damage.
Mythril Mines
Before entering, we recommend that you maximize your ability to deal "thunder" damage. Then take the new path, visible to the left of the bridge. Enter the cave to see her against the Black Pikeman. Use magic attacks to end it. Then right up to the crossroads. Go down to the right, another fight. Left, another battle, then go back to the intersection. Make your way to the lower right area, remove the Axefighter and then get to the second floor. Get rid of the Axefighter. Go up, then right. Open the chest, retrieving the Turbo Ether. Left, up, left, save your game. Go down and finish the Axefighter. Left, down, get rid of the Pikeman too. Exit the dungeon, go through the gate, then continue northwest. You will find yourself near Starkfort. Right, save, then visit the shop to "upgrade" your armor. Examine the rock to the left of the save point. Enter the fort. Left, retrieve the money from the chest. Right, take the potion too. Go up, right, along the stairs. Right, low, approaching the exit. Go back to Hartschild's, entering Goodman's residence and continuing to the lower left area.
Fire Temple
Go back to the Mythril Mines (the cave northwest of the bridge). Go down to the second floor, approaching the save point. Continue to the door. Wait for the surrounding magma to cool down. Follow the path to the left. At the first fork, right, then left (preferring the raised path), arriving at the stairs that lead to the second floor.
You will therefore find another crossroads. To reach the third floor, proceed along the second path from the left, arriving at the stairs that lead to the third floor. Yet another crossroads: deviate towards the path at the bottom left, then recover the X-Potion from the path at the bottom right. Continue to the left again; at the nth crossroads, make your way up, then down to the right, retrieving the chest with the Flame Charm. Continue to the upper right area, grabbing the Turbo Ether.
Go back to the upper left area, reaching the stairs that take you to the west area of the second floor. Yet another crossroads: go down to the lower right area, taking the Diamanti bracket.
Go back up, then left, continue along the path at the bottom right. Right up, follow the path to the chest with the Flare Hatchet. Go back down, then left. Before reaching the stairs on the left, throw up and retrieve the Gale Bow from the chest. Go back to the stairs on the left, reaching the first floor.
Left, re-enter the fire temple. Go down to the lower left corner, picking up the Flametongue. Go up, right, examine the play area nearby. Right, take the Turbo Ether from the chest. Right, retrieve the X-Potion from the nearby chest. Down, right, examine the play area. Low, right, take the shield. Left, pass the wizard, down. Save the game, left, down, left, go through the secret passage to recover the elixir. Enter the fire temple altar.
Boss: Chaugmar
The boss has 54000 life points, and is weak to "Thunder" type spells. During the early stages of the game, the boss will be completely invulnerable to any kind of damage. After his transformation, he will become vulnerable. Warning: immediately after the transformation, the opponent will use "Energy Burst", a move capable of inflicting enormous amounts of damage. In these moments, your best chance of causing heavy damage consists in the extensive use of "particular" objects, capable of overcoming the strong defenses of the enemy without problems.
You will therefore have to "awaken" the fire crystal by pressing the X key repeatedly: its proximity is able to significantly increase your basic abilities, you will consequently inflict more damage per shot to your opponent. Then exit the fire temple, turning to the right. Head down, returning to the entrance. Take advantage of the teleportation stone. Project yourself towards the bridge. Talk to Commander Goodman, returning to Hartschild. Continue to the commander's house.
Locating the Air Ship
Proceed to the ship, returning to the sea. Enter the tavern, talking to the man on the right, near the far left table. Then proceed towards Caldisla, entering the tavern. Continue to Hartschild, entering Goodman's residence. Proceed towards Caldisla. Enter the palace, and return to the ship. Enter the tavern, continuing to the market. Proceed upwards to get to the next game area. Return to Caldisla, continuing to the tavern. Go back to the ship, then off to the bridge. Examine the engine. When you reach the game area on the far left, examine the surroundings to locate the "Fury of Zeus".
Proceed to the engine room. Right, down, left. Take the money from the cashier. Continue to the left, then go down the stairs to get to floor B28. Right, go back to the stairs to B27. Activate the lever. Go back to the stairs, lower left. Proceed down the ramp at the bottom right, arriving at B28.
Go up, then left, take the money from the cashier. Go back towards the stairs, up to B29. Left, then down, take the ax below. Go down the stairs again, up to B29. Go down again, retrieving the trident from the chest. Go back to the stairs, left, then down again to retrieve the club from the chest. Continue to the left, following the path. At the crossroads, go down to retrieve the Raikiri from the crate. Go up, then right, following the path and recovering the Bacchus wine.
Follow the central path. Right, go up to the B28. Go up, proceed towards B27. Activate the switch. The lift will then be activated near B27. Approach the elevator, flip the switch. Left, then down, take the arctic sale from the chest. Right, walk along the path to the save point. Left, retrieve the Barrier Shroud from the chest. Go back to the save point, right, up, examine the engine.
Boss: Behemoth
The boss has 108000 life points, and is weak to thunder-type spells. The opponent mainly uses physical attacks; consequently, the most suitable subjects to face it are the Ninja, able to dodge most of the attacks thanks to their "Utsusemi". The opponent never moves more than once per turn, which will work to your advantage. Upon victory, access to the Grandship - an air ship - will be unlocked. So fly to Eternia (you will find the north-west area of the map). It will be possible to locate new hidden objects near Hartschild. Examine the upper right corner of Eleanor's room, recovering a Kunai. Also examine the barrels placed between the item shop and the guesthouse, thus recovering an elixir.
Chapter 4
Eternity
Follow the path on the left, reaching the Ice Golem.
Boss: Ice Golem
The opponent has 81000 life points, and is weak to fire-type spells. The opponent specializes in the use of physical attacks; as for the previous boss, the most suitable class is therefore the Ninja, which will allow you to dodge the opponent's attacks using Utsusemi. Among the opponent's attacks, there are "Blizzard Blast", able to hit the whole party at the same time causing "water" damage; then the Freezing Punch, also this "water" type attack, capable of inflicting damage to a specific member of your party. Despite the presence of these two harmful blows, it will be possible for you to avoid most of the opponent's blows, using the Ninja's Utsusemi ability as mentioned above.
So proceed along the way to Eternia. Proceed up, entering the healing tower. Right, talk to the nurse, reaching the top of the stairs. Exit Eternia to the left. Among the three possible paths, we recommend choosing the one further east, given the absence of particularly powerful enemies.
East Route
Proceed along the road that continues to the right, following the path. At the next fork, proceed towards the village of Gravemark. At the umpteenth crossroads, continue towards the "Eternian Central" command.
West Route
First make your way west. At the following fork, go right. Another crossroads, left, up to the vampire castle.
Central Path
Go straight to the center, the road will be very simple but you will be forced to fight some enemies along the way.
Eternian Central Command
Enter the castle, proceeding to the right, entering the room. You will have to see her at the same time with Victoria and Victor.
Boss: Victoria
Victoria's HP is 94500, and she is weak in light. As for the optimal strategy, you will have to try to avoid the "contact" with the magic called "Corpse": it is able to eliminate you in only 4 turns. Dark can deal significant damage, but to only one target at a time - it can also be countered by using "Reflect" to knock it back at the opponent.
Boss: Victor
Victor has 108000 life points, and is weak to Dark-type spells. He has no "particularity" compared to his wife Vittoria, except for the inverse sensitivity to magic - indeed, light vs. dark. We therefore recommend taking advantage of its weakness to eliminate it quickly, without having to resort to special tactics. Luckily for you, it primarily deals "holy" damage, which you can easily counter.
After the battle, the Aracanist class will be unlocked, endowed with the best ability to deal magic damage. The "Spiritmaster" class will also be unlocked, featuring the most effective healing spells. Both classes can be combined with black and white wizards.
So go back to the corridor, proceeding forward. Edea will wake up. Exit the room. After the various cutscenes, you will find yourself in the prison.
Get out of the prison
Go down, examining the nearby cells with Agnes. Proceed to the left, examine the cell with Tiz. Right, withdraw the money from the second cell. Right, go down to get the light blanket. Left, then - when you get to the third cell - you can take the 5000 soldi from the cashier.
Continue to the lower left corner, arriving at the stairs. Go down to the lower right area, coming to a hidden passage that leads to a chest containing Excalibur. Go up the stairs. Right, arriving at the third fork. Follow the path on the left. Down, right, then down again to take a box with Bacchus' wine.
Go up, look at the cutscene. Go up the stairs. Go back to the main entrance. Go up. At the top, right, interact with the bubble with the exclamation point. On the 47th floor, follow the path to the central room. Continue down to the right, then down again, then down to the left, recovering Lilith's kiss from the chest. Go back to the center, then continue to the lower left area, arriving at the 48th floor.
Follow the path that leads to the center of the room. Then go down to the bottom right and follow the path. Continue to the final area of the room, retrieving the dagger from the chest. Go back to the center, up, right, follow the path. If / when you need to rest, continue to the upper right room. Examine the bed, then make your way up the stairs to the 49th floor. Always ahead. Take the Stardust, then go up the stairs to the 48th floor, straight, then go up, continuing to the switch near the elevator, starting the battle with Braev.
Boss: Braev the Templar
Braev has 47250 life points, and is weak to dark-type spells. He specializes in physical attacks, capable of inflicting considerable damage. A nasty surprise is also expected for you: after defeating him a first and second time, he will recover all the HP - you will therefore have to effectively eliminate him 3 times. Pay attention to his "Heart Strike", elemental attack that always "causes" a critical hit.
After the battle, the "Templar" profession will be unlocked. Then proceed to the Everlast tower.
Everlast Tower
Enter the Everlast Tower. Proceed to the right, unlocking the air travel to reach the Everlast tower. Go back up the stairs to the second floor. Make your way to the central room on the second floor. Go down to the lower right area, proceeding along the stairs to the third floor. Follow the path to the left, reaching the blue chest. Go down, right, following the path to the chest containing the elixir. Go back to the locked room, right, down, then go up the stairs that lead to the fourth floor.
Climb again, then completely to the left. Go down, follow the path to the chest containing the dark shield. Go up, continue completely to the right. Collect the dragon's claw from the nearby chest. Go down the umpteenth flight of stairs, then continue down to the right, up to the fourth floor. Left, arriving at the temple of the earth.
Right, examine the next room, retrieving the crates in the area. Save your game, enter forward, arriving at the altar of the earth.
Boss: Gigas Lich
The boss has 108000 life points, and is weak to light-type spells. As for the optimal strategy, you will have to take advantage of the healing type spells: Holy One and Curada are able to inflict up to 6000 damage on the enemy, simultaneously healing the members of your party. You can then "awaken" the crystal of the earth, by pressing X repeatedly, to get additional points.
Holy Pillar
Exit the earth temple, reaching an area where you can use the air ship. Fly to the visible light in the lower right corner, entering the portal to face the final boss.
Boss: Alternate
The opponent has 135000 life points. Alternis only uses physical attacks, so we recommend using the abilities of Utsusemi (the ninja). So enjoy the intermission scene.
Footage - Japanese Trailer
Chapter 5
Back in Caldisla, Tiz will be left alone. Enter the ruins of Norende. Proceed to the huge ravine. Anges will rejoin your group. Then return to Caldisla. Go up and talk to Ringabel. Proceed to the cemetery, talk to Edea. Enter the tavern. You will now have to "awaken" the four crystals. Enter the fire temple, then the altar.
Boss: Othros
The opponent has 67500 life points for each of his heads. Its blue head is weak to fire, its red head is weak to water and immune to fire. We recommend using the "Iceflame" shield, which is capable of nullifying damage caused by both fire and water. Instead, avoid wasting time with "evasive" maneuvers: the opponent has several moves capable of hitting the entire party, in these cases it is impossible to "escape". We recommend using subjects with considerable defensive skills, along with (at least) one Spiritmaster. Your healer must be awarded the "Iceflame" shield.
Then continue towards the Water Temple, arriving at the altar.
Boss: Rusalka
Equipped with 81000 life, weak to lightning. His aquatic "clones" now have 135000 health points. If possible, we recommend using his "merge" ability to get rid of the clones themselves. You can also use Utsusemi to avoid most attacks, excluding Bewitching Voice. You will then have to proceed to Yulyana Woods, to carry out the repair of the dressing gown. So continue to the cave of the vestment. Once inside it, go down to its lowest part, talking to the sage. Exit the cave, continue to the fire temple and enter the altar.
Boss: Chaugmar
It has 94500 life points, and is weak to thunder-type spells. First of all, we recommend using Utsusemi to avoid its fearsome "Energy Burst". As for the damage to be "inflicted" on the enemy, we recommend that you take advantage of the various objects at your disposal, rather than trying to inflict "direct" damage on the opponent. The rest of the fight will be similar to the previous one, except for a certain greater ability of the opponent both in terms of life points and in terms of attack capacity. Then continue to the temple of the earth, proceeding to the altar.
Boss: Gigas Lich
The opponent will have 135000 life points, and is weak to light-type spells. Gigas Lich will have "enhanced" stats, as well as a new "Death" type spell. This combination will make the fight forcibly more complex. In all other respects, the fight will be analogous to the previous battle. Then proceed to the nearest light.
Boss: Alternate
Alternis has "higher" stats than the last time you faced him. We therefore recommend taking advantage of Dark Resistance. For the rest, the fight will not be different from the previous one.
Chapter 6
Retrieve the key by examining the dark colored area on the air ship. This will unlock the blue crates. Proceed to the Temple of the Wind, entering the altar.
Boss: Othros
It has 87750 life points for each of the two heads; you have already dealt with it, so you already know that its "blue" head is weak to fire and immune to water, the "red" head is weak to water and immune to fire.
Then make your way to the water temple, arriving at the altar.
Boss: Rusalka
Equipped with 87750m life points, weak to thunder. We recommend that you focus your attention on the "clones" he will summon, as they are able to quickly reduce your health points. Then proceed to the Fire Temple, entering the altar.
Boss: Chaugmar
The opponent has 101250 life points, and is weak to lightning-type spells. You already know it, so we recommend repeating the strategy followed in the past.
Then return to the Yulyana forest. Proceed to the cave, going down to the top floor. Talk to the sage, returning to the entrance and climbing up. Then continue towards the temple of the earth, reaching the altar.
Boss: Gigas Lich
He too has already been addressed. This time around, he will be endowed with 148500 life points - the rest of his characteristics will remain unaffected, including his weakness to light-type spells. Then return to the sacred pillar.
Chapter 7
Proceed to the main deck of the ship.
Boss: Airy
Subject has 216000 life points, is bug-type, and is weak to fire-type spells. His attacks will turn out to be exclusively of a "physical" type. We recommend using characters specialized in defense, as well as bringing with you immunities to Stop and Poison. The opponent has a total of 525 attacks; you will therefore have to make sure that your defense level exceeds the threshold of 525 to minimize the damage. When Airy has reached a very low HP level, the battle will be over quickly.
Boss: Airy - second round
The opponent has 134998 life points, and is weak to fire-type spells. Airy will mainly use magic based attacks. Acedia will cause generalized weakness towards all elements. Enigma will allow you to "disable" this effect. Dark Nebula will prove to be particularly effective against Enigma. However, we recommend that you cast Adaptation on anyone who uses something similar, so that they go to recover a sufficient amount of life points.
After the battle, Tiz will remain the only subject within the group. Proceed to the main bridge, talk to Edea. Continue to the tavern, talk to Agnes. Go back to the bridge, and continue towards the Yulyana wood. Proceed towards Norende, approaching the giant hole.
Dark aurora
Proceed to the left, locating the first chest and picking up the ring. Then go down to the floor below. Down again, left, another chest with Lamia's Tiara. Right, take the ring from the nearby chest. Left, down, take the belt from the chest. Down to the portal. Collect the other two nearby chests, containing the ring and the elixir. Right, follow the path to the left. Follow the path, going down to find a chest with some clothes. Then enter the portal on the left, arriving at the fourth floor.
Left, proceed along the path, recovering the jib. Up, reaching the sixth floor. Project yourself along the central path, entering the nearby portal, beyond which the boss awaits you.
Boss: Airy - third round
It has 134998 life points, and is weak to fire-type spells. We recommend that you bring the Fairy Ward with you, to free yourself from possible status alterations. We recommend using the Dark Knights (able to absorb magic) and the Ninja's Utsesumi. Pay attention to the "Default" moments of the enemy: in those moments he will begin to use Acedia + a magic attack, and it will be difficult for you to find protection from this combination.
Boss: Ouroboros - first phase
It has 202500 life points. The peculiarity of the boss is that he will use the skills that you have accumulated during the game. When / if his health points have dropped significantly, you can proceed to the second phase.
Boss: Ouroboros - second phase
It has 135000 HP and is weak to water, but you don't care much: you can't in any way inflict serious damage on the enemy. Just wait defensively, until the end of the battle.
Boss: Ouroboros - third phase
Equipped with 202500 life points and weak to water. His "Demonic Touch" attack causes everyone who touches the enemy to drop by 1 point. It will be possible for you to escape it. The "Zero Dimension" attack causes your instant death. To easily resolve the battle, we recommend using a Ninja's Utusemi, possibly combining it with Kairai, if / when the Ninja has good protection against death. The battle will end automatically when you have reached 50% of the enemy's health points.
Boss: Ouroboros - quarta fase
It has 270000 life points and weak to water. His Demonic Touch causes everyone present to lose 1 point. Unfortunately, Zero Dimension causes instant death. Fortunately for you, and as seen for the previous battle, using a combination of Utusemi and Kirai you will be able to resolve the battle without too much difficulty.
Boss: Ouroboros - fifth phase
Here we are at the final battle. Try to keep your closest friends in close proximity, as Ouroboros is able to use Divergence, an attack that causes all other commands at your disposal to be completely disabled.
So enjoy the final movie!
Video Solution - Playlist
Click here for the playlist
Video Solution - Introduction
Video Solution - Villa Lontano
 Bravely Default 3ds
- 3ds
Exit date: December 6 2013


